
View Poll Results: Which would you prefer more of in this thread?
Photos. Seeing is believing.


28
77.78%
Technical Info. Insert tab A into slot B.


6
16.67%
Videos. Gives me a reason to play with my Contour.


2
5.56%
Voters: 36. You may not vote on this poll
My 2003 Oz Rally Build. (lots of pic's and diy help)

Thread Starter
Newbie
Joined: Jul 2011
Posts: 40
Likes: 1
From: Baltimore, MD
My 2003 Oz Rally Build. (lots of pic's and diy help)
This is my 2003 Mitsubishi Lancer Oz Rally.
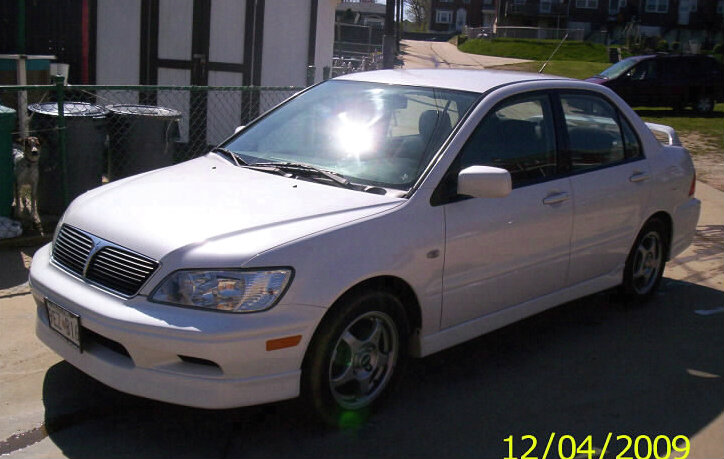
Please ignore the time stamp as this was a friends camera and i did not know how to remove it at the time.
There has been alot of work done to my lancer and i will be posting alot of pictures and as much helpful information as i can to help those looking to also complete their own projects on their lancers.
-
My first addition to the lancer was a simple one and something that is sure to add hp. (not really but it's fun to think so)
Had D&L tint my windows. Granted the tint is below Maryland's legal limit but as long as you drive with more brains then horsepower, the cops will leave you alone.


-
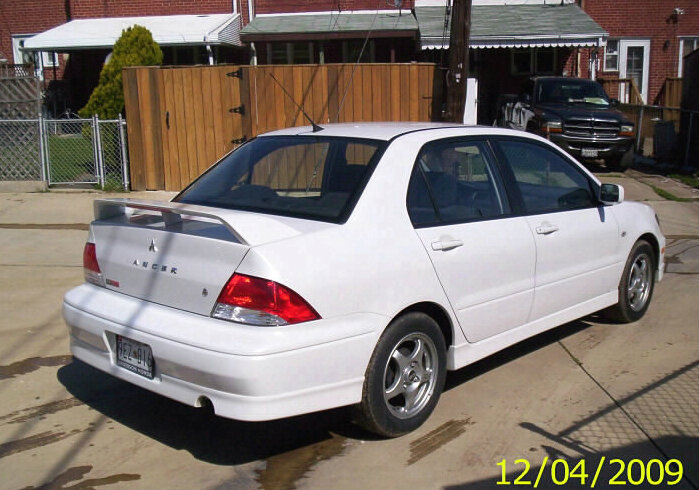
Next I decided to remove the stock spoiler and install a Evo 7 spoiler.
This was done easily by opening the trunk and removing bolts holding the spoiler on. The outer bolts were covered by some sort of rubber spring which just unscrewed. the bolts were located under it.


-
Later I decided I wanted to practice painting so I painted the hood and trunk/spoiler black.
The quality of this paint job was not professional but it was extremely fun to do. I roughed up the hood with some 60 grit when went over it with some white sandable primer then did flat black, wet sanded then did a clear coat.


Please ignore the time stamp as this was a friends camera and i did not know how to remove it at the time.
There has been alot of work done to my lancer and i will be posting alot of pictures and as much helpful information as i can to help those looking to also complete their own projects on their lancers.
-
My first addition to the lancer was a simple one and something that is sure to add hp. (not really but it's fun to think so)
Had D&L tint my windows. Granted the tint is below Maryland's legal limit but as long as you drive with more brains then horsepower, the cops will leave you alone.


-
Next I decided to remove the stock spoiler and install a Evo 7 spoiler.
This was done easily by opening the trunk and removing bolts holding the spoiler on. The outer bolts were covered by some sort of rubber spring which just unscrewed. the bolts were located under it.


-
Later I decided I wanted to practice painting so I painted the hood and trunk/spoiler black.
The quality of this paint job was not professional but it was extremely fun to do. I roughed up the hood with some 60 grit when went over it with some white sandable primer then did flat black, wet sanded then did a clear coat.


Last edited by Avirex; Jul 22, 2013 at 05:51 PM.
Thread Starter
Newbie
Joined: Jul 2011
Posts: 40
Likes: 1
From: Baltimore, MD
Progress
Within two days of this I come out one morning to find this:


-
So needless to say I had to replace the headlights and taillights and re-strip the hood. Welcome to my neighborhood.......


I had to rush order some headlights and taillights from Summit Racing because i needed my car to get to and from work.


-
After that I decided to install a K Speed Bodykit. I did all of this work at the industrial shop I work at. Hurray for bosses who let me use company shop and tools for personal reasons!
I started with the front bumper, removing the headlights and then the 3 bolts along the front bumper then 1 bolt in each fender.

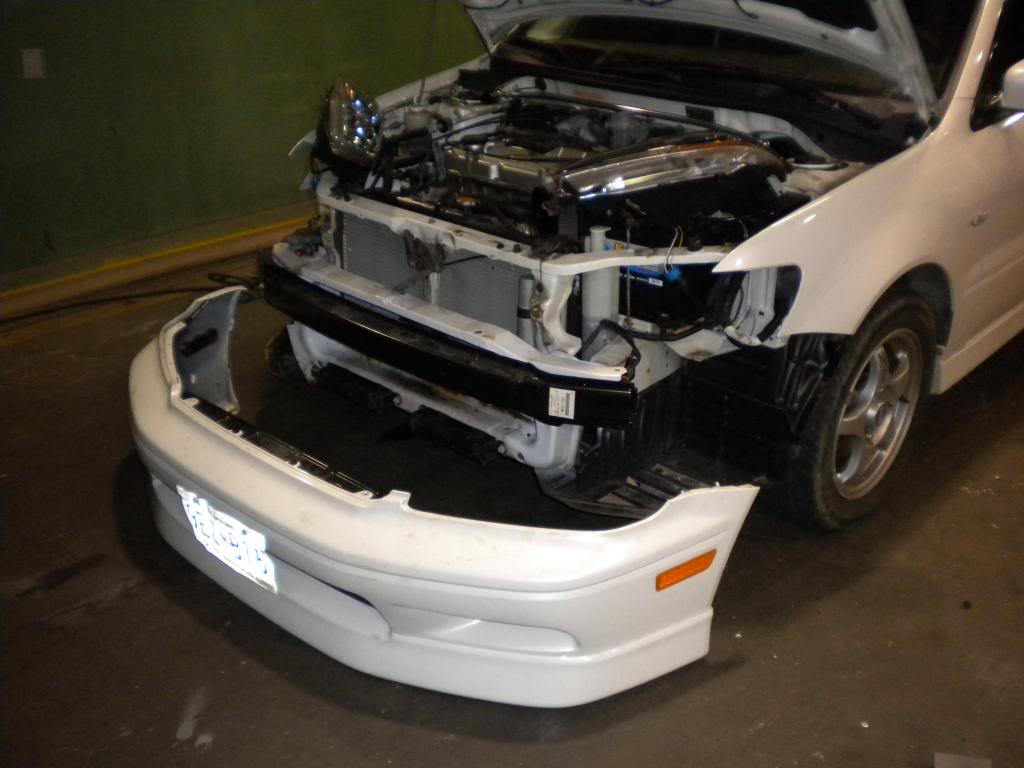
-
Here you can see the difference in the factory bumper and the aftermarket one.

Now it was a simple reversal of taking the factory bumper off to installing the aftermarket bumper.


Now for the rear bumper.


-
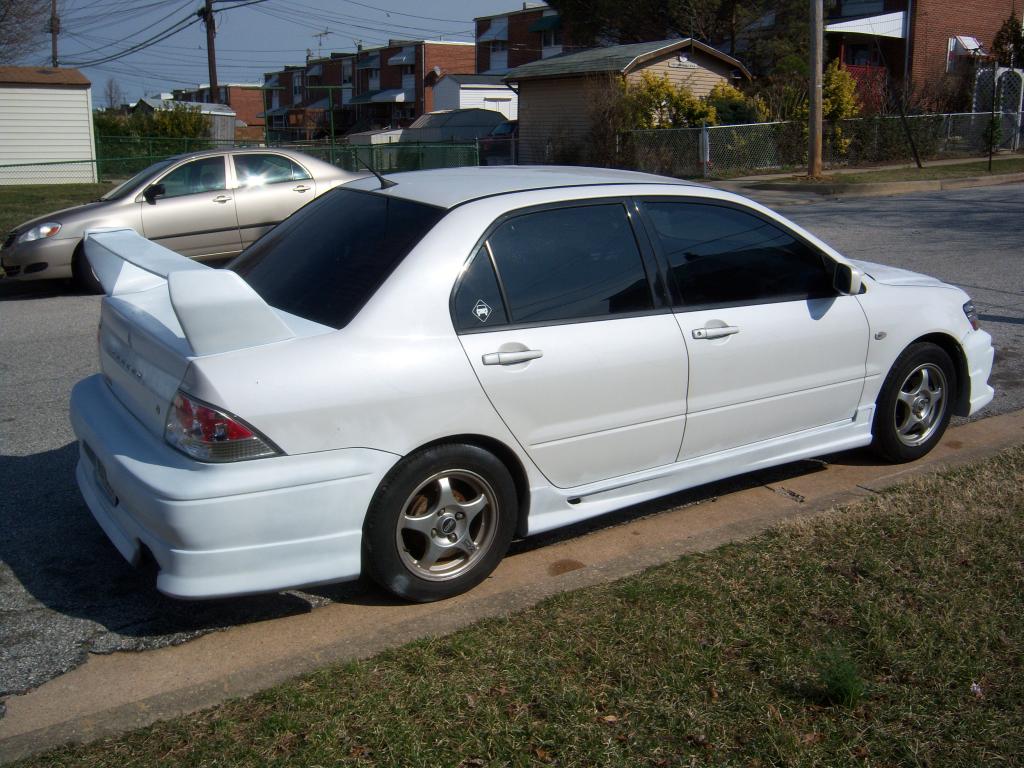
Then I slapped on a ebay grill, the sideskirts, and painted everything white.


-
So needless to say I had to replace the headlights and taillights and re-strip the hood. Welcome to my neighborhood.......


I had to rush order some headlights and taillights from Summit Racing because i needed my car to get to and from work.


-
After that I decided to install a K Speed Bodykit. I did all of this work at the industrial shop I work at. Hurray for bosses who let me use company shop and tools for personal reasons!
I started with the front bumper, removing the headlights and then the 3 bolts along the front bumper then 1 bolt in each fender.


-
Here you can see the difference in the factory bumper and the aftermarket one.

Now it was a simple reversal of taking the factory bumper off to installing the aftermarket bumper.


Now for the rear bumper.


-
Then I slapped on a ebay grill, the sideskirts, and painted everything white.


Last edited by Avirex; Jul 23, 2013 at 03:57 PM.
Thread Starter
Newbie
Joined: Jul 2011
Posts: 40
Likes: 1
From: Baltimore, MD
Progress
Next i wanted to try installing some Glowshift gauges in my A pillar. This was very simple to do.
In order to install these gauges; Oil Pressure, Oil Temp, Water Temp, I had to drain my coolant and oil.
First I had to remove the pillar, which easily popped out after some minor effort.


Once the pod pillar was removed I lined up the gauge pod with the pillar, made 3 marks on the pillar that were behind each gauge opening in the pod and drilled a hole. I fed the wires through the pillar before actually attaching the pod to it.

Once all the wires were through, I drilled the pod to the pillar. Granted, you do not have to drill the pod to the pillar. You can also use glue or some other type of adhesion.

Then to make this easier I used zip ties to clean up the wires behind the pillar.

I took all the wires and connected them into a single wire for each. This made it a lot easier when it came to running the wires down through the dash. For the green wires (sensor wires) i did not connect them and labeled each of them as they all run to different senors.


To feed the wires down through the dash I used a metal coat hanger that i straightened out. This is a good way also to feed wires through you firewall into your engine bay.

Once all the wires were fed down the dash, I removed the cover to the fuse box.
I then located a constant and switched fuse using a volt meter. Then using a nice little tool from Glowshift called 'Add-a-circuit' adapter I connected the constant and switched wires.


I also connected my ground wire to the bolt in the door jam.

I fed the green wires (sensor wires) through the wirewall using the same method mentioned above with the metal coat hanger. I fished the wires for the oil pressure and oil temp gauges to the oil filter location.
As mentioned before, the oil needs to be drained and the oil filter should be removed at this point. I attached another useful tool from Glowshift, the sandwich adapter. Just connected the adapter to where your filter goes then attach your new filter to the adapter. Then I just connected the wires to the senors and the senors to the adapter ports.

Then I fished the water temp wire to the upper radiator hose. I removed the house and cut out a small portion of it, installed the water adapter, again from Glowshift, to the hose and reattached it.

After that, i ran all the ground wires from each senor wire together then connected them to the negative part of my battery. After that, everything is done.


Last edited by Avirex; Jul 23, 2013 at 04:11 PM.
Thread Starter
Newbie
Joined: Jul 2011
Posts: 40
Likes: 1
From: Baltimore, MD
Progress
I decided to try 3M's Di-Noc Carbon Fiber wrap on my dash trim. I also purchased this from metrorestyling.com and a sample direct from 3M. the material is the same. even checked the thickness of it within 0.001 using micrometers. Save some money and do not order directly from 3M.


First i had to remove the dash trim. This involved removing my cluster cover; removed the 2 bolts on the underside of it and set it aside.


Then i had to remove my center cover; removed the HVAC knobs, removed the screws behind each outer knob, pull the cover off, set it aside.


Now i removed each of the trim pieces, the one to the left of the gauge cluster comes out simply by pulling the edge that was exposed when the cluster cover was removed. Once i released it from the dash, i had to unplug the controls for the power windows too.


Now for the center trim. Before you remove the center trim, remember to remove the two (2) bolts holding it in place that were covered by the center console piece removed earlier.


I had to pull this out so far, then unhook the clock & harness plugs.


Now that the trim is removed, i remove the clock and hazard harness from the center trim and the power mirror controls from the other trim.


I cleaned each piece with soap and hot water then dried them off. Before i removed the backing from the wrap, i laid it over each piece to make sure it would cover the area i wanted it too. then just cut it to size and work you way from the inside area of the trim to the outside, working out any wrinkles or air bubbles.


-
My lancer is a Oz Rally edition but when I took it to the dealership to have the tranmission swapped they, for some unknown reason, change my OZ gauges to ES gauges. So I then found out on Evolutionm that most of the clusters on lancers are plug & play. After searching around I found a EVO 8 GSR cluster and swapped it with the ES.

To remove the cluster, simply remove the cluster trim as previously shown. Then you have to pull out the left piece of the dash trim. You do not need to fully remove it, simply remove the parts attached near the cluster. This has to be done in order to give the extra space required to remove the cluster.


Tilt the cluster top away from you and work the cluster out. Below you can see how removing the left trim gives the needed space to remove the cluster.


Once the cluster is pulled out, you need to remove the two (2) clips from the back of the cluster.

Then just a simple reversal of the previous steps and the new cluster is in.


-
After getting the Evo VIII GSR cluster I decided I need to make all the lights in the dash red. So Thanks to a good friend on Evolutionm I purchased a light kit and changed the colors on my HVAC and clock.
This was a very easy mod to do. Just removed my HVAC cover, again, then removed the light guide by removing the two (2) screws.


Once the light guide is removed, you have to remove the two bulbs in the assembly and replace them with the ones I purchased from Lightrikz.com.

If your having trouble pulling out the bulbs, a small piece of tape placed over the bulb gives you some extra grip in order to remove the bulb.

Remember to test out the bulbs before putting everything back together.

Then remove the clock cluster as explained earlier, then simply add the colored film, one over the clock face itself and the other in the housing. If you only use one film, the color will appear orange.


Last edited by Avirex; Jul 23, 2013 at 05:03 PM.

looks like you put some work into it, im just suprised you bought a body kit for it, after having your lights smashed. If i was in your shoes, i would probably keep all the mods hidden. IE: interior, engine bay, suspension stuff.
hope kids leave your car alone
hope kids leave your car alone
Thread Starter
Newbie
Joined: Jul 2011
Posts: 40
Likes: 1
From: Baltimore, MD
Don't worry, i have taken steps to make sure this doesn't happen again. I no longer park my lancer on the open streets. i keep it parked on a gated driveway with 2 way alarm and video cams.
Thread Starter
Newbie
Joined: Jul 2011
Posts: 40
Likes: 1
From: Baltimore, MD
Progress
For the 'performance' part of my car I thought I would start with something easy so I went with a SR intake from K&N. This install was very easy, just remove your factory intake from the intake manifold and remove your MAS from the intake box. Hooking up the SR Intake was just a simple reversal of the steps to remove the factory one. Simply connect the MAS between the new filter and the pipe then connect the pipe to the intake manifold.


At this time i also installed a upper front and rear strut bar.
For the front all you have to do is remove the three (3) bolts on each of your towers.

To install the rear one I had to cut through the material liner of my trunk but after that it was a simple bolt on like the front was.

-
I decided I wanted to do a exhaust system, but I knew from past experiences that if your going to install a exhaust then you might as well replace your cat and exhaust manifold all at once. This project took me all day on a saturday at my shop.


This is the factory exhaust manifold. Beautiful isn't she? This was a royal pain in the *** to get off. First i had to remove the O2 sensor, which easily unscrewed.

I busted my knuckles more times then i care to remember. One of the nuts i couldn't get off but luckily a touch and a raw hide hammer got the last one off. I removed the factory and finally got a look at my motor block. kinda weird, never seen my motor like this.

Fitting the new manifold in was really easy. it slide right back into place, i kept hitting my knuckles against the radiator fan, Sucked.

For a minute i didn't think the O2 sensor would fit properly because i forgot to check the size of it compared to the new manifolds opening. But i got lucky and it fit.

Now at this point I had to remove the rest of the exhaust. Seems that every part I remove from this car is extremely rusty.
You might have noticed that the exhaust is in more pieces then it should be. I couldn't get the connection apart where the down pipe meets the muffler so i had to use one of the shops heavy die grinders to cut the exhaust in half.


You can see here where the exhaust went over the arm of the rear wheel which is why i needed to cut the pipe in half in order to remove it from the car.

Nothing but space and opportunity under the car now for a new exhaust.

This was probably the hardest part of the whole mod. Remove the 2nd O2 sensor from the factory cat. It was hard to unscrew it because i could not rotate the senor counter clockwise because it was twisting up the wiring nor could i rotate the factory cat because it was hitting the under carriage. Eventually I got it after alot of sweat and swearing.

With everything off i was free to install the rest of the new parts.


Last edited by Avirex; Jul 23, 2013 at 05:55 PM.
Trending Topics
Newbie
Joined: Aug 2012
Posts: 92
Likes: 0
From: Ontario, Canada
Hey man, very nice ride, love the work you've done to it. And sucks about some punks eh, but your rides come out for the better.
Do you also have a CarDomain? If so I think I am following you on there, a lot of the pictures look familiar. :P
Do you also have a CarDomain? If so I think I am following you on there, a lot of the pictures look familiar. :P
Thread Starter
Newbie
Joined: Jul 2011
Posts: 40
Likes: 1
From: Baltimore, MD
I'm also on MCM as "Avirex"
Thread Starter
Newbie
Joined: Jul 2011
Posts: 40
Likes: 1
From: Baltimore, MD
Progress
I decided I wanted to add more gauges. So in order to add more gauges I would have to relocate my head unit with a kit and install a Gruppe-S Evo Panel to house the three extra gauges. This is the new gauge panel. They say this will only fit a Evo but it fit my lancer just fine.

After removing the center console, you have to remove the factory radio unit. Remove the four (4) screws holding it in. Slowly pull the radio unit out until it stops. Do not force it out as it is usually hung up with wiring and antenna wire.


After the unit was out I had to fish the the wiring harness and antena wire down behind the HVAC controls. I had to then remove the factory tray at the bottom of the console.

The lower tray was easily removed by taking out the 2 screws on the top of it holding it to the dash. You can throw this piece away because the relocation kit comes with a new lower tray.


Here you can see the lower tray removed.
Now I removed the factory brackets from the side of the unit and replace them with the brackets that come with the relocation kit. Here you can see differences.

The new brackets mount to the sides of the unit in the same spot and the factory brackets did. When sliding it back into the bottom opening i had to make sure the clips on the back of the brackets connected with the studs to hold it at the right angle.

And here is one more showing the unit with the new lower tray cover attached.

Placing the new gauge panel in was easy. I had to remove the clips from the back of the factory one as well as use the control stickers. These tabs were easy enough to pry off.


These gauges along with the one in my Pillar and having the HVAC controls match look amazing. I know they don't add anything to HP but damn, seeing all these gauges makes you feel like your going faster. :P


Last edited by Avirex; Jul 21, 2013 at 02:44 PM.
Thread Starter
Newbie
Joined: Jul 2011
Posts: 40
Likes: 1
From: Baltimore, MD
After getting settled on all the red gauges, i decided I wanted blue instead. LOL. so first thing i did was remove my gauge cluster and change the blubs and face plates to change it from red to blue. I got the parts from a friend off Lightsrikz.com. Also replaced the gauges with blue.


-
Oh and thanks to drivers here in Maryland i decided to invest in a dash cam.

My blue set up. Love it.


-
Oh and thanks to drivers here in Maryland i decided to invest in a dash cam.

My blue set up. Love it.

Last edited by Avirex; Jul 23, 2013 at 06:07 PM.
i made a mistake like u did on my hood when i first rattlecanned it.. like urs i messed headlights up.. since i had jdm cedia's and i wasnt about to spend another $300 to replace them, i used goof off to remove the overspray, one in the tin can works well 
Thread Starter
Newbie
Joined: Jul 2011
Posts: 40
Likes: 1
From: Baltimore, MD
I did not make a mistake on my hood. My hood, headlights and tailights were vandalized by some punk *** kids in my neighborhood.
Thread Starter
Newbie
Joined: Jul 2011
Posts: 40
Likes: 1
From: Baltimore, MD
i decided to install a CF trunk. This install required help from my friend Tim. The trunk was a little tough due to lining the trunk release up just right to the under side of the trunk so it would work properly. Which this was critical because I was not install a key release for it.

A word of advice for this too, once you get your factory trunk off and your CF one on, be sure check the tension on the struts to the trunk. Remember they are set to lift your factory trunk, not the CF trunk, which is about half the weight of the factory one. If you just release your CF trunk then the struts will catapult it up with alot of force, which in turn could damage the trunk.

Decided to order some new lettering for the trunk too. I think this lettering looks better then factory lettering and much better then the 'oz rally edition' sticker that usually comes on this edition.


Seeing how it is illegal not to have a working 3rd brake light and seeing how i removed mine. I thought i would add one. But i did not want just any standard 3rd brake light. So i order a LED from honk kong and i also had to order a new emblem because the factory lancer emblem was to small.

I started off by drill i very small hole in the trunk were the previous emblem had been.

You want to double check this location on the under side of the trunk and make sure your not going to hit the cables or control required to unlock your trunk.

Once the hole was drilled i attached the emblem to the LED and fed the wires through the hole in the trunk.

Once the wires are through and the emblem was attached to the trunk I located the wires i had cut when i removed the factory spoiler. Then all i did was attach the black wires together (ground) and then attached the green wires. The LED i have has a green wire and a red wire, the green wire turns the LED red while the red wire turns the LED blue. The red wire was not connected at this time. but it will be attached later once i receive my taillights back from AAC.


And with that I now have a 3rd brake light.


A word of advice for this too, once you get your factory trunk off and your CF one on, be sure check the tension on the struts to the trunk. Remember they are set to lift your factory trunk, not the CF trunk, which is about half the weight of the factory one. If you just release your CF trunk then the struts will catapult it up with alot of force, which in turn could damage the trunk.

Decided to order some new lettering for the trunk too. I think this lettering looks better then factory lettering and much better then the 'oz rally edition' sticker that usually comes on this edition.


Seeing how it is illegal not to have a working 3rd brake light and seeing how i removed mine. I thought i would add one. But i did not want just any standard 3rd brake light. So i order a LED from honk kong and i also had to order a new emblem because the factory lancer emblem was to small.
I started off by drill i very small hole in the trunk were the previous emblem had been.
You want to double check this location on the under side of the trunk and make sure your not going to hit the cables or control required to unlock your trunk.
Once the hole was drilled i attached the emblem to the LED and fed the wires through the hole in the trunk.
Once the wires are through and the emblem was attached to the trunk I located the wires i had cut when i removed the factory spoiler. Then all i did was attach the black wires together (ground) and then attached the green wires. The LED i have has a green wire and a red wire, the green wire turns the LED red while the red wire turns the LED blue. The red wire was not connected at this time. but it will be attached later once i receive my taillights back from AAC.
And with that I now have a 3rd brake light.
Last edited by Avirex; Jul 23, 2013 at 06:11 PM.
Thread Starter
Newbie
Joined: Jul 2011
Posts: 40
Likes: 1
From: Baltimore, MD
After the trunk I decided to install a Seibon CF Hood. This mod required the help of my friend6 Tim. Took us a whooping 5 minutes.


After i got the hood installed i decided to install some Sparco hood pins.
First i had to find a place to mount the studs. I decided to use two holes that were already in the cross bar this way they were at even marks.


I left them stick up about 2 inches and only hand tightened them so it would be easier to make the many needed adjustments for getting the proper height.
I laid paper over the engine bay to prevent unnecessary metal getting into the engine during drilling.

I put some grey never-seize on top of each bolt then laid the hood down on the pins. I did this to mark the under side of the hood and show me where to drill for the pins.


I used a die grinder rather then a drill because i find them more adjustable then drills. So i used the a die grinder to bore out a hole big enough for the pin to fit through without any restrictions.
I ONLY DRILLED THROUGH THE BOTTOM PART OF THE HOOD AT THIS POINT.


BEFORE I WENT ANY FURTHER, I PUT EVERYTHING DOWN AND WALKED AWAY. THERE WAS NO TURNING BACK ONCE I WENT THROUGH THE TOP OF THE HOOD AND I WANTED TO MAKE SURE OF WHAT I WAS ABOUT TO DO.
Now that I had time to think, i remarked the under side of the outer part of the hood.
Once that was marked i used a die grinder to go though the top hood.

Once the pin is through the hood i placed the base down over the pin but i did not attach it to the hood. I had to open and close the hood about a dozen times, each time i was making small adjustments so that the pin fit at the proper height through the hood.

Once the height was exact, i bolted the base to the hood. The pin should slide thought the locking pin with some resistance but not alot. The minor resistance helps prevent the pin from rattling while driving.


-
Ordered a new CF grill from roadracemotorsports.com. Took awhile to get it but damn was it worth the wait.


After i got the hood installed i decided to install some Sparco hood pins.
First i had to find a place to mount the studs. I decided to use two holes that were already in the cross bar this way they were at even marks.
I left them stick up about 2 inches and only hand tightened them so it would be easier to make the many needed adjustments for getting the proper height.
I laid paper over the engine bay to prevent unnecessary metal getting into the engine during drilling.
I put some grey never-seize on top of each bolt then laid the hood down on the pins. I did this to mark the under side of the hood and show me where to drill for the pins.
I used a die grinder rather then a drill because i find them more adjustable then drills. So i used the a die grinder to bore out a hole big enough for the pin to fit through without any restrictions.
I ONLY DRILLED THROUGH THE BOTTOM PART OF THE HOOD AT THIS POINT.
BEFORE I WENT ANY FURTHER, I PUT EVERYTHING DOWN AND WALKED AWAY. THERE WAS NO TURNING BACK ONCE I WENT THROUGH THE TOP OF THE HOOD AND I WANTED TO MAKE SURE OF WHAT I WAS ABOUT TO DO.
Now that I had time to think, i remarked the under side of the outer part of the hood.
Once that was marked i used a die grinder to go though the top hood.
Once the pin is through the hood i placed the base down over the pin but i did not attach it to the hood. I had to open and close the hood about a dozen times, each time i was making small adjustments so that the pin fit at the proper height through the hood.
Once the height was exact, i bolted the base to the hood. The pin should slide thought the locking pin with some resistance but not alot. The minor resistance helps prevent the pin from rattling while driving.
-
Ordered a new CF grill from roadracemotorsports.com. Took awhile to get it but damn was it worth the wait.