
HOW TO: Relocate AWC Button to Dash

Thread Starter
Evolving Member
iTrader: (2)
Joined: Nov 2010
Posts: 123
Likes: 0
From: Framingham, MA
HOW TO: Relocate AWC Button to Dash
new thread for search purposes
Took me about 2 hours; with instruction maybe less
Tools required. Knife, Phillips screw driver, thin flathead to pry, 10mm socket, cutter
My vocabulary may be incorrect because I have no auto background but deal with it. Also this is how I did it, there maybe be an easier way but also deal with it
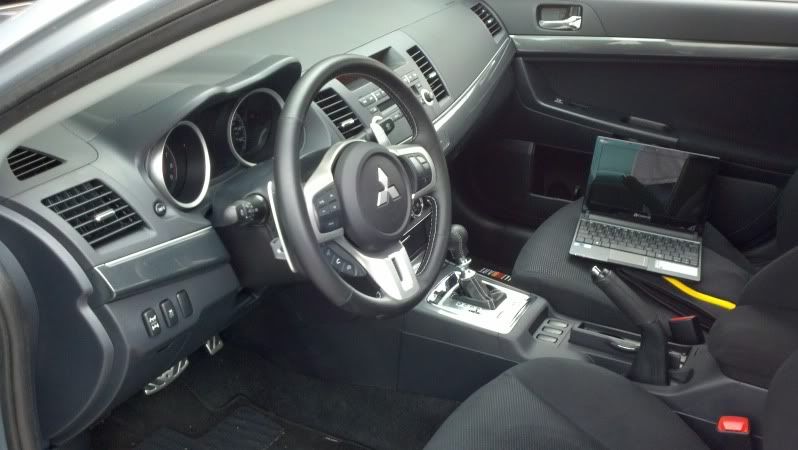
First step, pop out that awc box with a knife or something strong and thin and unhook the wire harness, also take out the awc button from the box and save it for the dash location, simple process just look at it

Using a 10mm socket, take out bolts inside the center console so you can remove this later. With a very thin flathead, thinner the better, pry up on the plastic cover for the cupholders area or whatever it is to dismantle the center area. see next step.

Pushing toward the cup holders where my fingers are, then sliding them under allows you to grab and pull upward to unhook some of the plastic clips, work this piece loose and take it out.

Unhook the button that holds the shift cover A, and B take the shift knob off.

Then C. pull up on the shifter area and work with it to loosen it free,

Then you can pull it over and let it hang, I did not unhook any wires, just let it hang there. Remove screws in the photo to remove more plastic on the console

Pull out the whole pastic covering off the center console. This allows you to get your fingers in the tight spots and gives you more space, this step may be avoidable but it worked well for me. this is a repeat photo.

Take out screws 1, 2, and 3. Open the fuse box and pull on that piece and work it loose until that piece hangs free from the top but still is connected from the bottom. The knee airbag piece stays where it is, I was cautious around the airbag.

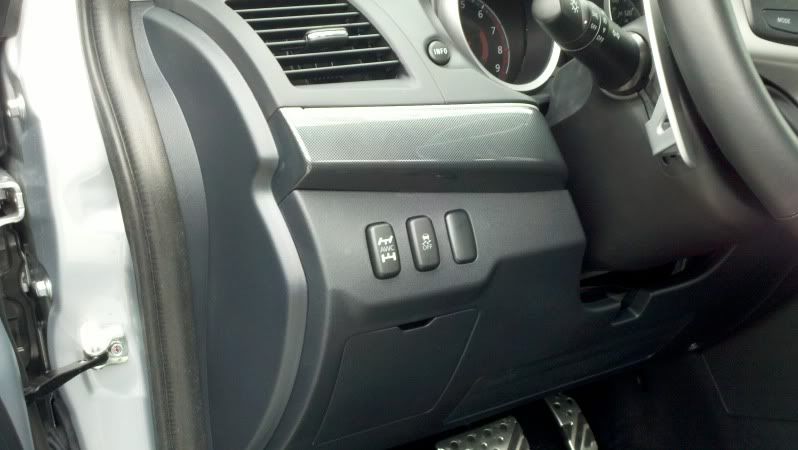
Take out a blank button, I used the one on the right because of; (question for anyone: what is connected to the blank button on the left here in my photo??)

Then you have to free the awc wires from the rest of the wires for the center console, which means for at least the 2011, I had to cut these ziptie wire holders which were a pain because you have to be very careful and they were in difficult spots. There were 3 I think. You will then have to free them of electrical tape and you have to get it free enough to bring the wires over to the left part of the dashboard. Didn�t really take detailed photos here but you can easily figure it out. Bring the wires over and connect that awc button to the dash location. Once you get that far I think you�ll easily manage assembling everything back together


hope that works for everyone.
cheers
Took me about 2 hours; with instruction maybe less
Tools required. Knife, Phillips screw driver, thin flathead to pry, 10mm socket, cutter
My vocabulary may be incorrect because I have no auto background but deal with it. Also this is how I did it, there maybe be an easier way but also deal with it
First step, pop out that awc box with a knife or something strong and thin and unhook the wire harness, also take out the awc button from the box and save it for the dash location, simple process just look at it
Using a 10mm socket, take out bolts inside the center console so you can remove this later. With a very thin flathead, thinner the better, pry up on the plastic cover for the cupholders area or whatever it is to dismantle the center area. see next step.
Pushing toward the cup holders where my fingers are, then sliding them under allows you to grab and pull upward to unhook some of the plastic clips, work this piece loose and take it out.
Unhook the button that holds the shift cover A, and B take the shift knob off.
Then C. pull up on the shifter area and work with it to loosen it free,
Then you can pull it over and let it hang, I did not unhook any wires, just let it hang there. Remove screws in the photo to remove more plastic on the console
Pull out the whole pastic covering off the center console. This allows you to get your fingers in the tight spots and gives you more space, this step may be avoidable but it worked well for me. this is a repeat photo.
Take out screws 1, 2, and 3. Open the fuse box and pull on that piece and work it loose until that piece hangs free from the top but still is connected from the bottom. The knee airbag piece stays where it is, I was cautious around the airbag.
Take out a blank button, I used the one on the right because of; (question for anyone: what is connected to the blank button on the left here in my photo??)
Then you have to free the awc wires from the rest of the wires for the center console, which means for at least the 2011, I had to cut these ziptie wire holders which were a pain because you have to be very careful and they were in difficult spots. There were 3 I think. You will then have to free them of electrical tape and you have to get it free enough to bring the wires over to the left part of the dashboard. Didn�t really take detailed photos here but you can easily figure it out. Bring the wires over and connect that awc button to the dash location. Once you get that far I think you�ll easily manage assembling everything back together
hope that works for everyone.
cheers
Newbie
Joined: Dec 2010
Posts: 28
Likes: 0
From: British Columbia
Nice writeup !
I'm to scared to do this to my car ATM, but I hate how the button is there. I've left my hand near the cup holder before and my car started beeping and it freaked me out but then I noticed my AWC settings were changed and realized what I did.
And for the wires on the very Left on my car with 2011 RA w/ RECARO PACKAGE it controls the HID's Headlights UP and DOWN, I dunno if it helps or not but that's what I have on the very left of those buttons. Those wires could be there for upgrading to that specific package, BUT I COULD BE WRONG.
Evolving Member
Joined: Nov 2009
Posts: 155
Likes: 2
From: Finland
Hmm I've got the 1st button (to the left) empty, then I have the ASC and AFS (Adaptive Front-lighting System) buttons. But moving the AWC button there also would be very tempting...nice writeup!

don't forget to get the cubby peice from the regular lancers to replace the blank trim panel on the center console, goes for about 13 bucks from the dealer, great for ipod/phone
Trending Topics

Nice work! One trick for people doing this job, wrap your screwdriver or knife edge or whatever tool you're using to pry the pieces with some masking tape, will save you from damaging any trim pieces in case you slip or pry too hard. If you're pro like the OP, you can get away with doing a clean job without, but for the rest of us, masking tape is your friend 
Finally got around to doing this today, and after two hours, a lot of cursing, and some bloody knuckles... success. I mounted it off to the left side of the TCS button instead, that way it's easier to get to and I can actually see the left and middle button from where I sit while driving, especially at night. Thanks again for the writeup, helped out tremendously!
Thread Starter
Evolving Member
iTrader: (2)
Joined: Nov 2010
Posts: 123
Likes: 0
From: Framingham, MA
aw, i must agree, i have it to the furthermost right position, and it is difficult to see at night, hidden behind the steering wheel, so maybe others might want to keep that in mind, stick it on the outermost spot.
