
Ralliart mud flaps


Thread Starter
Evolving Member
Joined: Nov 2011
Posts: 290
Likes: 0
From: earth
Ralliart mud flaps
I am considering buy a Ralliart mud flaps. The big one. I see some of them on ebay which I believe they are all after market one. I am wondering if there are any stock one? Is it different to install it? Do I need to drill any hole on my car?
It would be nice if anyone have the installation manual.
It would be nice if anyone have the installation manual.
Best kit is the Ralliarmor. Use Lancer (not EVO). They come pre-drilled with all hardware and you can pick the lettering color. They pick up OEM holes so no drilling on the car (unless you are sportback)
Search for install tips.
Search for install tips.
Thread Starter
Evolving Member
Joined: Nov 2011
Posts: 290
Likes: 0
From: earth
o yea, I asked a dealer about it. They order it from the same company. However, they would charge $300 something for it. so crazy. I am wondering if anyone know where to get a cheaper one. On ebay, those seller didn't mention if it is from Ralliarmor or not.
One more stupid question, would the mudflap cause some flapping wind sound that you would hear inside the car?
One more stupid question, would the mudflap cause some flapping wind sound that you would hear inside the car?
Thread Starter
Evolving Member
Joined: Nov 2011
Posts: 290
Likes: 0
From: earth
Yes, I know. I did some research. There are like 3 types of them only. One is from Rally Armor, and the others two are the one with the words "Ralliart" on it. I really love the Ralliart one, but I am not sure if I need to drill hole or not. I saw one of the two comes with screw. The other is like showing the mud flaps with 4 holes on it only. Anyone using the "Ralliart" one?
Trending Topics
Thread Starter
Evolving Member
Joined: Nov 2011
Posts: 290
Likes: 0
From: earth

Newbie
Joined: Apr 2011
Posts: 3
Likes: 0
From: Sydney
Hey Guys, i found some Official Ralliart Mudflaps for all Evo's on evobits.co.uk and fqperformance.com
There are three versions on their website, does anyone know the difference between them and if the cheapest one is good enough?
There are three versions on their website, does anyone know the difference between them and if the cheapest one is good enough?
Last edited by numnut; May 10, 2012 at 03:46 AM. Reason: edit: wrong url for websites
Newbie
Joined: Jul 2010
Posts: 29
Likes: 0
From: Colorado
I posted this message in another thread but I'll copy it here for you.
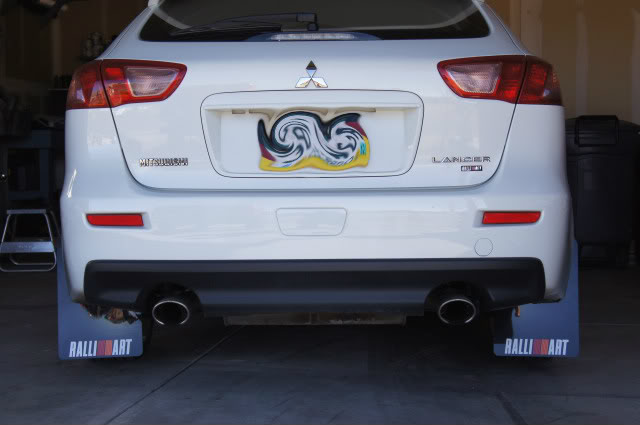
Got the mud flaps I ordered from this place in england this week. Installed them last night. They are designed for the Evo X but with a little mods I was able to get them to work. The instructions that came with them were pretty basic. I used basic hand tools to install them, rachet, wrench, screw driver and a drill. The only specialty tool was my impact gun to get the tire off.
The fronts kind of tip up towards the underside of the car at this angle but you don't notice it at all when standing. The left rear is a little more tilted that the right. But I'll live with it for now.
I ordered them from
HERE.
They have 3 different types of material at 3 different cost points. PVC, Polyurethane and a 2x2 carbon fiber weave with the cheapest option being the PVC. I bought the Poly
Newbie
Joined: Jul 2010
Posts: 29
Likes: 0
From: Colorado
So I was asked to post some pictures of hardware and what I did to install them.
First off the "Ralliart" word is a sticker.
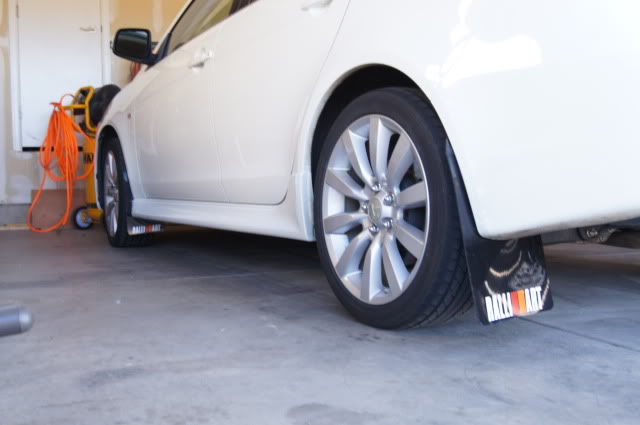
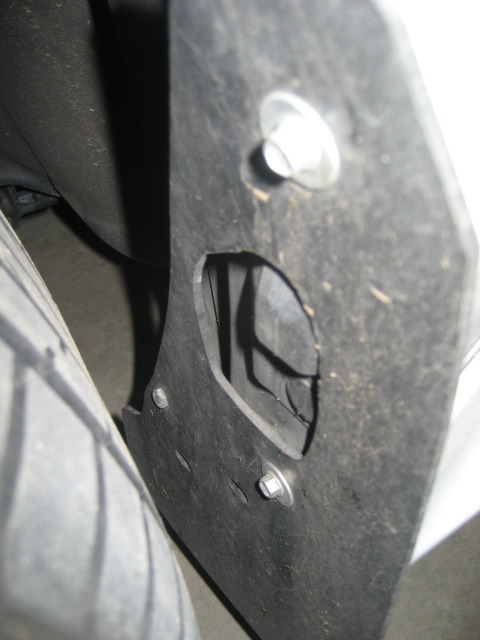
On the front mud flaps the cut out in the middle has to be modified inorder for the flap to lay flat against the fender well because of the bump in the plastic. First you remove a couple of plastic panel connectors. They pop right out out. The top screw in the picture uses the hole that came in the flap with a stock hole that use to hold one of the plastic connectors. On the lower two screws the screw with the washer uses a stock body hole but I had to make my own hole in the flap because pre made holes did not line up stock body hole I planned to use. The 3rd screw( bottom left ) I made my own hole in the flap the used the supplyed small metal bracket to attach to the bottom of the car. I bent the bracket by hand it comes as a straight peice.
When I installed this I took the tire off, then attached the flap using just the top screw. This showed me where to modifiy the large center hole to lay flat and also to make sure the flap looked good before marking the second and 3rd screw holes.
Driver front.
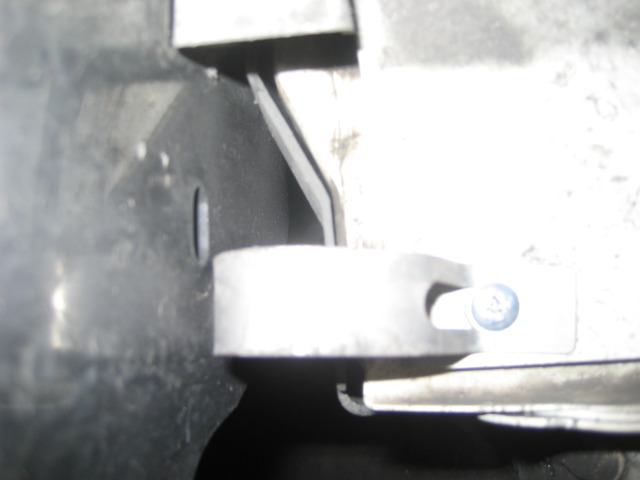
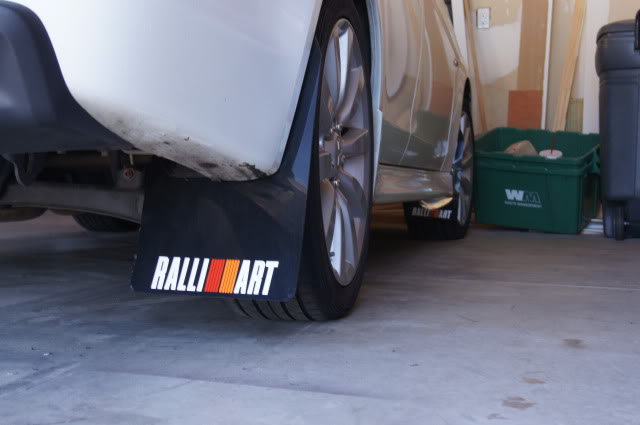
The rear flap was easier to install. Again I removed the tire and two plastic panel connectors to open up attachment points. The rear flaps I reused one of the connectors for the middle attachment hole as that lined up perfect. The upper hole which you can't see in the picture I just made sure the flap was lined up right then marked and drilled a new hole in the plastic fender well. Once I knew I had the flap exactly where I wanted it i then drilled the 3rd hole
which you can see at the end of the metal bracket.
Driver rear

First off the "Ralliart" word is a sticker.
On the front mud flaps the cut out in the middle has to be modified inorder for the flap to lay flat against the fender well because of the bump in the plastic. First you remove a couple of plastic panel connectors. They pop right out out. The top screw in the picture uses the hole that came in the flap with a stock hole that use to hold one of the plastic connectors. On the lower two screws the screw with the washer uses a stock body hole but I had to make my own hole in the flap because pre made holes did not line up stock body hole I planned to use. The 3rd screw( bottom left ) I made my own hole in the flap the used the supplyed small metal bracket to attach to the bottom of the car. I bent the bracket by hand it comes as a straight peice.
When I installed this I took the tire off, then attached the flap using just the top screw. This showed me where to modifiy the large center hole to lay flat and also to make sure the flap looked good before marking the second and 3rd screw holes.
Driver front.
The rear flap was easier to install. Again I removed the tire and two plastic panel connectors to open up attachment points. The rear flaps I reused one of the connectors for the middle attachment hole as that lined up perfect. The upper hole which you can't see in the picture I just made sure the flap was lined up right then marked and drilled a new hole in the plastic fender well. Once I knew I had the flap exactly where I wanted it i then drilled the 3rd hole
which you can see at the end of the metal bracket.
Driver rear