When you click on links to various merchants on this site and make a purchase, this can result in this site earning a commission. Affiliate programs and affiliations include, but are not limited to, the eBay Partner Network.
So I decided to turbocharge my lancer because after owning it for 5 years I wanted a little more power. Before you say “just get a ralliart/evo,” realize that I already own the car and selling it to get an evo would cost a lot more. I could probably get around $7k for it, but there are no ralliarts for sale around me and decent evos go for over $24k. ****************** is down now and there was some really good turbo build posts there that are gone, so hopefully this will become a new resource for people looking to boost their lancers.
This is a pretty easy build that you can do in your garage or on the street as everything is bolt on except for the exhaust after the downpipe. You can even do it over a couple days and drive it in between if you go in the right order. The hardest part about this build is getting the tuning down. If you have the complete turbo kit installed and still have the stock MAF sensor, you have to disconnect the wastegate actuator from the valve to prevent yourself from getting into boost. Other forum posts claim you can flash the evo ROM onto your stock ECU. I never had any luck with that, but the stock ROM can be flashed so its at least usable if you don’t get into open loop.
Total for parts is roughly $2350. There were other odds and ends not included here like oil, radiator fluid, maybe a clamp or two.
Labor
I needed some custom exhaust work to connect the downpipe to stock exhaust. Pipe, catalytic converter, and labor totaled about $300.
The engine oil feed plug was a real ***** to get out. I snapped a hex driver inside it and got a mechanic to get the plug out. Cost me $100.
An ECU that doesn’t come with your car needs to be programmed for your VIN at the dealer. Costs about $100.
Make Sure You Have All the Parts
Before you start tearing your car apart, it's a good idea to make sure you have everything. I put all the parts together and got all the clamps/hoses/etc in the right position like this.
Intercooler
You’ll need to remove the bumper and battery to do this. I mounted the intercooler to the car using a single bolt where a wiring clip was. Then I clamped the inlet and outlet pipe to the intercooler. After these three pieces are secure, you can put the bumper back on.
The picture below shows where you can attach the intercooler outlet pipe to the frame.
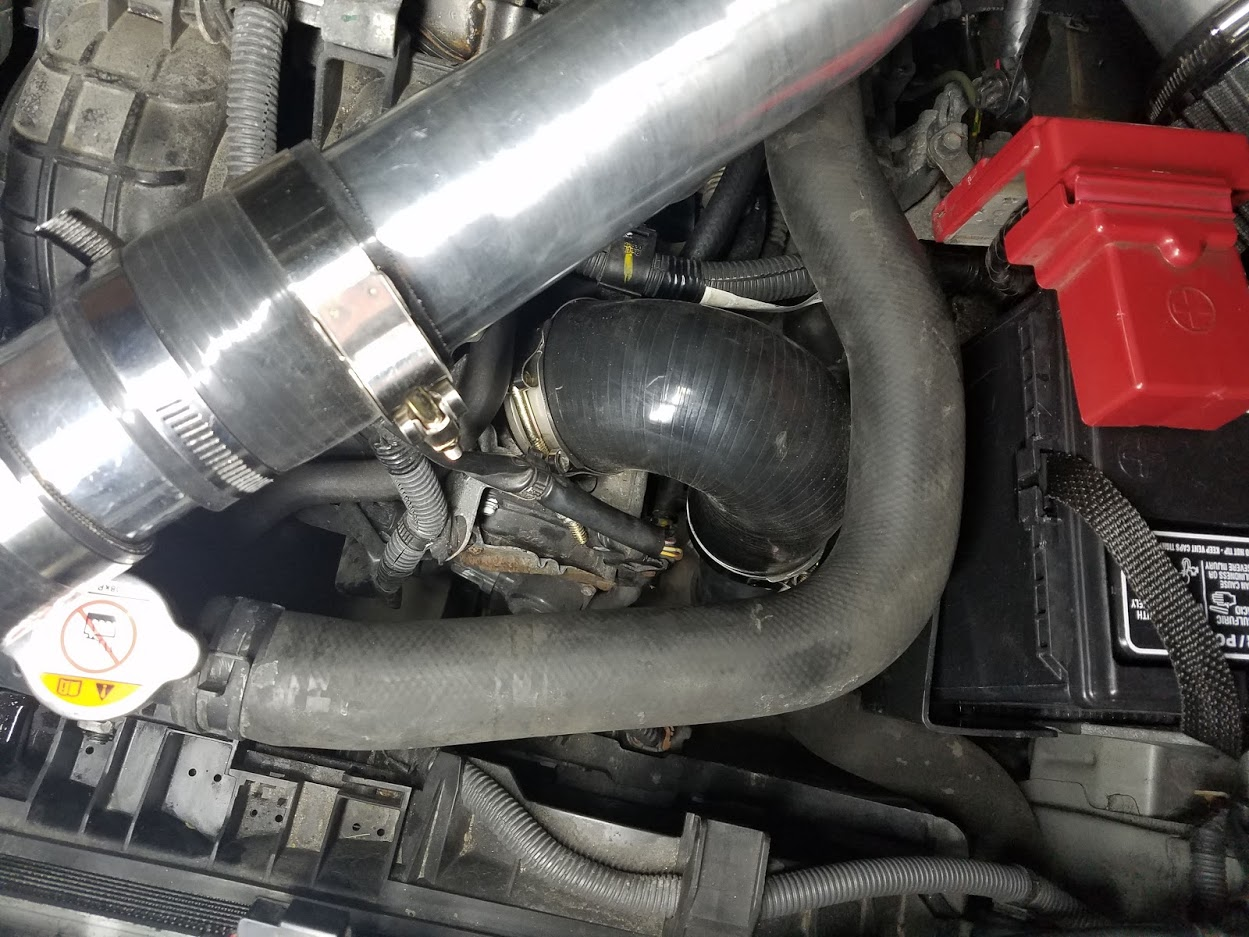
A 135 degree bend is needed to connect the throttle body to the air pipe. This part is a little tight and will take some effort to clamp it in a way that avoids pressing against the coolant line or interfering with the shift cables. As a side note, you’ll see some normal hose clamps where there should be T-bolt clamps. Those were replaced later.
Exhaust/Turbo
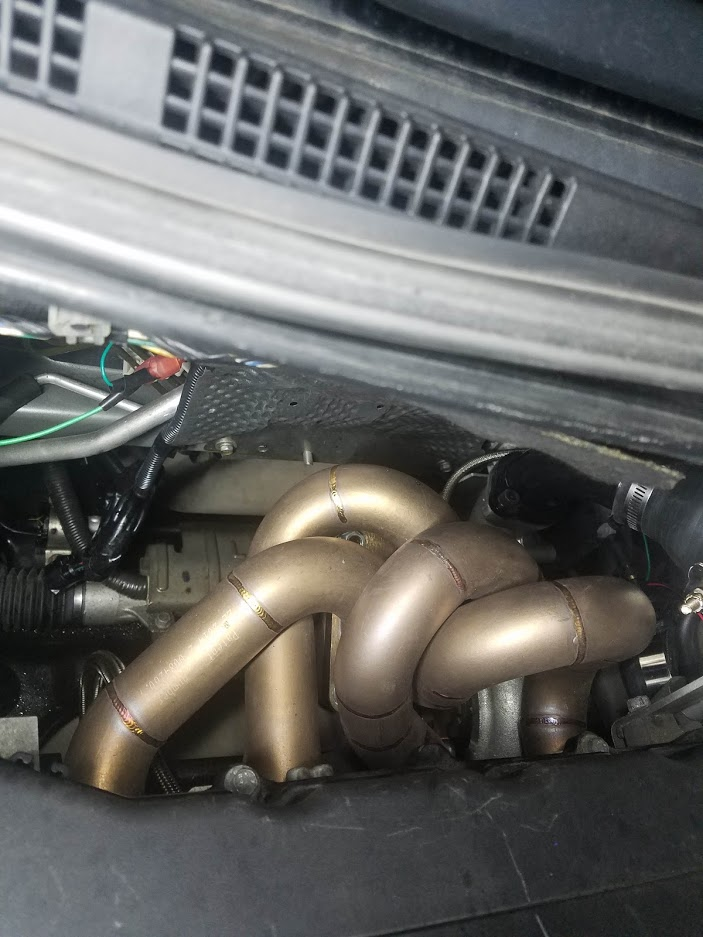
I replaced the stock wastegate actuator with the TRIDT model that has a 7psi spring in it. That’s a pretty safe boost level for the stock internals according to RRM and I can always add a boost controller later. I couldn’t fit the turbo and exhaust manifold on at the same time, so I had to drop the turbo down from the top, then bolt in the exhaust manifold, then bolt in the turbo from the bottom.
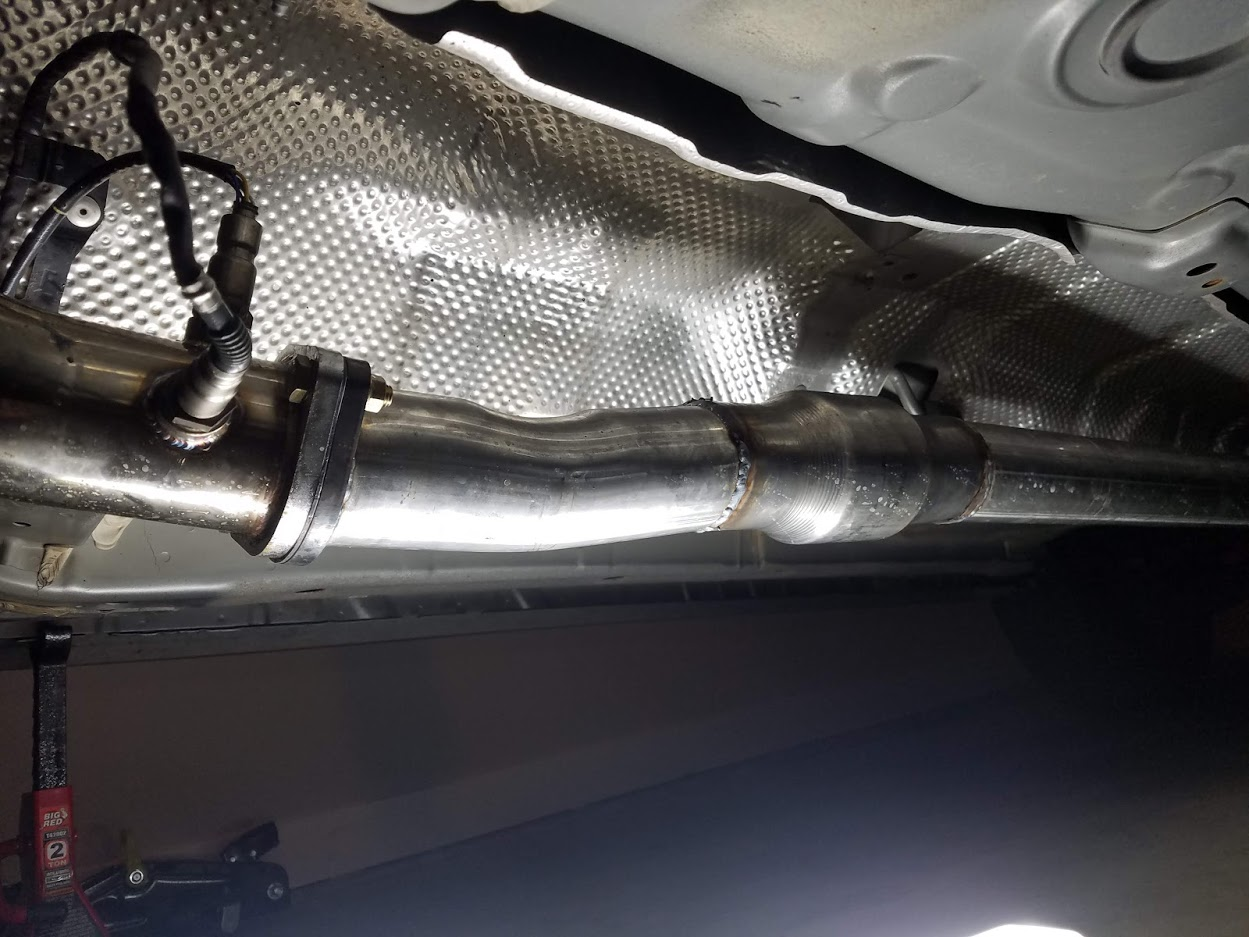
The new downpipe and stock exhaust will interfere with each other. I just cut the stock exhaust and ran it with just the downpipe until I got to the exhaust shop and replaced the mid section.
The downpipe is also very close to a wiring harness. Wrap the wires in heat reflective tape and maybe also wrap the downpipe with exhaust wrap to prevent and possible melting issues.
Intake
Now you can connect the rest of the air intake. The upper and lower intake pipes didn’t quite line up so I had to add an extra few inches. The MAF housing from MAPerformance and short air filter lets you use the stock battery location.
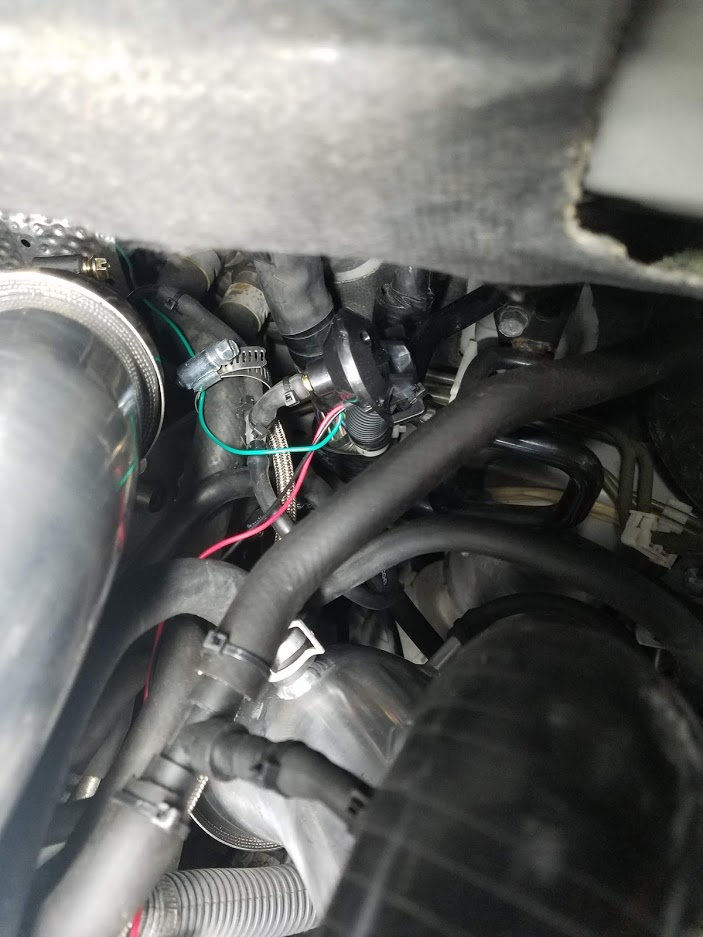
Replace the MAP sensor at the bottom left of the intake manifold with either a stock or OmniPower (or OEM) 3 bar sensor.
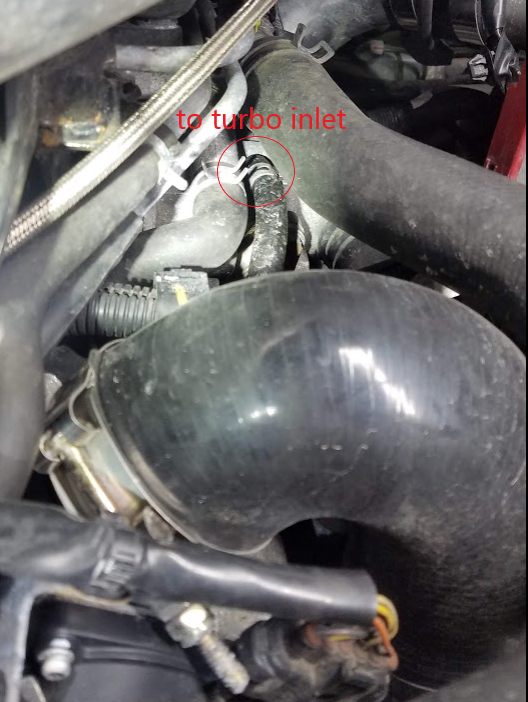
Make sure you connect all your boost and vacuum hoses. Vacuum for the BoV was tapped from the brake booster. The second BoV stem and PCV hose connects to the pre-turbo pipe. I’m running the turbo on wastegate pressure with a T-fitting for a boost sensor.
Turbo Oil and Coolant
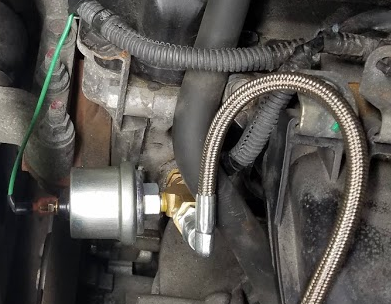
Oil feed location is below. This is a 3/8" BSPT fitting. A 3/8" npt will not fit and it will leak. This bolt was a real ***** to get out. I snapped my hex bit inside of it and had to get a mechanic to loosen it for me.
I added an oil pressure sensor to make sure the supply was good. I’ve removed it since then. Oil feed is a -4AN line that is routed under the intake manifold and around the right side of the engine. This avoids the hot exhaust manifold and burning your line open (I know because I’m an idiot and did that the first time).
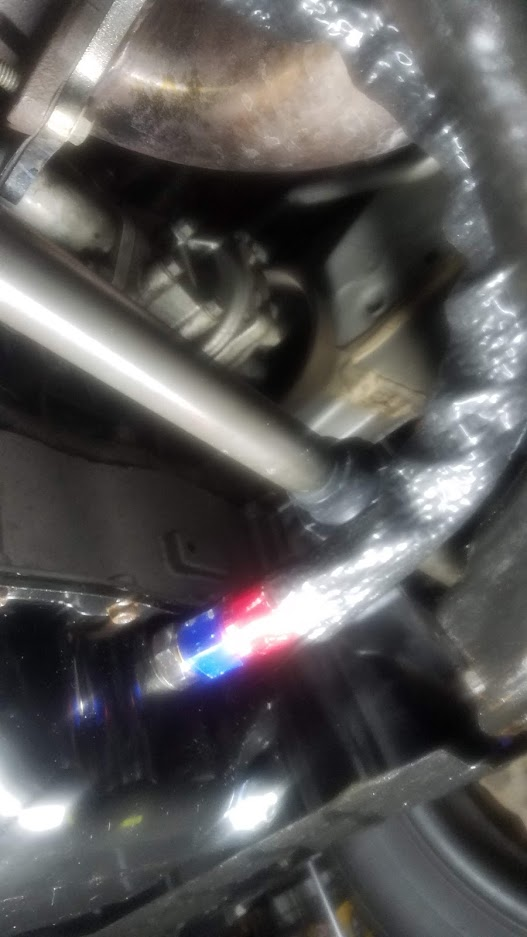
I used a -10AN braided line covered with a fire sleeve, mostly to prevent the line rubbing against the subframe. I removed the oil pan to drill a hole for the oil return fitting. The fitting uses rubber seals so it doesn’t need to be welded in.
A coolant line that goes from the block to near the throttle body can be rerouted through the turbo. When connecting the coolant lines to the turbo, you want the cold fluid to flow either horizontal or at a slight incline.
Electrical
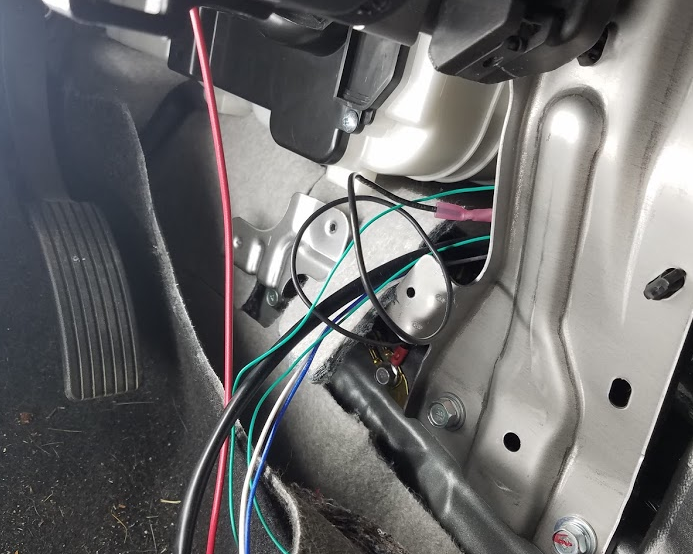
I routed my boost, oil pressure, and AFR gauges to the bottom of the center console. There was an audio input flap there that I wasn’t using so I removed it and didn’t need to drill any holes. To get behind the dash, you need to remove the glovebox to remove the trim on the passenger side door to remove the silver trim that goes across the dash to remove the radio trim. Then you need to remove the center console. I think there’s a youtube video on it.
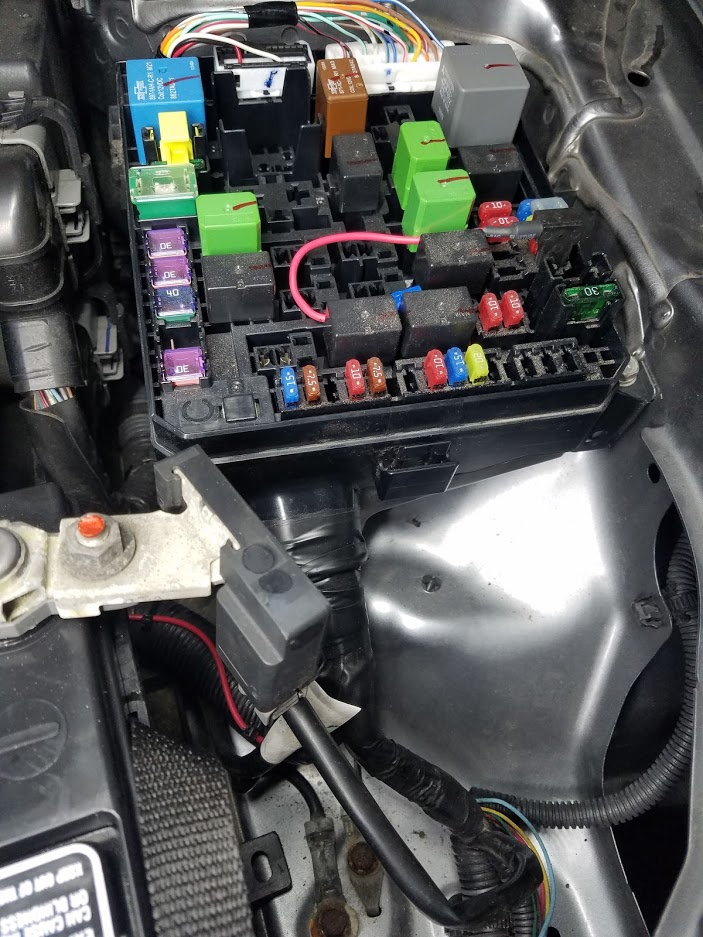
Power for these gauges can be piggybacked off the fuse box by the driver side door.
Ground is tapped from an existing ground connection on the trans tunnel on the driver side.
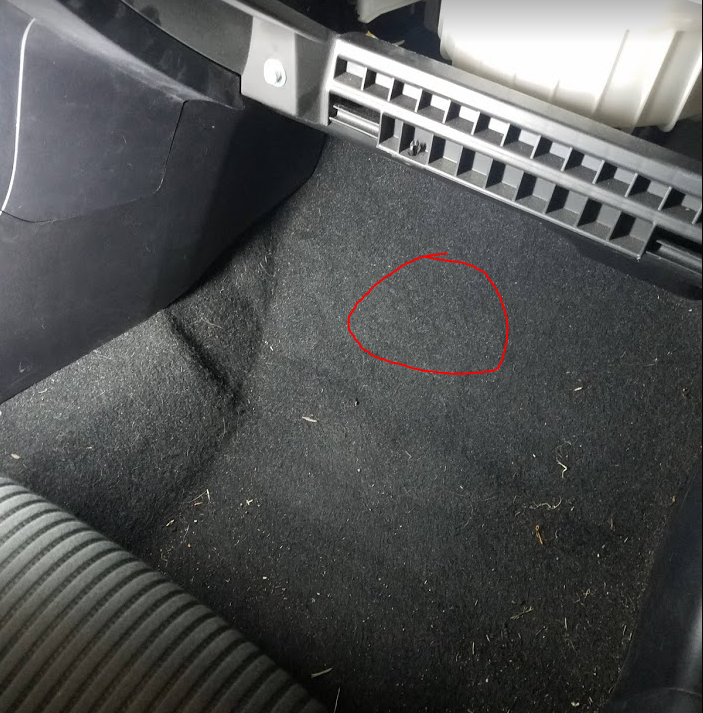
Data wires follow the front oxygen harness out of the interior through a grommet on the passenger floor. I forgot to take a picture of this and don’t want to rip up the carpet again even though it’s pretty easy. The green wires in the engine bay that you see in other pictures are the data wires and are routed up the firewall behind some heat shielding.
Power for the boost gauge goes to the engine bay fuse box using another fuse piggyback. The red wire zip tied to the wiring harness goes up into the red wire in the fuse box.
At this point, you can drive using an unmodified ROM. It won’t run well and will lean out under boost, so don’t be an idiot and watch your AFR gauge.
Stock ECU Tuning
There are a few things you can do to run your stock ECU with the new turbo. None of them will let you drive hard or get tons of power out of it. Again, don’t be an idiot and watch your AFR. You will need a Tactrix cable for this. Check out the N/A ROM tuning thread to get started and read everything in there.
To not lean out under boost so much, replace the injectors with Evo injectors and edit the ROM to match the new injectors.
To stop the car from going into limp mode when you step on the gas a little, modify the Torque Monitor and Torque Max tables to the values in the aforementioned tuning thread.
With those two modifications, you should be stable in closed loop operation. I would not try to tune it for power because of the MAP sensor. The stock is a 1 bar and by replacing it with a 3 bar you mess up all the load calculations. I haven’t found a way to modify this, but maybe one day I’ll dig into it.
Other threads mention being able to flash an Evo ROM on to the stock ECU. This did not work for me, even by bench flashing.
Evo ECU
To get any sort of power out of the new turbo, you need an Evo ECU. I used part number 1860C045, but other years/part numbers will probably work. First you need to get the VIN programmed by following this guide. The local dealership was able to do that for me for a hundred bucks.
First thing to do on the new ECU is enable mode 23 and disable boost control solenoid DTCs.
Next scale the MAF sensor reading to use better values for the 3” housing.
Fixing DTC P2253
EDIT:
I'm deleting all the previous information because it was running the O2 sensor on a floating ground and caused bad readings.
My USDM lancer came with a wideband O2 sensor, but Evos have narrowband sensors. You won't need to do anything if you have a narrow band front O2 sensor. The sensor needs to be wired according to the diagram below.
I routed the wiring by going up the trans tunnel and directly into the fuse box. Bypassing the chassis harness that routes through the cabin is a lot easier than trying to route it along the stock harness. You can't use any of the stock harness wires either because the signal wires for the wideband are grounded and shielded, but the narrowband signal wires are a twisted pair.
The blue and black wires on my extension are for the heater. The yellow and green wires are for the signal and must be a twisted pair according to the diagram. I made a few more splices than I needed to in my fuse box because it took a couple iterations to get here. For example the 4 splices on the top right are for the rear O2 sensor.
Fixing DTC P0243 and DTC P0247
These DTCs show up because the ECU is activating the boost control solenoids and monitoring them to make sure they're working. It does that by measuring the voltage spike of the line after the solenoid closes. If it doesn't detect the voltage spike, it will throw the DTC. You might notice that there are bits to disable this in the ROM definition file. I tried that, but it didn't work for me. Luckily it can be fixed by zeroing out all 3 boost target tables, all 3 reactive solenoid WGDC maps, and all 3 passive solenoid WGDC maps. If you tell the ECU to never activate the boost control, it will never know that it isn't there.
Last edited by SalD; Dec 1, 2020 at 08:38 AM.
Reason: Bad o2 adapter info
I haven't updated the post since it didn't get much attention, but everything is pretty solid on it. At 7psi I ran a 14.8s 1/4 mile and beat on it hard at autocross all year with no issues. Since then I cleaned up some wiring and had a better shop fix the downpipe. I also replaced the cylinder head with a 4b12 because I cracked my cam shaft cap putting in an evo intake cam. The only issue with it is I still haven't figured out the P2253 dtc, but my AFRs are good so I'm not too worried about it. Eventually I'll fix it and get it dyno tuned.
Nice man. Thank you for posting this. Very good info here. The only thing I dont have a good grasp on is how the wastegate, boost controller boost gauge and bov work and how they all get plumbed.
Its hard to find anything about boosting these motors
Last edited by DaltoManiac; Feb 8, 2020 at 09:37 AM.
Nice man. Thank you for posting this. Very good info here. The only thing I dont have a good grasp on is how the wastegate, boost controller boost gauge and bov work and how they all get plumbed.
Its hard to find anything about boosting these motors
I just run on wastegate pressure so it's just a short line from the wastegate to the turbo air outlet pipe. The ECU controls the stock boost controller, but you can just not hook it up and disable the DTC. I took out the boost gauge because I only needed it to verify the initial install.
The cxracing intercooler kit I got has everything for hooking up the BoV. Attach the recirculation pipe, connect the top of the BoV to manifold vacuum, and connect the bottom stem of the BoV to the intake pre-turbo. Do you want pictures? I can take some later.
Yes photos may be helpful. I have met people on a fb group called Mitsubishi Lancer Turbo Club that have had success using the stock ecu. I dont know much of anything about tuning a car but it seems like that is the biggest hurdle to cross. I actually drive an outlander sport 2wd 5speed with the 2 liter 4b11 motor so this build seems very possible to just do the same on my vehicle. Add me on fb. My Name on there is [redacted] . I have no profile pic and Im from [redacted]
Last edited by DaltoManiac; Feb 9, 2020 at 07:53 PM.
I'm not on Facebook and I think it's better to post info like this on the forums because it's easier for other people to find it. You can use your stock ECU, but you will need a 3 bar map sensor and you'll need to figure out where each map is in your rom. Tuning will be harder because the maf and map will disagree on load values and I don't know what problems that will cause other than bad map load scaling. I used a GSR Evo ECU and that was easy for me with a manual transmission.
Updates? I am building the same thing right now. Have the Evo turbo and manifold. Collecting the other parts on your list. Curious if you got it Dyno tuned or dealt with the code.
Last edited by C G; Jul 19, 2020 at 10:49 PM.
Reason: Spelling
Updates? I am building the same thing right now. Have the Evo turbo and manifold. Collecting the other parts on your list. Curious if you got it Dyno tuned or dealt with the code.
Which code do you mean? I did git rid of 0243, 0247, and 2253. I haven't dyno tuned it yet, but I did do some road tuning with ecuflash and evoscan. I was just making sure AFRs were good and smoothed out the cam timing tables. If you do this, getting a pro to accurately tune the fuel calibration table is a very good idea. Eventually I'll put my evo camshafts in and get it tuned, but it's my DD while I work on the Miata.
On one of the posts you had mentioned you still hadn't gotten rid of 2253 but I see you edited your original post to mention you did. I didn't catch that.
Yes I plan on having it professionally tuned. Your post has helped us a lot. Probably wouldn't have tried it otherwise.
On one of the posts you had mentioned you still hadn't gotten rid of 2253 but I see you edited your original post to mention you did. I didn't catch that.
Yes I plan on having it professionally tuned. Your post has helped us a lot. Probably wouldn't have tried it otherwise.
I'm glad I could help. It really is an easy job because almost everything is plug and play. You just need a dealer to recode the evo ecu, a good exhaust shop to modify/custom make your downpipe to fit the rest of your exhaust, and someone experienced in tuning evos. Running on a 7lb wastegate spring I beat on it hard through a summer of autocross and had no issues. Eventually the stock clutch wore down after 100k, so I upgraded to a lighter flywheel and better clutch that makes it feel a lot better.