How-To: Add a fan to your OEM SST cooler.
 May 27, 2013, 06:42 PM
#1
How-To: Add a fan to your OEM SST cooler.
Disclaimer: Continue at your own risk. I am not responsible for any damages, injuries, etc. that may befall you or anything you possess/encounter/contact/borrow/fondle/whatever while attempting to replicate my actions. This modification has worked for me, but it is not my fault or responsibility if you attempt this modification and experience negative consequences. Be aware and informed of your actions and all should go well.
So after a bunch of questions and a few requests, I'm finally going to put together an explanation for adding a fan to your SST oil cooler.
If you are doing any kind of spirited driving (if not, why do you own this car?) but don't abuse the life out of your car on a regular basis, maybe a $300+ transmission cooler upgrade isn't right for you. Maybe you just want a little extra, added protection to your beloved transmission without losing an arm and a leg for it. That's what this is about.
I have driven my car fairly aggressively for the last 45k+ miles and have been fortunate enough to avoid any major component failures, including the SST. Now, this is not to say that regular routine maintenance isn't the most essential factor in your car's longevity (because it is) but I'm positive that this has certainly helped to ensure safe operation during all of my 1/4 mile and 60-120 second autoX romps.
The fan I used is a SPAL 5.5" puller fan, originally marketed for motorcycle and atv use. Part number is 30103011 and is currently selling on eBay for less than $50, shipped.

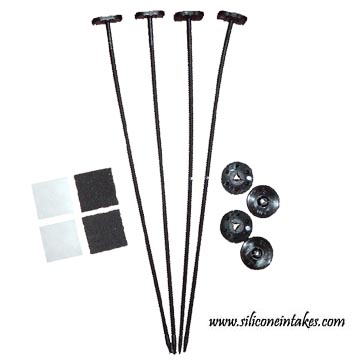
To attach the fan, I just used a universal radiator fan install kit, available for just a couple bucks at almost any auto parts store.
Then, for a power source, I used a Bussman "add-a-circuit", also available at most auto parts stores. I really love these things because they are super easy and allow you to add an accessory or other powered circuit without much affecting the circuit that you are tapping into. You just install this in place of your fuse that you'd like to tap, then install 2 fuses into the add-a-circuit. One fuse powers your original circuit and the other fuse sends power to the red wire coming off of the fuse-tap, giving you a completely new and independantly-fused circuit.

So after a bunch of questions and a few requests, I'm finally going to put together an explanation for adding a fan to your SST oil cooler.
If you are doing any kind of spirited driving (if not, why do you own this car?) but don't abuse the life out of your car on a regular basis, maybe a $300+ transmission cooler upgrade isn't right for you. Maybe you just want a little extra, added protection to your beloved transmission without losing an arm and a leg for it. That's what this is about.
I have driven my car fairly aggressively for the last 45k+ miles and have been fortunate enough to avoid any major component failures, including the SST. Now, this is not to say that regular routine maintenance isn't the most essential factor in your car's longevity (because it is) but I'm positive that this has certainly helped to ensure safe operation during all of my 1/4 mile and 60-120 second autoX romps.
The fan I used is a SPAL 5.5" puller fan, originally marketed for motorcycle and atv use. Part number is 30103011 and is currently selling on eBay for less than $50, shipped.
To attach the fan, I just used a universal radiator fan install kit, available for just a couple bucks at almost any auto parts store.
Then, for a power source, I used a Bussman "add-a-circuit", also available at most auto parts stores. I really love these things because they are super easy and allow you to add an accessory or other powered circuit without much affecting the circuit that you are tapping into. You just install this in place of your fuse that you'd like to tap, then install 2 fuses into the add-a-circuit. One fuse powers your original circuit and the other fuse sends power to the red wire coming off of the fuse-tap, giving you a completely new and independantly-fused circuit.
Last edited by 03chi-town0Z; May 27, 2013 at 09:53 PM.
 May 27, 2013, 06:43 PM
#2
I personally found it much easier to just remove my front bumper, but you can also access everything by jacking up the car and removing the left front wheel and plastic inner-fender liner. If you need help taking off your bumper, you can check this thread out here:
https://www.evolutionm.net/forums/09...nt-bumper.html
Yes, I know the pics are down, but I'll see what I can do to get some up, unless someone else has some they'd like to update that thread with...
https://www.evolutionm.net/forums/09...nt-bumper.html
Yes, I know the pics are down, but I'll see what I can do to get some up, unless someone else has some they'd like to update that thread with...
Last edited by 03chi-town0Z; May 27, 2013 at 09:46 PM.
May 27, 2013, 06:43 PM
#3
So, this whole install is fairly straight-forward and simple, but sometimes a picture can be worth far more than an explanation, so here goes. If you need more/better pictures or would like some ms-paint-style arrows and graphics added for easier viewing/locating, I can do that, too.
First off, the fan fits nice and snug back there in the stock location, which is why I suggest using a fan of this size. As you can see, the cooler IS relatively small, so anything much larger would just have a great deal of overlap and is unnecessary. The other nice thing about doing it this way is that I chose to add a 3/8" wide strip of 3/8" foam tape around the entire outer circumference of the fan (the gray stuff in the pic), and because of the size-match, it creates a nice seal against the cooler in lieu of trying to find or fabricate a shroud.

You can also see in that picture how I hooked up the ground wire. Add a simple eyelet to the black ground wire from the fan and bolt it up right near the cooler. No need to run wires all over the place for that one. Here's a little further-out pic, just in case you wanted it.

Next up is the power wire. I personally always like to add new circuits into the car instead of tapping into existing circuits, whenever possible. This isolates the component and helps reduce domino-style multiple failures where you have to check a half-dozen different things to find out what's broken and causing the circuit to shut down.
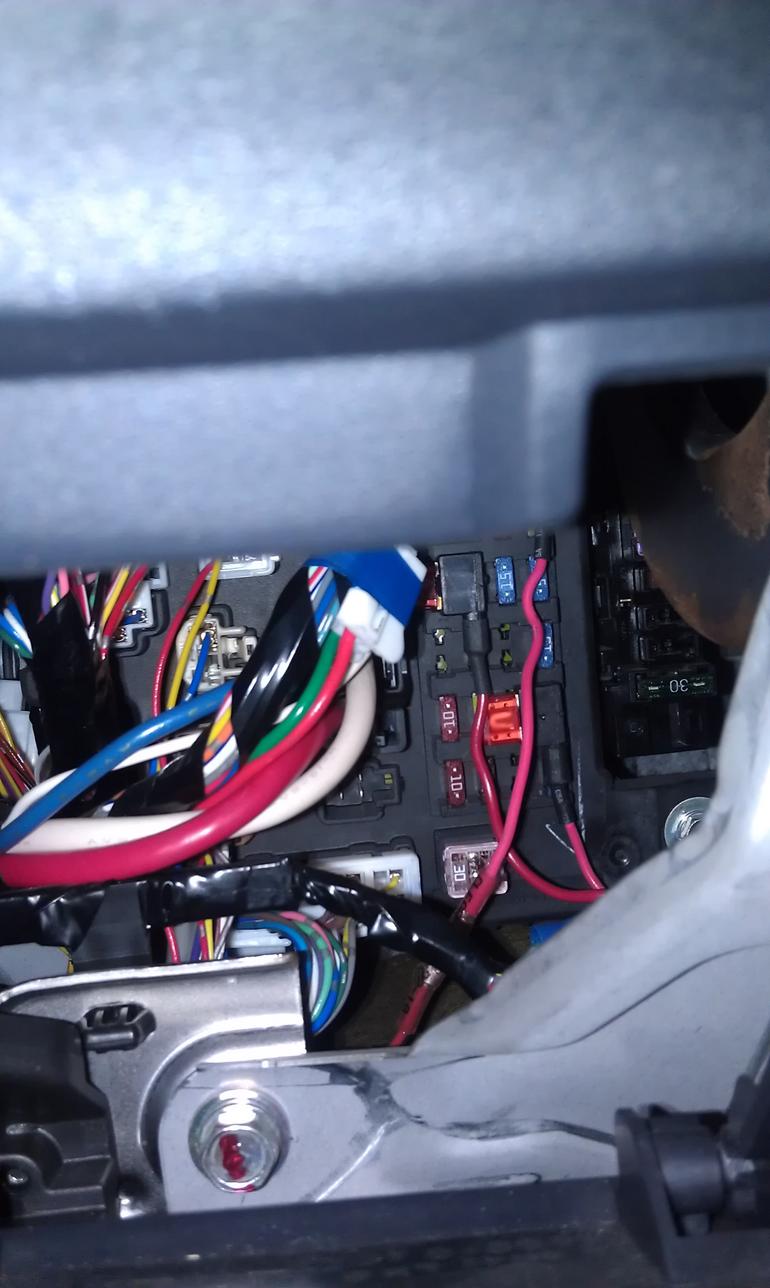
So, with that in mind, I cut off the in-line fuse holder that came with the fan and attached some fresh wire and routed it through the fender well and into the passenger compartment along with the hood cable. This pic was kinda crappy, and I didn't realize it until just now, but you should be able to see it up near the top, there. If it's really necessary, I can always take another.

Inside the driver's floor area, I removed the sill plate and kick-panel and added in a small toggle switch. I chose this area because it's easy to just kick it on and off when needed, but it sits high and outside enough that it doesn't get hit by accident. I will eventually re-route the wiring to the OEM switch panel location, once I get around to buying a switch that installs cleanly into one of those panel blanks, and then this small hole used for the old switch will be out of view and soon forgotten... I ran the power wire from the fan directly to this switch.

Lastly, I ran a wire from the switch up to the fusebox area and used the add-a-circuit on one of my 10A fuses to snag myself some power. You can see in the pic how much I like to use these things. I'm using 2 for my gauges and the third one for my fan, not sure which is which, but all are 10A and any should work just fine.
First off, the fan fits nice and snug back there in the stock location, which is why I suggest using a fan of this size. As you can see, the cooler IS relatively small, so anything much larger would just have a great deal of overlap and is unnecessary. The other nice thing about doing it this way is that I chose to add a 3/8" wide strip of 3/8" foam tape around the entire outer circumference of the fan (the gray stuff in the pic), and because of the size-match, it creates a nice seal against the cooler in lieu of trying to find or fabricate a shroud.
You can also see in that picture how I hooked up the ground wire. Add a simple eyelet to the black ground wire from the fan and bolt it up right near the cooler. No need to run wires all over the place for that one. Here's a little further-out pic, just in case you wanted it.
Next up is the power wire. I personally always like to add new circuits into the car instead of tapping into existing circuits, whenever possible. This isolates the component and helps reduce domino-style multiple failures where you have to check a half-dozen different things to find out what's broken and causing the circuit to shut down.
So, with that in mind, I cut off the in-line fuse holder that came with the fan and attached some fresh wire and routed it through the fender well and into the passenger compartment along with the hood cable. This pic was kinda crappy, and I didn't realize it until just now, but you should be able to see it up near the top, there. If it's really necessary, I can always take another.
Inside the driver's floor area, I removed the sill plate and kick-panel and added in a small toggle switch. I chose this area because it's easy to just kick it on and off when needed, but it sits high and outside enough that it doesn't get hit by accident. I will eventually re-route the wiring to the OEM switch panel location, once I get around to buying a switch that installs cleanly into one of those panel blanks, and then this small hole used for the old switch will be out of view and soon forgotten...
I ran the power wire from the fan directly to this switch.Lastly, I ran a wire from the switch up to the fusebox area and used the add-a-circuit on one of my 10A fuses to snag myself some power. You can see in the pic how much I like to use these things. I'm using 2 for my gauges and the third one for my fan, not sure which is which, but all are 10A and any should work just fine.
Last edited by 03chi-town0Z; May 27, 2013 at 09:42 PM.
May 27, 2013, 09:49 PM
#4
Finally finished and up before the weekend is officially over, as promised (barely, lol). Hope this helps, at least a few of you.
Please feel free to ask any questions or offer any suggestions. I am not saying that this is the only way, nor am I saything that this is by any means the best way. It's just the way that I did it, and it will hopefully help some others since it should be easy enough to replicate without too much hassle.
Please feel free to ask any questions or offer any suggestions. I am not saying that this is the only way, nor am I saything that this is by any means the best way. It's just the way that I did it, and it will hopefully help some others since it should be easy enough to replicate without too much hassle.

Trending Topics
May 28, 2013, 09:36 PM
#9
Evolved Member
iTrader: (9)
Join Date: Sep 2011
Location: El Paso
Posts: 635
Likes: 0
Received 0 Likes
on
0 Posts
 May 29, 2013, 08:08 AM
#10
Evolved Member
iTrader: (2)
Join Date: Feb 2008
Location: Paris, TN
Posts: 1,904
Likes: 0
Received 0 Likes
on
0 Posts
There are adjustable thermostatic controllers that can be continuously adjusted from 150F (65C) to 220F (104C). Once they kick on, they stay on until the measured temp is 10F (5.6C) lower than the kick on temp. If wired to an always hot source, it'll kick on and off as needed even if the ignition is off.
May 29, 2013, 06:28 PM
#11
Thanks David. If you'd like to add any details, or the photos from your thermostatic switch install on yours, please feel free to post them up in this thread as I'm sure there would be some people interested in going that extra step further than a simple switch install.
May 29, 2013, 07:07 PM
#12
Evolved Member
iTrader: (9)
Join Date: Sep 2011
Location: El Paso
Posts: 635
Likes: 0
Received 0 Likes
on
0 Posts
I can do that Kyle, here is how I routed the cables
https://www.evolutionm.net/forums/sh...d.php?t=374707
Great for wiring up the fan to a switch.
I'll draw up some wiring diagrams for using a the switch the way I do or a electronic controller. Which I might switch to depending the cost of it but I would still use the 2way switch for track days. I just want it on with no worries on track days.
Jun 25, 2013, 08:03 AM
#14
Evolved Member
iTrader: (2)
Join Date: Feb 2008
Location: Paris, TN
Posts: 1,904
Likes: 0
Received 0 Likes
on
0 Posts
quick question about the fan size....
Why 5.5" and not a 6" or 7"? are there clearance issues that prevent you from strapping a 6" fan on there? Seems 6" fans are more readily available/easier to find than 5.5" fans. Based on the pics in this thread, it looks like a slightly larger fan would be desirable in order to cover more rows in the cooler, but I can't tell how tight the clearance is from the pics.
Why 5.5" and not a 6" or 7"? are there clearance issues that prevent you from strapping a 6" fan on there? Seems 6" fans are more readily available/easier to find than 5.5" fans. Based on the pics in this thread, it looks like a slightly larger fan would be desirable in order to cover more rows in the cooler, but I can't tell how tight the clearance is from the pics.
Jun 25, 2013, 09:27 AM
#15
Evolved Member
iTrader: (9)
Join Date: Sep 2011
Location: El Paso
Posts: 635
Likes: 0
Received 0 Likes
on
0 Posts
You won't have a clearance issue. I think the efficiency will be an issue. You want a fan fins to be inside the area of the cooler. Remember it's the fins that cool it. The bigger the fins the bigger the motor. Having a fan that is that size of the cooler with is best. Maybe find one with higher RPMs as that will help cool it faster. It it was me I would not go with a bigger fan but find a fan that fits perfectly in the area of the cooler. I would measure the the cooler and then get a fan for it. 5.5" we already knows fits inside of it, so its easier just to go this route.