
So you sandblasted your valve cover and now its trashed...wait! Theres a solution!


So you sandblasted your valve cover and now its trashed...wait! Theres a solution!
So I've posted a thread about my valve cover being sand blasted/ glass beaded, and it seems to be a very popular subject. Most people told me that the cover was absolute trash and to buy a new one. I did some some talking with my uncles friend who is a aeronautic scientist for Nasa and he gave me a fix for this problem. Heres how to go about it!
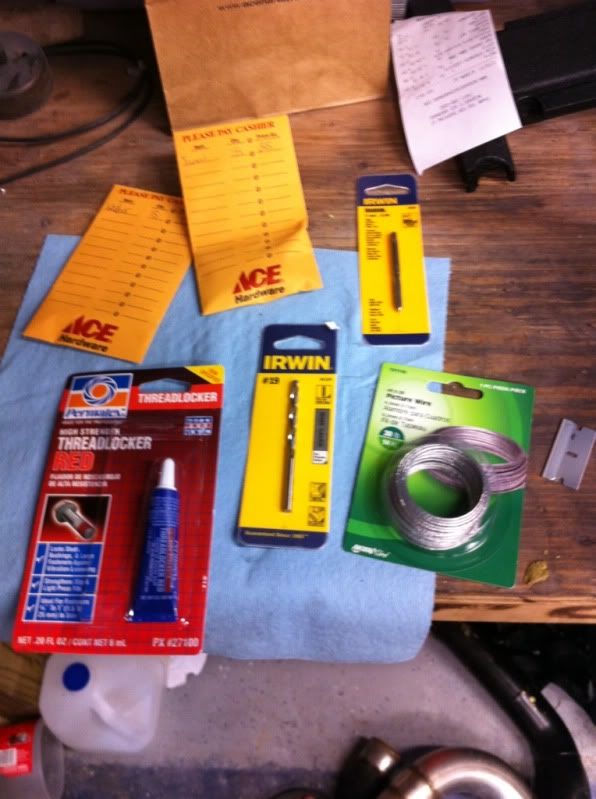
These are the basic things you will need in order to perform the fix:
1- #19 Dril Bit
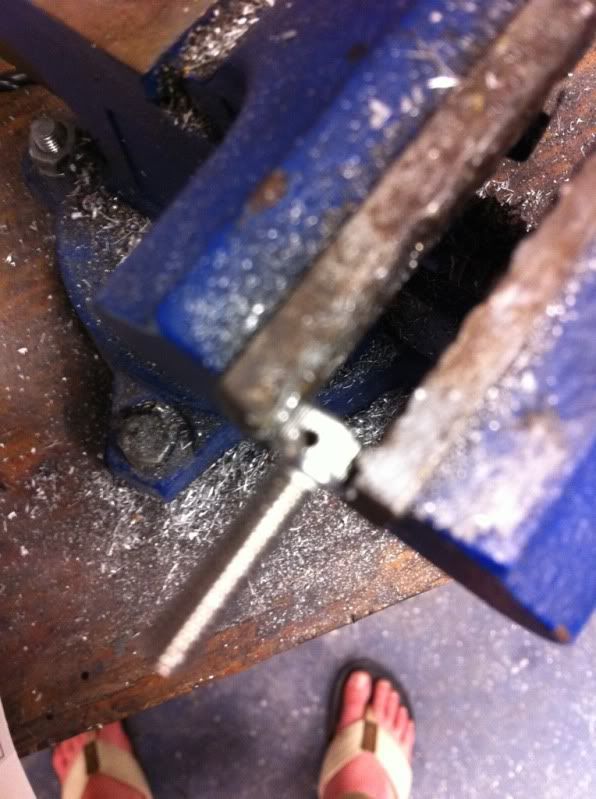
2- M5 x .80 tap
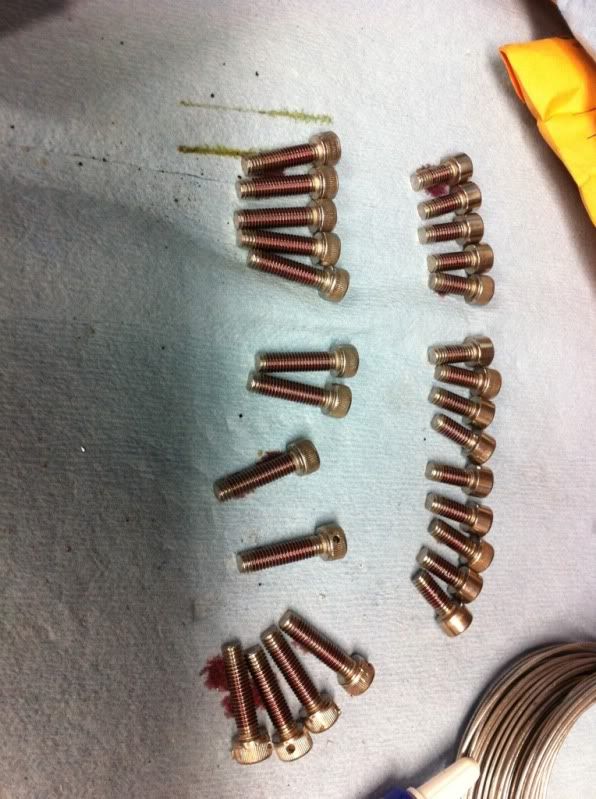
3- M5 Allen head bolts (Used the longest available so I could load the with red locktite)
4- Lock washers
5- Red Locktite
6- Safety Wire
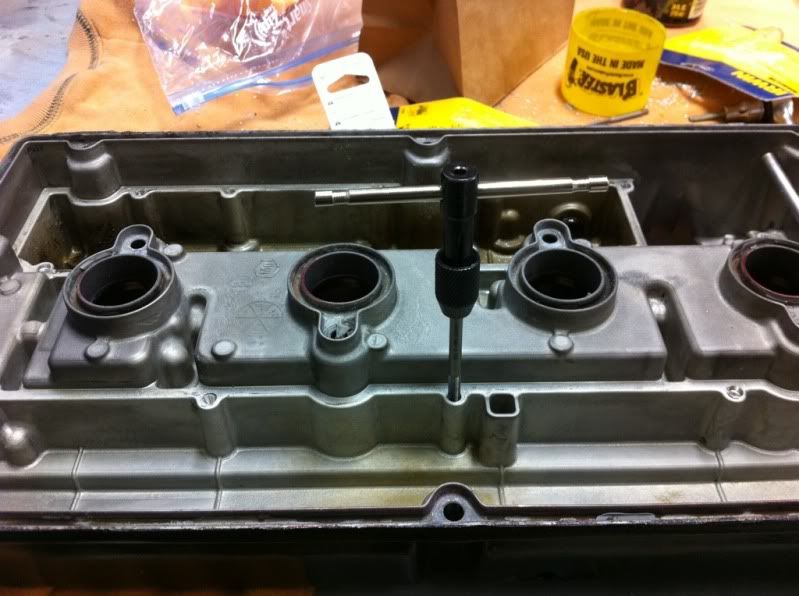
Step 1
Centerpunch all the large rivets and drill them out. When I did this I used a bit that was slightly larger than the rivet head so it would create a nice pilot hole to continue drill with out #19 but as stated before.
Step 2
Use the #19 bit and ream out all the holes you will need to tap. Be sure to drill a tiny bit and then back the bit out, clean it, and continue. If you have too much metal in the bore the bit will heat up and break or just wont go any deeper.
Step 3
Thread the holes with the M5 x .80 tap. Same idea here. Go slow, and don't go too deep too quickly. This will result in the same as mentioned with the drilling process.
Step 4
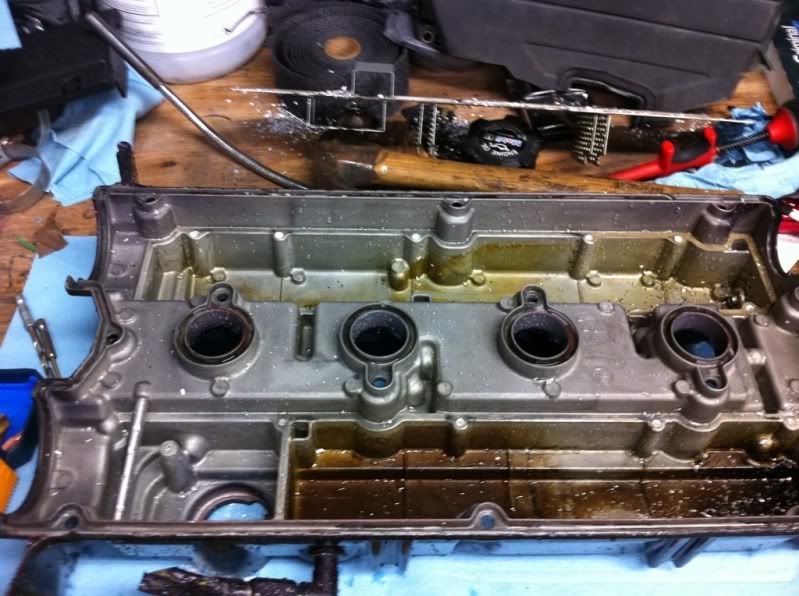
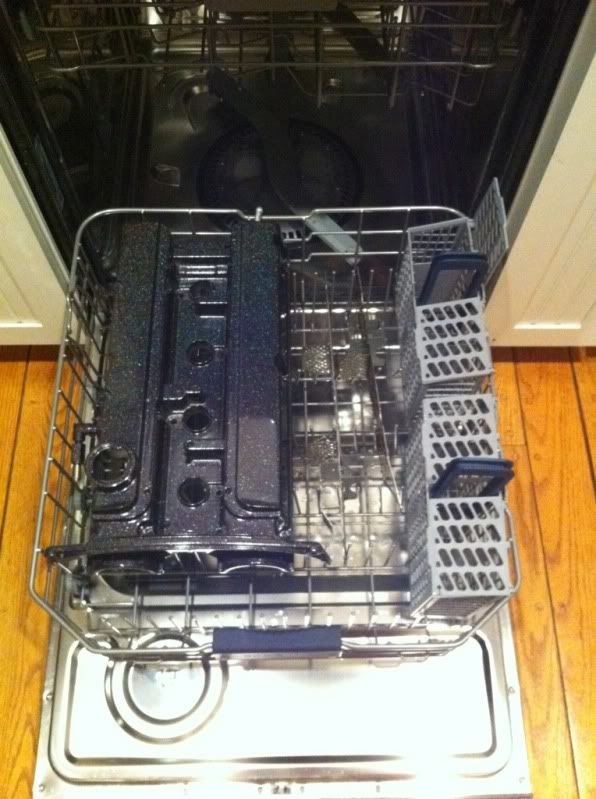
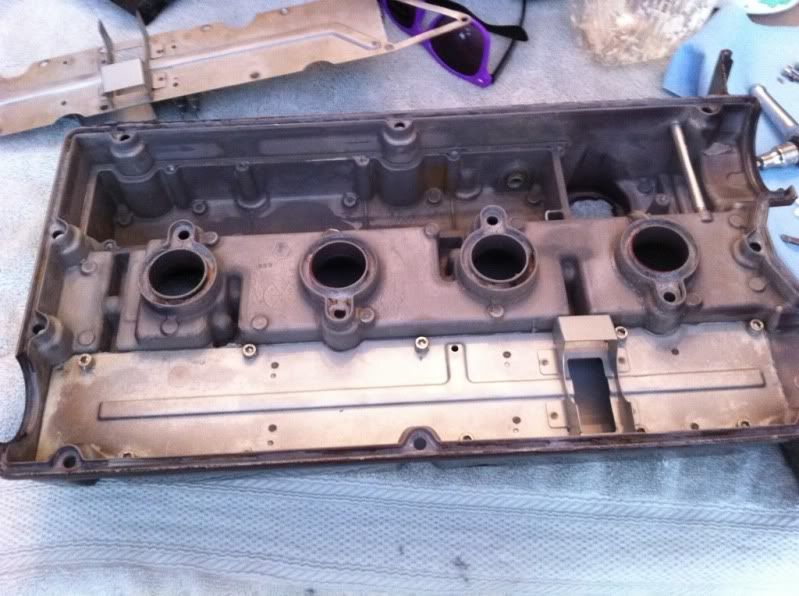
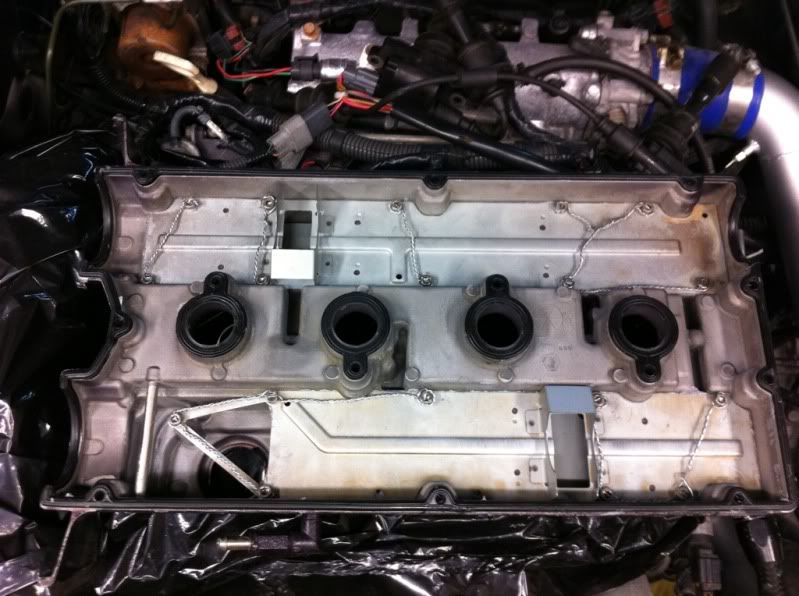
Wash all parts as well as you can. I soaked all my parts in degreaser, scrubbed them, and then put them in the dishwasher on "sanitize". I can assure anyone in doubt; there will be absolutely no debris left if you spend a solid day cleaning this thing like I did. I also used my compressor to blow out the PCV ports and then for extra measure hit them with a qtip.
And after many hours of meticulous cleaning...
Step 5
This step sucks. We need to drill all the bolt heads with a tiny drill bit so that they can be safety wired to prevent any chance of backing out. Its simple: just drill out the bolt heads with a tiny drill bit. I went through 6 bits doing this. Lucky for me they're only $1.97 at my local Home Depot.
Step 6
Use a bench grinder to clean up the drill holes in the bolt heads. Remember, the name of the game here is no debris anywhere. After cleaning them soak them in de greaser.
Step 7
Lay the cleaned bolts out and apply red locktite on them. I put one application on, let it site for 15 minutes and then rolled them to the other side and hit them again insuring full coverage.
Step 8
Thread in all your bolts. The magnesium is surprisingly strong and these went in and tightened very well. When tightening these down you want 12-14ft/lbs on each bolt.
Step 9
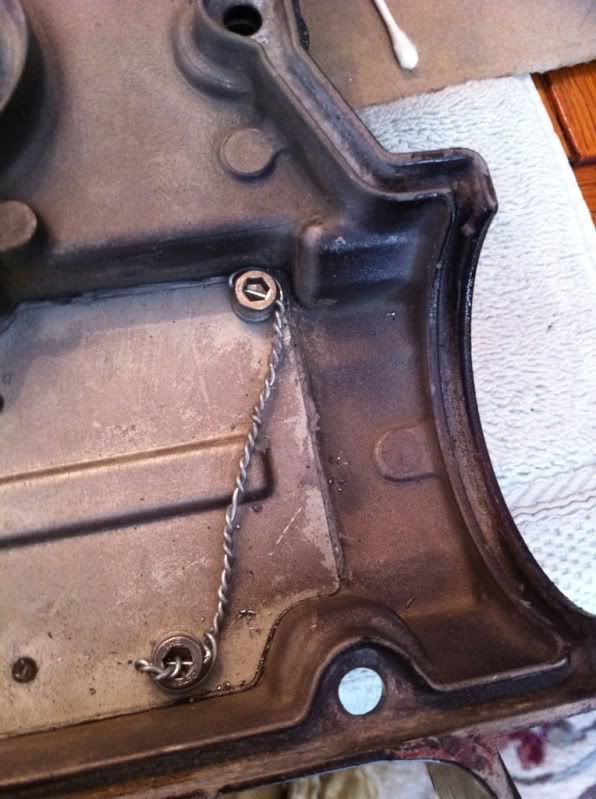
Safety wire time! This is a complicated and somewhat exacting science. You need to thread the wire in and bring one side around the bolt in the tightening direction. Next we want to braid the wire so there are about 8 twists per inch. The wire shouldn't be loose, but shouldn't be so tight that it might break under tension. This will prevent any bolts from backing out due to vibrations. The ultimate goal here is that if one bolt does loose its torque, the safety wire will keep it in place and tighten those around it. This website does a better job of explaining the different methods, and also includes pictures. Here is mine.
Basically done.
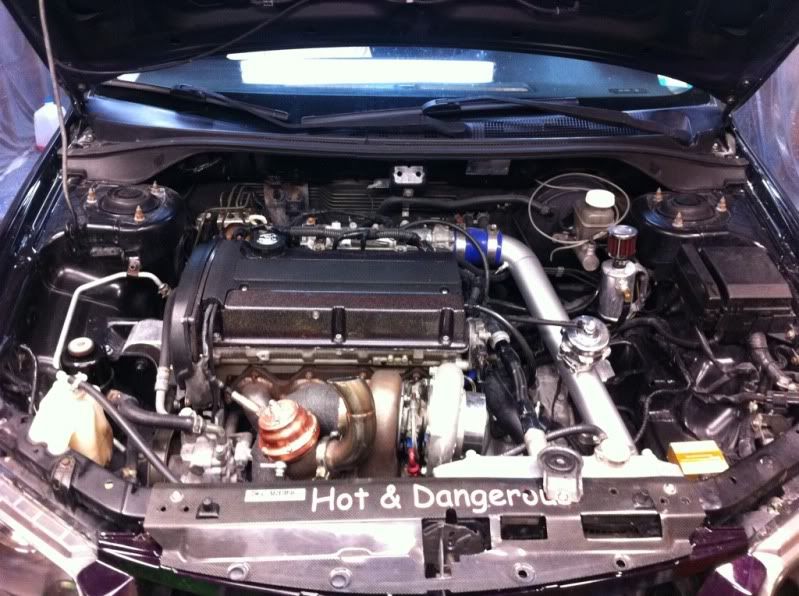
Reinstalled and ready to go!!
Hope this help everyone! Remember take your time!!
-James
**I do not take any responsibility for people using my write up. It is essential that if you do perform this fix that you take as much time as you need to get it perfect. Doing it wrong will cost you your motor**
These are the basic things you will need in order to perform the fix:
1- #19 Dril Bit
2- M5 x .80 tap
3- M5 Allen head bolts (Used the longest available so I could load the with red locktite)
4- Lock washers
5- Red Locktite
6- Safety Wire
Step 1
Centerpunch all the large rivets and drill them out. When I did this I used a bit that was slightly larger than the rivet head so it would create a nice pilot hole to continue drill with out #19 but as stated before.
Step 2
Use the #19 bit and ream out all the holes you will need to tap. Be sure to drill a tiny bit and then back the bit out, clean it, and continue. If you have too much metal in the bore the bit will heat up and break or just wont go any deeper.
Step 3
Thread the holes with the M5 x .80 tap. Same idea here. Go slow, and don't go too deep too quickly. This will result in the same as mentioned with the drilling process.
Step 4
Wash all parts as well as you can. I soaked all my parts in degreaser, scrubbed them, and then put them in the dishwasher on "sanitize". I can assure anyone in doubt; there will be absolutely no debris left if you spend a solid day cleaning this thing like I did. I also used my compressor to blow out the PCV ports and then for extra measure hit them with a qtip.
And after many hours of meticulous cleaning...
Step 5
This step sucks. We need to drill all the bolt heads with a tiny drill bit so that they can be safety wired to prevent any chance of backing out. Its simple: just drill out the bolt heads with a tiny drill bit. I went through 6 bits doing this. Lucky for me they're only $1.97 at my local Home Depot.
Step 6
Use a bench grinder to clean up the drill holes in the bolt heads. Remember, the name of the game here is no debris anywhere. After cleaning them soak them in de greaser.
**Sorry no pics**
Step 7
Lay the cleaned bolts out and apply red locktite on them. I put one application on, let it site for 15 minutes and then rolled them to the other side and hit them again insuring full coverage.
Step 8
Thread in all your bolts. The magnesium is surprisingly strong and these went in and tightened very well. When tightening these down you want 12-14ft/lbs on each bolt.
Step 9
Safety wire time! This is a complicated and somewhat exacting science. You need to thread the wire in and bring one side around the bolt in the tightening direction. Next we want to braid the wire so there are about 8 twists per inch. The wire shouldn't be loose, but shouldn't be so tight that it might break under tension. This will prevent any bolts from backing out due to vibrations. The ultimate goal here is that if one bolt does loose its torque, the safety wire will keep it in place and tighten those around it. This website does a better job of explaining the different methods, and also includes pictures. Here is mine.
Basically done.
Reinstalled and ready to go!!
Hope this help everyone! Remember take your time!!
-James


Good idea on lockwire although yours is pretty ugly haha! No worries though. Remember Left over right with 6-8 twists per inch and then at the pig tail right over left. Also, some of yours are negative meaning if the bolt was to actually start turning left, it would loosen its other bolt that its attached to as well.
Since these bolts them self arent under as much stress and vibration as an aircraft, they will be fine.
Since these bolts them self arent under as much stress and vibration as an aircraft, they will be fine.

Trending Topics


i dont know whats going on in that upper right hand corner. it probably would of been better if you saftey-wired the bolts in groups of 2 instead of four. like stated before some of your bolts are actually loosening instead of tightning. i would re-do some of those.
I would have used lock washers and cotter pins possibly. You have the safety wire ran the wrong way. for example when the top bolt try's to loosen in your picture it will be pulling against the other bolt in it's loosening direction also. Other than that nice job. It needs to look like this 
Last edited by 3grst01; Jul 22, 2011 at 11:57 PM.

Good idea on lockwire although yours is pretty ugly haha! No worries though. Remember Left over right with 6-8 twists per inch and then at the pig tail right over left. Also, some of yours are negative meaning if the bolt was to actually start turning left, it would loosen its other bolt that its attached to as well.
Since these bolts them self arent under as much stress and vibration as an aircraft, they will be fine.
Since these bolts them self arent under as much stress and vibration as an aircraft, they will be fine.
???
 Thank you!
i dont know whats going on in that upper right hand corner. it probably would of been better if you saftey-wired the bolts in groups of 2 instead of four. like stated before some of your bolts are actually loosening instead of tightning. i would re-do some of those.
I would have used lock washers and cotter pins possibly. You have the safety wire ran the wrong way. for example when the top bolt try's to loosen in your picture it will be pulling against the other bolt in it's loosening direction also. Other than that nice job. It needs to look like this
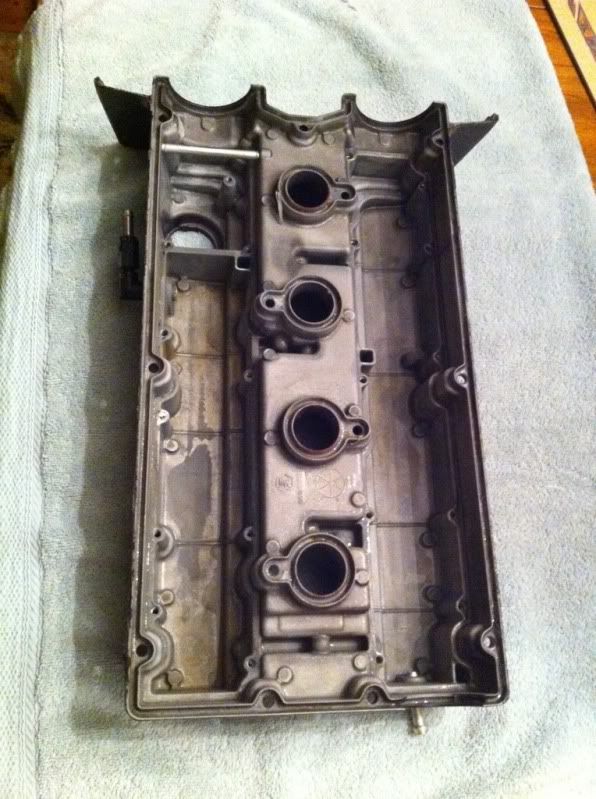
Glass beads got into the baffles of the cover. If they hadnt been removed for cleaning they would end up going through my motor and trashing my rod/main bearings. I didnt blast the cover myself. It was done without my consent at a local powdercoating shop.

Yah a shop got sand in the baffles of my old cover. I decided to just get a new one. For the amount of work/time involved the 200 for a new cover was just easier since im lazy. But good job for even attempting it.