Decided to make a headlight duct
#1
Evolved Member
Thread Starter
iTrader: (41)
Join Date: Sep 2007
Location: Alpharetta GA
Posts: 911
Likes: 0
Received 0 Likes
on
0 Posts
Decided to make a headlight duct
Well I couldn't figure out why my drivers side headlight kept fogging up so I did what any sain person would do. I cut a big friggin hole in it  I always liked the look of headlight ducts so I figured what the hell & gave it a shot. Here's sum pics.
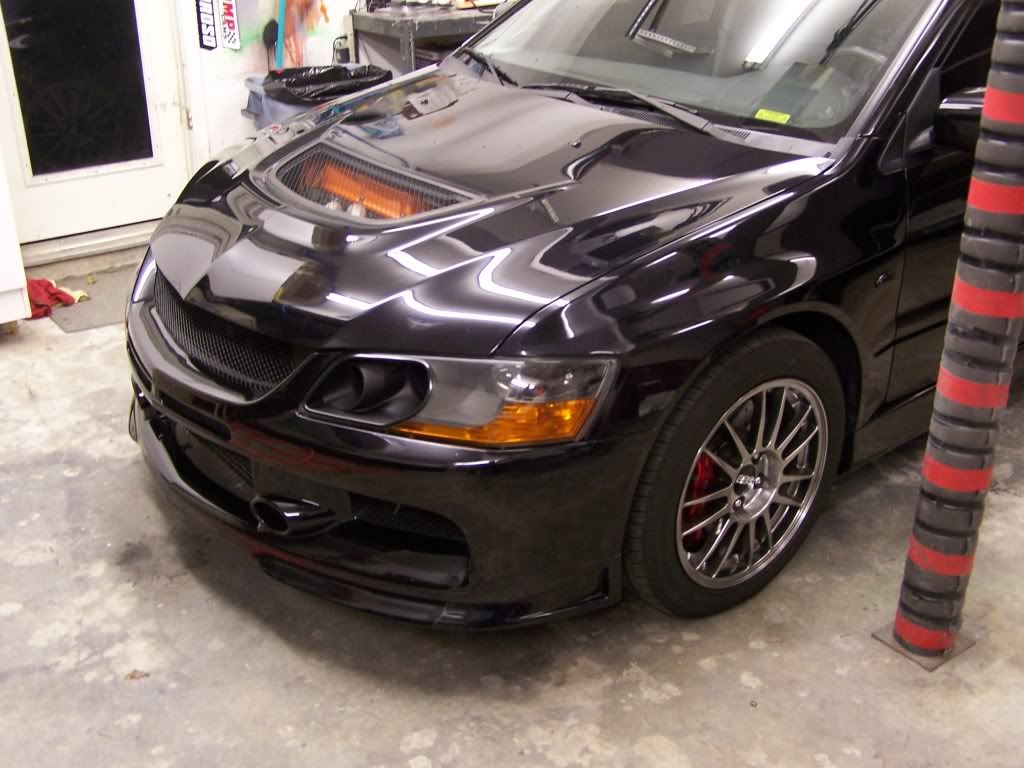
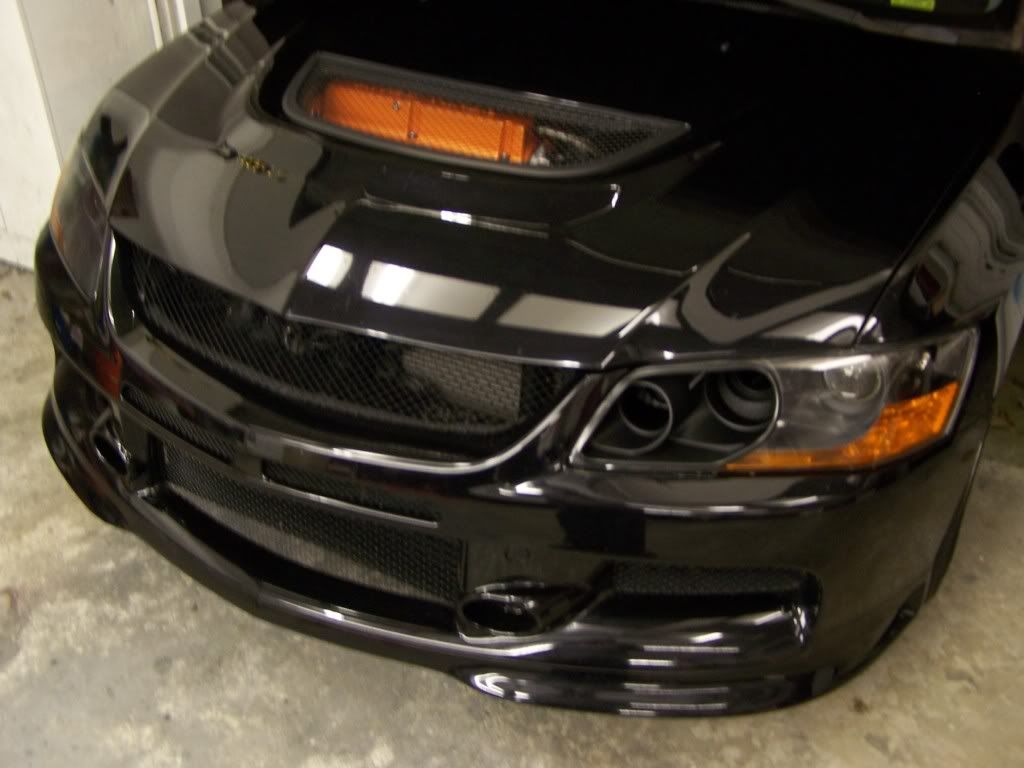
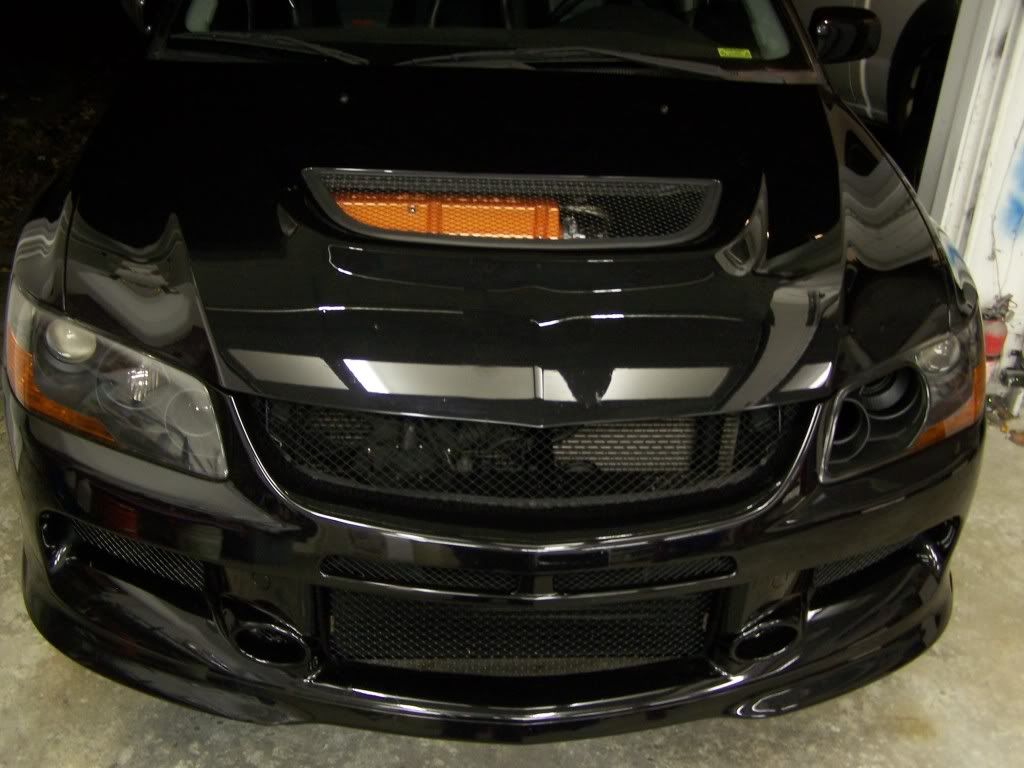
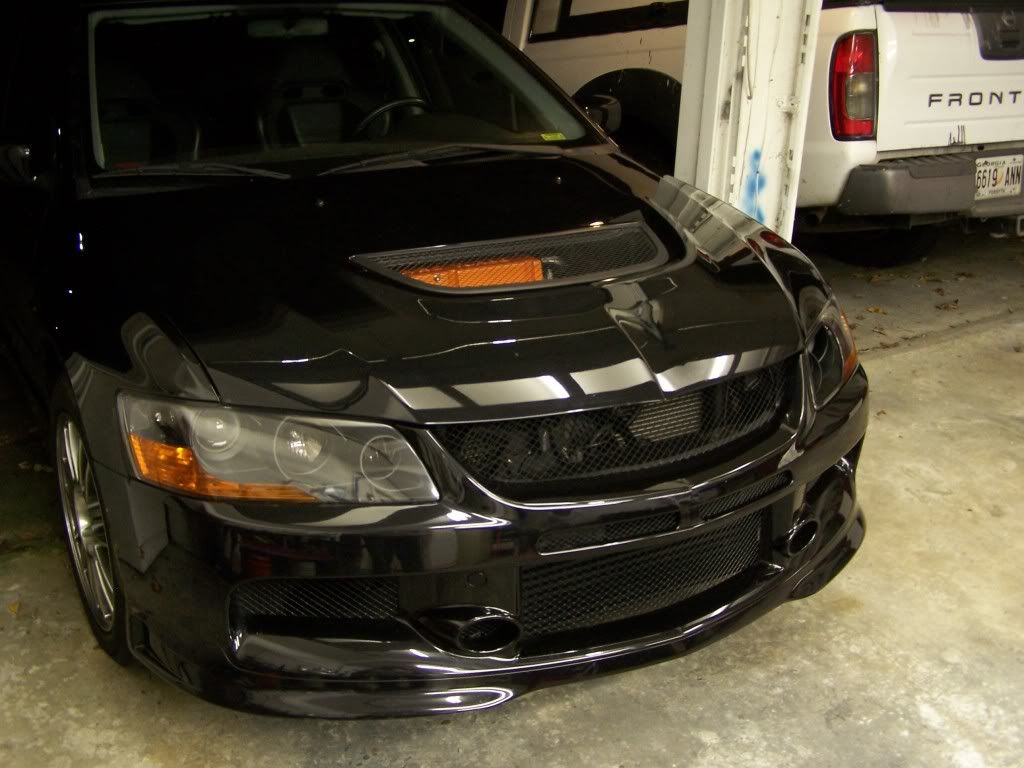
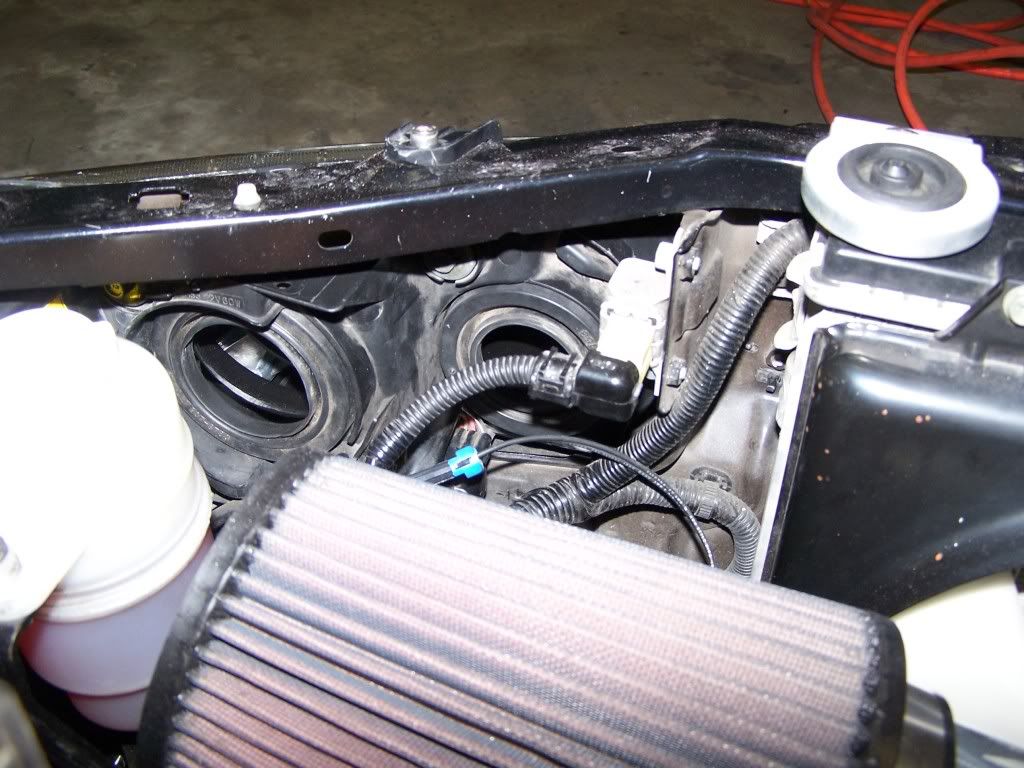
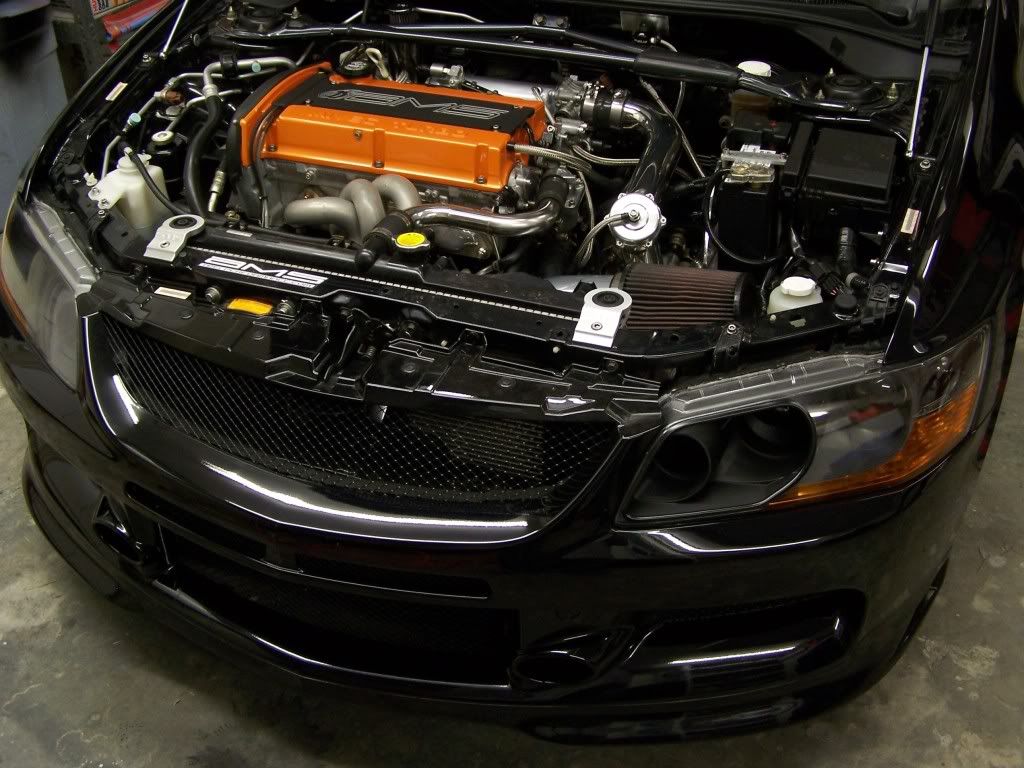
Well I keep getting requests for a write up so heres what I did. Sorry I wasn't planning to do a write up so There are no pics of the light dissassembled.
THIS IS ONLY A GUIDE. YOU WILL NEED DREMMEL SKILLS & CONFIDENCE IN PERFORMING A MOD SUCH AS THIS. IF YOU AREN'T ABSOLUTELY SURE YOU CAN DO THIS CORRECTLY THEN DO NOT TRY IT. I TAKE NO RESPONSIBLITY IF YOU DESTROY YOUR HEADLIGHT. GOOD LUCK.
1. Remove & dissassemble your light as per any headlight painting "How To"
2. Purchase some black door edge molding from an auto parts store. This may be hard to find since alot of places only care it in chrome which you could use also if that floats yer boat.
3. Place the inner housing behing the lense & either draw an outline of the area youwant to cut or use fine line 1/8" tape to make the outline. I used the tape cause it's easier for me.
4. Cut out the hole in the lense. Make sure you leave enought foom to file down the rough edge left by the tool & still have enought lense for the molding to slide over. For this I used a Dremmel tool with a side cutter bit. It looks like a drill bit but it's designed to cut rather than drill holes.
5. Once you have rough cut the lense then use a file or sanding bit on the Dremmel to smooth out the edges. Go slow & be careful so that you don't take too much material away.
6. After you've smoothed out your cuts you should have a nice little window cut into your lense. now is time to install the door edge molding. This stuff has some sticky stuff inside the grove & is pretty tight so it should hold itself in place pretty well. I started about midway down the inside edge heading trward the tight corner at the bottom cause this is the hardest place to get it installed & gives you plenty of room to work. tis stuff is hard to install arroud corners & will fight you. I used alittle bit of heat froma heat gun to soften it up a bit & make it easier. Just dont get it too hot. When you get back arround to the starting point cut the molding leaving it a lillt long & then try to install. trim small bits off till it fits perfect.
7.Now move on to the main headlight housing & remove the bulbs & the rubber boots that go behind the reflectors.
8. Take a marker & going in thru the hole in the back of the light mark a circle on the back of the high bean & fog reflectors with a sharpie that's about as big as the opening in the back of the housing.
9. Remove the fog light & High beam reflectors. They are kinda hard to get off the clips & I actually dammaged my clips & glued the reflectors back into place.
10. Once the reflectors are out use the side cutting tool to cut out the area you've marked on them. The high beam reflector is plastic & will cut easily. The fog reflector however is metal & will take a while.
11. After after cutting holes in the reflectors use your sanding bits to clean up the edges & make them nice & smooth.
12. Sand & poaint the reflectors any color you want. I chose flat black. At this time you can also paint the inner housing if you'd like.
13. Drill a few holes in the bottom of the main housing. This will allow water to drain out since it is now an open headlihgt assembly. Make sure they are big enough to allow sufficient drainage but they don't need to be too big.
14. Blow out all parts & clean them as best you can. Pay special attention to the back side of the lense.
15. Reassemble your light as per any headlight painting h"How To" & reinstall.
16. Enjoy
 I always liked the look of headlight ducts so I figured what the hell & gave it a shot. Here's sum pics.


Well I keep getting requests for a write up so heres what I did. Sorry I wasn't planning to do a write up so There are no pics of the light dissassembled.
THIS IS ONLY A GUIDE. YOU WILL NEED DREMMEL SKILLS & CONFIDENCE IN PERFORMING A MOD SUCH AS THIS. IF YOU AREN'T ABSOLUTELY SURE YOU CAN DO THIS CORRECTLY THEN DO NOT TRY IT. I TAKE NO RESPONSIBLITY IF YOU DESTROY YOUR HEADLIGHT. GOOD LUCK.
1. Remove & dissassemble your light as per any headlight painting "How To"
2. Purchase some black door edge molding from an auto parts store. This may be hard to find since alot of places only care it in chrome which you could use also if that floats yer boat.
3. Place the inner housing behing the lense & either draw an outline of the area youwant to cut or use fine line 1/8" tape to make the outline. I used the tape cause it's easier for me.
4. Cut out the hole in the lense. Make sure you leave enought foom to file down the rough edge left by the tool & still have enought lense for the molding to slide over. For this I used a Dremmel tool with a side cutter bit. It looks like a drill bit but it's designed to cut rather than drill holes.
5. Once you have rough cut the lense then use a file or sanding bit on the Dremmel to smooth out the edges. Go slow & be careful so that you don't take too much material away.
6. After you've smoothed out your cuts you should have a nice little window cut into your lense. now is time to install the door edge molding. This stuff has some sticky stuff inside the grove & is pretty tight so it should hold itself in place pretty well. I started about midway down the inside edge heading trward the tight corner at the bottom cause this is the hardest place to get it installed & gives you plenty of room to work. tis stuff is hard to install arroud corners & will fight you. I used alittle bit of heat froma heat gun to soften it up a bit & make it easier. Just dont get it too hot. When you get back arround to the starting point cut the molding leaving it a lillt long & then try to install. trim small bits off till it fits perfect.
7.Now move on to the main headlight housing & remove the bulbs & the rubber boots that go behind the reflectors.
8. Take a marker & going in thru the hole in the back of the light mark a circle on the back of the high bean & fog reflectors with a sharpie that's about as big as the opening in the back of the housing.
9. Remove the fog light & High beam reflectors. They are kinda hard to get off the clips & I actually dammaged my clips & glued the reflectors back into place.
10. Once the reflectors are out use the side cutting tool to cut out the area you've marked on them. The high beam reflector is plastic & will cut easily. The fog reflector however is metal & will take a while.
11. After after cutting holes in the reflectors use your sanding bits to clean up the edges & make them nice & smooth.
12. Sand & poaint the reflectors any color you want. I chose flat black. At this time you can also paint the inner housing if you'd like.
13. Drill a few holes in the bottom of the main housing. This will allow water to drain out since it is now an open headlihgt assembly. Make sure they are big enough to allow sufficient drainage but they don't need to be too big.
14. Blow out all parts & clean them as best you can. Pay special attention to the back side of the lense.
15. Reassemble your light as per any headlight painting h"How To" & reinstall.
16. Enjoy
Last edited by shunderwunder; Oct 27, 2009 at 05:05 PM.
Trending Topics
#14
Evolved Member
Thread Starter
iTrader: (41)
Join Date: Sep 2007
Location: Alpharetta GA
Posts: 911
Likes: 0
Received 0 Likes
on
0 Posts
I'll write up what I didtomorrow, but I didnt take pics durring the process.
I bought a lower bumper mesh for an VIII & modfied it to fit. Took forever & that mesh is kinda pricey but I can't stand seeing that bracket & the holes left from the emblem so it was well worth it.  4
4
 4
4


