
BEISSEN's Build

BEISSEN's Build
Ok I bought the car less then 2 years ago and had got the bad side of the deal as far as when getting a used Evo its either good or bad mine was bad. When I got it, it needed to be retuned,Replace the Head Gasket and needed allot of small items like exhaust "had a weld on tip on stock pipes", had 3 holes in the UICP, Replace the Tial 50mm BOV with a stock one, get a new MBC and replace the wheels which were rota torques 18 x 8.5 with horriable offsets and had spacers in just the rear to sit flush with the front tires. Then fix allot of small things that were done poorly.
It was not long I had the tires replaced by a member on DCEVOCLUB doing a direct swap for stock GSR VIII Enkeis w/New tires. I had the car retuned for the cams and had the head gasket replaced within one month and swapped the BOV out and had all the holes taken care of and also ordered the HKS Hi-Power with a test pipe. At this point the car took a major transformation from here on out.
When I got the car here are the modifications
XS POWER 3.5 core FMIC with short route pipeing & Tial 50mm
Stock Intake with K&N Filter
Comp 272 Cams
ARP Head Studs
E-bay 3" Downpipe
Gutted Cat
Defi Mechanical Boost Gauge
AEM A/F Gauge
walboro 255 lph
ACT Clutch
Rota Torques 18 x 8.5
5mm Spacers in the rear
Extended wheel studs in the rear
I bought a set of IX SE BBS Wheels for summer time and the VIII Enkeis for winter and replaced allot of parts on the car to get back up to where I want it.
Current Mods
Engine
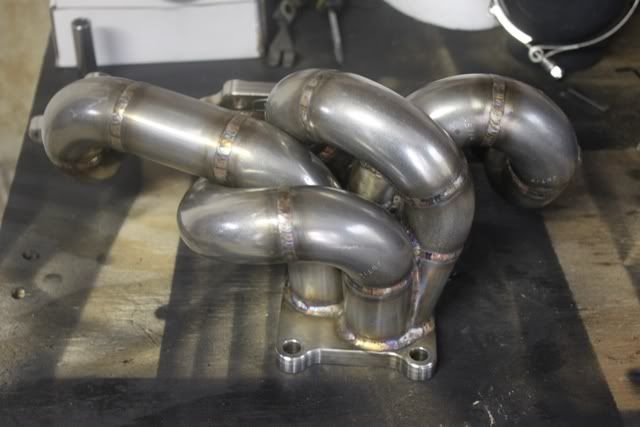
FiD Equal Length Tubular Manifold Full 304SS "Even the Flanges"
84mm Ported FP Red
FP Gen II Install Kit
Comp 272 cams
ARP Head studs
Omni Power 4 bar MAP Sensor for SD
JM Fab Intake Pipe "Modifed for SD"
JM Fab Oil Catch Can" New"
FID Vacuum Block "New"
HKS Super Mega Flow Filter Kit
Forge RS BOV VTA
ETS 3.5 Core
ETS 3" UICP
ETS v2 LICP "Modified for Dump Clearnace"
Injen Super SES Downpipe "Replaced E-bay 3" DP"
DTM 3" Test Pipe
HKS Hi-Power Cat Back
Walboro 255
Agency Power Front Motor Mount
Spark Tech non-CDI Ignition
Toxic Fab Cam Sensor Heat Sheild
Suspension/Brakes
Stock Bremebos
Slotted and Drilled Rotors
Swift Sport Springs
Blox Shift Knob
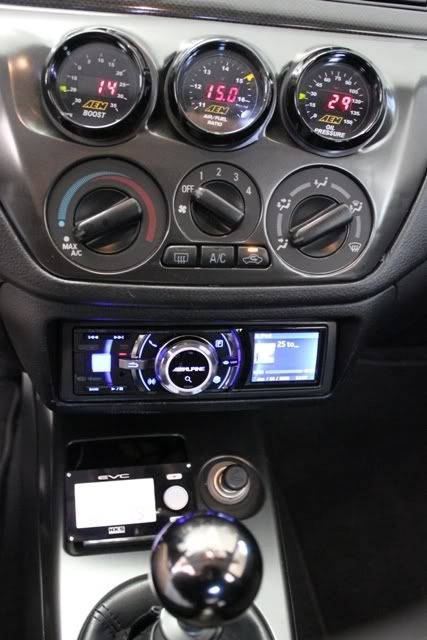
Electronics
AEM Boost, A/F & Oil Presure Gauges
Gruppe 52mm Molded Gauge Pod Dash kit
HKS Type 0 TT
HKS EVC VI Boost Controller w/Easy Writer Software
Alpine Headunit
Here are some current pictures


Newly Done Valve Cover with toxic fab Cam Sensor Cover"NEW 11/02"

Here are the parts that just came in this week. "NEW 11/02"


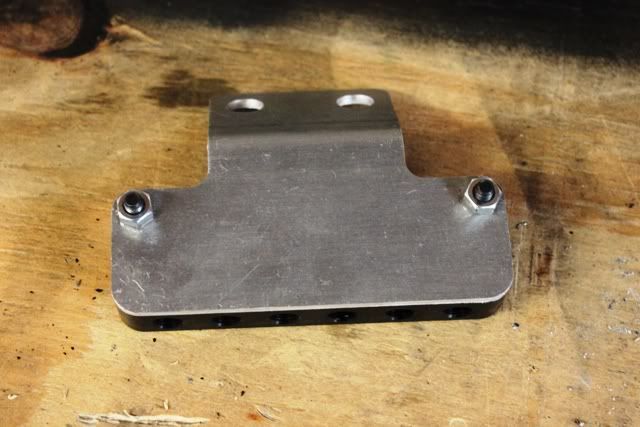
Ok well here is a Update and a small write up on my install of the FID Vacume Distrobution Block.
This was a very easy stright forward install and the Block is desined for the Evo VIII-IX a X is being made the bracket is whats I guess is vehicle specific but again there are those who will do as they want and mount in a differant location.
Parts and block.


Step 1. Remove the Two 14mm Bolts on the center section of the strut bar.


Step 2. Remove the 3 14mm nuts on the shock tower holding the strut bar on the passenger side to allow clearance for the plate to slide in place.

Step 3. Assemble the block as needed with givin fittings I used Thread Tape to make a perfect seal. I had smaller vacume line so I think it was 3/16 so my socket was a 7/16 to tighten the fittings into the block.
Step 4. Install the FID Block.
Step 5. Lightly tighten the center bolts and then tighten the strut bolts all the way then finish with the center bar bolts.
Last Step Install vacume lines into the Block Useing one as a main source. I did not have a 1/2 line to use so I used the 3/16 from the manifold in the Picture its the first fitting on the passenger side.


Now for my install I just ran the hose where I had it "T" so I could run my Boost Gauge and read it and have a solid line there now and its on the block with the rest of the hoses.
Before

After

I have in my setup the BOV,Boost Controller Solinoid and the Boost Gauge all ran on the block with no more "T" fittings.
Main Source of vacume "#1 passenger Side Fitting"
Before

After
Before with "T" Fitting connecting the BOV and the Boost Controller Soloniod

After with no fitting
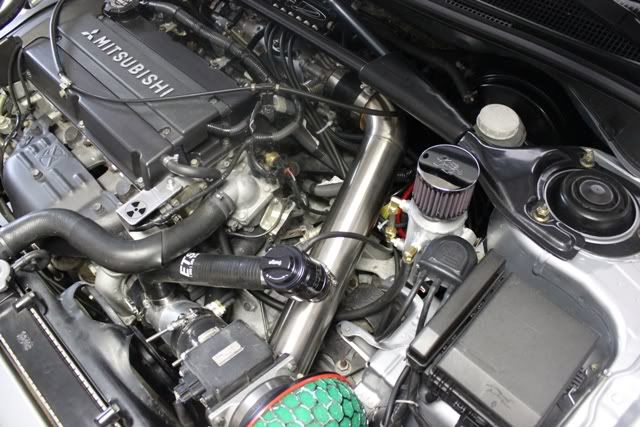
Here is a Shot of it all together with new Parts installed currently mod list updated on page 1.

New FID Manifold


Tuned at Ptuning 1st time 100 degrees outside high humidity

Open House/Dyno Day Ptuning "no retune" 10/17/2010

I will add more and update the progress and results when completed this will all be done on straight 93 oct for tuning no Meth no Race fuel and no E85. The shop has calibrated the dyno to 0% correction factor, which means no magical numbers its all stract factoring as most dynos factor in at 1.12%.
Page 1. Basics of the car and starting progress
Page 3. Updated info with more to come
It was not long I had the tires replaced by a member on DCEVOCLUB doing a direct swap for stock GSR VIII Enkeis w/New tires. I had the car retuned for the cams and had the head gasket replaced within one month and swapped the BOV out and had all the holes taken care of and also ordered the HKS Hi-Power with a test pipe. At this point the car took a major transformation from here on out.
When I got the car here are the modifications
XS POWER 3.5 core FMIC with short route pipeing & Tial 50mm
Stock Intake with K&N Filter
Comp 272 Cams
ARP Head Studs
E-bay 3" Downpipe
Gutted Cat
Defi Mechanical Boost Gauge
AEM A/F Gauge
walboro 255 lph
ACT Clutch
Rota Torques 18 x 8.5
5mm Spacers in the rear
Extended wheel studs in the rear
I bought a set of IX SE BBS Wheels for summer time and the VIII Enkeis for winter and replaced allot of parts on the car to get back up to where I want it.
Current Mods
Engine
FiD Equal Length Tubular Manifold Full 304SS "Even the Flanges"
84mm Ported FP Red
FP Gen II Install Kit
Comp 272 cams
ARP Head studs
Omni Power 4 bar MAP Sensor for SD
JM Fab Intake Pipe "Modifed for SD"
JM Fab Oil Catch Can" New"
FID Vacuum Block "New"
HKS Super Mega Flow Filter Kit
Forge RS BOV VTA
ETS 3.5 Core
ETS 3" UICP
ETS v2 LICP "Modified for Dump Clearnace"
Injen Super SES Downpipe "Replaced E-bay 3" DP"
DTM 3" Test Pipe
HKS Hi-Power Cat Back
Walboro 255
Agency Power Front Motor Mount
Spark Tech non-CDI Ignition
Toxic Fab Cam Sensor Heat Sheild
Suspension/Brakes
Stock Bremebos
Slotted and Drilled Rotors
Swift Sport Springs
Blox Shift Knob
Electronics
AEM Boost, A/F & Oil Presure Gauges
Gruppe 52mm Molded Gauge Pod Dash kit
HKS Type 0 TT
HKS EVC VI Boost Controller w/Easy Writer Software
Alpine Headunit
Here are some current pictures
Newly Done Valve Cover with toxic fab Cam Sensor Cover"NEW 11/02"
Here are the parts that just came in this week. "NEW 11/02"
Ok well here is a Update and a small write up on my install of the FID Vacume Distrobution Block.
This was a very easy stright forward install and the Block is desined for the Evo VIII-IX a X is being made the bracket is whats I guess is vehicle specific but again there are those who will do as they want and mount in a differant location.
Parts and block.
Step 1. Remove the Two 14mm Bolts on the center section of the strut bar.
Step 2. Remove the 3 14mm nuts on the shock tower holding the strut bar on the passenger side to allow clearance for the plate to slide in place.
Step 3. Assemble the block as needed with givin fittings I used Thread Tape to make a perfect seal. I had smaller vacume line so I think it was 3/16 so my socket was a 7/16 to tighten the fittings into the block.
Step 4. Install the FID Block.
Step 5. Lightly tighten the center bolts and then tighten the strut bolts all the way then finish with the center bar bolts.
Last Step Install vacume lines into the Block Useing one as a main source. I did not have a 1/2 line to use so I used the 3/16 from the manifold in the Picture its the first fitting on the passenger side.
Now for my install I just ran the hose where I had it "T" so I could run my Boost Gauge and read it and have a solid line there now and its on the block with the rest of the hoses.
Before
After
I have in my setup the BOV,Boost Controller Solinoid and the Boost Gauge all ran on the block with no more "T" fittings.
Main Source of vacume "#1 passenger Side Fitting"
Before
After
Before with "T" Fitting connecting the BOV and the Boost Controller Soloniod
After with no fitting
Here is a Shot of it all together with new Parts installed currently mod list updated on page 1.
New FID Manifold
Tuned at Ptuning 1st time 100 degrees outside high humidity
Open House/Dyno Day Ptuning "no retune" 10/17/2010
I will add more and update the progress and results when completed this will all be done on straight 93 oct for tuning no Meth no Race fuel and no E85. The shop has calibrated the dyno to 0% correction factor, which means no magical numbers its all stract factoring as most dynos factor in at 1.12%.
Page 1. Basics of the car and starting progress
Page 3. Updated info with more to come
Last edited by BEISSEN; Dec 15, 2010 at 10:36 PM.


Trending Topics
Evolved Member
Joined: Oct 2007
Posts: 3,640
Likes: 1
From: Florida
Thanks, Also love the stealth look in the dash as oppsed to the pillar.
You sure do just found out also that I have a E85 Station 25 miles away and might need to go out there to get some stock and run on it.
They came out pretty good

GLOSS BLACK


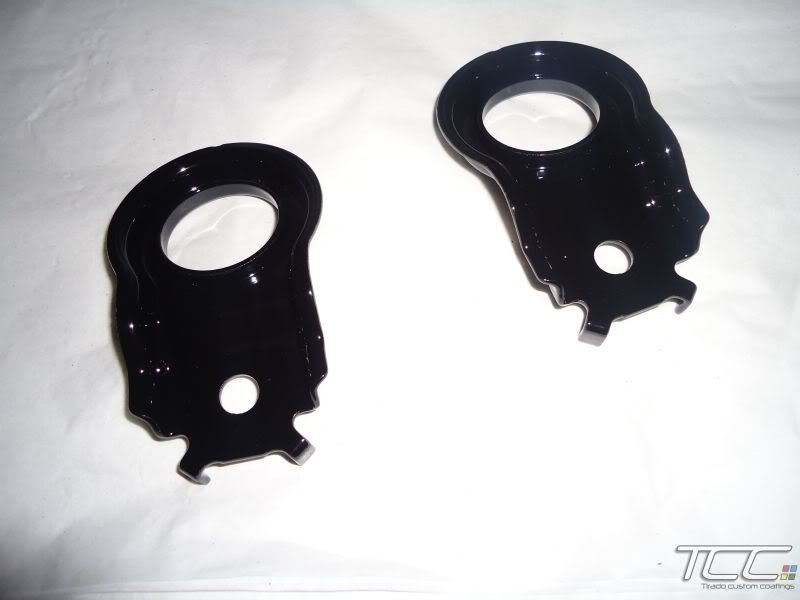

IF YOU NEED WORK DONE FROM POWDERCOATING TO PAINTING TO REFINISHING GO TO Tirado Custom Coatings. Your one stop shop for everything you need done right the first TIME!!!!!!!!
I would love to spend the money that you did on powdercoat but I ant the turbo setup drained me and still need 5-600 bucks more RockmanX but after all this my Manifold will be replaced.