Evo X Boost Gauge Install ,No splicing, No firewall drilling,Pics+Vid= Clean As Hell


 Oct 13, 2010, 06:22 PM
#138
Evolving Member
iTrader: (4)
Join Date: Nov 2003
Location: SoCAL
Posts: 146
Likes: 0
Received 0 Likes
on
0 Posts
Sorry to dig this post up. I'm having trouble with the dimming fuse. I tap into the fuse but that fuse is on even with the headlights off. Is there any other fuse I can use that will dim the gauge when the headlights are on? Some mentioned the ASC light? The wires are so bundled up back there I don't want to touch it.
Last edited by sohcpunk; Oct 13, 2010 at 07:05 PM.
Oct 16, 2010, 08:26 AM
#139
Evolving Member

Just used this write up to assist me on the install. Not crazy about going through the fender but I dont think it will cause any problems. I applied some gasket sealer around the the hole in the grommet so Im not anticipating any problems.
I removed the bezel around the defi gauge and i think it looks damn near oem. The slight color difference is almost unnoticeable in person.
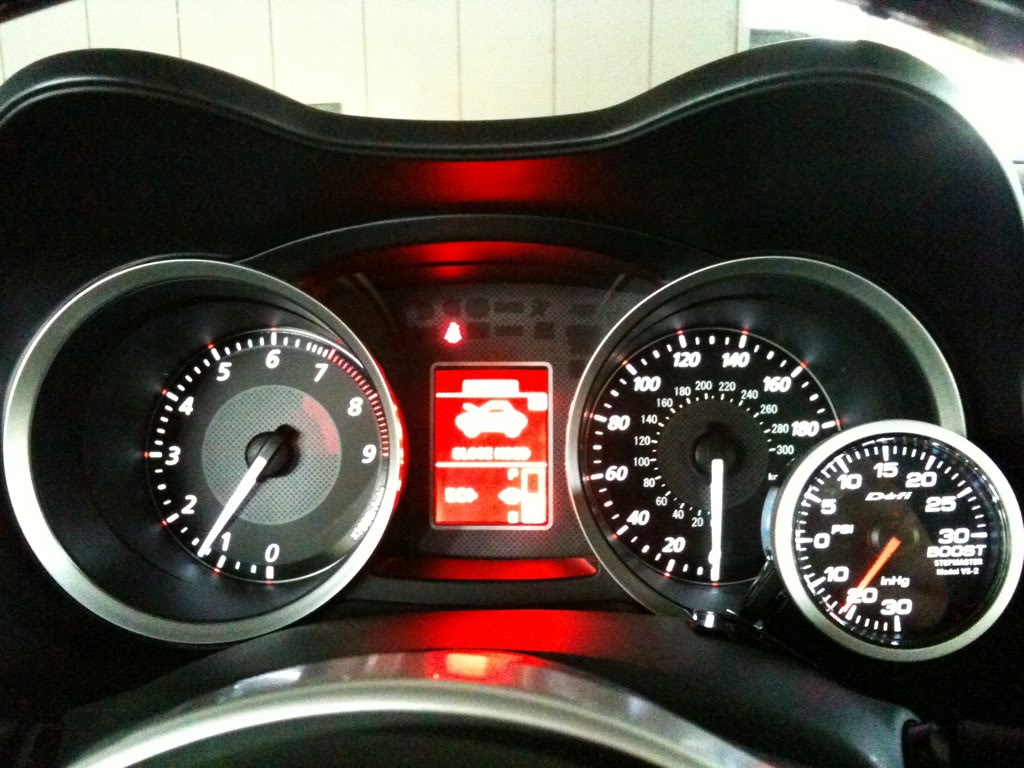
I removed the bezel around the defi gauge and i think it looks damn near oem. The slight color difference is almost unnoticeable in person.


 Jan 9, 2011, 01:28 PM
#145
Newbie
iTrader: (1)

Join Date: Dec 2010
Location: Vegas
Posts: 29
Likes: 0
Received 0 Likes
on
0 Posts
something that should be noted that has not been in the thread or anywhere else.. MAKE SURE you start from the engine bay first.. here's why. the sensor end on the UEGO cable WILL NOT fit through the grommet hole in the fender. make sure to drop the connector end from the engine bay, into the fender and feed that through the grommet hole.
also, the cable AEM provides is not long enough to reach the suggested T fitting position to whereever your gauge is being installed around the dash. you will need to add 2-3 feet of extra cabling to what's been provided. for that i simply cut off about 5 inches away from the connector end (end that goes into the gauge) and added Black, Green, and Red cables using butt connectors. that was the only way for me to do it cleanly. i have the perrin gauge pod. hit me up if anybody runs into trouble with the installation.
also, the cable AEM provides is not long enough to reach the suggested T fitting position to whereever your gauge is being installed around the dash. you will need to add 2-3 feet of extra cabling to what's been provided. for that i simply cut off about 5 inches away from the connector end (end that goes into the gauge) and added Black, Green, and Red cables using butt connectors. that was the only way for me to do it cleanly. i have the perrin gauge pod. hit me up if anybody runs into trouble with the installation.
Jan 13, 2011, 06:21 PM
#146
Evolved Member
iTrader: (9)
Join Date: May 2008
Location: Albany, NY
Posts: 563
Likes: 0
Received 0 Likes
on
0 Posts
This is a great guide, I used it to install my Defi White Racer Boost Gauge. Unfortunately after maybe 4 months it stopped working and I have to remove it and return it.
After removing the boost gauge will I have any leak issues? I'm removing basically everything except the plastic three-way joint that was spliced into the vac tube.
After removing the boost gauge will I have any leak issues? I'm removing basically everything except the plastic three-way joint that was spliced into the vac tube.

 Mar 15, 2011, 08:33 PM
#150
Evolving Member

Join Date: Aug 2004
Location: Germany
Posts: 142
Likes: 0
Received 0 Likes
on
0 Posts
I just did the install with a mechanical boost gauge... 20 minutes my ***... Took me 1-2 hours, but I'm slow...

Lag on the mechanical gauge, routed the way it's shown here, feels like 0.2 to 0.3 seconds... Not that bad, really.
What's the function of the hose that we are splicing into? Would the lag from the long line to the mechanical gauge affect it in a negative way?
Pro-Tip: If you drill the grommets snug and then cut them with a sharp knife from the drill hole outwards you can make sure everything fits and works before reattaching them.
It's also pretty much just as watertight as the "traditional" way. Did it with my A/F gauge the same way and checked repeatedly, everything is perfectly dry!
Last edited by germanracing; Mar 15, 2011 at 08:35 PM.