When you click on links to various merchants on this site and make a purchase, this can result in this site earning a commission. Affiliate programs and affiliations include, but are not limited to, the eBay Partner Network.
How to: Install OEM Backup Camera (above license plate)
Evo X How Tos / InstallationsPost or link to your detailed how to / installation articles in here. If you have any questions regarding the how tos, feel free to post them in the Request sub-forum.
Could someone elaborate on how they got the wiring from outside in to the trunk? I was looking at my options today and I see there is a hole above the license plate. It looks like if I drilled through it that it'd come out near a notch in the stock plastic (see pics below). Is this where you guys went through?
I'm not using the OEM camera...I bought one that attaches using the top license plate screws.
just curious are the part numbers for the evo? the parts guy at my local dealership couldnt find it and gave me the quote and install instructions for the outlander instead.
I installed the camera over the plate first but didnt like it because I was not able to understand the distance of the object I see on the camera from the car. You need to install it over the bumper and look down to the bumper to be able to see if you are about to hit something. After using it above the plate for a month, I moved it to the factory location (on the trunk just below the badge) and could not be happier. Now I can stop 1 centimeter from any object with ease. It also helps a lot for the offset objects. When the camera is above the plate you cant see the offset objects but at the factory location you can see them (not perfectly) and after a few weeks you learn to be able to stop just inches from any object not centered.
above the plate is more discreet but useless in my opinion what good is a camera if you cant know how far is the object to your car.
Hi, this is a great writeup. I was wondering, however, if anyone has done an install on the Sportback yet where the license plate is higher up and on the hatch. Thanks.
I installed the camera over the plate first but didnt like it because I was not able to understand the distance of the object I see on the camera from the car. You need to install it over the bumper and look down to the bumper to be able to see if you are about to hit something. After using it above the plate for a month, I moved it to the factory location (on the trunk just below the badge) and could not be happier. Now I can stop 1 centimeter from any object with ease. It also helps a lot for the offset objects. When the camera is above the plate you cant see the offset objects but at the factory location you can see them (not perfectly) and after a few weeks you learn to be able to stop just inches from any object not centered.
above the plate is more discreet but useless in my opinion what good is a camera if you cant know how far is the object to your car.
I so agree with you. you need to be able to see your own bumper and a few feet away.
I have a 10 Evo X MR. I installed backup cam in my Evo today, but I don't have the grid overlay. Other than that it works great. My camera comes on when i go into reverse and i can go into the camera settings where it has all the adjustment arrows, but they don't do anything at all ?(no grid overlay is shown). I am using a camera (MME31844) bought from the dealer. I'm just wondering if i did anything wrong or maybe the Evo mmcs is a little different?
I know this is an old thread but it is the first thread that comes up on a google search so I wanted to add this here.
I am in the process of the install and wanted to let readers know bumper removal is not necessary. When removing body pieces there is always a chance they don't always line up when put back on, or you break clips which is a PIA. So I always try and leave body pieces on the car when ever I can.
It is possible to run the wires from the license plate light to the grommet on the drivers side rear by the rear tail light.
You have to remove the tail light and look down to see where the wires from the grommet go.
You then have to run the coat hanger from the removed license plate light towards the grommet.
It will be too low to get to the grommet so you will have to use another coat hanger, make a hook and lift it so you can grab it through the grommet form the inside of the trunk.
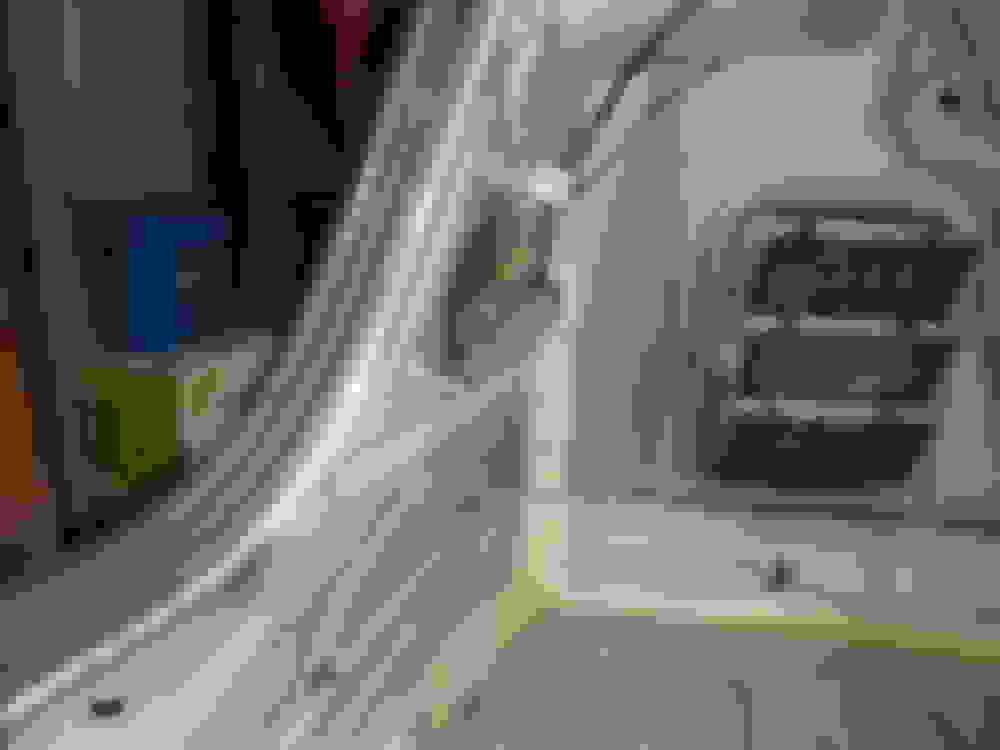
The pic below is after I already fished it through the grommet, the pick is taken looking down through the rear tail light hole, this is why you need to remove the tail light so you can see where the coat hanger is.
Coat Hanger through the grommet into the trunk area.
Last pic is the coat hanger going into the license plate hole.
Once you fish it through use electrical tape to tape all the wires to the coat hanger (stagger them if necessary so it's not so thick) and pull them through.
This should be much easier than removing the entire bumper.
I went with the camera that replaces the license place light. I used the existing plug, pulled the light out and soldered the positive and negative wires to the respective pins in the plug making it plug and play. The wires were too short to cut, strip and connect them where they were.
Hopefully this helps someone looking to do this without removing the rear bumper.
I went with the camera that replaces the license place light. I used the existing plug, pulled the light out and soldered the positive and negative wires to the respective pins in the plug making it plug and play. The wires were too short to cut, strip and connect them where they were.
I've been wanting to add a backup camera for some time now but I'm discouraged by how much the OEM one costs. I do want to have it display on my MMCS screen. Which camera did you go with? Does it work with the MMCS?
I've been wanting to add a backup camera for some time now but I'm discouraged by how much the OEM one costs. I do want to have it display on my MMCS screen. Which camera did you go with? Does it work with the MMCS?
What is MMCS? I have a semi older kenwood deck I am hooking the camera up to (it came with the car). It uses the yellow RCA and it has a reverse wire you connect to for power so it knows when you put it in reverse.
The camera I used is here. It replaces one of your liscense plate light.
Here is a basic video on how to install the camera, where to add the power to. Don't use teh t-taps he talks about, strip and solder all wires and then wrap in electrical tape or shrink wrap.
Please see the thread below for installing this type of camera on the EVO (the licence plate lite location, not the one in the vid) as it is made for a regular lancer and I had to make a shim out of the stock license plate light (very easy) to lower it a little as the bumper was initially covering half of the camera.
Last edited by DjEclipse; Jan 8, 2019 at 12:53 AM.
Here is some more info on a few things I had to do to make the amazon license plate reverse camera work with the EVO due to the rear diffuser we have which is lower than the regular lancer.. I also took a few pics of where to splice for power and ground in the trunk.
I know most here can probably figure all of this out but I posted the detailed pics for people new to this type of thing.
The reverse camera I got is here, it replaces your drivers side license plate light, you wire the light to the light so the light turns on with the lights. Green is power, black is ground. I took out the light and soldered the led wires to the plug so it is plug and play. The pic below is my first attempt, I cleaned it up and added the black ground from the led side of the camera, plugged it back in. I used electrical tape to make sure the wires were snug to the plug.
I did it this way as there is not enough wire to cut the plug and splice (it would have been a *****), and I didn't want to take off the rear bumper. Soldering the wires took about 2 min.
Once I fished the rca and power wires through to the inside of the trunk I taped the connections and installed the light. I realized the camera was too low and half of it was covered by the rear bumper. I used the stock light housing and curt it so it is flat and used it as a shim. I then cut a big notch out of it so I could get the wires in it. See pics below
I reinstalled the camera and it was much better. Still covered a little by the diffuser but you could see much more and you could also see the bumper so you have a reference. I can always make a thicker shim and longer screws to drop it down even more. I will see how this works for now.
Before shim 50% of camera covered by bumper.
After shim, much better (still not perfect).
Here is the view of the camera after the shim. It's night out so keep that in mind. The Drill is 4' away form the bumper, the truck is 12-15' away.
Stool is 10" away from bumper
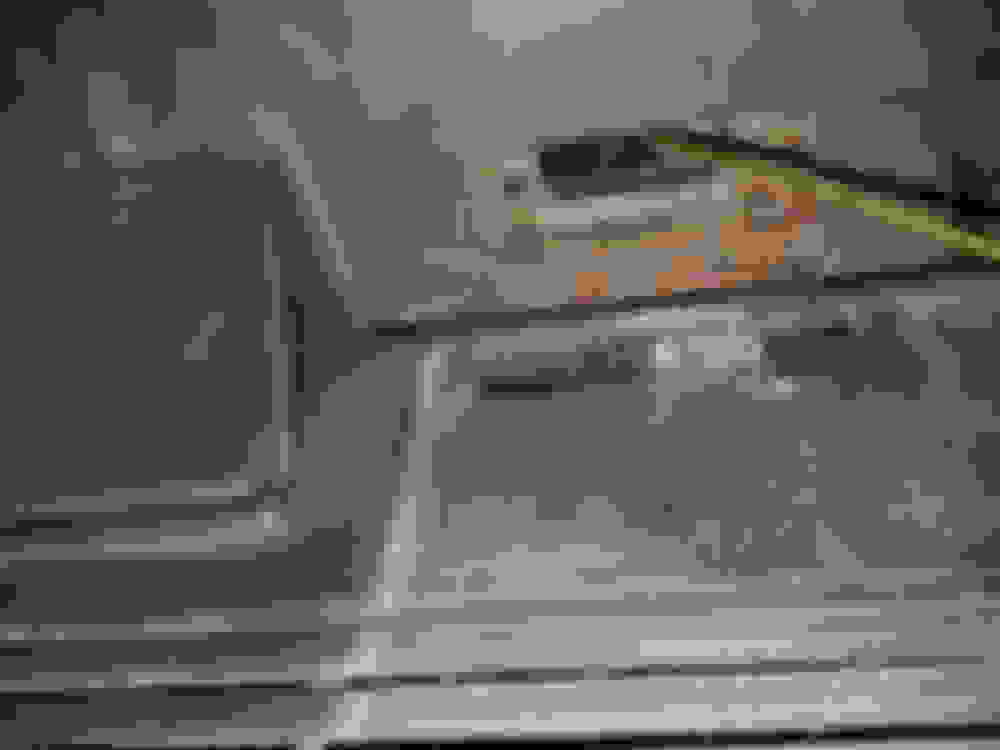
Here is a pic of where to ground.
Here is where to tap into the reverse light so the camera turns on when reverse lights are on.
Hopefully the extra pics help.
Last edited by DjEclipse; Jan 8, 2019 at 12:58 AM.