
Step by step down pipe removal and installation instructions


I have the hiflow metal cat instead of the test pipe? When wrapping thermal wrap should I cover the CC?
EDIT: NVM that I saw in the pictures after looking again.
I ended up wasting a lot of metal ty-raps when wrapping and re-wrapping my o2 area on the dp. Its easy to do on straight pipe, on curves its still not bad. But where there are the 2 pipes, the increased diameter and the 2 curves (o2 area) its such a pain in the a**. So on my 02/dp I have the top part wrapped and the part leading to the Cat, but I dont have that curbed wrap.
Im in the middle of nowhere right now, and im not making another run to the city just for ty-raps. Do you recommend leaving the wrap as it is (not covering the main part of the curve on the 02 pipe) or just ripping it all off and installing the dp as is?
At first I was thinking I should just take off all the wrap, but now Im thinking I should just leave it with the wrap on, but not on the curve, as some may be better then none....
Last edited by solipsism; Sep 18, 2009 at 10:38 AM.

Evolving Member
Joined: Oct 2008
Posts: 108
Likes: 0
From: SoCal
Here you go. Get the 2" wide stuff, it's alot easier to wrap. I wished I would have gone to this site earlier because now they have some Gen II copper coated stuff. I also used this stuff around the exhaust near the rear crossmember. My versionII T1R exhaust seems a little close to the rear diff.
http://www.thermotec.com/exhaust-insulating-wrap.html
I did notice a little cooler engine bay temp after I wrapped my down pipe, I'm thinking of using the Turbo wrap also but I don't know if there will be any possible danger to the turbo or wastegate actuator...
http://www.thermotec.com/exhaust-insulating-wrap.html
I did notice a little cooler engine bay temp after I wrapped my down pipe, I'm thinking of using the Turbo wrap also but I don't know if there will be any possible danger to the turbo or wastegate actuator...
Thread Starter
Evolved Member
Joined: Jun 2009
Posts: 653
Likes: 12
From: Houston, TX
I have the hiflow metal cat instead of the test pipe? When wrapping thermal wrap should I cover the CC?
EDIT: NVM that I saw in the pictures after looking again.
I ended up wasting a lot of metal ty-raps when wrapping and re-wrapping my o2 area on the dp. Its easy to do on straight pipe, on curves its still not bad. But where there are the 2 pipes, the increased diameter and the 2 curves (o2 area) its such a pain in the a**. So on my 02/dp I have the top part wrapped and the part leading to the Cat, but I dont have that curbed wrap.
Im in the middle of nowhere right now, and im not making another run to the city just for ty-raps. Do you recommend leaving the wrap as it is (not covering the main part of the curve on the 02 pipe) or just ripping it all off and installing the dp as is?
At first I was thinking I should just take off all the wrap, but now Im thinking I should just leave it with the wrap on, but not on the curve, as some may be better then none....
EDIT: NVM that I saw in the pictures after looking again.
I ended up wasting a lot of metal ty-raps when wrapping and re-wrapping my o2 area on the dp. Its easy to do on straight pipe, on curves its still not bad. But where there are the 2 pipes, the increased diameter and the 2 curves (o2 area) its such a pain in the a**. So on my 02/dp I have the top part wrapped and the part leading to the Cat, but I dont have that curbed wrap.
Im in the middle of nowhere right now, and im not making another run to the city just for ty-raps. Do you recommend leaving the wrap as it is (not covering the main part of the curve on the 02 pipe) or just ripping it all off and installing the dp as is?
At first I was thinking I should just take off all the wrap, but now Im thinking I should just leave it with the wrap on, but not on the curve, as some may be better then none....
As for the down pipe being split like yours, I would wrap the small (waste gate discharge) section first, tie it off, then wrap the large section, and do a bit of over lapping where they join up. If you don't like how it turns out, expiriment a bit until it looks right. And yes, its a pain, but if you do a good job on the wrap, you won't have to mess with it again and it will stay wrapped for a really long time, like forever. Don't be afraid to wrap both pipes together if you need to. It won't hurt anything, and the heat will still be contained.
Based on how long ago you posted, your pipe is probably isntalled already. You can probably still get to the top of it to wrap it, but it will be a real pain in the ***. I wrapped mine prior to install.
Thread Starter
Evolved Member
Joined: Jun 2009
Posts: 653
Likes: 12
From: Houston, TX
Safety wire
Here is a link to an aviation supplier where you can buy safety wire in 1lb rolls. It works well for tieing up the ends of heat wrap.
http://www.aircraftspruce.com/catalo...safetywire.php
http://www.aircraftspruce.com/catalo...safetywire.php


These photos are not related to the down pipe install. However, since I did the full exhaust at the same time, and I am sure many people do the same, I have included these photos.
Here is a picture of my test pipe with the heat wrap installed. The reason for wrapping it is two fold. Fist, to keep heat down under the car, and second, to keep the heat up inside the test pipe to reduce chances of CEL. This particular car has a COBB stage2, so the CEL is not an issue. Heat is. Yes, this stuff really works.

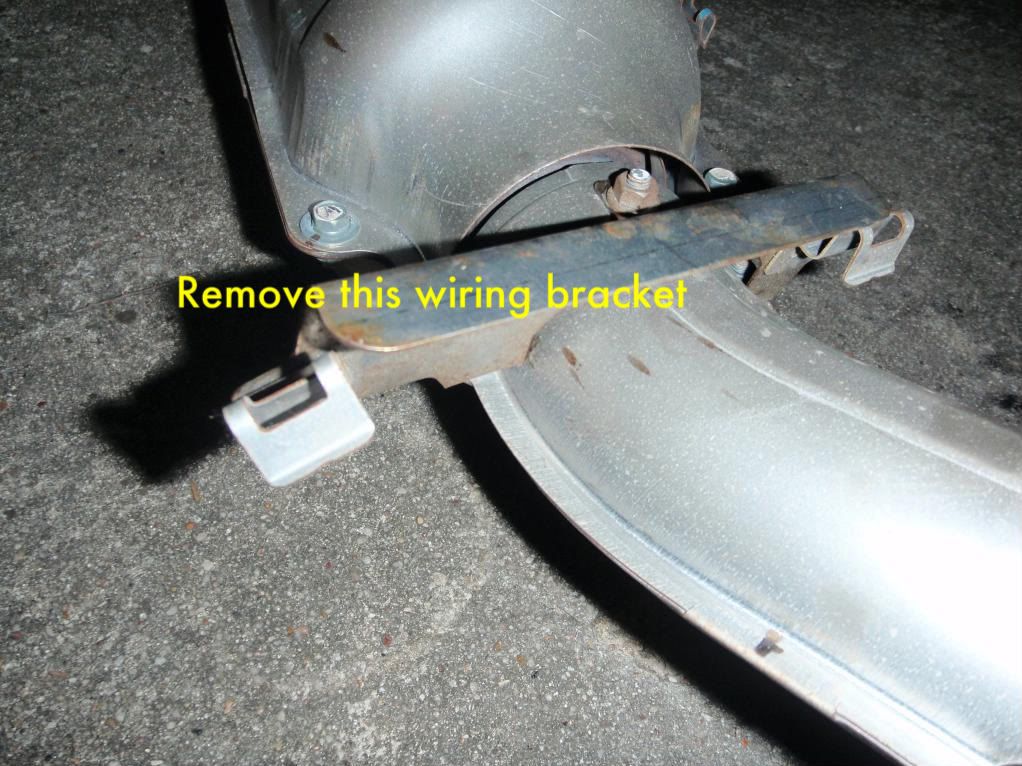
O2 sensor bracket on factory cat. I used this same bracket on the test pipe.
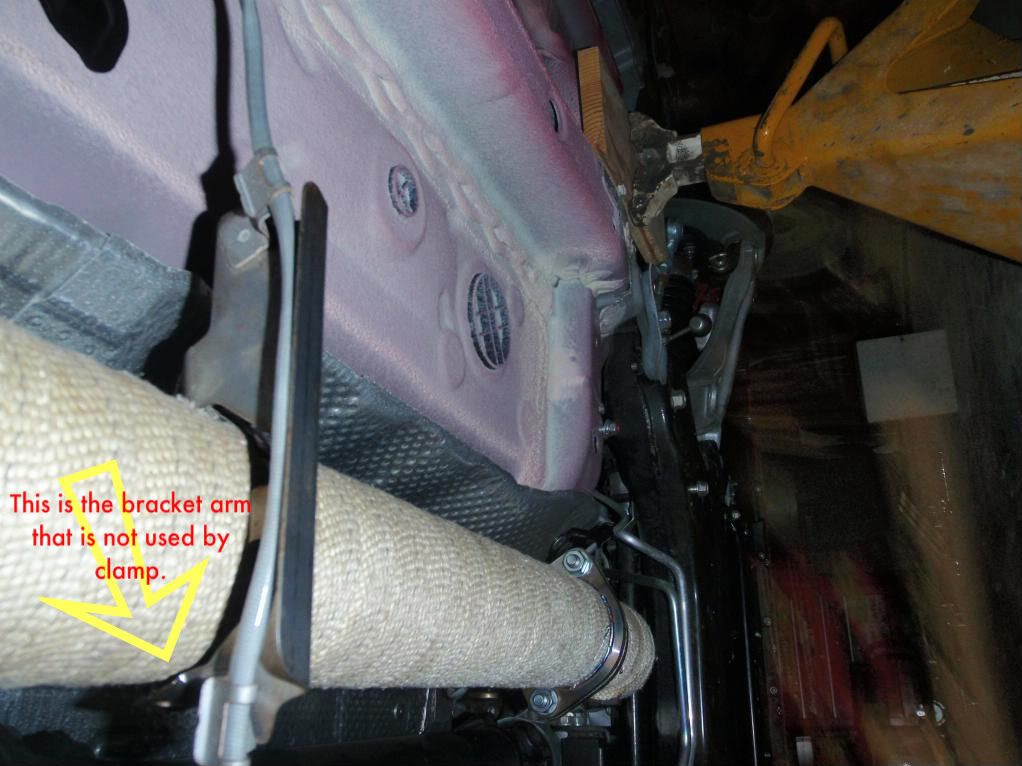
Here is the O2 bracket installed on the test pipe. I guess its a good ground floor view of the exhaust installation. Note that the car is barely 24" off the ground. It would not seem like it, but this is actually a pretty good height to work at without a creeper.
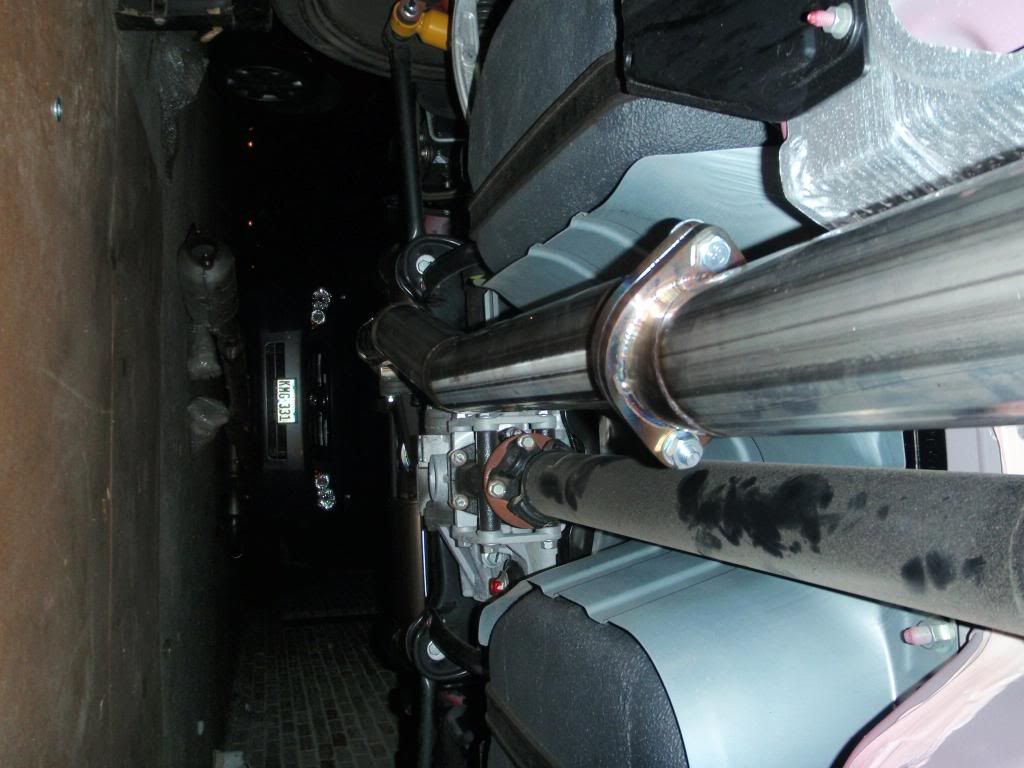
Here is the view from the cat aft.
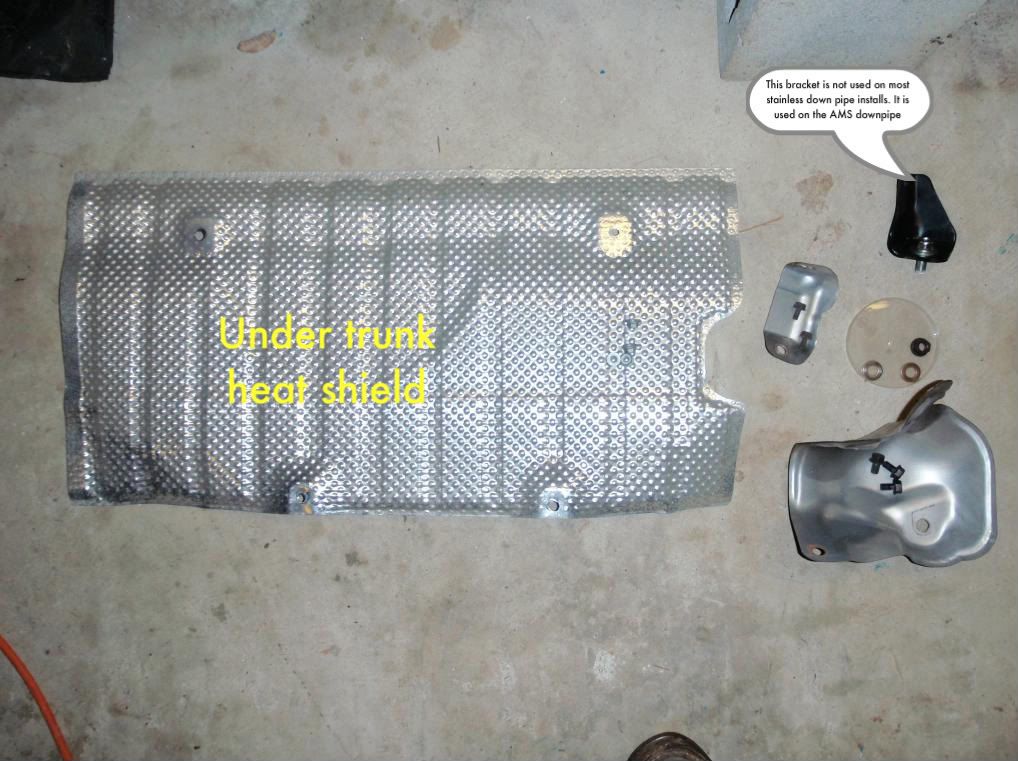
Heat shield under trunk removed due to excessive vibration. There is a pretty good gap though, so it should be fine.
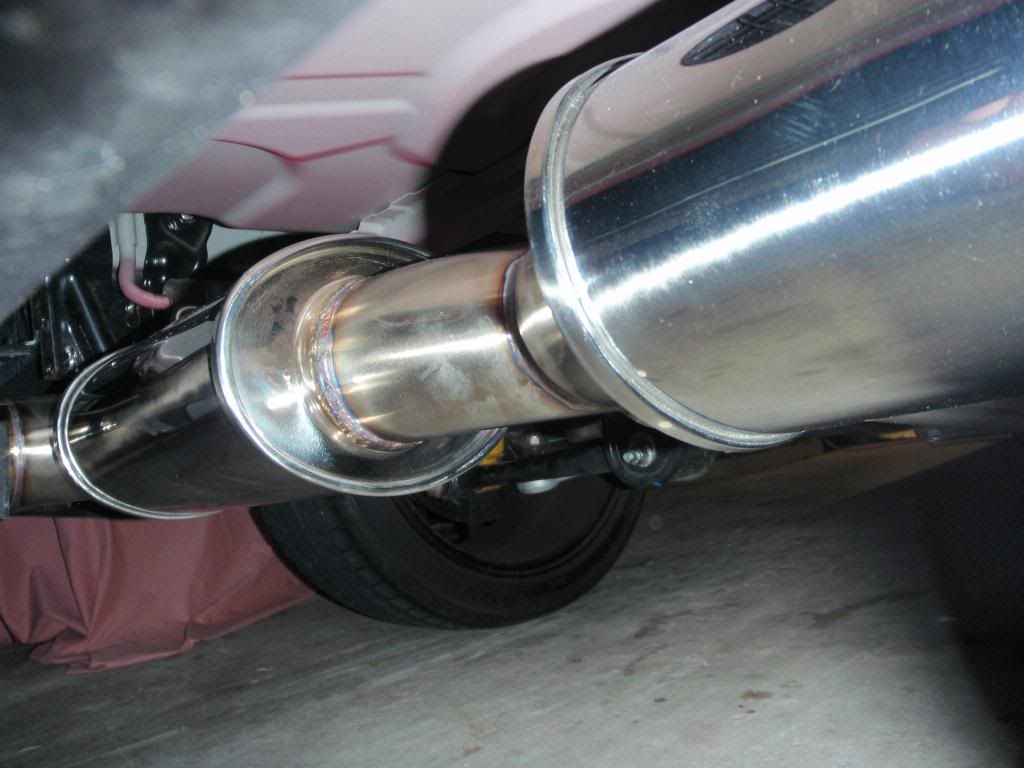
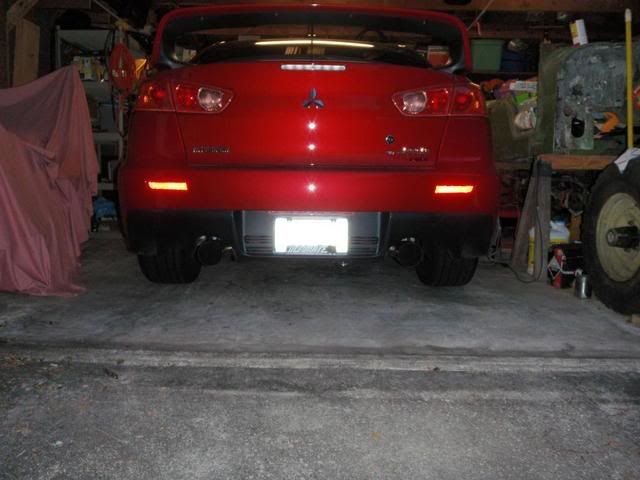
Rear view of exhaust installed.
Parts that won't be re-installed.
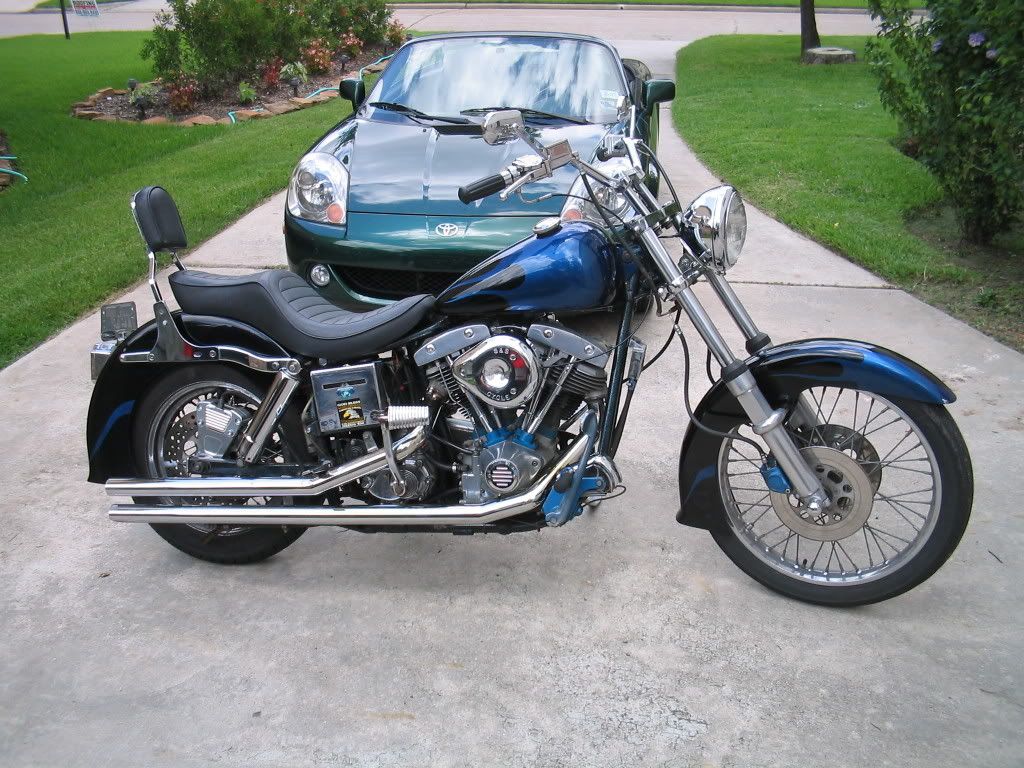
Totally off topic picture of some of my other toys cause I think I'm done with this post. Finally. The car is an 2003 and 100% stock. The bike is an 81 wide glide with a 93" stroker, ported and flow matched heads, S&S B series carb. Very old school. Also very fast for a new HD, let alone an old shovel.
Here is a picture of my test pipe with the heat wrap installed. The reason for wrapping it is two fold. Fist, to keep heat down under the car, and second, to keep the heat up inside the test pipe to reduce chances of CEL. This particular car has a COBB stage2, so the CEL is not an issue. Heat is. Yes, this stuff really works.
O2 sensor bracket on factory cat. I used this same bracket on the test pipe.
Here is the O2 bracket installed on the test pipe. I guess its a good ground floor view of the exhaust installation. Note that the car is barely 24" off the ground. It would not seem like it, but this is actually a pretty good height to work at without a creeper.
Here is the view from the cat aft.
Heat shield under trunk removed due to excessive vibration. There is a pretty good gap though, so it should be fine.
Rear view of exhaust installed.
Parts that won't be re-installed.
Totally off topic picture of some of my other toys cause I think I'm done with this post. Finally. The car is an 2003 and 100% stock. The bike is an 81 wide glide with a 93" stroker, ported and flow matched heads, S&S B series carb. Very old school. Also very fast for a new HD, let alone an old shovel.


Newbie
Joined: Oct 2014
Posts: 31
Likes: 0
From: Minnesota
I have a tendency to jump into things, and I didn't think it was this involved. This will come in handy for me soon.

