
Grimmspeed 3 port installation for INTERNAL WG!


Grimmspeed 3 port installation for INTERNAL WG! (UPDATE!)
UPDATE: Before you read the rest of this, I will make it known that Grimmspeed did contact me and asked some questions about my install to make sure it was correct, they also are going to send me the correct bracket for the X, which I would have been content with the one I have, but I want to make it VERY clear that they did make an effort to right things with me, it shows good business sense IMO so please don't shy away from this because of what I wrote about the manual, the part itself works very well and has added a nice bit of power to the car.. even with 4 stock advans that grip very well the car can now break it loose faster than ever... it feels a bit more like the VIII's and IX's to be honest with the way the power just HITS you...
Now on to the install!
Ok, after going through pure HELL getting the install straight. IMO BURN the manual they send because a lot of it is worth less and the pics are confusing.
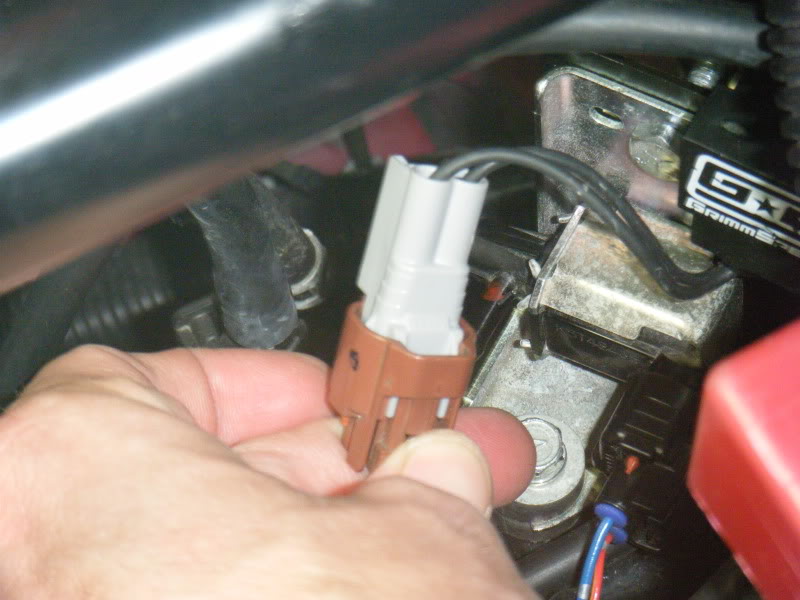
Now, I didn't take any pics of the uninstall of the old parts, but it is simple, remove the factory bracket after unplugging the 2 factory solenoids of course one is black, one is brown. Remove the hoses from the black solenoid completely, all you need to do with the brown is just remove the solenoid it self from the bracket. Keep the black and mount it to the bottom of the bracket. All of the nuts and bolts are 10mm.
This is made to seem pretty complicated, and i'm hoping that I can simplify it. Go to your local hardware store and get 5 ft. (just to be safe of 5/32" vacuum tubing... it cost me a .99 a foot. Also get some black zip ties... I got the ones that about a foot long just to be able to get them as tight as possible.
Ok so bascially with all of these vaccum lines that connect to the OE bracket and solenoids will be replaced by simply 3 lines... JUST 3 so DO NOT go by the directions
The pics I will show are all you will need for the installation.
First off, here is a pic of the nipple that is just a little past where the UICP meets with the turbo. I have this already zip tied and installed... but in your case, remove it. I will warn you that it's tough to get some of these lines off, you may want to use a pair of vice grips or whatever to turn the tube... be cautious as to how hard you pull because the nipple can bend.
This is where the tube is and what it looks like, and what it will look like when completed.
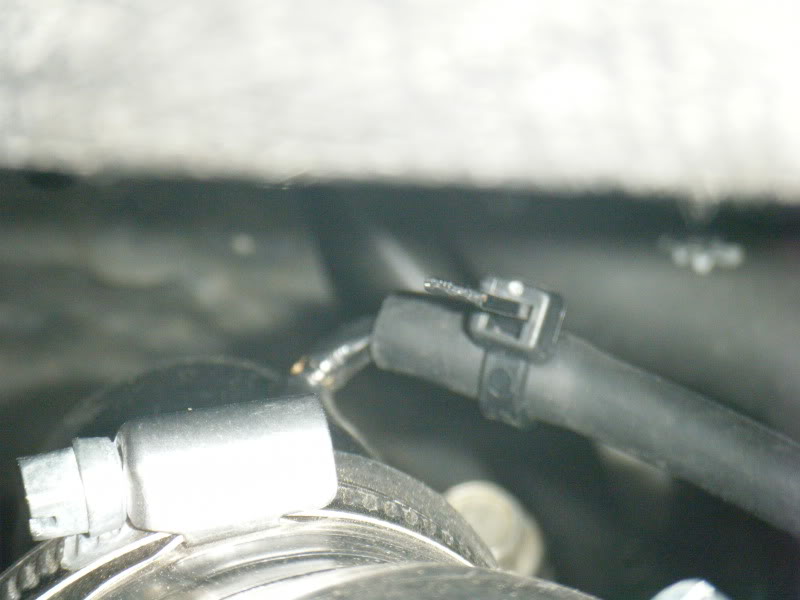
Ok so pull this vacuum line off, you will see where it T's together with the wastegate... pull the tube off of there as well, and don't bother saving the T.
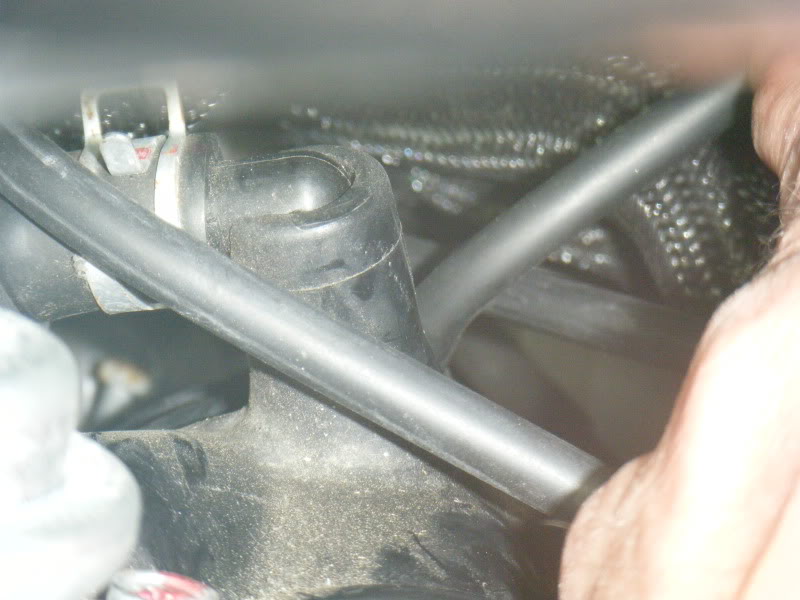
The wastegate tube is here and will look as so when finished...

The one last tube to pull off was hard to get a picture of, and can be hard to find... follow the airbox up to where it comes close to the solenoid bracket and feel around for the line.. when you get it off of there, you may wind up pulling out the plastic piece that goes into there, but you can plug it right back in, and i'd put the vac line on first so it's easier. This is the best pic I could get of it. I didn't point to it, but you will want the vac line that is furthest away in this pic, the other one is going somewhere else...
ok now.. take the GS 3 port and mount it as you see here in the picture.. I used a whole new bolt, so get this from the hardware while you are there, or maybe you have a bolt AND nut to fit this.. or maybe you can figure out another mounting way that works for you.
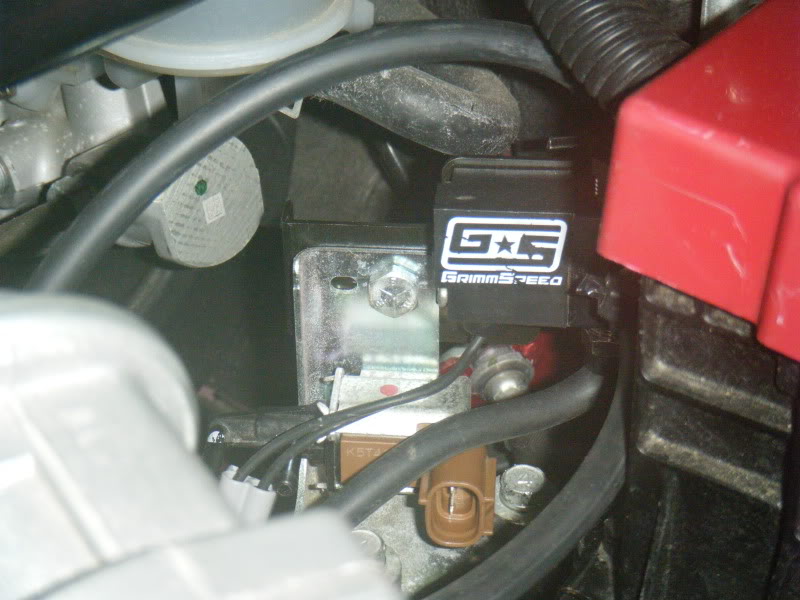
Another shot..
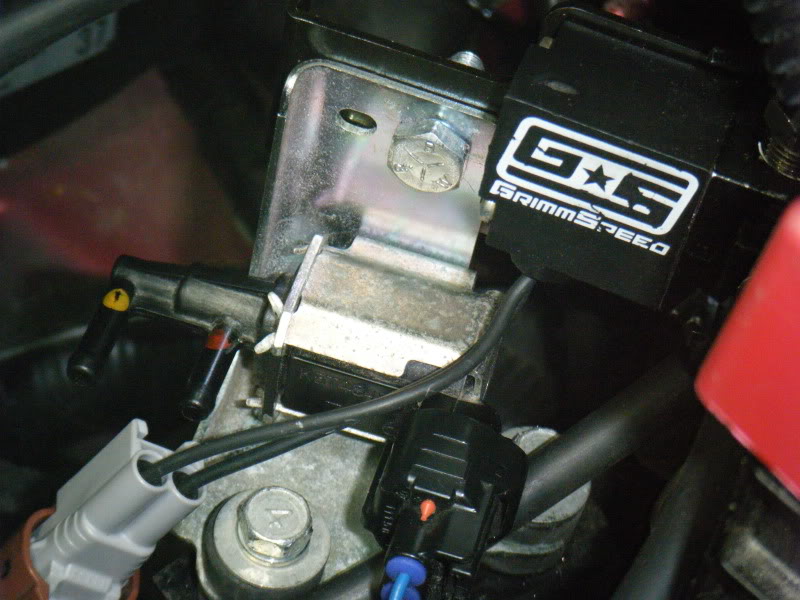
Now, GS's manual shows the brown solenoid attached, which I found confusing and had to get a lot of help from some of the people here which I appreciate very much. HOWEVER, the brown solenoid needs to be GONE and the black needs to be put on the bottom of the bracket as I had stated earlier.
Now, plug in the GS's electric port to the BROWN connector you took off the brown solenoid... connected the black that you disconnected from the black earlier, and as I said before, make sure NO vac lines are on the black solenoid.. you only need 3 lines on the 3 port, and for this entire installation in case I didn't make that clear enough earlier!
NOTE: If you do not connect the black to the black solenoid you will throw a P0247 code, which to my knowledge won't hurt the car, but it keeps everything nice and neat.
Now, we will hook out vacuum lines up, the idea here is to make them as short as possible, but not kinked or stretched. So, take your pick of doing the the WG nipple or the turbo nipple first and without cutting anything yet, spit on your fingers and rub it on the nipple... (yeah that sounds bad)... anyway, the line will go on MUCH easier. Now, put your bracket with the 3 port mounted where the bracket will be and measure the line with the line and when you feel it is short enough, for the task, but long enough that it won't be to short to work with cut it off.
Do the same with the WG which is pictured above..
Now try to find the nipple from the intake... some people have aftermarket intakes and don't have a nipple which is perfectly ok and it doesn't even have to be hooked up.. I just did it again for it to be clean and I like things done the right way.
You should now have all of your lines measured, cut and ready to go..
Hook up PORT 3 to the turbo... follow the line from the turbo to BE SURE that it's going to the right place.
Hook up PORT 2 to the WG and again follow the line all the way up and then plug it in, it's easy to get these things confused.. I did.
Hook up PORT 1 to the intake if you are going to use it and if not, then skip this part.
Take your lines and put the zip ties on them as firmly as possible, on all 3 ports and the Turbo, WG and Intake nipples. Re-mount bracket with your new 3 port on with your 2 10mm bolts and that's it!
CAUTION: Make sure you have your engine tuned for this! Or ask around and some people will know how to help you.
I hope this helps someone because I really did need it, but thanks to those Tephra, and Golden among others who helped me get it straight and made me want to hopefully make the installation a little easier for someone else.
Now on to the install!
Ok, after going through pure HELL getting the install straight. IMO BURN the manual they send because a lot of it is worth less and the pics are confusing.
Now, I didn't take any pics of the uninstall of the old parts, but it is simple, remove the factory bracket after unplugging the 2 factory solenoids of course one is black, one is brown. Remove the hoses from the black solenoid completely, all you need to do with the brown is just remove the solenoid it self from the bracket. Keep the black and mount it to the bottom of the bracket. All of the nuts and bolts are 10mm.
This is made to seem pretty complicated, and i'm hoping that I can simplify it. Go to your local hardware store and get 5 ft. (just to be safe of 5/32" vacuum tubing... it cost me a .99 a foot. Also get some black zip ties... I got the ones that about a foot long just to be able to get them as tight as possible.
Ok so bascially with all of these vaccum lines that connect to the OE bracket and solenoids will be replaced by simply 3 lines... JUST 3 so DO NOT go by the directions
The pics I will show are all you will need for the installation.
First off, here is a pic of the nipple that is just a little past where the UICP meets with the turbo. I have this already zip tied and installed... but in your case, remove it. I will warn you that it's tough to get some of these lines off, you may want to use a pair of vice grips or whatever to turn the tube... be cautious as to how hard you pull because the nipple can bend.
This is where the tube is and what it looks like, and what it will look like when completed.
Ok so pull this vacuum line off, you will see where it T's together with the wastegate... pull the tube off of there as well, and don't bother saving the T.
The wastegate tube is here and will look as so when finished...
The one last tube to pull off was hard to get a picture of, and can be hard to find... follow the airbox up to where it comes close to the solenoid bracket and feel around for the line.. when you get it off of there, you may wind up pulling out the plastic piece that goes into there, but you can plug it right back in, and i'd put the vac line on first so it's easier. This is the best pic I could get of it. I didn't point to it, but you will want the vac line that is furthest away in this pic, the other one is going somewhere else...
ok now.. take the GS 3 port and mount it as you see here in the picture.. I used a whole new bolt, so get this from the hardware while you are there, or maybe you have a bolt AND nut to fit this.. or maybe you can figure out another mounting way that works for you.
Another shot..
Now, GS's manual shows the brown solenoid attached, which I found confusing and had to get a lot of help from some of the people here which I appreciate very much. HOWEVER, the brown solenoid needs to be GONE and the black needs to be put on the bottom of the bracket as I had stated earlier.
Now, plug in the GS's electric port to the BROWN connector you took off the brown solenoid... connected the black that you disconnected from the black earlier, and as I said before, make sure NO vac lines are on the black solenoid.. you only need 3 lines on the 3 port, and for this entire installation in case I didn't make that clear enough earlier!
NOTE: If you do not connect the black to the black solenoid you will throw a P0247 code, which to my knowledge won't hurt the car, but it keeps everything nice and neat.
Now, we will hook out vacuum lines up, the idea here is to make them as short as possible, but not kinked or stretched. So, take your pick of doing the the WG nipple or the turbo nipple first and without cutting anything yet, spit on your fingers and rub it on the nipple... (yeah that sounds bad)... anyway, the line will go on MUCH easier. Now, put your bracket with the 3 port mounted where the bracket will be and measure the line with the line and when you feel it is short enough, for the task, but long enough that it won't be to short to work with cut it off.
Do the same with the WG which is pictured above..
Now try to find the nipple from the intake... some people have aftermarket intakes and don't have a nipple which is perfectly ok and it doesn't even have to be hooked up.. I just did it again for it to be clean and I like things done the right way.
You should now have all of your lines measured, cut and ready to go..
Hook up PORT 3 to the turbo... follow the line from the turbo to BE SURE that it's going to the right place.
Hook up PORT 2 to the WG and again follow the line all the way up and then plug it in, it's easy to get these things confused.. I did.
Hook up PORT 1 to the intake if you are going to use it and if not, then skip this part.
Take your lines and put the zip ties on them as firmly as possible, on all 3 ports and the Turbo, WG and Intake nipples. Re-mount bracket with your new 3 port on with your 2 10mm bolts and that's it!
CAUTION: Make sure you have your engine tuned for this! Or ask around and some people will know how to help you.
I hope this helps someone because I really did need it, but thanks to those Tephra, and Golden among others who helped me get it straight and made me want to hopefully make the installation a little easier for someone else.
Last edited by Methodical4u; May 7, 2010 at 01:51 PM.


i'm maxing about 25.5 right now.. i'm also about to add the Perrin recirc BOV as well so it may hold even better after that on the top.
Trending Topics


Hey guys,
We did the install on a local car and I could have sworn we had the brown and the black solenoids straight for when I wrote the manual. Needless to say, I was wrong and I apoligize to Methodical (did you get the EVO X specific bracket I sent to you?) and anyone else that was confused by this. We have updated the installation manuals that are included with the kit and on our website. We strive to be accurate and create as few headaches as possible to our customers. I don't think there will be anymore confusion going forward and the install should be very straight forward for anyone else looking to do the install.
Thanks,
-Chad