
Has any one used Scosche dash kit??


Thread Starter
Newbie
Joined: Oct 2008
Posts: 5
Likes: 0
From: Perth, Australia
Has any one used Scosche dash kit??
Hi Guys,
I have just got a Pioneer DEHP6050P head unit and thinking getting a dash kit now. Need some help guys. Has any one used Scosche MI3019B dash kit.
Please can you post pic if you have used this kit.
I have a few questions, please share your comments.
How does it fit
Does it match with rest of the dash.
Does it come with brackets and other fittings(so that i can put a single din unit in it)
I know JDM one is a perfect match but with current Australian $ it cost around 400$(bit expensive).
Thanks
Tama

Newbie
Joined: Jan 2009
Posts: 28
Likes: 0
From: Texas
I've heard from everyone that the Scosche is 100000 times better than the Metra one. I'm doing my install today with the Scosche. I'll up pics after I'm all done. It may not be until tomorrow since I'm doing a lot more than just the headunit.
Newbie
Joined: Jul 2008
Posts: 41
Likes: 0
From: US
I bought the Scoche Kit off of Ebay for $40. Overall I'm happy, my only grip is the top gap is about 1mm. Most people dont notice but I do so bugs me  . If you press down on the dash i goes away, still trying to figure out a way to keep the dash pressed down.
Yes i can use a single din design. it comes with a pocket to put under the single din radio. And you use the factory mounting brackets so the radio is nice and solid, color match is spot on. Looks factory....Other than the 1mm gap. I recommend it!
if you get it, use very fine grit sand paper around the edges of the kit to get rid of the manufacturing ridges. oh and the clips that come with the kit work well but are not as good at the factory clips. if you have to take the kit back off for some reason a couple of the clips stay in the dash and then fall under the dash... pain in the *** so just make sure your done with everything before you snap it in place.
Tomorrow Ill take pics so you can see it in!!!
. If you press down on the dash i goes away, still trying to figure out a way to keep the dash pressed down.Yes i can use a single din design. it comes with a pocket to put under the single din radio. And you use the factory mounting brackets so the radio is nice and solid, color match is spot on. Looks factory....Other than the 1mm gap. I recommend it!
if you get it, use very fine grit sand paper around the edges of the kit to get rid of the manufacturing ridges. oh and the clips that come with the kit work well but are not as good at the factory clips. if you have to take the kit back off for some reason a couple of the clips stay in the dash and then fall under the dash... pain in the *** so just make sure your done with everything before you snap it in place.
Tomorrow Ill take pics so you can see it in!!!


Trending Topics
***DISCONNECT BATTERY BEFORE BEGINNING!!!***
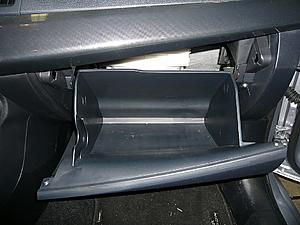
remove glove box
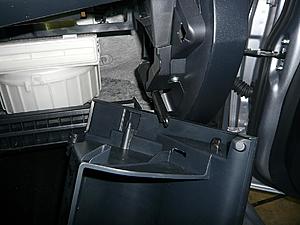
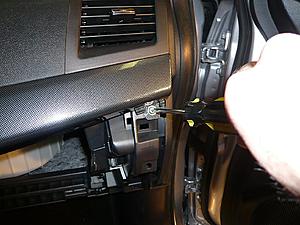
remove this screw and pull off the trim piece (carefully but forcefully)
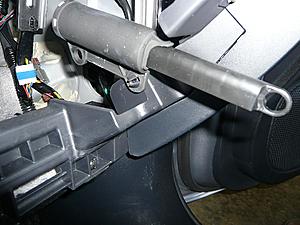
remove this screw (same thing)
remove glove box


remove this screw and pull off the trim piece (carefully but forcefully)

remove this screw (same thing)

Last edited by kingu; Mar 5, 2009 at 09:26 AM.
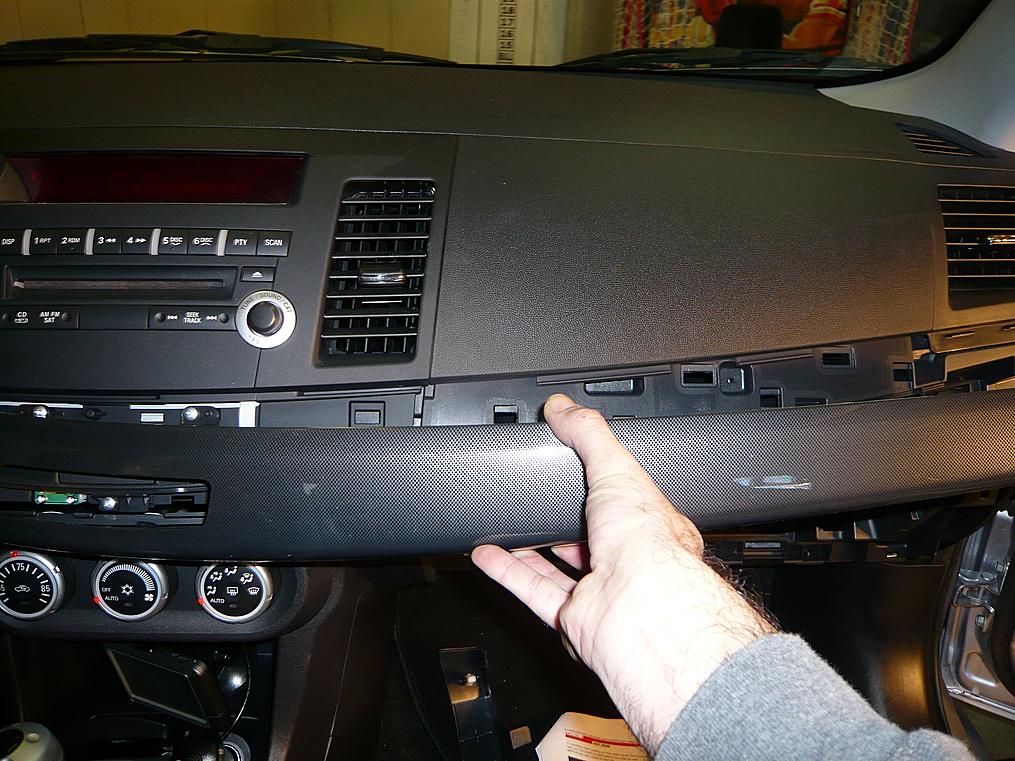


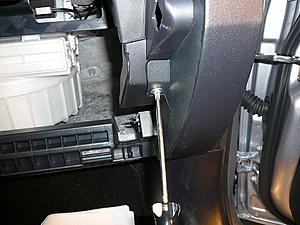
remove the dash plate (carefull but forcefully...again)
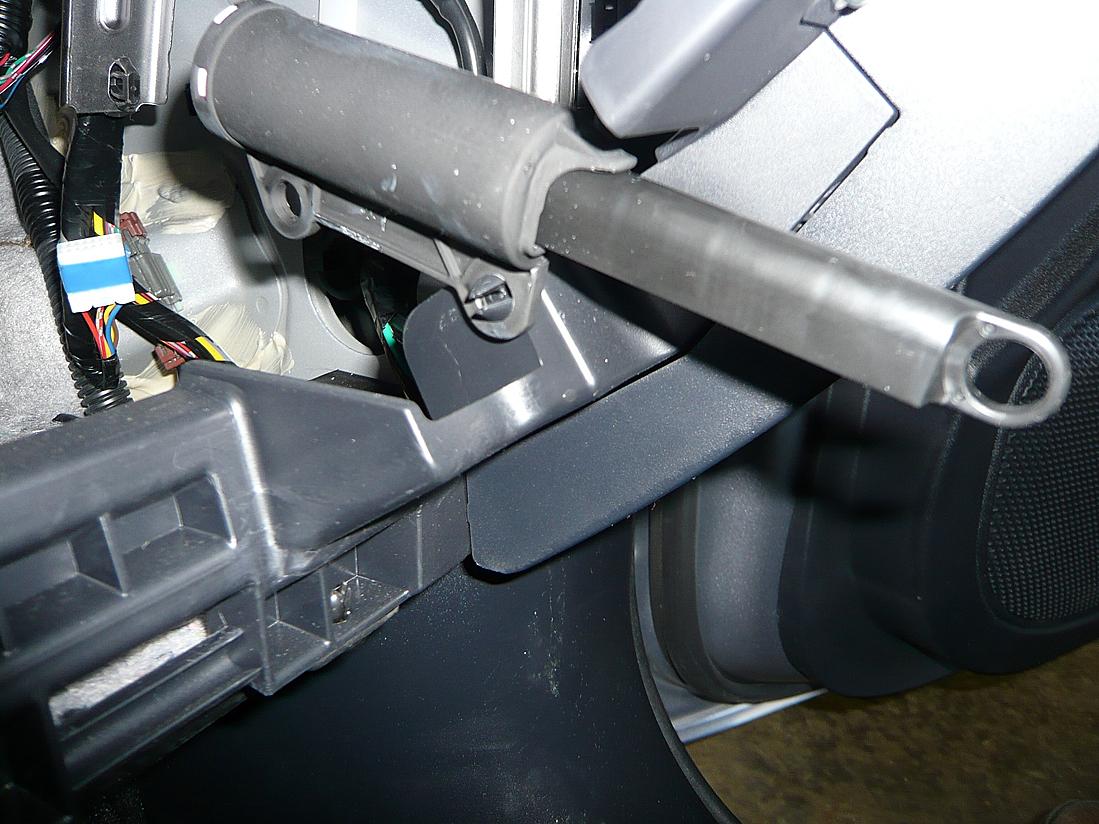
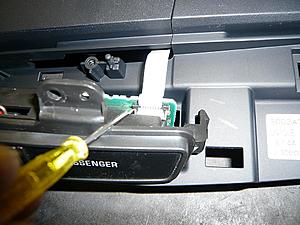
remove the old stereo control ribbon from the hazard/airbag doo-hickey
remove the air vents from the old dash
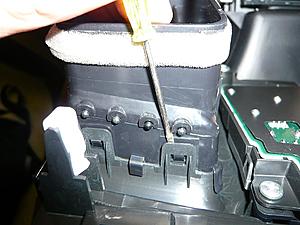
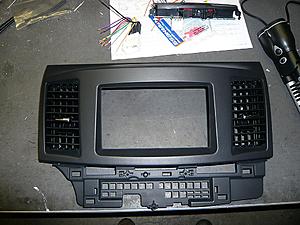
snap vents into the Scosche dash

remove the old stereo control ribbon from the hazard/airbag doo-hickey

remove the air vents from the old dash

snap vents into the Scosche dash

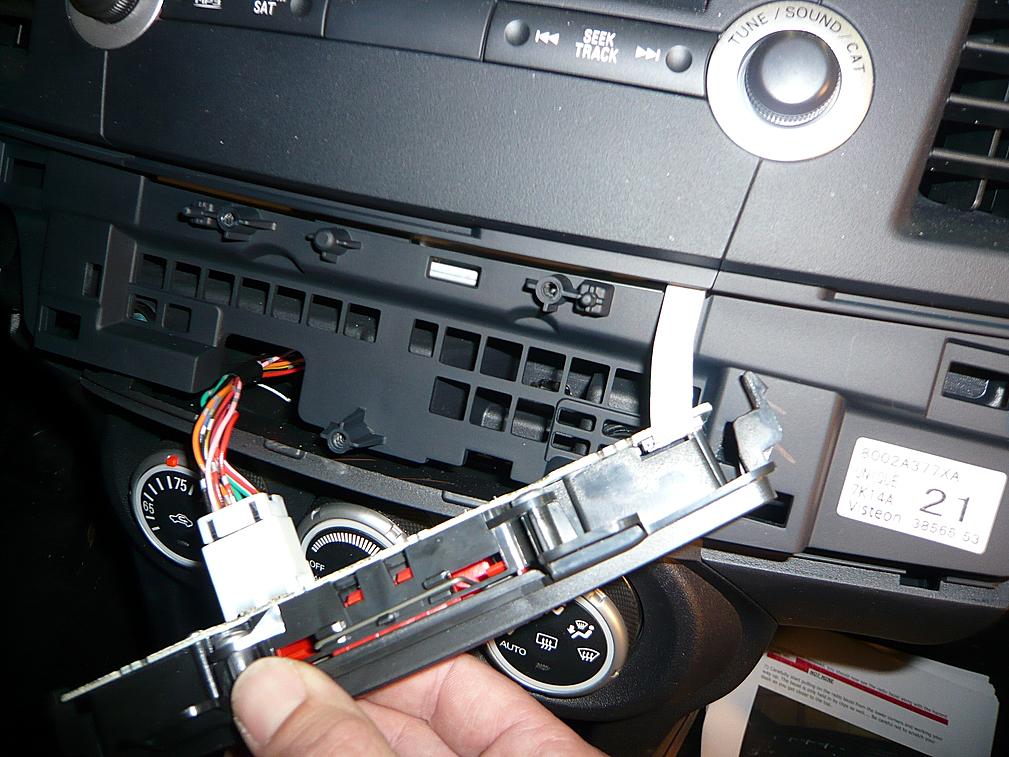
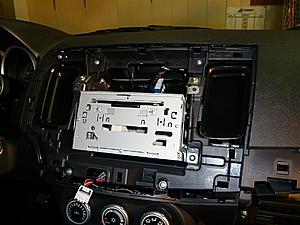
remove 4 screws and pull out old unit...unplug
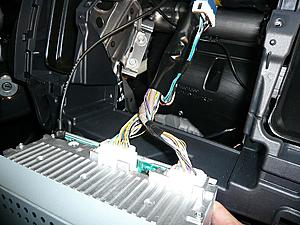
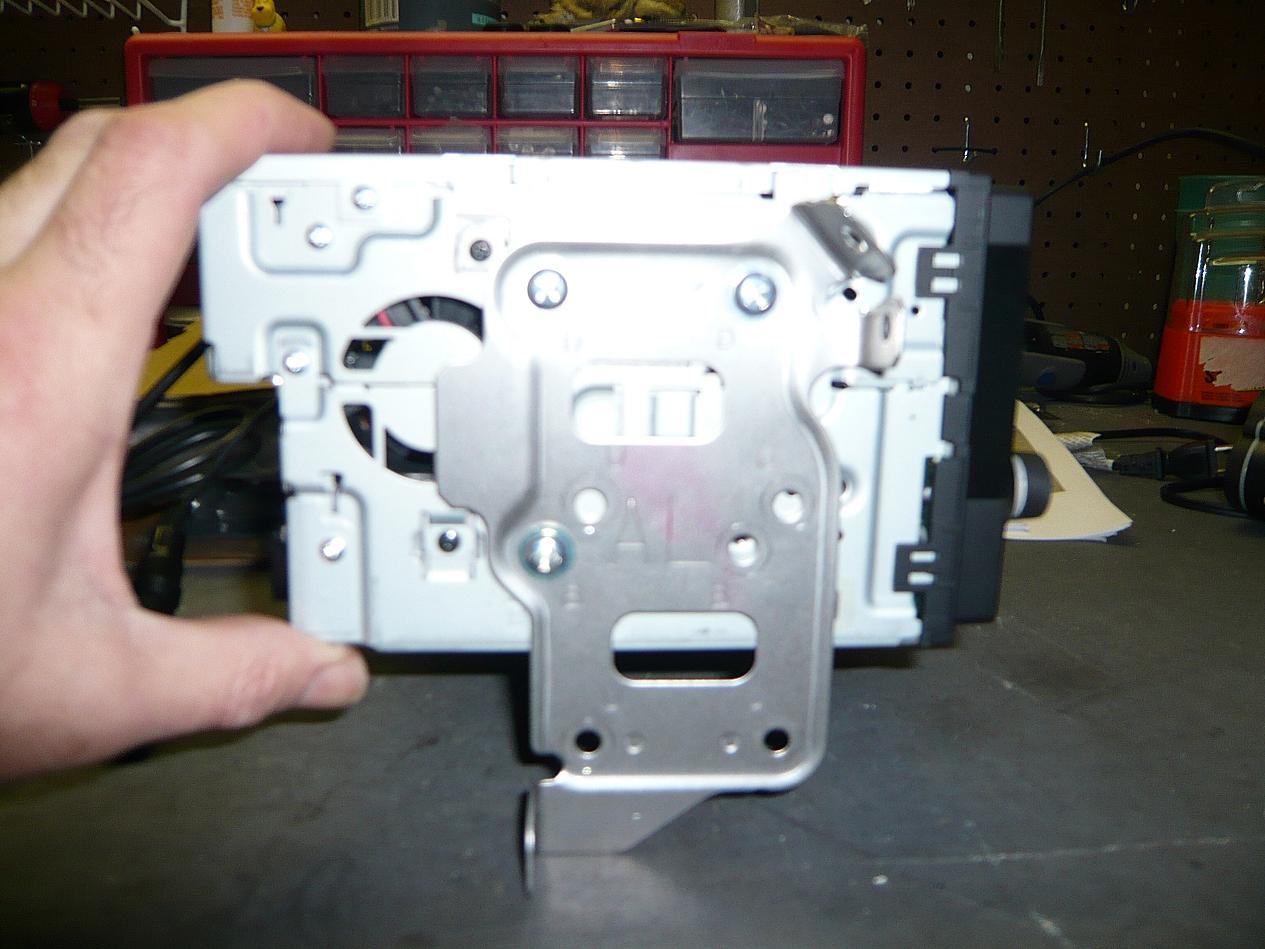
remove mounting brackets
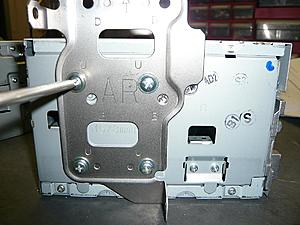
install bracket on new unit (may not mount same way. do a test fit before tightening)

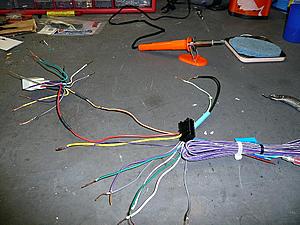
at this point i did the wiring on my harness. obviously you could do it first if you want. i just needed a change of pace. i soldered the connections and used heat shrink tubing...i highly recommend do this.
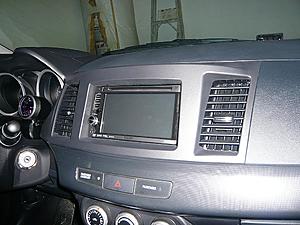
plug it in, screw it down, pop all the pieces back in place and you're done.
it took me about 4-5 hours from start to finish, but after having done it once, i could probably do it in an hour and a half. pretty easy. i installed the gps antenna, xm radio kit and the ipod cable too...just didn't show them. i can if you need me to.
if you have any more questions let me know
B

remove mounting brackets

install bracket on new unit (may not mount same way. do a test fit before tightening)
at this point i did the wiring on my harness. obviously you could do it first if you want. i just needed a change of pace. i soldered the connections and used heat shrink tubing...i highly recommend do this.

plug it in, screw it down, pop all the pieces back in place and you're done.

it took me about 4-5 hours from start to finish, but after having done it once, i could probably do it in an hour and a half. pretty easy. i installed the gps antenna, xm radio kit and the ipod cable too...just didn't show them. i can if you need me to.
if you have any more questions let me know
B
Last edited by kingu; Mar 5, 2009 at 09:28 AM.
it comes with a piece (like a cubby box) that fills up the bottom part if you have a single din unit. not sure if the stock brackets will work though.
Thread Starter
Newbie
Joined: Oct 2008
Posts: 5
Likes: 0
From: Perth, Australia
Hi Kingu,
Thanks for posting the pics. After install it looks pretty good, matches with the dash prefectly.
Did you change the speakers also. If yes can you please post the pics for them also.
I just got my speakers, amp + sub and waiting for the dashkit to come. Then i can start working on my install.
Thanks
Tama.