When you click on links to various merchants on this site and make a purchase, this can result in this site earning a commission. Affiliate programs and affiliations include, but are not limited to, the eBay Partner Network.
This build has been a long time coming. So I'm excited there is now going to be a bit of progress. I bought a gun metal gray evo 7 at the start of 2008 from IMG which was already on it's way from Japan. When it arrived it had a bit of rust under the body so IMG sent it straight back, called me and told me what had happened and asked what I want. I decided on a blue 7 which IMG started looking for and had it in my hands a couple of months later. It worked out well as this one was in great condition, already had ohlins coil overs in it and was a $1000 cheaper.
I've enjoyed it immensely over the the last 8 years, but any sort of changes I wanted to do constantly slipped through my fingers.
I knew that when I finally got around to starting the build I wasn't going to do it in small stages. I wanted to do a big chunk at once to keep the overall cost as efficient as possible. I also get idea's constantly and think "Hey this would be a good idea, I wonder if this would work".
With these ideas it means that off the shelf products for the most part aren't going to work. When I started to look into what needed to change to incorporate my ideas it would snowball a little bit in terms of what needed to be custom made. When you make one part custom, all of a sudden everything needs to be custom. I started to look into who would be able to create all the parts I require when I got another idea "I should do it myself".
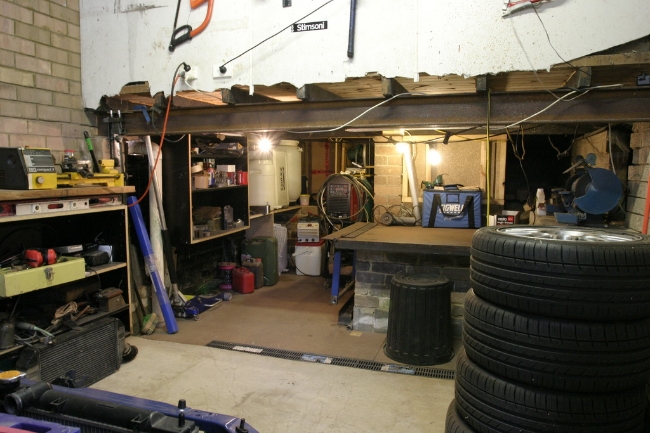
So I enrolled in tafe to get a few basic skills tig welding and started work on my garage. I've only got a single car garage which was already full of a lot of crap leaving me with no room to move. So the only option was to rip the wall off the back and start digging.
This was the first step after digging everything out, adding the beam in under the house to open the area up and bricking it all back up.
Building the subfloor.
How it stands today
Now the fun part starts.
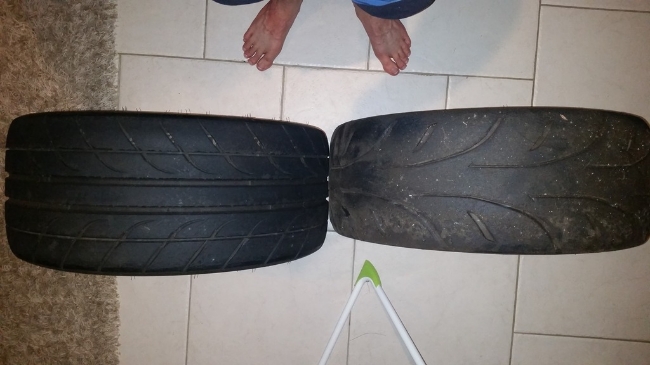
Before I add any more power I have to make sure that I have enough grip so that I can actually make it around the first corner and if I'm going to change the tyres it had to be a minimum width of 265.
A set of 9.5" TE37 that already had a almost new set of 265's came up. I needed new tyres at the time so this made sense.
These tyres really are considerably wider so I had to get a bit of work done to make them fit. Looking at them though you can't really see what was changed. They no longer rub unless you hit a pothole while corner hard on the road. I've never had any rubbing on track.
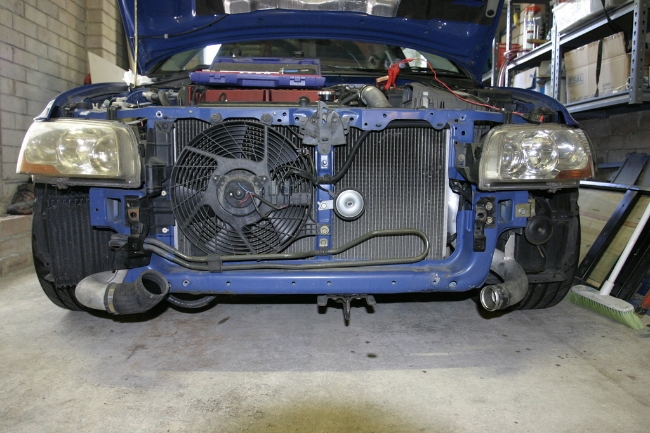
I've now taken the car off the road to start work on the intercooler, radiator and piping. I've got until the end of this year to have everything complete when I have to get it up to Benny to get the turbo kit made and tuned. I have a dead line of February to have it all complete as I have my second born due on the 5th (The same weekend I'm away to watch the Bathurst 12hr)
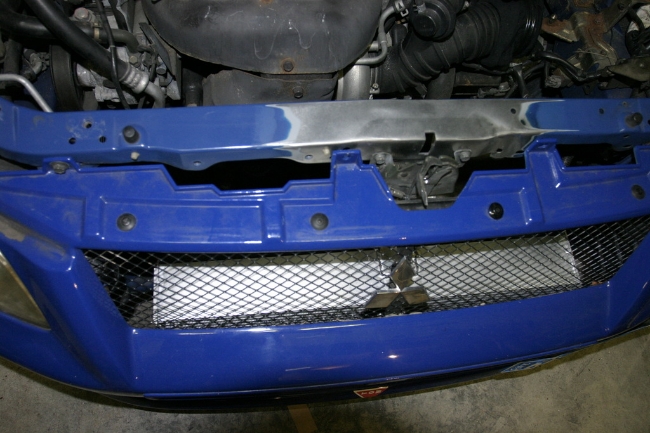
Everything here has to go as the plan is to fit a backdoor intercooler and dual pass tucked radiator. I'm also hoping to put the intake in the same spot as the oil cooler except for on the passenger side
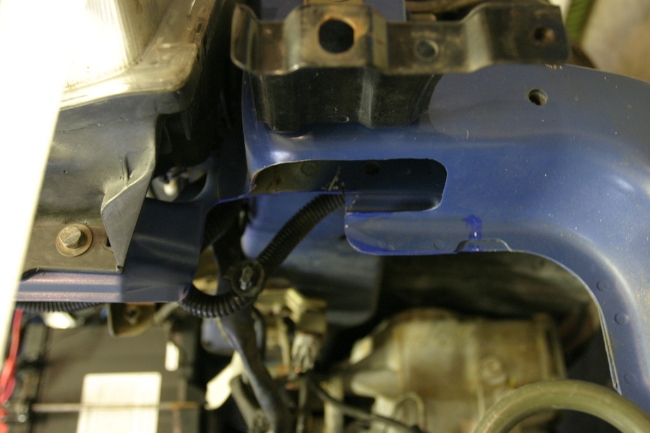
While I was getting the tyres to fit I also had a notch taken out of the radiator support to make it a little easier to fit the uicp and to ensure I can still maximise the amount of space the radiator can take up.
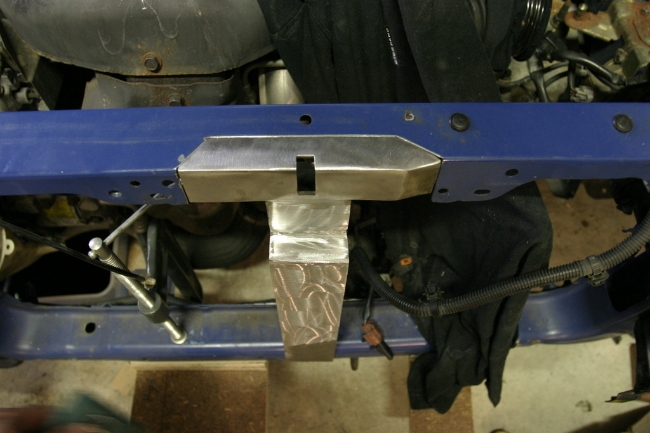
I also cut the bonnet latch out and support so that it could be brought forward. I need to be able to have the maximum amount of space possible in the engine bay without sacrificing the cooling.
Trial fitting
This ended up being a little bit tricky as nothing on the latch support is straight. I also had to make sure bringing the latch this far forward and changing the angle in which it sits wasn't going to impede on the bonnet actually locking like stock. The latch itself also had to be slightly reshaped so that it locked correctly.
All welded up and locking correctly
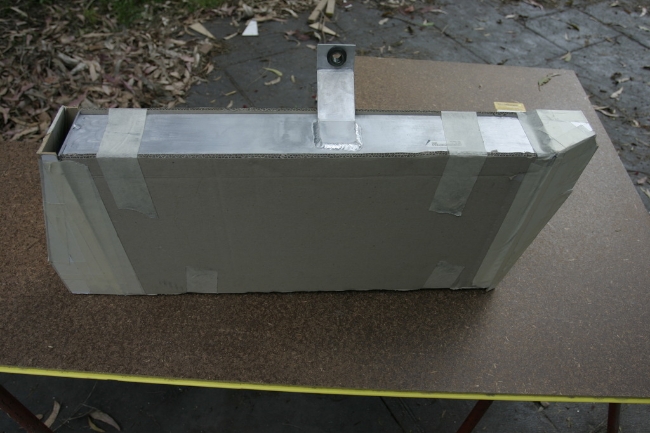
The next step is to mount the intercooler at it's final height and mock up the end tanks to make sure it won't have any issues.
This is the final design I've come up with which fits beautifully, but i've had to remove power steering cooler as it was getting in the way (The cooler is wider than I was expecting). I'm still not 100% sure where that will go, but I can sort that out later.
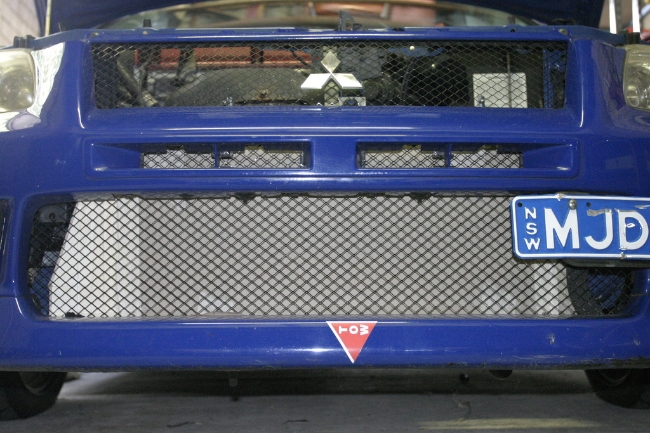
How it should look behind the front bar
This brings me up today. Now I need to order all the parts I need to make sure I can actually pull this off before the end of the year.
Last week I purchased a 7163 T4 and today I need to order the radiator core, and have the final drawings of the end tanks ready to get cut.
Track times
Wakefield
162kw RE11s 1:09:01
Eastern Creek
162kw RE11s (3yr old) 1:50:43
Checklist of parts to get:
PWR Radiator Core 42mm
S2 cams
GSC Beehive valve springs and retainers
Cam gears
ARP Head studs
Blox front engine mount
Walbro 460
ID 1300 Injectors
Any advice of anything else I'd require feel free to chime in. Shouldn't need anything for the turbo kit as Benny will be handling that
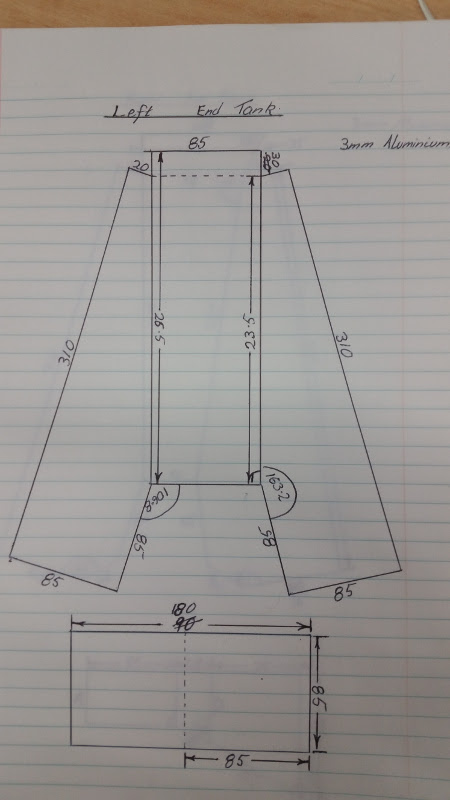
I've just finalised the drawings for the end tank designs for the intercooler which hopefully I can get cut pretty quickly.
I'm going to get these cut for me as I think if I did it at home they'd get scratched up a bit. I'm attempting to keep it some what presentable.
This is the design for the left side which will enter effectively the same as stock.
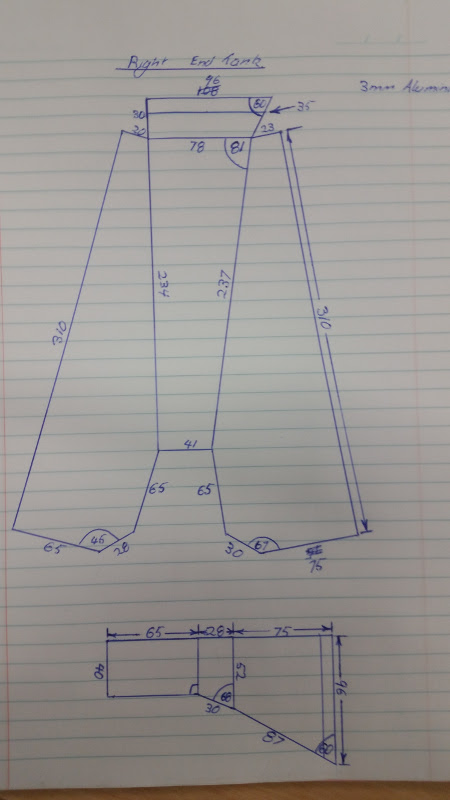
and this is the right end tank which will exit out the back of the intercooler.
I'm not an engineer by any means so if you see any issues with these feel free to let me know.
I've also been procrastinating about the design for the radiator as after talking to PWR they believe having a dual pass radiator will be too restrictive with the dimensions I have.
Based on the cross sectional area of the inlet pipe (35mm diameter) vs the tubes. The top half of the radiator (first pass) is 50% bigger, but they still think it's restrictive.
They'd know better than me so I may need to do a single cross flow design which means it will exit on the opposite side of the engine. I'd then need to route a pipe back to correct side for the inlet from the engine.
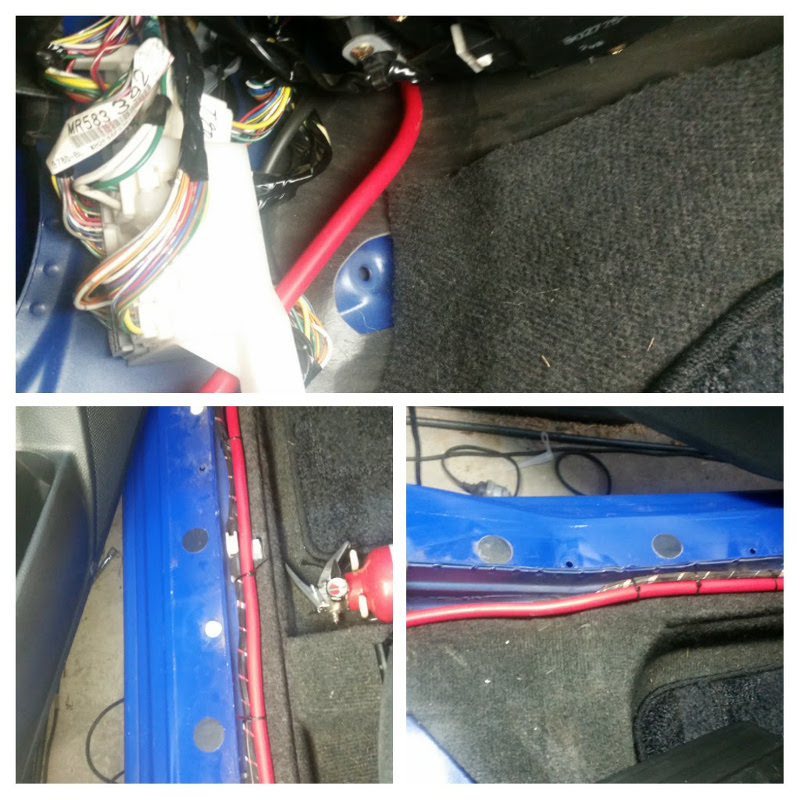
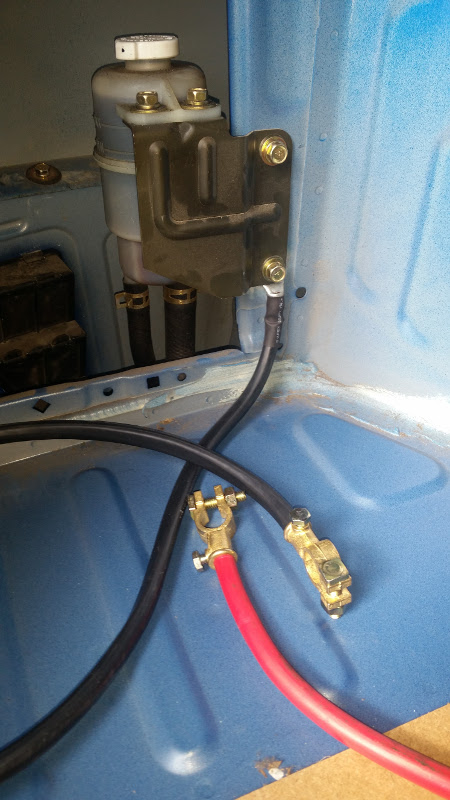
I've now done most of the work for moving the battery to the boot.
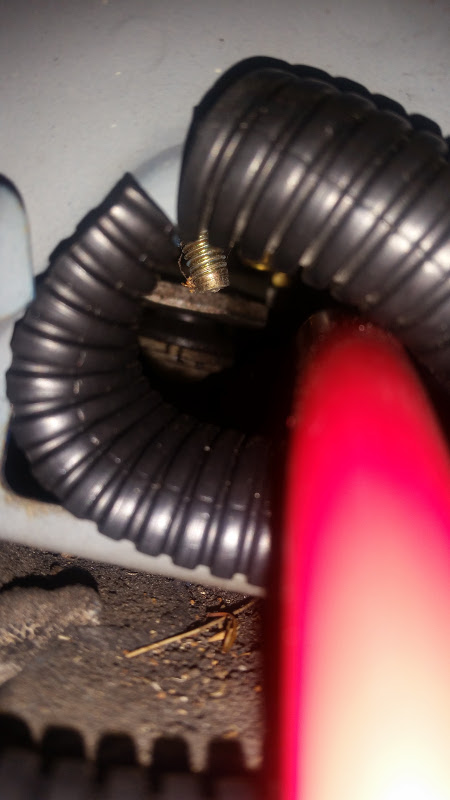
I've found some opening through the water galley at the bottom of the windshield so that I didn't a have to drill any new holes.
It seals quite nicely on the existing grommet that enters the cabin behind the glove box, but I'll probably add a bit of sealant as well just to be doubly shaw it's ok.
The cable then runs along the door trimmings and into the boot.
The only things I was missing is the fuse, battery box and the battery connectors I picked up are the wrong size so I'll have to swap them as well.
I used an Evo 10 terminal block to replace the existing. It needed very slight trimming for the larger cables, but seemed to work nicely. The only problem I had with that was the cables are now very tight which I still need to find a solution for.
While I did get to test the electrics work, I wasn't able to test if the starter motor gets enough current unfortunately.
Last week I also purchased the radiator core, fans, piping and a rivnut tool. So hopefully that should all arrive this week along with the turbo.
I don't think my intercooler end tanks will be cut by this weekend, so at least I can crack on with getting the radiator fabed up and hopefully mounted.
I went through quite a number of different iterations on the radiator design after the mentioned discussion I had with PWR, but I've finally come up with a design that should hopefully work.
It's now going to be a single pass cross flow design. This means the inlet is actually going to be on the wrong side of the engine. What I'll need to do is run some square tubing along the top radiator support (so that it kind of looks like the top of the stock radiator) which will have the billet filler and inlet welded to it. This also means I should now be able to use the stock mounts at the top which is nice.
There is a lot of room in the engine bay now, yet with all the wires going everywhere it looks quite messy. While I'd love to clean all that up it's not going to be a show car so don't know if it'll be worth the effort. Maybe if it ever becomes a full-time race car it will get done then.
So I've just recently found out that it's not a good idea to have folds when building the end tanks for the intercooler as it can cause stress fractures.
So while this won't change my design, it means each section will be cut separately and i'll have to weld it all together.
The sizing might change slightly as there is no fold to account for anymore.
It looks like the title of this thread didn't save properly. Can I change it myself or do I need admin to do it?
I can only find the edit buttons for individual posts.
 Nov 30, 2016, 02:34 PM