Building a new factory longblock


 Jul 17, 2019, 08:10 AM
#17
^ Thanks!! Definitely a lot of work so you have to love it.
So where we left off.......I thought I killed my new HG with brake clean. In the meantime, I figured I'd start off with some "campus beautification". Stripping, cleaning and painting parts like the wiper arms, battery hold down bracket, Radium catch can bracket, etc.
Scored a crank pulley with about half the mileage of my own from one of the members here (thanks man). The rubber damper was in noticeably better shape, so this was a win.

Unsurprisingly, the water pipe had some serious corrosion. Yikes!

Wire wheel whipped that right off.

*Update on the slide hammer / intermediate shaft puller tool*
This thing worked like a charm. No struggle. Popped right out.

Now to continue removing and cleaning parts, and getting the engine bay and vicinity ready for the swap. Labeling the harness went more quickly than I thought. In some ways, these cars are really quite simple and i'm very grateful not to be working on a "modern" car.


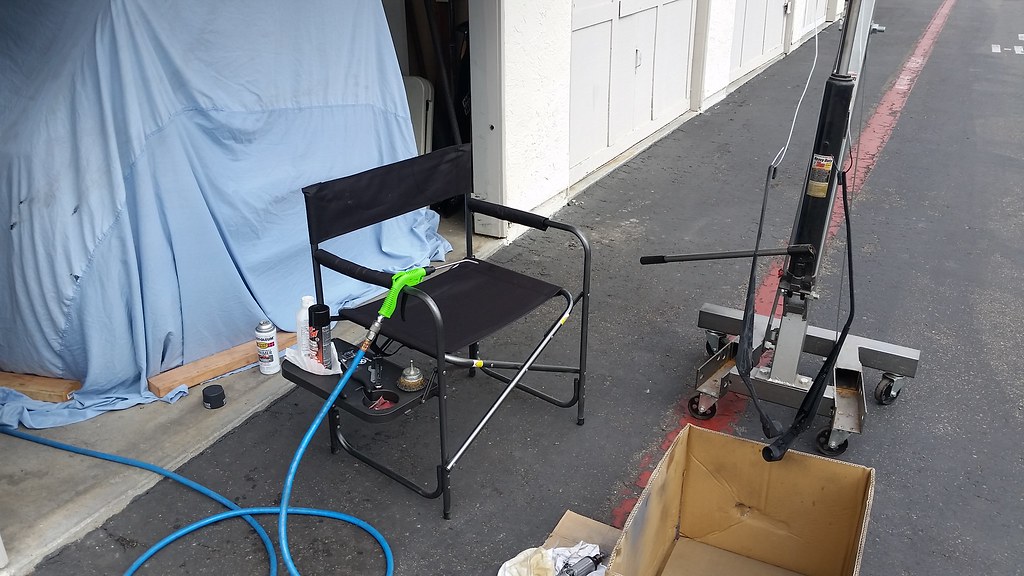
This was fun. The bungee cord extravaganza used to get the AC comp, PS pump, oil cooler lines, and oil cooler cardboard wrap all in place. Glad I splurged for that 50 pack of bungees at harbor freight years ago HAHAHA

So where we left off.......I thought I killed my new HG with brake clean. In the meantime, I figured I'd start off with some "campus beautification". Stripping, cleaning and painting parts like the wiper arms, battery hold down bracket, Radium catch can bracket, etc.
Scored a crank pulley with about half the mileage of my own from one of the members here (thanks man). The rubber damper was in noticeably better shape, so this was a win.
Unsurprisingly, the water pipe had some serious corrosion. Yikes!
Wire wheel whipped that right off.
*Update on the slide hammer / intermediate shaft puller tool*
This thing worked like a charm. No struggle. Popped right out.
Now to continue removing and cleaning parts, and getting the engine bay and vicinity ready for the swap. Labeling the harness went more quickly than I thought. In some ways, these cars are really quite simple and i'm very grateful not to be working on a "modern" car.
This was fun. The bungee cord extravaganza used to get the AC comp, PS pump, oil cooler lines, and oil cooler cardboard wrap all in place. Glad I splurged for that 50 pack of bungees at harbor freight years ago HAHAHA
Jul 17, 2019, 08:59 AM
#18
I'm going to shelve my ego once again here and share another huge embarrassing failure. This next part was painful so i'm warning you.
After cleaning the head and block mating surfaces thoroughly and getting my 2nd new HG, it was time to bust out all my pretty new factory head bolts and torque the head down. I have a 1/2" Matco torque wrench that does angle, and I was going to put witness marks on the bolt heads for redundancy. If you are not familiar with the torque procedure for factory head bolts, here you go, per the FSM:
1) torque sequentially to 58 lb ft
2) back them all off
3) torque sequentially to 15 lb ft
4) torque sequentially 90 degrees
5) torque sequentially another 90 degrees

Step 1 should have been "check all bolts for defects and after you've cleaned all threads in the block CLEAN THEM ALL AGAIN. And maybe clean them again". Because Bolt #2 only made it to 47lb in Step 1 and then that f*cker snapped.

In case you are wondering how I knew it only made it to 47 lb ft, this torque wrench reads torque in real time on the display.

Well, at that point I was ready to call it a night. I removed the head and gasket, cleaned them and wrapped them up. The next day I went back out to the garage, feeling refreshed and ready to tackle the bolt extraction from my brand new virgin block. I was pissed but determined. The two main concerns were contamination of neighboring areas, and damage to the deck surface. So I wrapped the block up with plastic stretch wrap, and then taped off the area in a somewhat surgical fashion I suppose you could say.
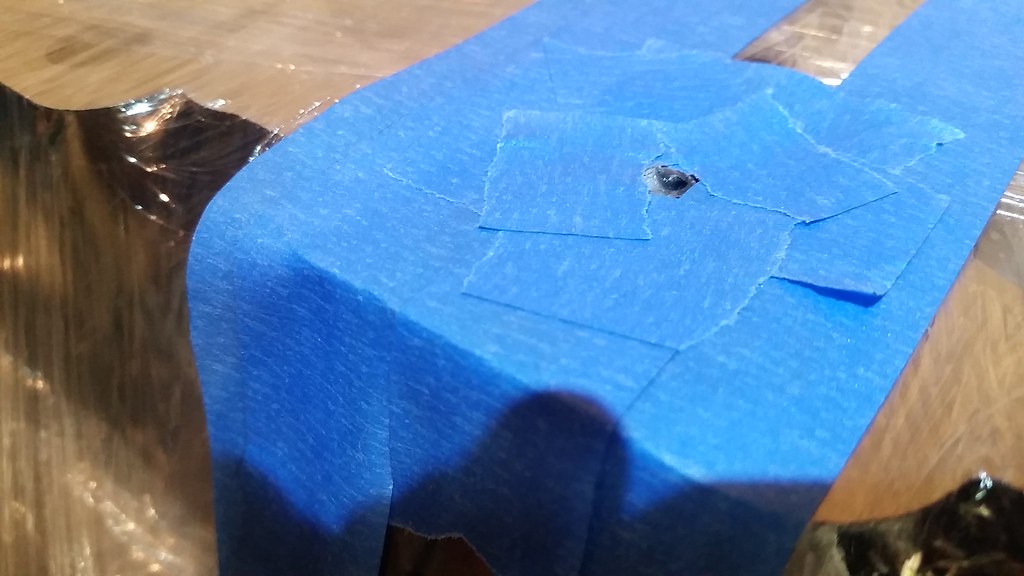
Next a layer of duct tape for some cushion
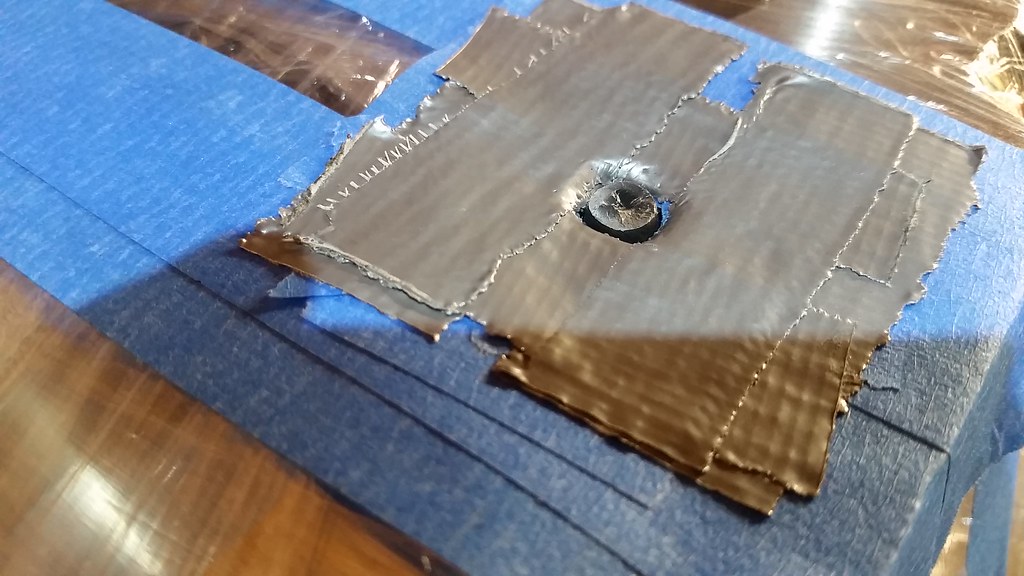
And a layer of foil tape for some extra abrasion resistance

Then grind the top of that ugly ***** smooth so you can center punch it
I then proceeded to drill the center of the bolt out using LH drills, and gradually increasing in size. I have only done extraction a few times so i'm no pro, but for the record this is one of the best holes i've ever drilled in a broken fastener. Again, I was determined not to harm the block.

I then started working a spiral extractor into the hole. I will spare you the boredom of this process, but it required a lot of patience. Insert extractor bit, give it a few taps, turn it and hope it bites. It doesn't, so drill a bit more, then repeat. Anyway, I was using the 1/8" extractor and POP it snapped off inside the bolt.

I was about ready light my garage on fire. Not really, but I was pretty dejected. If you have ever had this happen to you, you know that screw extractors are hardened steel, and you're not getting a drill bit through that thing anytime this century. I tell ya, this really had me questioning this whole project and my own abilities. How did I get here?

This is what I want to share with the reader:
I made two mistakes here. First, I assumed that because the block was brand new from Mitsubishi, that the threads were clean and ready, and I did not do anything except blast them with 90 psi of air from my blow gun. I figured that would be sufficient.
Second, I didn't really inspect the bolts very closely. I looked at each of them for defects but could I have done a more thorough job? Sure. Maybe I put these OEM parts on too much of a pedestal.
So what I did to remedy this FUBAR'd head bolt was take the block to a good machine shop, and they welded a bolt to it, and it turned right out. We checked the threads in the block and they were A-OK. I was pretty relieved.
Immediately I ordered ARP head studs. It's funny...when I built that 6 bolt 4G63 about 10 years ago, I bought ARP headstuds without hesitation. It was just common knowledge that even for a mild build, that's what everyone uses. Using factory head bolts didn't even cross my mind. But for this build, I was hellbent on recreating a new factory engine so I went with stock head bolts. I'm still not exactly sure why that bolt failed at 47 lb ft, but the machinist who removed it said that he thought it had been machined incorrectly from the factory.
After cleaning the head and block mating surfaces thoroughly and getting my 2nd new HG, it was time to bust out all my pretty new factory head bolts and torque the head down. I have a 1/2" Matco torque wrench that does angle, and I was going to put witness marks on the bolt heads for redundancy. If you are not familiar with the torque procedure for factory head bolts, here you go, per the FSM:
1) torque sequentially to 58 lb ft
2) back them all off
3) torque sequentially to 15 lb ft
4) torque sequentially 90 degrees
5) torque sequentially another 90 degrees
Step 1 should have been "check all bolts for defects and after you've cleaned all threads in the block CLEAN THEM ALL AGAIN. And maybe clean them again". Because Bolt #2 only made it to 47lb in Step 1 and then that f*cker snapped.
In case you are wondering how I knew it only made it to 47 lb ft, this torque wrench reads torque in real time on the display.
Well, at that point I was ready to call it a night. I removed the head and gasket, cleaned them and wrapped them up. The next day I went back out to the garage, feeling refreshed and ready to tackle the bolt extraction from my brand new virgin block. I was pissed but determined. The two main concerns were contamination of neighboring areas, and damage to the deck surface. So I wrapped the block up with plastic stretch wrap, and then taped off the area in a somewhat surgical fashion I suppose you could say.
Next a layer of duct tape for some cushion
And a layer of foil tape for some extra abrasion resistance
Then grind the top of that ugly ***** smooth so you can center punch it
I then proceeded to drill the center of the bolt out using LH drills, and gradually increasing in size. I have only done extraction a few times so i'm no pro, but for the record this is one of the best holes i've ever drilled in a broken fastener. Again, I was determined not to harm the block.
I then started working a spiral extractor into the hole. I will spare you the boredom of this process, but it required a lot of patience. Insert extractor bit, give it a few taps, turn it and hope it bites. It doesn't, so drill a bit more, then repeat. Anyway, I was using the 1/8" extractor and POP it snapped off inside the bolt.
I was about ready light my garage on fire. Not really, but I was pretty dejected. If you have ever had this happen to you, you know that screw extractors are hardened steel, and you're not getting a drill bit through that thing anytime this century. I tell ya, this really had me questioning this whole project and my own abilities. How did I get here?
This is what I want to share with the reader:
I made two mistakes here. First, I assumed that because the block was brand new from Mitsubishi, that the threads were clean and ready, and I did not do anything except blast them with 90 psi of air from my blow gun. I figured that would be sufficient.
Second, I didn't really inspect the bolts very closely. I looked at each of them for defects but could I have done a more thorough job? Sure. Maybe I put these OEM parts on too much of a pedestal.
So what I did to remedy this FUBAR'd head bolt was take the block to a good machine shop, and they welded a bolt to it, and it turned right out. We checked the threads in the block and they were A-OK. I was pretty relieved.
Immediately I ordered ARP head studs. It's funny...when I built that 6 bolt 4G63 about 10 years ago, I bought ARP headstuds without hesitation. It was just common knowledge that even for a mild build, that's what everyone uses. Using factory head bolts didn't even cross my mind. But for this build, I was hellbent on recreating a new factory engine so I went with stock head bolts. I'm still not exactly sure why that bolt failed at 47 lb ft, but the machinist who removed it said that he thought it had been machined incorrectly from the factory.
Jul 17, 2019, 09:37 AM
#19
Moving right along here. ARP headstuds came in, so I cleaned them, and then cleaned all the threads in the block. I used a little bit of ARP lube on them and threaded a couple of them in hand tight, then put the HG down.
*Note* HG #2 had been torqued albeit only slightly in the center (bolts # 1 & # 2), so I decided not to re-use it. Instead I went back to HG #1. Wait, but I thought that one was messed up? Funny store there. My research (please correct me if you know otherwise) suggests that the rubbery coating on these factory HGs is Viton, kinda like what many valve stem seals are made from. Definitely never use solvents on it. The thing was, the Viton on my second HG wasn't any nicer right out of the package. Let me try to explain. When I hit the first HG with brake clean, I noticed some of the viton coming off and stopped immediately. I figured "better safe than sorry" and ordered another HG. When I removed HG # 2 from the plastic package, some of its Viton had been slightly worn away just from life inside the parts distribution network. While It was totally passable, there was just a little bit of black Viton residue inside the plastic package from it sliding around in there for however long. This was a pretty clear indication that it was time to do a back to back comparo with HG #1. Come to find out, even after my brake clean mishap, HG #1 was perfectly good, and possibly had even more Viton intact than HG #2! Figures.
Anyway, ARP head studs all in hand tight, and all were sitting at the exact same height above the deck within about 1/32" of an inch.

Torque time. To prevent sequence errors, I labeled the bolts to keep it straight in my head. Man it felt good to get the head torqued on properly! I went in three steps. 25, 50, 80 lb ft.

Then install the lifters into their freshly cleaned bores, and put the rockers on.


Got the cams in, all the caps torqued, and pressed the cam seals in using a 36mm Honda axle nut socket. Grease the inside of the cam seals. I used Toyota FIPG (similar to Mitsubond) on the specified cam caps per the FSM. Installed the CAS and thermostat housing, again in accordance with the FSM. It's starting to look like an engine!
Next up was front case installation. Note this castle plug that covers the front balance shaft.


FSM wants 17 lbs on that castle plug. I tried to find a more economical way to do this, but ended up shelling out way too much $$$ for a Genuine Mitsubishi tool on eBay. Well, now I have it. If anyone needs it, hit me up. I just didn't want to pull the timing side apart due to a leak here, so spending the cash on the socket seemed like the lesser of two evils. I'm sure I probably could have got it pretty close by coming up with some other method (and I investigated some other ideas) but in the end peace of mind was well worth the money spent.

Again, it felt weird to install brand new balance shafts! I deleted them from that 6 bolt build 10 years ago.
I suggest torquing the sprockets for the rear balance shaft and oil pump drive sprocket before you put the case on. Made it much easier to hold the shafts and apply torque.
Ok, front case is on!

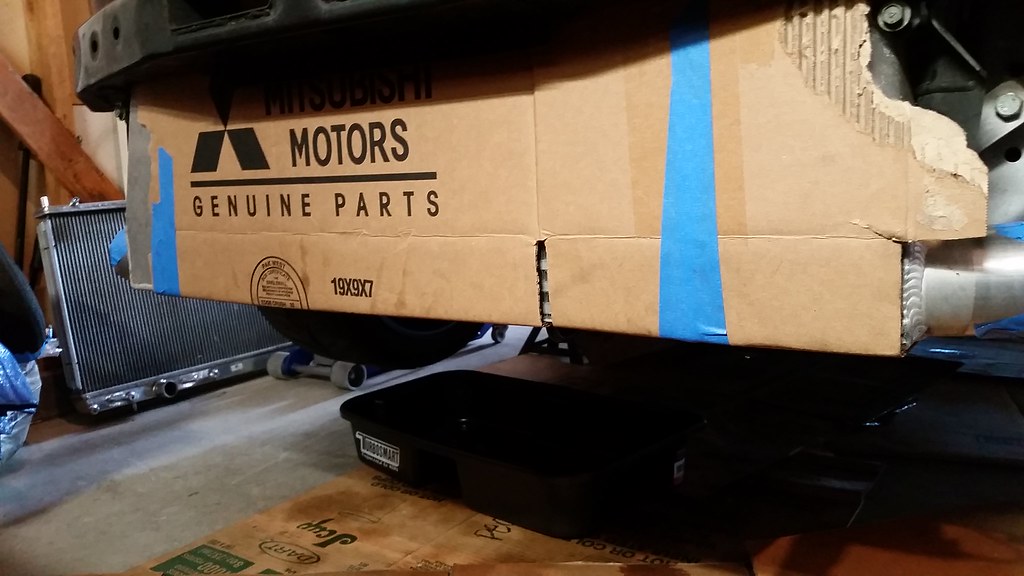
Next was cleaning up the oil pan which I was re-using from the original engine. It's imperative that the flange is stripped of all old gasket material, cleaned, and that none of that crap gets into the pan or if it does, that you wash it thoroughly.

Also re-used the original pickup and crank scraper. Used a new gasket for the pickup tube of course.

Installed the new pan. Be sure to use the two shorter bolts in the appropriate spots on the timing side, and I snugged it down and torqued in steps. I used the aforementioned Toyota FIPG as my sealant here. Man I love this stuff! Highly recommended.

*Note* HG #2 had been torqued albeit only slightly in the center (bolts # 1 & # 2), so I decided not to re-use it. Instead I went back to HG #1. Wait, but I thought that one was messed up? Funny store there. My research (please correct me if you know otherwise) suggests that the rubbery coating on these factory HGs is Viton, kinda like what many valve stem seals are made from. Definitely never use solvents on it. The thing was, the Viton on my second HG wasn't any nicer right out of the package. Let me try to explain. When I hit the first HG with brake clean, I noticed some of the viton coming off and stopped immediately. I figured "better safe than sorry" and ordered another HG. When I removed HG # 2 from the plastic package, some of its Viton had been slightly worn away just from life inside the parts distribution network. While It was totally passable, there was just a little bit of black Viton residue inside the plastic package from it sliding around in there for however long. This was a pretty clear indication that it was time to do a back to back comparo with HG #1. Come to find out, even after my brake clean mishap, HG #1 was perfectly good, and possibly had even more Viton intact than HG #2! Figures.
Anyway, ARP head studs all in hand tight, and all were sitting at the exact same height above the deck within about 1/32" of an inch.
Torque time. To prevent sequence errors, I labeled the bolts to keep it straight in my head. Man it felt good to get the head torqued on properly! I went in three steps. 25, 50, 80 lb ft.
Then install the lifters into their freshly cleaned bores, and put the rockers on.
Got the cams in, all the caps torqued, and pressed the cam seals in using a 36mm Honda axle nut socket. Grease the inside of the cam seals. I used Toyota FIPG (similar to Mitsubond) on the specified cam caps per the FSM. Installed the CAS and thermostat housing, again in accordance with the FSM. It's starting to look like an engine!
Next up was front case installation. Note this castle plug that covers the front balance shaft.
FSM wants 17 lbs on that castle plug. I tried to find a more economical way to do this, but ended up shelling out way too much $$$ for a Genuine Mitsubishi tool on eBay. Well, now I have it. If anyone needs it, hit me up. I just didn't want to pull the timing side apart due to a leak here, so spending the cash on the socket seemed like the lesser of two evils. I'm sure I probably could have got it pretty close by coming up with some other method (and I investigated some other ideas) but in the end peace of mind was well worth the money spent.
Again, it felt weird to install brand new balance shafts! I deleted them from that 6 bolt build 10 years ago.
I suggest torquing the sprockets for the rear balance shaft and oil pump drive sprocket before you put the case on. Made it much easier to hold the shafts and apply torque.
Ok, front case is on!
Next was cleaning up the oil pan which I was re-using from the original engine. It's imperative that the flange is stripped of all old gasket material, cleaned, and that none of that crap gets into the pan or if it does, that you wash it thoroughly.
Also re-used the original pickup and crank scraper. Used a new gasket for the pickup tube of course.
Installed the new pan. Be sure to use the two shorter bolts in the appropriate spots on the timing side, and I snugged it down and torqued in steps. I used the aforementioned Toyota FIPG as my sealant here. Man I love this stuff! Highly recommended.
Aug 20, 2019, 09:39 PM
#21
As usual, long overdue update. Gonna try putting captions below the photos...is it better? Let me know.
I'm going to take a quick break from the engine here and give a bit of story. I was trying to get the car done by June 29th for my friend's wedding. Here's more on that.

My buddy found a real clean, low mileage, 1 owner Evo IX MR. He'd been wanting one for quite a while. We went to look at it ASAP and unbelievably, it wasn't bogus, so he drove it home. Actually we drove it 4 hours directly to his bachelor party (which he was 2 hours late for - no problem, because EVO!). This pic was taken shortly after arrival at the spot- a lavish 25k sq ft residence he'd managed to rent for both the bachelor party and the wedding...friend of a friend sort of deal. We were hoping for a photo shoot on wedding day with the Evos. So that kinda became my deadline for the assembly of the new engine and installation.

Fun fact: this was the largest pool installed in a private residence in the USA at one time. I guess it was dethroned within the last few years. Whatever. It was amazing. You can literally swim through the house in a couple of spots. There are bridges for indoor foot traffic.

Another shot of the pool. After my lapdance from the midget stripper (lol) I went for a swim. Good times. Not pictured is the water slide.

20+ car garage. I might not ever go upstairs!

The wedding was awesome. Such a sick spot.

We had some weird *** weather in June. SoCal coastal is always pretty gloomy in June, but it was a bit more than usual this year. We had some clouds threatening at first but it worked out. Ended up with an epic, full rainbow on the East sky and shortly thereafter, this sunset over the ocean.

The Evo sitting pretty on the big day. Spoiler alert, I didn't make the deadline. I didn't fire the engine for the first time until July 8th. Close but no cigar.
So, while my car didn't make it, it was a great motivator that got me out to the garage after work when maybe I would have done something else, and the project would have taken considerably longer.
Next update I'll get back into the process. I do also want to include my parts list so i'm going to call myself out here for accountability purposes.
I'm going to take a quick break from the engine here and give a bit of story. I was trying to get the car done by June 29th for my friend's wedding. Here's more on that.
My buddy found a real clean, low mileage, 1 owner Evo IX MR. He'd been wanting one for quite a while. We went to look at it ASAP and unbelievably, it wasn't bogus, so he drove it home. Actually we drove it 4 hours directly to his bachelor party (which he was 2 hours late for - no problem, because EVO!). This pic was taken shortly after arrival at the spot- a lavish 25k sq ft residence he'd managed to rent for both the bachelor party and the wedding...friend of a friend sort of deal. We were hoping for a photo shoot on wedding day with the Evos. So that kinda became my deadline for the assembly of the new engine and installation.
Fun fact: this was the largest pool installed in a private residence in the USA at one time. I guess it was dethroned within the last few years. Whatever. It was amazing. You can literally swim through the house in a couple of spots. There are bridges for indoor foot traffic.
Another shot of the pool. After my lapdance from the midget stripper (lol) I went for a swim. Good times. Not pictured is the water slide.
20+ car garage. I might not ever go upstairs!
The wedding was awesome. Such a sick spot.
We had some weird *** weather in June. SoCal coastal is always pretty gloomy in June, but it was a bit more than usual this year. We had some clouds threatening at first but it worked out. Ended up with an epic, full rainbow on the East sky and shortly thereafter, this sunset over the ocean.
The Evo sitting pretty on the big day. Spoiler alert, I didn't make the deadline. I didn't fire the engine for the first time until July 8th. Close but no cigar.
So, while my car didn't make it, it was a great motivator that got me out to the garage after work when maybe I would have done something else, and the project would have taken considerably longer.
Next update I'll get back into the process. I do also want to include my parts list so i'm going to call myself out here for accountability purposes.
The following users liked this post:
SoSoEVO (Aug 21, 2019)
Aug 21, 2019, 11:12 AM
#22
Congrats to your friend on the marriage and new evo! The rental property and car both look fantastic....what's this news about a midget stripper? . My wife and I just had our wedding this past July 27th. Feels good to have all that planning behind us.
. My wife and I just had our wedding this past July 27th. Feels good to have all that planning behind us.
Aug 21, 2019, 10:41 PM
#23
Congrats to you guys! My fiancee and I are on our way as well. Seems like a lot of work. Hope she wants to handle it all! Haha.
yeah one of his buddies got him a midget stripper. Still cracks me up to this day. She was kinda fugly and at first I was like helllll no. But she actually wasn't half bad.
yeah one of his buddies got him a midget stripper. Still cracks me up to this day. She was kinda fugly and at first I was like helllll no. But she actually wasn't half bad.
Aug 23, 2019, 11:09 AM
#24
Congrats to you guys! My fiancee and I are on our way as well. Seems like a lot of work. Hope she wants to handle it all! Haha.
yeah one of his buddies got him a midget stripper. Still cracks me up to this day. She was kinda fugly and at first I was like helllll no. But she actually wasn't half bad.
yeah one of his buddies got him a midget stripper. Still cracks me up to this day. She was kinda fugly and at first I was like helllll no. But she actually wasn't half bad.Thanks man! I can confirm that weddings are a TON of work, but once the homework is done (from sending invitations to the start of the ceremony) you feel like the man of the year. After the ceremony is over and the reception starts, the feeling is incredible and the energy in the room explodes. As guys, we have less work to do the day of. The poor brides and her bridal party have to get up early and do hair, makeup, nails, extra photos, and more. The good news is, you don't need to hire a wedding planner because most wedding vendors will point you in the right direction to other vendors, but I HIGHLY recommended hiring a wedding coordinator for the day of the event. They helped us so much and took care of a lot of the chaos and idiotic things happening during the wedding. We didn't notice a single bad thing
Sep 4, 2019, 11:27 PM
#25
^ I appreciate the experience!
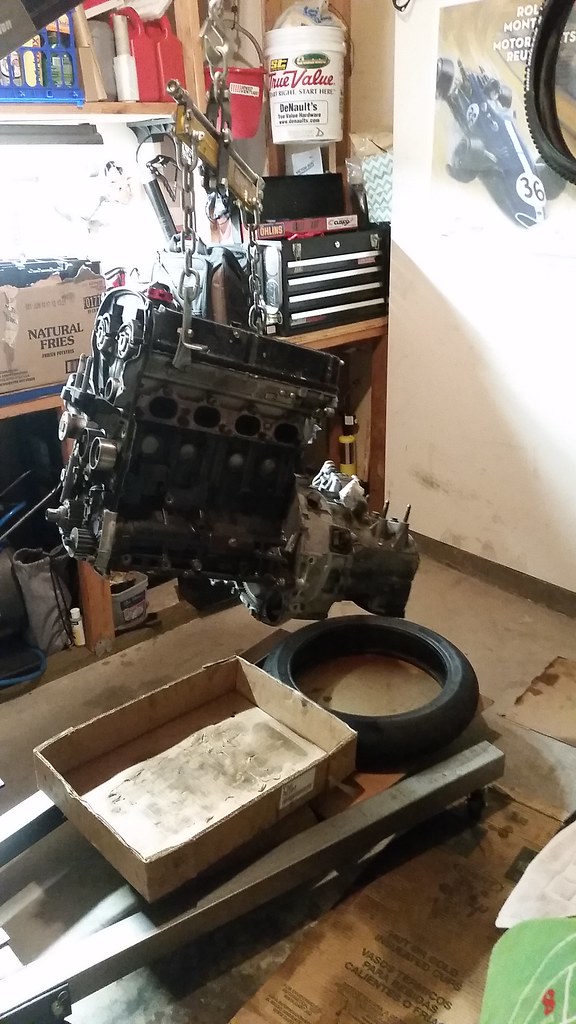
Now that the engine is built, it just needs to be timed. But first, I need to rob some parts off the old engine. I decided to do all this with the original engine out of the car. On to the engine removal!

Make sure *everything* is disconnected. The transfer case may turn out to be a bit of a challenge. I used a combination of patience, careful prying, and bungees to get it out of the way.
Attach the load leveler- that's the yellow chingadera. It's a must have. More on that in a second.

I used a floor jack to even out the load and unweight the transmission mount so I could zip off those 4 nuts, as well as all the other mounts. By this time the longitudinal member running between the subframe and the radiator support was long gone, so I just had to disconnect the driver's side and rear mounts. Easy enough.

Now with everything disconnected, adjust your load leveler. The beauty of this thing is that it allows you to apply the lifting force more towards one side or the other. It was recommended by a friend that I pull the engine/transaxle together out the top so that's what I did. To make this possible, you want to angle the timing side of the engine so that it is the highest point. Use your load leveler to achieve this.

A little bit of patience and angling the fk out of the whole thing and it comes right out, no problemo.

There are two O Rings that the FSM wants you to replace on the T-Case. Are they for sure going to leak if you don't? Probably not. But mine had 116k miles and I sure as sht not going to reuse O Rings. And they're cheap!
Made a little apparatus to store the engine/trans on.
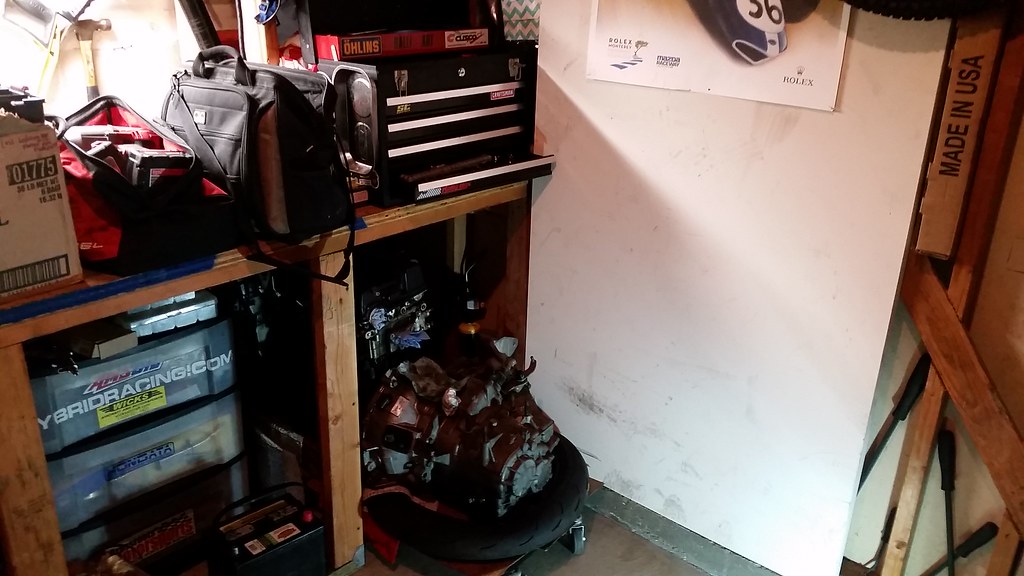
Fits like a glove.
Now that the engine is built, it just needs to be timed. But first, I need to rob some parts off the old engine. I decided to do all this with the original engine out of the car. On to the engine removal!
Make sure *everything* is disconnected. The transfer case may turn out to be a bit of a challenge. I used a combination of patience, careful prying, and bungees to get it out of the way.
Attach the load leveler- that's the yellow chingadera. It's a must have. More on that in a second.
I used a floor jack to even out the load and unweight the transmission mount so I could zip off those 4 nuts, as well as all the other mounts. By this time the longitudinal member running between the subframe and the radiator support was long gone, so I just had to disconnect the driver's side and rear mounts. Easy enough.
Now with everything disconnected, adjust your load leveler. The beauty of this thing is that it allows you to apply the lifting force more towards one side or the other. It was recommended by a friend that I pull the engine/transaxle together out the top so that's what I did. To make this possible, you want to angle the timing side of the engine so that it is the highest point. Use your load leveler to achieve this.
A little bit of patience and angling the fk out of the whole thing and it comes right out, no problemo.
There are two O Rings that the FSM wants you to replace on the T-Case. Are they for sure going to leak if you don't? Probably not. But mine had 116k miles and I sure as sht not going to reuse O Rings. And they're cheap!
Made a little apparatus to store the engine/trans on.
Fits like a glove.
The following users liked this post:
SoSoEVO (Sep 9, 2019)
Sep 5, 2019, 12:20 AM
#26
Next up, timing.

First order of business, take needed items off the old engine and put them on the new engine. I actually didn't need very much- I had purchased just about everything on the timing side, so I only had to snag the crank sensor, tensioner arm, and the engine mount bracket/pulley support bracket. Probably not a bad idea to carefully clean the crank sensor while you are in there.

And there we go.Transfer complete, and new parts in place. Ready to be belted.

Belt on, all marks lined up, tensioner grenade pin free to insert/remove after turning it over 3 times and waiting 15 minutes.
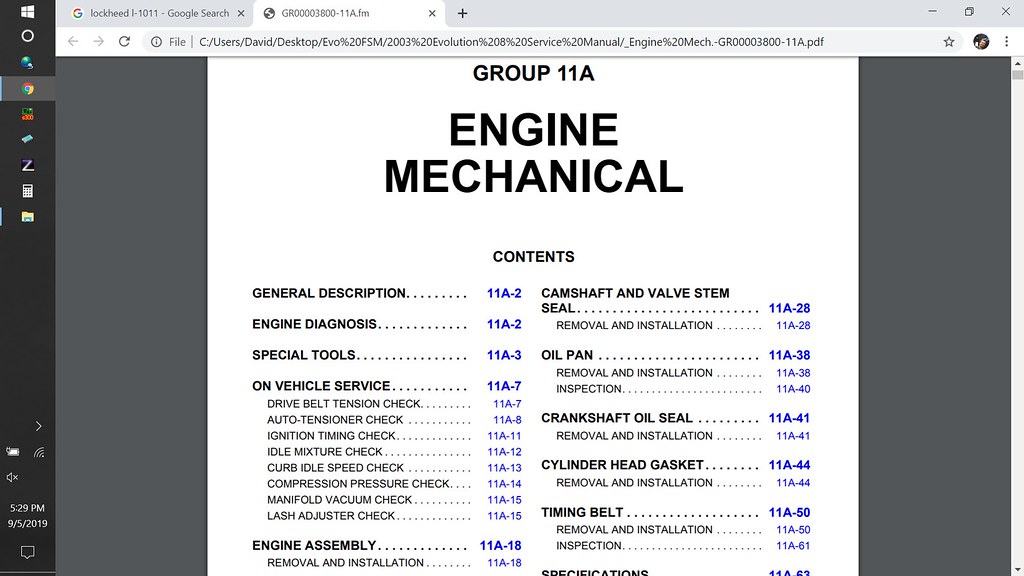
I was pulling my hair out following the last few steps of the procedure in the FSM. You'll want to note that the FSM gives two different sets of directions, depending on if you are looking at the procedure as outlined in chapter 11A or chapter 11B. One of them is retarded and the other makes complete sense, specifically the part referring to setting the tensioner. In hindsight, it's almost hilariously bad. I have the FSM on a different computer so I'm going to try to remember to come back and edit this to provide some more info here.
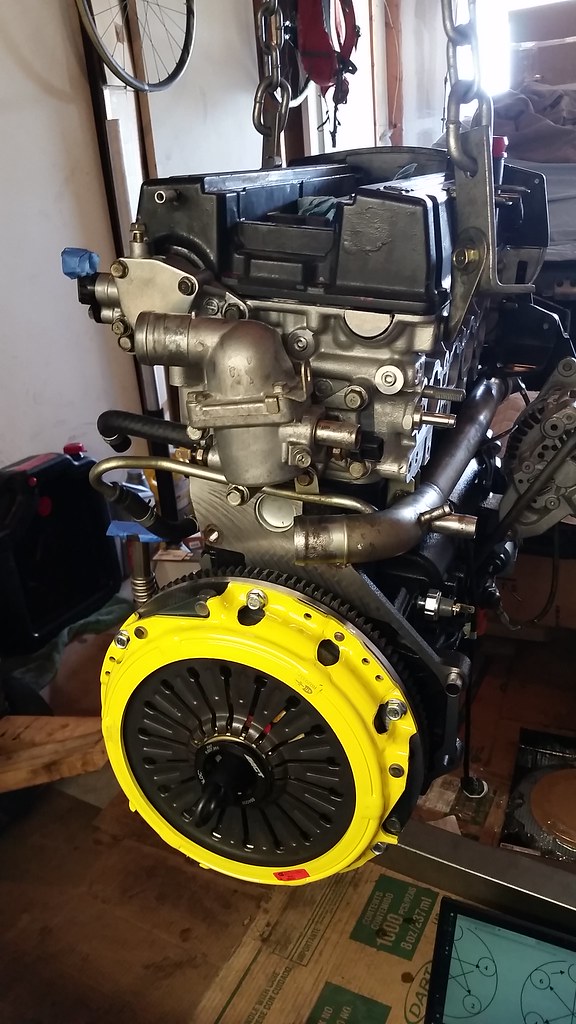
Before mating the new engine with the trans, it was time to install the new clutch. I went with the tried and true ACT ME2-HDSS. (Heavy duty pressure plate/sprung hub street disc). https://www.advancedclutch.com/produ...ung-me2-hdss-2
I opted to ditch the included TOB in favor of an OEM TOB after reading several horror stories about the ACT TOB failing.
-------------------------> Here's another spoiler alert. I'm about 1k miles in now on the new setup and I LOVE this clutch so far. Very linear engagement, super mellow driving characteristics, and still gives confidence that there is plenty of holding capacity for my relatively modest goals. That and product fit/finish were great. Packaging was also very good. I've had a few ACT clutches over the years and they've all been good for me.

Meanwhile during the clutch install the old engine makes a great coffee table.


Well bless my stars, a factory clutch! I had to throw these pics in there. Not sure how many of these cars are still running factory clutches. But this one still seemed perfectly happy, and was holding great @ 359 lb ft.

Got the trans bolted up to the new engine and back in she goes. Note that I swapped my spare, ugly, craig's list-sourced valve cover on whenever I was lifting the engine. Even though my "good" valve cover desperately needs refinishing, there's no sense in making it worse.

Beautiful. Time to start buttoning it up.

Mmmm.

And there we are.
Next step was to fill all fluids, go back and double, triple check everything, and then pray to whatever. I really wish I had primed the engine by spinning the oil pump sprocket (prior to T-Belt install) with the impact/drill/what have you. At that time, I did not have the VC on and I didn't want to go making a mess. Boy was that some horrible logic.
Before firing the engine for the first time, I wanted to make sure and prime the oiling system so I disconnected the crank sensor and ran the starter for a while. The oil pump was cavitating and not drawing anything up from the pan. Great! Not really. It was the night before I had to leave to go to Quebec for a week for work. I did not want to leave the job at this point. OK...what am I missing here...
Called RRE.
They asked if I had refilled the oil cooler.........
Nope. Shoot! Good idea. So I disconnected and manually refilled the oil cooler.
Tried it again....pump still isn't drawing any oil into the system. No oil pressure.
At this point it was time to fill the oil system...the hard way.
I drained the pain, disconnected the turbo feed, and manually backfilled the system through the head's outlet port for the turbo oil feed. As we know, this is the end of the line for the oil circuit, so we are basically working our way backwards through the oiling circuit. And I thought priming it with the VC off was going to be a mess. Man, let me tell you this sucked. But sure as sh*t it worked! Cranked the engine, immediately built oil pressure, reconnected the crank sensor and fired her. 100 psi of oil pressure and we were off and running.
Next step was bleeding the cooling system and checking for leaks. By now it's about 10pm and I had to leave for LAX in 5 hours.
Next installment will be test drive and teething issues
First order of business, take needed items off the old engine and put them on the new engine. I actually didn't need very much- I had purchased just about everything on the timing side, so I only had to snag the crank sensor, tensioner arm, and the engine mount bracket/pulley support bracket. Probably not a bad idea to carefully clean the crank sensor while you are in there.
And there we go.Transfer complete, and new parts in place. Ready to be belted.
Belt on, all marks lined up, tensioner grenade pin free to insert/remove after turning it over 3 times and waiting 15 minutes.
I was pulling my hair out following the last few steps of the procedure in the FSM. You'll want to note that the FSM gives two different sets of directions, depending on if you are looking at the procedure as outlined in chapter 11A or chapter 11B. One of them is retarded and the other makes complete sense, specifically the part referring to setting the tensioner. In hindsight, it's almost hilariously bad. I have the FSM on a different computer so I'm going to try to remember to come back and edit this to provide some more info here.
Before mating the new engine with the trans, it was time to install the new clutch. I went with the tried and true ACT ME2-HDSS. (Heavy duty pressure plate/sprung hub street disc). https://www.advancedclutch.com/produ...ung-me2-hdss-2
I opted to ditch the included TOB in favor of an OEM TOB after reading several horror stories about the ACT TOB failing.
-------------------------> Here's another spoiler alert. I'm about 1k miles in now on the new setup and I LOVE this clutch so far. Very linear engagement, super mellow driving characteristics, and still gives confidence that there is plenty of holding capacity for my relatively modest goals. That and product fit/finish were great. Packaging was also very good. I've had a few ACT clutches over the years and they've all been good for me.
Meanwhile during the clutch install the old engine makes a great coffee table.
Well bless my stars, a factory clutch! I had to throw these pics in there. Not sure how many of these cars are still running factory clutches. But this one still seemed perfectly happy, and was holding great @ 359 lb ft.
Got the trans bolted up to the new engine and back in she goes. Note that I swapped my spare, ugly, craig's list-sourced valve cover on whenever I was lifting the engine. Even though my "good" valve cover desperately needs refinishing, there's no sense in making it worse.
Beautiful. Time to start buttoning it up.
Mmmm.
And there we are.
Next step was to fill all fluids, go back and double, triple check everything, and then pray to whatever. I really wish I had primed the engine by spinning the oil pump sprocket (prior to T-Belt install) with the impact/drill/what have you. At that time, I did not have the VC on and I didn't want to go making a mess. Boy was that some horrible logic.
Before firing the engine for the first time, I wanted to make sure and prime the oiling system so I disconnected the crank sensor and ran the starter for a while. The oil pump was cavitating and not drawing anything up from the pan. Great! Not really. It was the night before I had to leave to go to Quebec for a week for work. I did not want to leave the job at this point. OK...what am I missing here...
Called RRE.
They asked if I had refilled the oil cooler.........
Nope. Shoot! Good idea. So I disconnected and manually refilled the oil cooler.
Tried it again....pump still isn't drawing any oil into the system. No oil pressure.
At this point it was time to fill the oil system...the hard way.
I drained the pain, disconnected the turbo feed, and manually backfilled the system through the head's outlet port for the turbo oil feed. As we know, this is the end of the line for the oil circuit, so we are basically working our way backwards through the oiling circuit. And I thought priming it with the VC off was going to be a mess. Man, let me tell you this sucked. But sure as sh*t it worked! Cranked the engine, immediately built oil pressure, reconnected the crank sensor and fired her. 100 psi of oil pressure and we were off and running.
Next step was bleeding the cooling system and checking for leaks. By now it's about 10pm and I had to leave for LAX in 5 hours.
Next installment will be test drive and teething issues
Last edited by Apex Hunter; Sep 5, 2019 at 11:11 AM. Reason: Typos etc
Sep 5, 2019, 06:12 PM
#28
^ No kidding. This took up 95% of my free time during the month of June. I had spent a bunch of time prepping for the project during May also.
Here's what I was alluding to in my previous post regarding the discrepancies in the FSM regarding setting the TB tensioner pulley. The instructions in the 11A (Engine Mechanical) chapter are far more straightforward. You might even say the instructions in the 11B (Engine Overhaul) are straight up problematic. I'll let them speak for themselves here.
Good

???


Kind of a side note here, I found that using a 1/4" beam style torque wrench to hit 31 in-lbs was the right tool, thanks Jafro. A breakaway style torque wrench would have sucked.
Here's what I was alluding to in my previous post regarding the discrepancies in the FSM regarding setting the TB tensioner pulley. The instructions in the 11A (Engine Mechanical) chapter are far more straightforward. You might even say the instructions in the 11B (Engine Overhaul) are straight up problematic. I'll let them speak for themselves here.
Good
???
Kind of a side note here, I found that using a 1/4" beam style torque wrench to hit 31 in-lbs was the right tool, thanks Jafro. A breakaway style torque wrench would have sucked.
Oct 3, 2019, 08:37 AM
#29
Newbie

Join Date: Jul 2017
Location: Pennsylvania
Posts: 3
Likes: 0
Received 0 Likes
on
0 Posts
Nice work man! Im starting my reassembly right now. Im gonna be following this closely! One thing though, When you installed the Balance shafts, did they spin freely as soon as you put them in? I set the timing on the motor before and I remember them wanting to spin on their own a little bit. I just want to double check before I get too far ahead. And its impossible to find anyone that hasnt just deleted them
Oct 8, 2019, 09:15 PM
#30
^Hey, thanks and sorry for the slow reply! Feel free to PM me as needed.
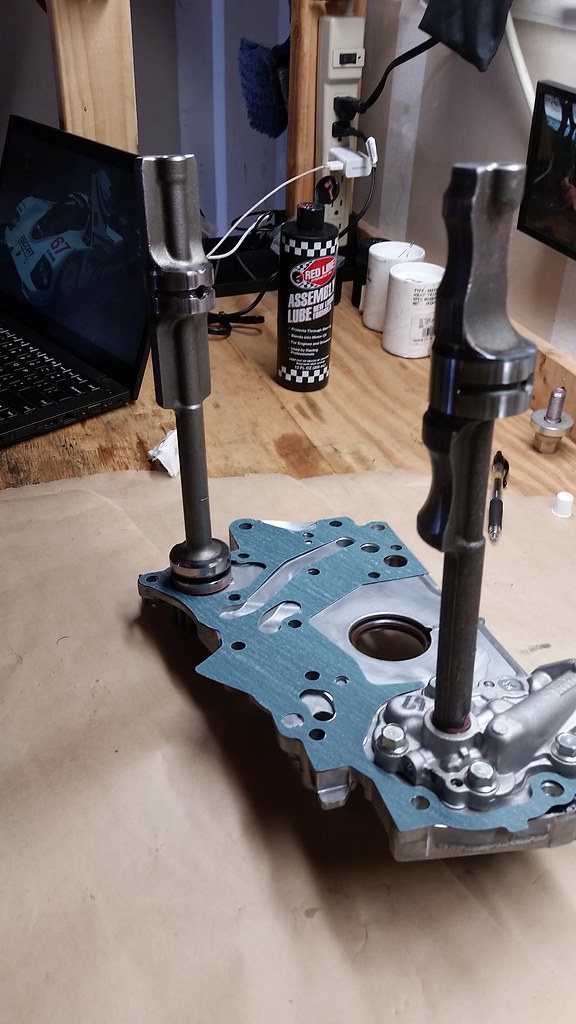
The balance shafts were able to spin freely after installation. I actually put them onto the front case first to make it easier to torque those fasteners. Then I installed the front case and balance shafts together as one assembly. I hope that makes sense. I put plenty of assembly lube on the bearing surfaces for the shafts. They actually had more clearance that I was expecting. I wasn't worried though, as the new shortblock was shipped with the BS bearings already installed, and these balance shafts were brand new. It's unlikely I received parts that weren't manufactured to tolerance and somehow were missed in QC.
I will say that the balance shafts on the old motor (with 116k miles) definitely had more play in them and spun even more freely, and the heavy spot on the "front" shaft was much easier to spot on the old motor when I was setting the timing.