


APR rear diffuser. write-up


APR rear diffuser. write-up
did a search, and there isnt much on this topic.... so i'll do a write up.
always wanted a rear diffuser, and the one from APR looked the best for me. its functional, and isnt too much "in your face".
decided to go with CF, rather than plastic, and not sure it was the right choice.
CF, comes from a mold, and more importantly is shaped and hardens in a way that no 2 'same' parts can ever be absolutely identical. accordingly, the one i got, although it looked perfect, wasnt a perfect fit. one corner stuck out a bit, and another was crooked altogether. plus, there are small narrow gaps around the contour, where the diffuser actually touches the top part of the bumper... but when we saw this, being that this is CF, we (i went to a repair shop and put the car up on a lift) couldnt bend it , heat it up to shape it, or do much else... we ended up having to put more screws and double sided tape to hold everything together. now there are several small screws where they shoudlnt be...
i have a feeling that with plastic, it would have been a whole lot easier. although it must be said, CF just looks better in general
pics to follow
.
always wanted a rear diffuser, and the one from APR looked the best for me. its functional, and isnt too much "in your face".
decided to go with CF, rather than plastic, and not sure it was the right choice.
CF, comes from a mold, and more importantly is shaped and hardens in a way that no 2 'same' parts can ever be absolutely identical. accordingly, the one i got, although it looked perfect, wasnt a perfect fit. one corner stuck out a bit, and another was crooked altogether. plus, there are small narrow gaps around the contour, where the diffuser actually touches the top part of the bumper... but when we saw this, being that this is CF, we (i went to a repair shop and put the car up on a lift) couldnt bend it , heat it up to shape it, or do much else... we ended up having to put more screws and double sided tape to hold everything together. now there are several small screws where they shoudlnt be...
i have a feeling that with plastic, it would have been a whole lot easier. although it must be said, CF just looks better in general
pics to follow
.



i run the same diffuser and love the way it looks. have the same issues with the corners not coming flush with the bumper though. im prolly just going to rivit them flush when i get some free time.

thats what im thinking, but wont the CF crack under pressure, especially in the corners ??
car is filthy. i hope it would look better when car is clean.
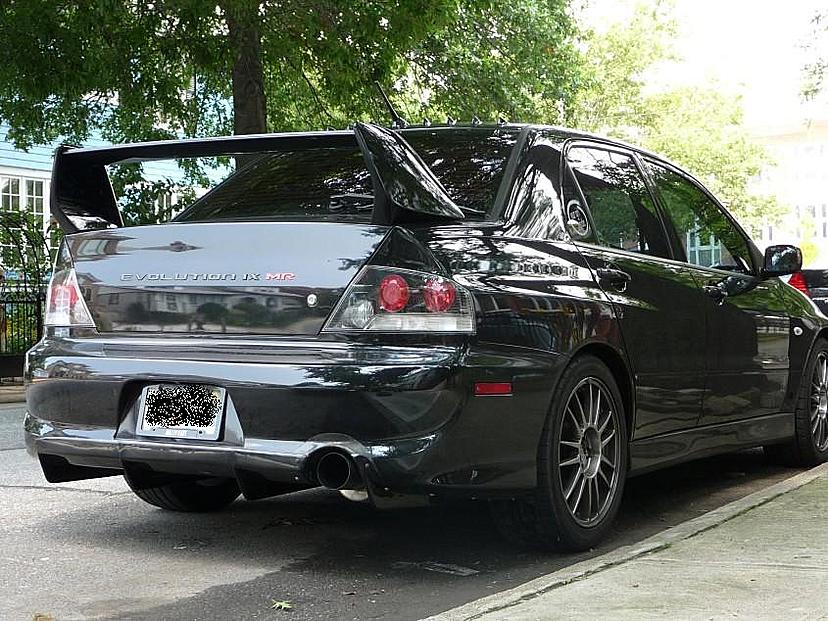
the red arrows point to where i had to put in extra screws (ugly but they hold the corners to the bumper
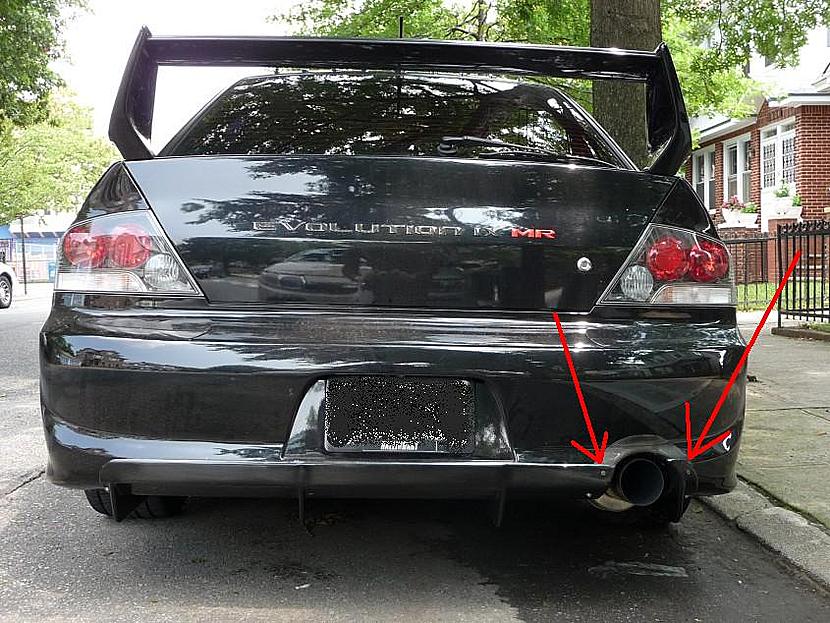
fuzzy, but you can see the Diffuser clearer
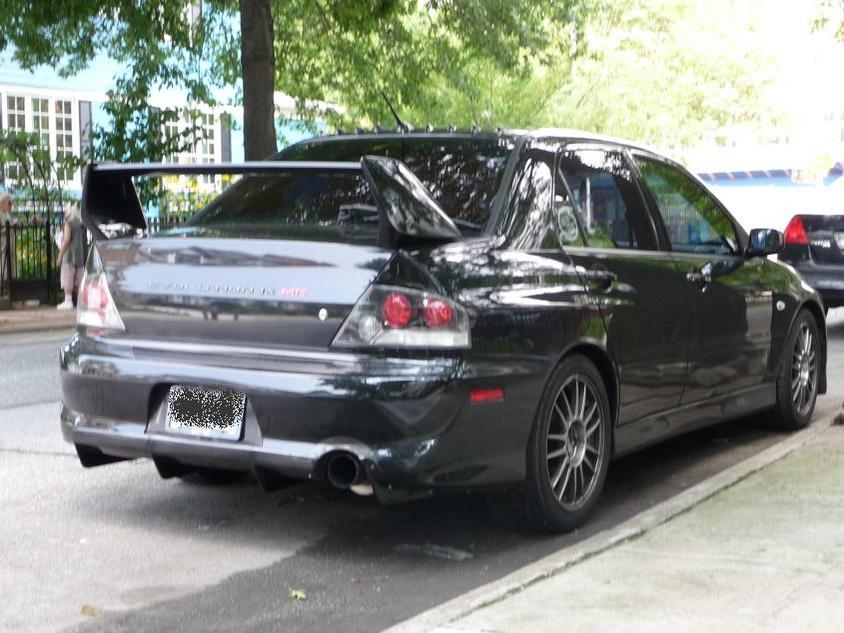
the red arrows point to where i had to put in extra screws (ugly but they hold the corners to the bumper
fuzzy, but you can see the Diffuser clearer
Last edited by S6devil; Aug 3, 2009 at 09:02 AM.

i put the extra screws on the underside and it made it fit snug and used black touch up paint to cover the extra ones
i like the piece though except when it comes time to strap down on the dyno its a pita
i like the piece though except when it comes time to strap down on the dyno its a pita
Trending Topics


I found the same issues as you when installing my CF diffuser. I used 3/16" rivets with washers and pulled as tight as I could to have everything sit perfectly flush. Perfectly flush ended up being a pipe dream. From 20 feet you wouldn't notice a thing. Standing directly over the back of the bumper you notice the gap.


Thread
Thread Starter
Forum
Replies
Last Post
YogSaahoth
Evo How Tos / Installations
84
Nov 10, 2016 02:49 PM
WhoDatEvo
Evo X How Tos / Installations
12
Nov 2, 2016 10:10 PM
JayDub514
For Sale - Interior / Exterior / Sound / Styling
2
Jun 24, 2016 06:35 AM
D Grade
Northwest Region
11
Sep 12, 2011 09:43 PM
Ted B
Evo How To Requests / Questions / Tips
18
Nov 8, 2010 12:30 AM
