Road/Race Piggy-Back Evaluation
 Jul 12, 2007, 02:48 PM
#1
Evolved Member
Thread Starter

Join Date: May 2007
Location: Ft Worth
Posts: 606
Likes: 0
Received 0 Likes
on
0 Posts
Road/Race Piggy-Back Evaluation *More Pics*
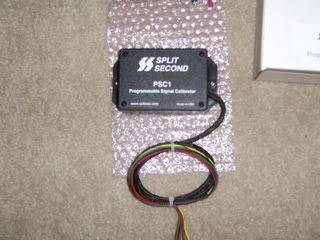
Ok guys and gals, its is official. I have recieved my 08 GTS (manual) RRM ECU piggy back. I'm so excited to be a tester on this thing. Due to the Marine Corps I won't be able to install it this weekend. Besides, I'm also waiting on the pulley to do dynos anyways.
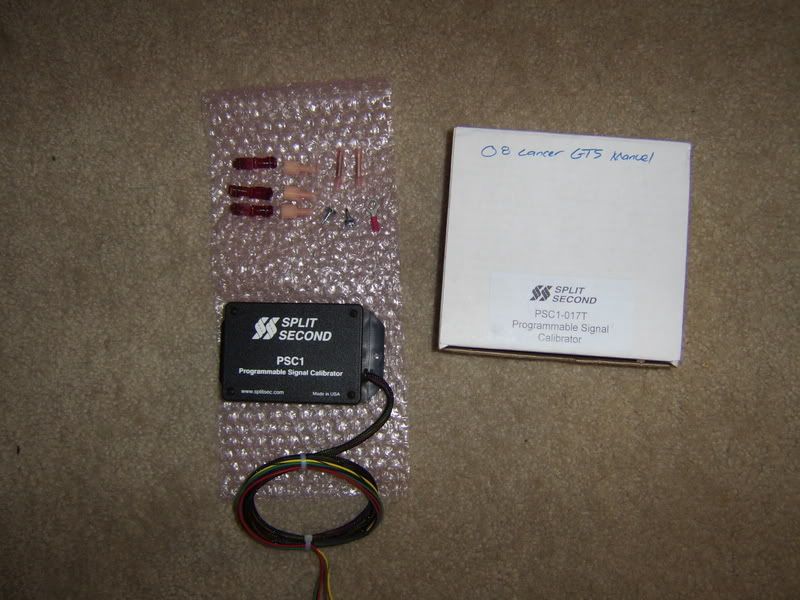
FIRST IMPRESSION: This thing is super nice. Rock and the boys at RRM went all out. Its very clean and simple design. Weighs maybe 1/2 a pound if that. Measures in at 5" long, 3" tall, and 1.5" thick. All wires are color coded (unless you're color blind ).
).
All hardware has been supplied to install it. When I first opened it I saw a 2 page instruction sheet and got a little worried. It took me literally 2 minutes to read the directions and I fully understood them. YES, they are that simple!!!
Looking at the provided hardware and seeing how it wires in, I have came up with a better way to make this completely removeable IF you ever have to take the car into the dealership. Its very simple and I will be working with Rock and the other RRM boys to get this out to everyone when its fully released.
On with the pics:
This will be an on going review where I will post pics of the install step-by-step and dyno sheets.
So far RRM gets a huge and I don't think that will change.
FIRST IMPRESSION: This thing is super nice. Rock and the boys at RRM went all out. Its very clean and simple design. Weighs maybe 1/2 a pound if that. Measures in at 5" long, 3" tall, and 1.5" thick. All wires are color coded (unless you're color blind
). All hardware has been supplied to install it. When I first opened it I saw a 2 page instruction sheet and got a little worried. It took me literally 2 minutes to read the directions and I fully understood them. YES, they are that simple!!!
Looking at the provided hardware and seeing how it wires in, I have came up with a better way to make this completely removeable IF you ever have to take the car into the dealership. Its very simple and I will be working with Rock and the other RRM boys to get this out to everyone when its fully released.
On with the pics:
This will be an on going review where I will post pics of the install step-by-step and dyno sheets.
So far RRM gets a huge
and I don't think that will change.
Last edited by SeRious08; Jul 21, 2007 at 01:28 PM.
 Jul 12, 2007, 04:35 PM
#2
Evolving Member
Join Date: Mar 2007
Location: INDY
Posts: 491
Likes: 0
Received 0 Likes
on
0 Posts
So are you going to use wire snaps? And by the way you are a lucky SOB get that mother hooked up and just tell the SGT. that your sick and you need a two days off and full use of the tank dyno
Jul 12, 2007, 06:58 PM
#3
Evolved Member
Thread Starter
Join Date: May 2007
Location: Ft Worth
Posts: 606
Likes: 0
Received 0 Likes
on
0 Posts
Actually what RRM sent was very similar to the idea that I had, but there is one thing that I would change to make it completely removeable. I'll post pics early next week.
Jul 19, 2007, 10:24 AM
#4
Evolved Member
Thread Starter
Join Date: May 2007
Location: Ft Worth
Posts: 606
Likes: 0
Received 0 Likes
on
0 Posts
Well, let me tell you.
Total time to install: 26 minutes
Service Engine Light: No
Does it look stock: Yes and no - you can hide the wires and box if you want up under the battery tray or somewhere else.
Completely Removeable: Yes! For those that are worried about warranty I have made it where it can be removed without a dealership knowing.
Idle: Perfect. No change
Redline: Remains the same
Gas milage per gallon: Mine actually increased 3 miles per gallon so far. That was just driving it to work this morning. It will take a good week to get concrete avg.
UPDATE: Just filled up the car.
Pre-piggy: 21-22 mpg city
After piggy: 25.5 mpg city
Butt Dyno: There is a slight increase in hp but I felt it more in the tq area. With the manual tranny piggy it starts pulling harder than stock from about 3200 rpms to redline. Not sure of the gain numbers but its good enough to feel. I know on the stock dyno the tq starts to fall on its face right at 5000 rpms. Not now. It feels as if it more flatlines instead of dropping. I also found it easier to break the tires loose when shifting into second.
I will post pics tonight.
Last edited by SeRious08; Jul 23, 2007 at 01:04 PM.
Jul 19, 2007, 01:23 PM
#6
Evolved Member
Thread Starter
Join Date: May 2007
Location: Ft Worth
Posts: 606
Likes: 0
Received 0 Likes
on
0 Posts
There goal wasn't for all out power right now. Remember, this piggy is re-programmable.
I feel they have accomplished what they wanted.
1. Increase the Tq across the entire powerband
2. Increase the mpg
3. Smooth out the air/fuel
Once cams, heads, headers, turbos ect are released, you can reprogram it.
I feel they have accomplished what they wanted.
1. Increase the Tq across the entire powerband
2. Increase the mpg
3. Smooth out the air/fuel
Once cams, heads, headers, turbos ect are released, you can reprogram it.
Trending Topics
Jul 19, 2007, 02:36 PM
#8
Evolving Member

Join Date: Jun 2007
Location: Nanaimo BC Canada
Posts: 132
Likes: 0
Received 0 Likes
on
0 Posts
what he decribed above is what most people will be happy to hear.. the mid range increase where you will spend most of your time
low and mid increases are exactly what I am looking for, the higher rpm gains are just gravy
I think I'm more in anticipation of what cams might come out to work with this then the piggy on a mostly stock engine but hey.. everything so far are excelent building blocks ...
low and mid increases are exactly what I am looking for, the higher rpm gains are just gravy
I think I'm more in anticipation of what cams might come out to work with this then the piggy on a mostly stock engine but hey.. everything so far are excelent building blocks ...
 Jul 20, 2007, 06:45 AM
#10
EvoM Staff Alumni
iTrader: (88)
Join Date: Aug 2003
Location: Concord Township, Ohio
Posts: 8,733
Likes: 0
Received 3 Likes
on
3 Posts
Cleaned up a lot of posts between the thread start and actual results.
Also, note that the car has an RRM intake and GReddy exhaust.
Not really. It's a piggyback on a naturally aspirated car. You're only looking at a few HP and TQ here and there.
We have to be realistic, folks. The piggyback is the best mod you can do to a Lancer, but it's still not going to free up 20hp. When the car is N/A, it's just a big air pump. Suck, explode, exhale. The engineers did a pretty good job of tuning it. What RRM does it make it more aggressive and sporty. Getting HP on an N/A motor isn't exactly like getting blood from a stone, but it's close.
Please try to be realistic with your expectations. That's all I ask. And I'm sure Rob would agree with me.
You can call and order, as far as I know. It's just not on the website yet.
Road/Race Phone Number - 562.906.0080
Also, note that the car has an RRM intake and GReddy exhaust.
We have to be realistic, folks. The piggyback is the best mod you can do to a Lancer, but it's still not going to free up 20hp. When the car is N/A, it's just a big air pump. Suck, explode, exhale. The
Please try to be realistic with your expectations. That's all I ask. And I'm sure Rob would agree with me.
You can call and order, as far as I know. It's just not on the website yet.
Road/Race Phone Number - 562.906.0080
Jul 21, 2007, 01:46 PM
#11
Evolved Member
Thread Starter
Join Date: May 2007
Location: Ft Worth
Posts: 606
Likes: 0
Received 0 Likes
on
0 Posts
Ok here are a few more pics of the install.
Removed the bolts that hold ECU down. There are 3. One 10mm and two 12mm.
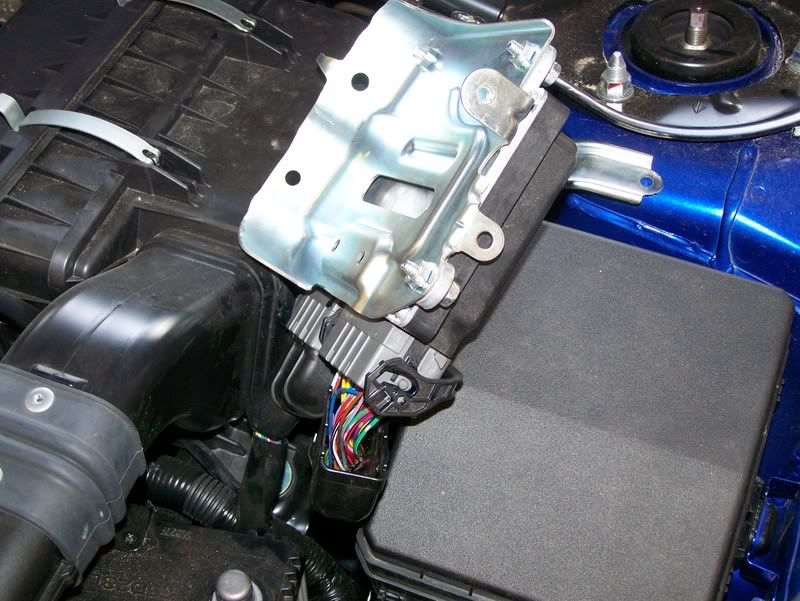
ECU is unplugged and put to the side. There are also 2 zip-ties that hold the harnesses. I removed these to be able to get to the harnesses easier.
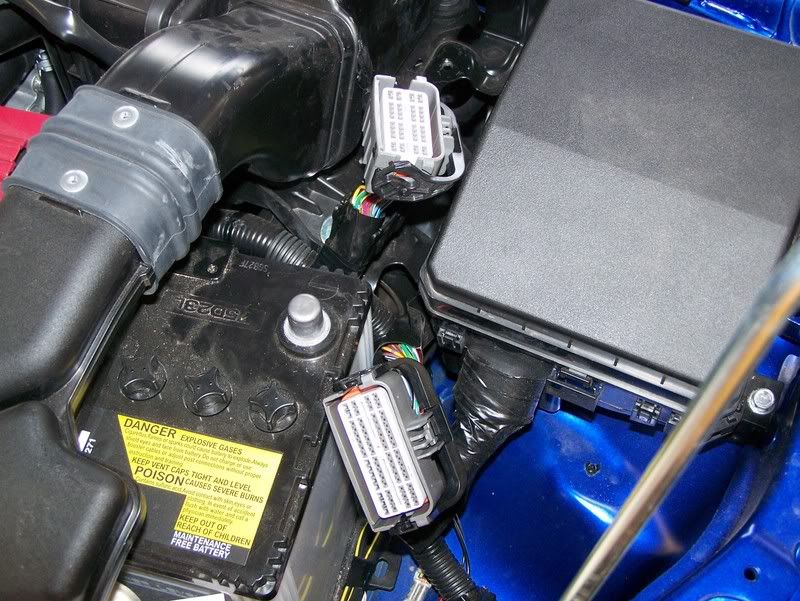
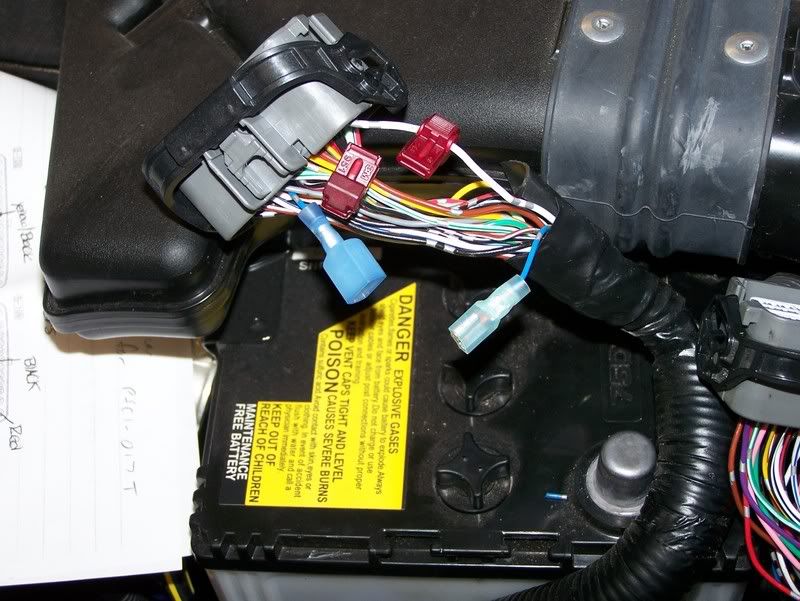
Here I was beginning the splicing. If you look close I have peeled back some of the plastic cover of the black wire. This is to make sure a good contact is made. Once the wire splice clip is added you may choose to solder it.

More splicing. If you noticed on the one wire (MAF signal) I have placed a male/female connector.
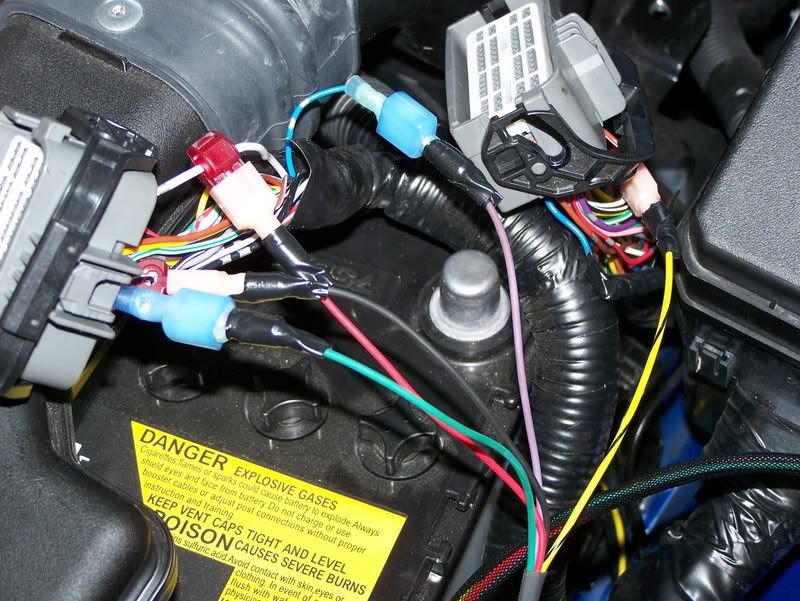
Here I have completed the wiring of the piggy. NOTE: In this pic I actually made a mistake and changed it. I didn't get another pic. The green wire actually goes to the MAF side of the blue wire. The purple wire goes to the ECU harness side.
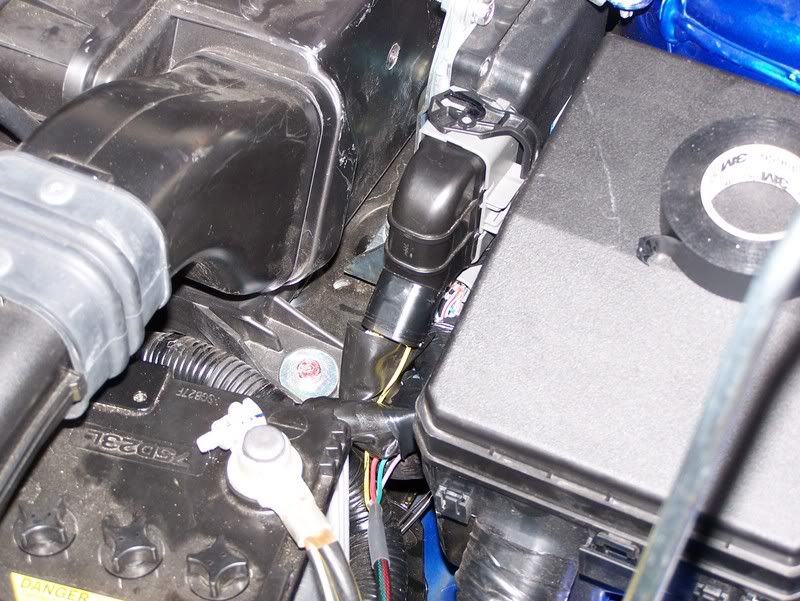
Here is my piggy mounted (temporarily). I was in a rush to get the results out to you guys so I didn't permanently mount it. The piggy comes with enough wire to mount it on the fire wall or for a stealthy look, mount it under the batter tray.

Here she is all put back together. Still looks basicly stock to me. I could have taken an extra 10 minutes and wrapped the wires in some split loom and really make it look stock. But I will do that once I permenantly install it. NOTE: Permanent does not mean that it can't be removed in case of warranty.
If you guys need more pics or info let me know.
Dyno is coming up either next weekend or week after.
Removed the bolts that hold ECU down. There are 3. One 10mm and two 12mm.
ECU is unplugged and put to the side. There are also 2 zip-ties that hold the harnesses. I removed these to be able to get to the harnesses easier.
Here I was beginning the splicing. If you look close I have peeled back some of the plastic cover of the black wire. This is to make sure a good contact is made. Once the wire splice clip is added you may choose to solder it.
More splicing. If you noticed on the one wire (MAF signal) I have placed a male/female connector.
Here I have completed the wiring of the piggy. NOTE: In this pic I actually made a mistake and changed it. I didn't get another pic. The green wire actually goes to the MAF side of the blue wire. The purple wire goes to the ECU harness side.
Here is my piggy mounted (temporarily). I was in a rush to get the results out to you guys so I didn't permanently mount it. The piggy comes with enough wire to mount it on the fire wall or for a stealthy look, mount it under the batter tray.
Here she is all put back together. Still looks basicly stock to me. I could have taken an extra 10 minutes and wrapped the wires in some split loom and really make it look stock. But I will do that once I permenantly install it. NOTE: Permanent does not mean that it can't be removed in case of warranty.
If you guys need more pics or info let me know.
Dyno is coming up either next weekend or week after.
Last edited by SeRious08; Jul 21, 2007 at 01:54 PM.
Jul 23, 2007, 01:06 PM
#14
Newbie

Join Date: Jul 2007
Location: Ottawa, Canada
Posts: 7
Likes: 0
Received 0 Likes
on
0 Posts
Question
My only question is, with all the splicing that is done, won't it be quite abvious to the mechanic at the dealership (assuming you need some warranty work or something) that there has been some tinkering with the ECU?