Custom & Economical Laptop Station
 Nov 24, 2005, 08:20 PM
#1
Custom & Economical Laptop Station
What you need: A HOME DEPOT BIATCH!!! 
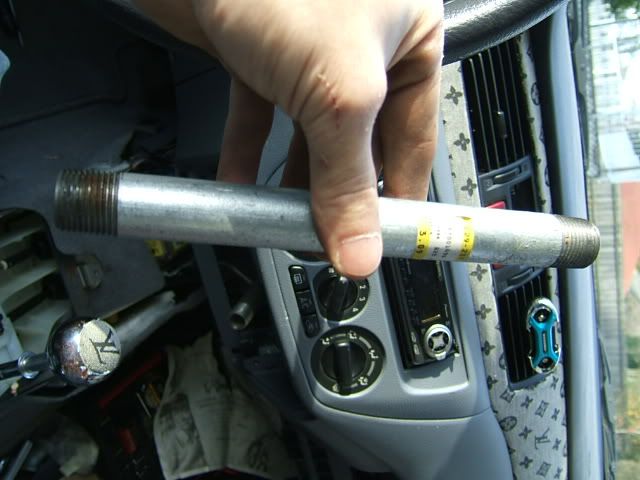
Aright, youll have to forgive me for not posting exact numeral lengths of pipe or measurments. The thing is that where ever you imagine the setup is gonna be, itll end up different, so the fitting is pretty much trial and error on your first run.
I had to get a bunch of pipes, all like "hmm nope, need a longer one... how 'bout his? yup thatll work!" etc. etc.
Also you may not wanna position it like I did so... Do as thou wilt.
Belive me however, if you take you time and do this right, You can tug on ths bar! Its sturdy and strong. Your lappy will be all good, dont even worry about bumpy roads.
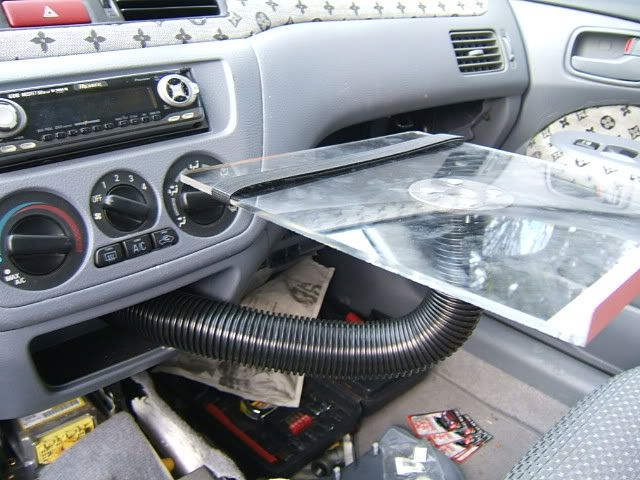
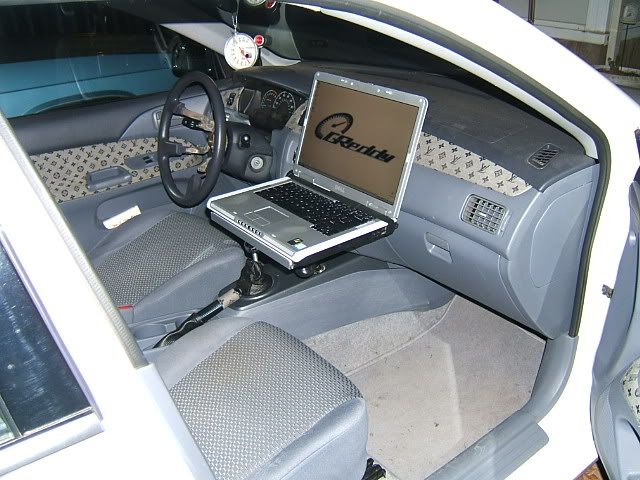
Cut a peice o' Plexi glass to about 13x13 (Dont worry I have a 17" lappy also. This will accomadate most sizes wide or small)
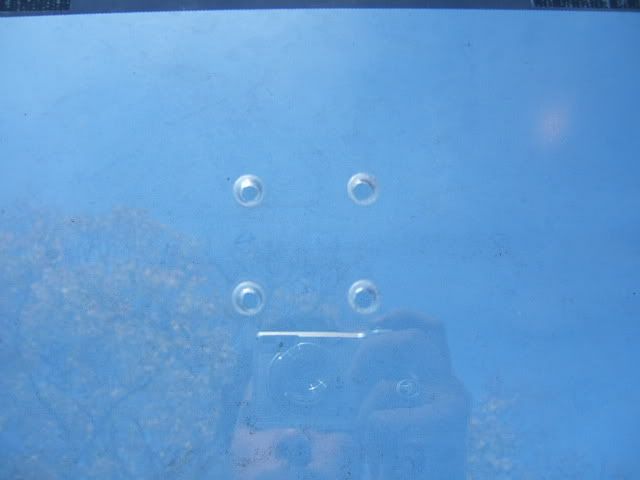
Mark and Drill 4 holes in the center where your flange will go (You'll See...)
I added a velcro strip to be a tie down strap. Its connecter to the plexi (bottom side) with 2 small peices of sticky sided velcro, and pulled around.
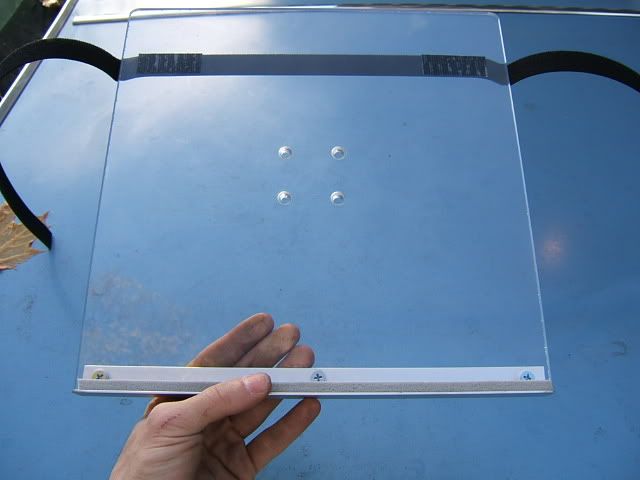
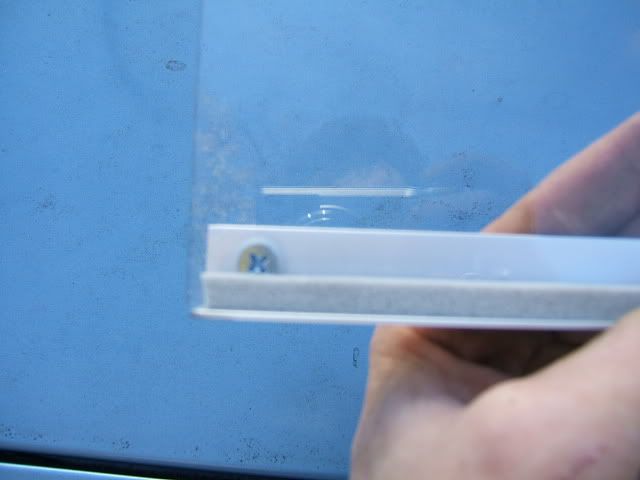
I cut and added a small corner type peice of metal, and screwed it in to make the plexi stronger and to hold the lappy incase it neede to be on a slant.
I then cut a strip of memory foam (sticky on one side) and pasted it on, so it doesnt scratch the laptop.
Now remove the cubby hole by taking out the 2 screws on the inside top, and pull.
The whole cubby just pops out.
Also pull out the console beneath. (You dont have to, but my hands wouldnt fit otherwise)

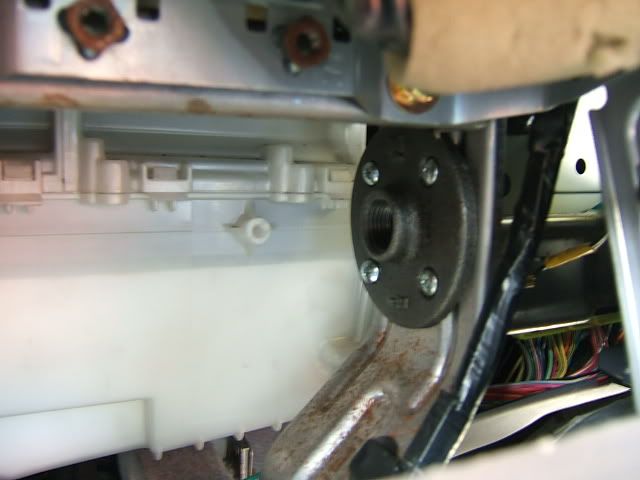
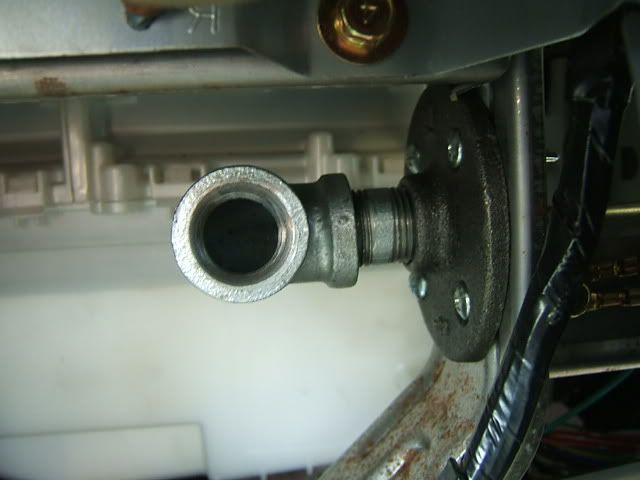
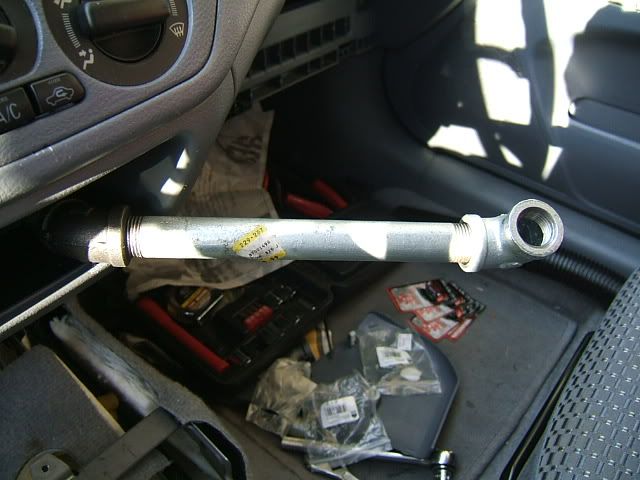
Inside on the Bottom Right, youll see a steel frame.
Use a Dremmel to pre fabricate some holes (Hold flange, mark holes with a sharpie) and insert four 1" (or 1.5") self tapping screws.
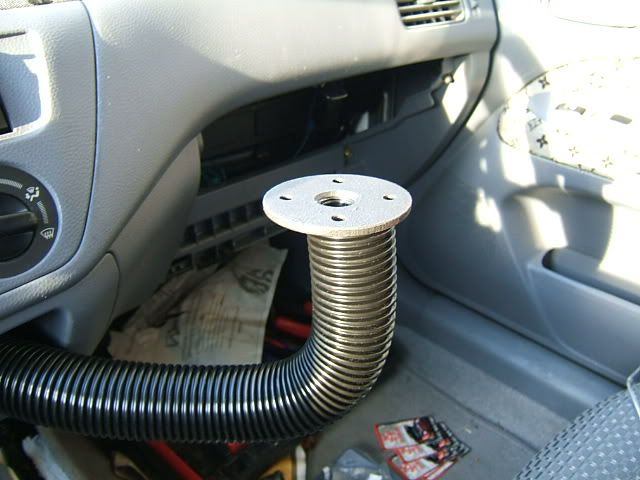
Screw on a 2" flange, then a 90 Degree Elbow
Attatch the longer flange (I wrote "longer" cus itll vary depending on what position/place your comfortable with your laptop being in)
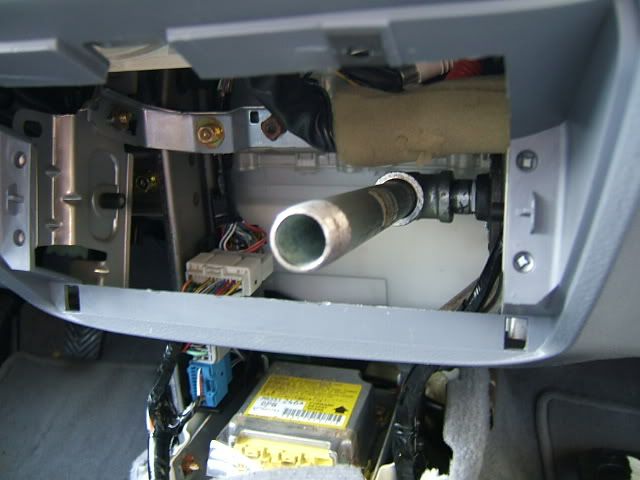
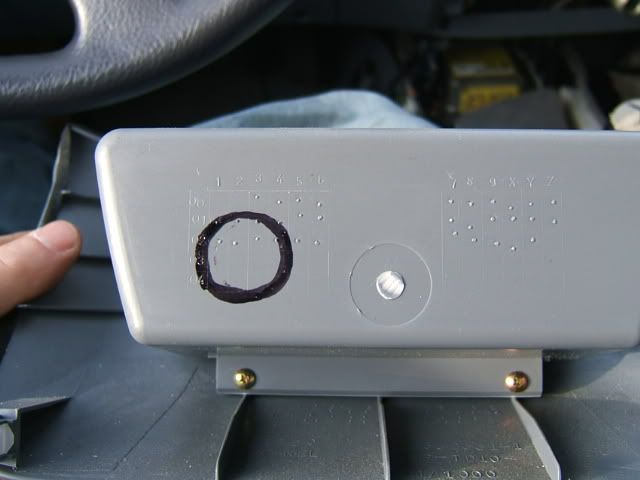
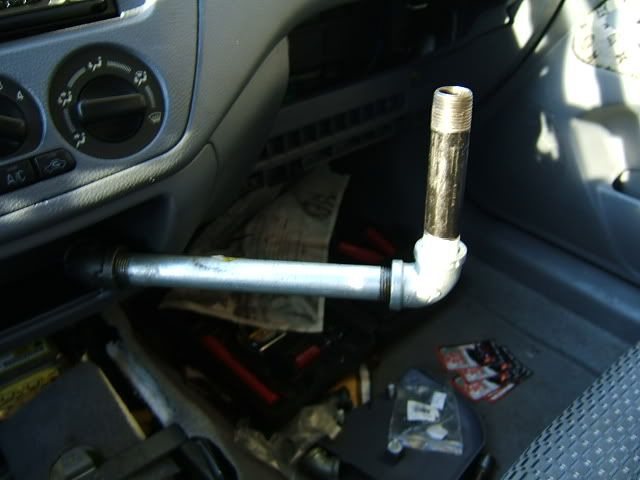
On the back of your cubby, theres a grid etched on it... draw a circle there (where I did) a tiny bit bigger than the width of your flange. Bore that circle out.
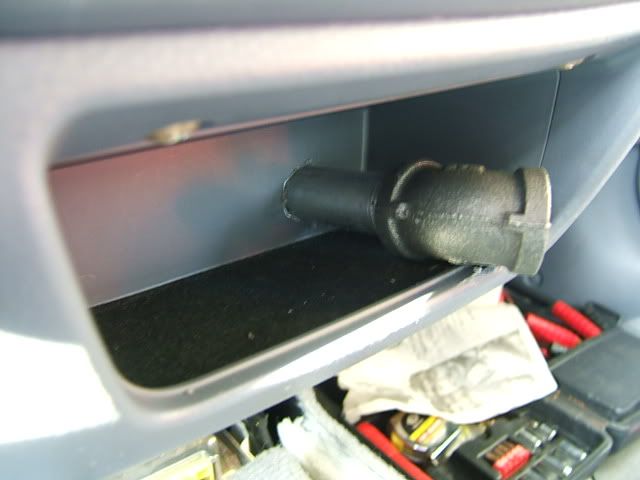
Slide your cubby back in, pipe in the hole, pop it, and screw it... (Get your head outta the gutter ) Then screw on the 45 Degree elbow.
Next Flange, screw that on... then a 90 Degree elbow, then the next flange... You get the idea...
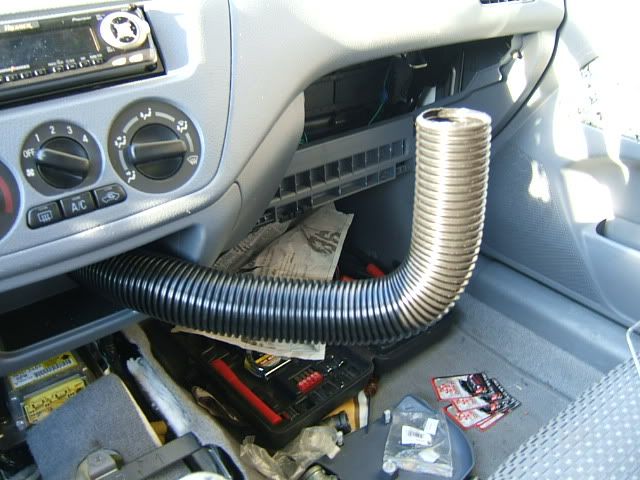
Now place your tubing over, and with a razor slice (around w/ the spiral, Not across) the excess length off, so it doesnt bunch up. You want it to look straight and smooth as possible...
Then at the top screw on your 2nd flat flange (Is there a proper name for that?)
Place your plexi ontop line up the holes, and screw in.
[
Hold up!
You cant put your Laptop on yet, I know your over zealous about it.
Windex the finger prints off, & clean up your mess. Put ALL your tools away.
Ok now do it
...and VOILA!
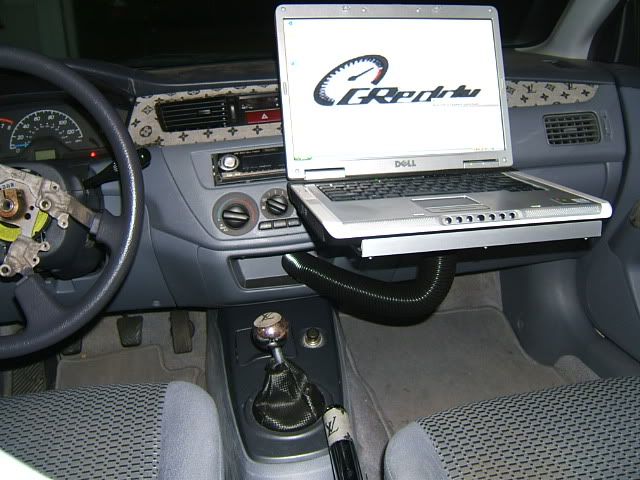
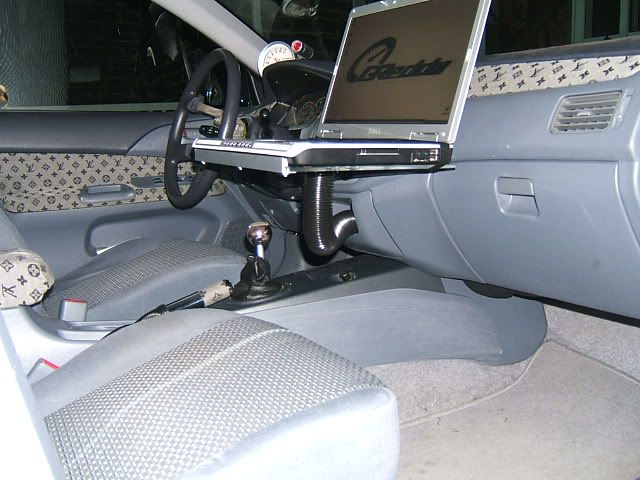
Hope ya like it!
MORE INFO HERE - an addition to make it removeable
Aright, youll have to forgive me for not posting exact numeral lengths of pipe or measurments. The thing is that where ever you imagine the setup is gonna be, itll end up different, so the fitting is pretty much trial and error on your first run.
I had to get a bunch of pipes, all like "hmm nope, need a longer one... how 'bout his? yup thatll work!" etc. etc.
Also you may not wanna position it like I did so... Do as thou wilt.
Belive me however, if you take you time and do this right, You can tug on ths bar! Its sturdy and strong. Your lappy will be all good, dont even worry about bumpy roads.
Cut a peice o' Plexi glass to about 13x13 (Dont worry I have a 17" lappy also. This will accomadate most sizes wide or small)
Mark and Drill 4 holes in the center where your flange will go (You'll See...)
I added a velcro strip to be a tie down strap. Its connecter to the plexi (bottom side) with 2 small peices of sticky sided velcro, and pulled around.
I cut and added a small corner type peice of metal, and screwed it in to make the plexi stronger and to hold the lappy incase it neede to be on a slant.
I then cut a strip of memory foam (sticky on one side) and pasted it on, so it doesnt scratch the laptop.
Now remove the cubby hole by taking out the 2 screws on the inside top, and pull.
The whole cubby just pops out.
Also pull out the console beneath. (You dont have to, but my hands wouldnt fit otherwise)
Inside on the Bottom Right, youll see a steel frame.
Use a Dremmel to pre fabricate some holes (Hold flange, mark holes with a sharpie) and insert four 1" (or 1.5") self tapping screws.
Screw on a 2" flange, then a 90 Degree Elbow
Attatch the longer flange (I wrote "longer" cus itll vary depending on what position/place your comfortable with your laptop being in)
On the back of your cubby, theres a grid etched on it... draw a circle there (where I did) a tiny bit bigger than the width of your flange. Bore that circle out.
Slide your cubby back in, pipe in the hole, pop it, and screw it... (Get your head outta the gutter
) Then screw on the 45 Degree elbow. Next Flange, screw that on... then a 90 Degree elbow, then the next flange... You get the idea...
Now place your tubing over, and with a razor slice (around w/ the spiral, Not across) the excess length off, so it doesnt bunch up. You want it to look straight and smooth as possible...
Then at the top screw on your 2nd flat flange (Is there a proper name for that?)
Place your plexi ontop line up the holes, and screw in.
[
Hold up!
You cant put your Laptop on yet, I know your over zealous about it.
Windex the finger prints off, & clean up your mess. Put ALL your tools away.
Ok now do it
...and VOILA!
Hope ya like it!
MORE INFO HERE - an addition to make it removeable
Last edited by Blacksheepdj; Mar 17, 2006 at 07:45 AM.


Thread
Thread Starter
Forum
Replies
Last Post