Battery Relocation to Trunk
#1
Battery Relocation to Trunk
The details took a lot of thought to try to "do it right". Hope this how-to helps if someone else wants to do this project.
Reason for doing it
One simple reason - heat drastically shortens the life of small AGM batteries. I had selected the PC680 mini-battery to make room for my custom air intake and to reduce weight at the front of the car by about 25 lb. The first one lasted a year. Now, living a life of luxury in the trunk, the battery should survive a lot longer. As a bonus, weight is relocated to the back inside the rear shock, and it creates much room in the engine bay.
Background
Mitsubishi locates the battery in the evo x trunk. I found a really cool paper written by Mitsu engineers that documents their design thinking. Its very interesting and totally worth reading: http://www.nanopulser.com.sg/images/...tem_Design.pdf
Here is a pic of the stock evo setup (credit to "sirsleepsalot" in diymobileaudio forum):

Parts I Chose and Why
Cable: the local PartSource had nice rubber-coated flexible 2 gauge SAE J1127 black cable. 20 feet is enough. Some folks use smaller 4 awg, some use huge 0 awg. I'm not worried about excessive voltage drop with 2 awg. I calculated the worst-case temperature rise for a 12 foot long cable. Assume a worst case starter current draw of 200 amps. Therefore power input Q is 200A x 12V = 2400W=8191 Btu/h. Weight W of 12 feet of copper cable is 3.5 lb. Specific heat of copper Cp is 0.092 Btu/lb-F. Calculate the temperature rise dT of the cable due to the humungous current: dT = Q/(WxCp) = 7.1 degrees F per second. Say the starter is cranked for 8 seconds, the temp rise is 8 x 7.1 = 57F. If the inside car temp is hot at 100F then the cable temp is 157F. This is well within the recommended temp for this cable. And, solder melts at 363F so my soldered terminal connections would not melt. Doing another calculation with this equation, I can crank for 49 seconds at 150 amps draw before the cable reaches 360F. So, we don't have to worry about overheating this size of battery cable.
Fuse: The only fuse I added was to the positive cable near the battery. It is necessary because if that cable shorts out to ground for some reason say due to an accident, there is a rush of over 2000 amps through the cables. You want the fuse to blow very quickly so that current is interrupted before it starts a fire. However, you want to have a high pulse current when starting the car without blowing the fuse. The solution is a slow-blow fuse designed for this exact scenario. Littelfuse makes these called Mega fuses, and a nice mounting box for it too (bought from Newark element 14, online). Look at the Time-Current Characteristic Curve graph here: http://www.littelfuse.com/~/media/au...n_mega_32v.pdf
I selected a 100 amp fuse. If you pick the 100 amp curve, it will blow in 0.02 seconds at 2000 amps, but allows 150 amps for 800 seconds (probably the most current our starter will normally ever draw). Bingo.

cable cutters: get a pair to make your life easy. Seriously.

Cable Terminals: I used six of the common copper ones for 2awg, with a 5/16 " hole.
Making Cables
I chose to solder the terminals. Crimping would be good but I couldn't locate anyone with a professional crimper. Soldering is good too and I know how to do it correctly. Trim back the cable sheath so you see a bit of the copper when inserted fully into the terminal:

Where the cable sticks in, use plumbers emery cloth or sandpaper to make the inside of the terminal shiny (this is critical for a good bond). Apply flux to the copper cable end. Heat the cable end using a propane torch, melt the flux, and touch the copper with resin-core solder to "tin" it a little bit. Set it aside. Heat the terminal (I held it in a vice). Melt resin-core solder inside the terminal so it fills about half way. Then insert your cable end, pushing gently, while keeping the terminal hot - apply heat only to the outside of the terminal and not to the cable. When the cable slides in all the way, then touch your solder to the exposed bit of copper cable above the terminal to melt some additional solder into the joint. When the joint looks full-ish with solder, you're done. Hold the cable in place for several seconds while it cools enough to solidify the joint. Having someone there to help you hold things is recommended. When all is cool, you can fit some heatshrink tubing over the joint.
The Engine Bay
I wanted to keep the original battery terminals up front. It makes me cringe when I see originals cut and butchered and taped together. Also, it presents an easy way to use booster cables. I had some SAE battery terminals for the PC680 lying around and screwed them onto the top of my old PC680 battery, which I had cut off from the battery case.

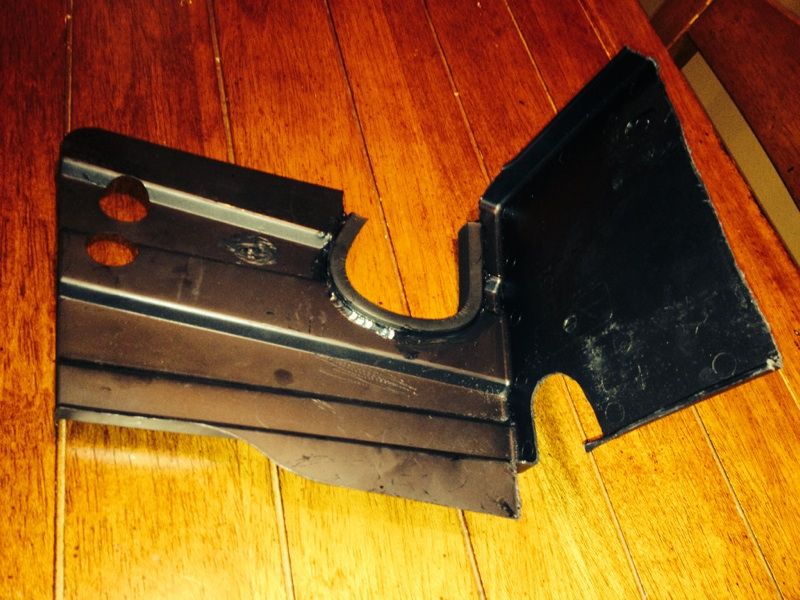
Then I bent some lexan sheet (I had laying around for 20 years) to create a lightweight base. It's epoxied together.

I epoxied and riveted the assembly together, using the old PC680 base I made, and painted it black.

It bolted down using original car frame battery base holes so I didn't have to drill any. Very light yet real stiff. The negative terminal simply has the OEM cable attached to it. The positive terminal has the OEM cable attached along with the incoming positive battery cable from the trunk screwed on underneath it.

Running Cable From Engine Bay to Trunk
Jack up and remove the driver side front wheel and splash guard. From the engine bay run the cable under the fender beside the OEM wire bundles. Secure it with zip ties.

To enter the cabin, cut a hole in the large rubber grommet, above where the other wires are going through it. Insert the cable into the car through this hole, a bit of lube helps here. Later before you button it all up, dab some auto silicone around the cable so it seals the hole.

Remove the plastic driver side floor sill (just pops off). Lay the cable alongside the other wires.

I reattached the cover, then reopened it looked again a couple days later to see if all was well. Some reinforcing ribs under the cover had pressed against the cable (see the small straight marks) so I carved the ribs out. Lots of room under there now.


You don't have to remove the plastic sill cover that rises toward the seat belt, just slide the cable through. Take off the plastic doorsill in the back to fit the cable. Remove the rear seat cushion and the upright part of the seat nearest the door. Run the cable alongside the others there, and bring it into the trunk, routing it above the carpeted side cover and let it hang down into the trunk.
The end of this cable attaches to the fuse holder. The fuse holder is bolted to a small home made aluminum bracket that was hacksawed into shape then painted yellow; it bolts to the crossmember under the speakers. I made a small cable length to go from the other end of the fuse to the battery.

I made a short cable for the ground connection from the trunk battery to the chassis, similar to the stock evo. This new ground cable terminal bolts under the rear seat bracket bolt. Be sure to sand away any paint etc to get a clean electrical connection. I cut a small bit out of the carpeted trunk cover, at the bottom, to bring the cable into the trunk.

Battery Trunk Mounting
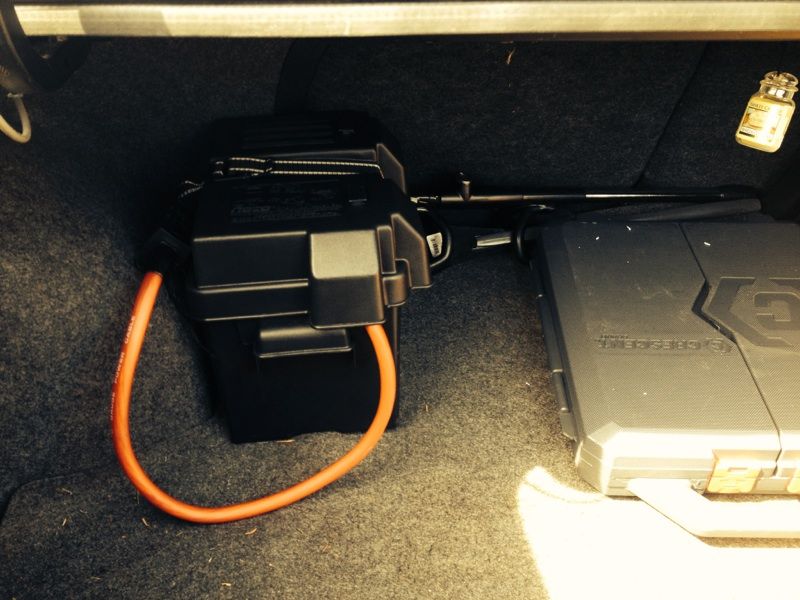
I used the existing PC680 battery holder I had laying around.

I drilled two holes into trunk floor to bolt down the base of the holder. There are places on our trunk floor where, if you drill, it comes out to an accessible flat location under the car. I measured over, and down, from the existing rear shock front mounting bolt like this:

From under the car, here is one of the bolts:

Now cut the trunk board:

I have a bit of excess cable length in case I change battery styles later and need it. Will get a red cover for the positive terminal. Done.

Reason for doing it
One simple reason - heat drastically shortens the life of small AGM batteries. I had selected the PC680 mini-battery to make room for my custom air intake and to reduce weight at the front of the car by about 25 lb. The first one lasted a year. Now, living a life of luxury in the trunk, the battery should survive a lot longer. As a bonus, weight is relocated to the back inside the rear shock, and it creates much room in the engine bay.
Background
Mitsubishi locates the battery in the evo x trunk. I found a really cool paper written by Mitsu engineers that documents their design thinking. Its very interesting and totally worth reading: http://www.nanopulser.com.sg/images/...tem_Design.pdf
Here is a pic of the stock evo setup (credit to "sirsleepsalot" in diymobileaudio forum):

Parts I Chose and Why
Cable: the local PartSource had nice rubber-coated flexible 2 gauge SAE J1127 black cable. 20 feet is enough. Some folks use smaller 4 awg, some use huge 0 awg. I'm not worried about excessive voltage drop with 2 awg. I calculated the worst-case temperature rise for a 12 foot long cable. Assume a worst case starter current draw of 200 amps. Therefore power input Q is 200A x 12V = 2400W=8191 Btu/h. Weight W of 12 feet of copper cable is 3.5 lb. Specific heat of copper Cp is 0.092 Btu/lb-F. Calculate the temperature rise dT of the cable due to the humungous current: dT = Q/(WxCp) = 7.1 degrees F per second. Say the starter is cranked for 8 seconds, the temp rise is 8 x 7.1 = 57F. If the inside car temp is hot at 100F then the cable temp is 157F. This is well within the recommended temp for this cable. And, solder melts at 363F so my soldered terminal connections would not melt. Doing another calculation with this equation, I can crank for 49 seconds at 150 amps draw before the cable reaches 360F. So, we don't have to worry about overheating this size of battery cable.
Fuse: The only fuse I added was to the positive cable near the battery. It is necessary because if that cable shorts out to ground for some reason say due to an accident, there is a rush of over 2000 amps through the cables. You want the fuse to blow very quickly so that current is interrupted before it starts a fire. However, you want to have a high pulse current when starting the car without blowing the fuse. The solution is a slow-blow fuse designed for this exact scenario. Littelfuse makes these called Mega fuses, and a nice mounting box for it too (bought from Newark element 14, online). Look at the Time-Current Characteristic Curve graph here: http://www.littelfuse.com/~/media/au...n_mega_32v.pdf
I selected a 100 amp fuse. If you pick the 100 amp curve, it will blow in 0.02 seconds at 2000 amps, but allows 150 amps for 800 seconds (probably the most current our starter will normally ever draw). Bingo.

cable cutters: get a pair to make your life easy. Seriously.

Cable Terminals: I used six of the common copper ones for 2awg, with a 5/16 " hole.
Making Cables
I chose to solder the terminals. Crimping would be good but I couldn't locate anyone with a professional crimper. Soldering is good too and I know how to do it correctly. Trim back the cable sheath so you see a bit of the copper when inserted fully into the terminal:

Where the cable sticks in, use plumbers emery cloth or sandpaper to make the inside of the terminal shiny (this is critical for a good bond). Apply flux to the copper cable end. Heat the cable end using a propane torch, melt the flux, and touch the copper with resin-core solder to "tin" it a little bit. Set it aside. Heat the terminal (I held it in a vice). Melt resin-core solder inside the terminal so it fills about half way. Then insert your cable end, pushing gently, while keeping the terminal hot - apply heat only to the outside of the terminal and not to the cable. When the cable slides in all the way, then touch your solder to the exposed bit of copper cable above the terminal to melt some additional solder into the joint. When the joint looks full-ish with solder, you're done. Hold the cable in place for several seconds while it cools enough to solidify the joint. Having someone there to help you hold things is recommended. When all is cool, you can fit some heatshrink tubing over the joint.
The Engine Bay
I wanted to keep the original battery terminals up front. It makes me cringe when I see originals cut and butchered and taped together. Also, it presents an easy way to use booster cables. I had some SAE battery terminals for the PC680 lying around and screwed them onto the top of my old PC680 battery, which I had cut off from the battery case.

Then I bent some lexan sheet (I had laying around for 20 years) to create a lightweight base. It's epoxied together.

I epoxied and riveted the assembly together, using the old PC680 base I made, and painted it black.

It bolted down using original car frame battery base holes so I didn't have to drill any. Very light yet real stiff. The negative terminal simply has the OEM cable attached to it. The positive terminal has the OEM cable attached along with the incoming positive battery cable from the trunk screwed on underneath it.

Running Cable From Engine Bay to Trunk
Jack up and remove the driver side front wheel and splash guard. From the engine bay run the cable under the fender beside the OEM wire bundles. Secure it with zip ties.

To enter the cabin, cut a hole in the large rubber grommet, above where the other wires are going through it. Insert the cable into the car through this hole, a bit of lube helps here. Later before you button it all up, dab some auto silicone around the cable so it seals the hole.

Remove the plastic driver side floor sill (just pops off). Lay the cable alongside the other wires.

I reattached the cover, then reopened it looked again a couple days later to see if all was well. Some reinforcing ribs under the cover had pressed against the cable (see the small straight marks) so I carved the ribs out. Lots of room under there now.


You don't have to remove the plastic sill cover that rises toward the seat belt, just slide the cable through. Take off the plastic doorsill in the back to fit the cable. Remove the rear seat cushion and the upright part of the seat nearest the door. Run the cable alongside the others there, and bring it into the trunk, routing it above the carpeted side cover and let it hang down into the trunk.
The end of this cable attaches to the fuse holder. The fuse holder is bolted to a small home made aluminum bracket that was hacksawed into shape then painted yellow; it bolts to the crossmember under the speakers. I made a small cable length to go from the other end of the fuse to the battery.

I made a short cable for the ground connection from the trunk battery to the chassis, similar to the stock evo. This new ground cable terminal bolts under the rear seat bracket bolt. Be sure to sand away any paint etc to get a clean electrical connection. I cut a small bit out of the carpeted trunk cover, at the bottom, to bring the cable into the trunk.

Battery Trunk Mounting
I used the existing PC680 battery holder I had laying around.

I drilled two holes into trunk floor to bolt down the base of the holder. There are places on our trunk floor where, if you drill, it comes out to an accessible flat location under the car. I measured over, and down, from the existing rear shock front mounting bolt like this:

From under the car, here is one of the bolts:

Now cut the trunk board:

I have a bit of excess cable length in case I change battery styles later and need it. Will get a red cover for the positive terminal. Done.

Last edited by RalliartN; Mar 22, 2014 at 11:35 AM.
The following users liked this post:
Tommyfacekicker (Jun 26, 2019)
#2
Evolved Member
iTrader: (5)
Looks great! Wish I would have done mine that way. Having the full sized battery in the far back hand right makes some corners have weird weight transfer. In my new RA I will moste likely relocate it this way. I had a mini battery once but it didn't survive the winter. Lol Oh and I used the hole in the firewall on the passenger side behind the strut tower. Then sent it along the trim same as you.
Great write up! You always do good at these!!
Great write up! You always do good at these!!
#6
Follow-up
Thank you for the kind words, gentlemen.
I've been to the track, and lived with the mod on the pot-holed bumpy backroads on the way to work, and everything has stayed tight, no issues. Small battery starts car nicely, no blown fuses or anything heating up wierdly.
I'll report back at the end of the year on battery longevity, since my main reason for moving it was to escape from under-hood heat and prolong battery life.
#7
Evolving Member
Awesome, I was searching for a write up on this. So with the ground cables in the engine bay what did you do with them? Did you just bolt it to the frame in the front and the rear and only run the positive line back?
Trending Topics
#8
Evolving Member
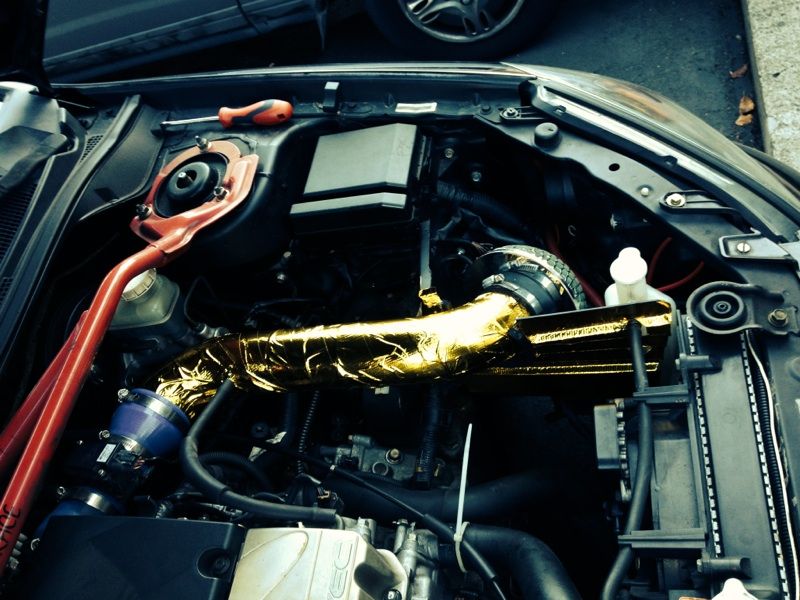
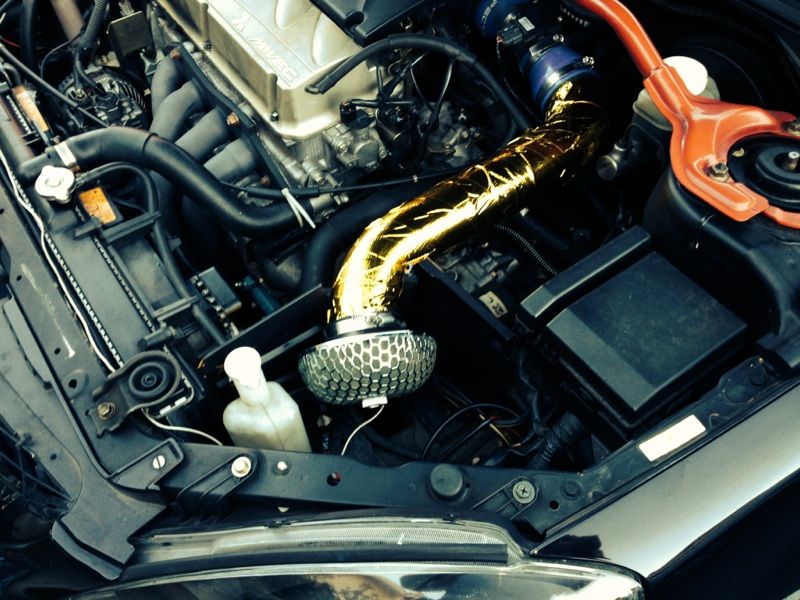
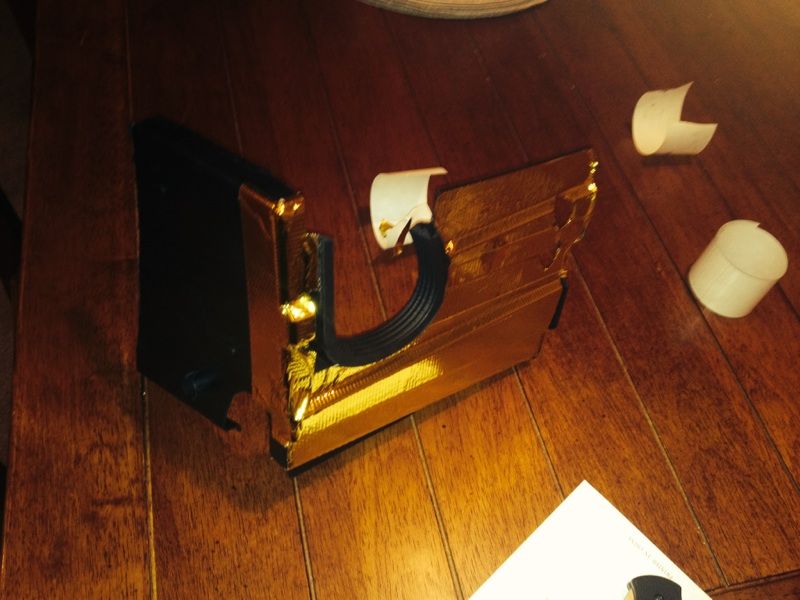
Got this done yesterday, I went with 0 Gauge, it fit just fine. I relocated the original grounds and now my lights are brighter, so that's nice. Air intake fits right where the battery was, and I am going to use the original base for the battery as an air box. I will post a couple pics today or tomorrow. Having the intake away from the transmission/header actually gave me a noticeable difference when it heats up in there.
#9
Super - please post pics.
Sorry for this late response, I just noticed your post today. Yes, only ran a positive cable from the engine bay to the trunk. The grounds in the engine bay stayed in their original locations, didn't add-to or touch those cables at all, but I did unbolt them, sanded off paint and corrosion from the chassis, then bolted it back together dry (you can smear a bit of anti-seize or grease on top after re-assembly to help keep water out).
I've lived with the conversion all summer. The little battery in the trunk is okay now that it is away from the engine bay heat. Actually used the handy +/- terminals in my engine bay to attach boost cables to help a fellow start his Hyundai Genesis at the track after his battery failed.
btw, what size fuse did you end up using? My 100 amp is doing the job.
Last edited by RalliartN; Aug 19, 2014 at 05:32 AM.
#10
Evolving Member
I got the exact same one after going through your notes. I bought a 0 gauge sub wiring kit from Amazon Prime for around $33 US, 21' of red and 2' of black, plus terminals (crimp  ). Yeah I did the sanding and whatnot. I didn't get around to wrapping my headers like I had planned, but I should be getting the box in and my reflective tape/silicone on today.

Great write up and in good time.

Great write up and in good time.
#11
Amazing wire price, good find.
btw, I wrapped my stock header pipes with the "titanium" coloured stuff and its been fine for a couple of years. I have a vented hood and when it rains hard the header wrap gets wet but that blows off as steam a minute after I start the engine. Where I live we have very damp mornings, hard rains, and I track the car so the header bakes. No issues so far. To wrap, I started at the top of one pipe, went down to the flange where it joins into another pipe, then immediately wrapped back up to the top of the adjacent pipe and then clamped the wrap end. Did this way for the other two pipes also. I tried to secure the wrap end with the special thin clamps you can get, but they were crap as I wasn't able to tighten them to my liking. So instead, I ended up putting a couple of turns of some thin lock-wire around the wrap, then used the lock wire pliers to twist the ends tight - this has lasted, the wrap is still tight.
btw, I wrapped my stock header pipes with the "titanium" coloured stuff and its been fine for a couple of years. I have a vented hood and when it rains hard the header wrap gets wet but that blows off as steam a minute after I start the engine. Where I live we have very damp mornings, hard rains, and I track the car so the header bakes. No issues so far. To wrap, I started at the top of one pipe, went down to the flange where it joins into another pipe, then immediately wrapped back up to the top of the adjacent pipe and then clamped the wrap end. Did this way for the other two pipes also. I tried to secure the wrap end with the special thin clamps you can get, but they were crap as I wasn't able to tighten them to my liking. So instead, I ended up putting a couple of turns of some thin lock-wire around the wrap, then used the lock wire pliers to twist the ends tight - this has lasted, the wrap is still tight.
Last edited by RalliartN; Aug 20, 2014 at 07:43 AM.
#12
Evolving Member
I think we have the same header wrap, DEI? I live in Washington where I typically get 45-55" of rain a year. One of my good friends works at a shop (Nameless Performance for any of you Subie fans out there) and he said they deal with a lot of cracked headers due to wraps getting wet over and over. I have some 310 stainless slip lock ties to keep them on with. Then coating it in some silicone to keep it dry. I just wish I had decided to do that before I installed them, now I get to take them off again. I need to get a vented hood to put on there. I considered doing the DIY hood vent, but don't see the point as I would eventually get a CF hood anyways. I don't think I have ever had a car that got as hot as this one under the hood.
#14
Evolving Member
Mounted some thermostats in there on a hot day (94 F) after a 30 min drive, 25 degree difference between motor side and filter side. If the car sits at idle the filter side will start to heat up, I need to ad some weather stripping to the top of it so it seats with the hood. Or something like that. With that tape on there I can actually grab the pipe without needing to visit the hospital. Can't feel much of a difference, but something deep in my soul is telling me I am moving quicker, which is good enough for me.


