
R/TErnie's Evo 9 2.2L 4G64 EFR7670

R/TErnie's Evo 9 2.2L 4G64 EFR7670 - Start Vids Pg 40!
I bought my Evo Sept 17th 2008 from forum member here Mistaken. Since then I've changed the car a lot and gone through several different setups chasing, what I consider, the perfect setup. I've also had a lot of advice, help, and input from Aaron @ English Racing. Many thanks to Aaron. I've put a lot of thought into this car and hopefully it does what I intend it to do. I've had a few turbos in the past, Evo 9 (355whp), old skool FP Green (360whp), 64mm FP Red(482whp), 80mm FP Red (540whp), and the HKS7460(488whp). I'm a drag racer at heart, I've come to love auto-x and road courses, and want something that is hard to beat on the street.
My goals with the car are to run sub 10.50's, run a 1.07.xx at PGP, and set FTD at the local auto-x events.
My general thought process of building a complete car (not just an engine) to run these times was all centered around the limitations of the transmission and transfer case. 1st being making fast 1-2 shifts at high RPM without lockout. And 2nd setting a reasonable power/torque limit that is not be exceeded to keep the transmission and T/C alive.
These limitations set my redline, then I chose my stroke based on piston speeds and R/S ratios. I moved the wrist pin up in the piston and got a custom lightweight H-beam made by R&R to fill the gap. After that I knew I wanted 600whp and I wanted it to be very responsive. That narrowed down my turbocharger selection to a few stock framed turbochargers, a few garrett, FP, and BW turbos. I started focusing on compressor geometry and looking at what was being copied and duplicated by all the new billet wheels. Extended tip geometry among other tricks seemed to be the most recent large improvement in compressor design. Without turning into a BW EFR infomercial... I was sold on the EFR because it has a titanium aluminum turbine wheel. This reduces the mass of the turbine by 30% over an identical turbine made of inconel. BW used this inertia advantage to make the wheel larger in diameter, improve mass flow, and energy harnessing efficiency. It also has some great features that I know I want and need. I'm a huge twin scroll proponent. I also appreciate the widely spaced bearing package on the CHRA and the anti-surge cover! My old HKS7460 didn't have an anti-surge cover and it drove me NUTS. Now some of you might be thinking why not use a stock appearing turbo like the FP BB Red (I ran the 64mm and the 80mm red btw) Although it has advantages like better static spool due to the compact turbo manifold and tiny turbine housing... it still has an inconel turbine wheel. I contacted all the stock appearing manufacturers and begged them to make a stock appearing turbo with a Ti wheel and they all respectfully declined. My decision was easy. I would take a small hit in additional weight and complexity of the EFR setup and make a HUGE improvement in transient response! I chose an E85 setup because it chemically intercools, has a much higher octane rating, it's way cheaper than c16, and my turbo spools up faster! All win.
I guess I'll write more about my reasoning later on in the thread, but for now... Here's a compilation of the parts I've got together for this car. Some are installed, some are in boxes, and all of it needs to installed.
2006 Evo 9 GSR
ENGINE
ER Machined 4G64 Long Rod 2.235L
Machined for Evo oil squirters
MAP Feed line
Cosworth 87mm Head Gasket
Wiseco HD 9:1 1.13 CH pistons
R&R H Beam 159mm Rods
Eagle 94mm Crank
MAP L19 Head Studs
ARP Main Studs
R/TErnie Balance Shaft Delete (thanks ER)
Clevite Race Main Bearing
Clevite Race Rod Bearing
R/TErnie modded Water Pump (thanks ER)
OEM Water Pump
OEM Oil Pump
Earls Oil Cooler
AMS/Moroso oil pan
Fluidampr UDP
R/TErnie -10AN catch can setup
HEAD
Evo 9 ForceFed CNC Ported head
GSC S3 Cams - Hope to replace with GSC R2's
AEM TRU Time Cam Gear
ER MidgetSpec MIVEC Cam gear
Ferrea Valve Guides
Ferrea Valves
Ferrea Seals
Kiggly HLA
Kiggly Springs, Retainers, and seats
EXHAUST
R/TErnie 1.5" sch10 Divided T4 Turbo manifold
R/TErnie 3.5� SS v-band downpipe
R/TErnie dump tubes
R/TErnie 3.5� Titanium Exhaust
TURBO SETUP
BW EFR7670 EWG 1.05AR
TiAL Sport Q BOV
TiAL Sport MVS wastegates
Magnus v5 Intake manifold
Full Blown Throttle Body
R/TErnie Garrett FMIC 24x12x4
R/TErnie IC piping
FUEL
Injector Dynamics 2150cc's
Wilson Manifolds D Fuel Rail
Kinsler FPR
Full Blown Double Pumper
Twin 255 Walbros
-8AN Feed Line Earls Pro-Lite and SS hardline under car
-6AN Return Line Earls Pro-Lite and SS hardline under car
ELECTRONICS
VIPEC v44 PnP Evo 9 ECU
Turbo speed sensor
Ethanol content sensor
5 bar map sensor
OP and FP 10 bar sensors
AEM 3 port EBC Solenoid w/ .040" restrictor
IAT sensors pre and post intercooler
AEM 6 in 1 Wideband
DRIVETRAIN
AMS shifter bushings
SS braided clutch line
QM 8 Leg 7.25� Twin Disk Clutch - race friction w/ heavy flywheel
TRE MAX LOCK Rear Differential
Evo 9 Trans with Evo 8 3rd&4th
OEM Transfer Case
Gruppe-S ACD reflash
R/TErnie Relocated ACD pump
SUSPENSION
Ohlin DFV R&T Shocks
HyperCoil & Swift springs
Robispec - R/TErnie Trailing Links
Whiteline F&R RCK
27mm Rear ARB
CCW Classics 18x10.5 +38
295/30/18 R888�s or 285/30/18 Hoosier R6
R/TErnie CNC'd 22mm spacer
ARP Extended wheel studs
Aluminum lug nuts
BRAKES!
Girodisc 2pc front rotors
Girodisc Ti shims
Raybestos ST43 Pads
Motul RBF660 fluid
Girodisc SS lines
OTHER STUFF
.020" Thick Titanium Hood prop
Odyssey Mini-Battery
Removed Rear Wiper Assembly w/ new Glass
Skunk2 weighted shift knob
5000k 55watt HID kit
JDM Rear bumper
Evo 7 Tails
JDM side markers
ACD Relocation
Links:
March 2nd Update (you're already here! scroll down)
March 23rd Part I Update
March 23rd Part II Update
March 24th Update
March 28th Update
March 29th Update
April 2nd Update
April 23rd Part I Update
April 23rd Part II Update
May 8th Update
May 10th Update
May 23rd Update
May 30th Update
July 9th Update
July 25th Update + start video!
People I need to thank
My wife and family- for putting up with my habit and all the car parts in the house.
Aaron Oneil & English Racing for the incredible insight and experience
Raffi and Geoff at Full-Race for hooking me up with an EFR.
Brock @ BW for bringing such a great product to market.
Michael, JR, Erica, and Chris for great deals on parts, fab components, and INTERCOOLER CORES!
Russell at Mitsubishiparts.net for the best place to buy OEM Mitsu parts online.
Jon @ TRE for an AMAZING rear diff. I love Jon's work. I will own his T/C and transmission before 2013 comes.
Chad and Brent @ CBRD for the support.
Robert @ ROBIspec for the great talks, advice, and support.
Andrew and Myles @ GTWorx/RaceCompEngineering for the Ohlins and their suspension guidance.
Sean Ivey and Sam @ IveyTune. Great support for my HKS purchase, well respected, and nice guys all around.
Tony and Mike @ T1 Race Development for some badass Injectors, advice, and support.
Marco and Seann @ Magnus Motorsport for a badass intake manifold, advice, and support.
Mikey and Freddie @ SPEC-Ops - My NW Evo friends with which we've had lots of good times. Many Thanks
Justin @ ForceFed for the CNC ported head. Same port...every hole... everytime.
Adam and Nate @ MAP for the hookups on parts.
David Buchur for being a great rabbit to chase.
Martin @ Girodisc for some great brakes and technical insight.
MrFred - Mychailo - For the OEM ECU work and material property education.
jid2 - Jared - For the inside scoop, advice, and insight.
Indy - Jim - Thanks for the words of advice and insight.
Bill and Bob @ Drift Office for the Dynojet time and VipeC
Eric @ Compulsive Motorsports for the MD Dyno time
Brian Green @ Forged Performance (Oregon) for the MD dyno time and c16!
Mike @ R&R Rods for the custom work
Nero @ Titan for some great advice.
Don Smith - my good friend, wheelman, co-worker, and certified racing nut!
Don *** - my good friend, machinist, and engine junky
Mark Powell - my good friend, mortician, facilitator of my metal fab and racing learning experience.
Adam Baxter - my good friend, wheelman, and fellow fabricator (FSAE teammate)
Matt Nucci - my good friend, Catia jockey, and suspension GENIUS (FSAE teammate)
Trevor Hull - my good friend, machining expert, and aero junky. (FSAE teammate)
Paul Marsh - my good friend and MoteC data junky (FSAE teammate)
Scott O'Farrell - my good friend and wheel man. (FSAE teammate)
Trever McDermott - my good friend, wiring junky, and all around eccentric car junky (FSAE teammate)
Guillaume Marceau - my good friend and exceptional Honda & Transmission builder
Ben LaVelle - my good friend and amazing body/paint man.
Marshall & Stu Hagen - for a great trip to Texas for TX2K12!
Last edited by R/TErnie; Jul 25, 2012 at 10:33 AM.
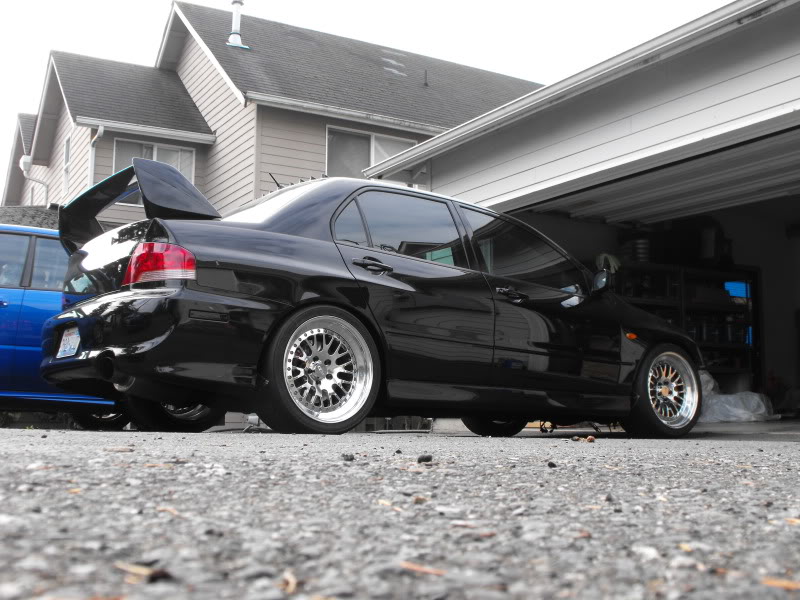
I'll start with a few pictures of the car and then work into detailed in depth discussion with pics.
Wheel/Tire progression over time. Big thanks to Rishi@AutoRnD for the hookup on the Enkei wheels!
Stock 17x8 Enkei with 245/45/17 RE01Rs
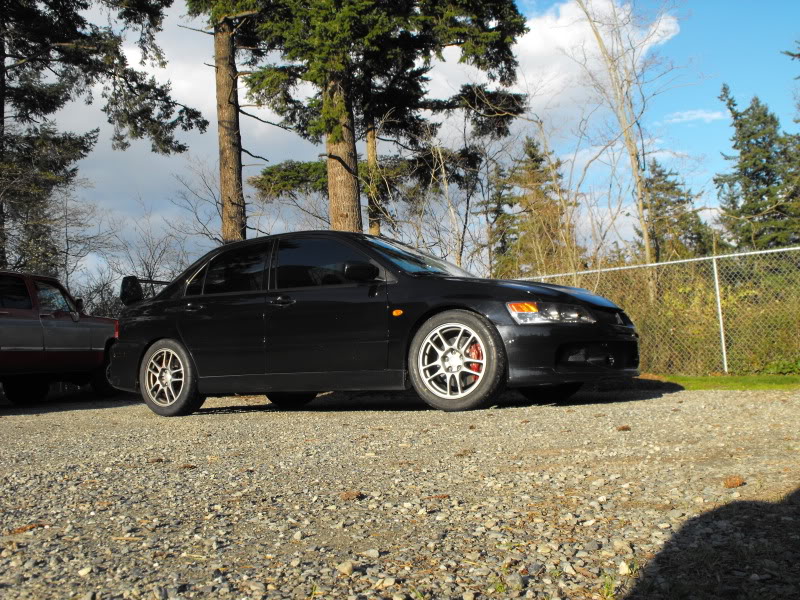
18x9.5 Enkei NT03 +38 (25mm spacer up front) with 265/35/18 RE-01Rs and lowering springs
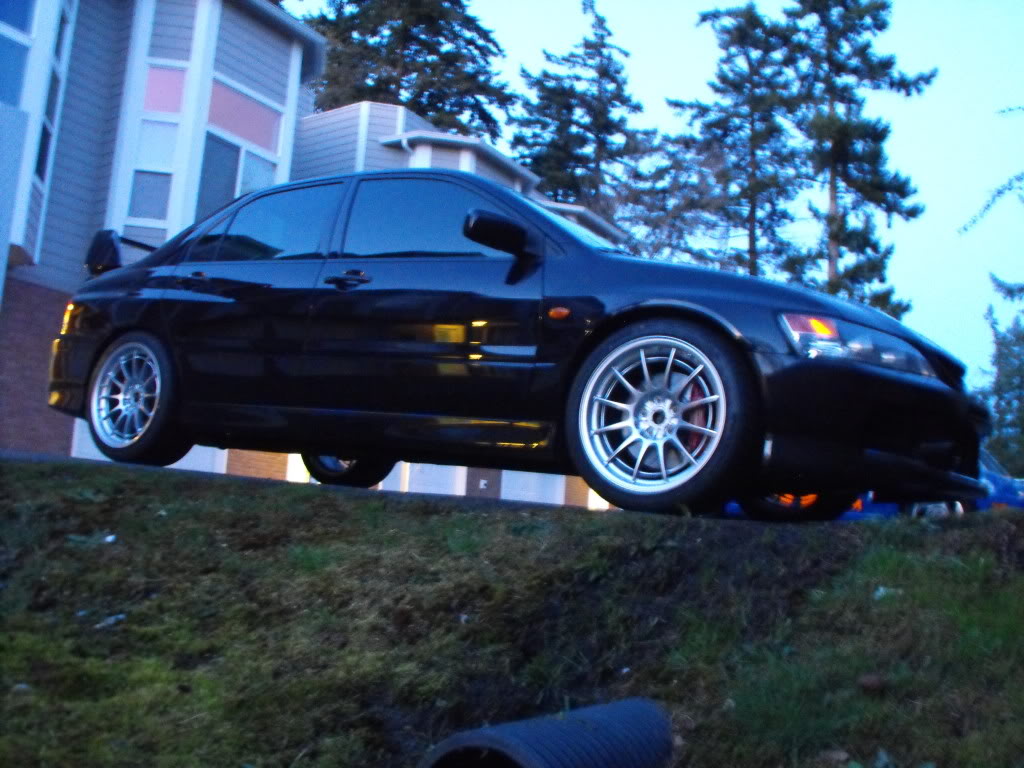
18x9.5 Enkei NT03 +38 (25mm spacer up front, 5mm rear) with 285/30/18 Hoosier R and Skunk2 Pro-Cs
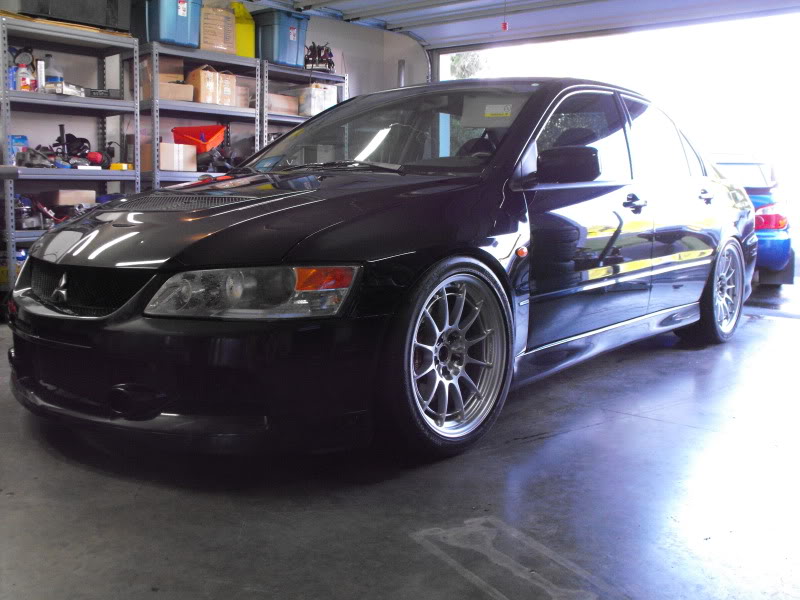
18x10 Enkei RPF1 +38 (20mm spacer up front) with 295/30/18 R888's, custom trailing links, Ohlins, and other
Current: 18x10.5 CCW Classic +38 (Custom R/TErnie 22mm spacer, trailing links, Ohlins, the works.
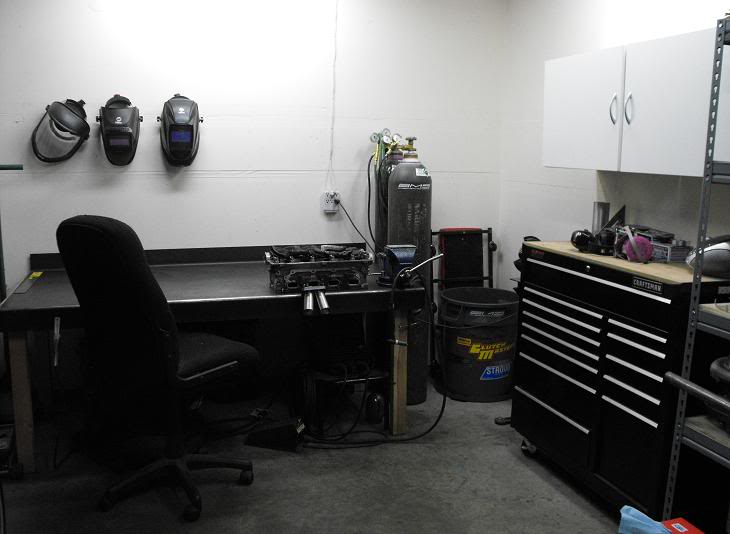
Here's a picture of the workbench in the garage. This is where all the magic happens.
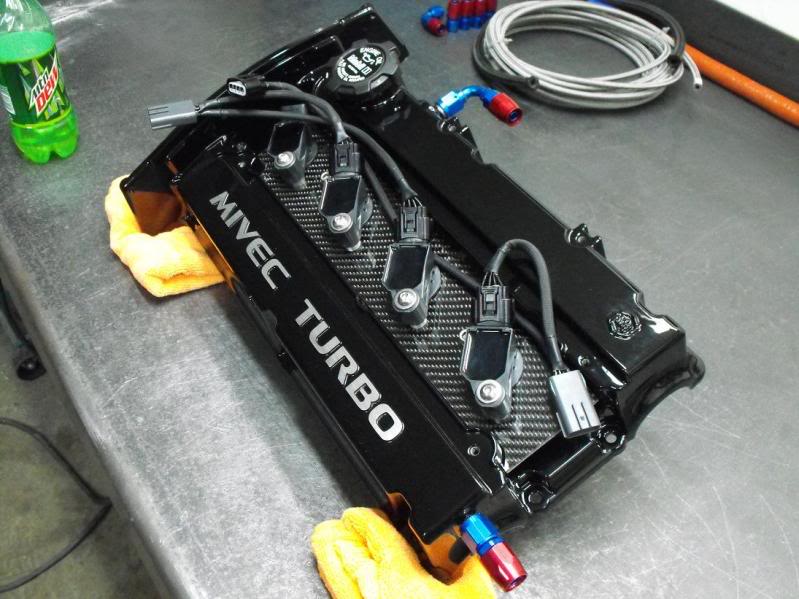
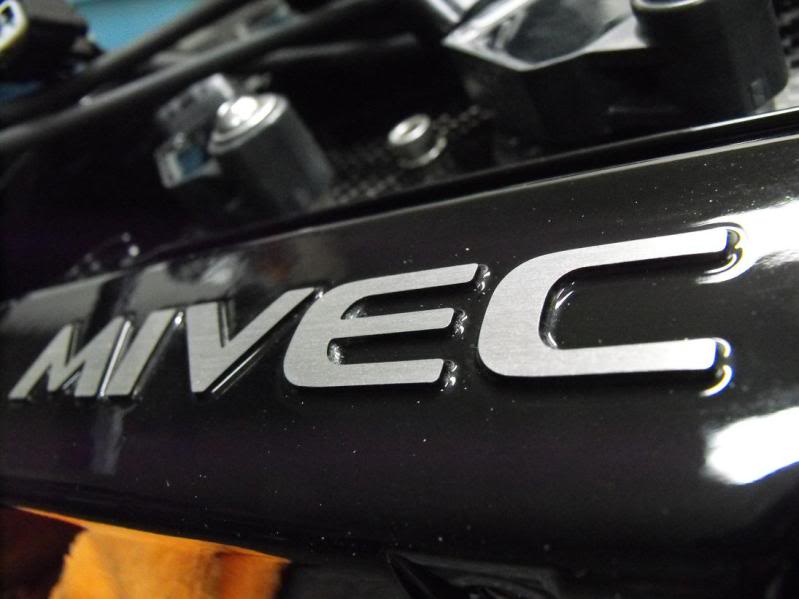
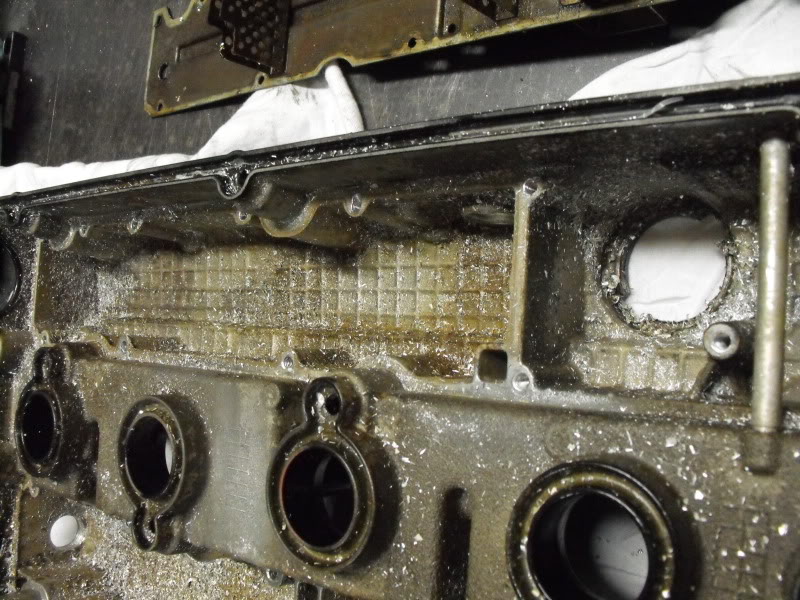
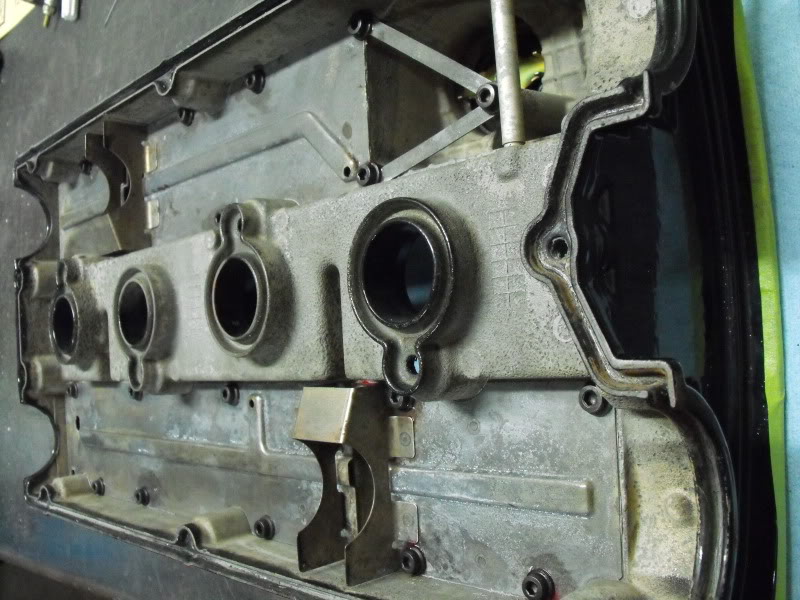
Here's some pictures of my valve cover progress.
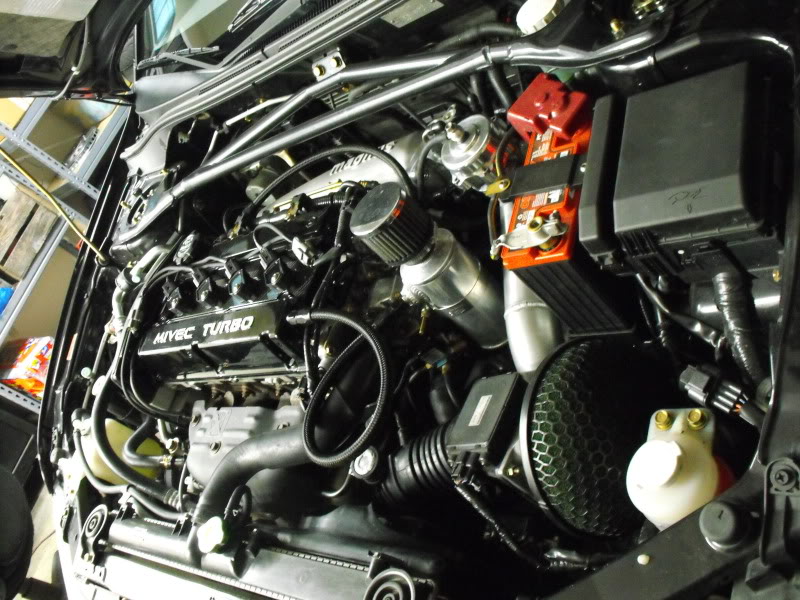
When I got the VC back from Carlos Tiago's Custom Coatings along with the Spoolinup COP setup
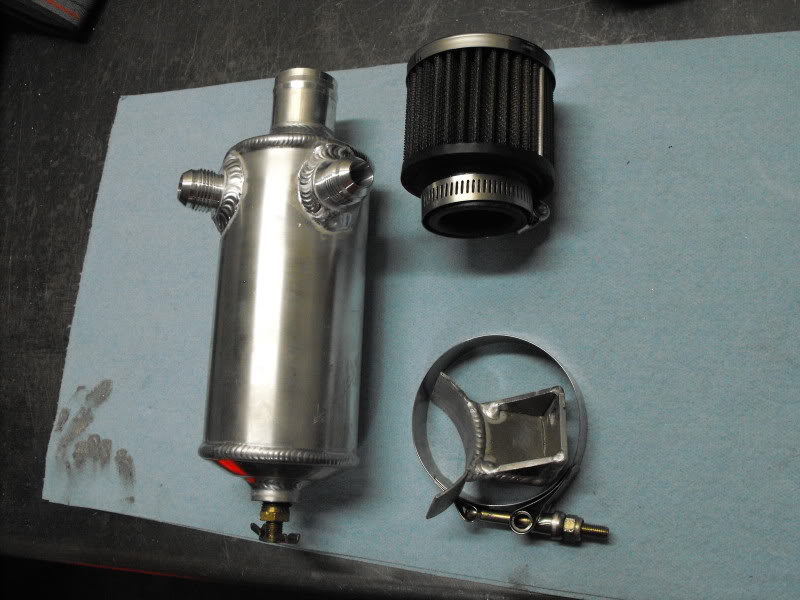
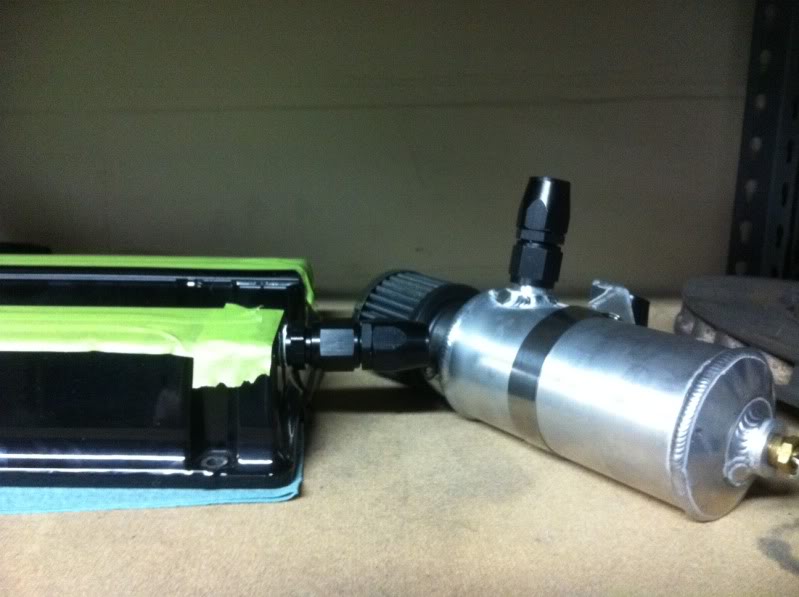
I used the STM -6AN breather fittings with a Peterson catch can. Very nice, but waaay too much restriction. Ended up pushing a valve cover gasket near the cam gear into the timing cover! sucked big time! This is what it looked like before install and installed.

Since then I've identified a few issues. I need more ventilation to reduce the pressure on the bottom side of the piston rings. This will reduce my chances of ring flutter and improve my ring sealing. Lucky me my amazing BW EFR turbo has DUAL dynamic seals on the compressor and turbine side of the shaft! This keeps the pressure out of the CHRA, out of the oil drain line, and you guessed it... out of the crankcase.
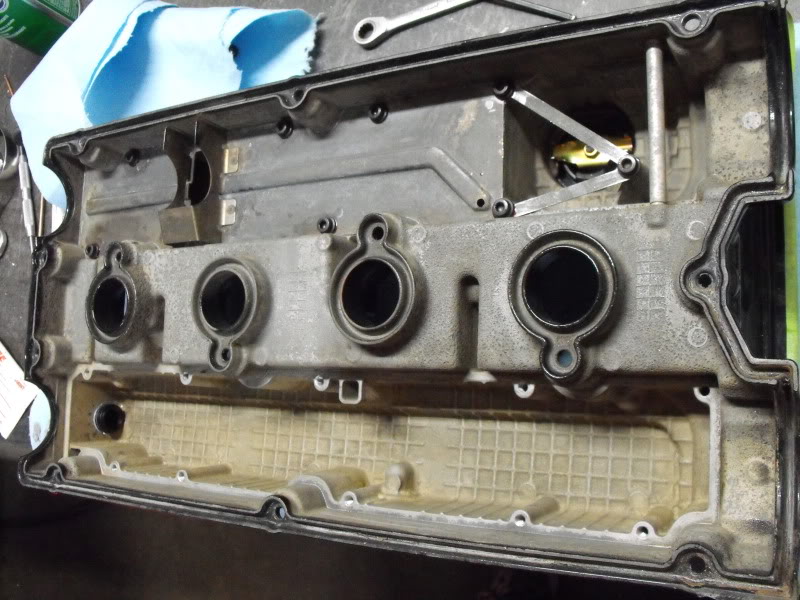
Issue #2 When someone powdercoats your valve cover they typically sand blast it first. They can't clean behind your baffles and therefore there is blast media and crap stuck behind your baffles. I needed to clean this out.
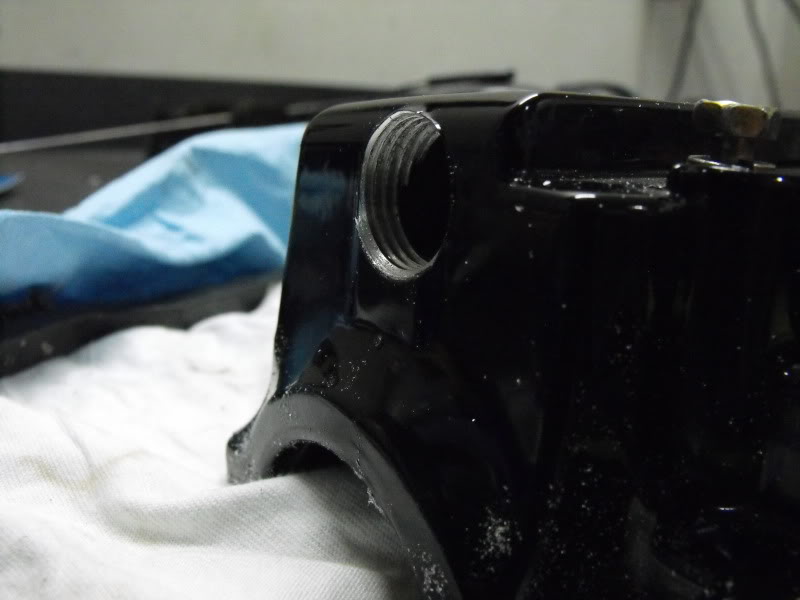
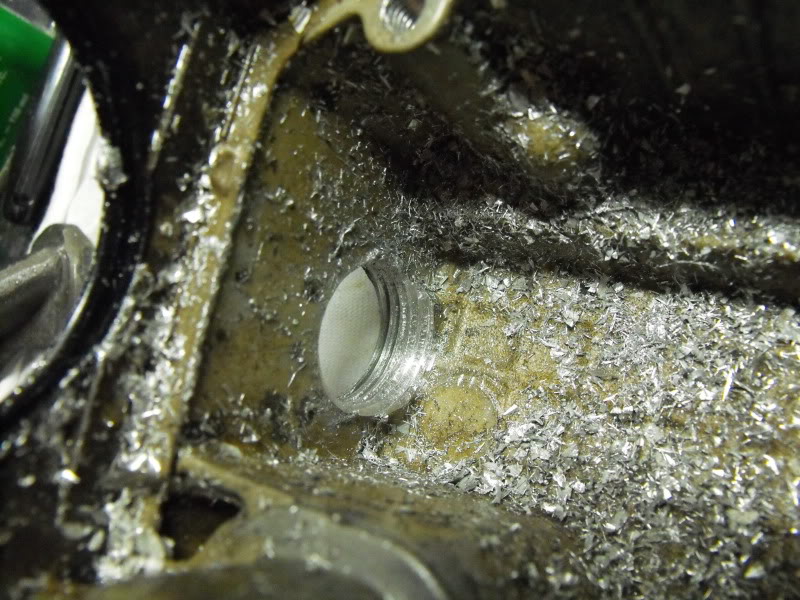
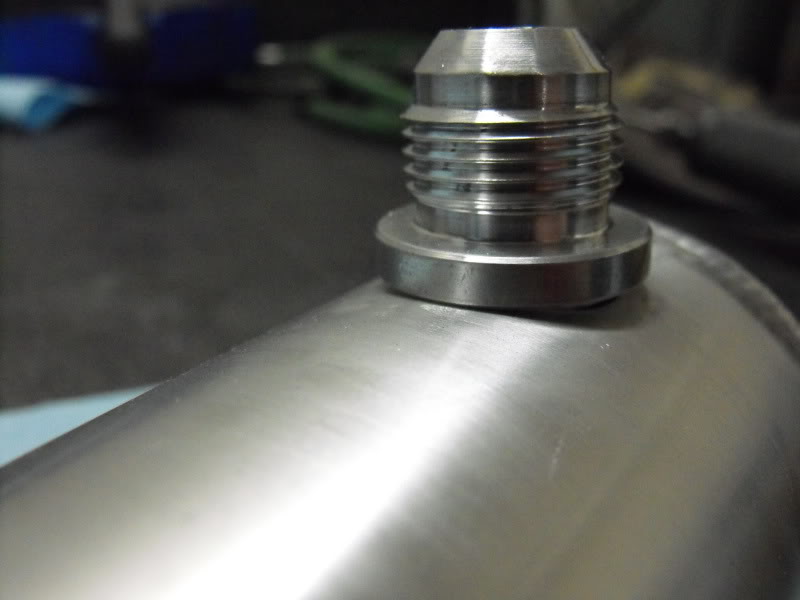
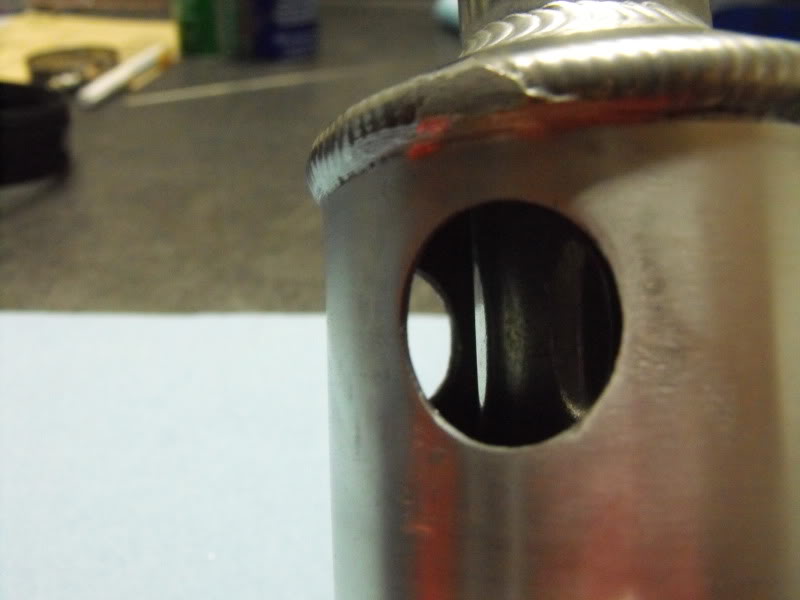
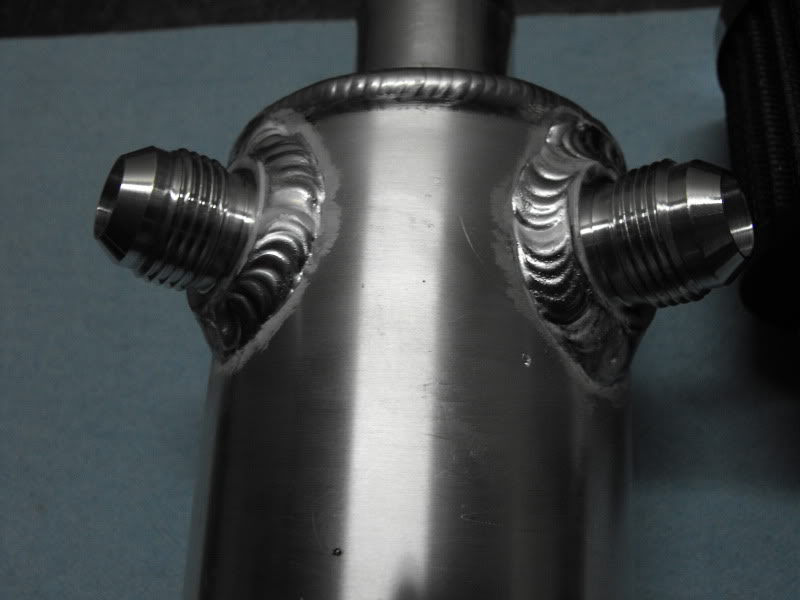
Issue #3 I needed Bigger vents. My catch can had -6AN male fittings that I welded on and I need -10AN... time for some grinding and sanding. I also needed to remove the -6AN fittings in my VC and put in some -10AN fittings.
NOTES: www.anplumbing.com i've been using them for 12 years. Great service and their online catalog makes an plumbing easy. AN stands for Army-Navy. The sizes are the numerator and the denominator is always 16. This results in a fraction which states what the inner diameter is. For example -10AN is 10/16" or 5/8" diameter.... -8AN is 8/16" or 1/2" diameter. AN fittings have a 37 degree flare (which is unique to itself and JIC fittings) DO NOT PUT TEFLON ON AN FITTINGS. They seal on the conical seat. I do suggest putting anti-seize on the threads. Enough blabber... onto the pictures.
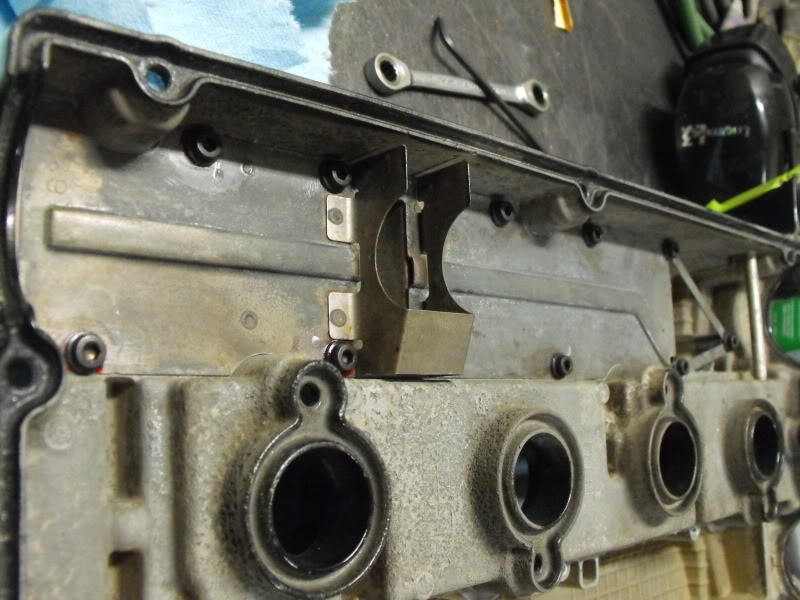
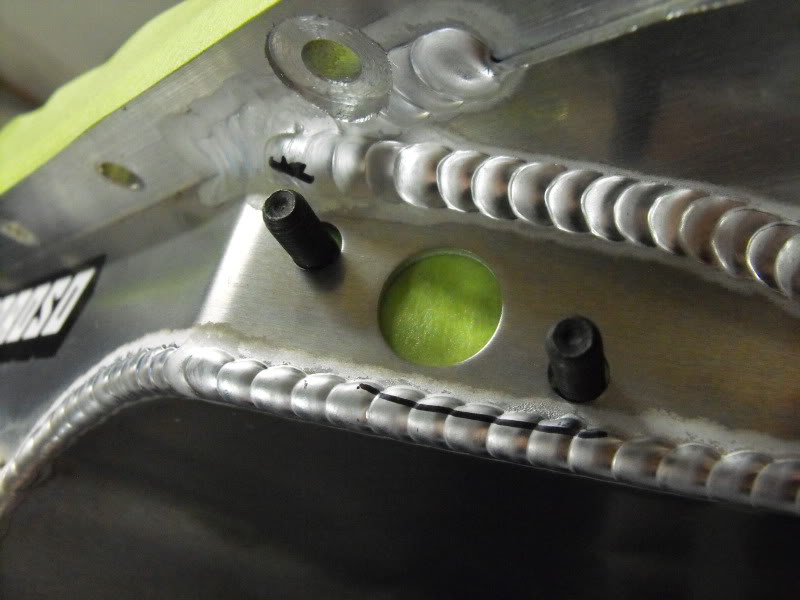
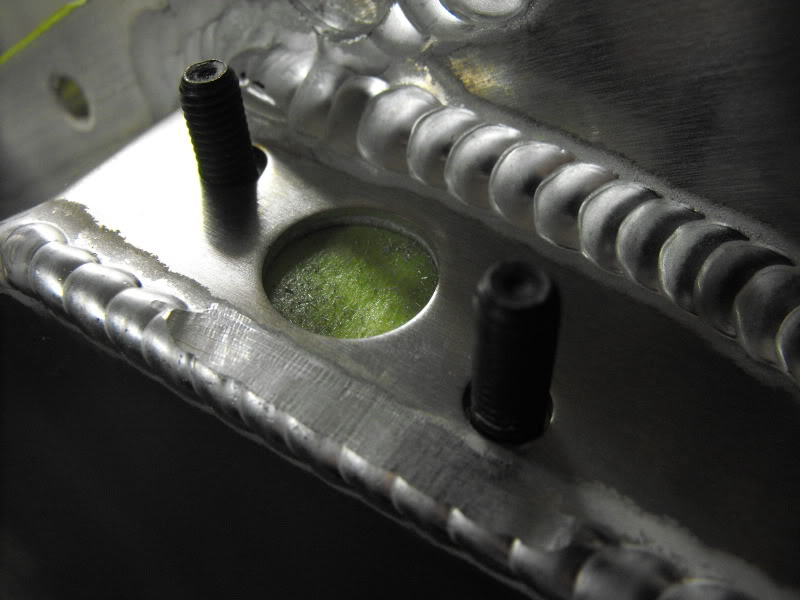
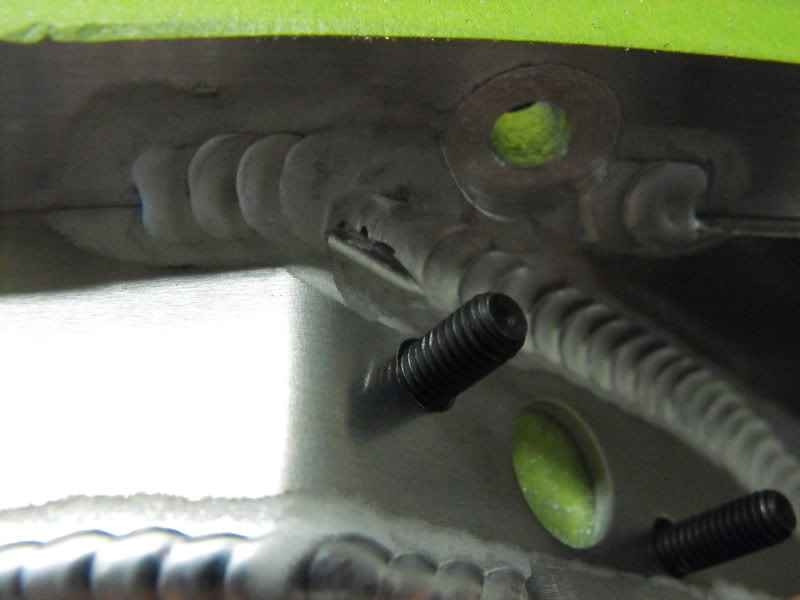
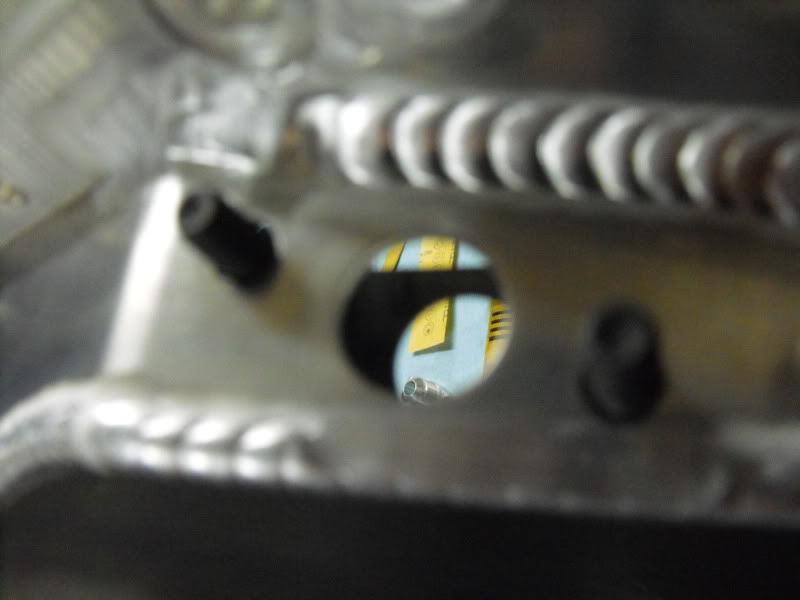
Drilling out the rivets that hold the baffles, drilling and tapping for several 5mmx1.0 socket head cap screws, and drilling and tapping for the 1/2" NPT to -10AN fittings. Lot's of Magnesium cheese!

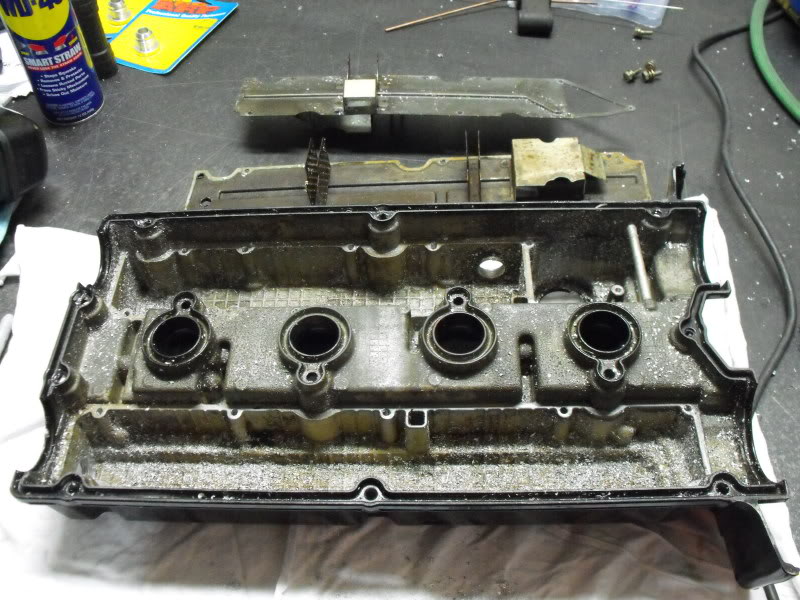
After several cycles through the dishwasher
NOTE: NPT (National Pipe Tapered) are considered an abomination by Carrol Smith... use sparingly. These seal on the threads... USE TEFLON!
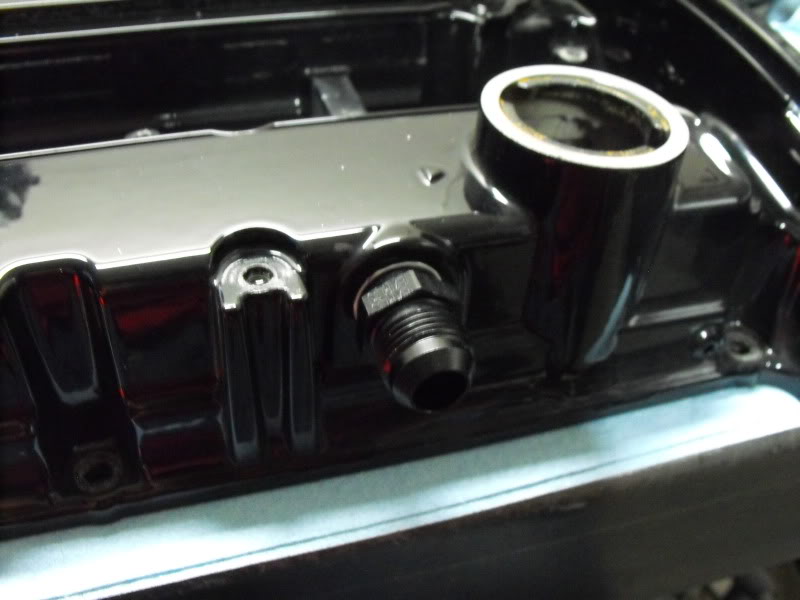
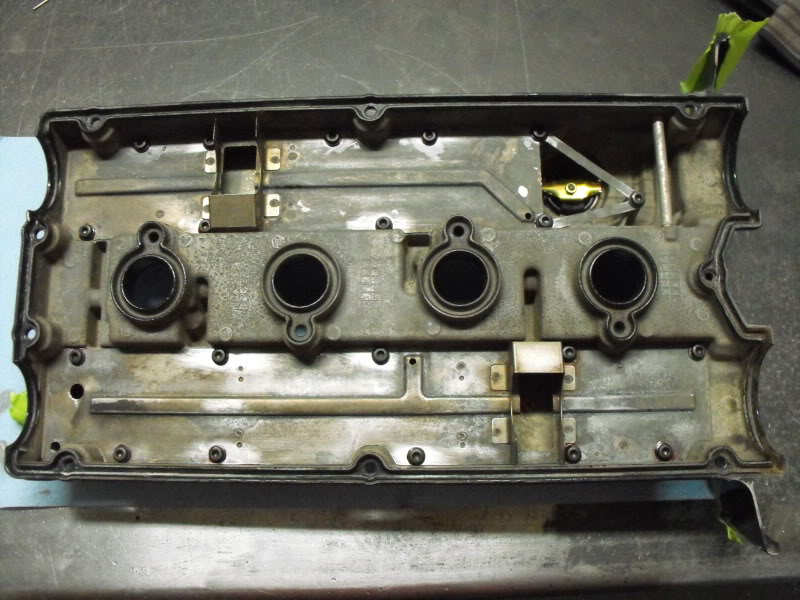
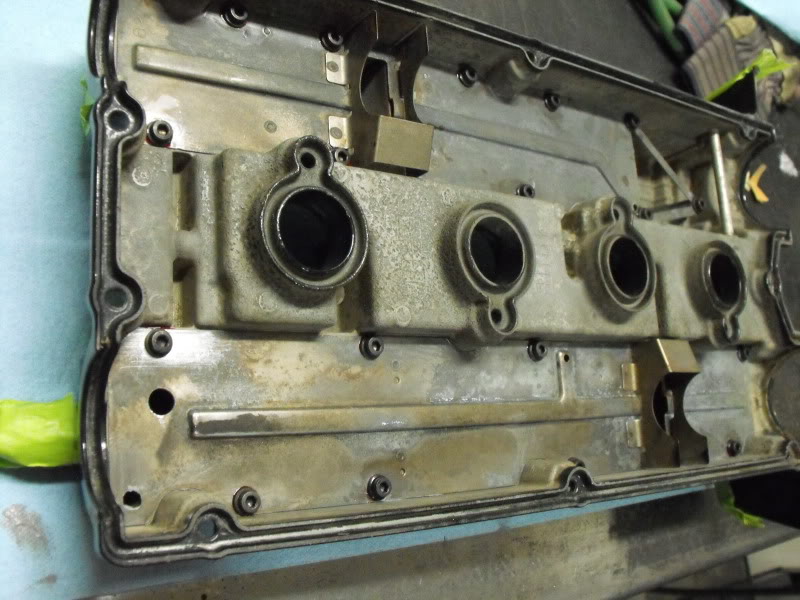
I cleaned the threads with Brakleen, blew them out with compressed air, and used Red Loctite on the SHCS's I got from McMaster-Carr. These SHCS's hold my baffles in place now. Super clean!
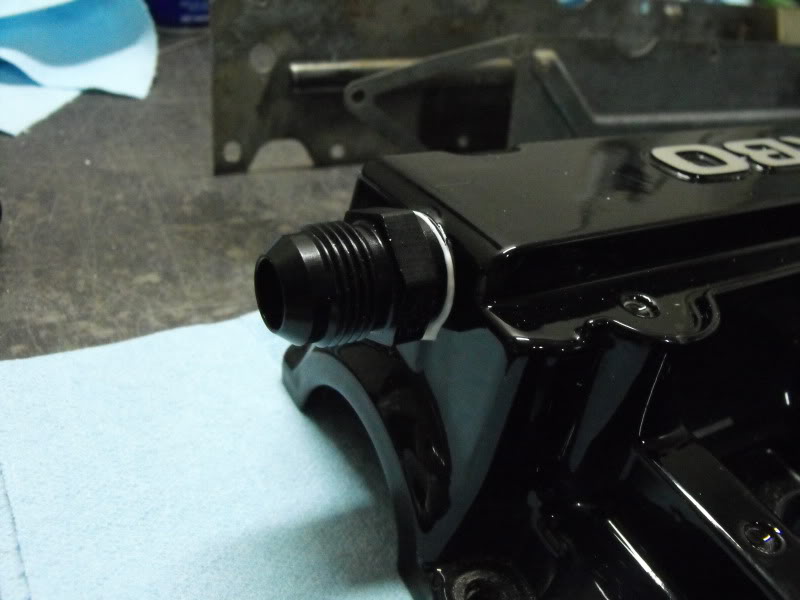
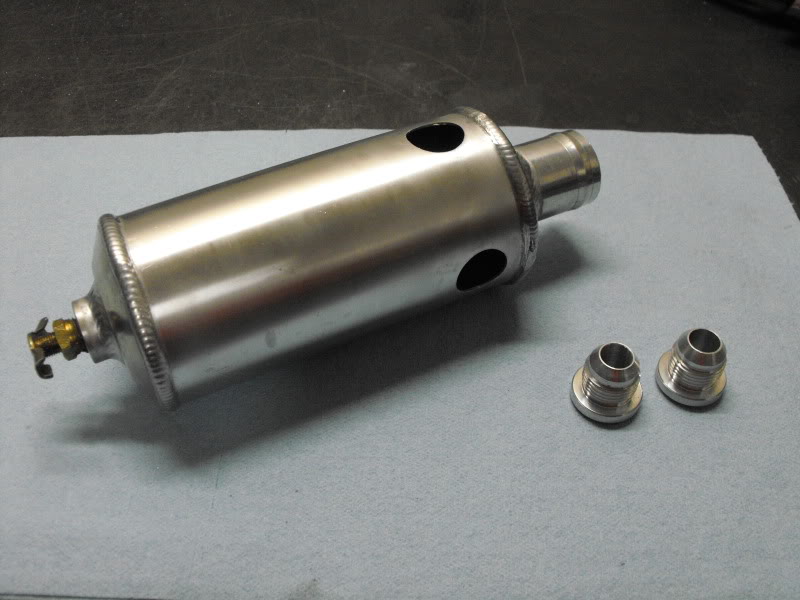
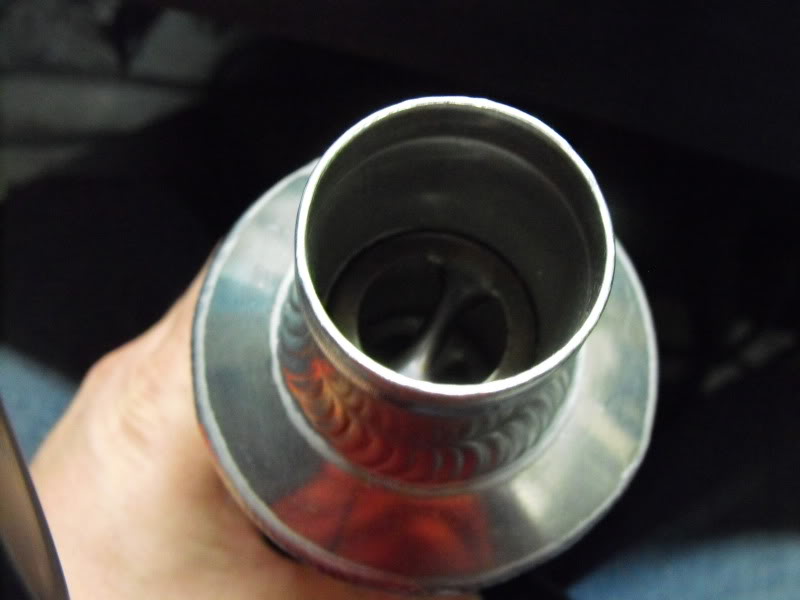
Modified Peterson Baffled Catch Can. You can see I removed the old -6AN fittings. I did a pretty snazzy job huh?
NOTE: Don't buy AN Plumbings weld fittings. Buy ARP (yeah the guys who make the bolts) Weld on AN fittings. They come with a round base and not a HEX base for EASY welding. Your fabricator will praise you.
Wheel/Tire progression over time. Big thanks to Rishi@AutoRnD for the hookup on the Enkei wheels!
Stock 17x8 Enkei with 245/45/17 RE01Rs
18x9.5 Enkei NT03 +38 (25mm spacer up front) with 265/35/18 RE-01Rs and lowering springs
18x9.5 Enkei NT03 +38 (25mm spacer up front, 5mm rear) with 285/30/18 Hoosier R and Skunk2 Pro-Cs
18x10 Enkei RPF1 +38 (20mm spacer up front) with 295/30/18 R888's, custom trailing links, Ohlins, and other
Current: 18x10.5 CCW Classic +38 (Custom R/TErnie 22mm spacer, trailing links, Ohlins, the works.
Here's a picture of the workbench in the garage. This is where all the magic happens.
Here's some pictures of my valve cover progress.
When I got the VC back from Carlos Tiago's Custom Coatings along with the Spoolinup COP setup
I used the STM -6AN breather fittings with a Peterson catch can. Very nice, but waaay too much restriction. Ended up pushing a valve cover gasket near the cam gear into the timing cover! sucked big time! This is what it looked like before install and installed.
Since then I've identified a few issues. I need more ventilation to reduce the pressure on the bottom side of the piston rings. This will reduce my chances of ring flutter and improve my ring sealing. Lucky me my amazing BW EFR turbo has DUAL dynamic seals on the compressor and turbine side of the shaft! This keeps the pressure out of the CHRA, out of the oil drain line, and you guessed it... out of the crankcase.
Issue #2 When someone powdercoats your valve cover they typically sand blast it first. They can't clean behind your baffles and therefore there is blast media and crap stuck behind your baffles. I needed to clean this out.
Issue #3 I needed Bigger vents. My catch can had -6AN male fittings that I welded on and I need -10AN... time for some grinding and sanding. I also needed to remove the -6AN fittings in my VC and put in some -10AN fittings.
NOTES: www.anplumbing.com i've been using them for 12 years. Great service and their online catalog makes an plumbing easy. AN stands for Army-Navy. The sizes are the numerator and the denominator is always 16. This results in a fraction which states what the inner diameter is. For example -10AN is 10/16" or 5/8" diameter.... -8AN is 8/16" or 1/2" diameter. AN fittings have a 37 degree flare (which is unique to itself and JIC fittings) DO NOT PUT TEFLON ON AN FITTINGS. They seal on the conical seat. I do suggest putting anti-seize on the threads. Enough blabber... onto the pictures.
Drilling out the rivets that hold the baffles, drilling and tapping for several 5mmx1.0 socket head cap screws, and drilling and tapping for the 1/2" NPT to -10AN fittings. Lot's of Magnesium cheese!
After several cycles through the dishwasher
NOTE: NPT (National Pipe Tapered) are considered an abomination by Carrol Smith... use sparingly. These seal on the threads... USE TEFLON!
I cleaned the threads with Brakleen, blew them out with compressed air, and used Red Loctite on the SHCS's I got from McMaster-Carr. These SHCS's hold my baffles in place now. Super clean!
Modified Peterson Baffled Catch Can. You can see I removed the old -6AN fittings. I did a pretty snazzy job huh?
NOTE: Don't buy AN Plumbings weld fittings. Buy ARP (yeah the guys who make the bolts) Weld on AN fittings. They come with a round base and not a HEX base for EASY welding. Your fabricator will praise you.
Last edited by R/TErnie; Mar 23, 2012 at 01:24 PM.
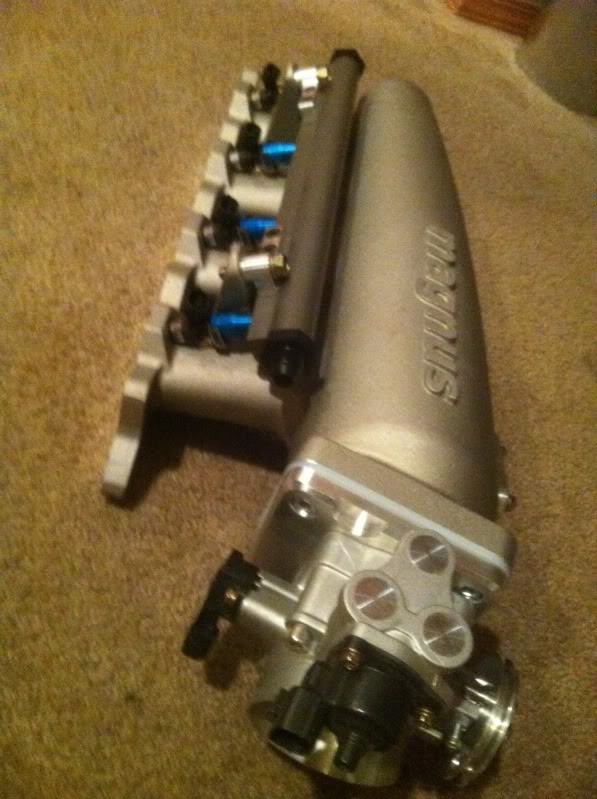
Magnus v5 Intake Manifold.
The v5 made huge gains on my old FP Red setup "OMFG Magnus v5" (insert link) and I really like cast intake manifold... and really the entire design. Marco is an O.G. and he makes nice parts that perform. I feel this is the best intake manifold (maybe shy of the Driven Innovations or Wilson Billet Intake manifold) and certainly when you consider how much they cost! The AMS F-1 Intake manifold I also like, but their velocity stacks are not a complete 180 degree velocity stack. Lets just say I've tested on an engine dyno at least 10 different velocity stack designs... I know their stack design in not a winner. The AMS runner length is also longer which produces a Helmholtz resonance frequency that improves cylinder filling at a lower engine speed than the Magnus. As maybe mentioned before I'm gearing towards making power at 8k... Magnus wins. Both have HUGE plenums which I love... big plenum = big power at the expense of throttle response. I've made probably 50 or more intake manifolds for Dodge Neons (yeah I know) and have a ton of experience making, designing, and fabricating intake manifolds. It says something when I'd rather buy a Magnus.
This all being said, I have done some mods to my current Magnus (2nd one I've owned)
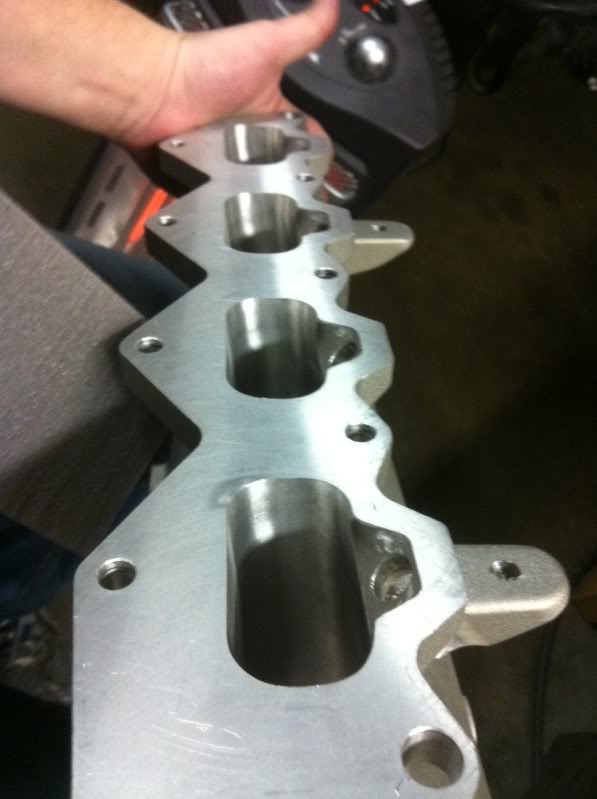
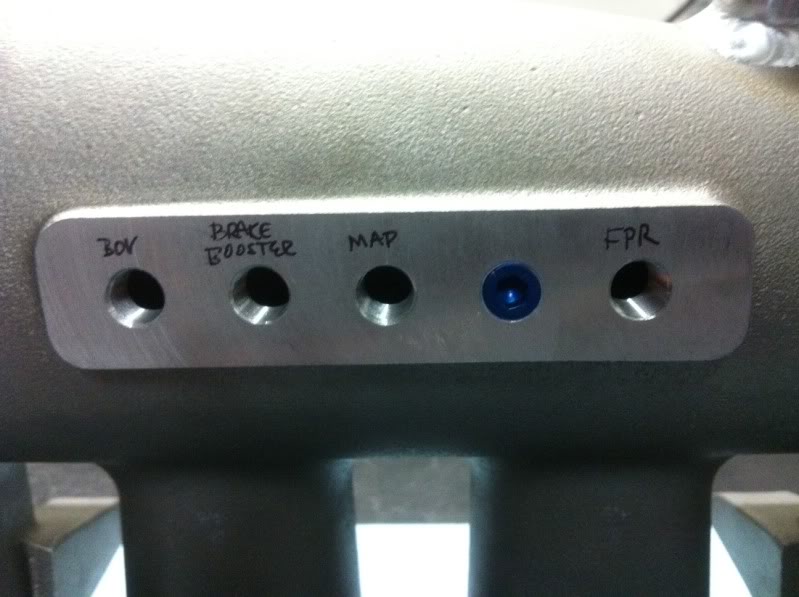
I ported the opening to match the Full-Blown cast 70mm throttle body. Very nicely done piece. Looks stock/OEM...I like it. After porting the intake manifold to match, I radiused the inlet flange into the plenum to help the transition and reduce the pressure loss as well as pulsations inside the plenum.
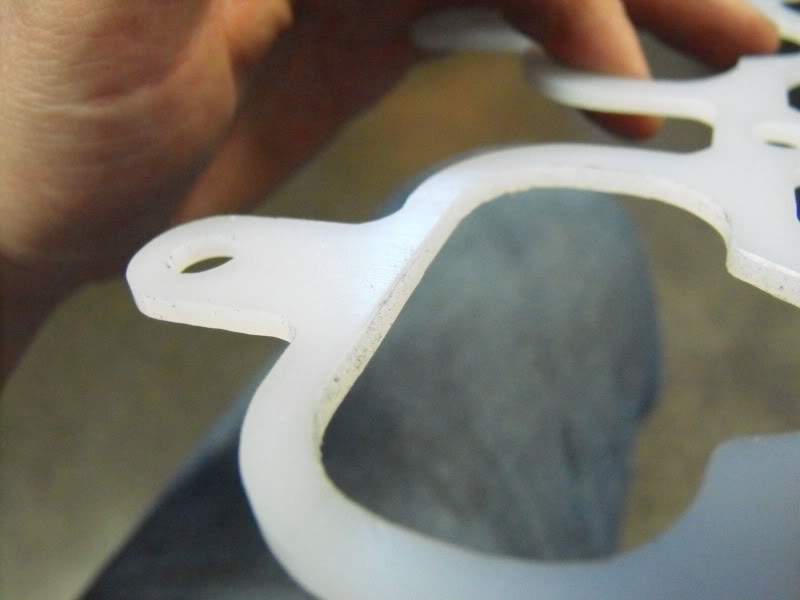
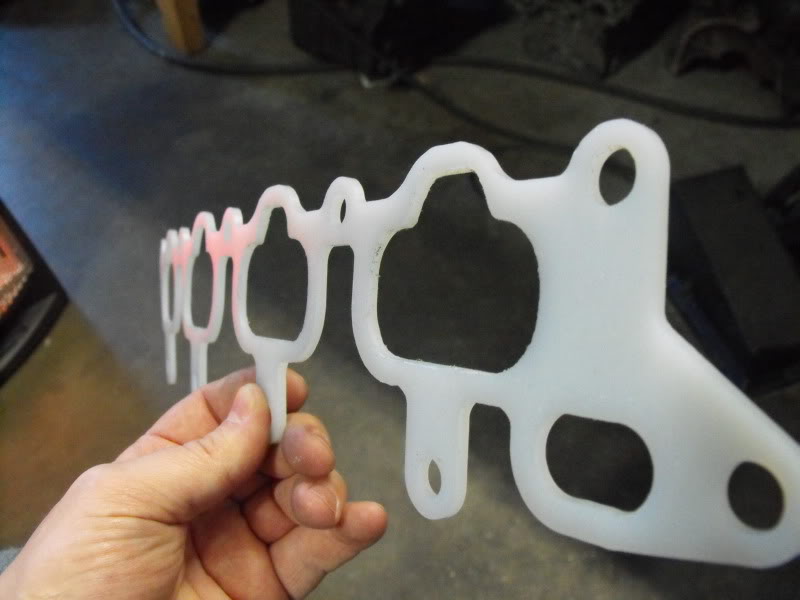
Here I actually used my carbide and PORT matched the GASKET to the intake manifold. The gasket was smaller than the Intake manifold. I have more pics of the portwork inside the magnus, but they're on my cell phone. More pics tomorrow.
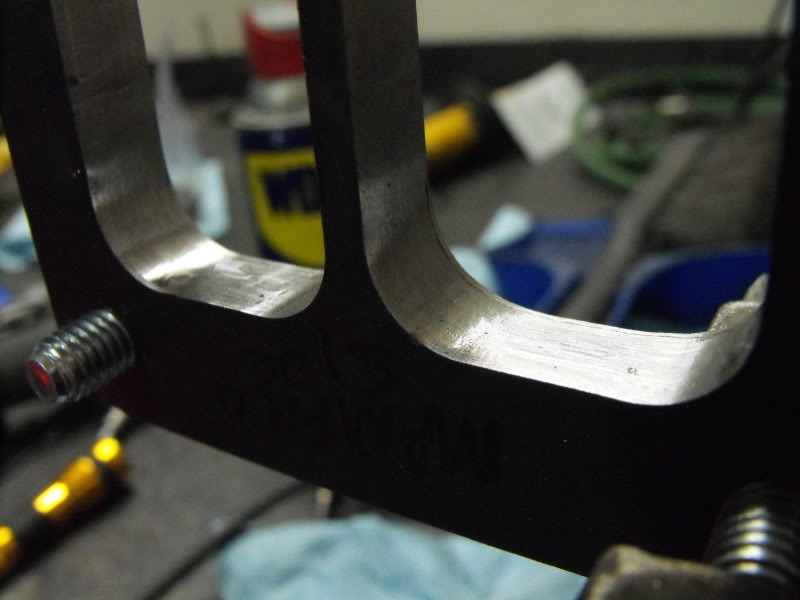
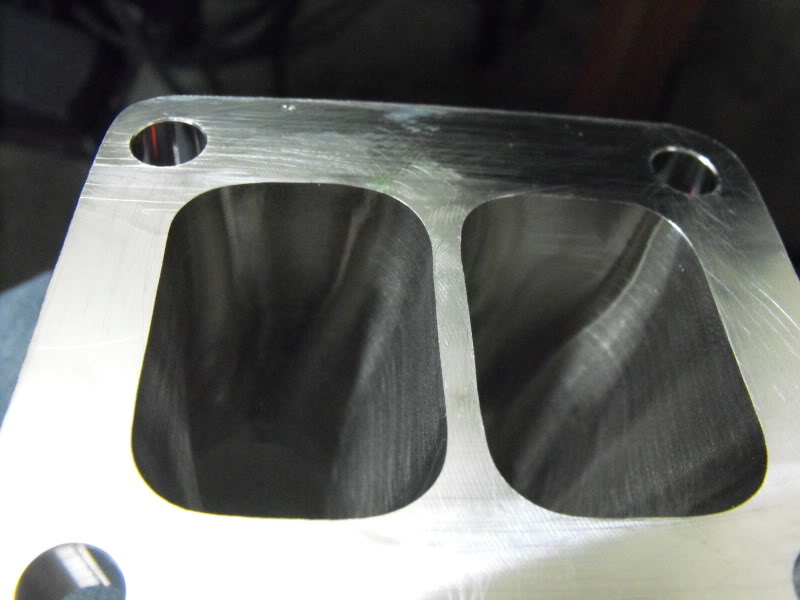
BORG WARNER EFR 7670 DIVIDED T4 1.05AR
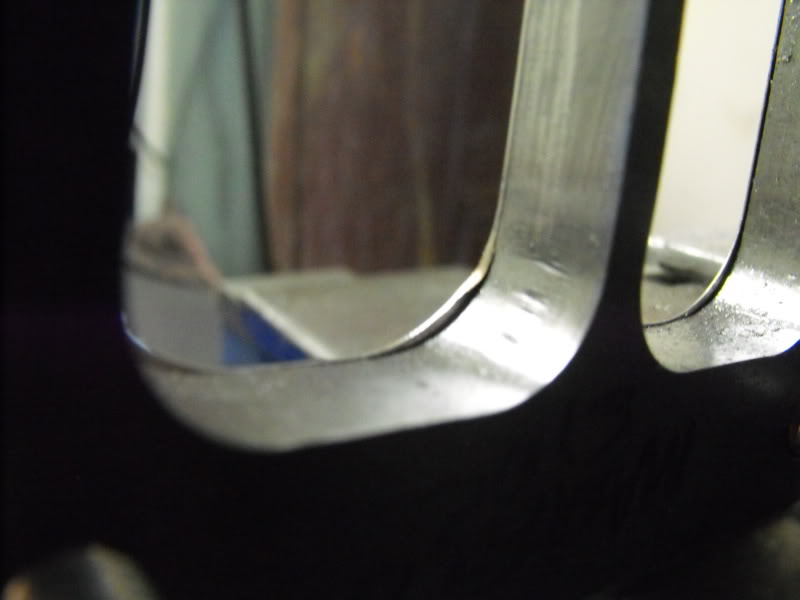
I port match everything. Here I took my turbine inlet flange that I'll be using on my turbo manifold, my gasket, and my turbocharger and port matched them to each other. The radiuses on the flange pattern are slightly different so it took some porting to make this right. The Flange, gasket, and turbocharger are all indexed to each other.
Everything bolted up prior to porting. This would've cost me a few ponies
Here I am porting the turbine housing and blending it into the volute.

Gasket Matching the gasket?

After a quick trip to the dishwasher, brake clean, and compressed air.

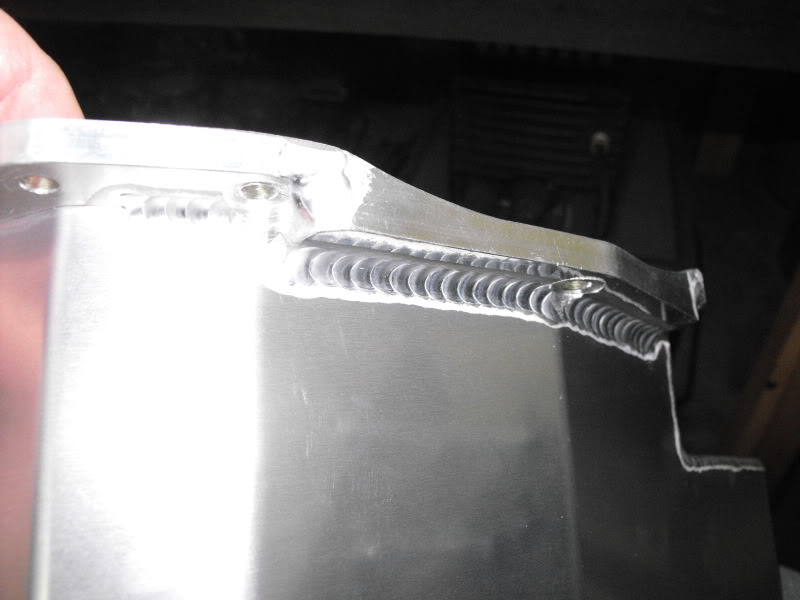
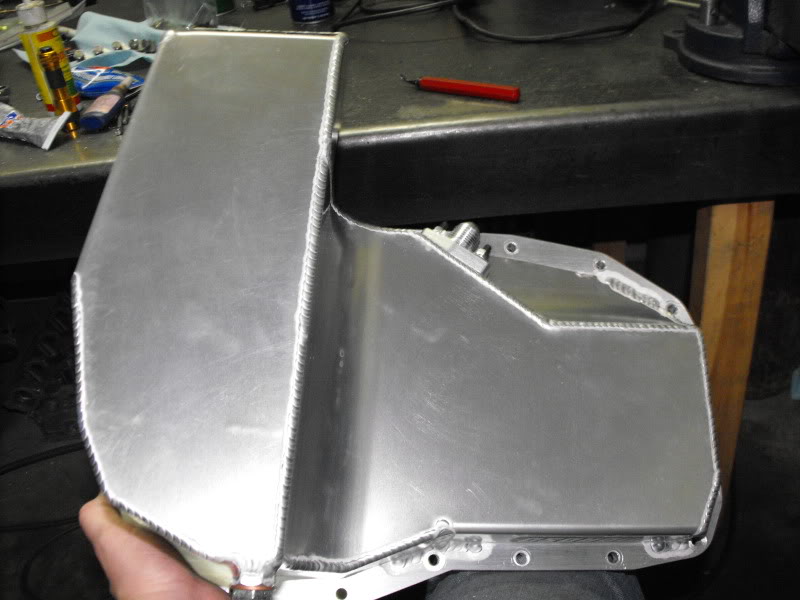
AMS OIL PAN MODIFICATIONS
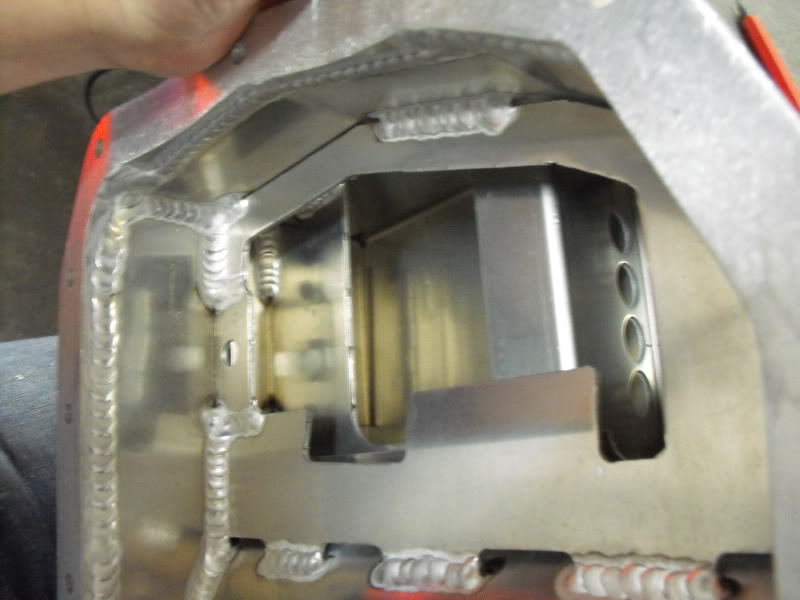
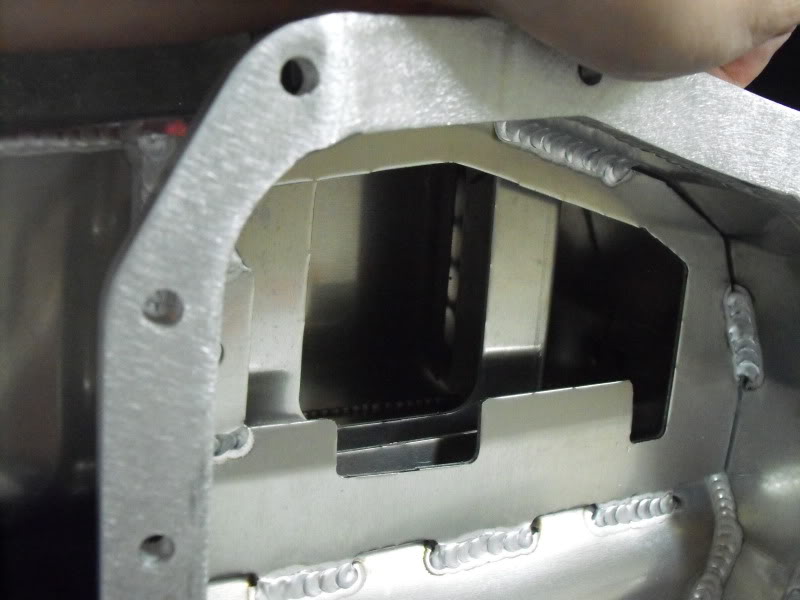
The gasket area on the drain flange has a weld bead on it... this would be quite crappy. So I spent some time using a carbide, flap wheel, and some sand paper making this right.


Other than that I noticed it wasn't perfectly flat. But I think it will work.
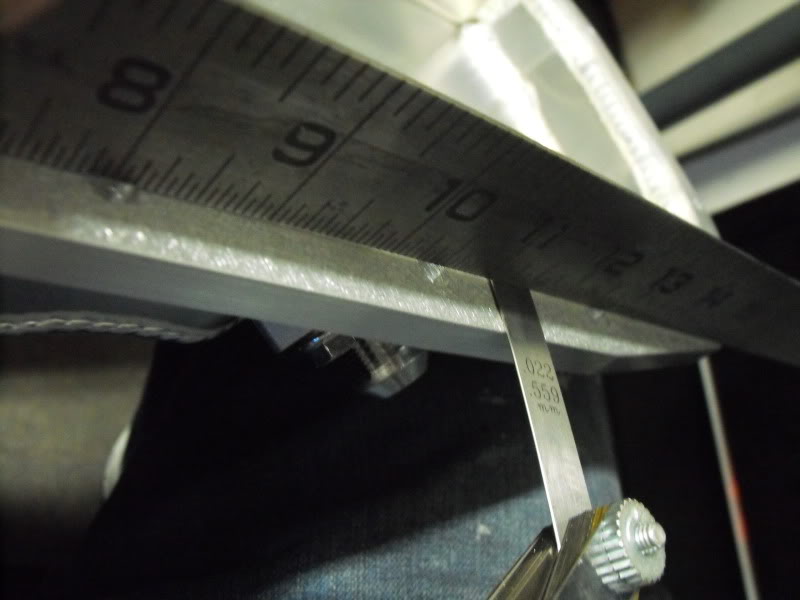
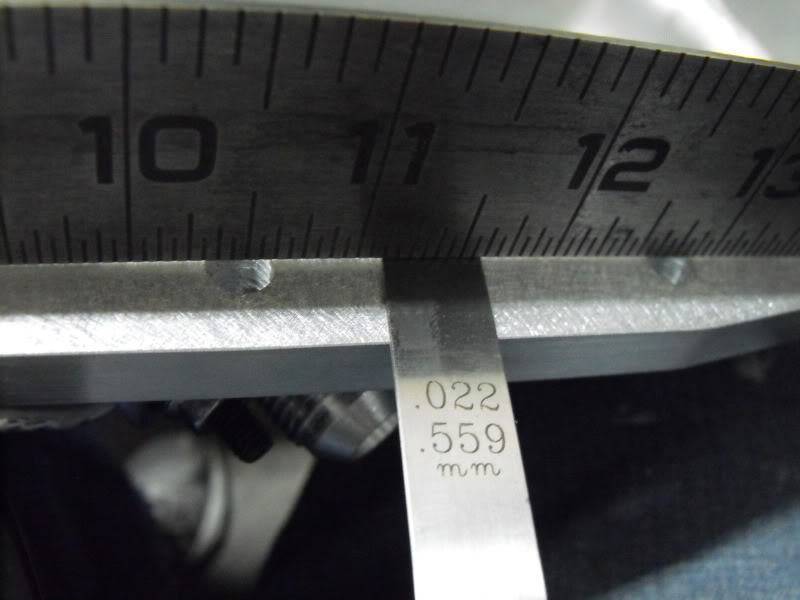
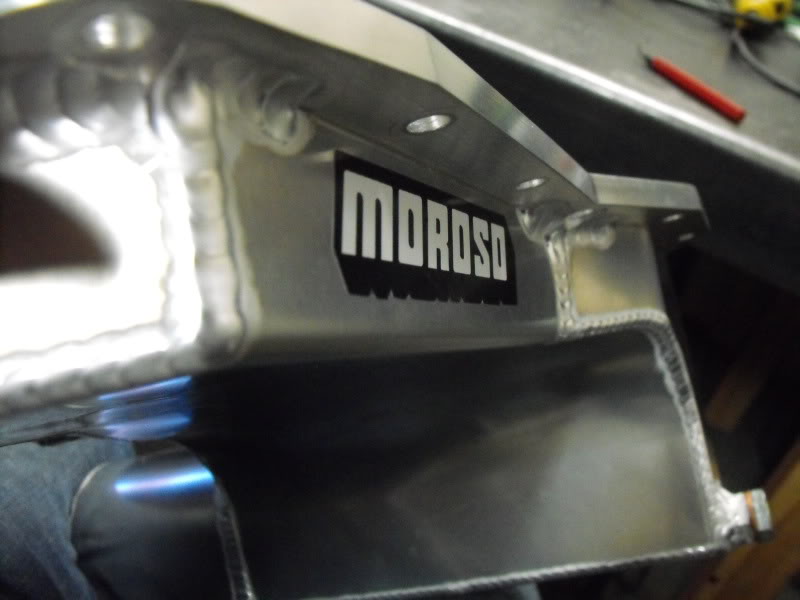
Here are more pictures of the AMS oil pan for people who want to see what it looks like before buying it based on a 1"x1" picture on the internet.

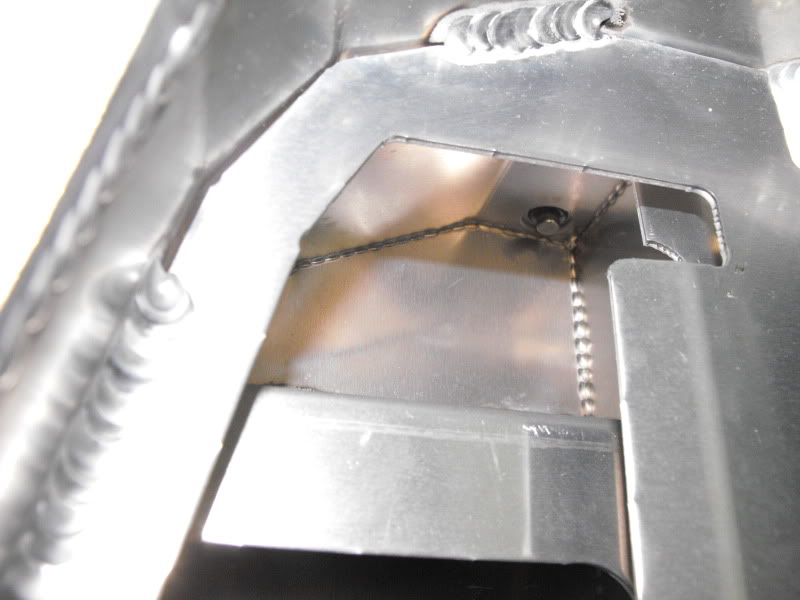
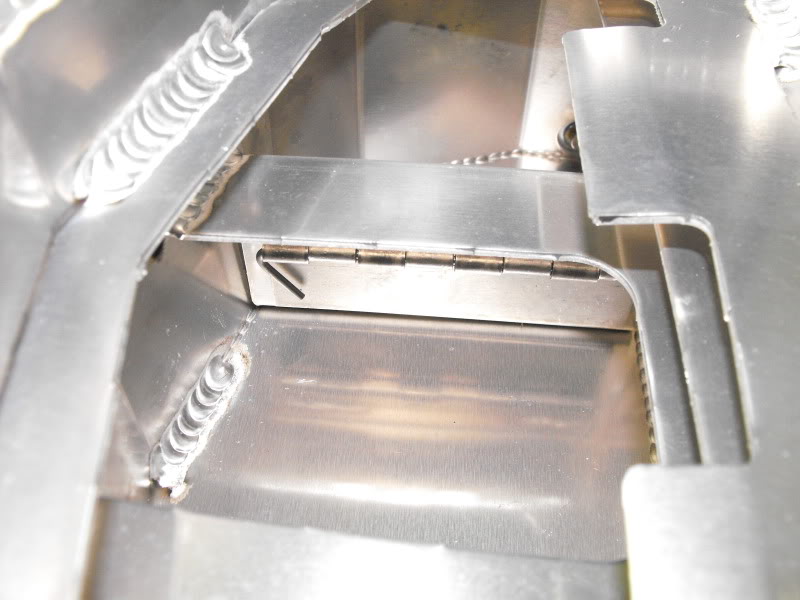
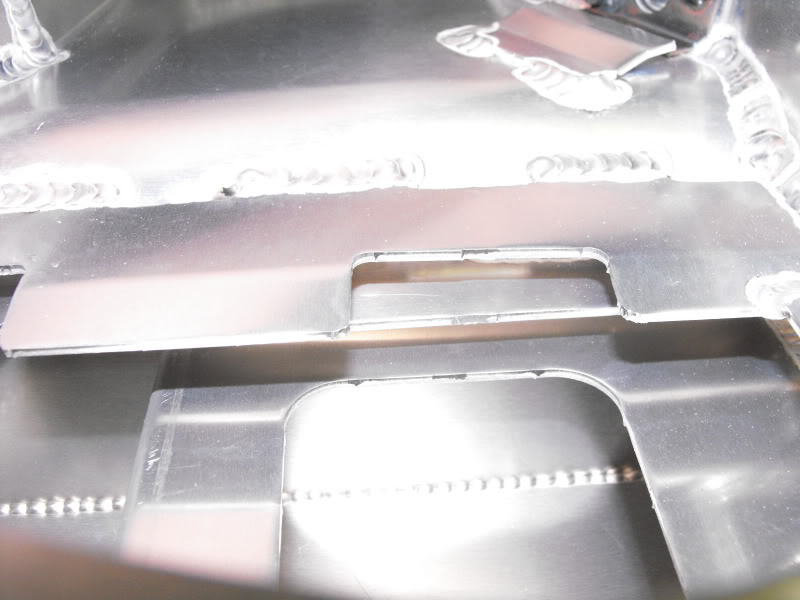
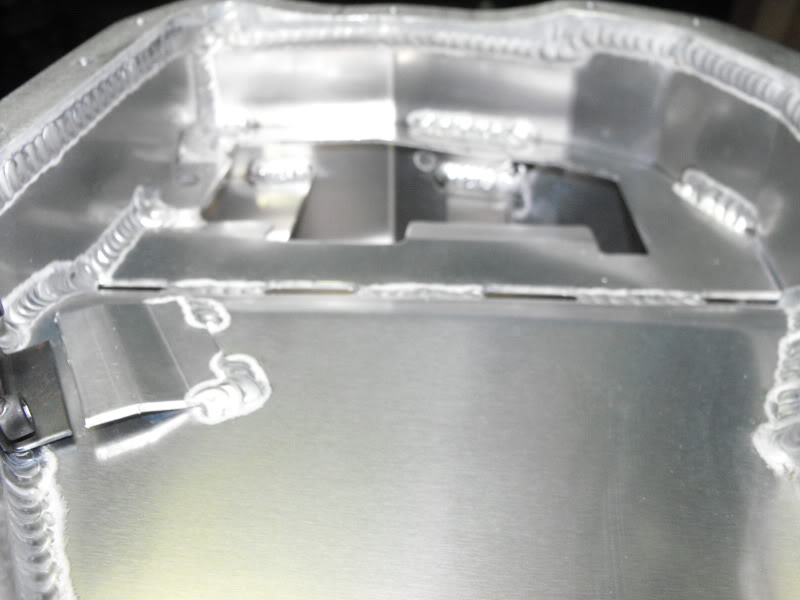
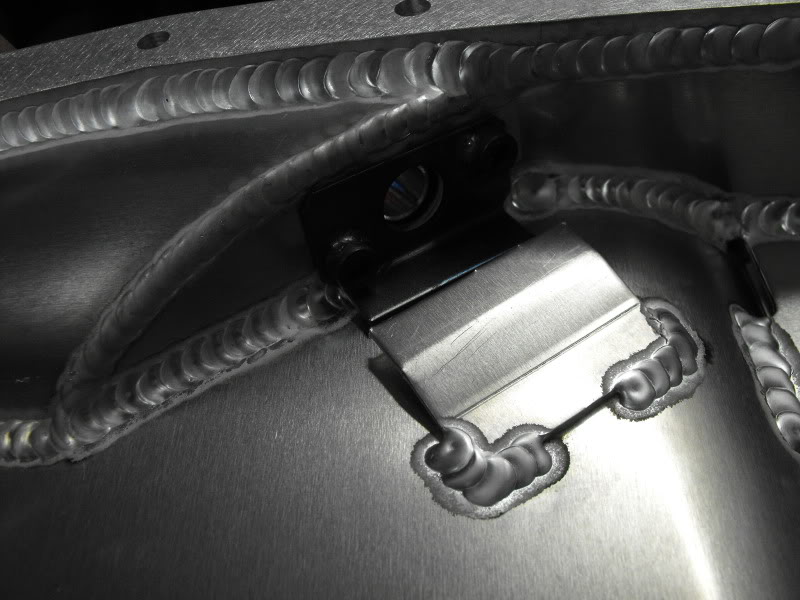
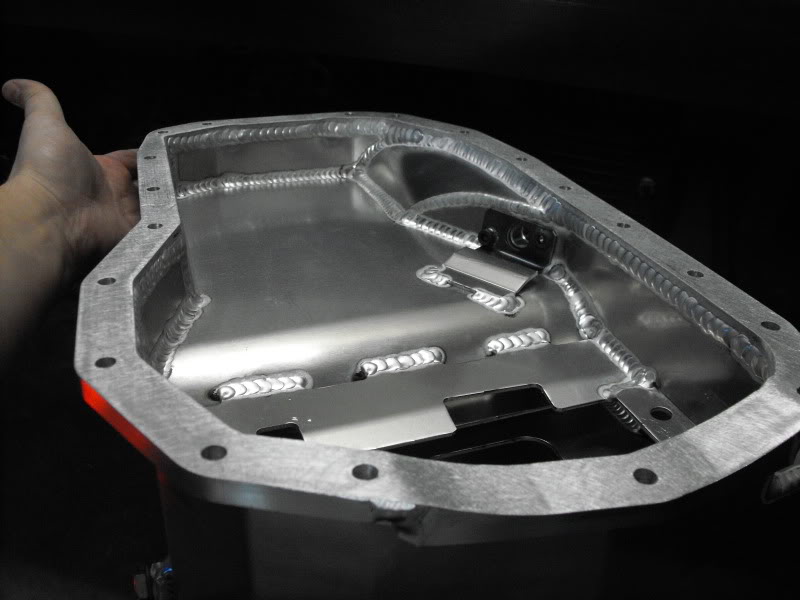

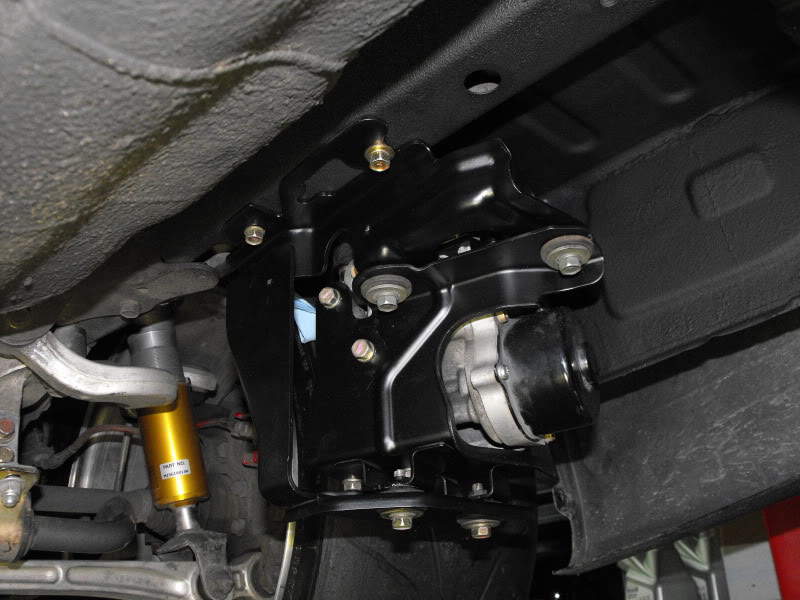
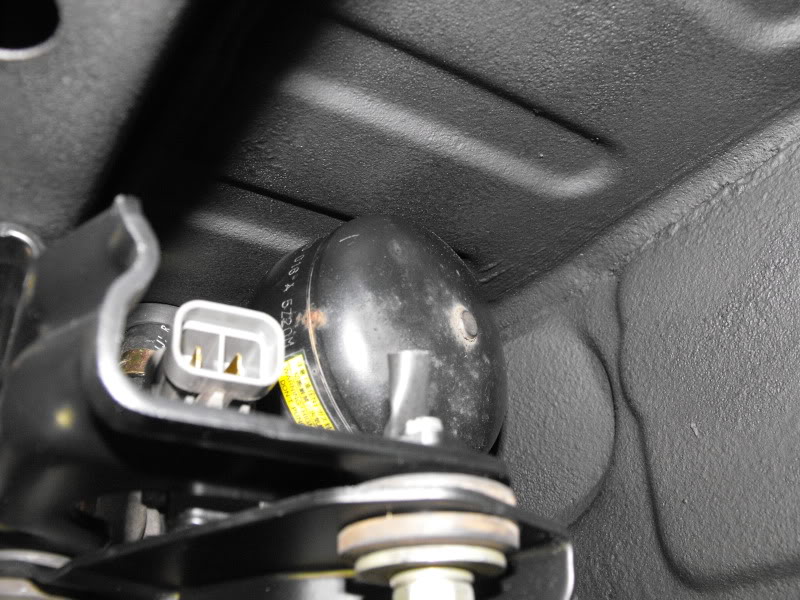
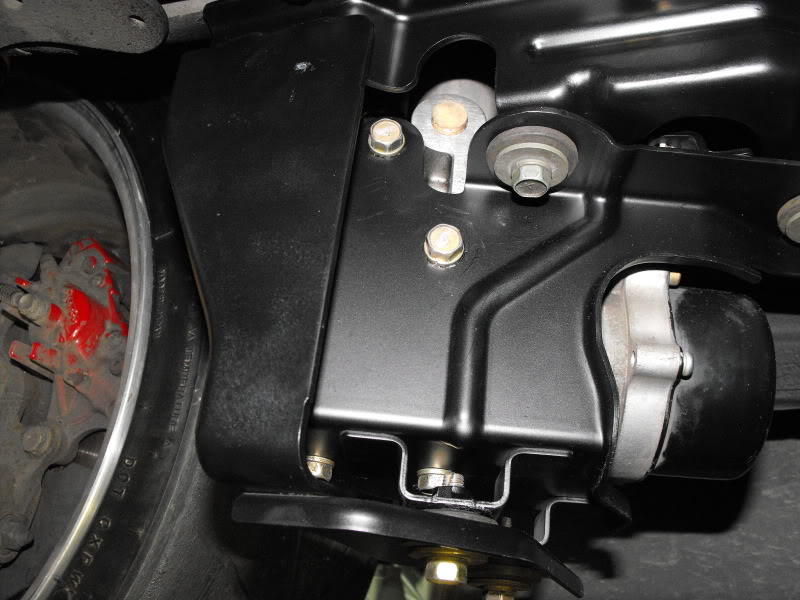
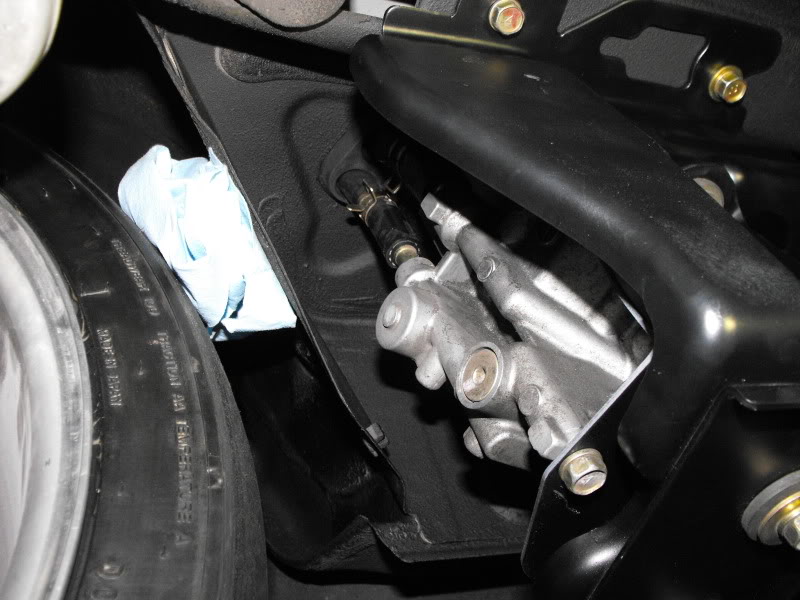
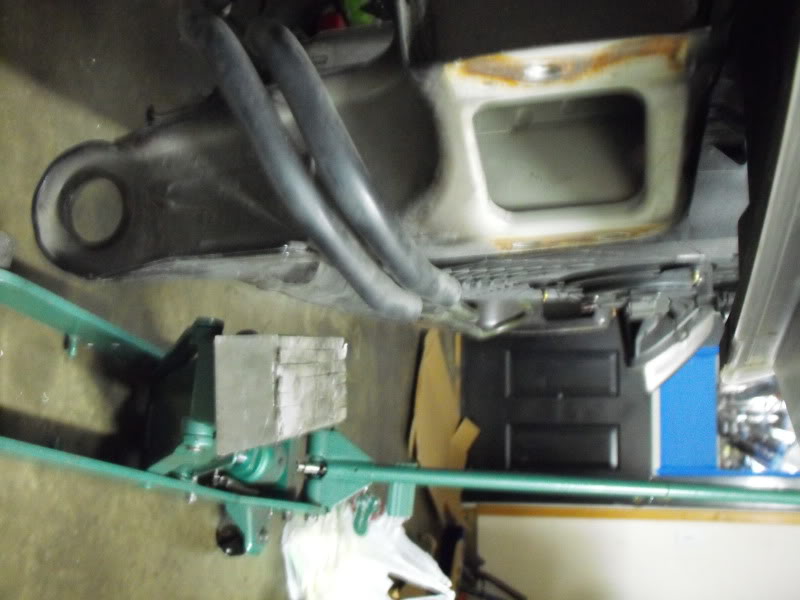
RELOCATING THE ACD AND THE BATTERY TO THE TRUNK
So this is a bit harder to explain, but I'll make it quick and you can study up yourself. RCVD = Race Car Vehicle Dynamics by Milliken and Milliken. Great book. Tire sensitivity is a characteristic of tires that relates Normal Force to Grip. (Normal force is physics speak for a force acting perpendicular to earth... GRAVITY) What the data shows when looking at Normal Force relative to Grip is that as you increase the Normal Force (weight) on the tire you increase the grip at a decreasing rate. If you understand this... Aero makes sense to you too. No extra mass in the vehicle, but you have a higher normal force and therefore MORE grip.
Now if you've ever corner balanced an Evo or seen one balanced you'll know that your front weights are high 900's and the rears are in the 600's Tire size F&R being the same your tires up front make less grip. Don't scratch your head... it's basic physics! For F=MA. Since the Mass of the front of your Evo is more... it also takes MORE force to accelerate it laterally. Tire sensitivity shows that the front end will have LESS grip than the rear.
Evo's understeer. period. They do it less than Subaru's though! We can reduce understeer by increasing front grip (bringing traction UP). This is the preferred method of fixing understeer. Other people will add a huge rear ARB and run less camber in the rear....maybe even more tire pressure to REDUCE REAR GRIP.
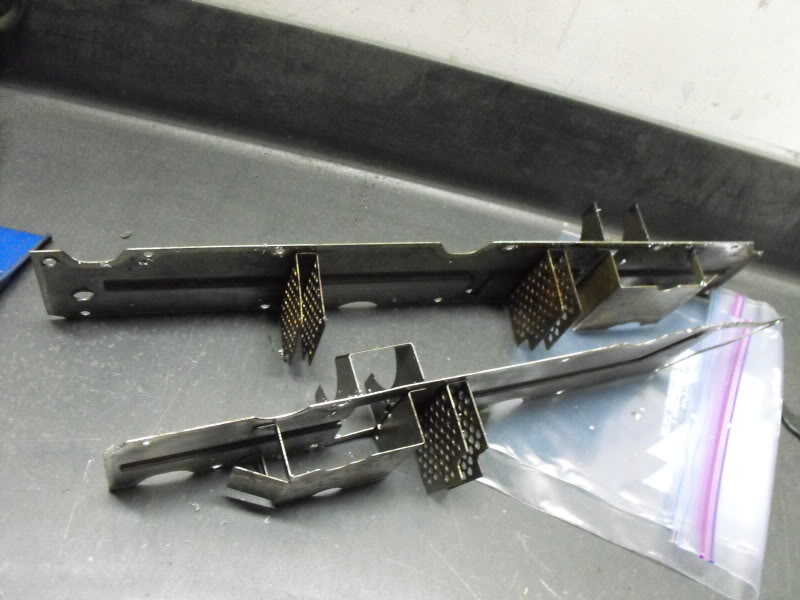
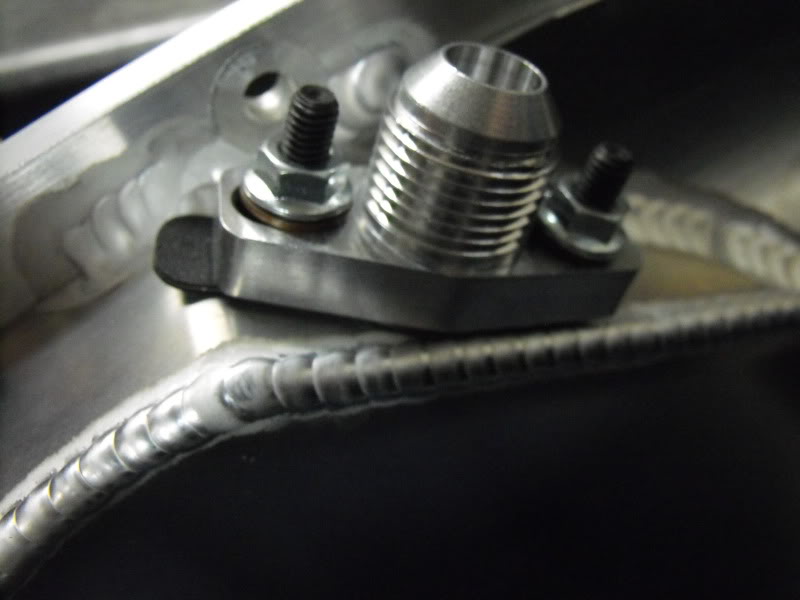
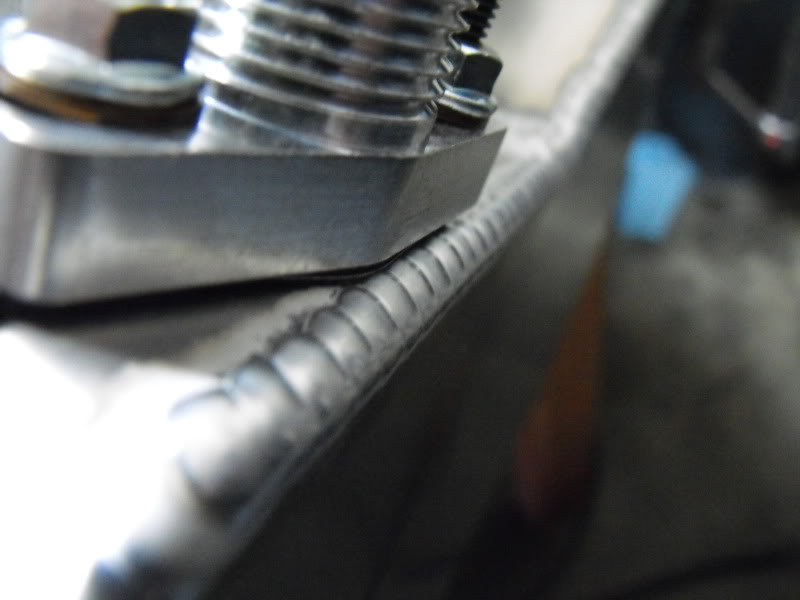
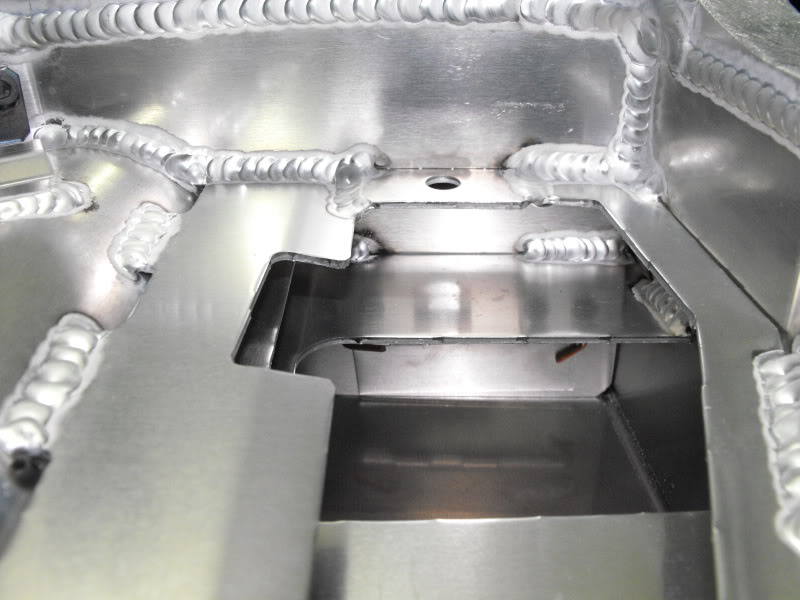
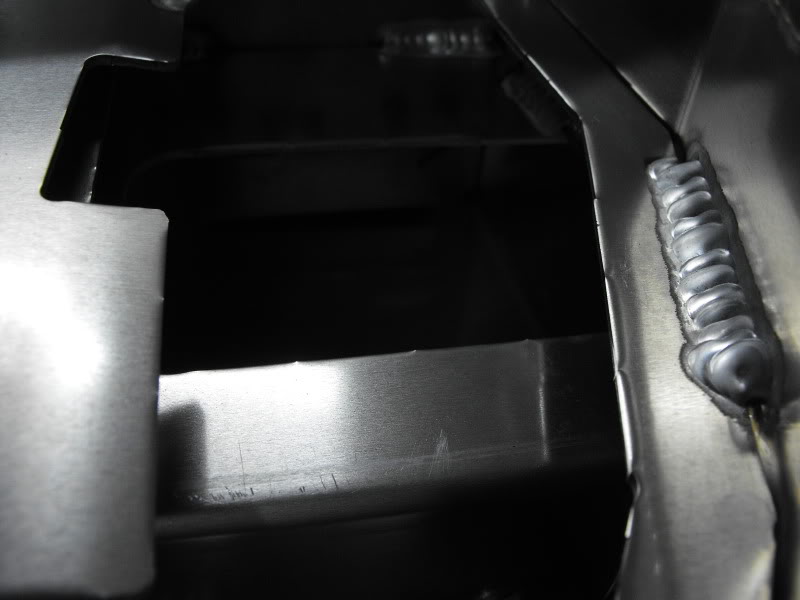
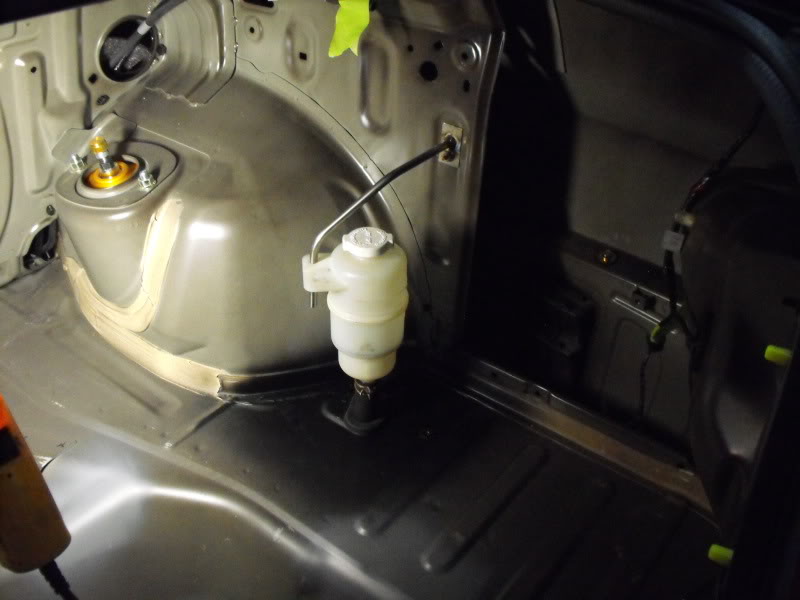
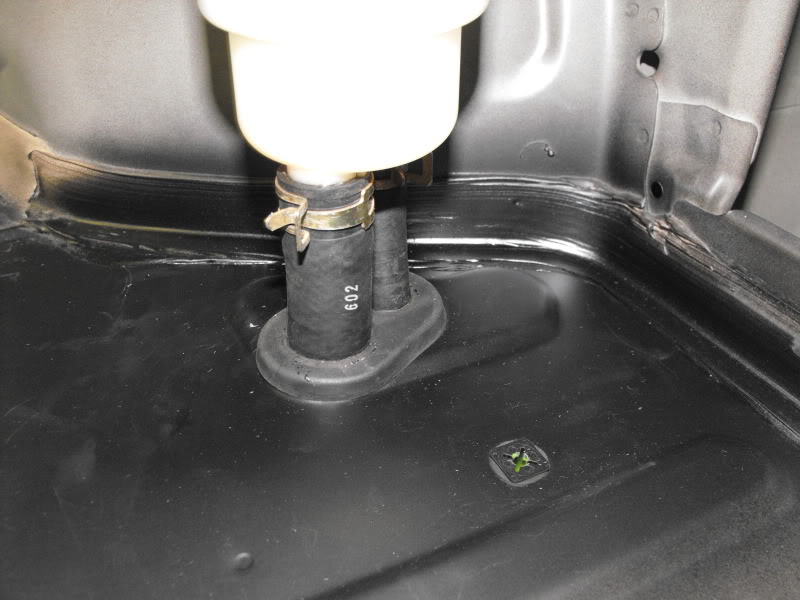
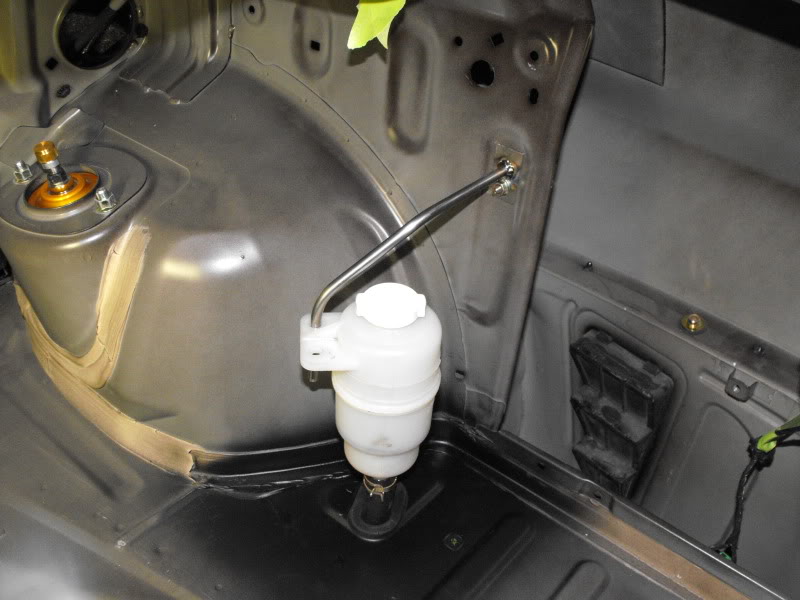
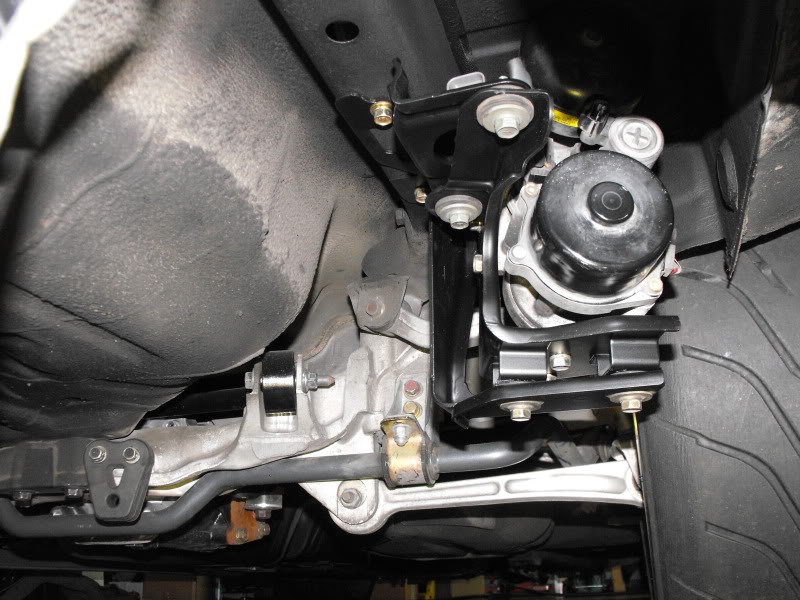
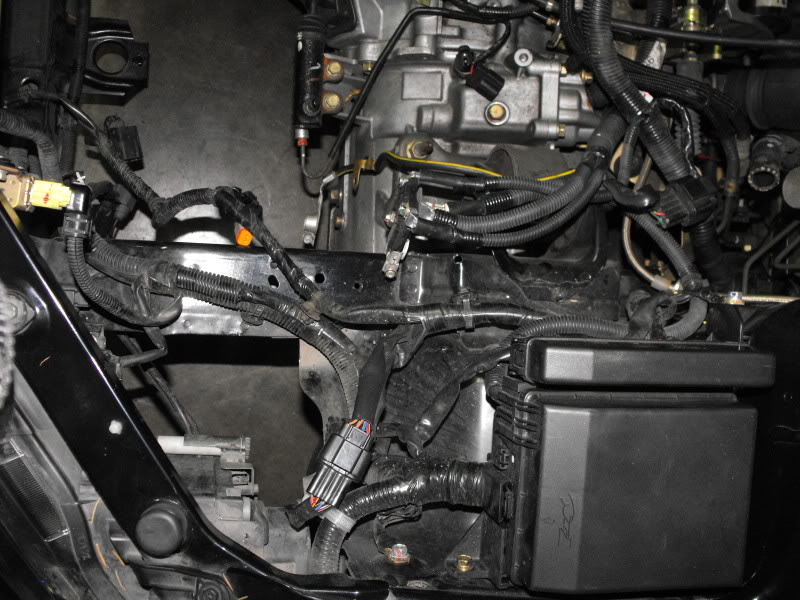
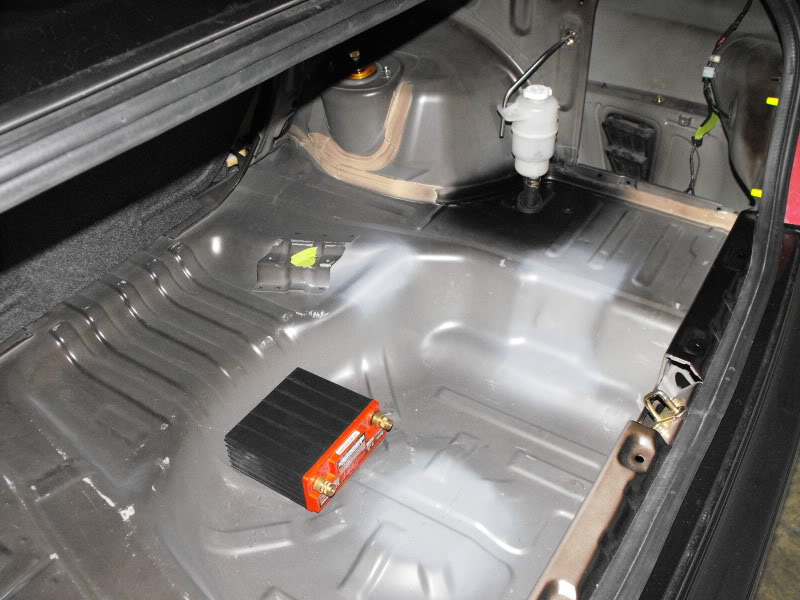
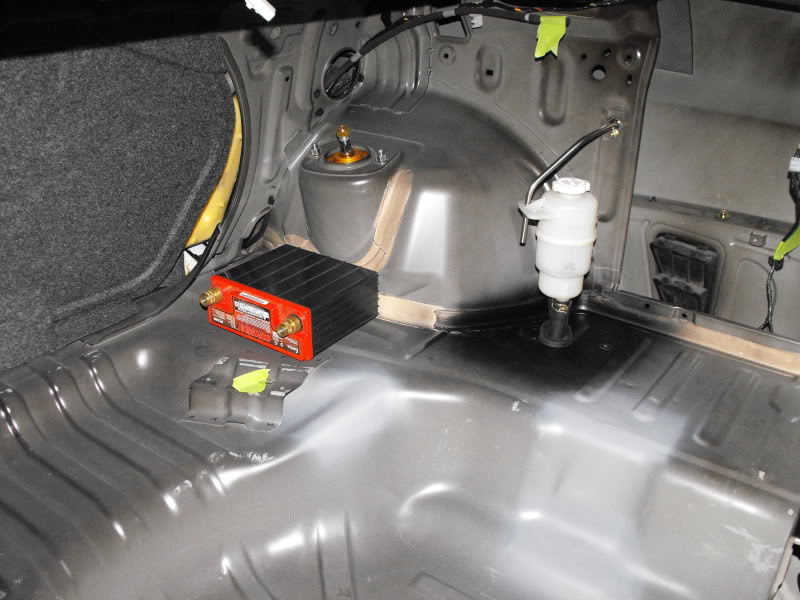
I have a better idea. Move weight to the rear of the car from the front! There are two easy pieces... well relatively easy. Battery and the ACD Reservoir/pump assembly. Notice I moved them to the PASSENGER side of the trunk and as low as possible. I chose the passenger side due to the Left - Right imbalance in the car provided by the fat organic mass that pilots this s*&^ box. The parts are low to reduce the height of the c.o.g. Center Of Gravity. lower cog does all kinds of amazing things... also reduces weigh transfer (remember that thing about tire sensitivity?) 2 tire lightly loaded generate more grip than 1 tire heavily loaded. All kinds of win going on here.
Yes that is a Titanium bracket to support the ACD reservoir.
NOTES: Pass through grommit comes from the Evo X. The thread pitch on the ACD pump is a 14mm x 1.5 INVERTED FLARE
The v5 made huge gains on my old FP Red setup "OMFG Magnus v5" (insert link) and I really like cast intake manifold... and really the entire design. Marco is an O.G. and he makes nice parts that perform. I feel this is the best intake manifold (maybe shy of the Driven Innovations or Wilson Billet Intake manifold) and certainly when you consider how much they cost! The AMS F-1 Intake manifold I also like, but their velocity stacks are not a complete 180 degree velocity stack. Lets just say I've tested on an engine dyno at least 10 different velocity stack designs... I know their stack design in not a winner. The AMS runner length is also longer which produces a Helmholtz resonance frequency that improves cylinder filling at a lower engine speed than the Magnus. As maybe mentioned before I'm gearing towards making power at 8k... Magnus wins. Both have HUGE plenums which I love... big plenum = big power at the expense of throttle response. I've made probably 50 or more intake manifolds for Dodge Neons (yeah I know) and have a ton of experience making, designing, and fabricating intake manifolds. It says something when I'd rather buy a Magnus.
This all being said, I have done some mods to my current Magnus (2nd one I've owned)
I ported the opening to match the Full-Blown cast 70mm throttle body. Very nicely done piece. Looks stock/OEM...I like it. After porting the intake manifold to match, I radiused the inlet flange into the plenum to help the transition and reduce the pressure loss as well as pulsations inside the plenum.
Here I actually used my carbide and PORT matched the GASKET to the intake manifold. The gasket was smaller than the Intake manifold. I have more pics of the portwork inside the magnus, but they're on my cell phone. More pics tomorrow.
BORG WARNER EFR 7670 DIVIDED T4 1.05AR
I port match everything. Here I took my turbine inlet flange that I'll be using on my turbo manifold, my gasket, and my turbocharger and port matched them to each other. The radiuses on the flange pattern are slightly different so it took some porting to make this right. The Flange, gasket, and turbocharger are all indexed to each other.
Everything bolted up prior to porting. This would've cost me a few ponies
Here I am porting the turbine housing and blending it into the volute.
Gasket Matching the gasket?
After a quick trip to the dishwasher, brake clean, and compressed air.
AMS OIL PAN MODIFICATIONS
The gasket area on the drain flange has a weld bead on it... this would be quite crappy. So I spent some time using a carbide, flap wheel, and some sand paper making this right.
Other than that I noticed it wasn't perfectly flat. But I think it will work.
Here are more pictures of the AMS oil pan for people who want to see what it looks like before buying it based on a 1"x1" picture on the internet.
RELOCATING THE ACD AND THE BATTERY TO THE TRUNK
So this is a bit harder to explain, but I'll make it quick and you can study up yourself. RCVD = Race Car Vehicle Dynamics by Milliken and Milliken. Great book. Tire sensitivity is a characteristic of tires that relates Normal Force to Grip. (Normal force is physics speak for a force acting perpendicular to earth... GRAVITY) What the data shows when looking at Normal Force relative to Grip is that as you increase the Normal Force (weight) on the tire you increase the grip at a decreasing rate. If you understand this... Aero makes sense to you too. No extra mass in the vehicle, but you have a higher normal force and therefore MORE grip.
Now if you've ever corner balanced an Evo or seen one balanced you'll know that your front weights are high 900's and the rears are in the 600's Tire size F&R being the same your tires up front make less grip. Don't scratch your head... it's basic physics! For F=MA. Since the Mass of the front of your Evo is more... it also takes MORE force to accelerate it laterally. Tire sensitivity shows that the front end will have LESS grip than the rear.
Evo's understeer. period. They do it less than Subaru's though! We can reduce understeer by increasing front grip (bringing traction UP). This is the preferred method of fixing understeer. Other people will add a huge rear ARB and run less camber in the rear....maybe even more tire pressure to REDUCE REAR GRIP.
I have a better idea. Move weight to the rear of the car from the front! There are two easy pieces... well relatively easy. Battery and the ACD Reservoir/pump assembly. Notice I moved them to the PASSENGER side of the trunk and as low as possible. I chose the passenger side due to the Left - Right imbalance in the car provided by the fat organic mass that pilots this s*&^ box. The parts are low to reduce the height of the c.o.g. Center Of Gravity. lower cog does all kinds of amazing things... also reduces weigh transfer (remember that thing about tire sensitivity?) 2 tire lightly loaded generate more grip than 1 tire heavily loaded. All kinds of win going on here.
Yes that is a Titanium bracket to support the ACD reservoir.
NOTES: Pass through grommit comes from the Evo X. The thread pitch on the ACD pump is a 14mm x 1.5 INVERTED FLARE
Last edited by R/TErnie; Mar 23, 2012 at 01:26 PM.


I love absolutely everything about this.
I must say that I respect the hell out of you for making such educated choices on parts, and not building a motor, but a car.
Good luck mang.
Edit: One of the hardest decisions I had to make was between a de-stroked 2.2L 4g64 or a LR 2.4L. I picked the latter, and thus am extremely excited to see the results of your 2.2L.
Last edited by Blue91lx; Mar 22, 2012 at 10:18 PM.
uvambo,
REAL Injector Dynamics injectors. Thank you Tony Palo.... T1 Race Development. Tony is not only a great Injector manufacturer, but an A+ fabricator and engine tuner. Tony has a low low 8 second integra that I know will run 7's this year as well as a slew of R35 GTR's that he's been building. I'll discuss the injectors at a later time when I have some nice shots of them.
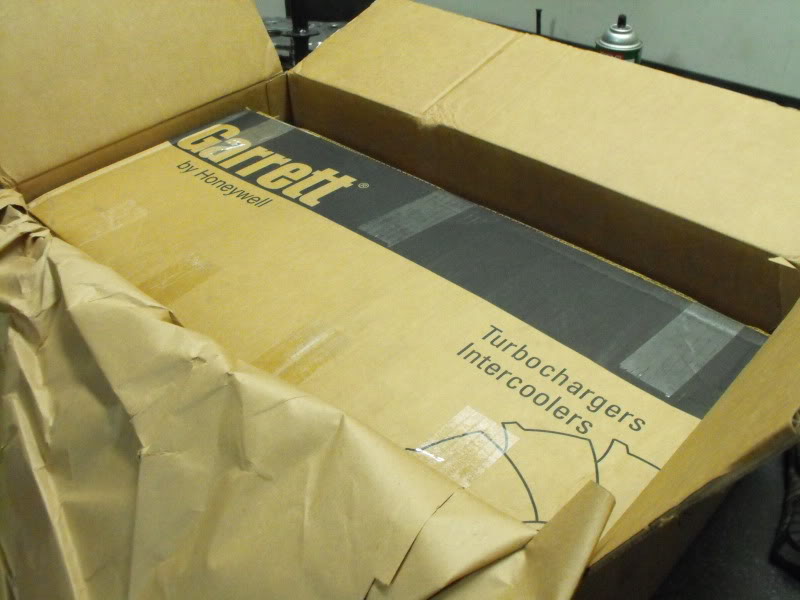
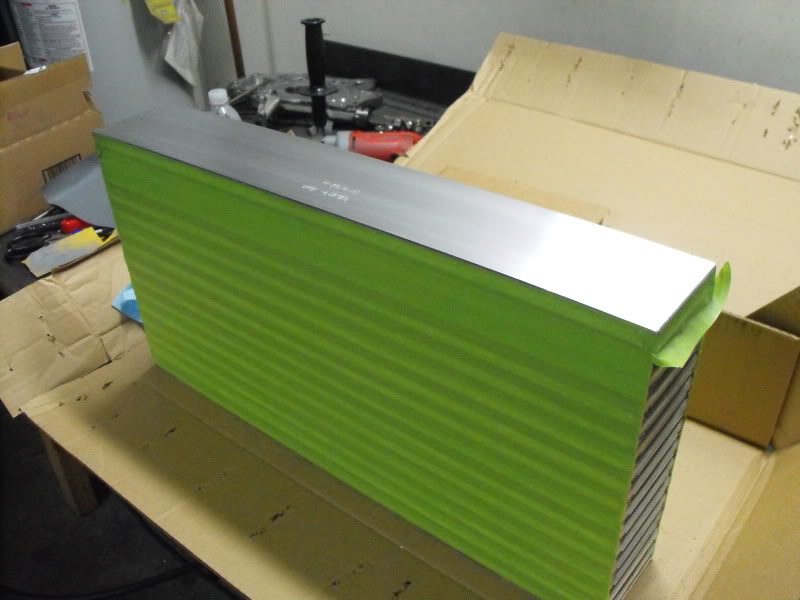
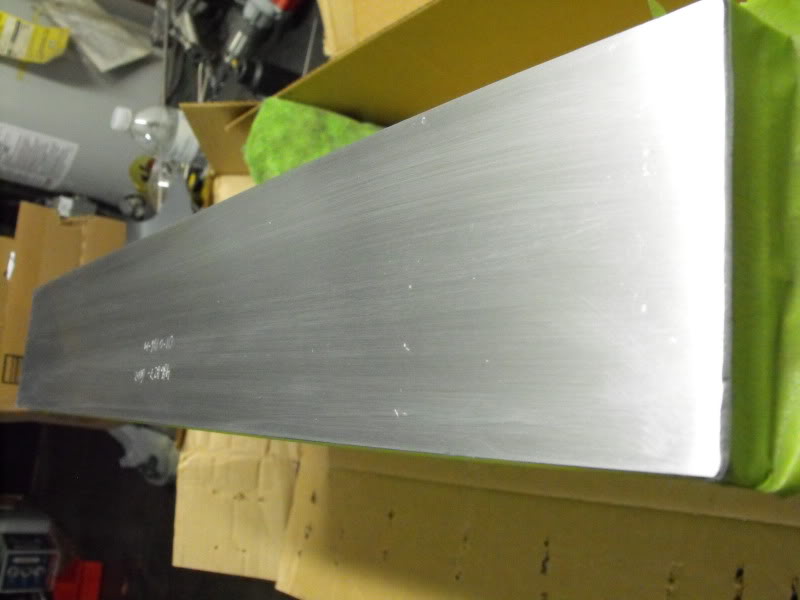
Garrett 24x12x4 Intercooler Core. Thank you Chad Block of CBRD for the hookup on the core! I talk with Chad frequently and give him bad ideas.
I've only taped up the core durign fabrication and sanded the top of the core to make it more bling.

So this is ADHD in action. I started fitting the intercooler using my jack, block of 7075 w/foam tape on top. Which led me to think of doing a backdoor intercooler. This was super popular in the Honda scene (Honda-tech users unite! - .RTErnie) I did a similar setup for my 1st gen turbo neon. Backdoor entrance and side exit. Worked just fine.
So, I mounted the intercooler and set it the same place I have for the past 3 I've built for it (all 22" wide cores) see below
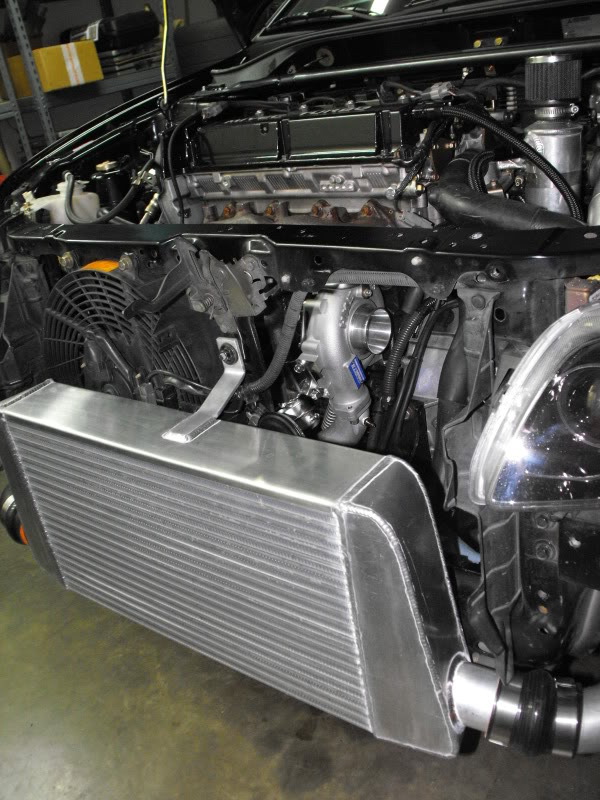
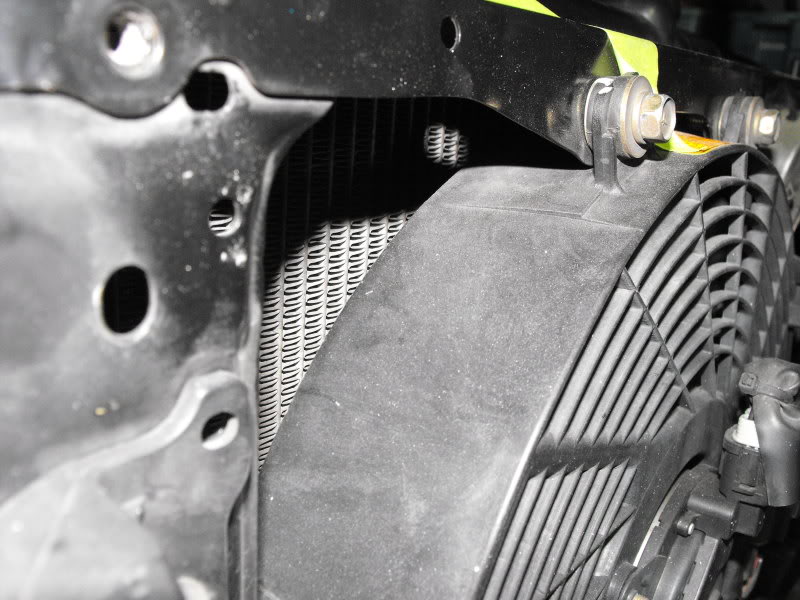
and looked to see how far it hung below the front core support... about 2.5"-2.75" just enough space to run a 2.5" charge pipe under the core support. Now I have to give some props to Dave Buschur for doing this on his Evo, which kicked my OCD into overdrive and got me thinking.
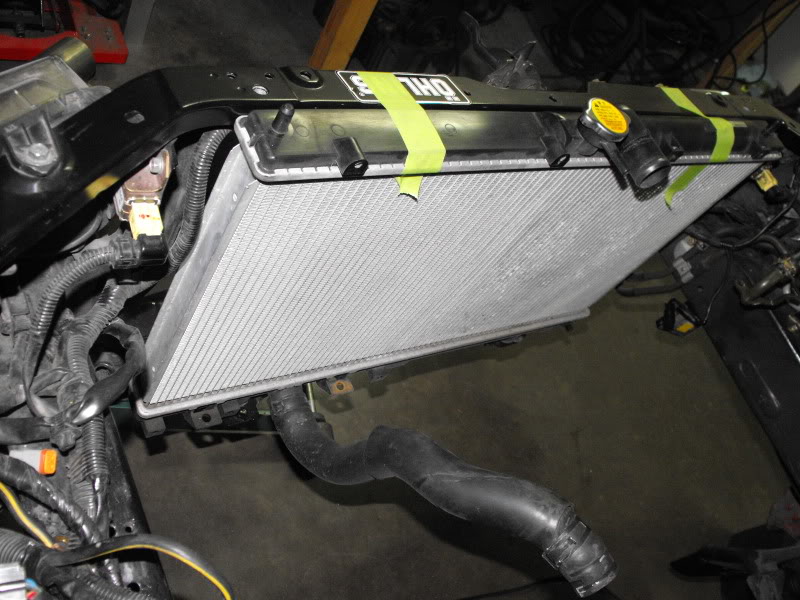
So now that I was looking at routing it underneath for the inlet AND the outlet to the intercooler I was contemplating how I make the end tanks to minimize the pressure loss. So I started looking at my different tubing bend radiuses and wondering how far I needed to clear the radiator. So I mocked up the radiator and taped it firm to the top of the core support.
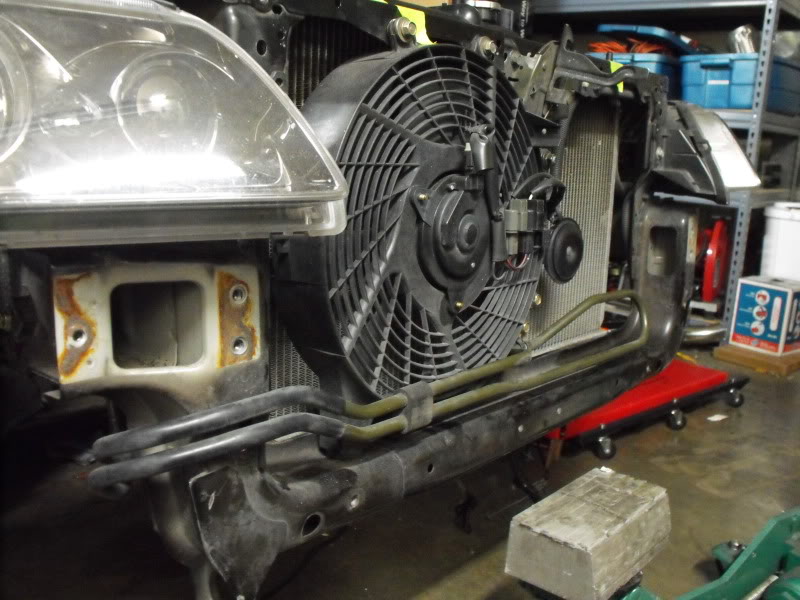
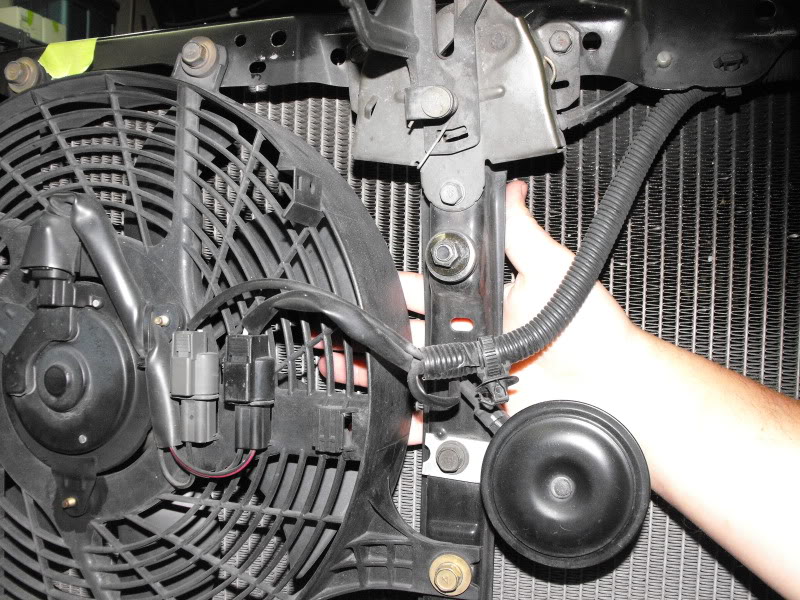
Now that I did that... I got to thinking about my slim fan I bought. So I removed the OEM fan and mocked the slim fan up. Then I got to thinking about the UICP coming under the radiator (backdoor exit), the lower radiator hose, clearing the fan motor... and then you guessed it... Fitting my MASSIVE 4" intake from the EFR inlet to driver side area behind the front bumper where the ACD pump used to be. Yeah buddy! Fresh air... pressurized...sealed off. all win. Only problem is now routing the 4" pipe into this area and fitting my 12" long air filter in there.
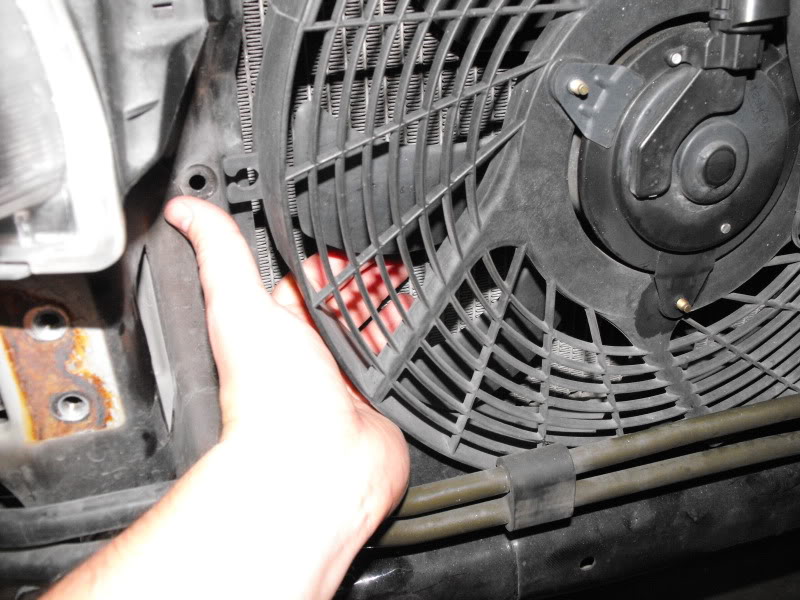
So I'm looking at the fan setup in puller mode when my roommate shows up. He pokes around and asks a few questions. Then he asks me... "Hey, why don't you just put the fan on the other side. There's tons of room over there. I stood there bewildered. WHY! why hadn't I thought of that. I reponded... "great idea!" So by moving to a twin push fan configuration I give myself a boatload more space. I plan to put a 12" high flow fan on the passenger side (where the stock AC fan is located)... I will do this because A... there is mounting for it and B) the left side has a larger opening. I'll put my old 10" ebay fan on the driver's side in push mode and relocate the horn to somewhere where airflow isn't critical.
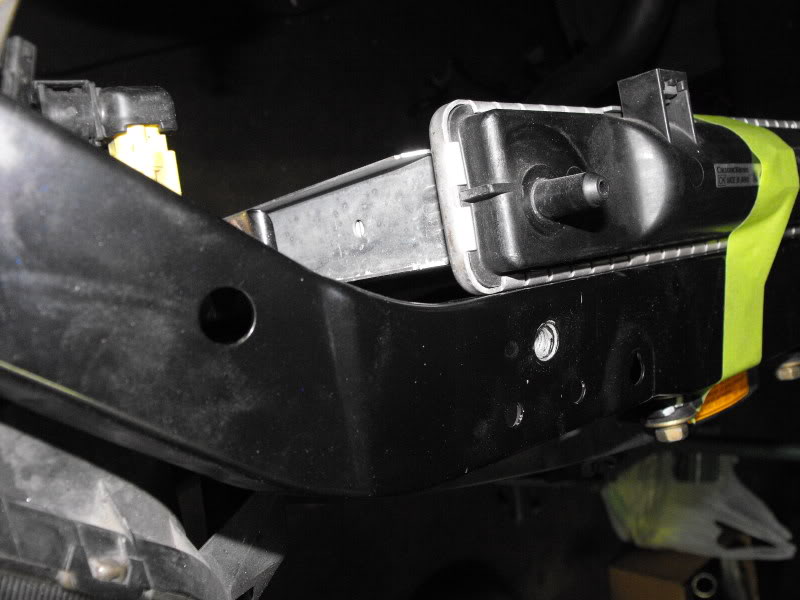
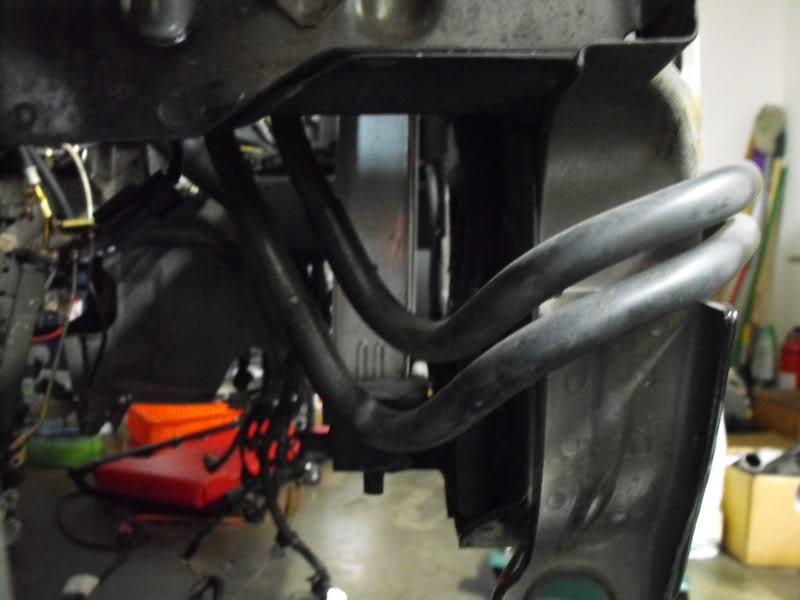
This got me thinking about moving things to improve airflow. I was looking at how the bumper fit against the core and rubbed slightly. Made me nervous to have the PS cooler lines touching the back of the core and the bumper touching the front. If only I could move those PS cooler lines. Again... roommate steps in... "why can't you just fab new lines that aren't in the way." Me thinking "no ****"... yeah lets do that. PS cooler lines measure 12mm in diameter. I'll have to figure out what pressure these lines are under and order some annealed aluminum tubing... bend it and route it between the radiator and core support. I did my best to take picture showing the gap where the AC condenser used to be. This will allow me to mount the intercooler about .250" back/closer to the radiator.
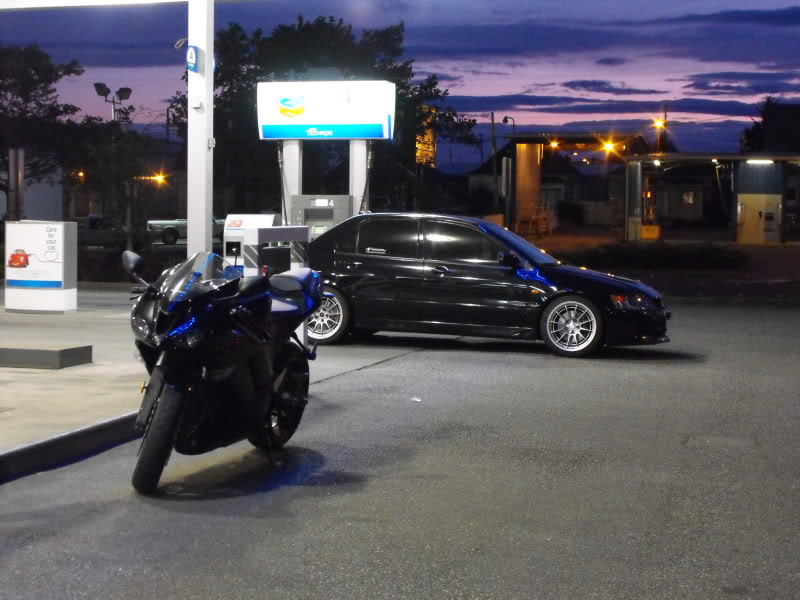
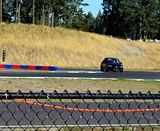
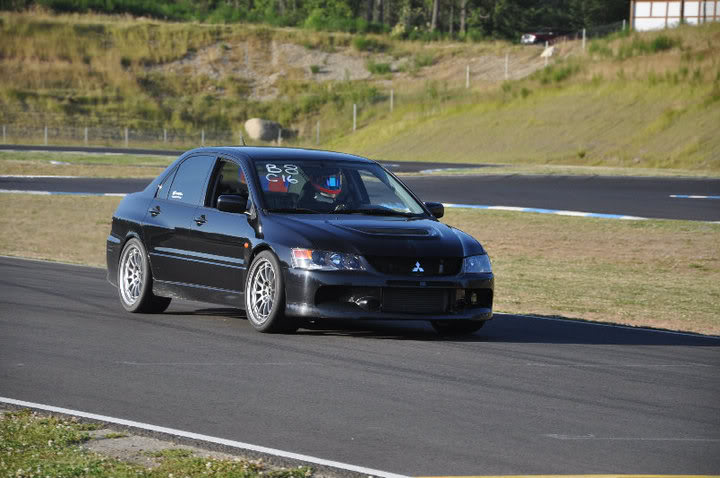
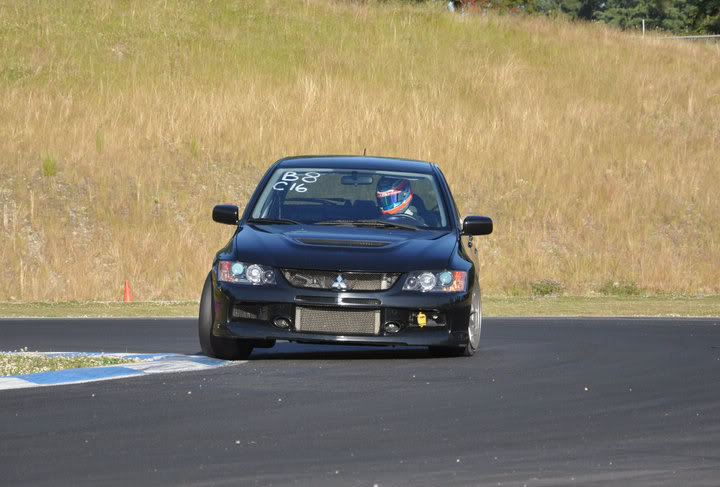
Random shot of the Evo
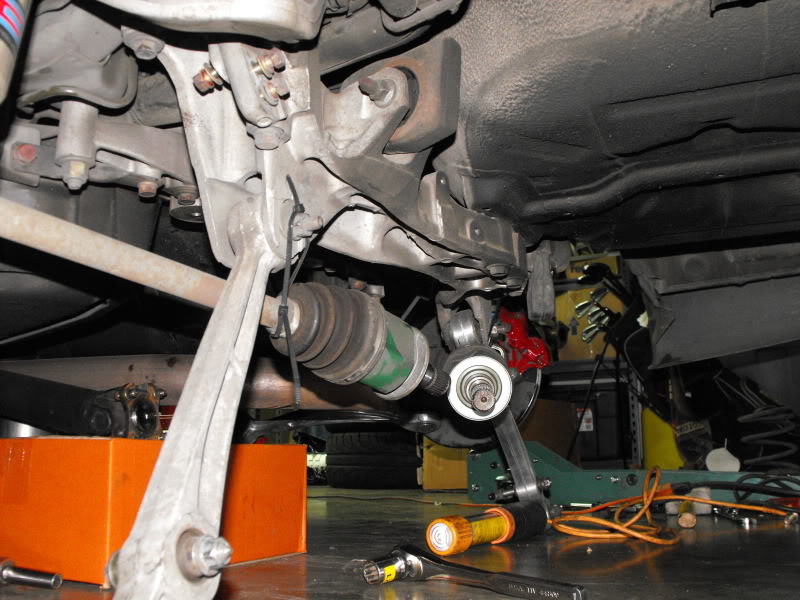
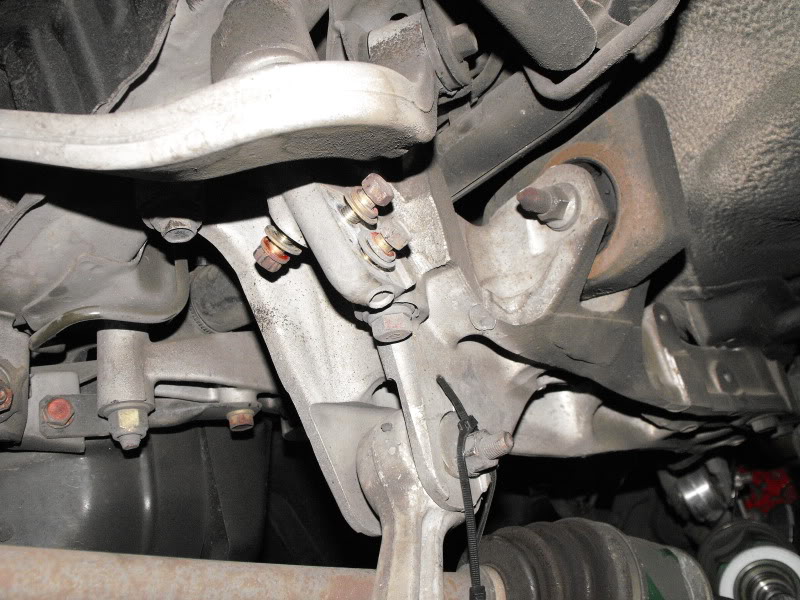
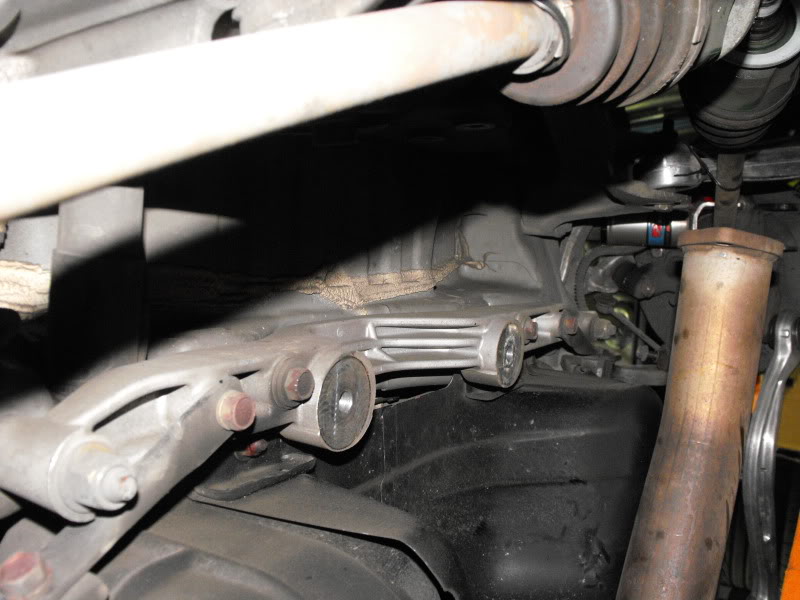
Video fo the Evo at PGP after we got the TRE rear diff on the car. Amazing modification. Don't fall for that "you can do this in your garage BS" I'm fairly confident I have access to a lot of tools and machinery... and I'm not equipped to accurately setup a ring and pinion. Jon @ TRE does sooooo much for such a great price. I'm a HUGE MAXX LOCK fanboi.
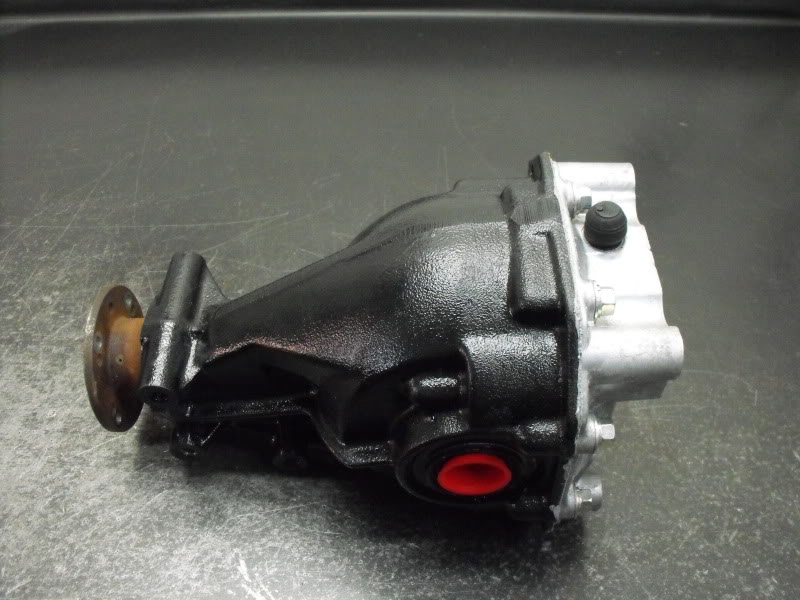
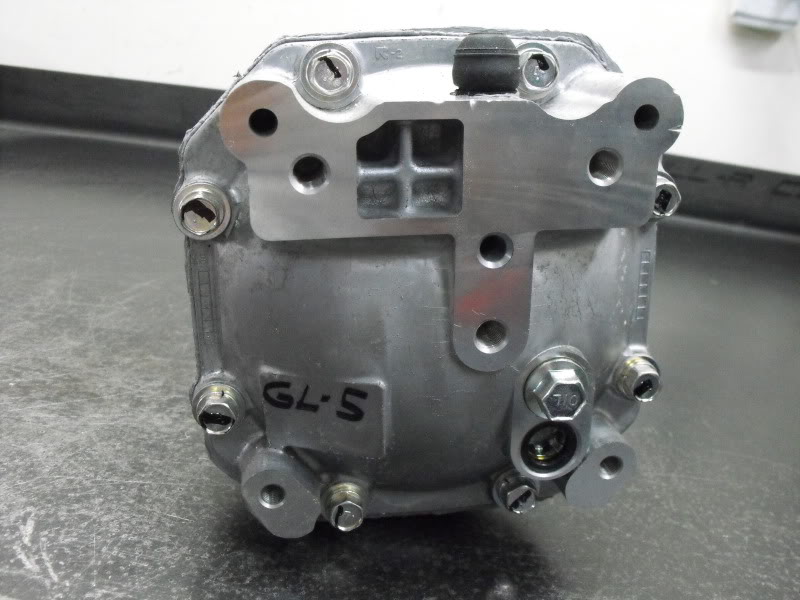
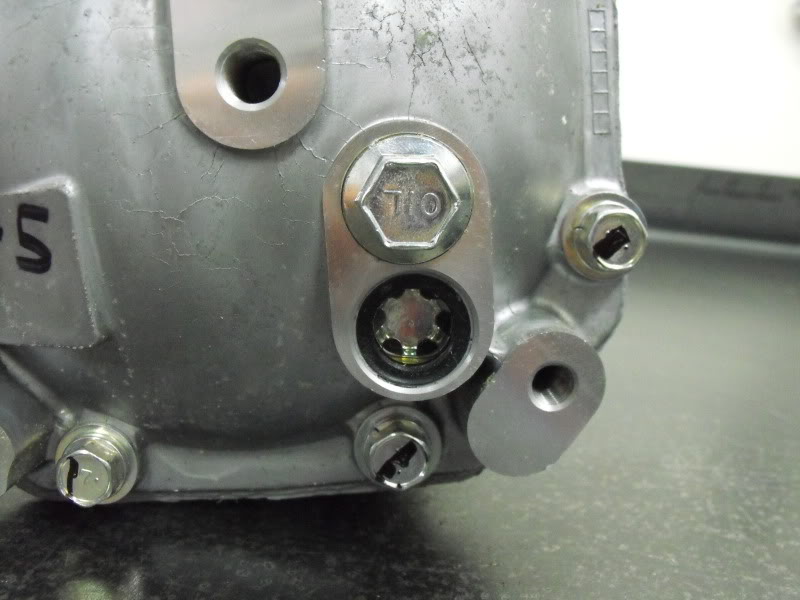
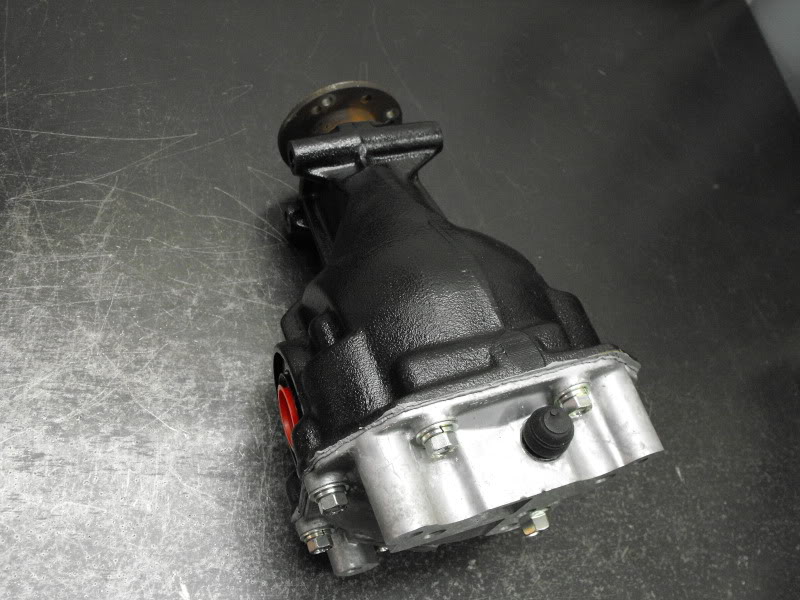
Shortcut for removing the rear diff! Someone had a thread on Evom. Many thanks I saved time and an alignment.
All smiles at Pacific Grand Prix (PGP) I raced in their Lap Attack series with my old roommate Scott O'Farrell. True wheel man. Ran a best of a 1:09.8, I ran a best of a 1:10.0

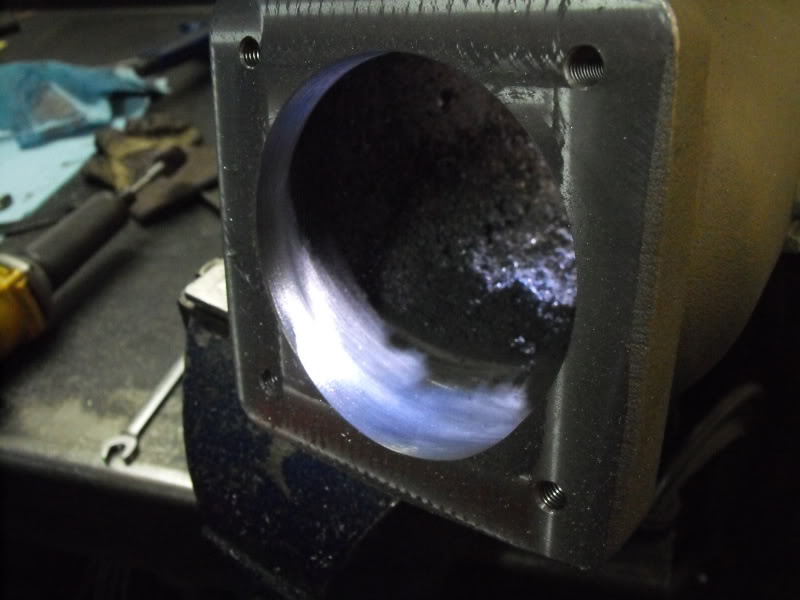
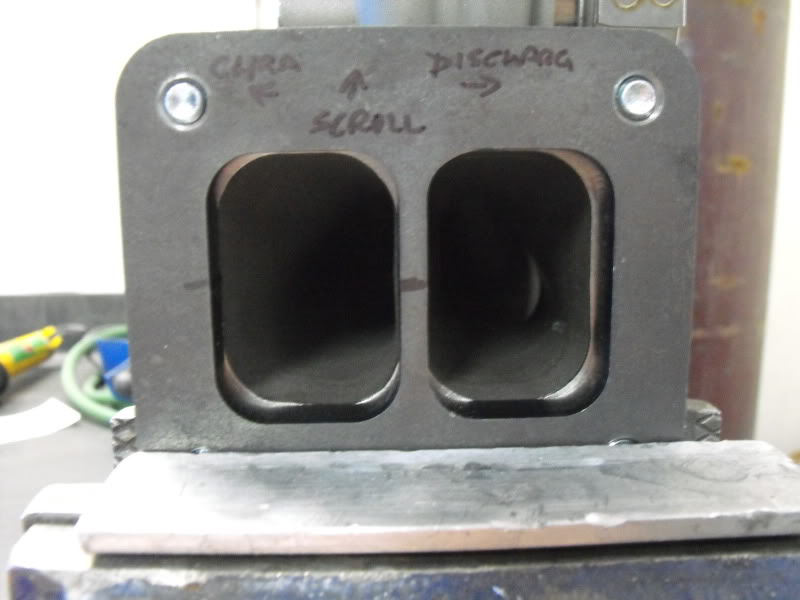
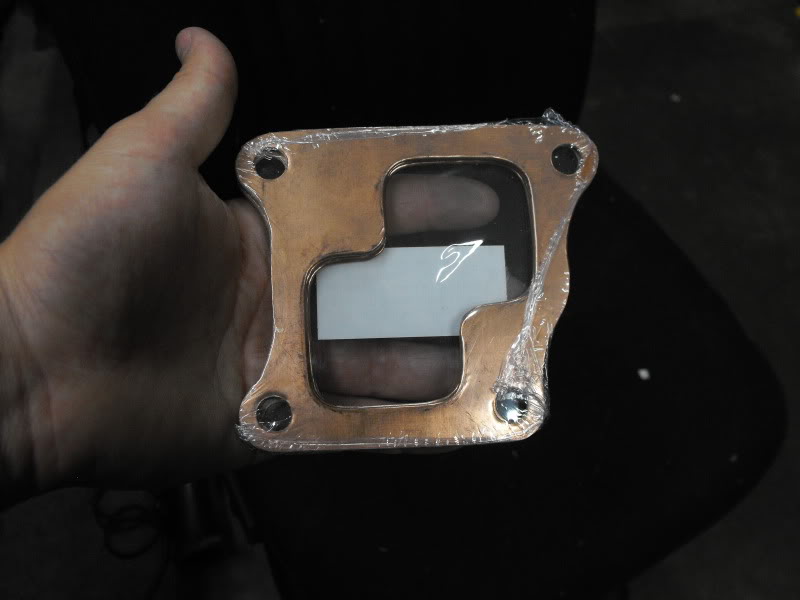
A gasket I had made for BlackCarbonEvo's Custom Single Scroll FP Black (Mikey @ Spec Ops now)
I ported the divided out of the factory TS housing and made the A/R much larger. Mikey still holds the highest horsepower FPBlack record @ 750whp. Big thanks to Mikey for being adventurous and the guys at English Racing (especially Aaron) for putting it all together.
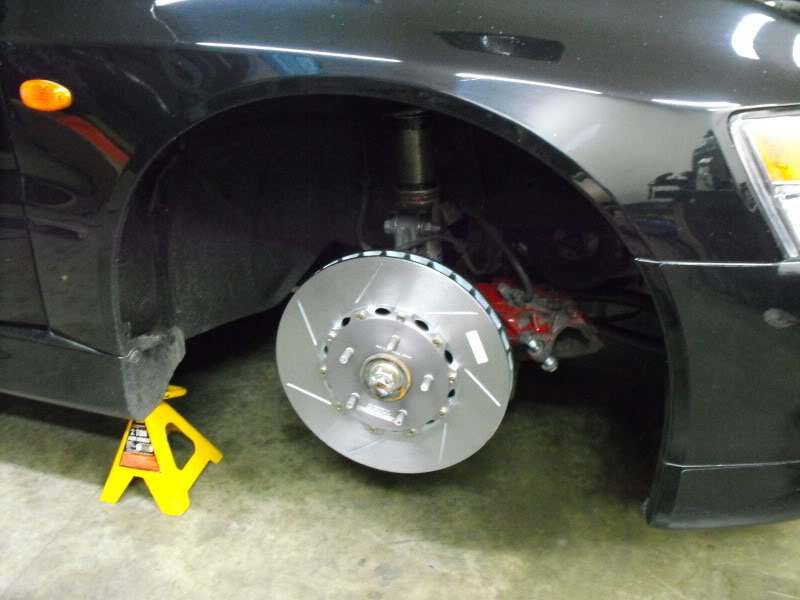
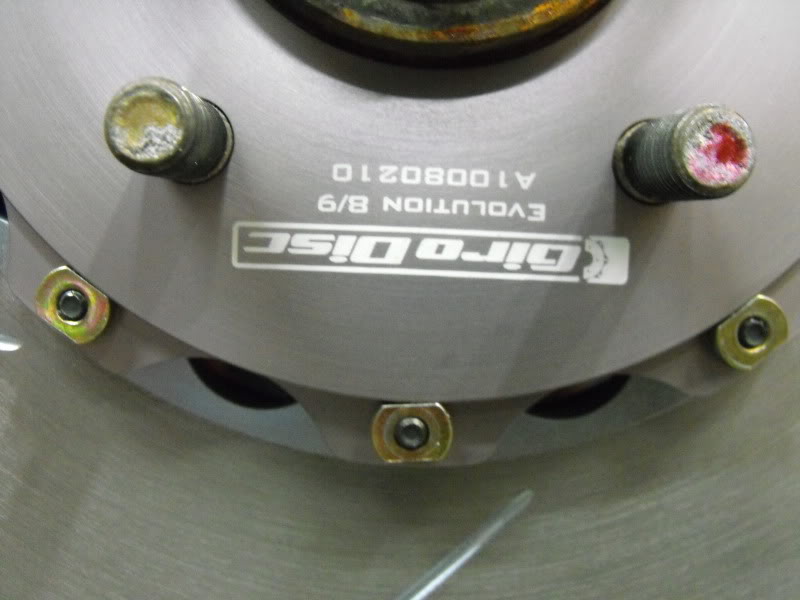
Girodisc 2pc rotors. Thanks Martin!
REAL Injector Dynamics injectors. Thank you Tony Palo.... T1 Race Development. Tony is not only a great Injector manufacturer, but an A+ fabricator and engine tuner. Tony has a low low 8 second integra that I know will run 7's this year as well as a slew of R35 GTR's that he's been building. I'll discuss the injectors at a later time when I have some nice shots of them.
Garrett 24x12x4 Intercooler Core. Thank you Chad Block of CBRD for the hookup on the core! I talk with Chad frequently and give him bad ideas.
I've only taped up the core durign fabrication and sanded the top of the core to make it more bling.
So this is ADHD in action. I started fitting the intercooler using my jack, block of 7075 w/foam tape on top. Which led me to think of doing a backdoor intercooler. This was super popular in the Honda scene (Honda-tech users unite! - .RTErnie) I did a similar setup for my 1st gen turbo neon. Backdoor entrance and side exit. Worked just fine.
So, I mounted the intercooler and set it the same place I have for the past 3 I've built for it (all 22" wide cores) see below
and looked to see how far it hung below the front core support... about 2.5"-2.75" just enough space to run a 2.5" charge pipe under the core support. Now I have to give some props to Dave Buschur for doing this on his Evo, which kicked my OCD into overdrive and got me thinking.
So now that I was looking at routing it underneath for the inlet AND the outlet to the intercooler I was contemplating how I make the end tanks to minimize the pressure loss. So I started looking at my different tubing bend radiuses and wondering how far I needed to clear the radiator. So I mocked up the radiator and taped it firm to the top of the core support.
Now that I did that... I got to thinking about my slim fan I bought. So I removed the OEM fan and mocked the slim fan up. Then I got to thinking about the UICP coming under the radiator (backdoor exit), the lower radiator hose, clearing the fan motor... and then you guessed it... Fitting my MASSIVE 4" intake from the EFR inlet to driver side area behind the front bumper where the ACD pump used to be.
Yeah buddy! Fresh air... pressurized...sealed off. all win. Only problem is now routing the 4" pipe into this area and fitting my 12" long air filter in there. So I'm looking at the fan setup in puller mode when my roommate shows up. He pokes around and asks a few questions. Then he asks me... "Hey, why don't you just put the fan on the other side. There's tons of room over there. I stood there bewildered. WHY! why hadn't I thought of that. I reponded... "great idea!" So by moving to a twin push fan configuration I give myself a boatload more space. I plan to put a 12" high flow fan on the passenger side (where the stock AC fan is located)... I will do this because A... there is mounting for it and B) the left side has a larger opening. I'll put my old 10" ebay fan on the driver's side in push mode and relocate the horn to somewhere where airflow isn't critical.
This got me thinking about moving things to improve airflow. I was looking at how the bumper fit against the core and rubbed slightly. Made me nervous to have the PS cooler lines touching the back of the core and the bumper touching the front. If only I could move those PS cooler lines. Again... roommate steps in... "why can't you just fab new lines that aren't in the way." Me thinking "no ****"... yeah lets do that. PS cooler lines measure 12mm in diameter. I'll have to figure out what pressure these lines are under and order some annealed aluminum tubing... bend it and route it between the radiator and core support. I did my best to take picture showing the gap where the AC condenser used to be. This will allow me to mount the intercooler about .250" back/closer to the radiator.
Random shot of the Evo
Video fo the Evo at PGP after we got the TRE rear diff on the car. Amazing modification. Don't fall for that "you can do this in your garage BS" I'm fairly confident I have access to a lot of tools and machinery... and I'm not equipped to accurately setup a ring and pinion. Jon @ TRE does sooooo much for such a great price. I'm a HUGE MAXX LOCK fanboi.
Shortcut for removing the rear diff! Someone had a thread on Evom. Many thanks I saved time and an alignment.
All smiles at Pacific Grand Prix (PGP) I raced in their Lap Attack series with my old roommate Scott O'Farrell. True wheel man. Ran a best of a 1:09.8, I ran a best of a 1:10.0
A gasket I had made for BlackCarbonEvo's Custom Single Scroll FP Black (Mikey @ Spec Ops now)
I ported the divided out of the factory TS housing and made the A/R much larger. Mikey still holds the highest horsepower FPBlack record @ 750whp. Big thanks to Mikey for being adventurous and the guys at English Racing (especially Aaron) for putting it all together.
Girodisc 2pc rotors. Thanks Martin!
Last edited by R/TErnie; Mar 23, 2012 at 11:09 AM.


