
Got my defi's...


Thread Starter
Evolved Member
Joined: Jan 2005
Posts: 604
Likes: 0
From: MA
i got defi's installed to. i love them. i used the 42 draft's water temp adaptor and oil plug adaptor and everything is perfect. i could not be happyer.
Thread Starter
Evolved Member
Joined: Jan 2005
Posts: 604
Likes: 0
From: MA
Update:
I wired in the Link control meter into the radio harness and found that power is red with a black stripe, not just red. I highly advise not to try and follow colors that are listed online unless they are exact. If you have a test light use it. Ground it out and with the key off, start putting the tip in each pin hole. When you find one that makes the test light light up, thats your 12v constant (and also you know that the ground is good, so you can just grab a connector to wire the end onto and attach it to the screw you used)
Next, turn the key to acc. Find the other pin hole that makes the test light come on, that is your acc (orange). Lastly is small lamp, simply turn on your parking lights and see which pin hole lights your test light and your done.
Also, be sure that your battery is disconnected after you determine what wires are which.
To clear up confusion about what "small lamp" is, that needs to be tapped so that the control unit II will light up when your headlights are on. If you dont tap for the white wire, the unit will light up for a small period of time during self check, and go out.
Ill have pics up when my pod gets here, which will be monday.
JoshR
Newbie
Joined: Jan 2007
Posts: 5
Likes: 0
From: huntley illinois
just ordered defi gauges and i got a water temp gauge in my package. my question is has anybody gotten this gauge,and do you need to order an adapter to hook it up or did it come with gauge . thanks
Thread Starter
Evolved Member
Joined: Jan 2005
Posts: 604
Likes: 0
From: MA
where didu get your adapter for oil pressure ,i cant find one thanks
Also, make sure you have a BSPT tap for the oil temp threads, as the defi sensor is NPT, and the oil block adapter if BSPT. Oil pressure you dont have to worry about.
Thread Starter
Evolved Member
Joined: Jan 2005
Posts: 604
Likes: 0
From: MA
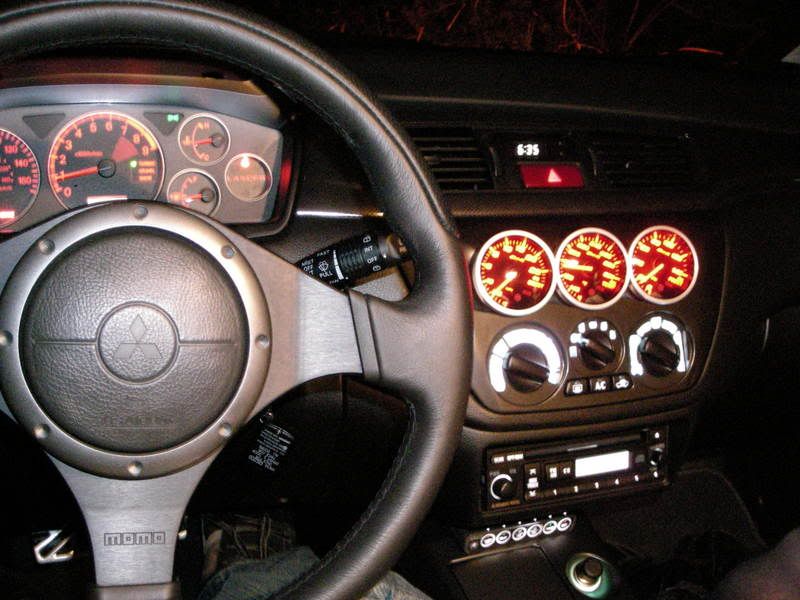
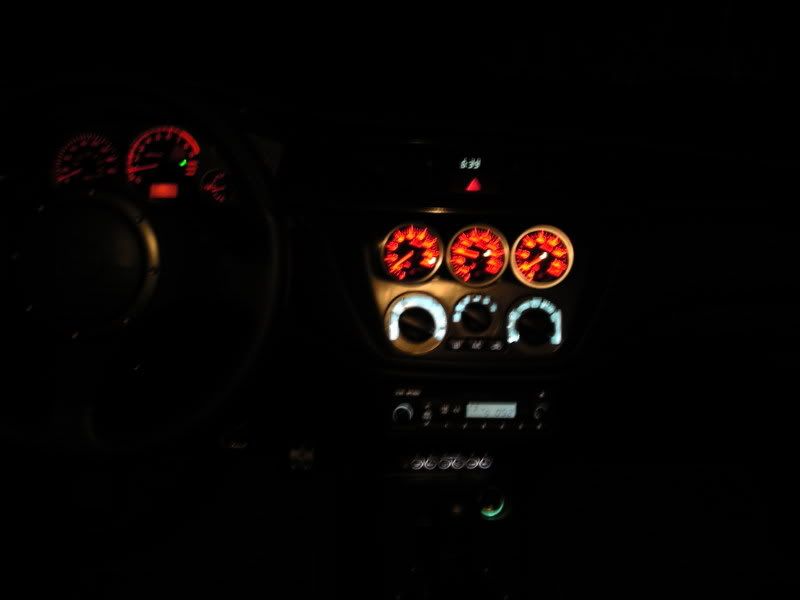
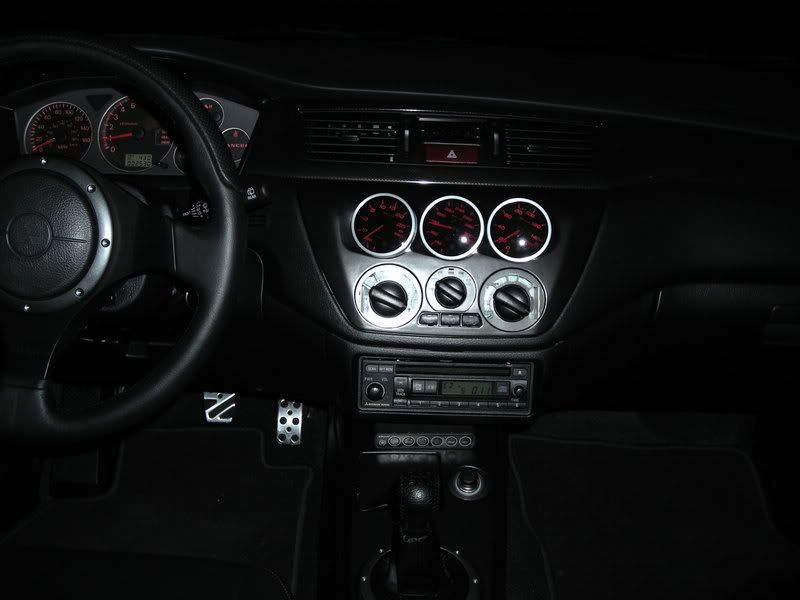
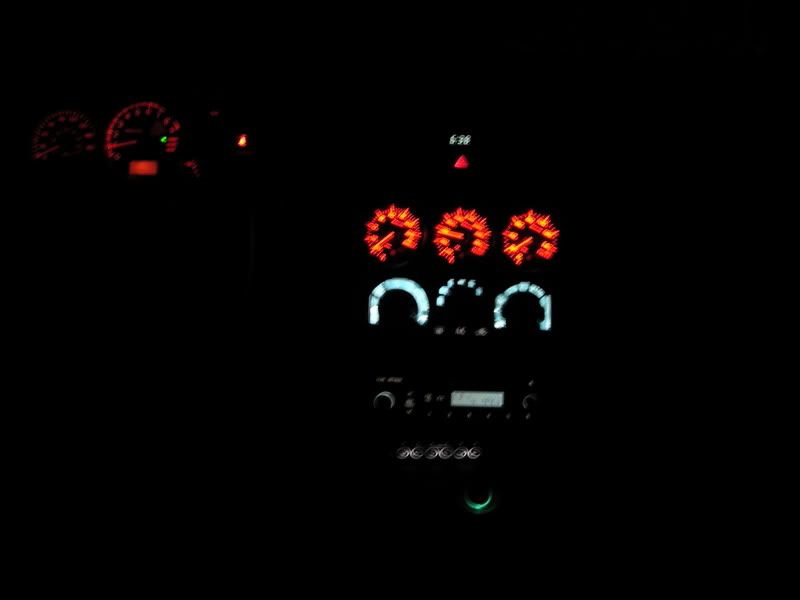
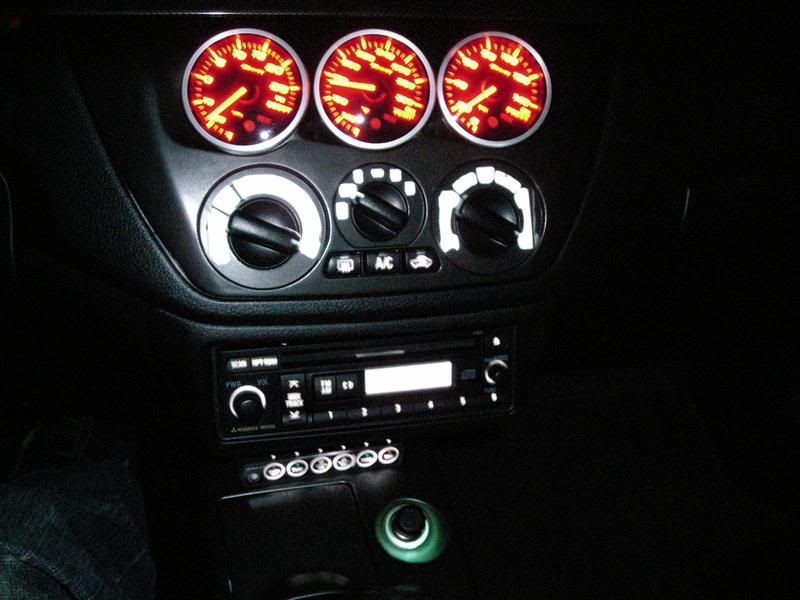
New pics
Well, after waiting over a month for the pod to come in from JSCspeed, here are the finished pics. The only thing left is to install the climate control stickers, as the new pod did not come with them. On to the pics, sorry for the quality....
Thread Starter
Evolved Member
Joined: Jan 2005
Posts: 604
Likes: 0
From: MA
Does anyone have this same pod? Just wondering if yours are pressed fit.
The reason i ask is because the gauges just kind of sit there without alot of pressure and bump after bump kinda moves them.
Im thinking about a way to make them more sturdy in the pod to prevent them from turning, anyone have ideas?
The reason i ask is because the gauges just kind of sit there without alot of pressure and bump after bump kinda moves them.
Im thinking about a way to make them more sturdy in the pod to prevent them from turning, anyone have ideas?
Thread Starter
Evolved Member
Joined: Jan 2005
Posts: 604
Likes: 0
From: MA
man i love those gauges, how much did you end up paying for the gauges and the link?
If you dont mind spending the money, these are highly recommended.

That is a lot of money, but they look nice.
FYI, Take your old console piece and take the butt end of a pen and pop the old climate control stickers out, they are strong enough plastic so they wont get damaged, and you can take just a tiny dab of super glue on either end to get them to stick to the new piece.
FYI, Take your old console piece and take the butt end of a pen and pop the old climate control stickers out, they are strong enough plastic so they wont get damaged, and you can take just a tiny dab of super glue on either end to get them to stick to the new piece.
Thread Starter
Evolved Member
Joined: Jan 2005
Posts: 604
Likes: 0
From: MA
That is a lot of money, but they look nice.
FYI, Take your old console piece and take the butt end of a pen and pop the old climate control stickers out, they are strong enough plastic so they wont get damaged, and you can take just a tiny dab of super glue on either end to get them to stick to the new piece.
FYI, Take your old console piece and take the butt end of a pen and pop the old climate control stickers out, they are strong enough plastic so they wont get damaged, and you can take just a tiny dab of super glue on either end to get them to stick to the new piece.
JoshR