
Magnus v5 Installation on an Evo 9

Magnus v5 Installation on an Evo 9
This write up is to serve as a helpful guide to anyone installing a Magnus v5 on their Evo 9. The TTP write up did not accurately portray the amount of work that it takes to make this manifold work. I've personally installed two of these on Evo 9's (one being my car)
Modifications Required:
-Mini Battery Tray
-Mini Battery
-Rerouted Intercooler piping (UICP)
-Relocation of the ground strap for the negative terminal.
-Bending your vacuum barbs on your throttle body
-Adding washers to several different locations to prevent bottoming out fasteners and clearance issues.
-Grinding the Intake manifold in three (count it..1,2,3) places
-Fixing casting imperfections in the intake runners
-Surfacing flanges to make them flat.
-Trimming the provided gasket to port match to the intake manifold/head
-Bending your fuel pressure regulator return steel line and shortening the softline
-Bending both the return line and feed line under the throttle body
-Relocation of your Boost control solenoid due to charge pipe relocation.
-You need to mount your MAP sensor externally with a JM Fabrications adapter OR weld on the MAP sensor boss from JM Fabrications.
-Extend your brake booster line
-Change Periphery bits FCA 13,14, and 15 from 1 to 0
-Weld on boss for the oil dipstick tube
-Reroute wiring for installation
-Removal/depinning of Evap, FPR, and EGR wiring.
-Figuring out how to make a new groundstrap from the firewall.
****Details (the things that you should sweat)****
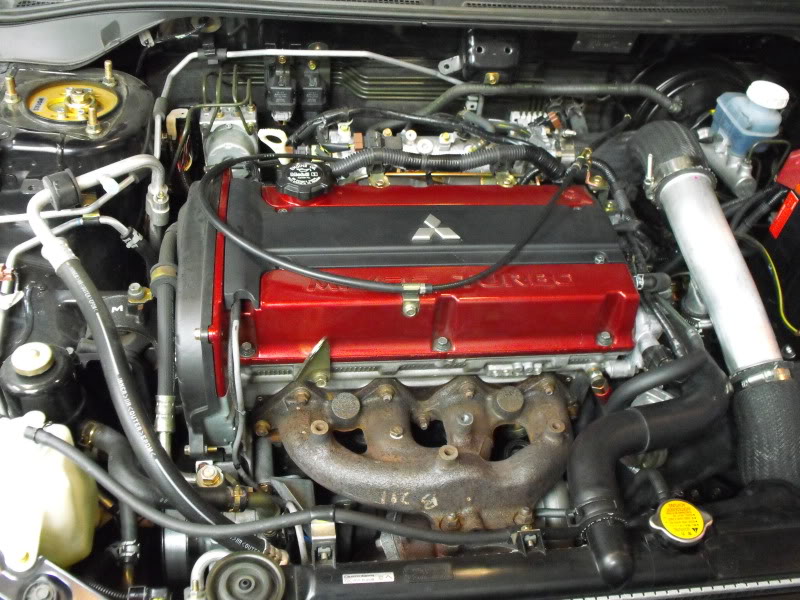
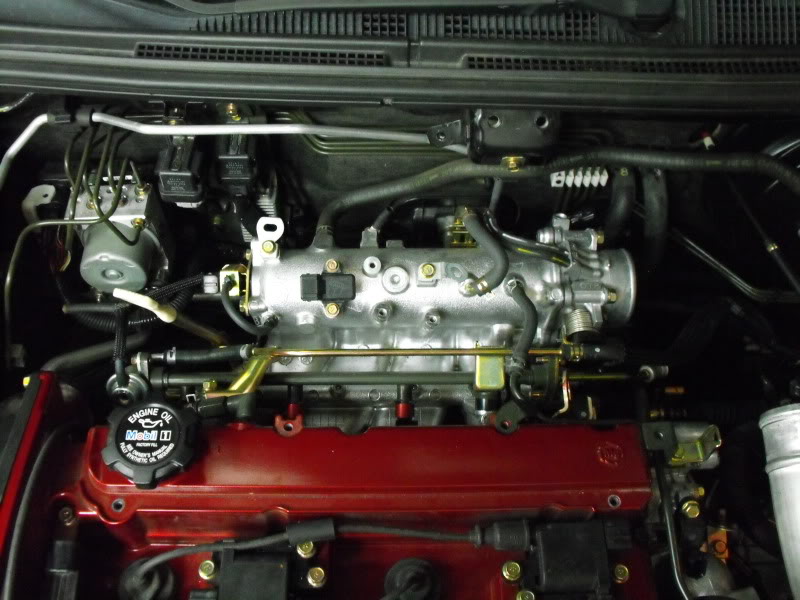
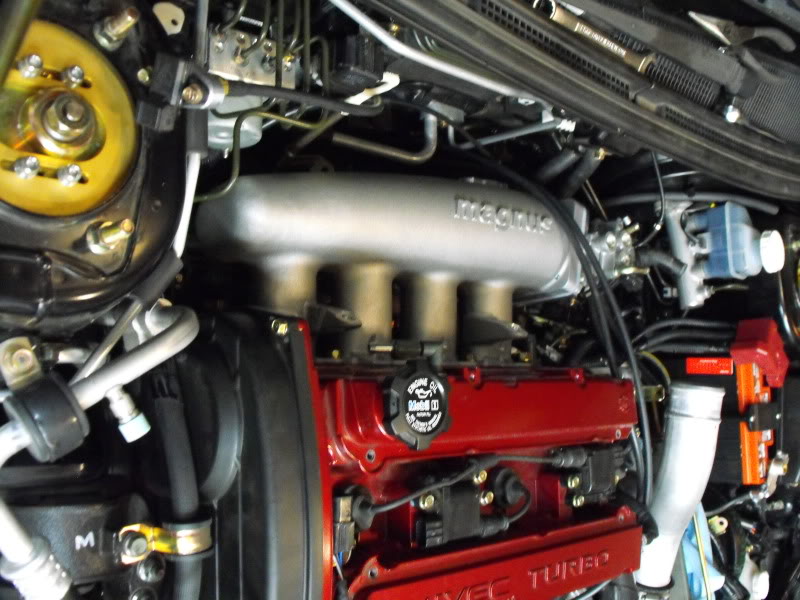
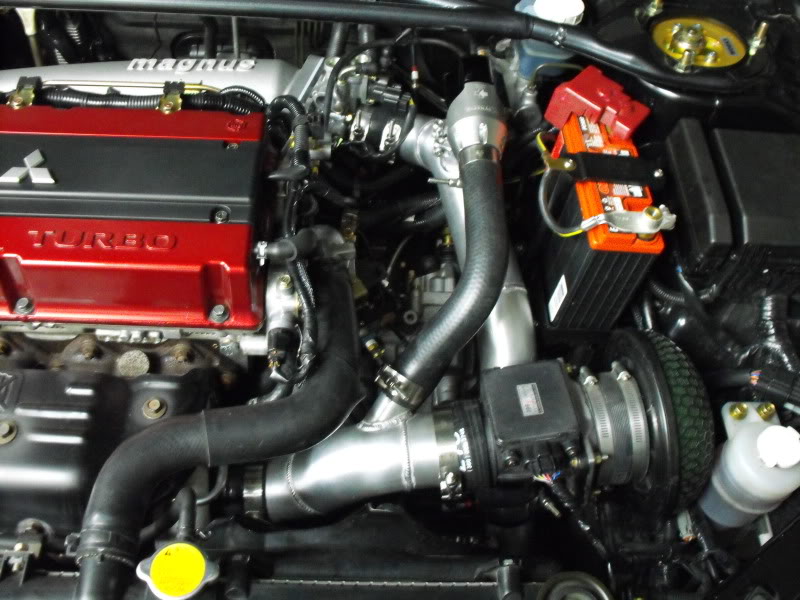
Engine Bay with Factory Intake manifold
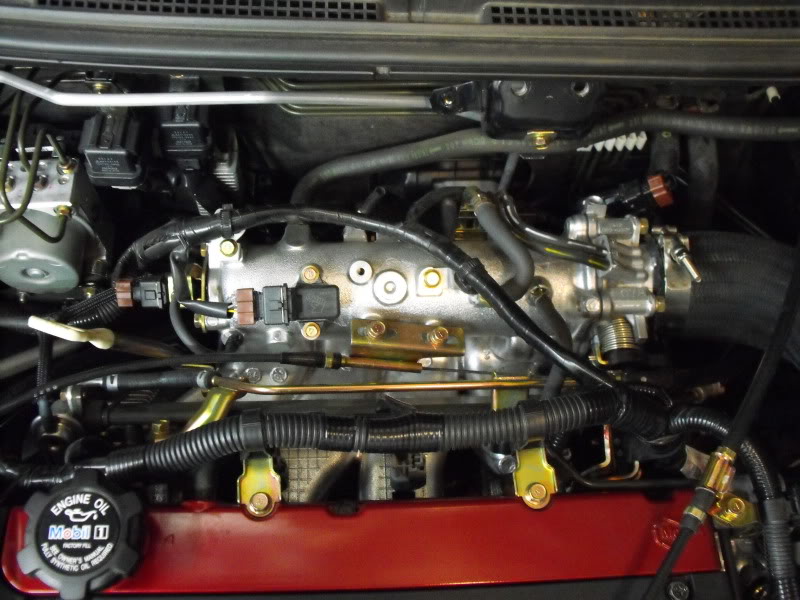
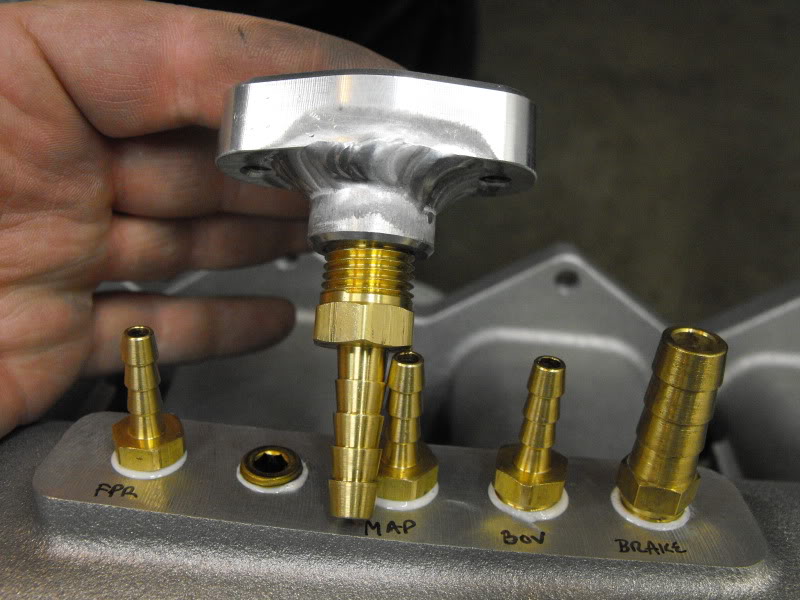
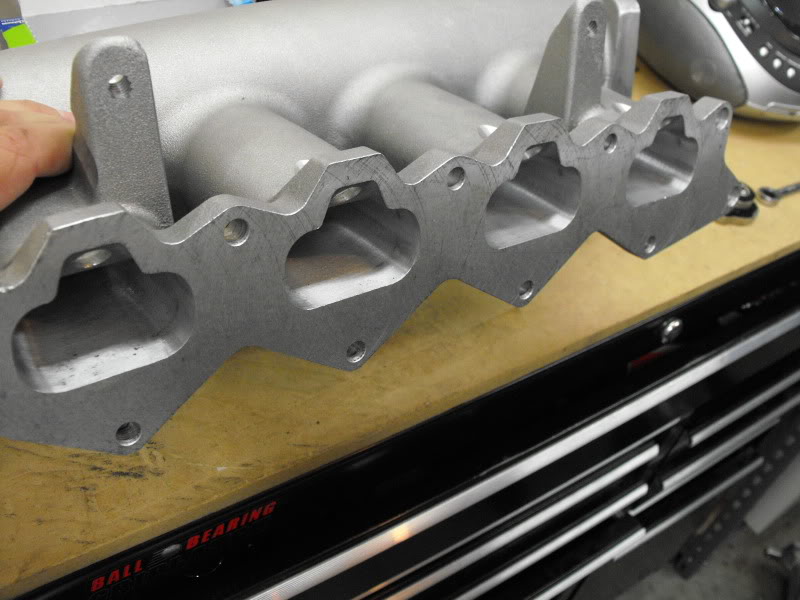
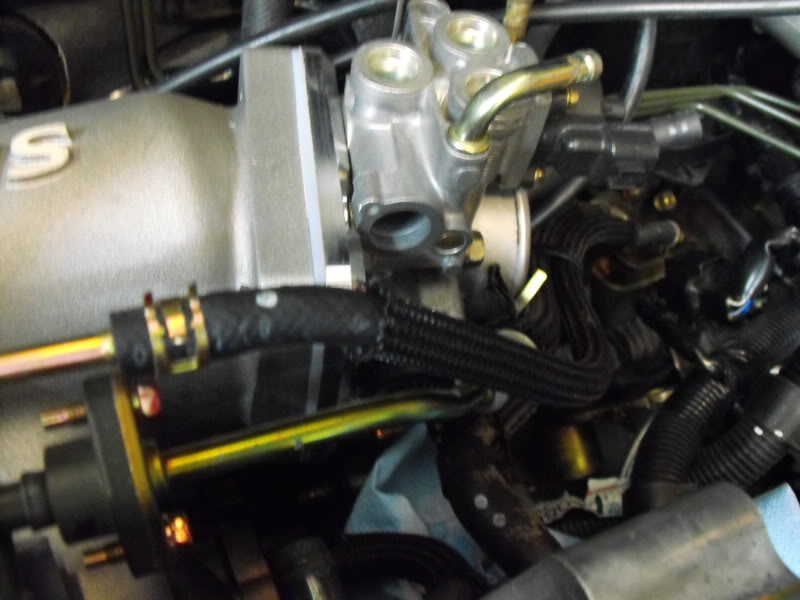
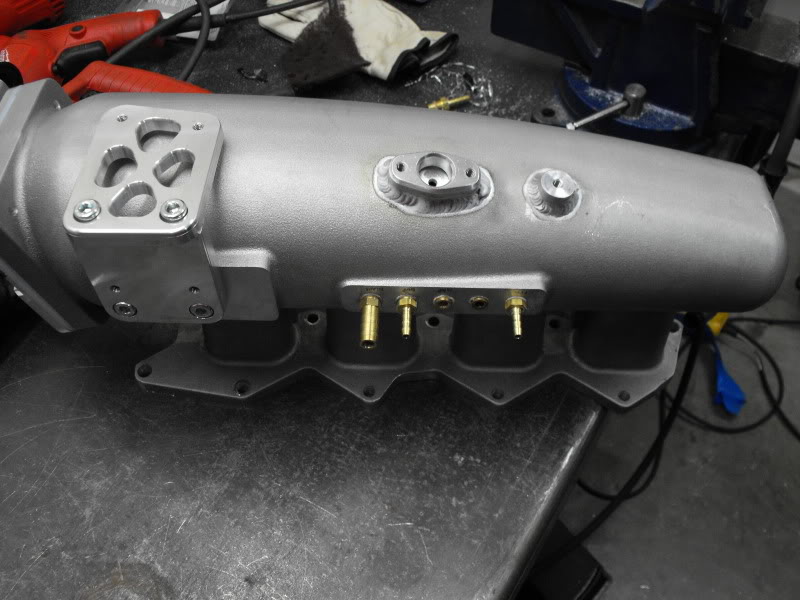
Intake Manifold w/OMNI 4 bar MAP
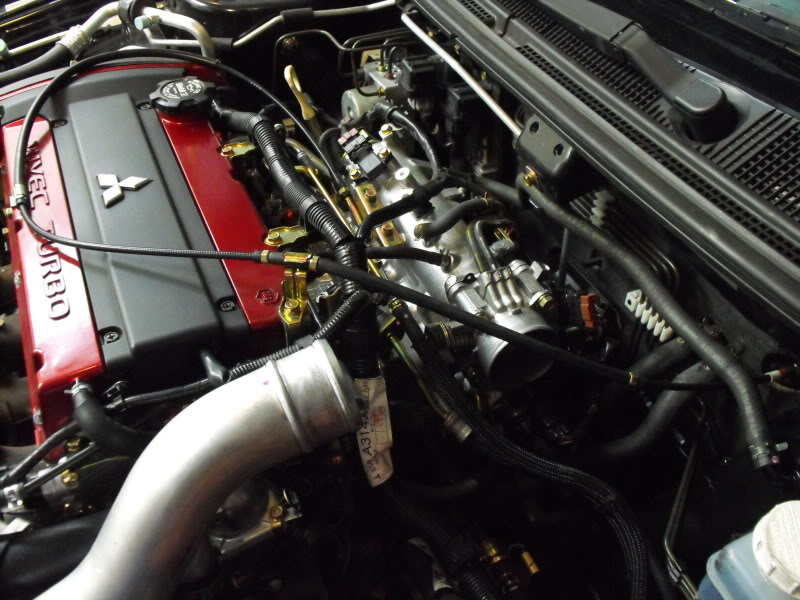
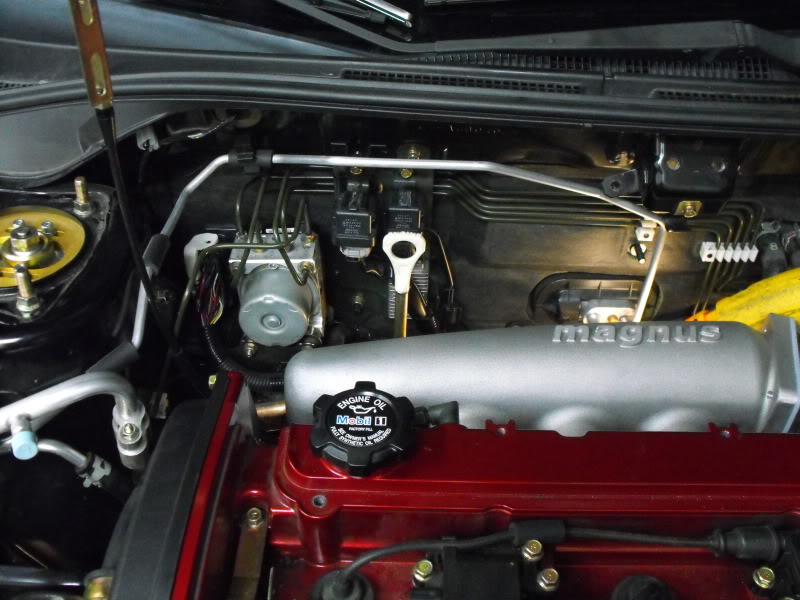
Intake Manifold from a different angle

STEP #1 DRAIN COOLANT
Remove Upper Intercooler coupler (10mm worm clamps x 2)
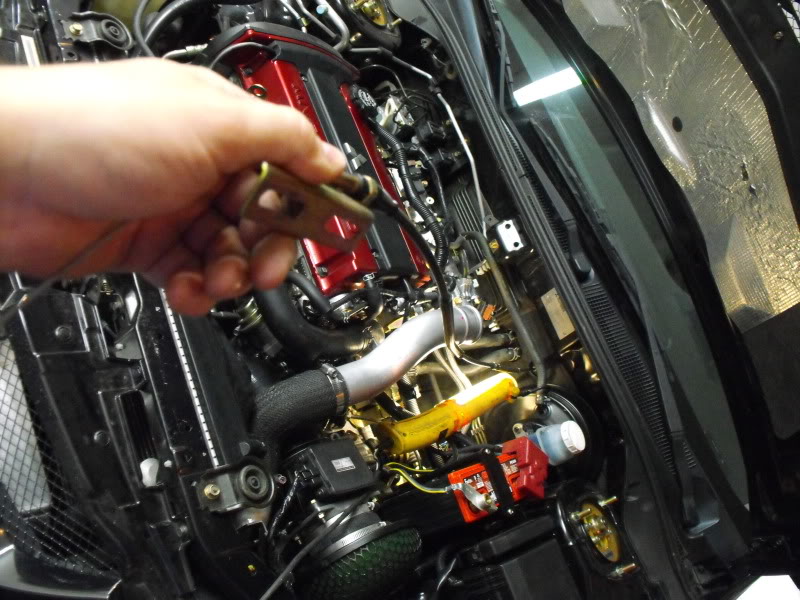
Remove the throttle cable from the throttle body
Unbolt the 10mm fasteners holding the throttle cable to the intake manifold on the top. Remove the 10mm brackets and fasteners that route the cable over your valve cover. There is on in the front near your turbo manifold and another close to your intake camshaft. Remove these so you can place the throttle cable out of the way as shown.
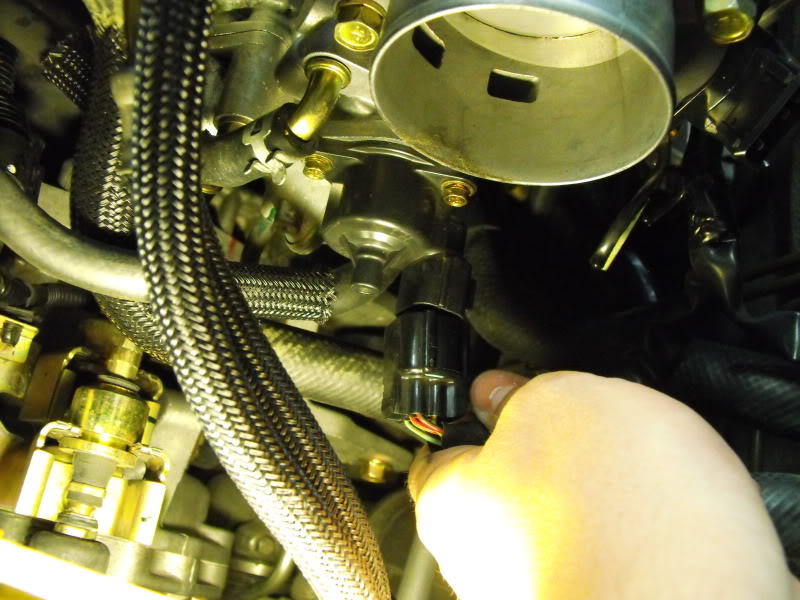
Disconnect all the wiring from the intake manifold.
- Throttle Position Sensor
- Idle Air Control Valve
- Injectors (4)
- MIVEC
- EGR
- FPR Solenoid
- Evap Purge Solenoid
- Knock Sensor
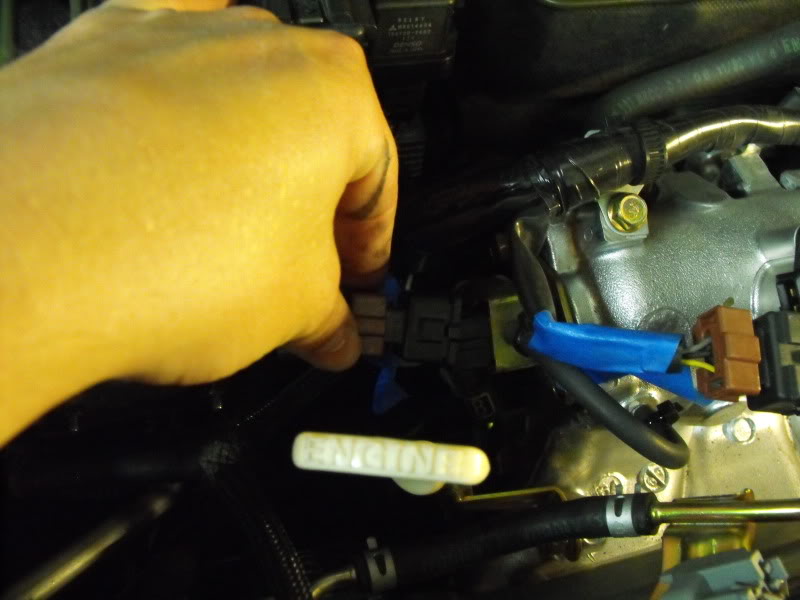
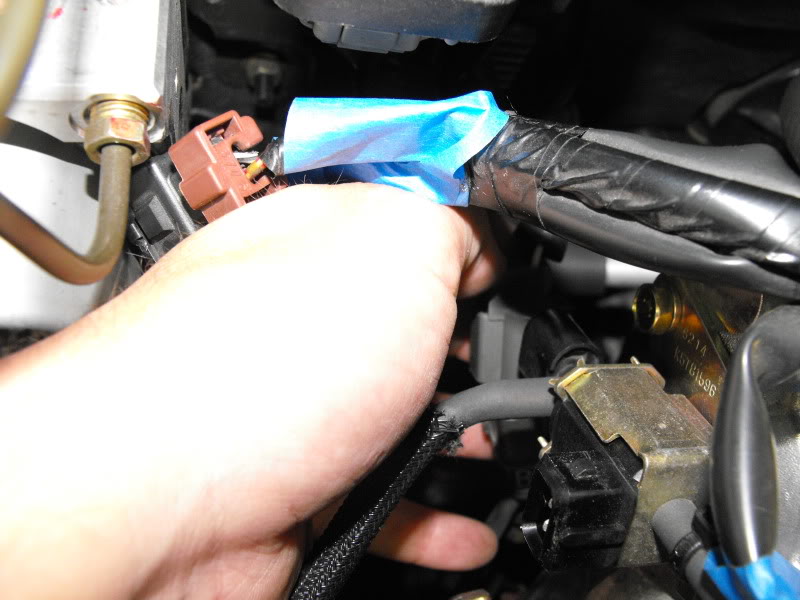
I then disconnected the whole wiring harness and laid it over the transmission towards where the MAF sensor is located.
I had to disconnect
- Front o2 sensor
- Coil packs 2-3, and 1-4
- Crankshaft Position Sensor and Ground
- coolant temp sensor
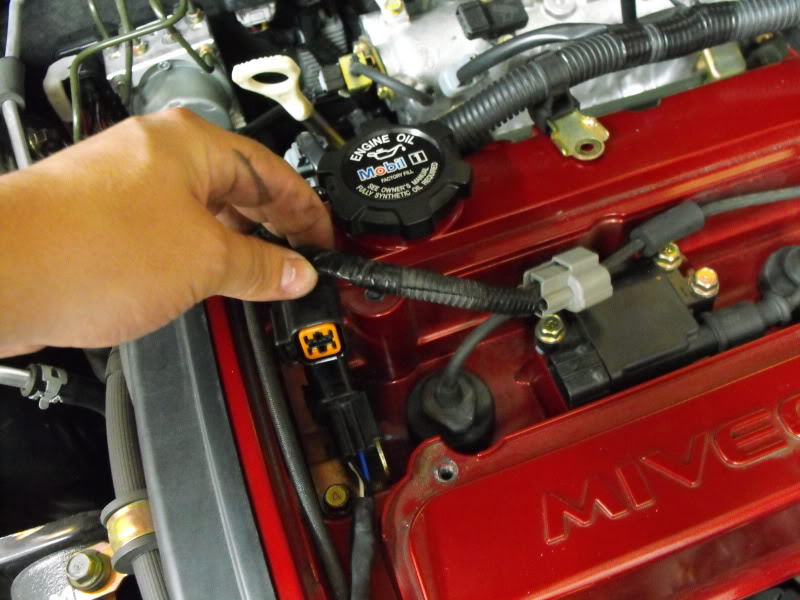
This is what it looks like when you get it all disconnected.


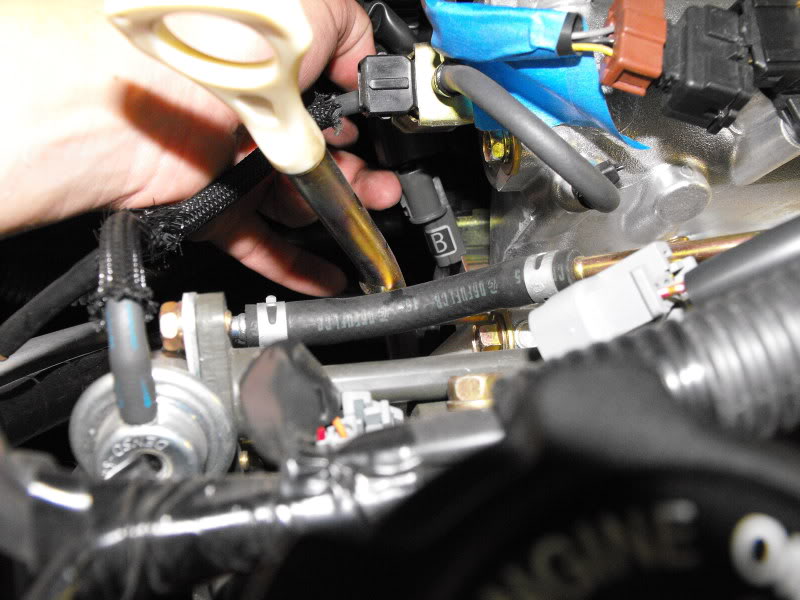
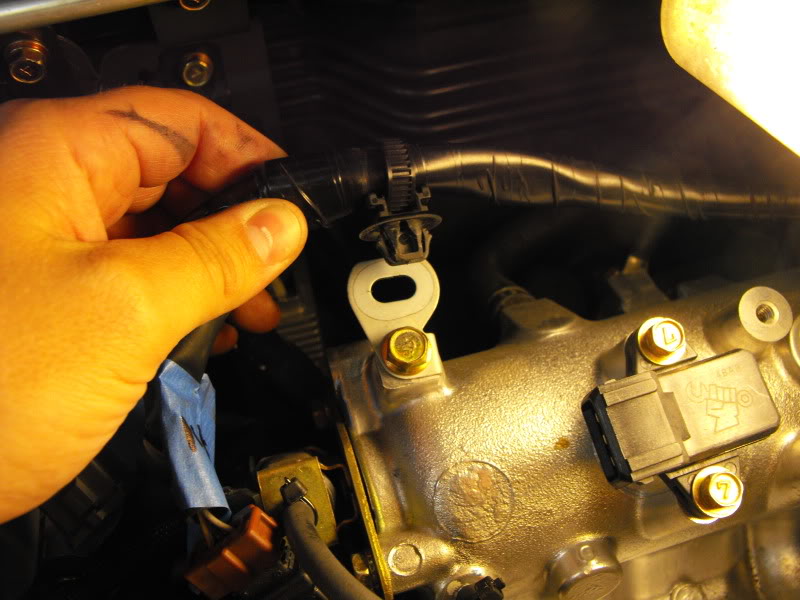
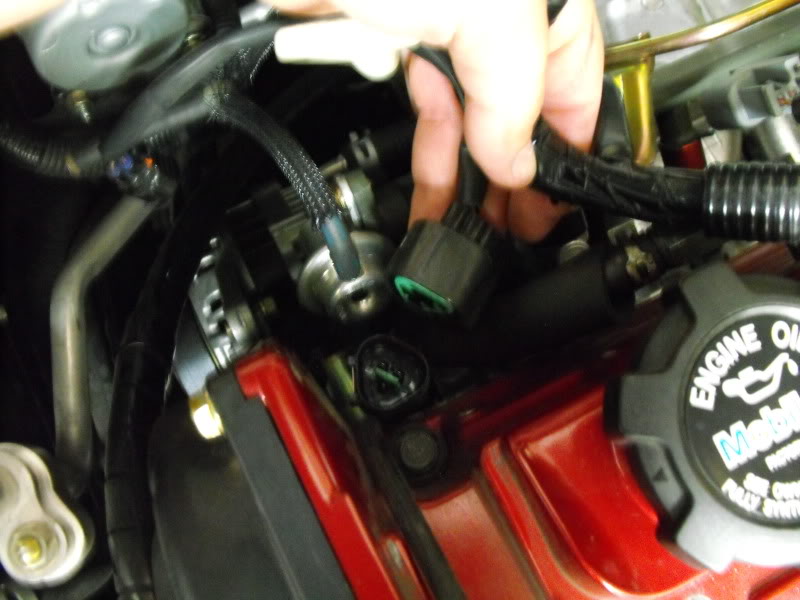
I then started taking off vacuum line connections starting with the FPR.
Positive crankcase ventilation 1
Positive crankcase ventilation 2

Brake boost vacuum line

Evaporation Purge Line (NOT SHOWN)
Blow off valve softline (I removed the hardline as well)
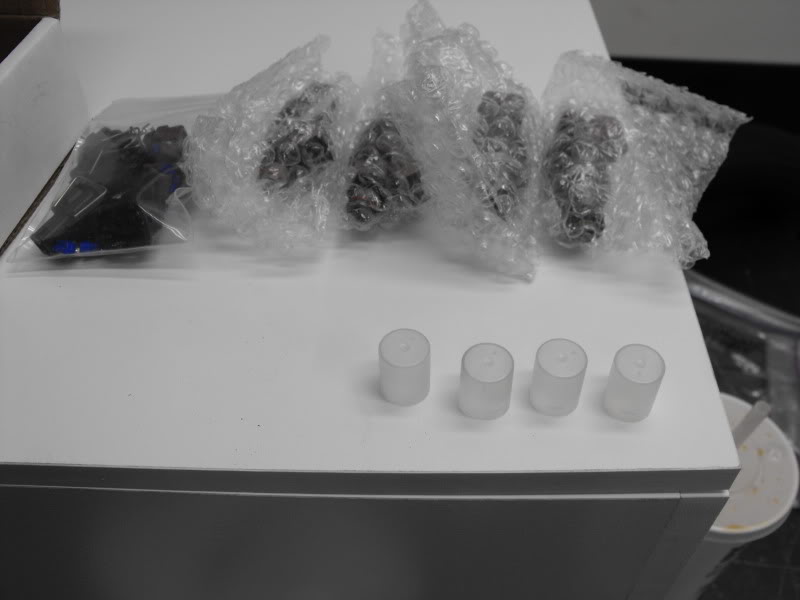
Remove the fuel rail 12mm bolts (2)
Be careful not to drop the plastic fuel rail spacers while removing these fasteners. Spacers shown below
Fuel rail removed.
Cap injectors for time being to protect them from debris. (I had these left over from my ID 1000 install)
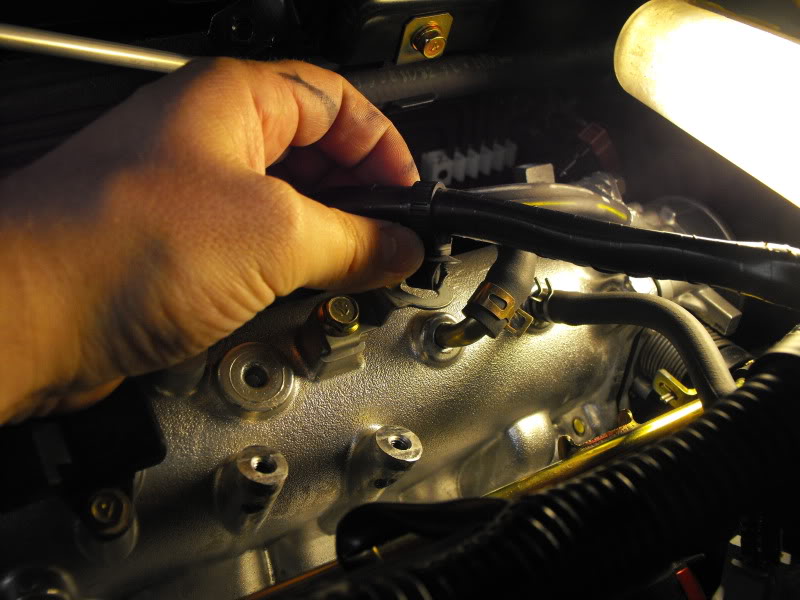
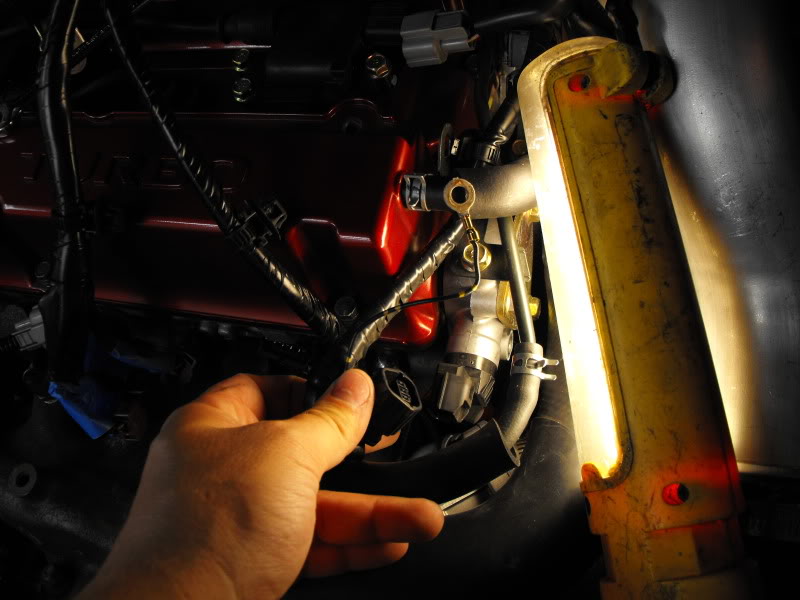
Remove Oil dipstick tube mounting bolt 10mm (1)
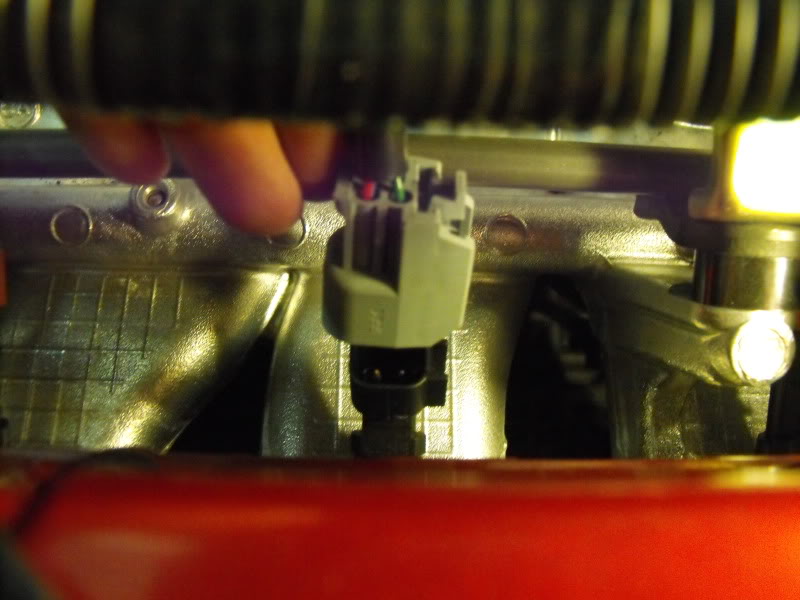
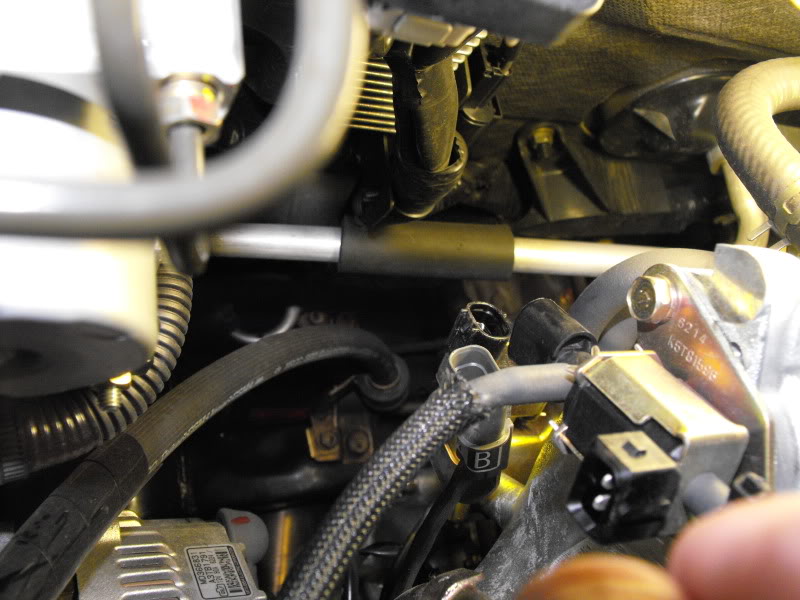
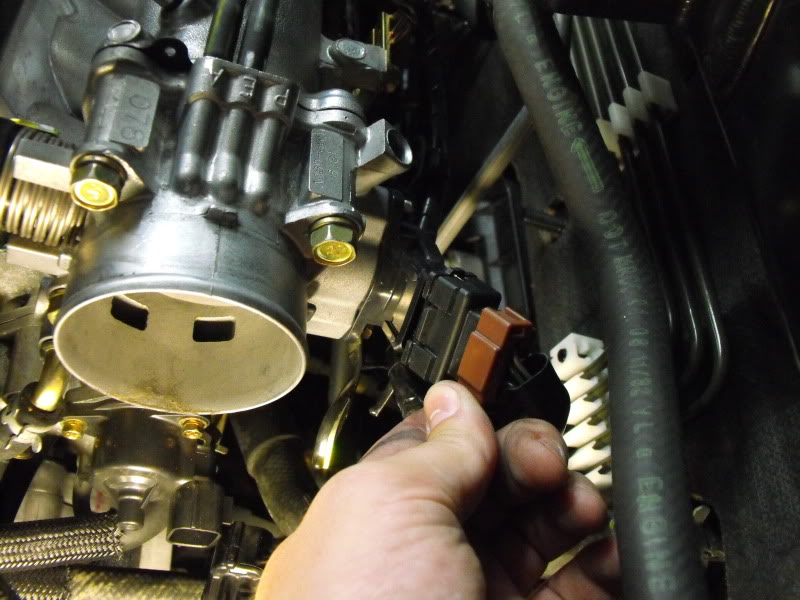
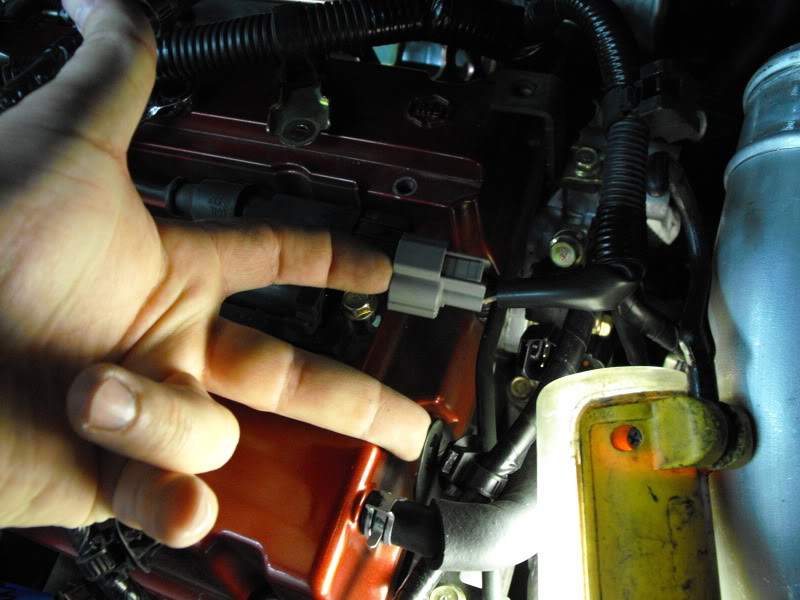
Remove the sensor here (not sure exactly what it is... crankshaft position sensor?) underneath the 14mm nut and lock washer.
Remove the alternator bracket by taking out the two 12mm bolts here as well as the one that is underneath runner #1 (from timing belt) (3 12mm bolts total)
Remove coolant feed and return lines for the heater core @ the cylinder head.
Take all the 12mm bolts out and the other 14mm nut with lock washer.
(when you have all the bolts for the intake manifold.... one will be longer than the rest... this goes back under runner #1 (from the timing belt) after it goes through the alternator bracket (reason why it's longer!)
Remove intake manifold! I used a combination of open ended wrenches, wratcheting wrenches, 3/8" drive, 1/4" drive, and swivel sockets to remove the stock intake manifold. It's a PITA. Move the coolant lines out of the way the best you can so you can fit your arms under the Intake manifold. I was lucky enough to be blessed with small hands.

***REST OF INSTALL TOMORROW**** sleepy time
Modifications Required:
-Mini Battery Tray
-Mini Battery
-Rerouted Intercooler piping (UICP)
-Relocation of the ground strap for the negative terminal.
-Bending your vacuum barbs on your throttle body
-Adding washers to several different locations to prevent bottoming out fasteners and clearance issues.
-Grinding the Intake manifold in three (count it..1,2,3) places
-Fixing casting imperfections in the intake runners
-Surfacing flanges to make them flat.
-Trimming the provided gasket to port match to the intake manifold/head
-Bending your fuel pressure regulator return steel line and shortening the softline
-Bending both the return line and feed line under the throttle body
-Relocation of your Boost control solenoid due to charge pipe relocation.
-You need to mount your MAP sensor externally with a JM Fabrications adapter OR weld on the MAP sensor boss from JM Fabrications.
-Extend your brake booster line
-Change Periphery bits FCA 13,14, and 15 from 1 to 0
-Weld on boss for the oil dipstick tube
-Reroute wiring for installation
-Removal/depinning of Evap, FPR, and EGR wiring.
-Figuring out how to make a new groundstrap from the firewall.
****Details (the things that you should sweat)****
Engine Bay with Factory Intake manifold
Intake Manifold w/OMNI 4 bar MAP
Intake Manifold from a different angle
STEP #1 DRAIN COOLANT
Remove Upper Intercooler coupler (10mm worm clamps x 2)
Remove the throttle cable from the throttle body
Unbolt the 10mm fasteners holding the throttle cable to the intake manifold on the top. Remove the 10mm brackets and fasteners that route the cable over your valve cover. There is on in the front near your turbo manifold and another close to your intake camshaft. Remove these so you can place the throttle cable out of the way as shown.
Disconnect all the wiring from the intake manifold.
- Throttle Position Sensor
- Idle Air Control Valve
- Injectors (4)
- MIVEC
- EGR
- FPR Solenoid
- Evap Purge Solenoid
- Knock Sensor
I then disconnected the whole wiring harness and laid it over the transmission towards where the MAF sensor is located.
I had to disconnect
- Front o2 sensor
- Coil packs 2-3, and 1-4
- Crankshaft Position Sensor and Ground
- coolant temp sensor
This is what it looks like when you get it all disconnected.
I then started taking off vacuum line connections starting with the FPR.
Positive crankcase ventilation 1
Positive crankcase ventilation 2
Brake boost vacuum line
Evaporation Purge Line (NOT SHOWN)
Blow off valve softline (I removed the hardline as well)
Remove the fuel rail 12mm bolts (2)
Be careful not to drop the plastic fuel rail spacers while removing these fasteners. Spacers shown below
Fuel rail removed.
Cap injectors for time being to protect them from debris. (I had these left over from my ID 1000 install)
Remove Oil dipstick tube mounting bolt 10mm (1)
Remove the sensor here (not sure exactly what it is... crankshaft position sensor?) underneath the 14mm nut and lock washer.
Remove the alternator bracket by taking out the two 12mm bolts here as well as the one that is underneath runner #1 (from timing belt) (3 12mm bolts total)
Remove coolant feed and return lines for the heater core @ the cylinder head.
Take all the 12mm bolts out and the other 14mm nut with lock washer.
(when you have all the bolts for the intake manifold.... one will be longer than the rest... this goes back under runner #1 (from the timing belt) after it goes through the alternator bracket (reason why it's longer!)
Remove intake manifold! I used a combination of open ended wrenches, wratcheting wrenches, 3/8" drive, 1/4" drive, and swivel sockets to remove the stock intake manifold. It's a PITA. Move the coolant lines out of the way the best you can so you can fit your arms under the Intake manifold. I was lucky enough to be blessed with small hands.
***REST OF INSTALL TOMORROW**** sleepy time
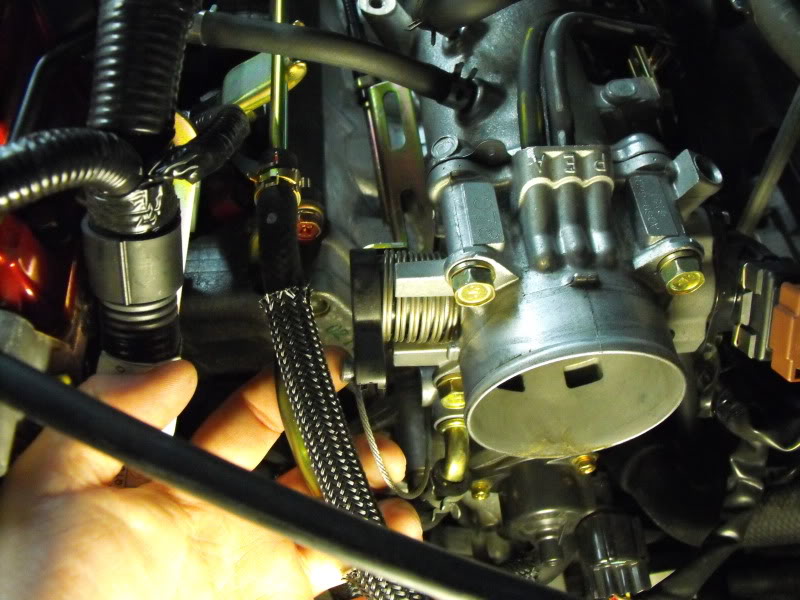
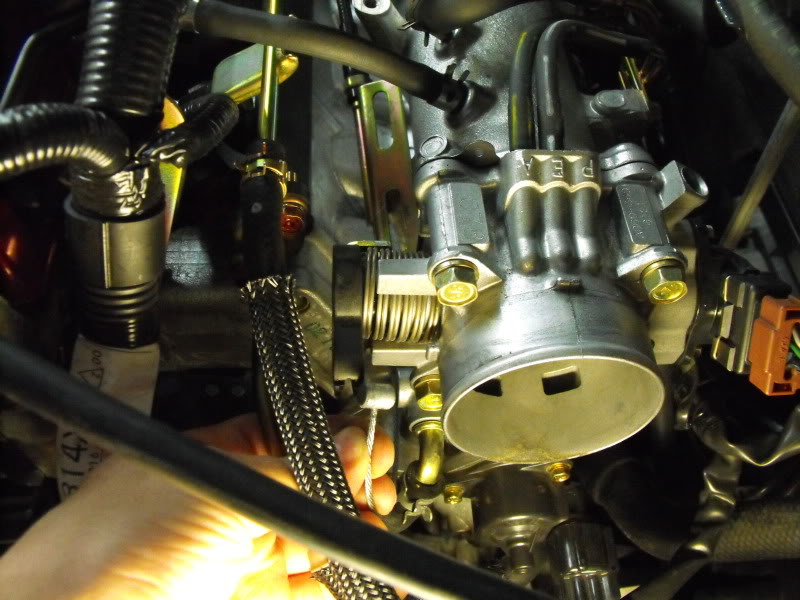
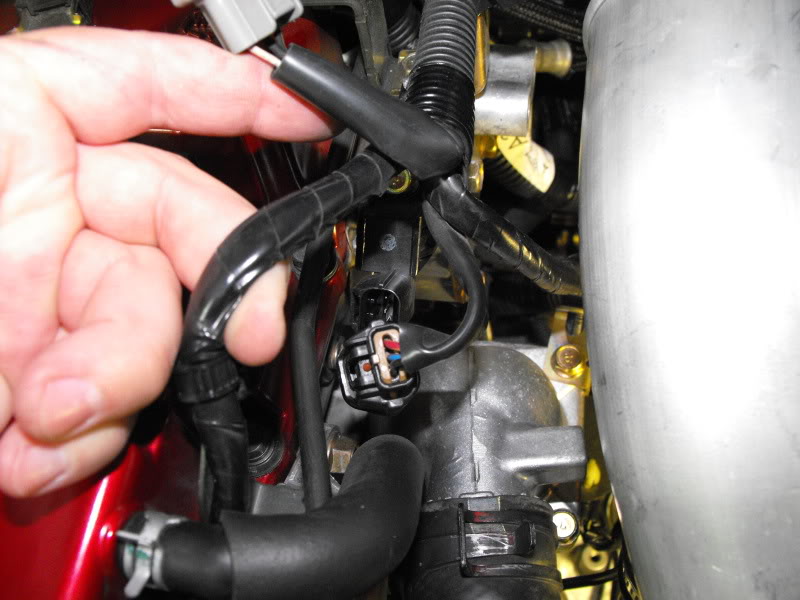
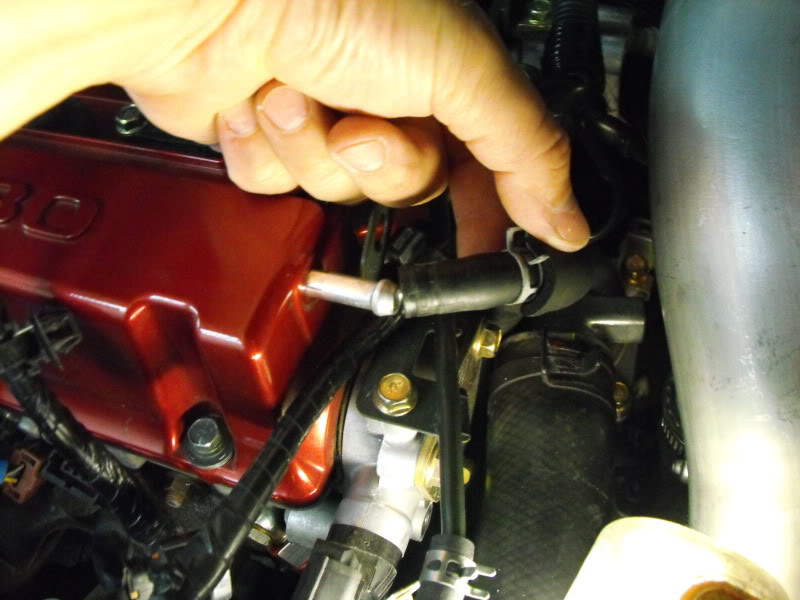
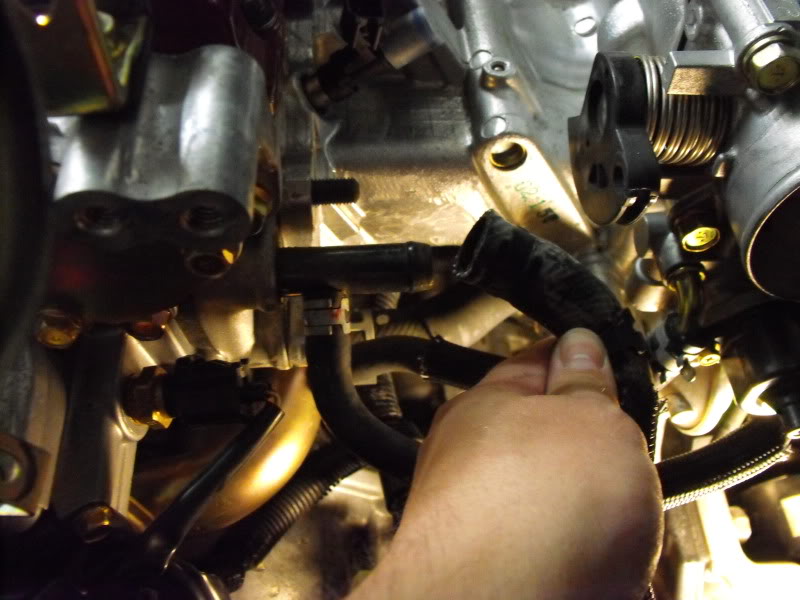
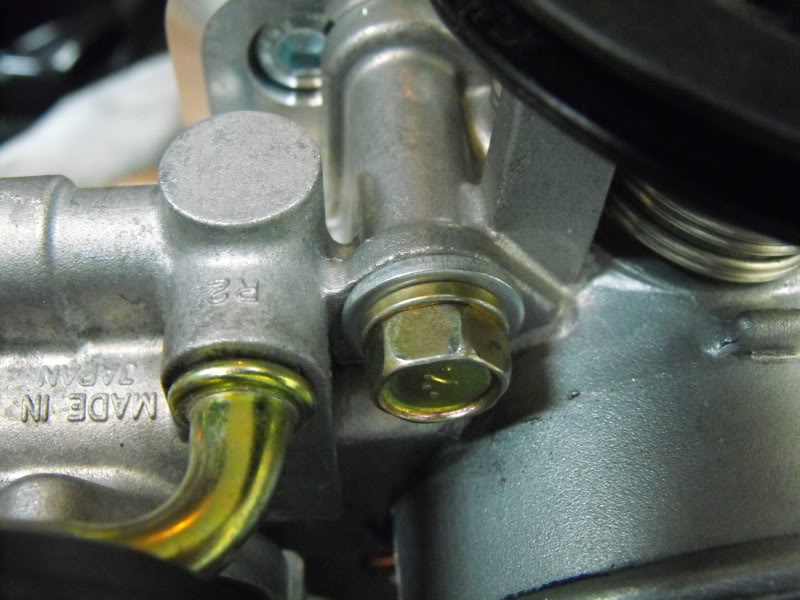
Problem: vacuum lines from throttle body don't clear adapter flange on magnus IM.... oversight? I think so.
Solution: bend them out of the way.
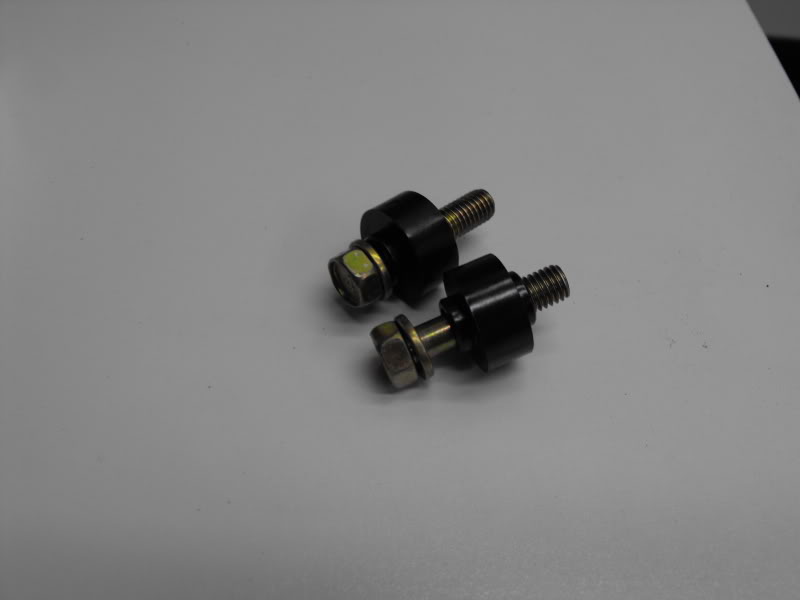
Problem: Adapter flange is not thick enough and fasteners bottom out on blind hole.
Here's some math to prove it's an issue...
Fastener
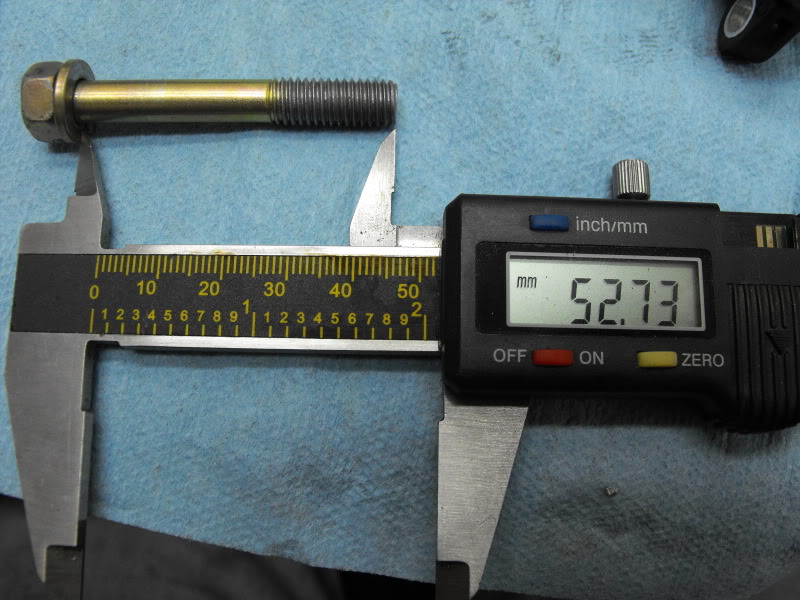
+
Flange and gasket
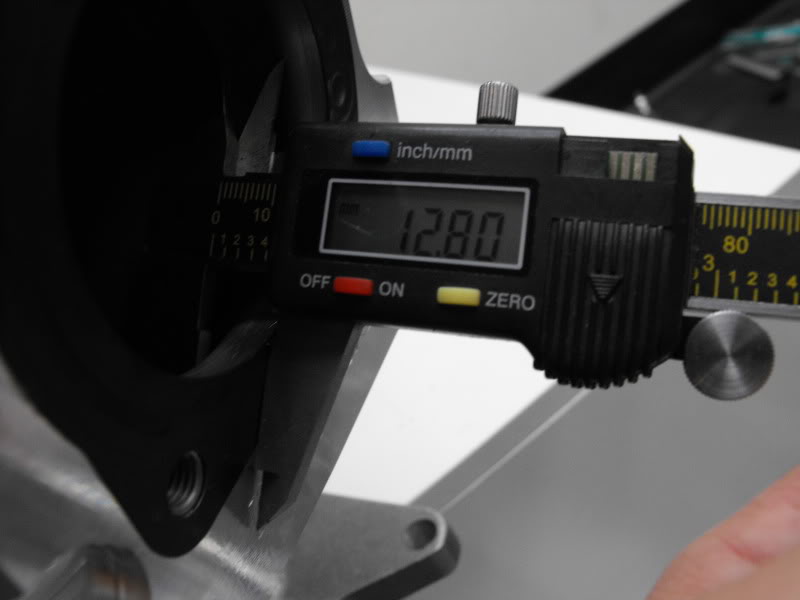
=/=
TB thickness
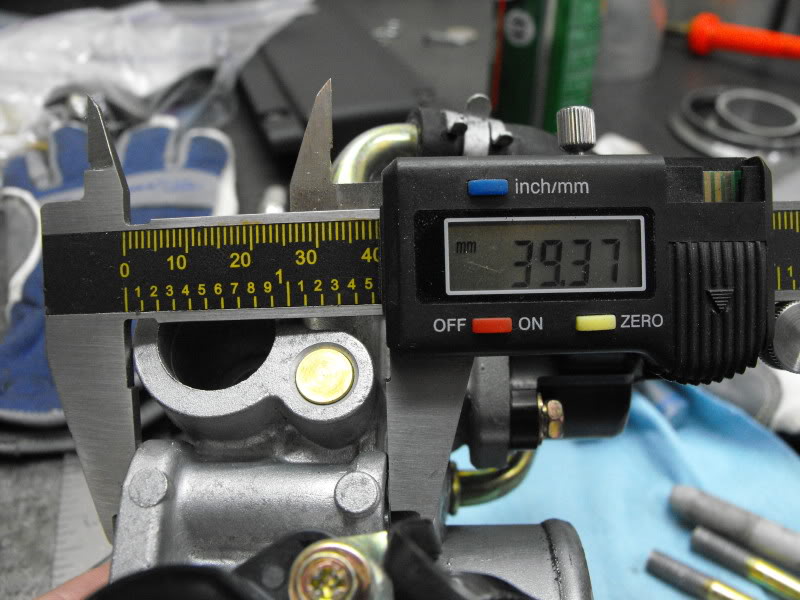

Solution: add a washer under the head of the fastener
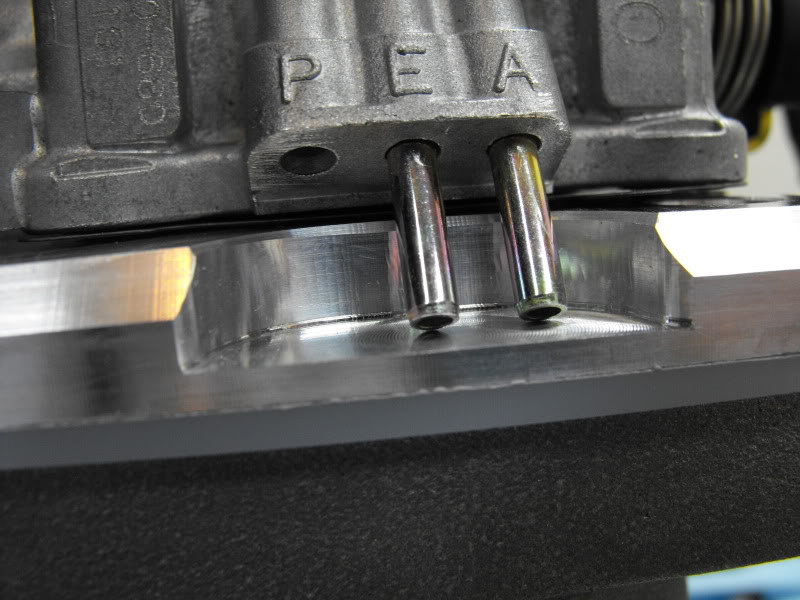
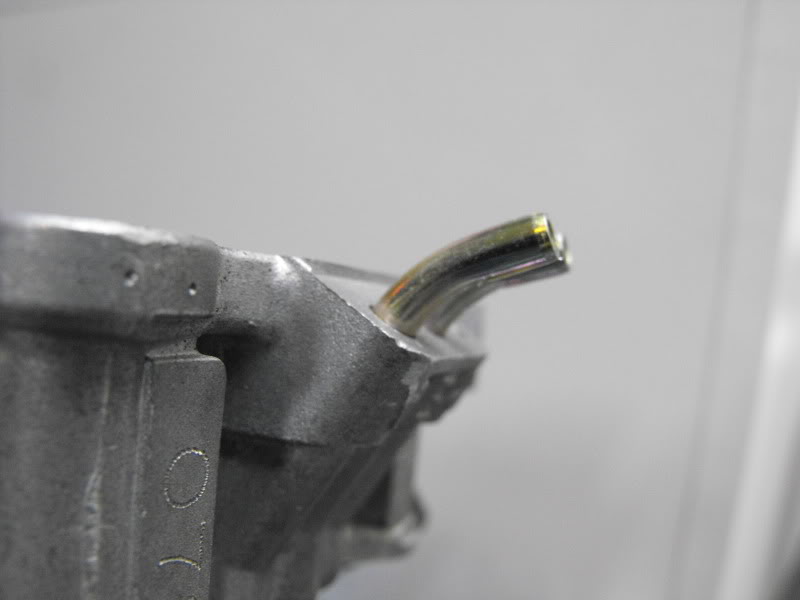
Problem: JMF's adapter flange has a bigger barb diameter than the barbs included with the magnus kit.
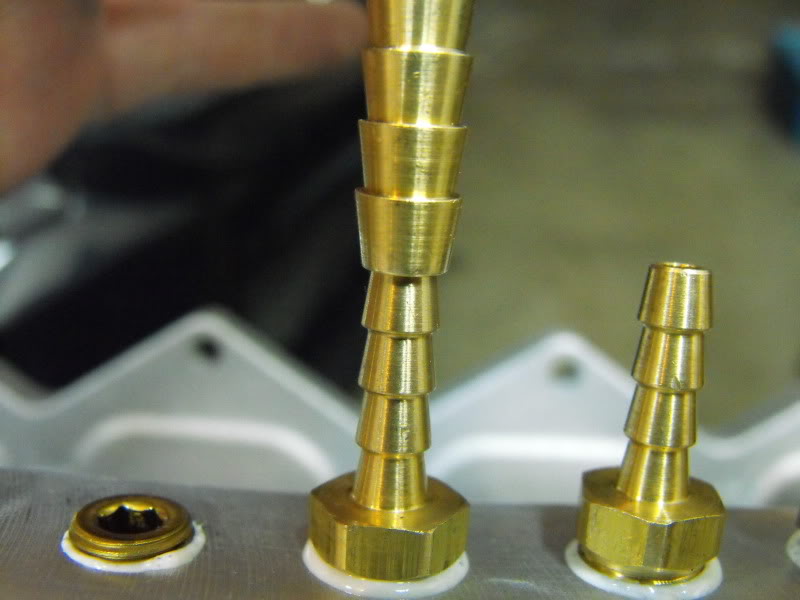
Solution: scrap that crappy idea and weld that sucker on.
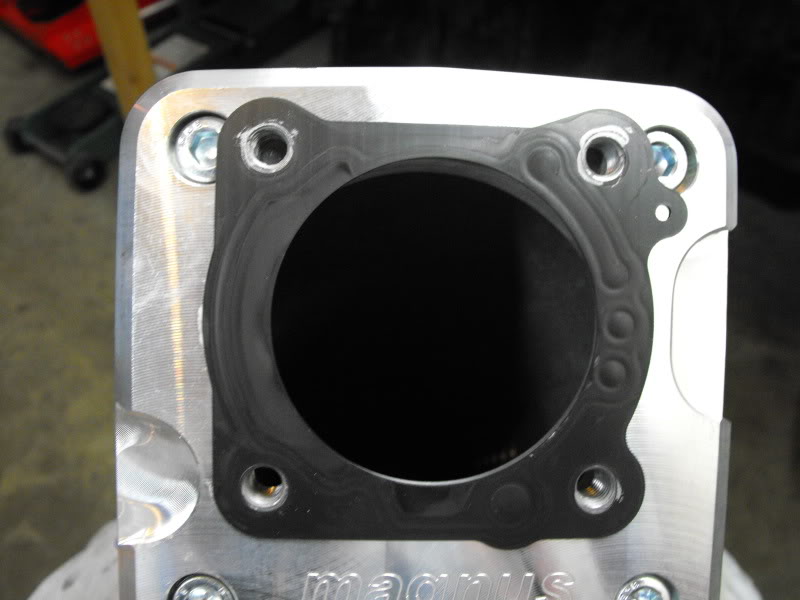
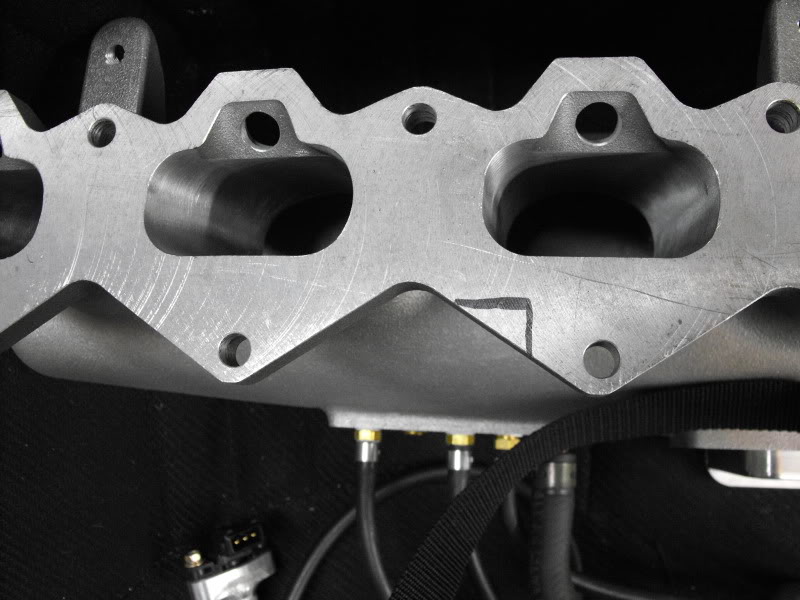
Problem: casting flaws in intake runners and it was dirty in general.
Solution: Bling that badboy out.
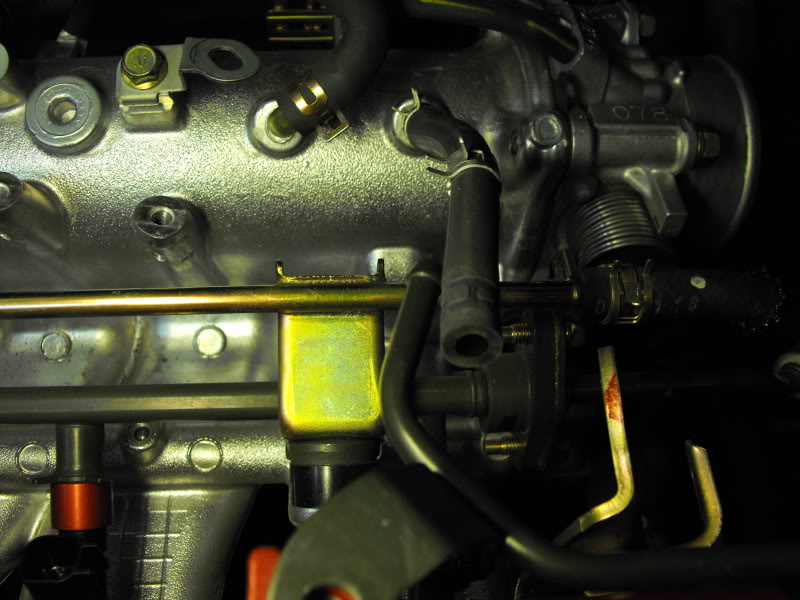
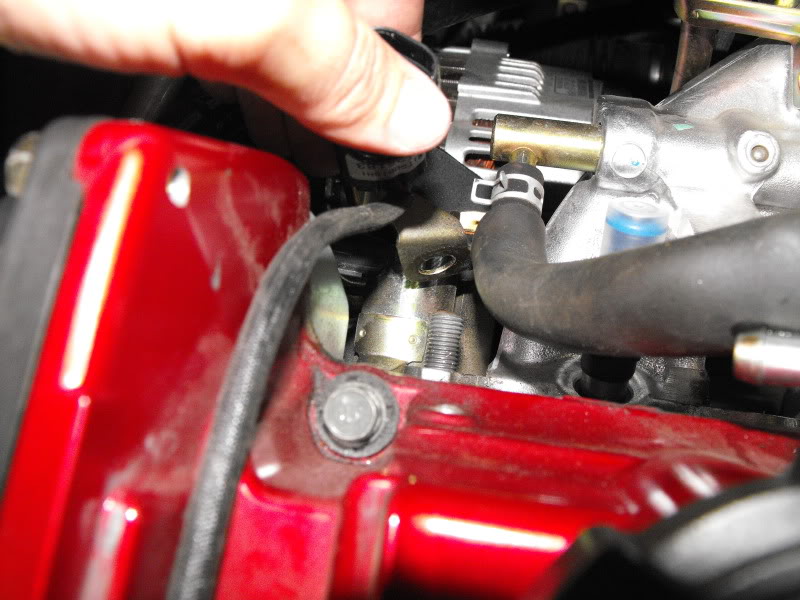
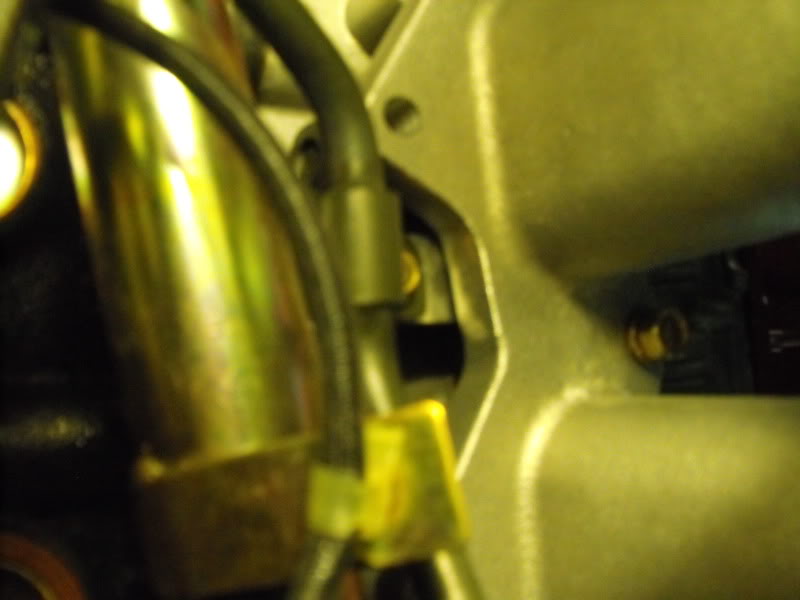
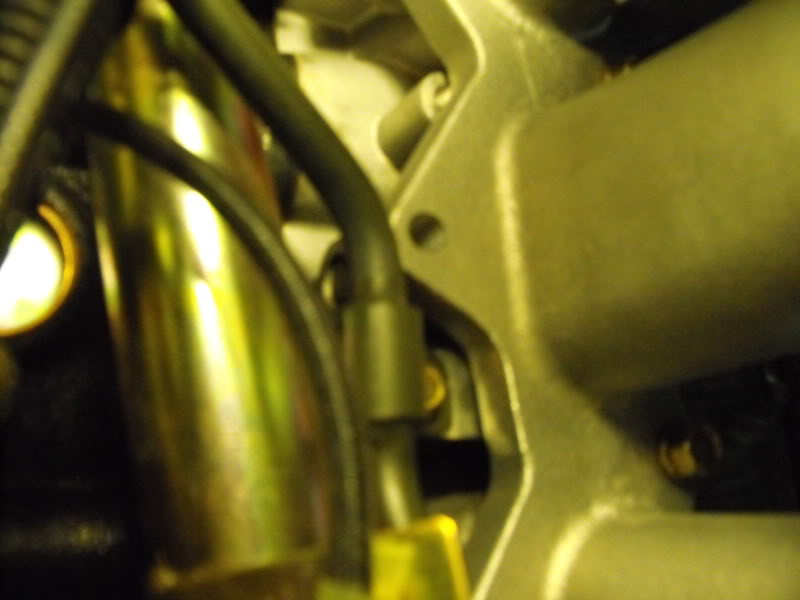
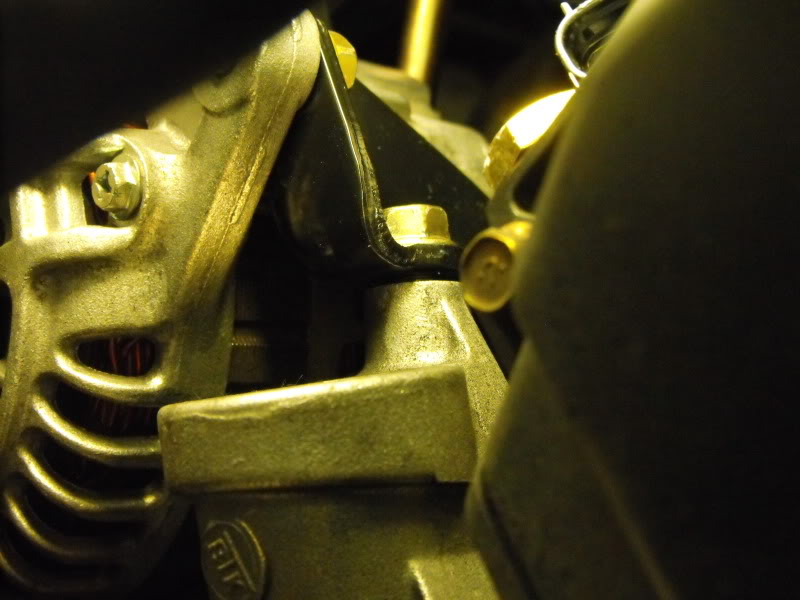
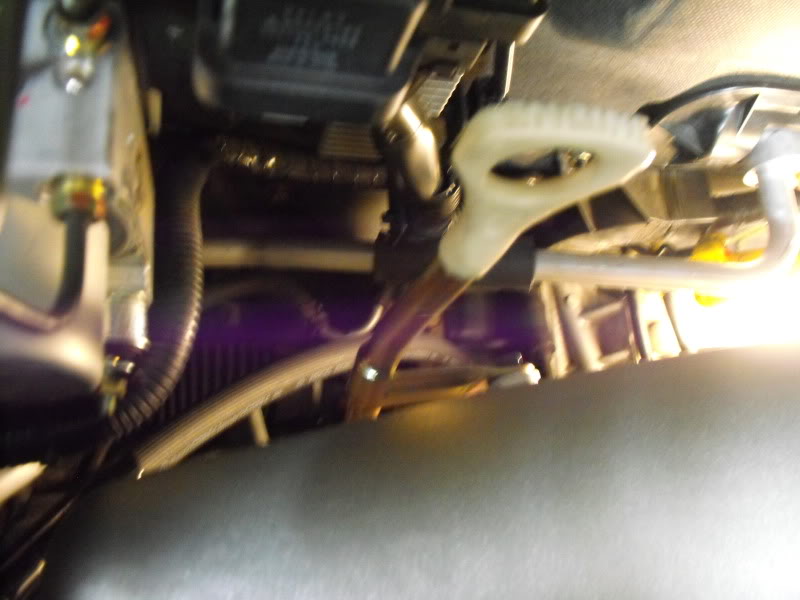
Problem: Intake manifold head flange interferes with the MIVEC oil feed line bracket. Kind of hard to see. There is a bolt that ties the bracket into the head.
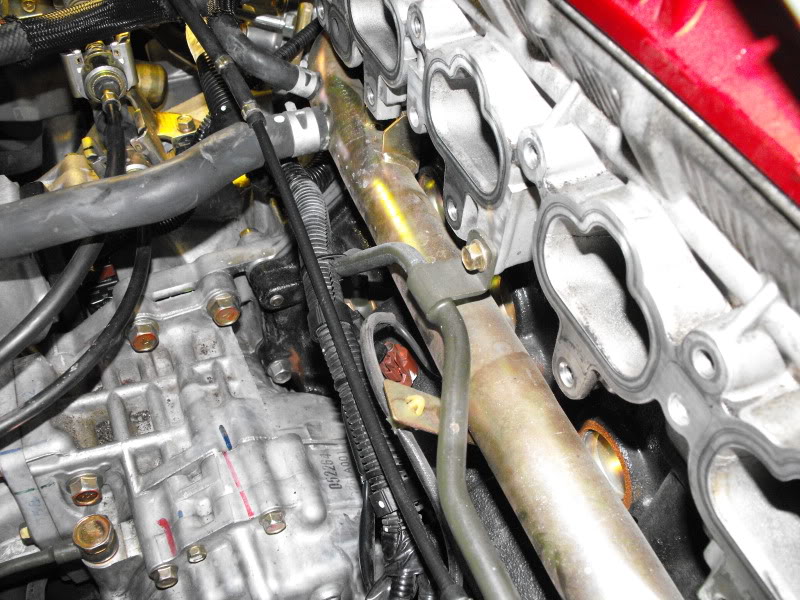
Solution: Grind the head flange to clear! Look at the AMS cast intake manifold... it's machined to clear this.
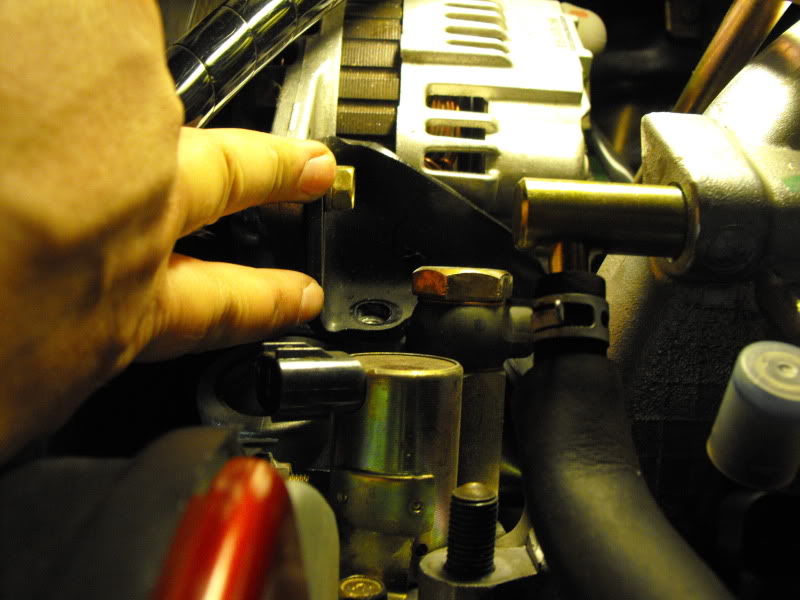
Problem: because of the magnus phenolic spacer the brackets that are mounted to the face of the intake manifold flange are spaced differently than before. BINGO! you got it...the alternator bracket is now spaced incorrectly from the head and if you torque that bolt down you're going to permanently deform that bracket
Solution: put a washer underneath the bracket and the alternator. I used the left over washers from the ones I bought to fix the TB bolt spacing problem. GRRRR!
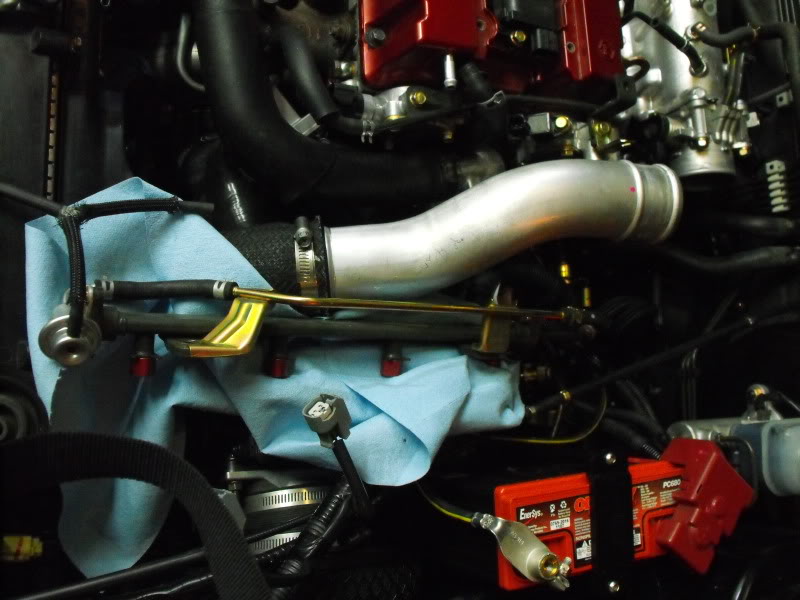
Test fit! You'll get to do a lot of this. Unfortunately the magnus is much like a lap dance... you'll test fit it no less than 5 times.
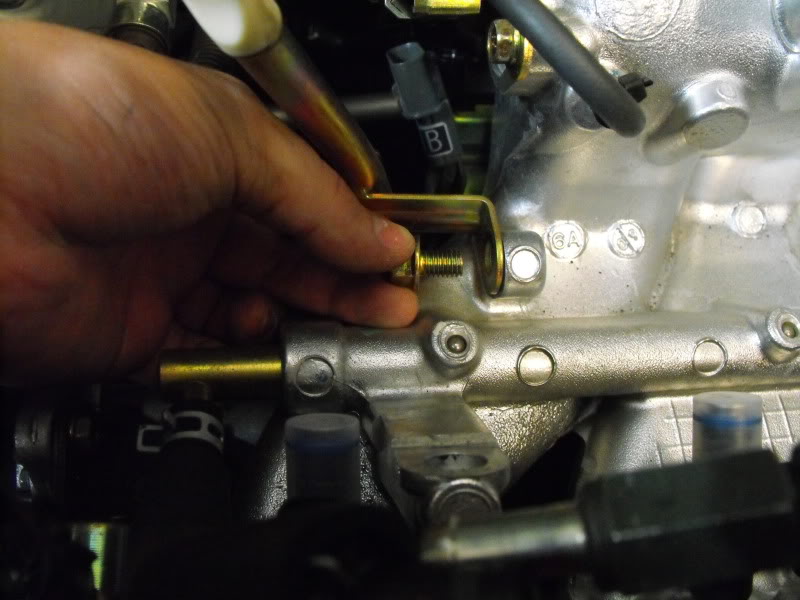
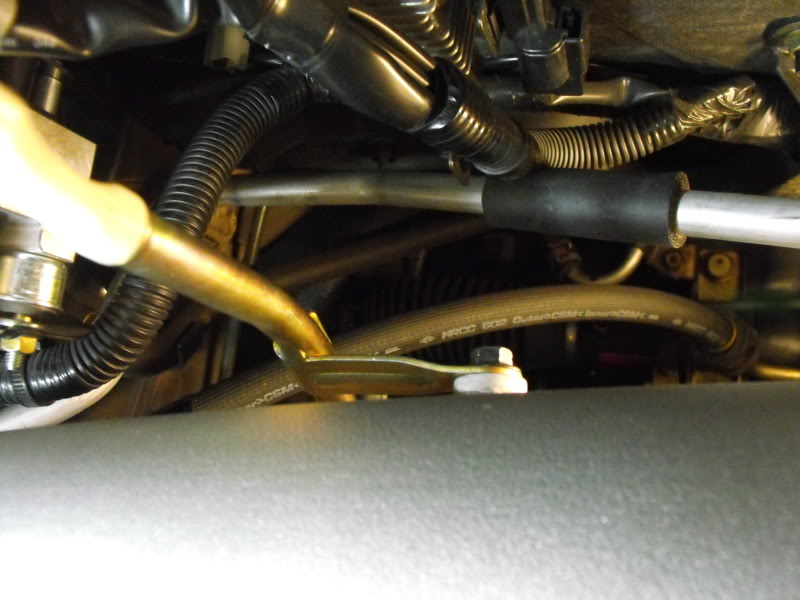
Problem: fuel lines are in the way.
Solution: Bend them... and keep bending them. I ended up coming back and rebending the lines at least 6 more times.
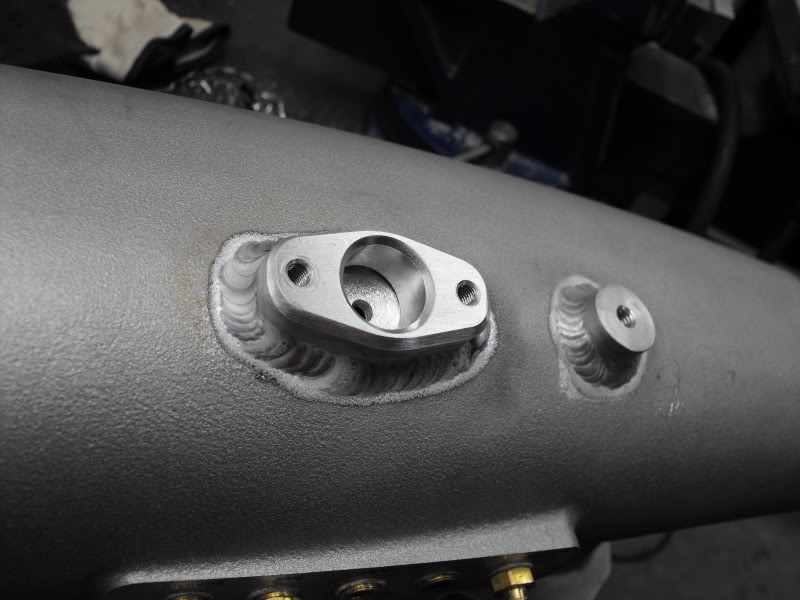
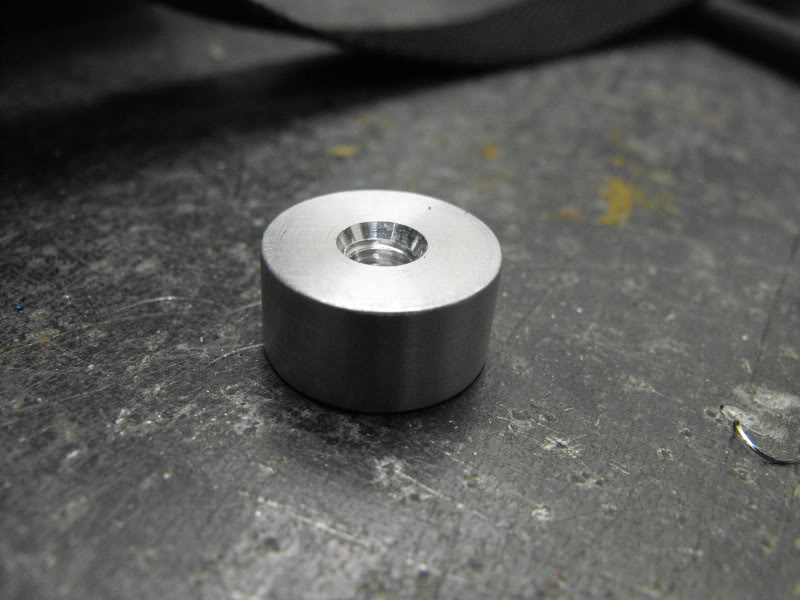
Problem: Oil dipstick tube has no mounting tab. Big deal right? Wrong. Crankcase pressure can blow an unsecured oil level tube out of the block allowing a nice 1/4" diameter HOLE in your block for oil to pour out of when you accelerate. In the "biz" we like to call this a "feature."
Aluminum Bung I had lathed up by a nice co-worker.
Said aluminum bung I welded in
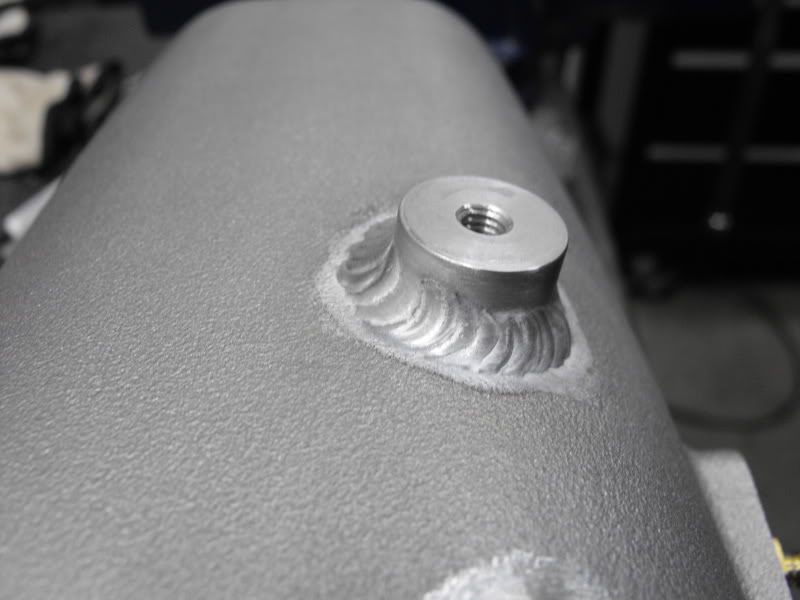
All welding complete
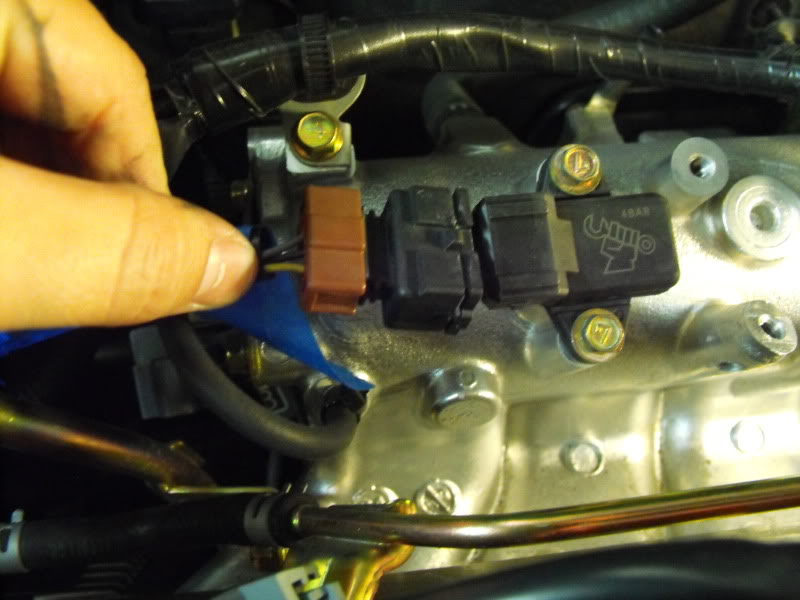
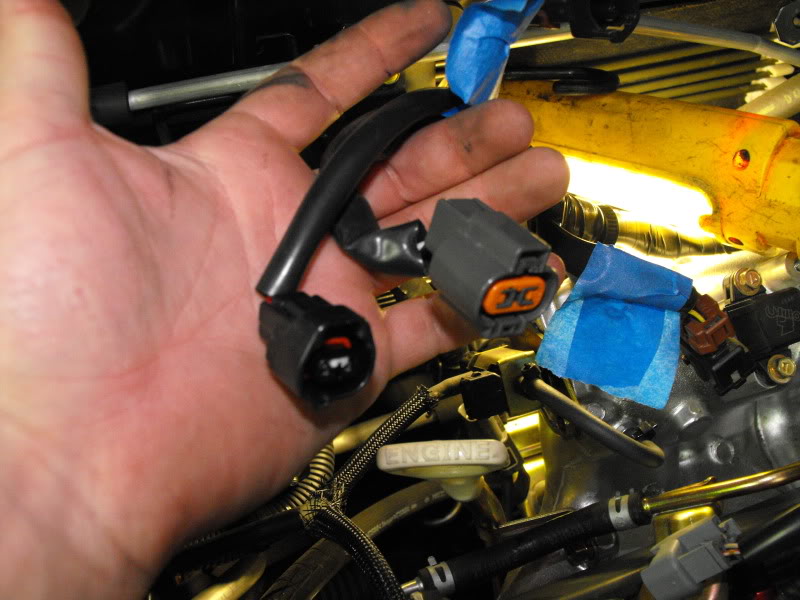
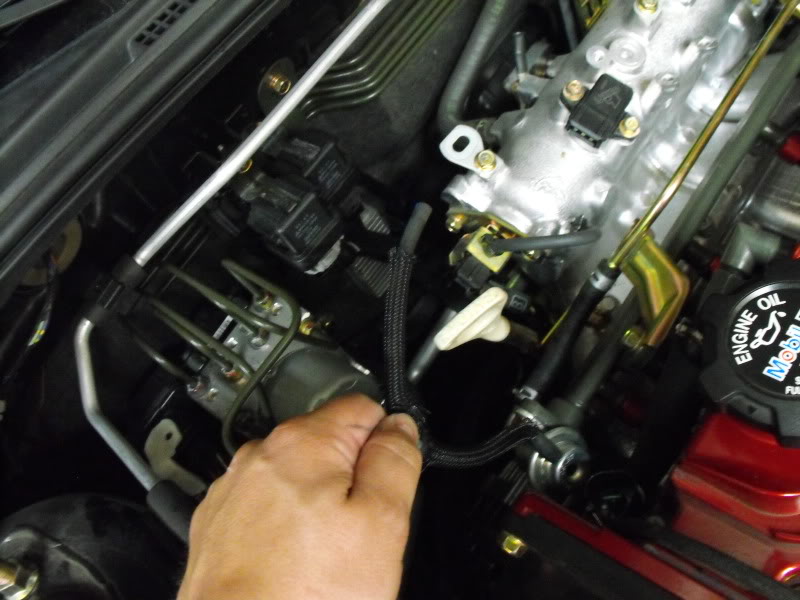
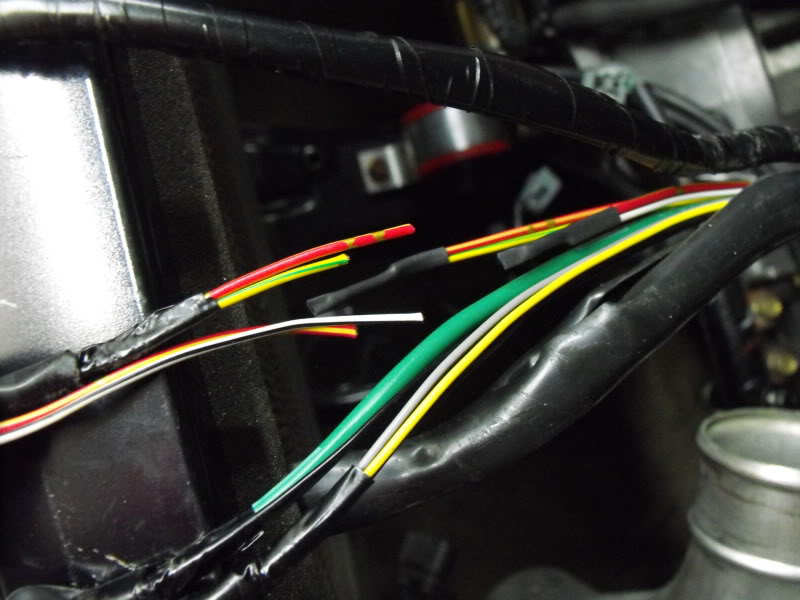
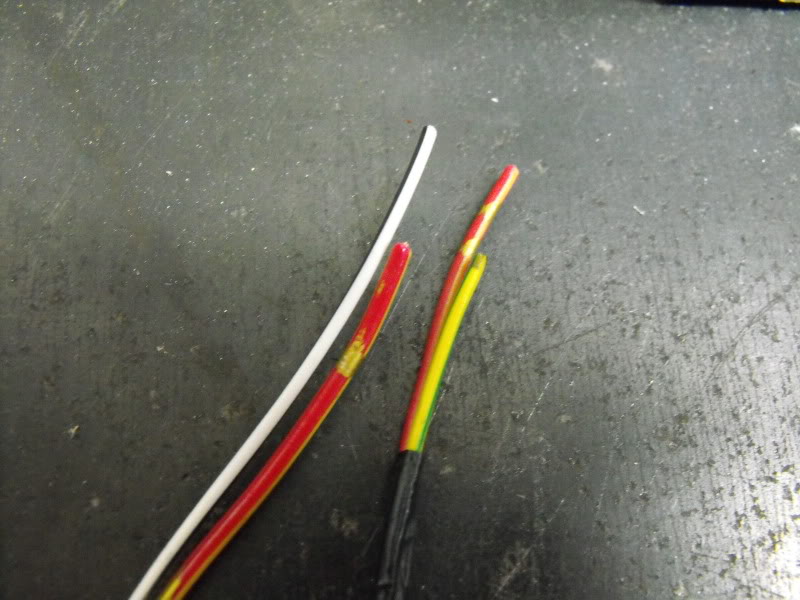
Problem: You have all these unsightly sensor connectors that are no longer used. EGR and the FPR solenoid.
Solution:I cut the connectors out of the harness, shrink wrapped, and re-loomed the wiring.
Problem: The mivec solenoid itselt has some clearance issues. I took the angle grinder to the intake manifold where it rubbed...and then it did not rub anymore. Solution=had.
WARNING: If you're very strong like Mike Kessler (blkcarbonevo) you can actually tighten the intake manifold nuts tight enough to bend and crack the intake manifold flange by deforming the phenolic spacer. Solution: Don't go HULK-style on your intake manifold
Magnus FINALLY installed.
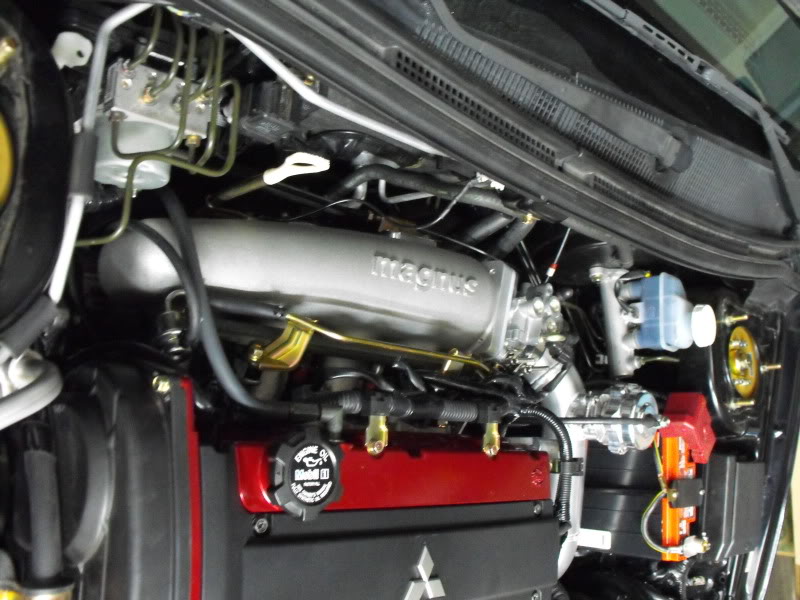
I hope that helps guys. If I were to install another one of these I would give myself a full 8 hours to remove/install the intake manifold.
The manifold ROCKS! I love it. It not only looks great, but performs like a champ. 2nd best modification I've done to my car short of the FP Red. Props to Marco for making a manifold that MAKES POWA!
Solution: bend them out of the way.
Problem: Adapter flange is not thick enough and fasteners bottom out on blind hole.
Here's some math to prove it's an issue...
Fastener
+
Flange and gasket
=/=
TB thickness
Solution: add a washer under the head of the fastener
Problem: JMF's adapter flange has a bigger barb diameter than the barbs included with the magnus kit.
Solution: scrap that crappy idea and weld that sucker on.
Problem: casting flaws in intake runners and it was dirty in general.
Solution: Bling that badboy out.
Problem: Intake manifold head flange interferes with the MIVEC oil feed line bracket. Kind of hard to see. There is a bolt that ties the bracket into the head.
Solution: Grind the head flange to clear! Look at the AMS cast intake manifold... it's machined to clear this.
Problem: because of the magnus phenolic spacer the brackets that are mounted to the face of the intake manifold flange are spaced differently than before. BINGO! you got it...the alternator bracket is now spaced incorrectly from the head and if you torque that bolt down you're going to permanently deform that bracket
Solution: put a washer underneath the bracket and the alternator. I used the left over washers from the ones I bought to fix the TB bolt spacing problem. GRRRR!
Test fit! You'll get to do a lot of this. Unfortunately the magnus is much like a lap dance... you'll test fit it no less than 5 times.
Problem: fuel lines are in the way.
Solution: Bend them... and keep bending them. I ended up coming back and rebending the lines at least 6 more times.
Problem: Oil dipstick tube has no mounting tab. Big deal right? Wrong. Crankcase pressure can blow an unsecured oil level tube out of the block allowing a nice 1/4" diameter HOLE in your block for oil to pour out of when you accelerate. In the "biz" we like to call this a "feature."
Aluminum Bung I had lathed up by a nice co-worker.
Said aluminum bung I welded in
All welding complete
Problem: You have all these unsightly sensor connectors that are no longer used. EGR and the FPR solenoid.
Solution:I cut the connectors out of the harness, shrink wrapped, and re-loomed the wiring.
Problem: The mivec solenoid itselt has some clearance issues. I took the angle grinder to the intake manifold where it rubbed...and then it did not rub anymore. Solution=had.
WARNING: If you're very strong like Mike Kessler (blkcarbonevo) you can actually tighten the intake manifold nuts tight enough to bend and crack the intake manifold flange by deforming the phenolic spacer. Solution: Don't go HULK-style on your intake manifold
Magnus FINALLY installed.
I hope that helps guys. If I were to install another one of these I would give myself a full 8 hours to remove/install the intake manifold.
The manifold ROCKS! I love it. It not only looks great, but performs like a champ. 2nd best modification I've done to my car short of the FP Red. Props to Marco for making a manifold that MAKES POWA!

Thread
Thread Starter
Forum
Replies
Last Post
R/TErnie
Evo Engine / Turbo / Drivetrain
74
Dec 22, 2014 05:30 PM
R/TErnie
Member Unresolved Disputes
23
Apr 21, 2012 05:35 PM
R/TErnie
For Sale/WTB - Engine / Drivetrain / Power
38
Oct 8, 2011 11:20 AM