When you click on links to various merchants on this site and make a purchase, this can result in this site earning a commission. Affiliate programs and affiliations include, but are not limited to, the eBay Partner Network.
How to: Evo IX spoiler disassembly. With pics and only three parts!
Evo How Tos / InstallationsPost or link to your detailed how to / installation articles in here. If you have any questions regarding the how tos, feel free to post them in the Request sub-forum.
How to: Evo IX spoiler disassembly. With pics and only three parts!
For a while I've been wondering how to do this, and many posts have just been vague with no direction. Most leading back to the VIII thread which is of no help to us that own IXs. Since I am about to repaint my car (and clean old plasti dip), I figured I'd show a step by step, and quick tutorial, on break down of the stock spoiler. (GG to WW in case you want to know)
1. Removal of the spoiler
This is a given, and I have not included photos. It's four bolts on the truck, of which, all are 10mm. Simply unbolt and remove. The wing will have adhesive but it's been nearly 10 years since they were released. The adhesive should give easily.
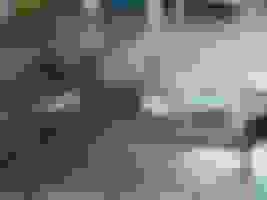
2. Inner panel removal
This is when the work gets a little tricky. I was reading about how to remove and got different results. Either ,"it's not like the VIII," and the thread dying or "...it's a velcro latch. Don't use a heat gun." Both are true (to an extent), but there is a small thread of adhesive on the inner workings.
To remove, simply use a heat gun on the lower setting and point it at the small cracks between the inner and outer spoiler housings. Do not point the gun in the middle of the panel, this is the velcro, and will probably weaken it in the process.
After a while of heating these sections, begin to pry open from the bottom of the spoiler. This takes some patience, and I would HIGHLY recommend not trying to Hulk this part down. You'll end up breaking something most likely. As you're pulling reapply heat along the gaps, and continue pulling with a mild amount of force. You will hear popping and cracking. This is the velcro separating and the pins in the housing separating. Eventually these inner panel will separate, and you can feel relieved because you just finished the most tedious part.
The adhesive strip I mentioned.
Your finished product. 3. Outer panel removal
There are eight bolts in total for this part (four to each side). All of which require an 8mm socket.
These bolts can be a bit tedious, but easily removed with a bit of ratcheting.
There are two bolts connecting to the carbon fiber, but these are not needed. The CF is attached to the bracket you are removing with the 8mm bolts. Repeat for the other side.
Upon removing the bolts simply pull the bracket up and off the outer housing, and you are done.
Fully taken apart:
Enjoy folks and best of luck!
I'm not responsible if you go HULK SMASH on this and break something. Just be patient.
Check out my other post on making regular headlights into fog light housings!
Does the brackets cover the hollow opening of the carbon fiber section? I’m wondering if you can pour some kind of light expanding foam in there to stiffen it up.
Does the brackets cover the hollow opening of the carbon fiber section? I�m wondering if you can pour some kind of light expanding foam in there to stiffen it up.
The brackets don�t cover it completely if I remember correctly but I�m not 100% sure.
I just removed my 06 spoiler for the first time. The screws came off perfectly fine (surprised). But I can't get it off the damn adhesive. All 4 screws are out. Thanks!
I need some Evo 9 IX wing parts. Anybody have some of the upright parts like the inner drivers side plastic piece?
Thanks Mitsuatb
Any luck finding the parts you were after? The right hand side vertical part fell of for some reason and got ran over by a car! I couldn�t find any spares yet.