
HOW TO: Hardwire Radar Detector / Mirror Mount | Evo VIII/IX


Thread Starter
Evolving Member
Joined: Apr 2012
Posts: 177
Likes: 1
From: California
HOW TO: Hardwire Radar Detector / Mirror Mount | Evo VIII/IX
**I am not responsible for your actions, this is a write-up guide on how to install one. If you are not comfortable working on your own car, please take it to a shop who knows how.
This works with all radar detectors, but make sure you get a mirror mount + hardwire kit specific to your radar detector. The ones listed in this guide are for most Passport radar detectors.
What you need:
-Radar detector
-Mirror Mount (Blendmount for Passport - www.amazon.com/gp/product/B002J47Q3O/)
-Hardwire kit (Blendmount for Passport - www.amazon.com/gp/product/B0062PO02Q/)
-Bussmann Fuse Tap
-Credit card (or similarly shaped object)
-Fuse puller (should be one in your car already)
-Wire Cutter/Stripper
-Vice grips, crimper, or similar
-Ratchet, 10mm socket, small extension
-Small zipties
Step 0 (optional): Disconnect the battery.
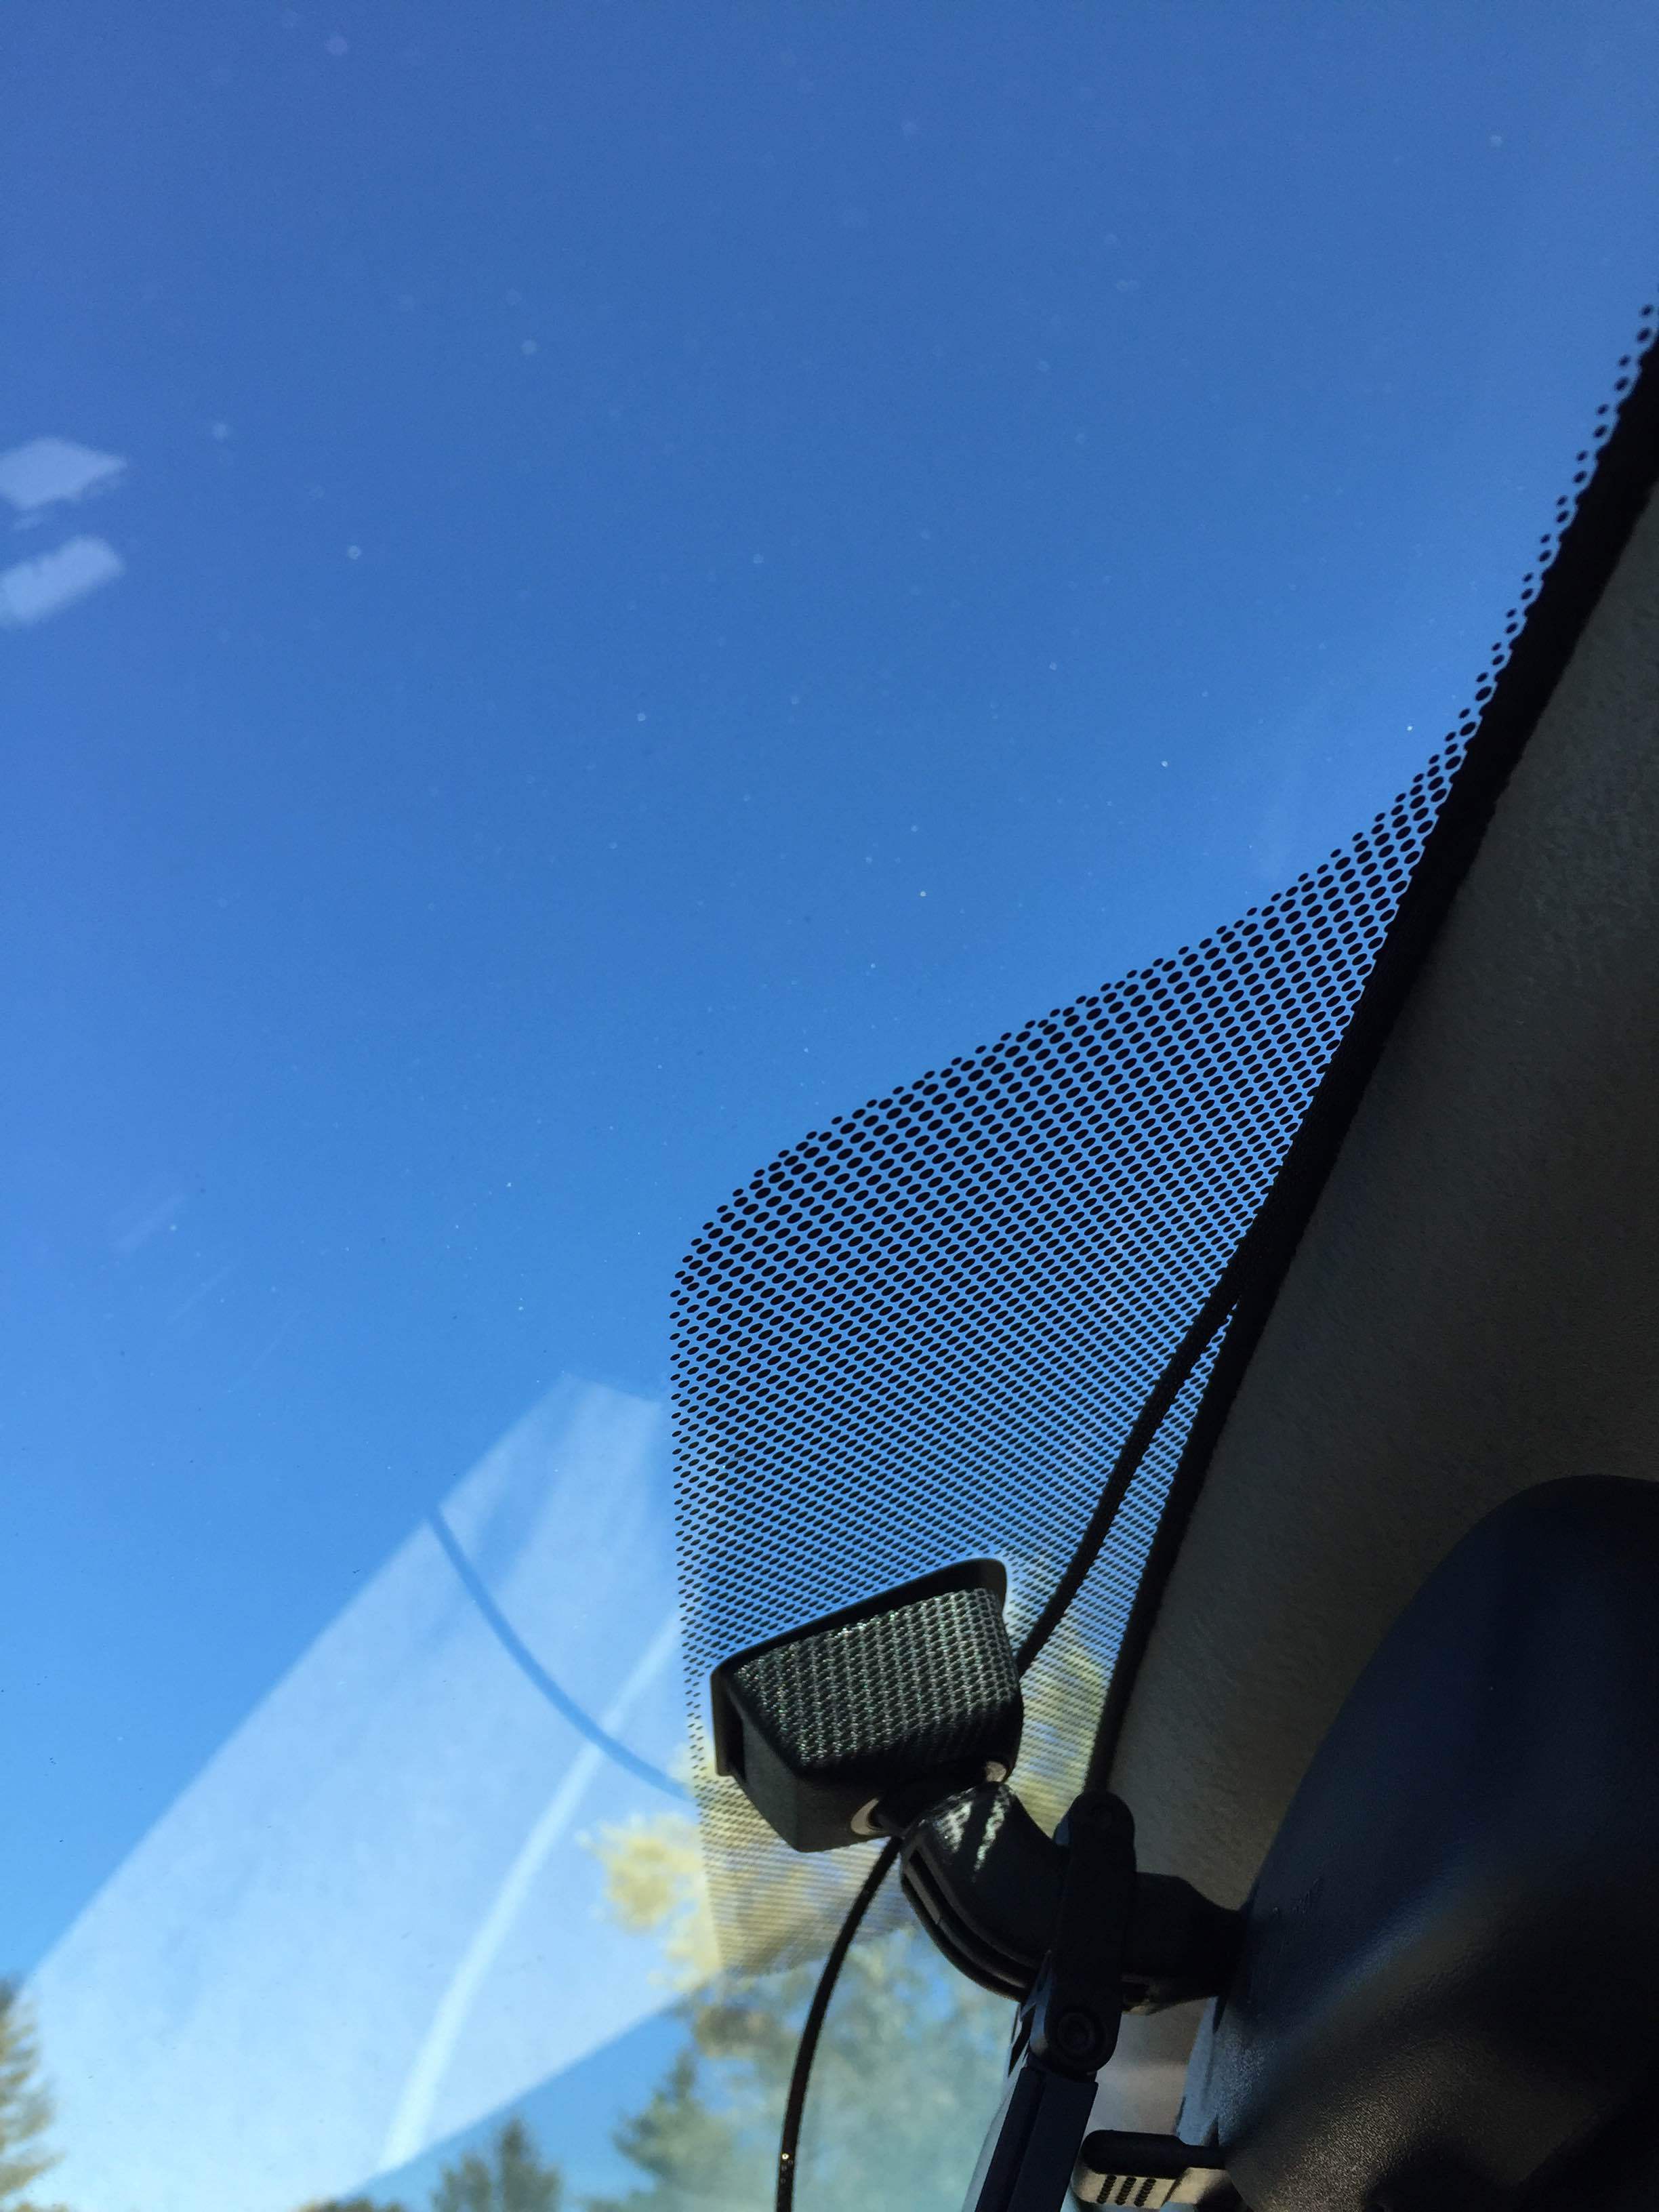
Step 1: Take your Mirror Mount and attach your radar detector on to it (easier to install with the two already attached). Then, using the allen key included with the Mirror Mount, fasten it to your mirror stem, leaving the bolts slightly loose. Adjust the mirror mount so that the radar detector is level. If you used the Blendmount Mirror Mount, it will line up straight perfectly. If you used a no-name / knock off mirror mount, you may need to adjust it more to get it to line up. After the radar detector is lined up, tighten all the bolts.

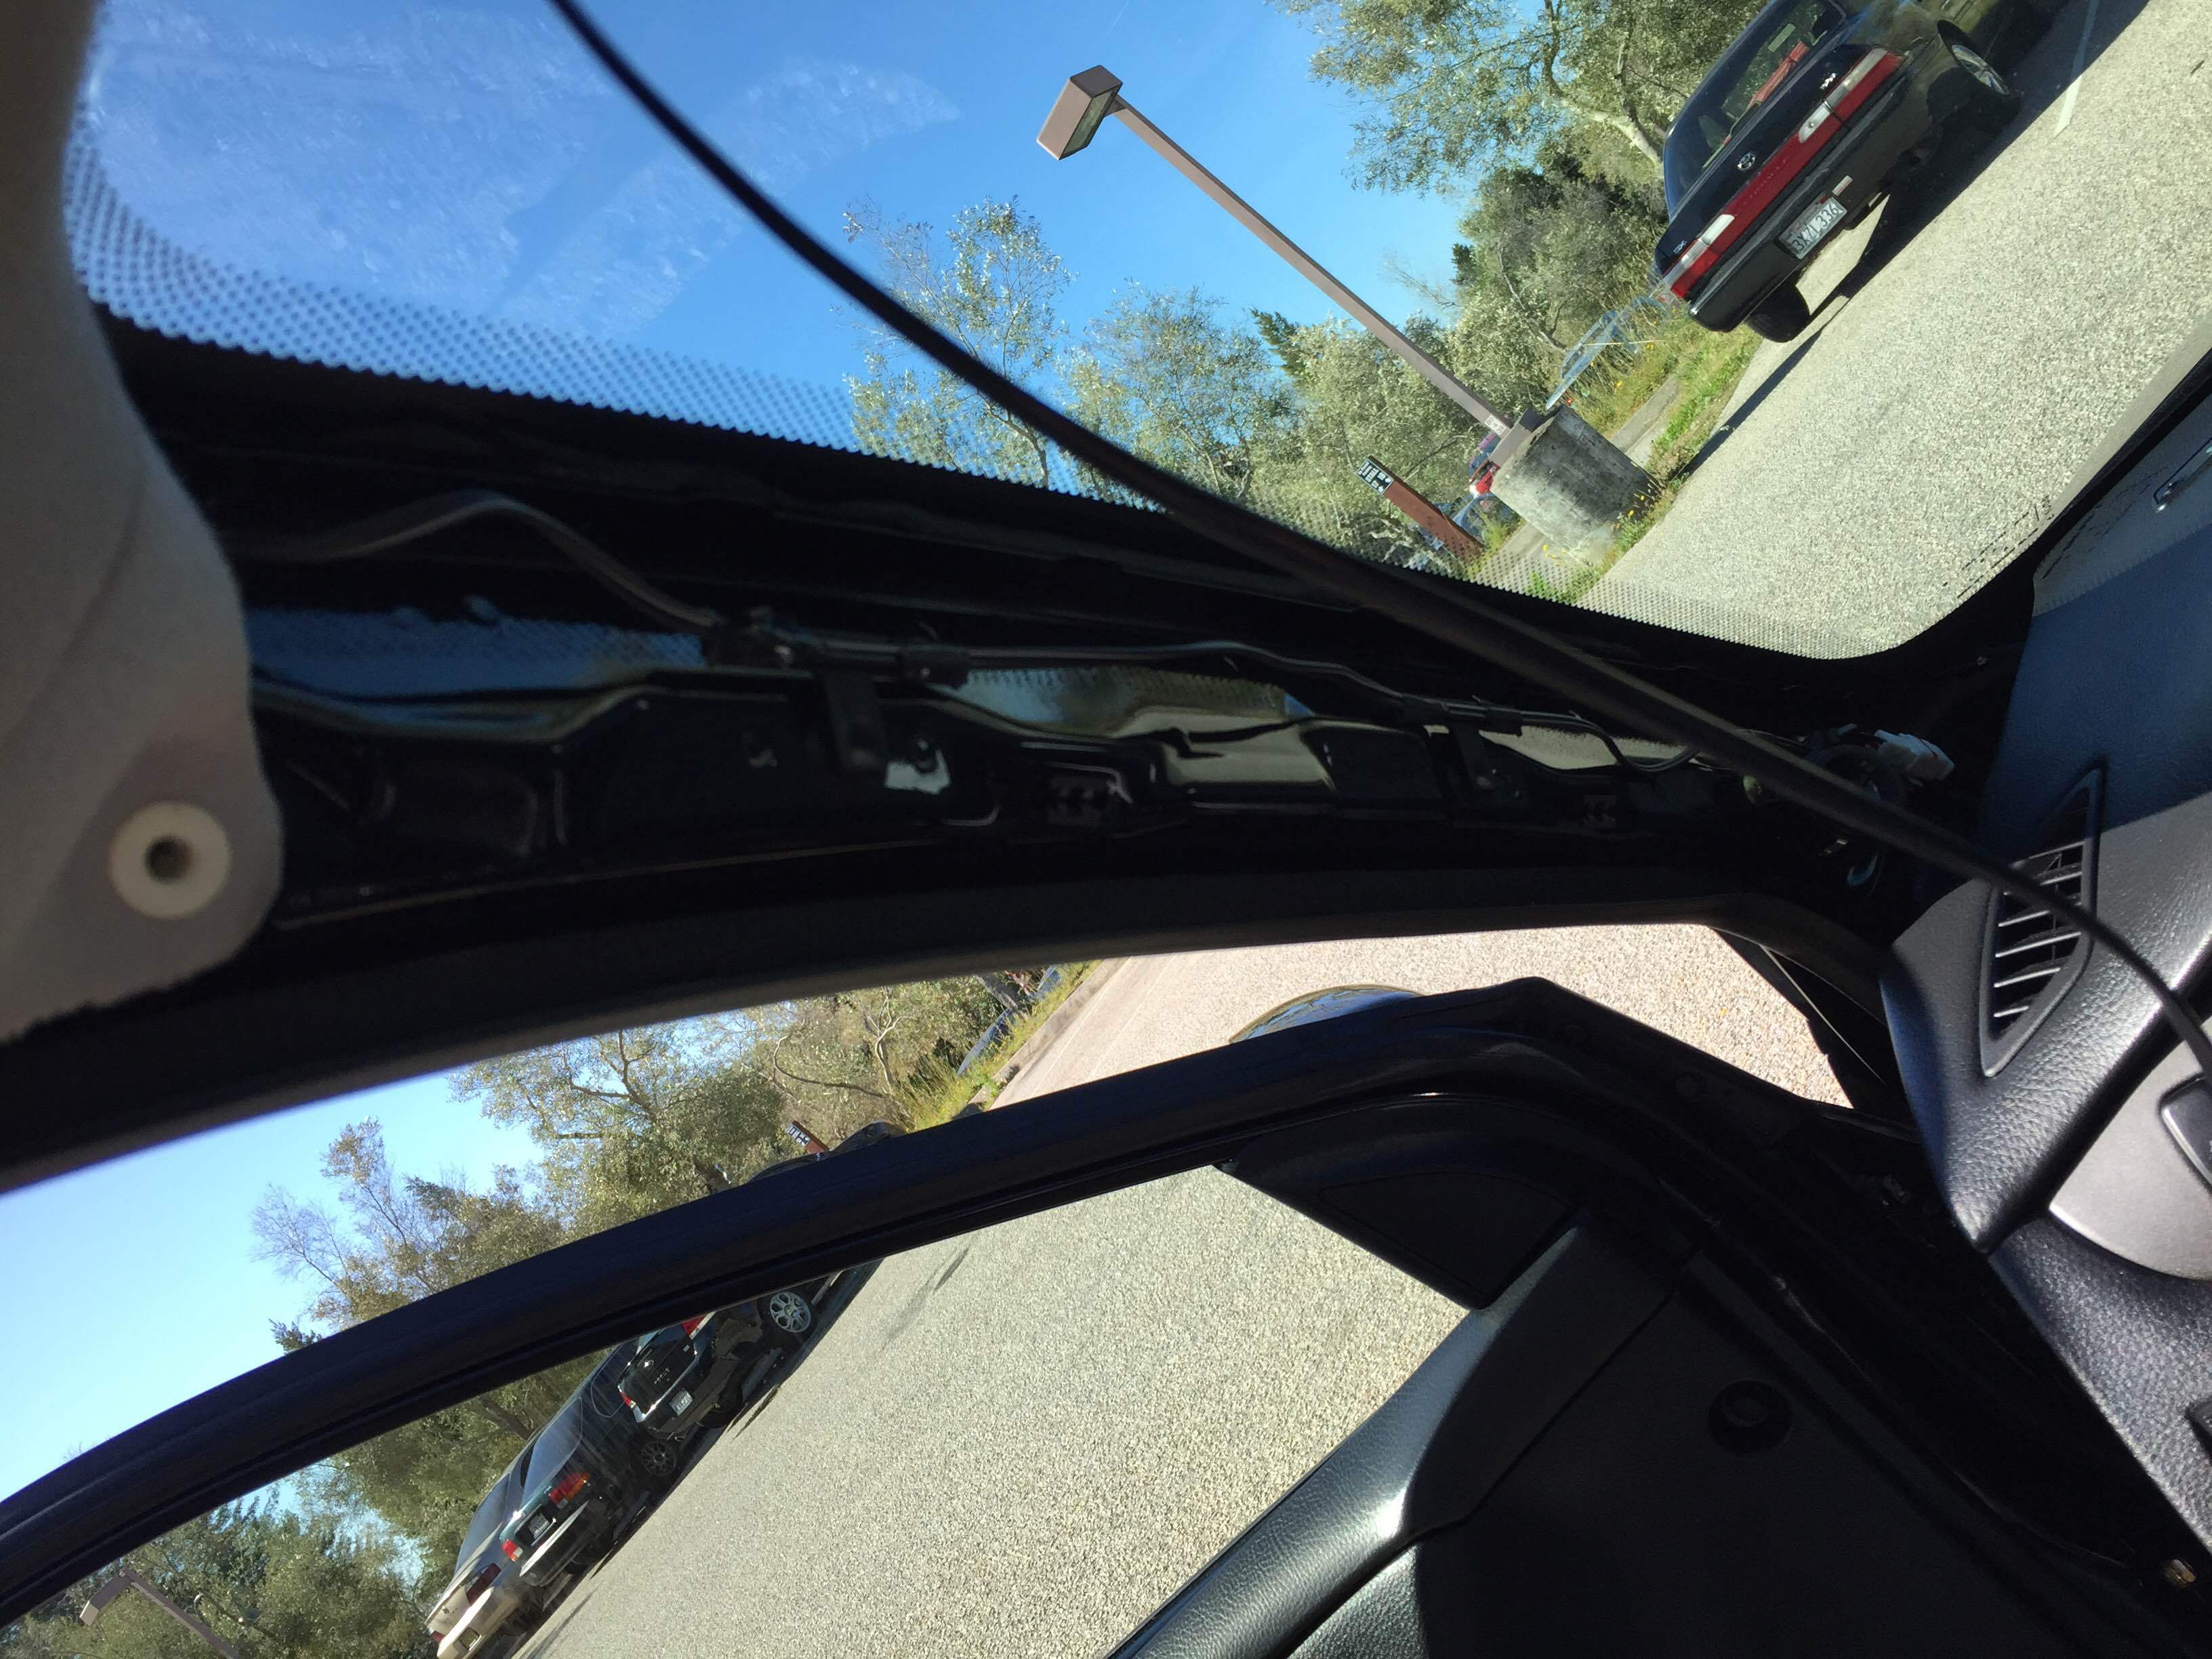
Step 2: Remove the driver side A-pillar by pulling it off. There are 2 clips that hold it on, it will take a little bit of force to pull it off. TIP: Pull towards the passenger side, it will pop off.
Step 3: Take your hardwire kit and plug one end into the radar detector. Use your fingers and push the wiring up into the gap between the headliner and the roof. It may be a little stiff, if so you can use a credit card or similarly shaped object to help push it in. Keep doing this with the wiring all the way to the driver side A-pillar.
Step 4: Zip tie the wiring with the pre-existing tweeter wiring (or if you removed those, just secure the wires in the path down the A-pillar).


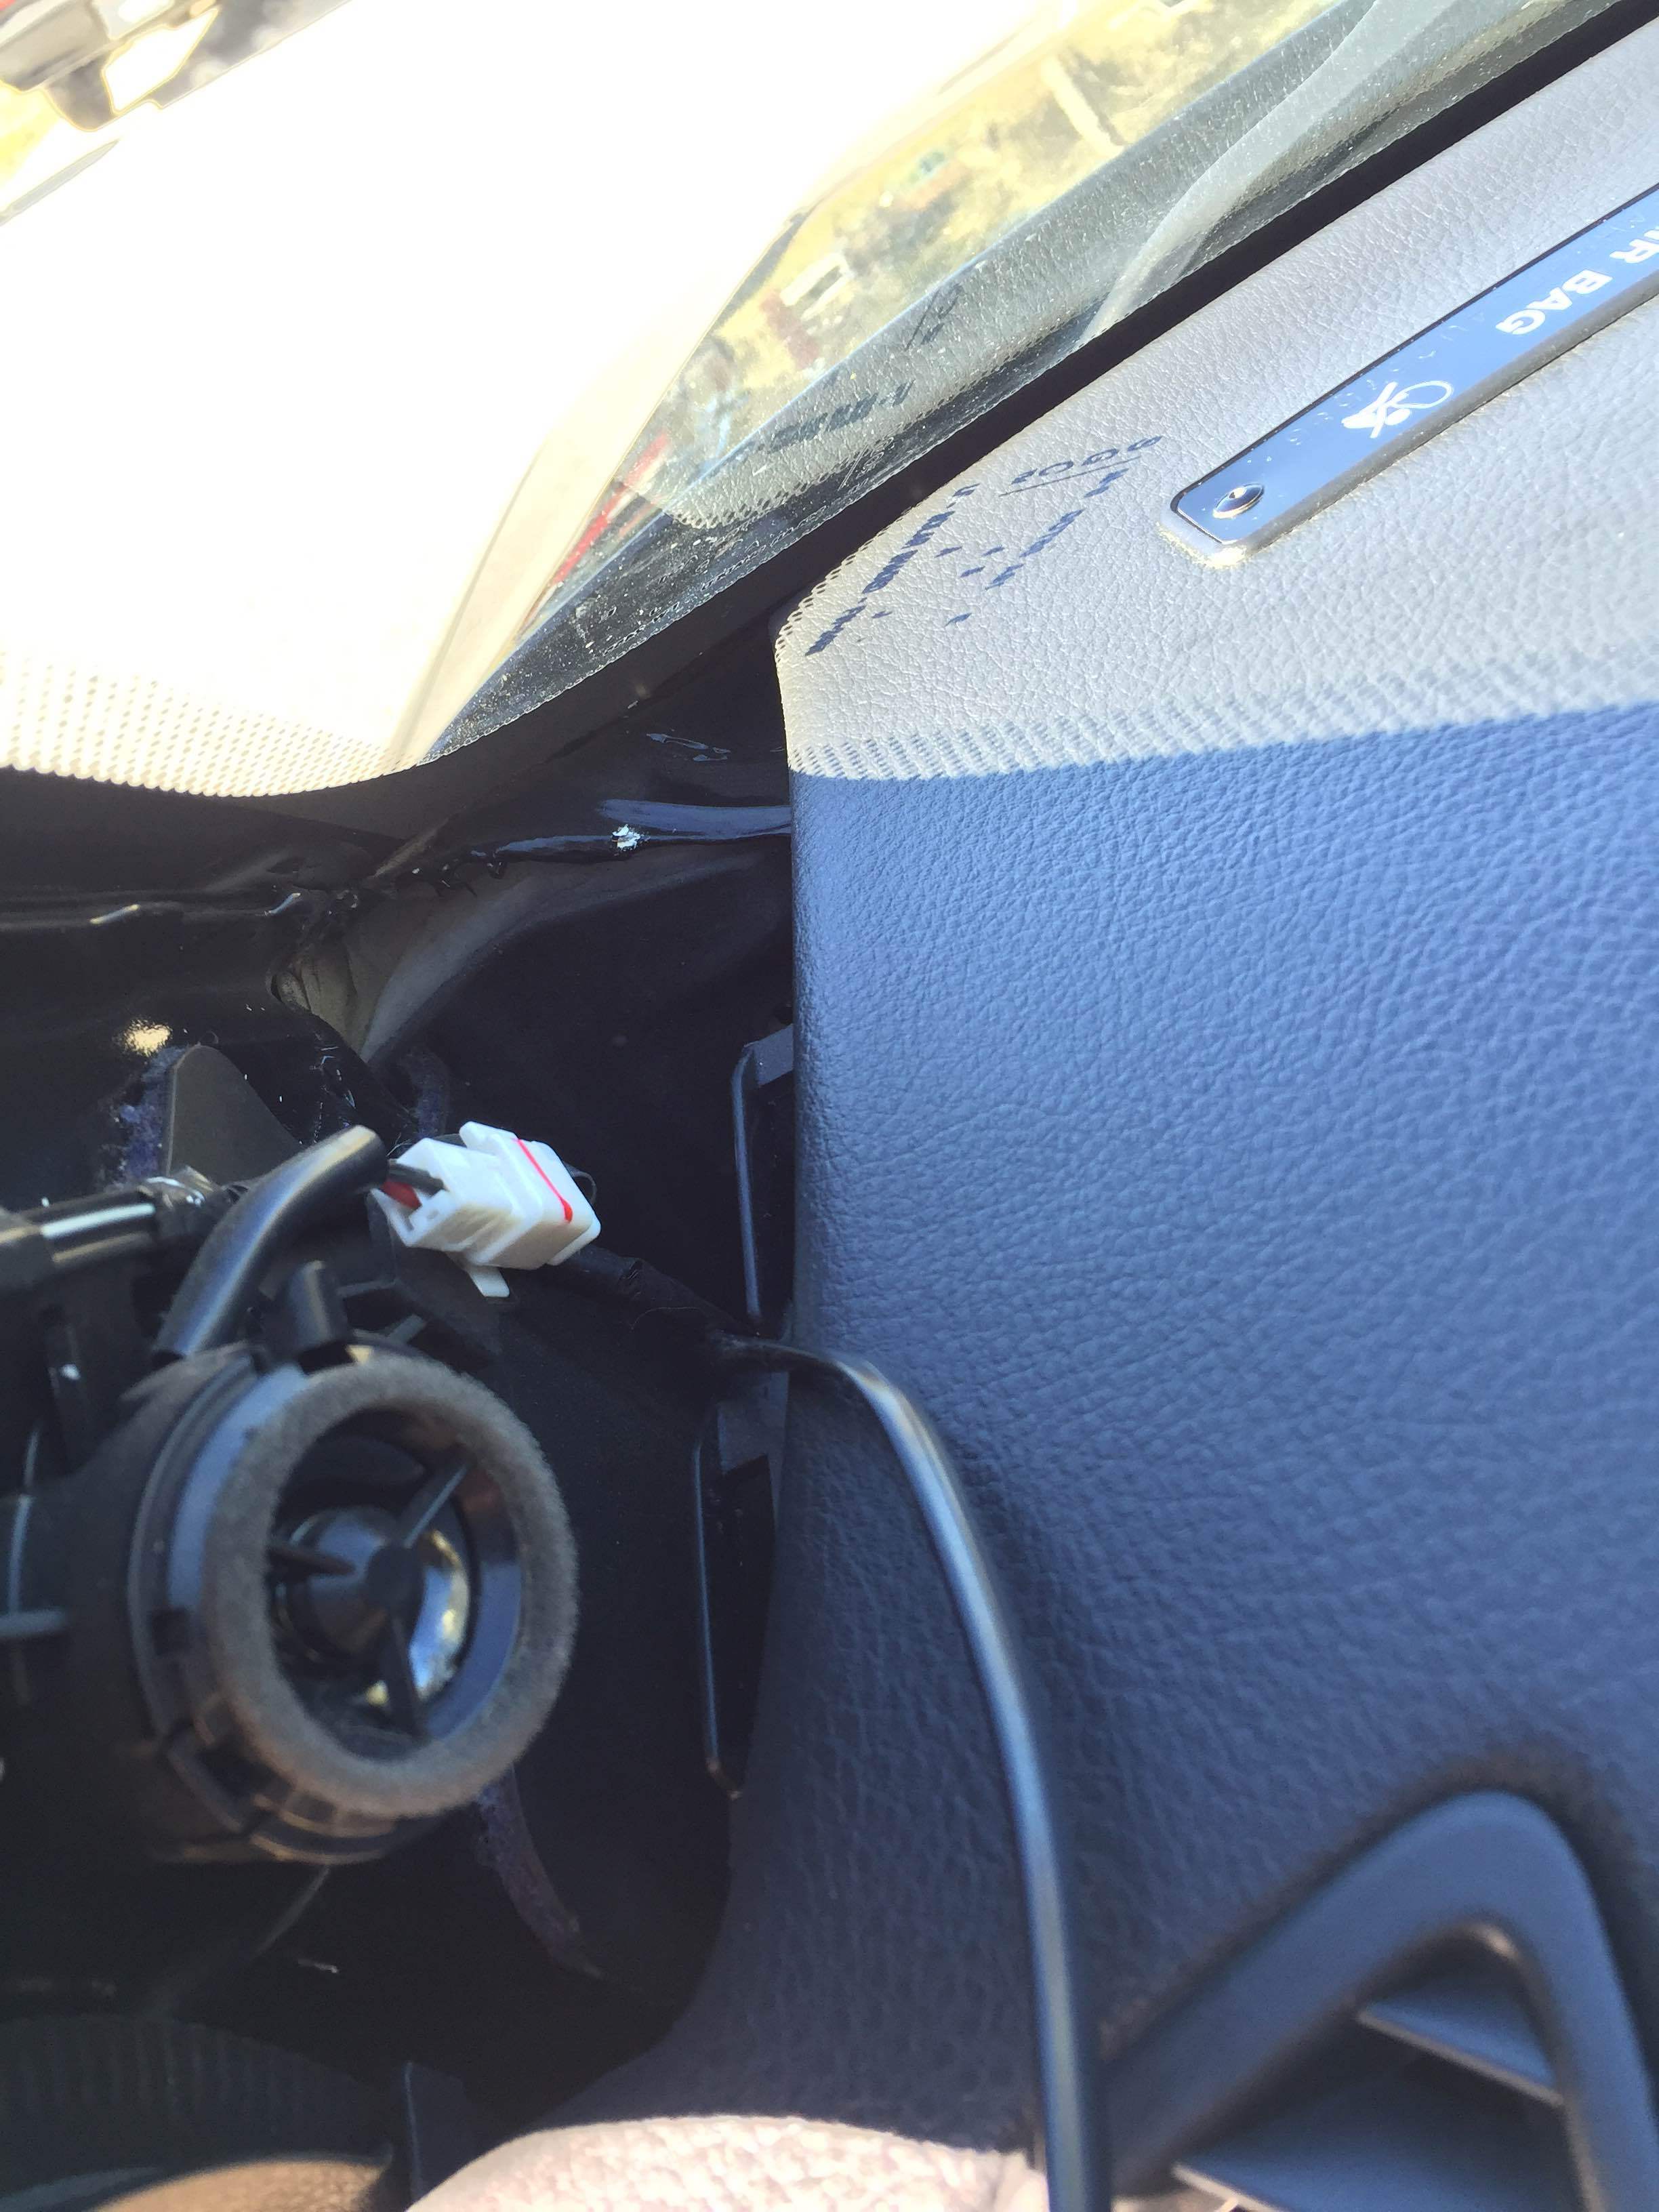
Step 5: Remove the coin holder (or dimmer switch, different for some models) which is located under the steering wheel. If you have coin holder, just open it and pull it out. If you have the dimmer switch, figure it out. Located behind this is the interior fuse box/panel.
Step 6: Feed the wiring down the hole at the bottom of the A-pillar. If you look underneath from where you removed the coin holder/dimmer switch, you can see the light from the A-pillar hole. Feed the wiring until you get it through to the bottom of the dash.

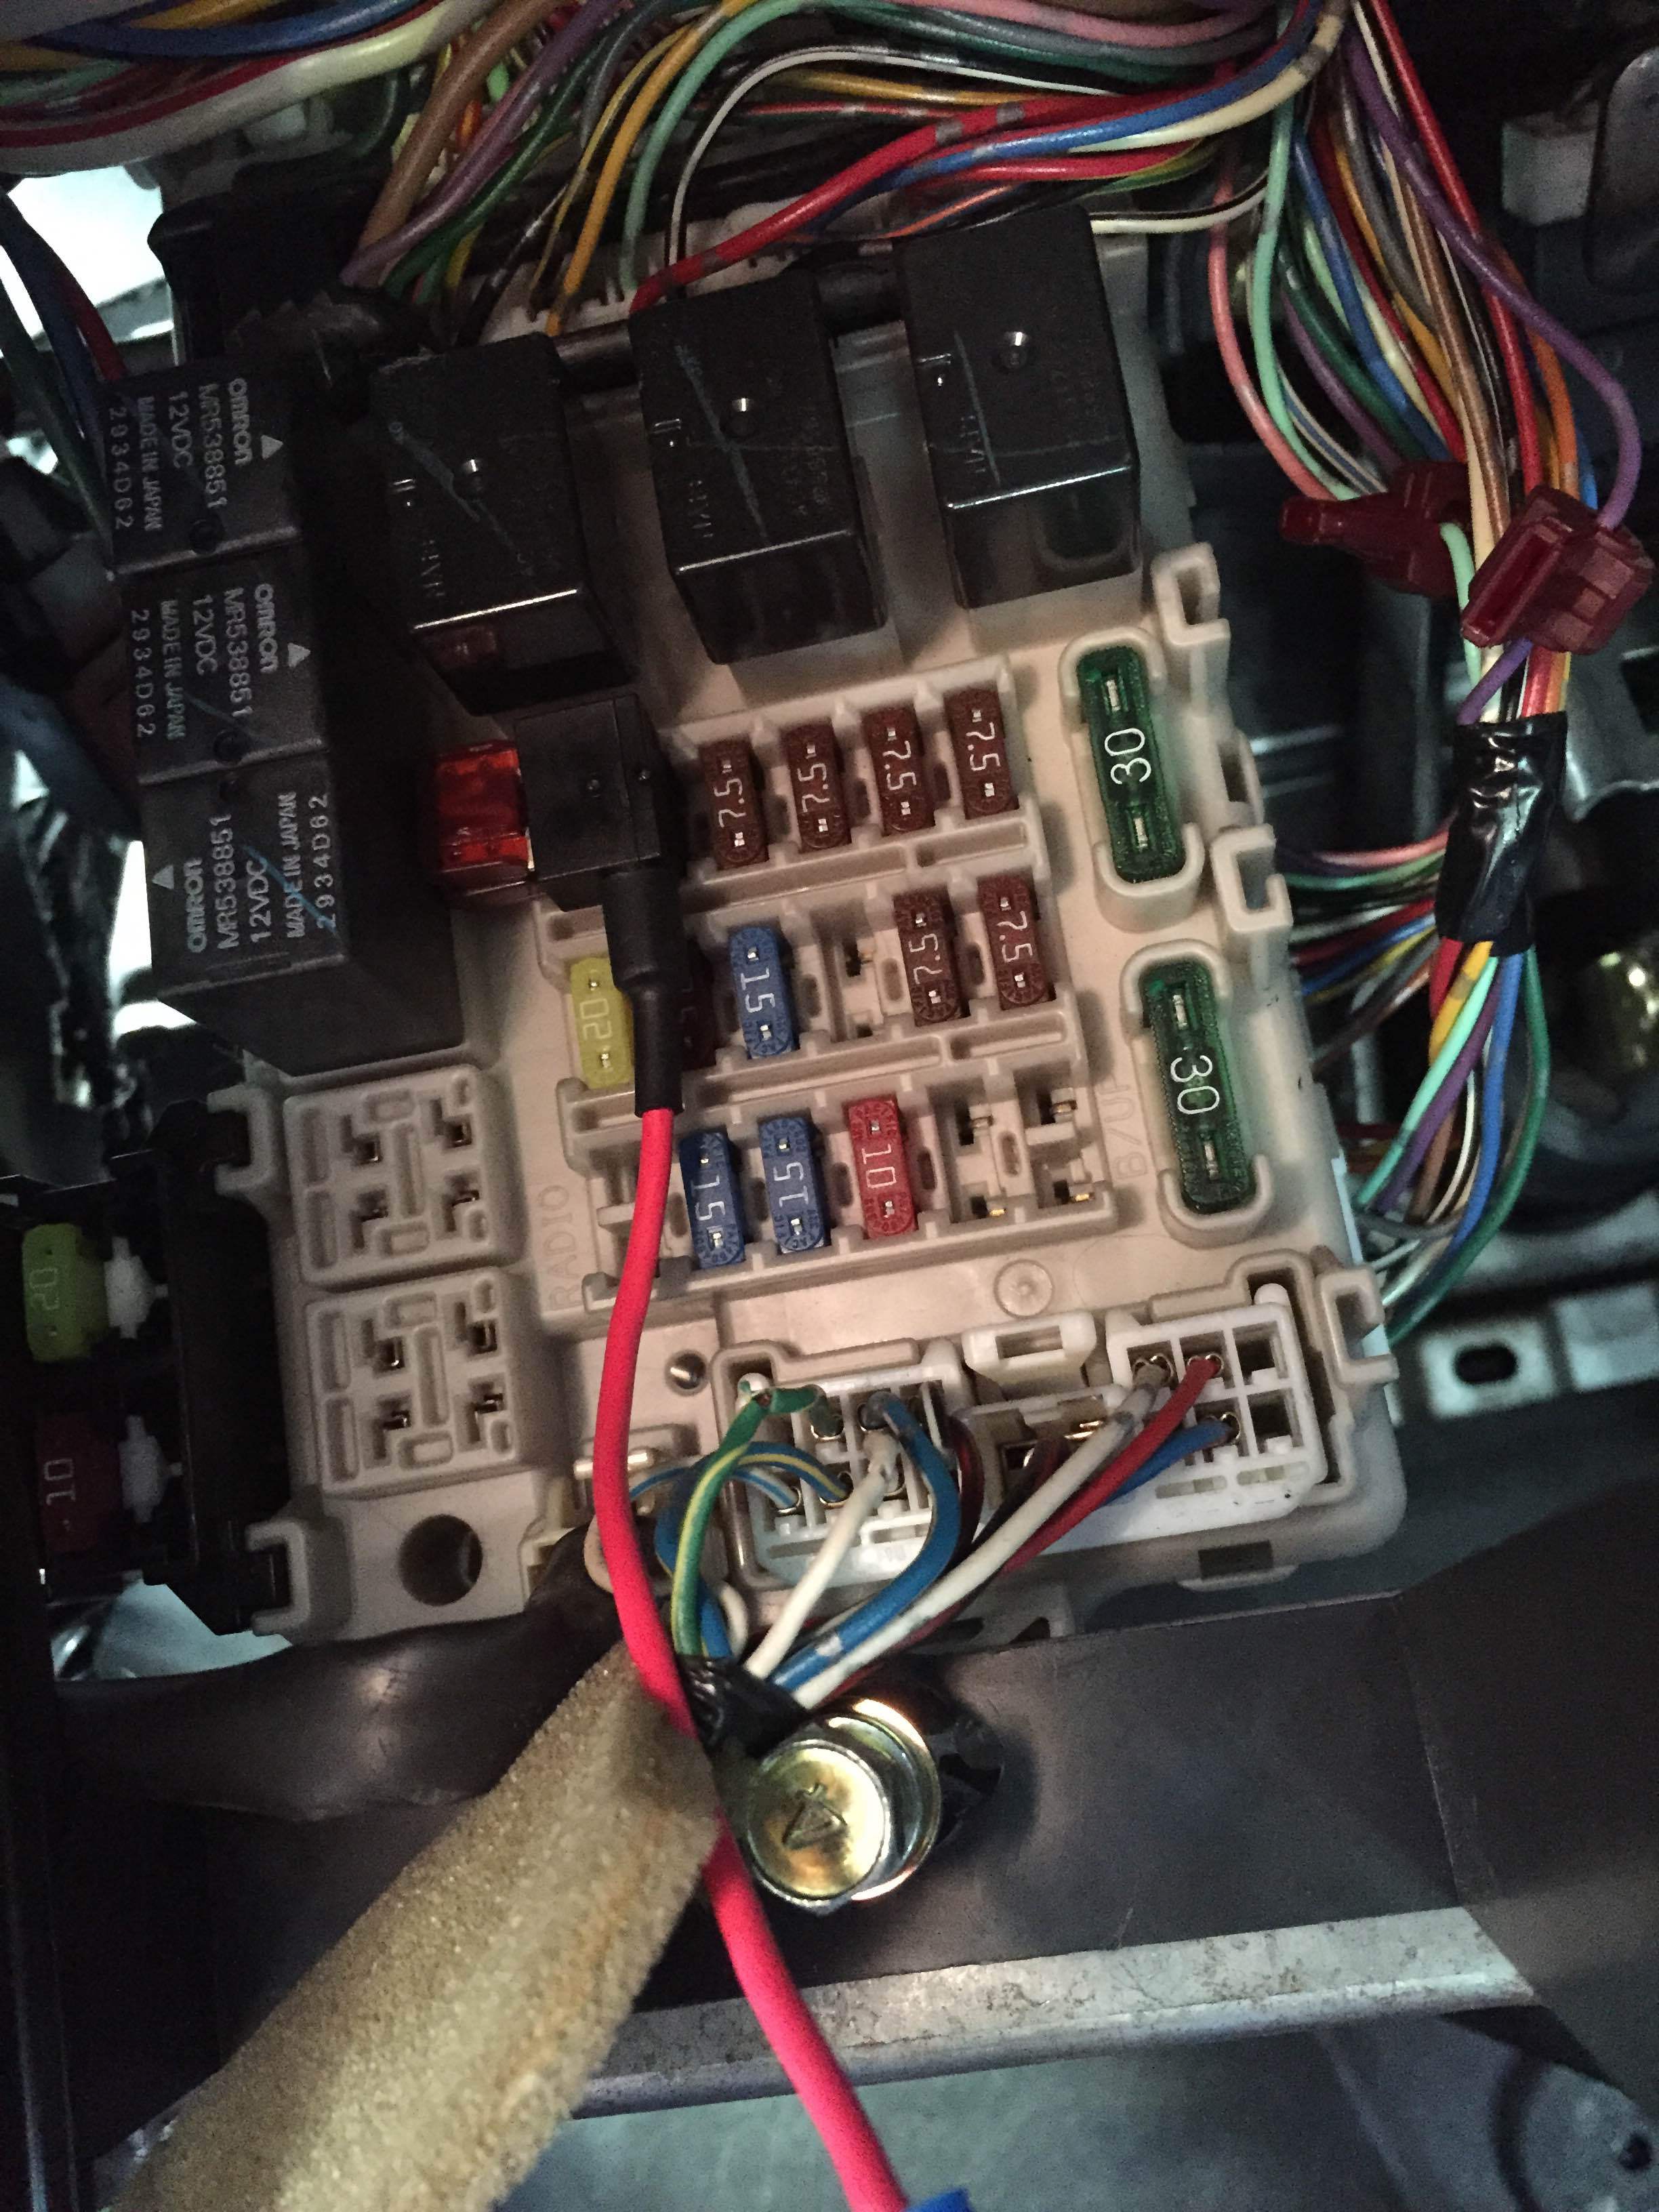
Step 7: Use your wire strippers and cut the positive wire of the hardwire kit. Strip off some of the insulation to expose the wiring. Take your Bussmann fuse tap, which should come with a crimp connector already attached, insert the exposed wiring into the crimp connector, and crimp it down with your grips, crimper, or whatever you have.
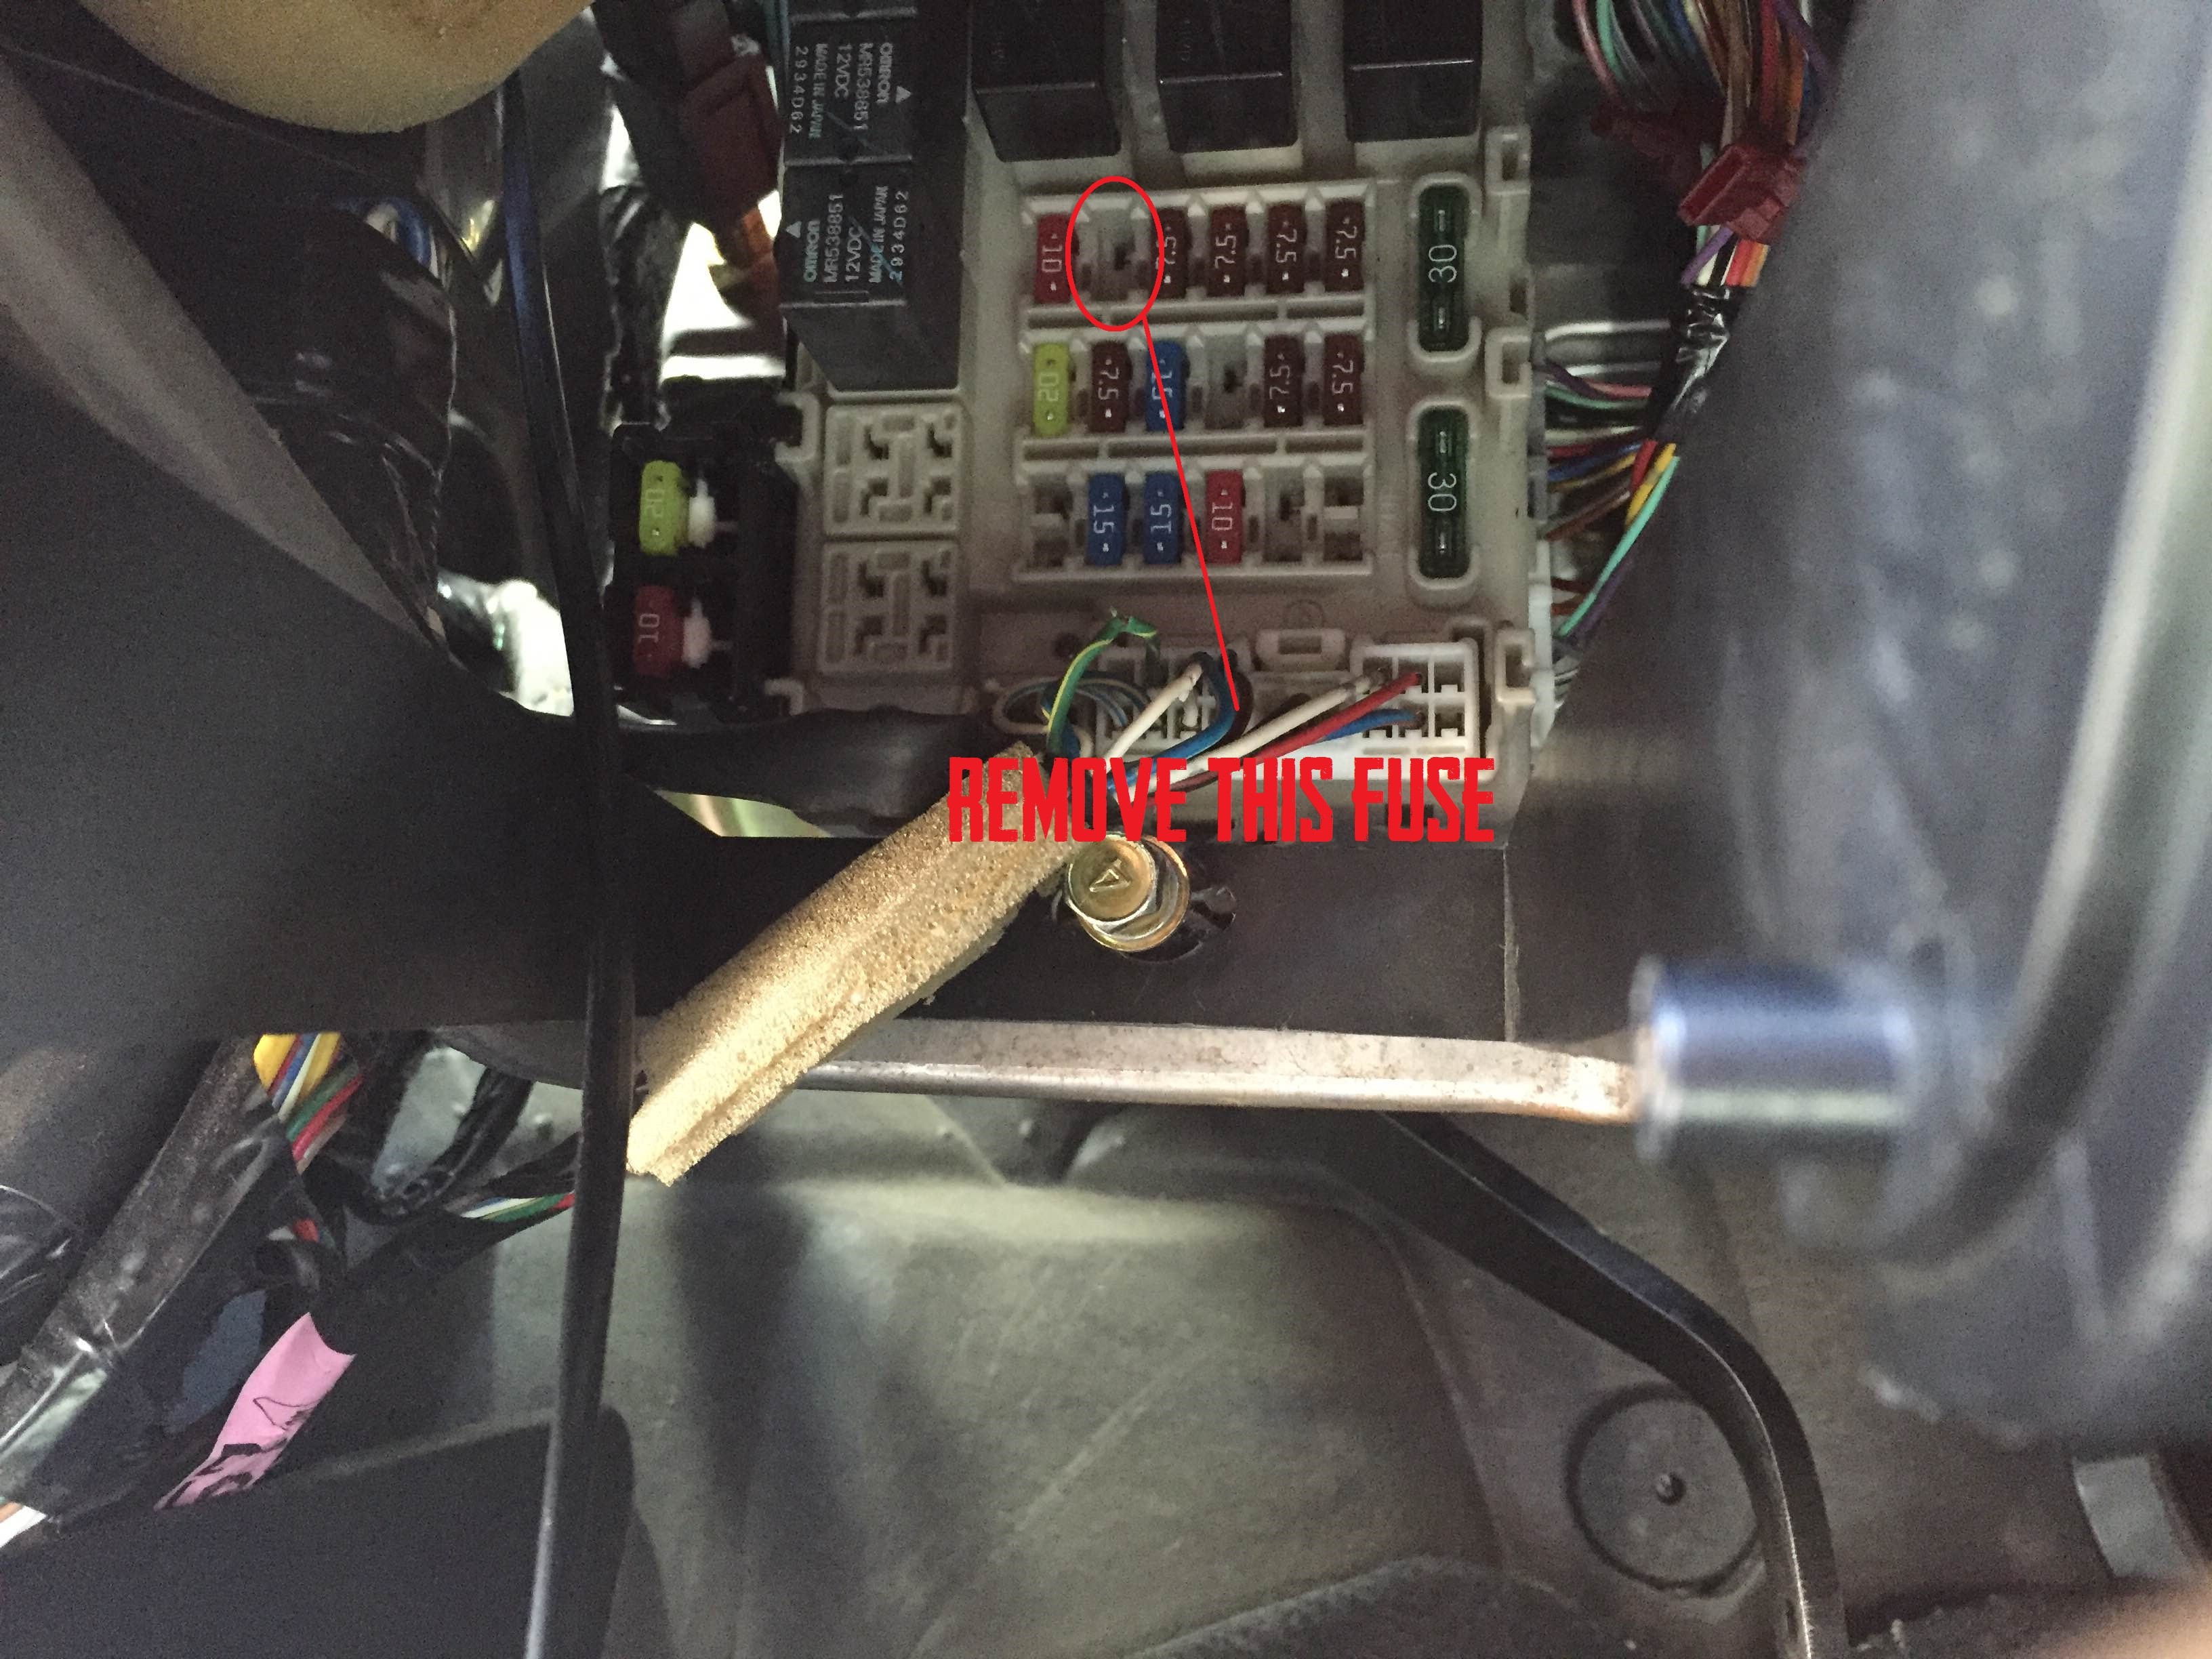
Step 8: Pull the 7.5a fuse for your gauges. It should be the top row, second fuse from the left. You should have a fuse puller attached to your coin holder, but if not, needle nose pliers also work.
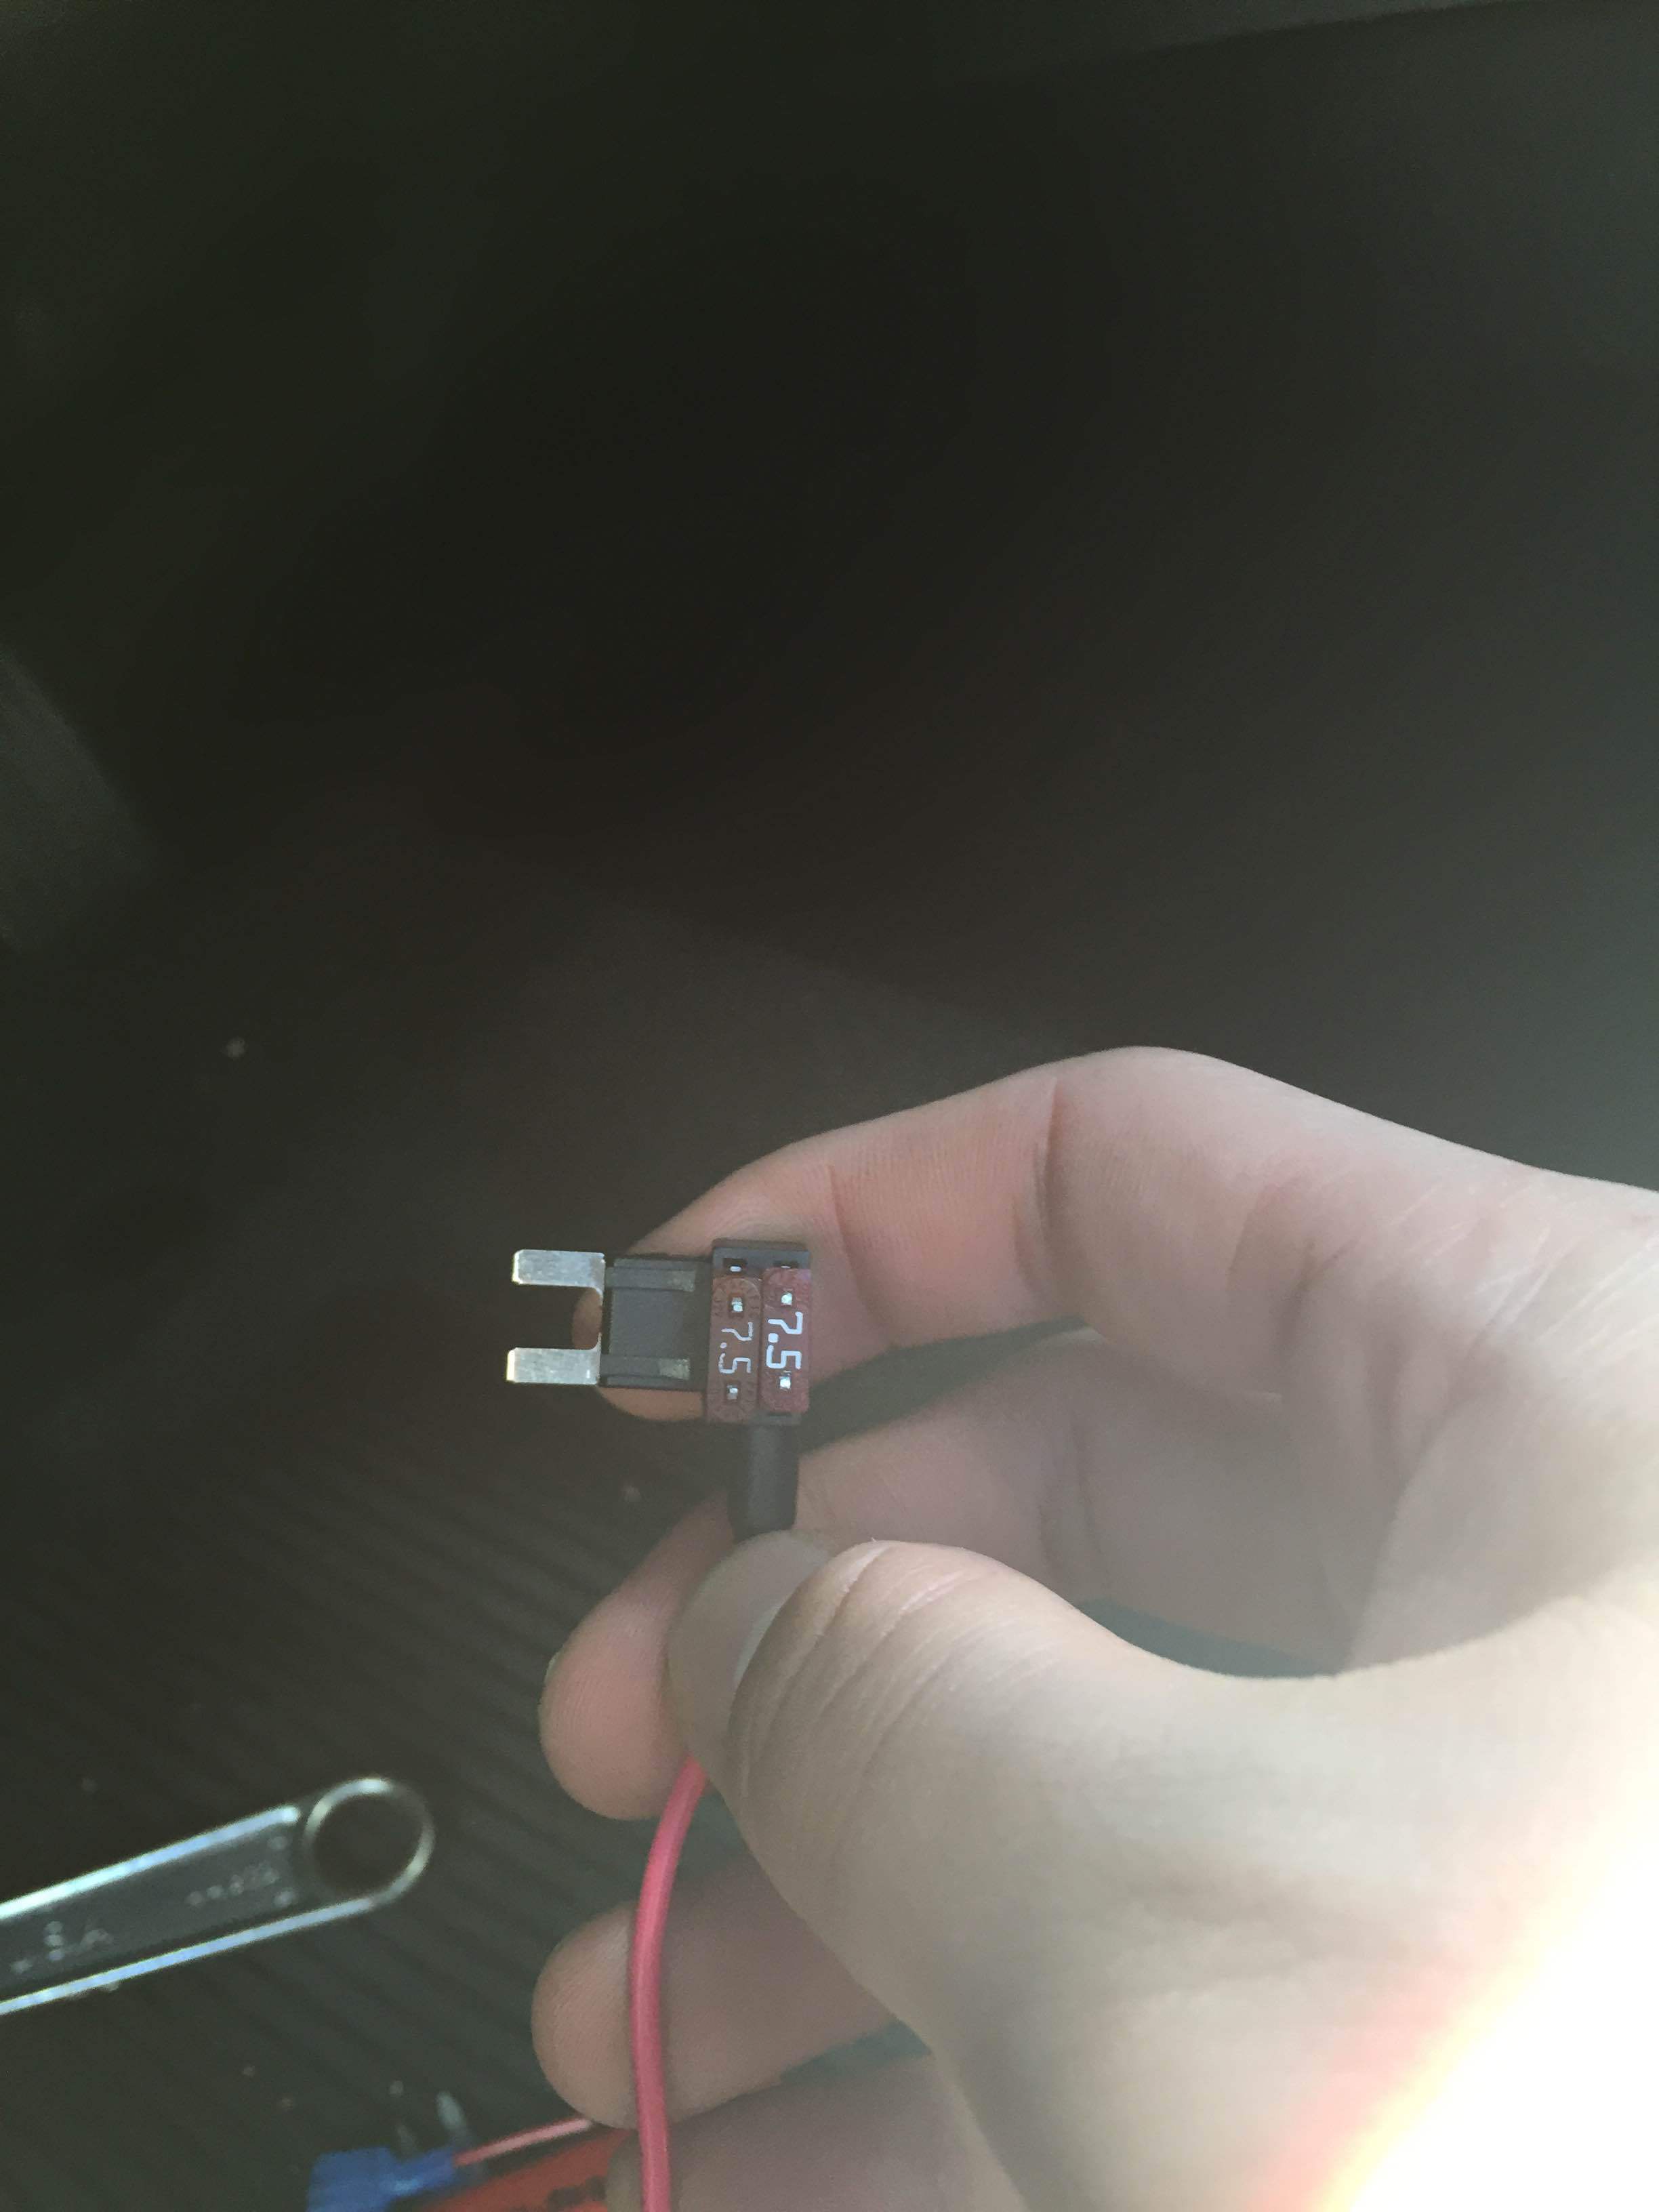
Step 9: Put two 7.5a fuses into the slots on your Bussman fuse tap. Insert the Bussman fuse tap into the fuse slot for the gauges from which you just removed the fuse.
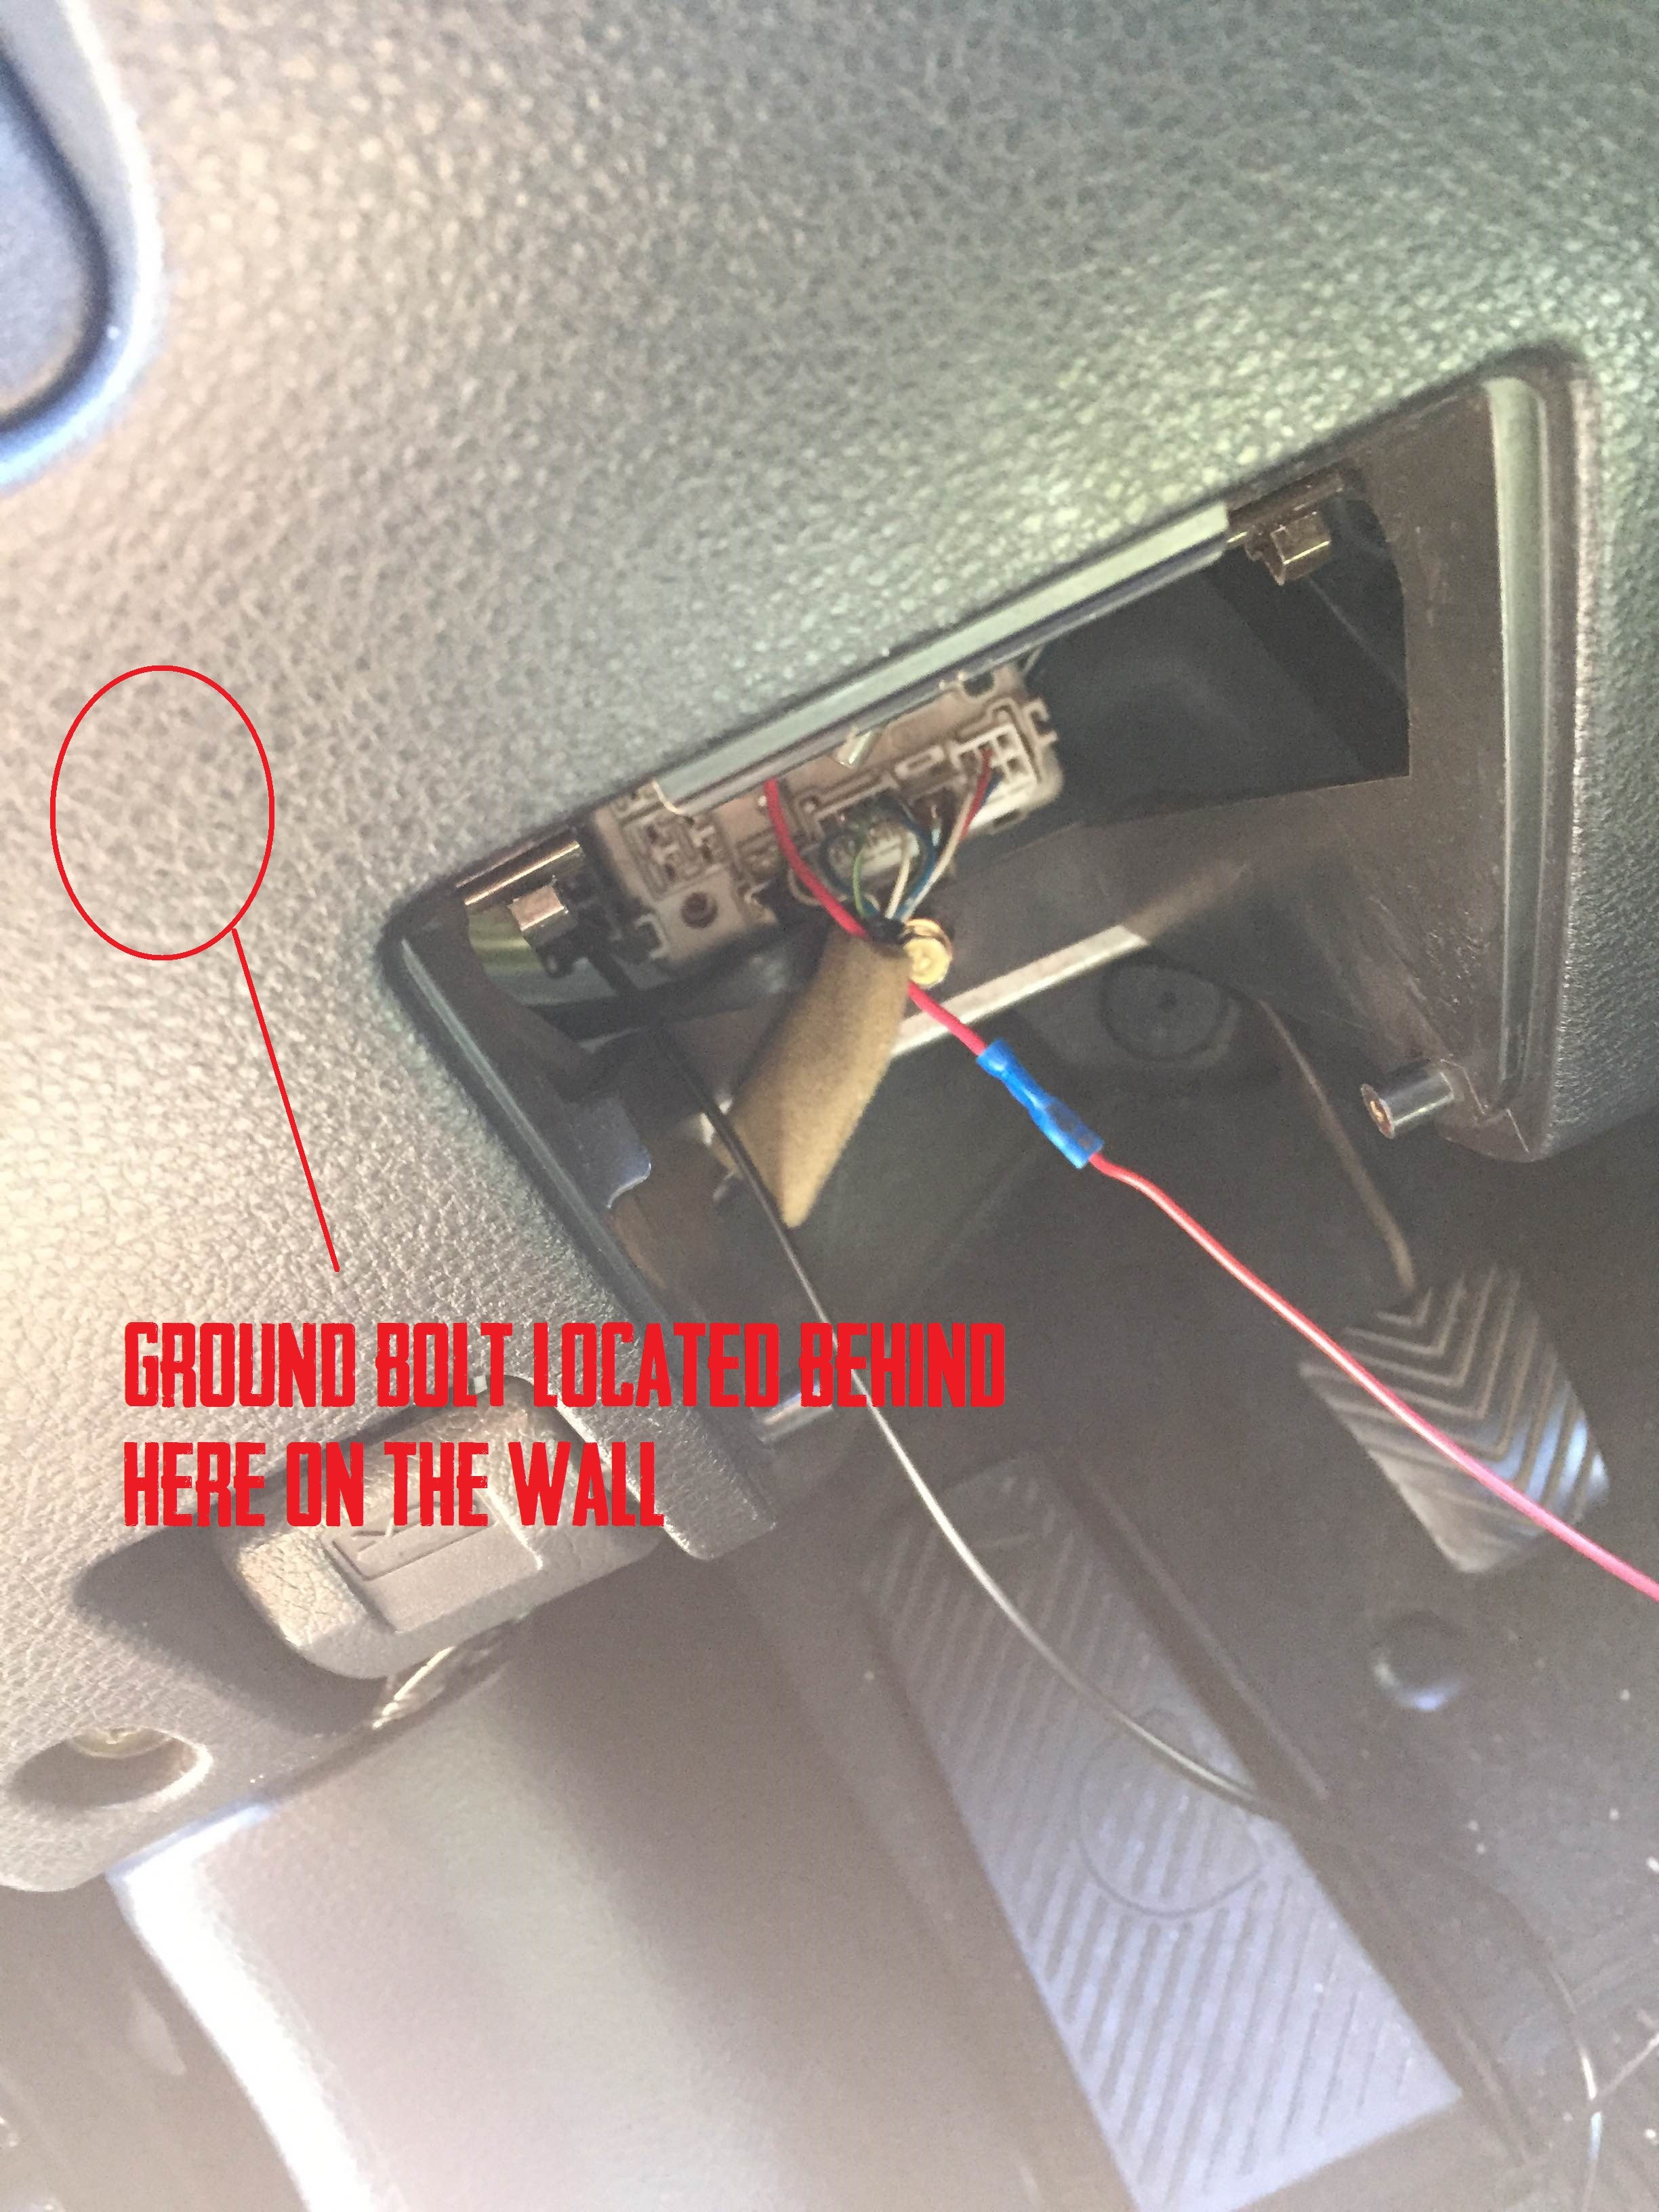
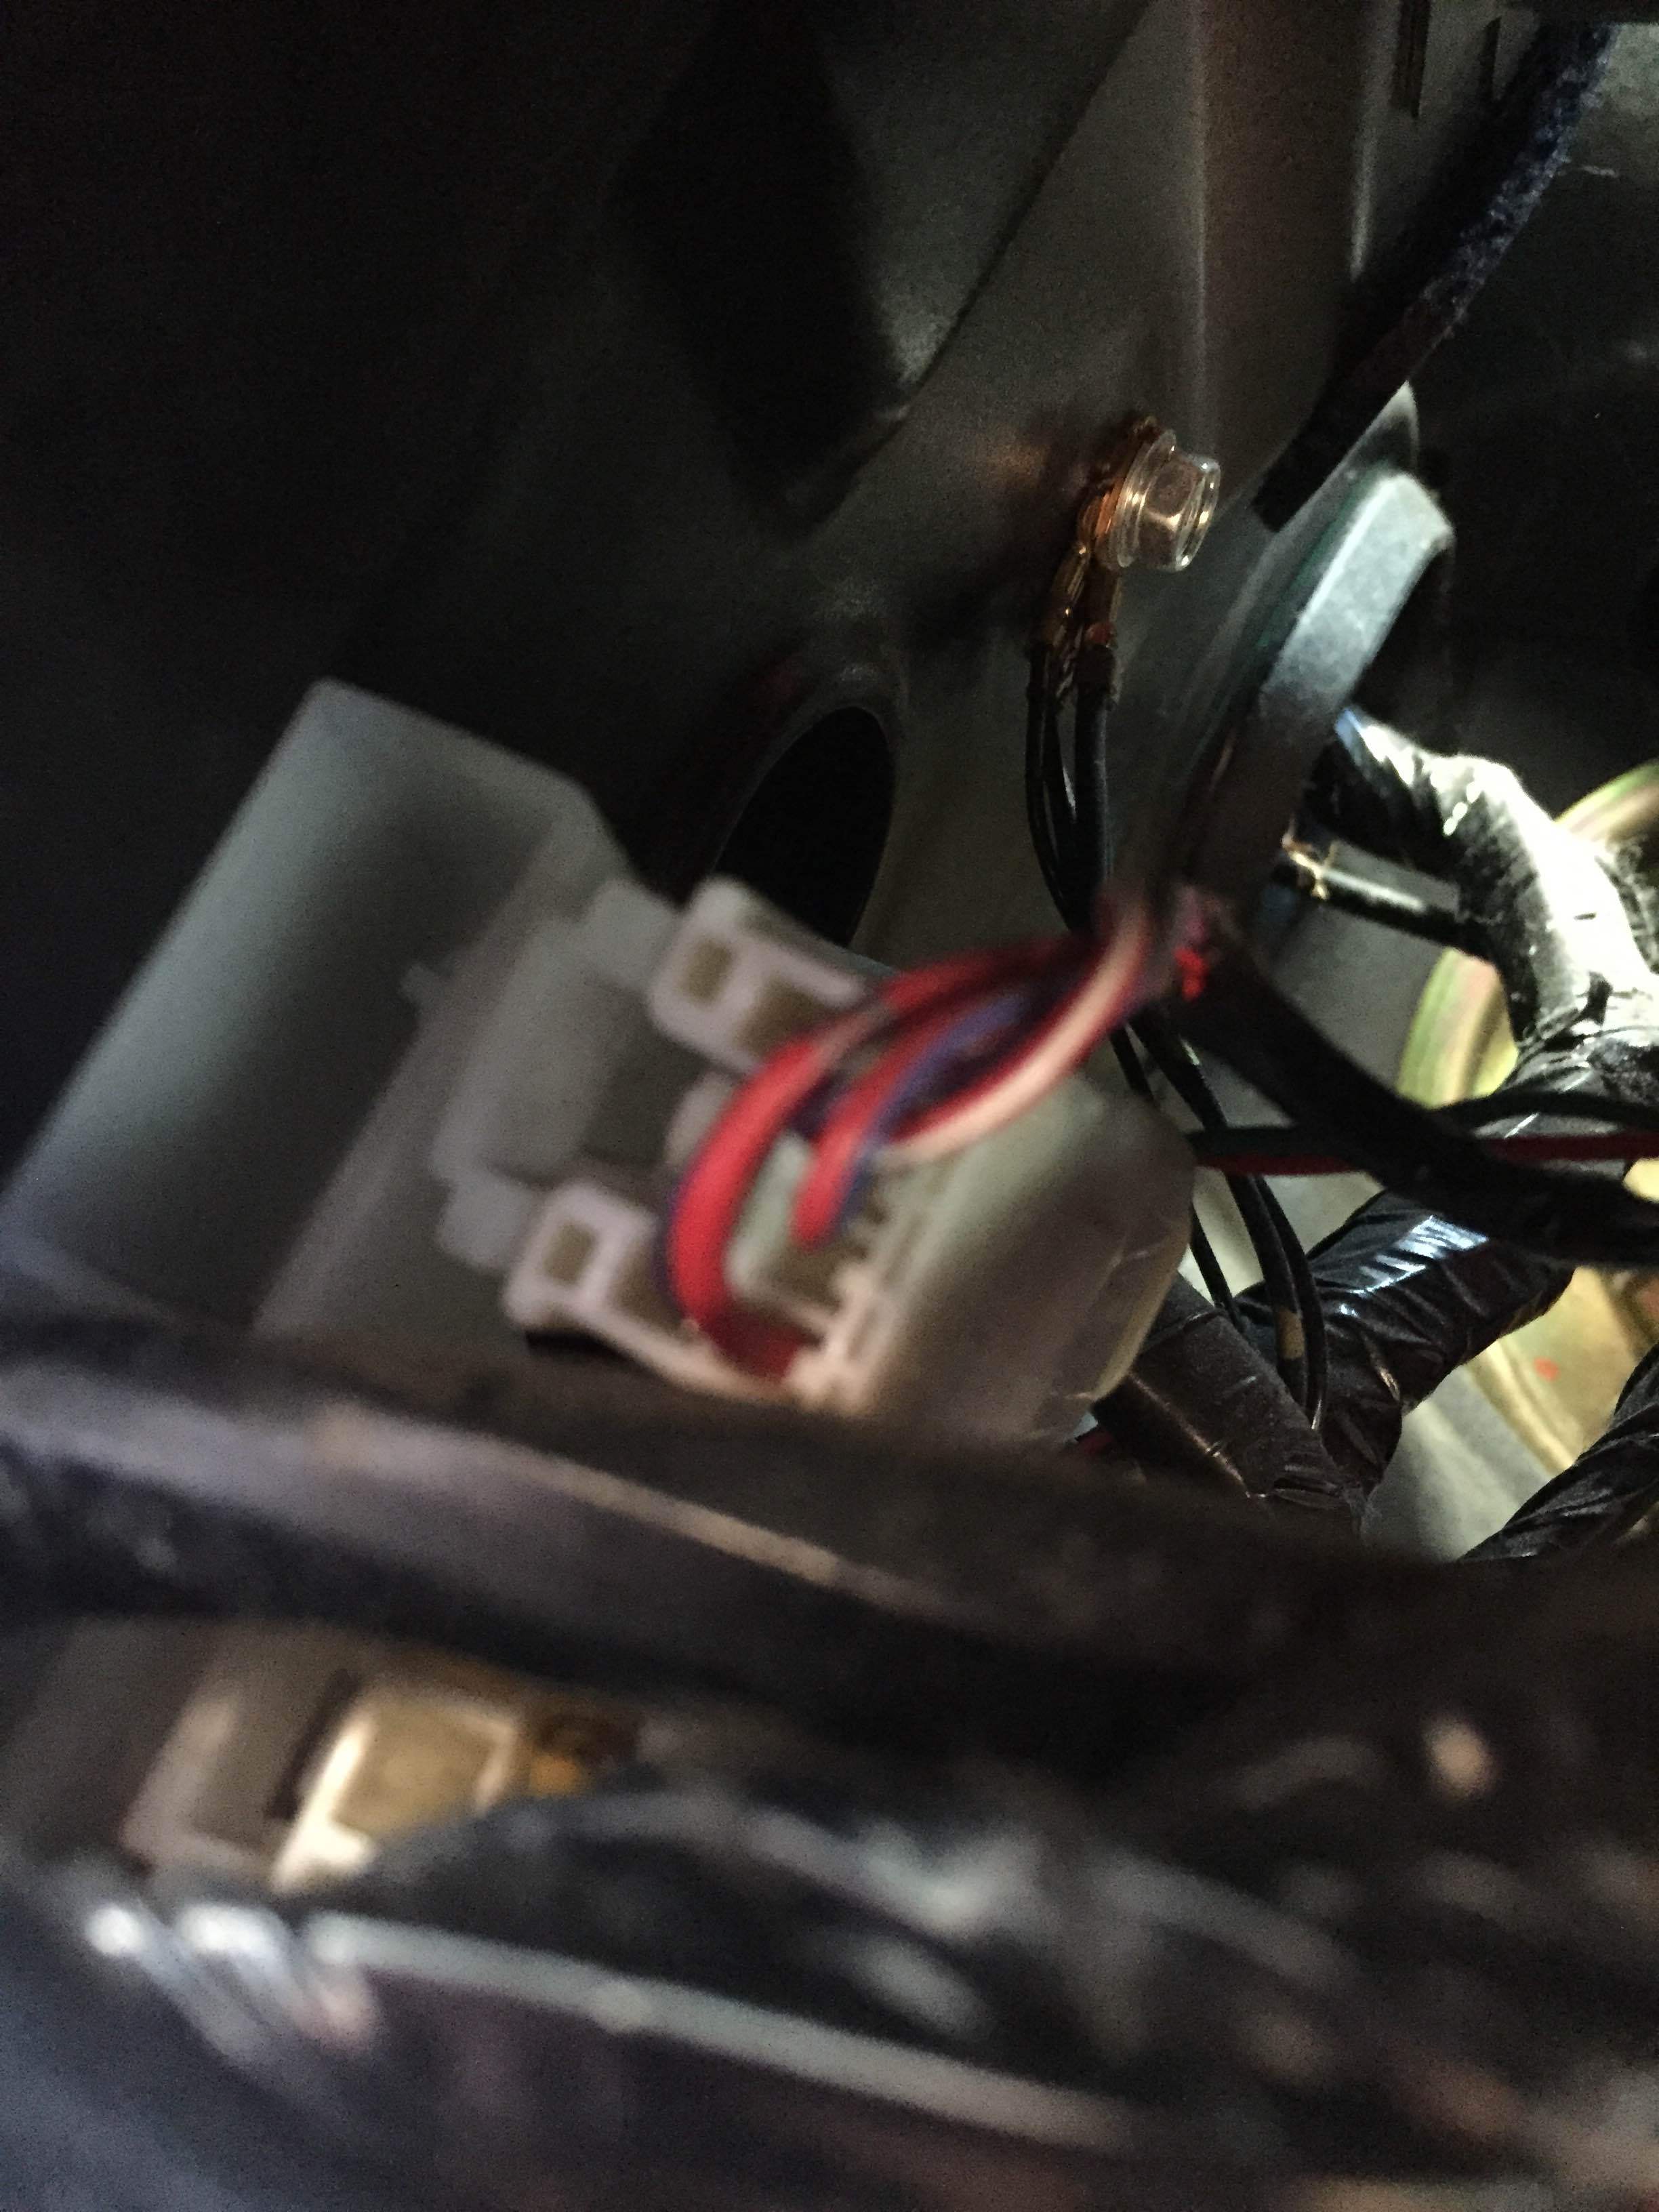
Step 10: Located along the side of the firewall is a pre-existing ground bolt/point. It should have two ground wires already. Use your ratchet/10mm socket to remove the bolt. Add the ground connector/wire to the bolt, put the two pre-existing ground wires back on the bolt, and re-install the bolt.
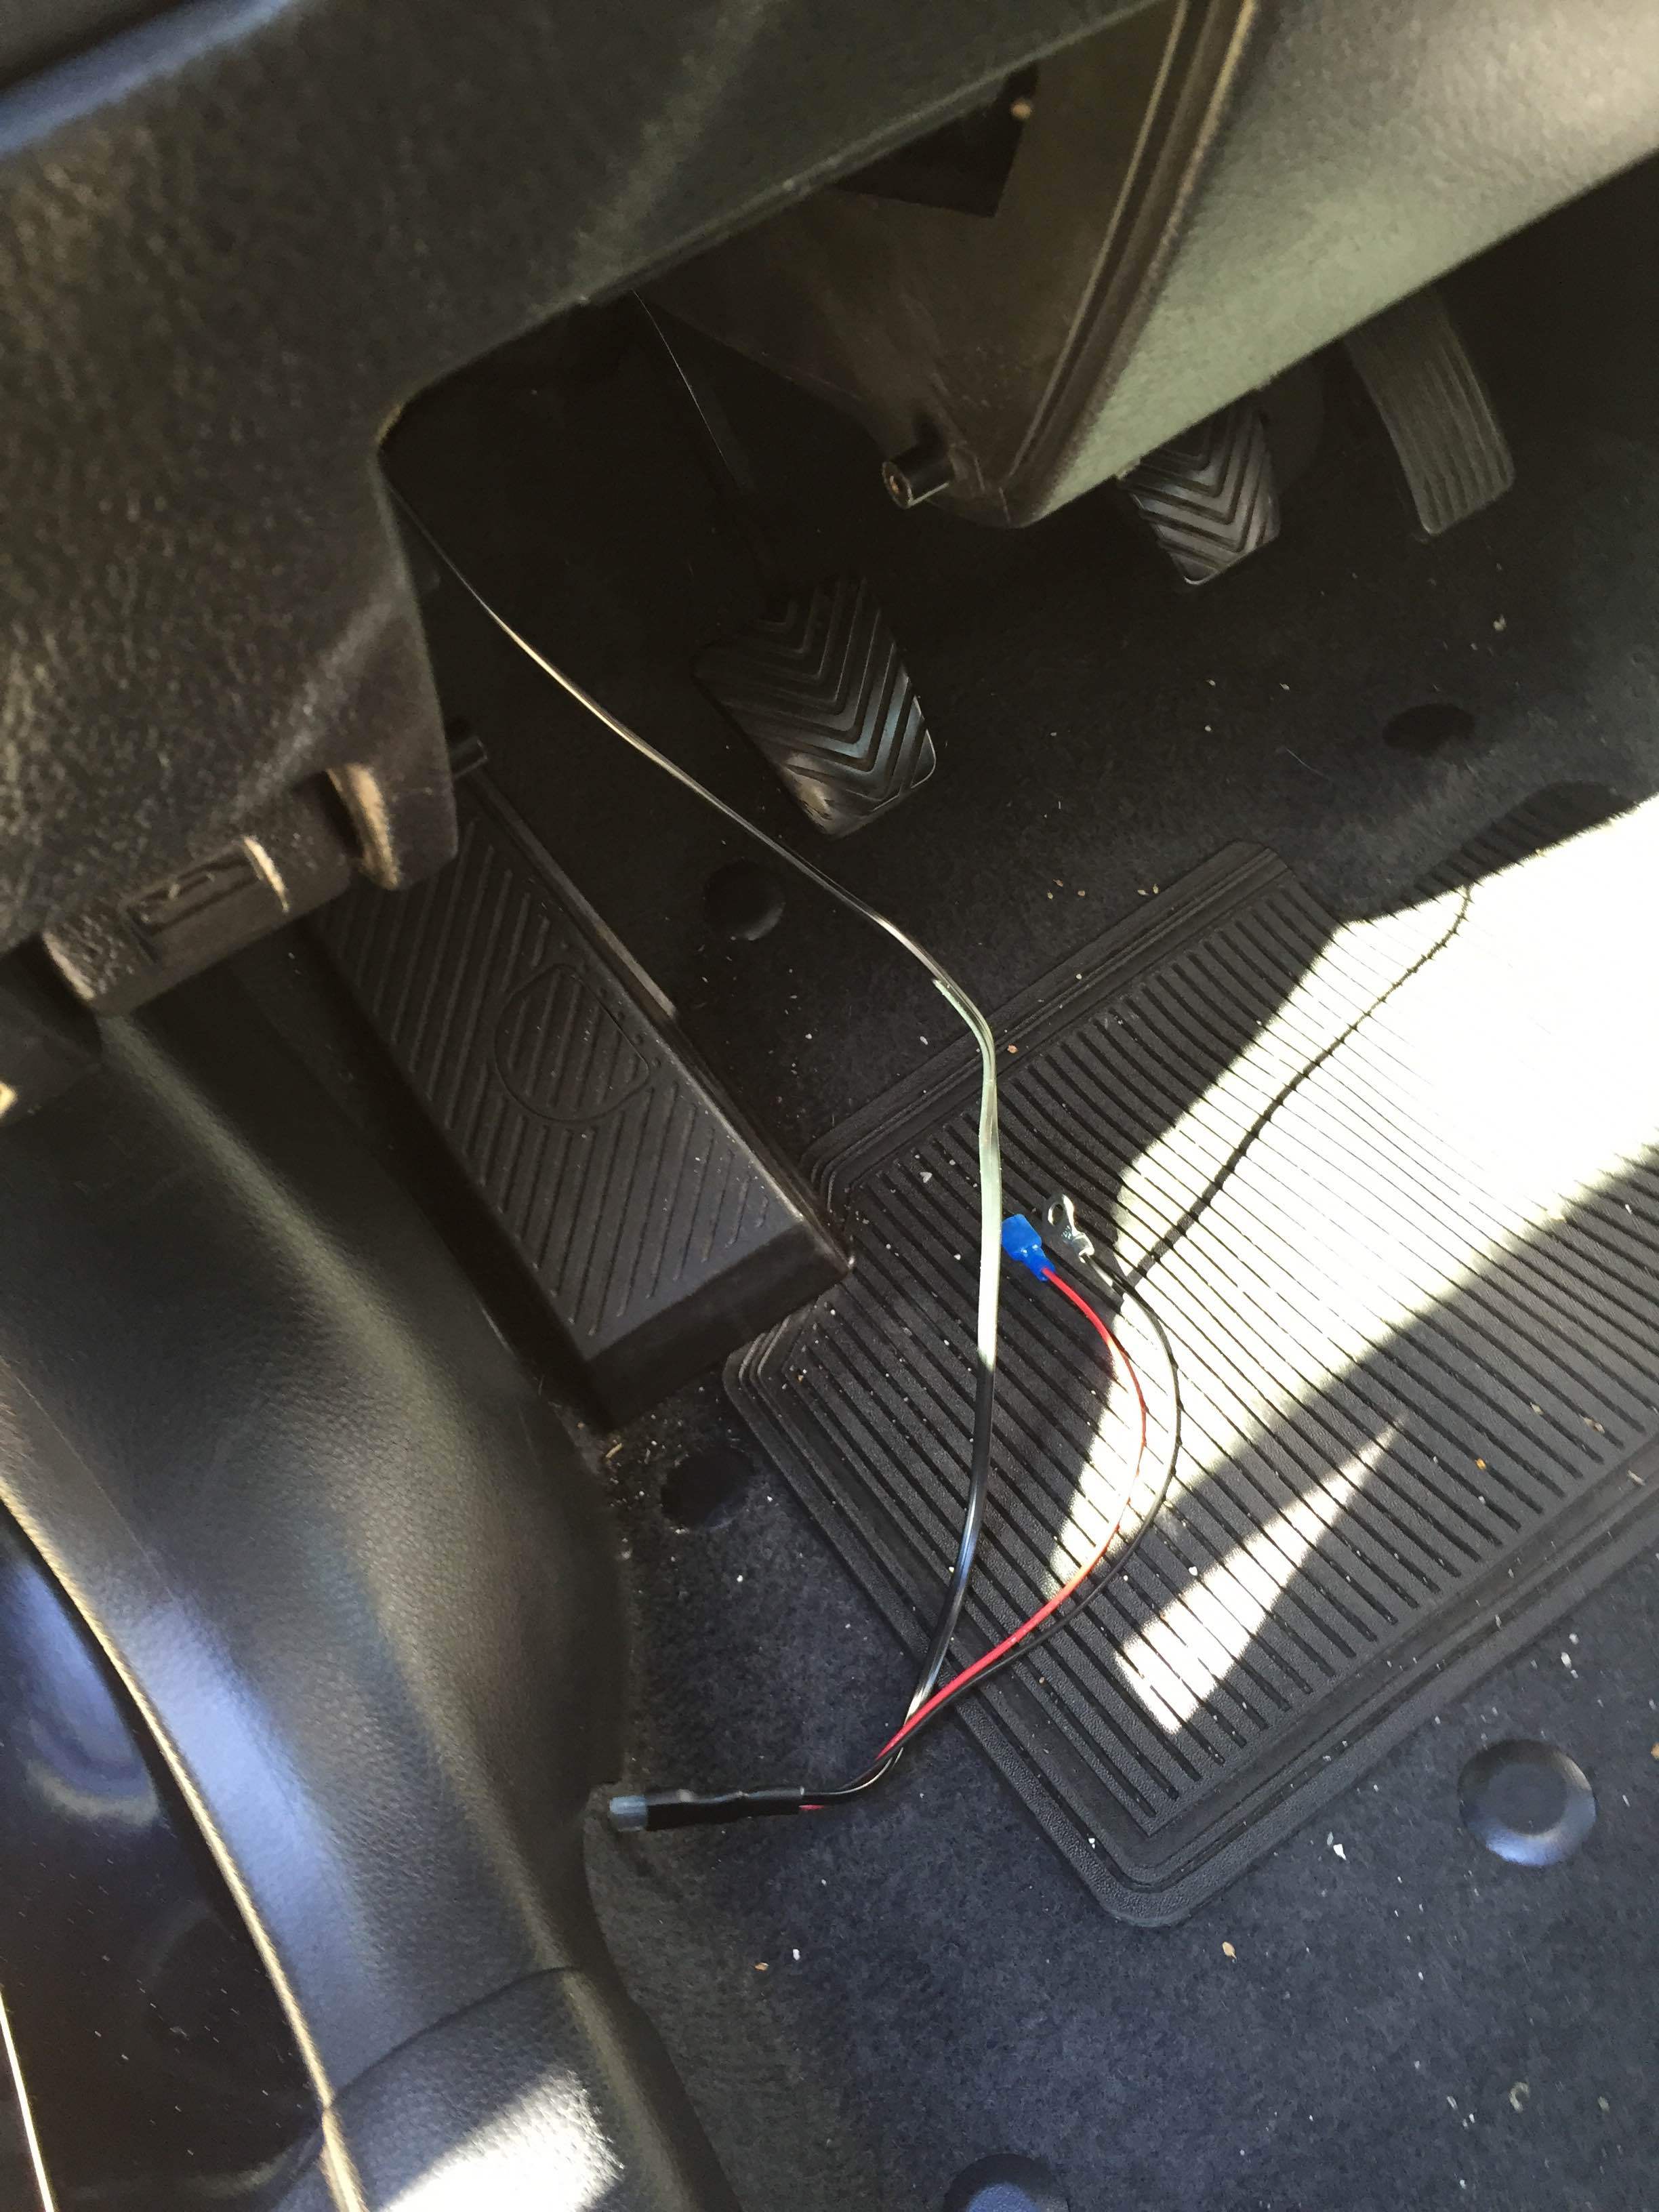
Step 11: Use zipties to clean everything up, making sure no wires are interfering with the steering column or hanging down in the way of the clutch pedal.
Step 12: Turn on the car to check that the radar detector turns on/works.
Step 13: Re-install the coin holder/dimmer switch by snapping it in. Re-install the A-pillar carefully, do not bend or break the plastic mounting tabs on the A-pillar.
If you run into any issues or have any questions, post here and I will try to answer them
This works with all radar detectors, but make sure you get a mirror mount + hardwire kit specific to your radar detector. The ones listed in this guide are for most Passport radar detectors.
What you need:
-Radar detector
-Mirror Mount (Blendmount for Passport - www.amazon.com/gp/product/B002J47Q3O/)
-Hardwire kit (Blendmount for Passport - www.amazon.com/gp/product/B0062PO02Q/)
-Bussmann Fuse Tap
-Credit card (or similarly shaped object)
-Fuse puller (should be one in your car already)
-Wire Cutter/Stripper
-Vice grips, crimper, or similar
-Ratchet, 10mm socket, small extension
-Small zipties
Step 0 (optional): Disconnect the battery.
Step 1: Take your Mirror Mount and attach your radar detector on to it (easier to install with the two already attached). Then, using the allen key included with the Mirror Mount, fasten it to your mirror stem, leaving the bolts slightly loose. Adjust the mirror mount so that the radar detector is level. If you used the Blendmount Mirror Mount, it will line up straight perfectly. If you used a no-name / knock off mirror mount, you may need to adjust it more to get it to line up. After the radar detector is lined up, tighten all the bolts.
Step 2: Remove the driver side A-pillar by pulling it off. There are 2 clips that hold it on, it will take a little bit of force to pull it off. TIP: Pull towards the passenger side, it will pop off.
Step 3: Take your hardwire kit and plug one end into the radar detector. Use your fingers and push the wiring up into the gap between the headliner and the roof. It may be a little stiff, if so you can use a credit card or similarly shaped object to help push it in. Keep doing this with the wiring all the way to the driver side A-pillar.
Step 4: Zip tie the wiring with the pre-existing tweeter wiring (or if you removed those, just secure the wires in the path down the A-pillar).
Step 5: Remove the coin holder (or dimmer switch, different for some models) which is located under the steering wheel. If you have coin holder, just open it and pull it out. If you have the dimmer switch, figure it out. Located behind this is the interior fuse box/panel.
Step 6: Feed the wiring down the hole at the bottom of the A-pillar. If you look underneath from where you removed the coin holder/dimmer switch, you can see the light from the A-pillar hole. Feed the wiring until you get it through to the bottom of the dash.
Step 7: Use your wire strippers and cut the positive wire of the hardwire kit. Strip off some of the insulation to expose the wiring. Take your Bussmann fuse tap, which should come with a crimp connector already attached, insert the exposed wiring into the crimp connector, and crimp it down with your grips, crimper, or whatever you have.
Step 8: Pull the 7.5a fuse for your gauges. It should be the top row, second fuse from the left. You should have a fuse puller attached to your coin holder, but if not, needle nose pliers also work.
Step 9: Put two 7.5a fuses into the slots on your Bussman fuse tap. Insert the Bussman fuse tap into the fuse slot for the gauges from which you just removed the fuse.
Step 10: Located along the side of the firewall is a pre-existing ground bolt/point. It should have two ground wires already. Use your ratchet/10mm socket to remove the bolt. Add the ground connector/wire to the bolt, put the two pre-existing ground wires back on the bolt, and re-install the bolt.
Step 11: Use zipties to clean everything up, making sure no wires are interfering with the steering column or hanging down in the way of the clutch pedal.
Step 12: Turn on the car to check that the radar detector turns on/works.
Step 13: Re-install the coin holder/dimmer switch by snapping it in. Re-install the A-pillar carefully, do not bend or break the plastic mounting tabs on the A-pillar.
If you run into any issues or have any questions, post here and I will try to answer them
Last edited by Treyzian; Apr 28, 2015 at 03:18 PM.
Thread Starter
Evolving Member
Joined: Apr 2012
Posts: 177
Likes: 1
From: California
I would think so, but you can know for sure by checking the fuse. If it's blown, switch to a 7.5a. I threw away the 2a fuse that came with it and just used a 7.5a anyways.


Trending Topics


Thread
Thread Starter
Forum
Replies
Last Post
BadKarmaCreepin
Evo X How Tos / Installations
1
Apr 7, 2015 06:35 PM
J Yim
For Sale - Interior / Exterior / Sound / Styling
1
Jun 4, 2009 11:50 PM
willRalliart
04-06 Lancer Ralliart How To Requests / Questions / Tips
11
Jan 5, 2006 08:38 AM
Shinka
Evo General
5
Sep 24, 2005 08:54 PM