
CT9A LED tail light

Thread Starter
Newbie
Joined: Jan 2008
Posts: 5
Likes: 0
From: Australia
Ok, deciding to try something different that I have been meaning to try since er,, bout 2 years ago now.
The idea was originally to change all the globes to LED in the tail lights, then got thinking and decided to
chuck the idea out. Why not just change the whole look of the tail light, everyone is so focused on changing
the front color headlights to black I thought id try something different?
There are other CT9A tail lights that are full LED, but didn?t do anything for me. Being original is always
better anyway?
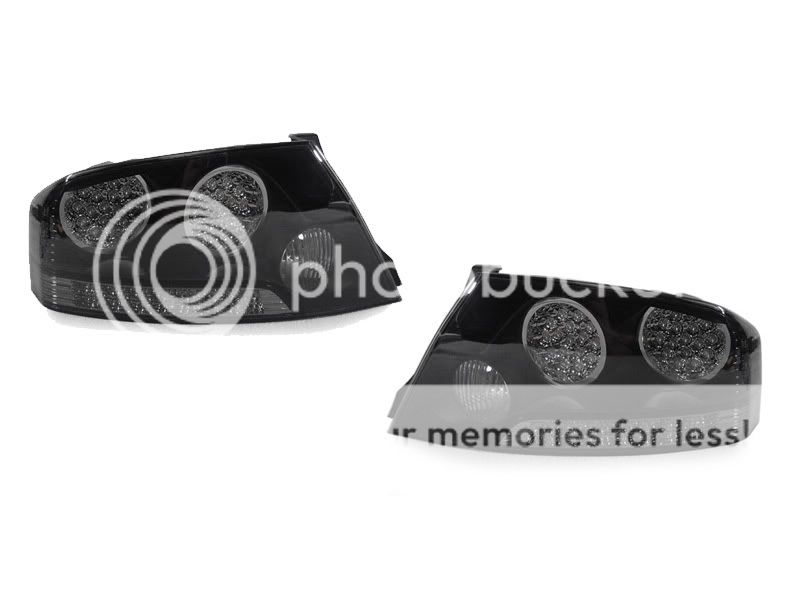
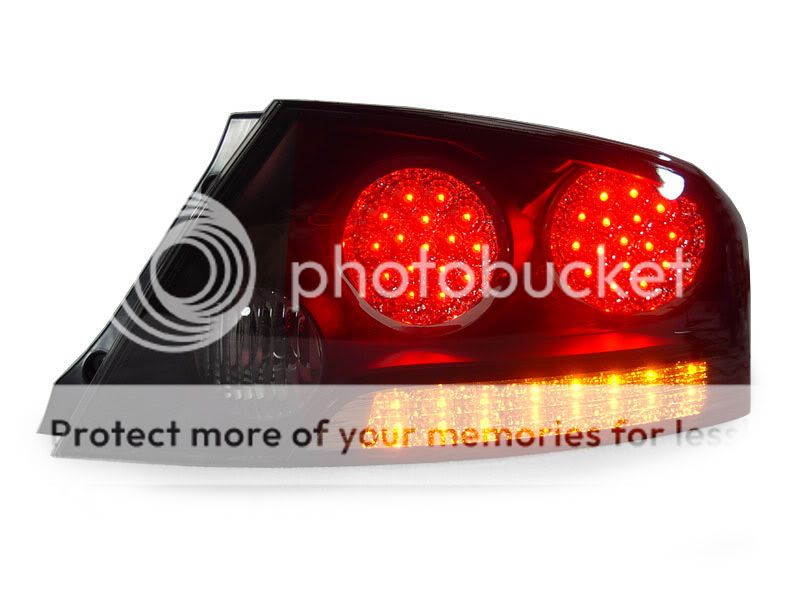
LINK : http://www.ebay.com/itm/2003-2006-MITSUBIS...ies&vxp=mtr
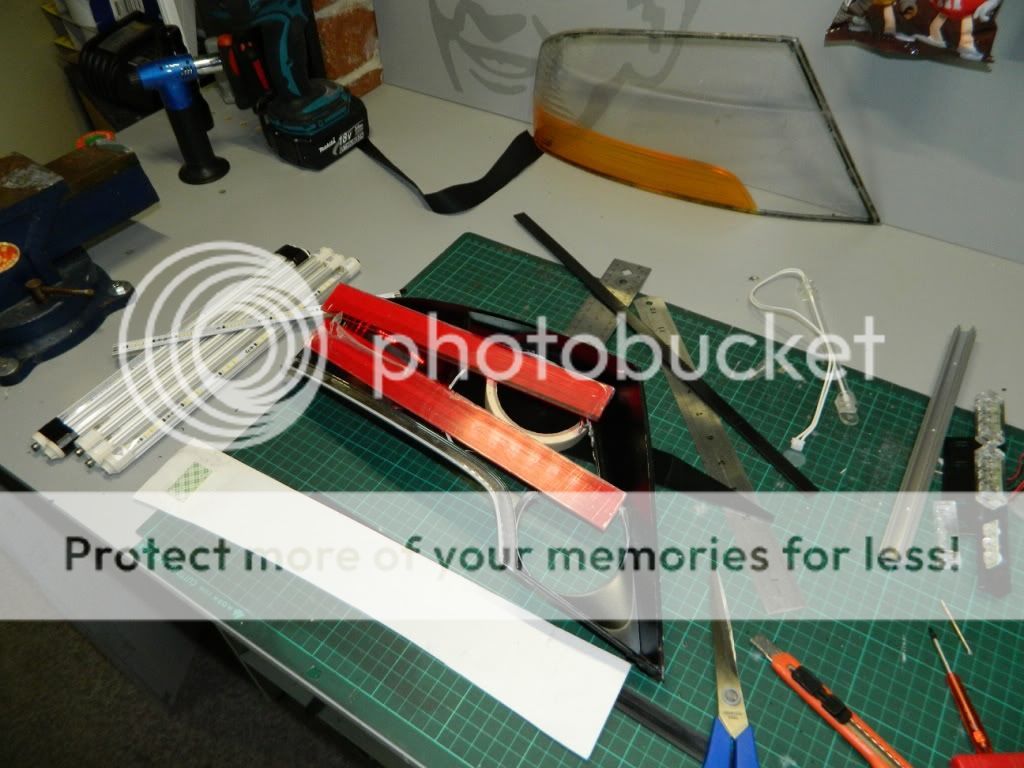
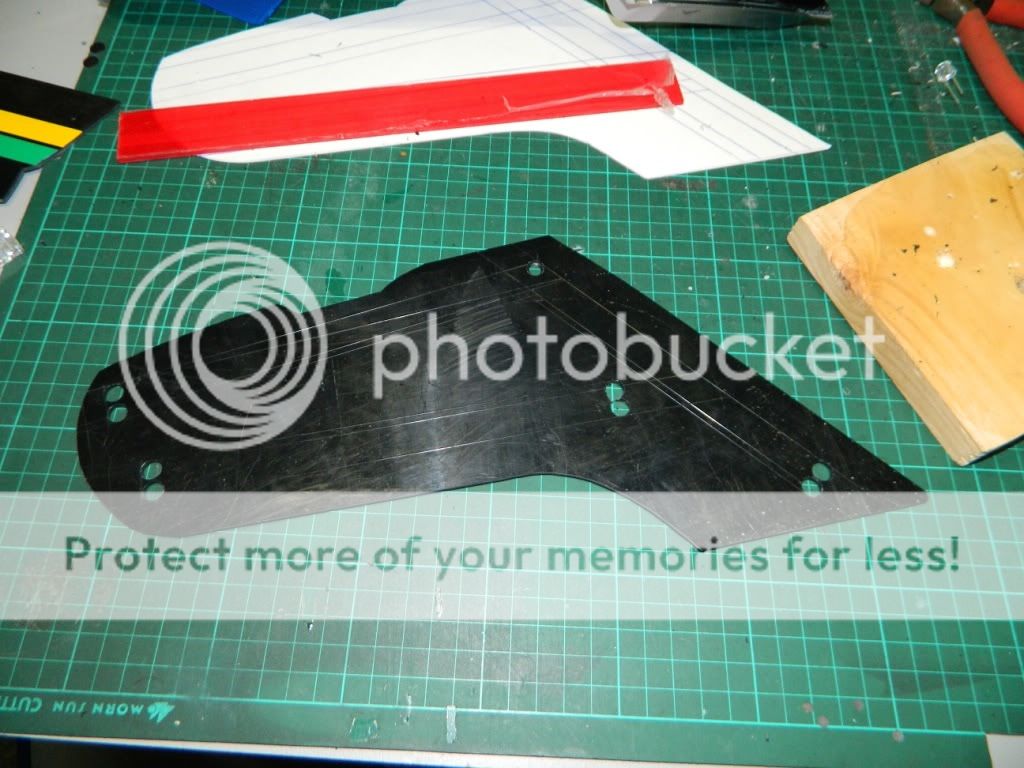
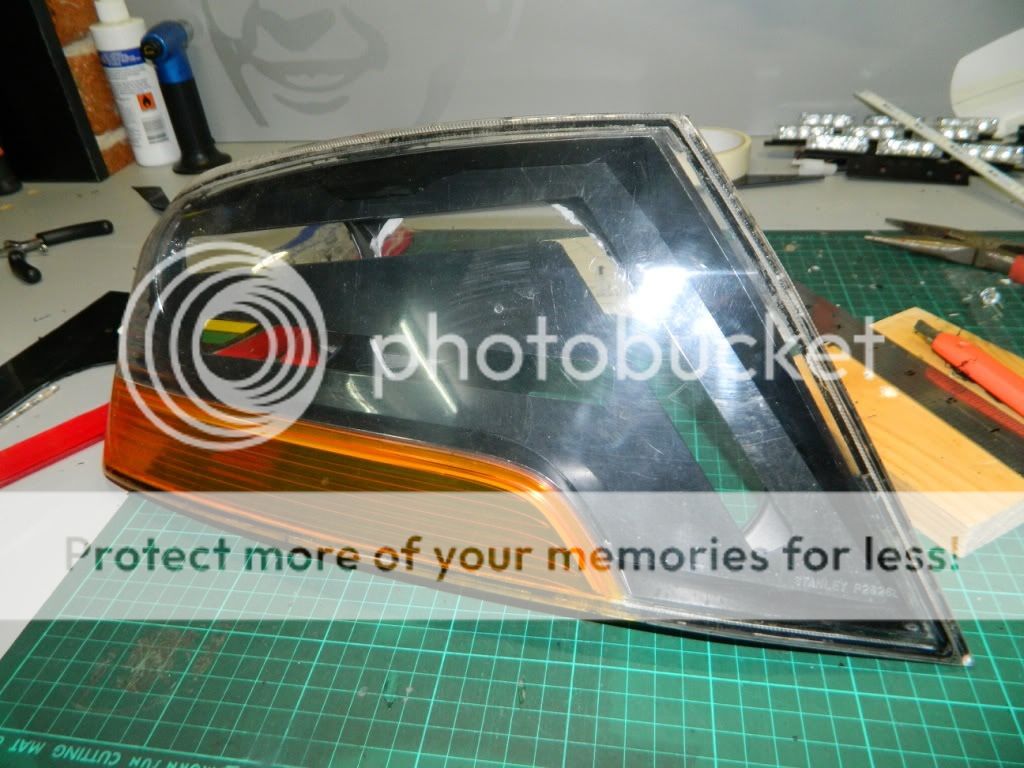
CRACKING IT OPEN :
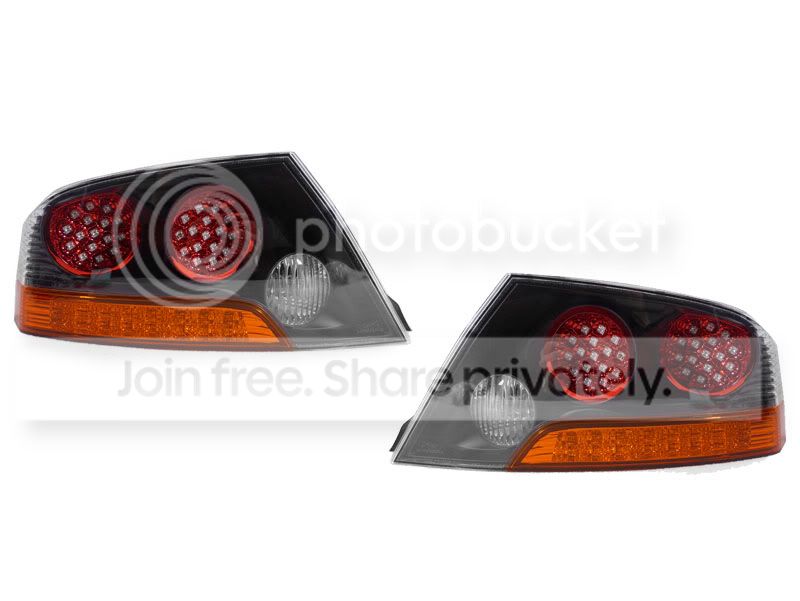
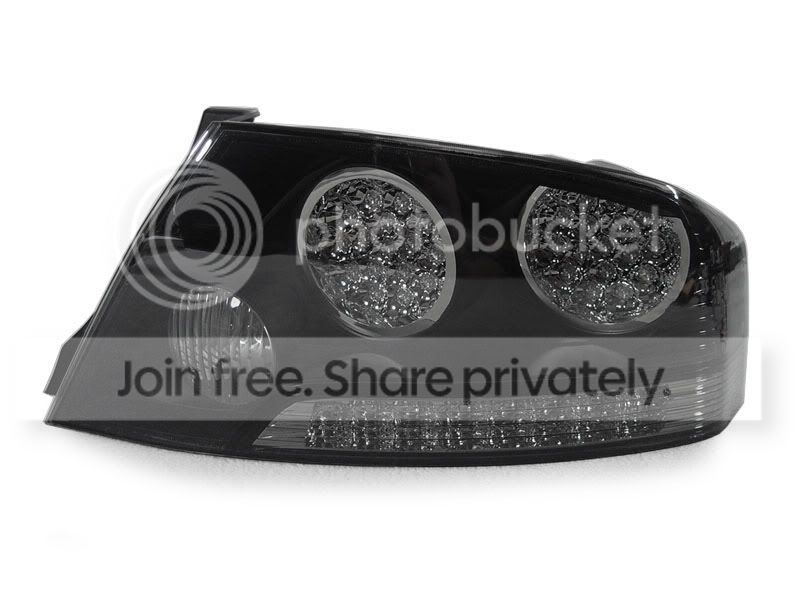
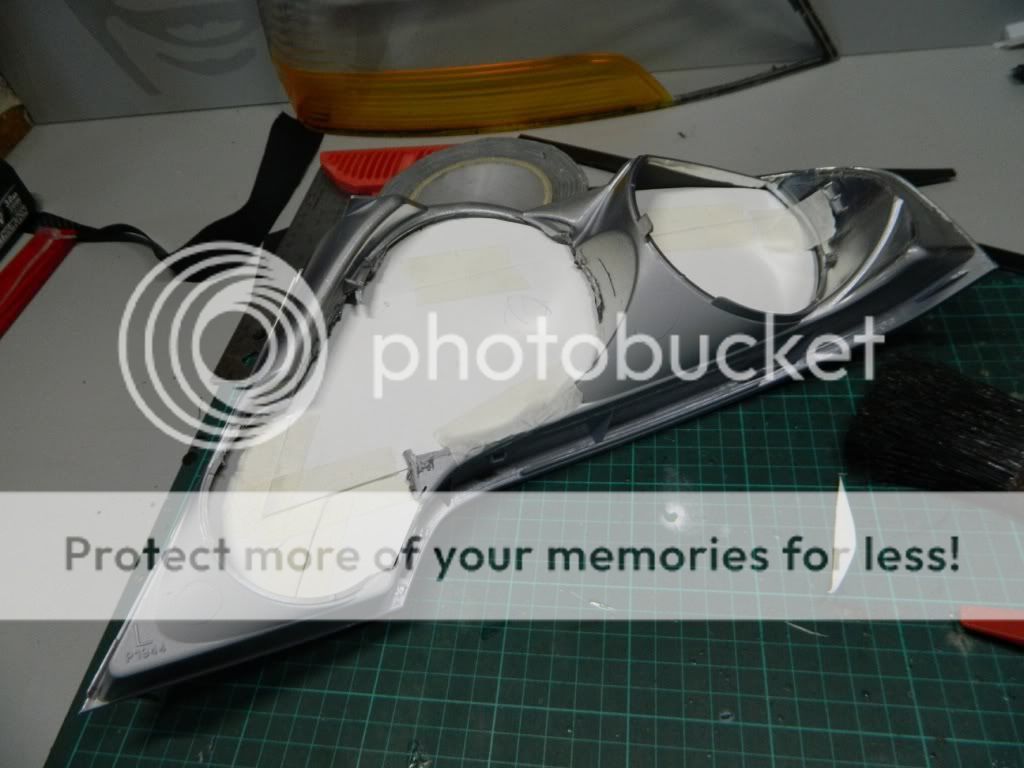
After obtaining 2 sets of the tail lights (EVO8 / EVO8 painted), it was time to crack it open and start the
project? Because the shroud and the main shell are in two parts, it made it easier to make a pattern
and design the template. Using RED Perspex as the main lighting color, positioning the cut-out was the
next step?
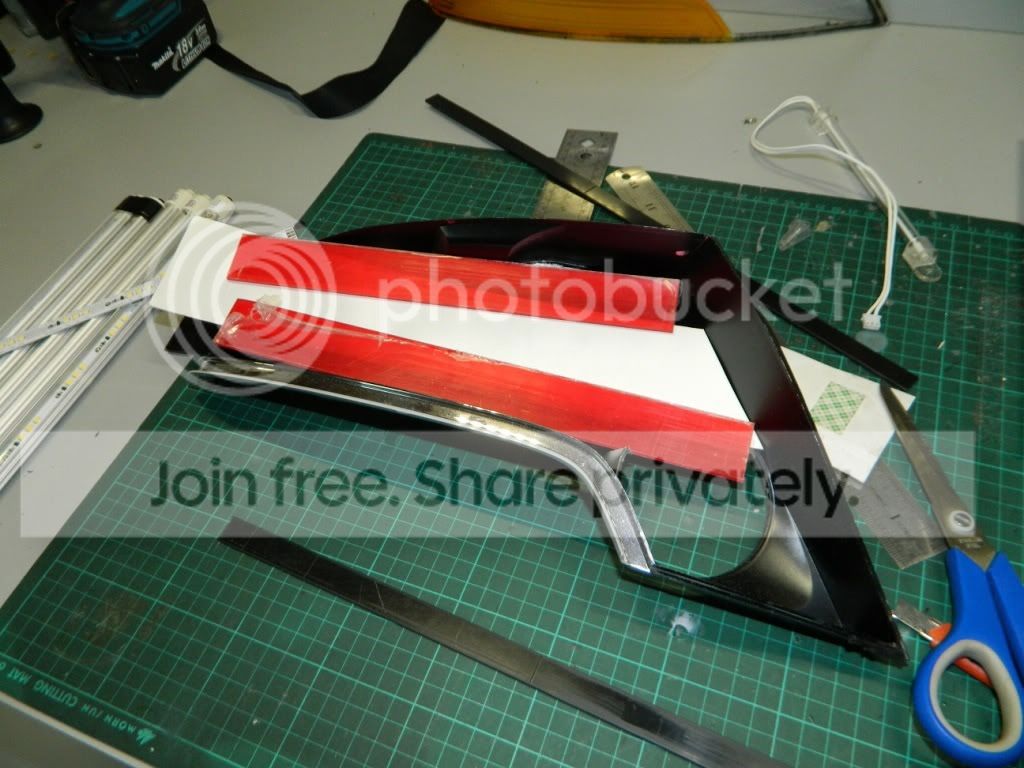
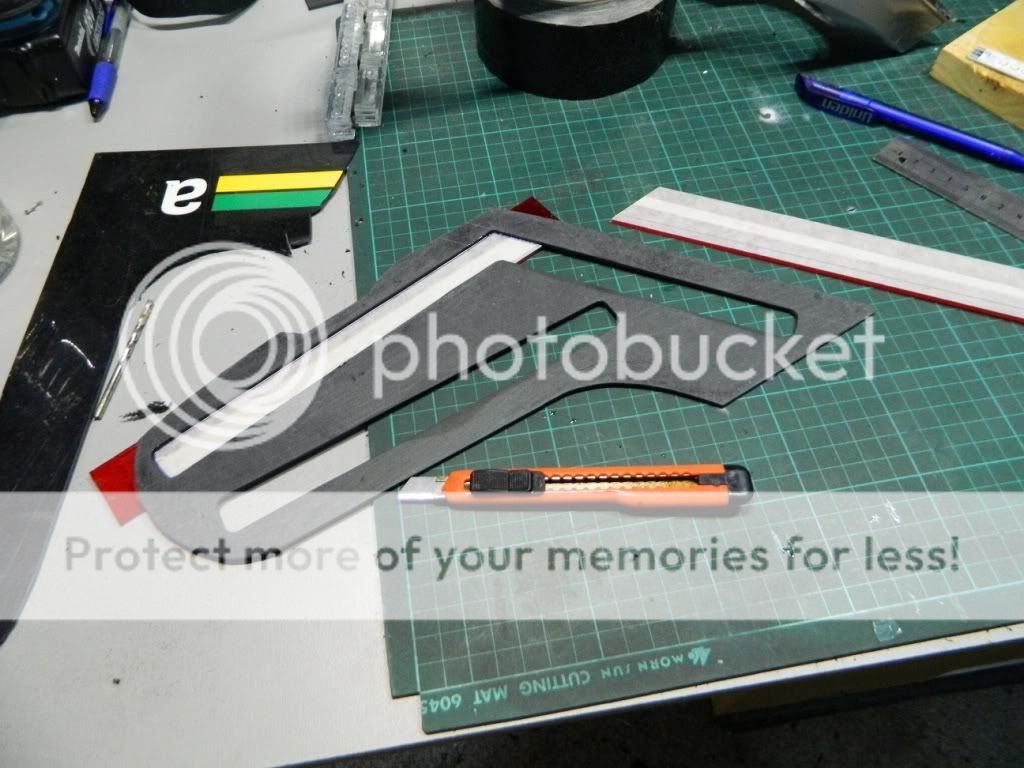
Using cardboard, it made the pattern easy to make in 3 parts?

With the design, had to make sure that the NEW panel was on a right angle to maximise the light projection
to the vehicles at the rear both parker lighting and stop lighting?
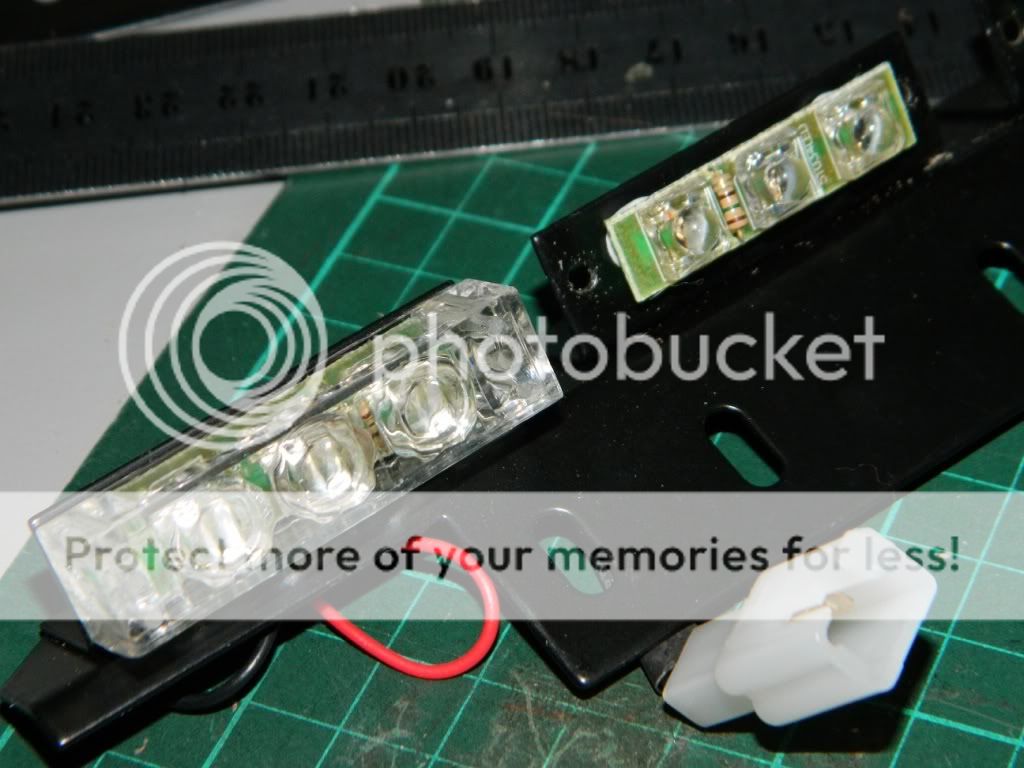
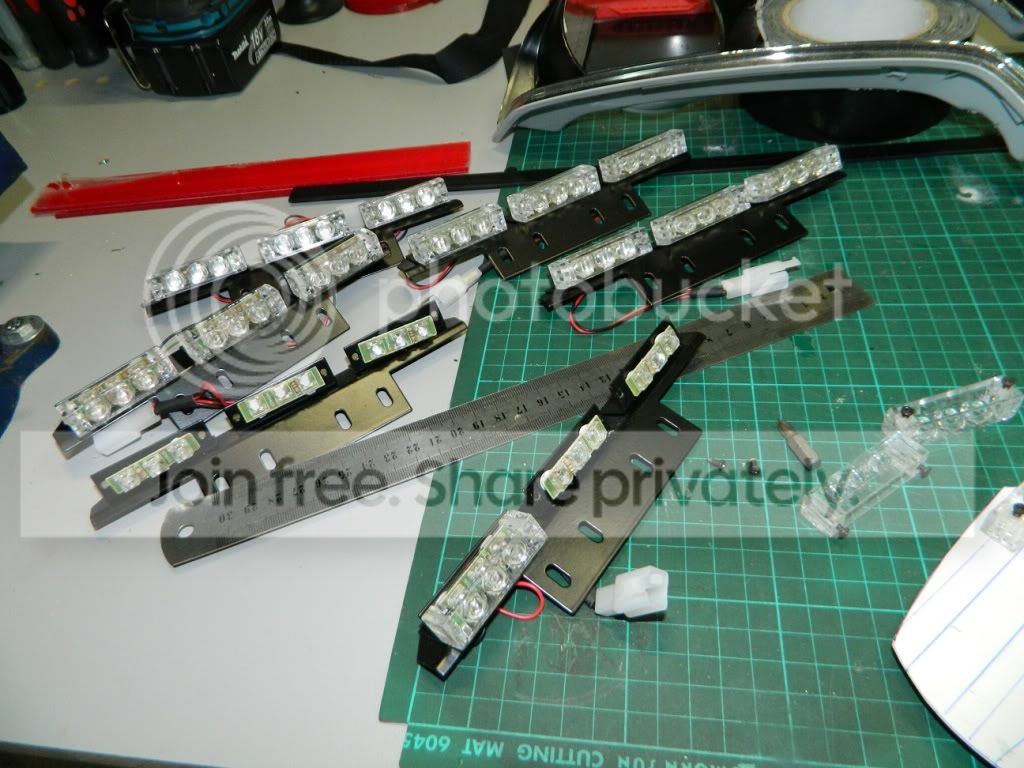
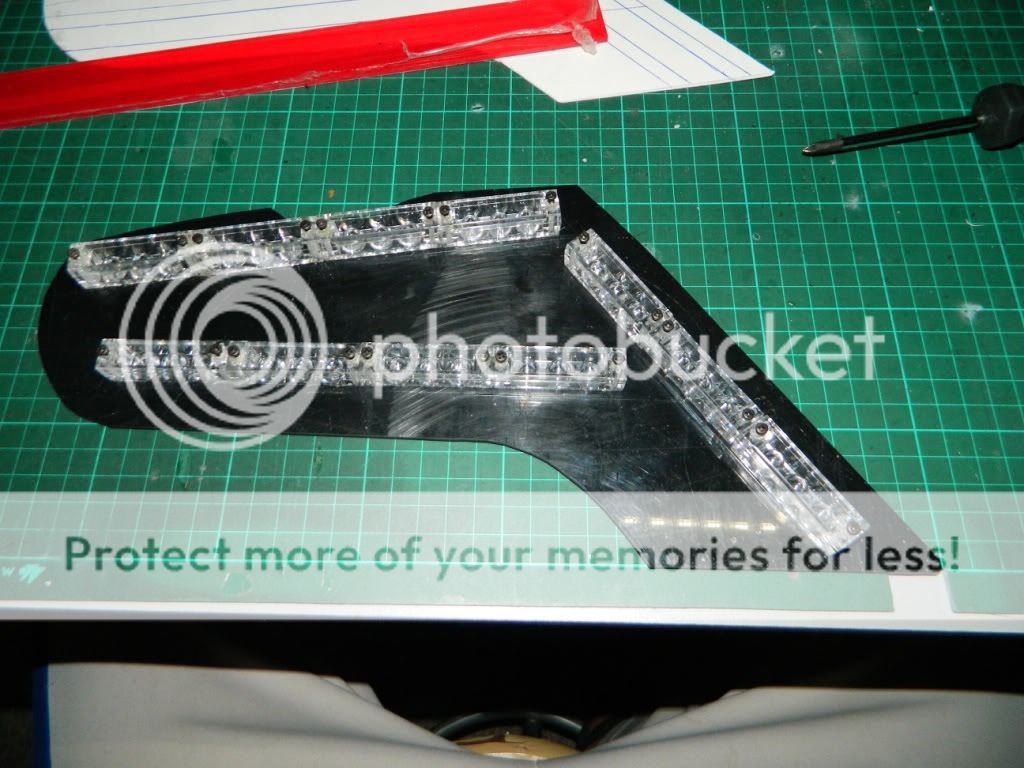
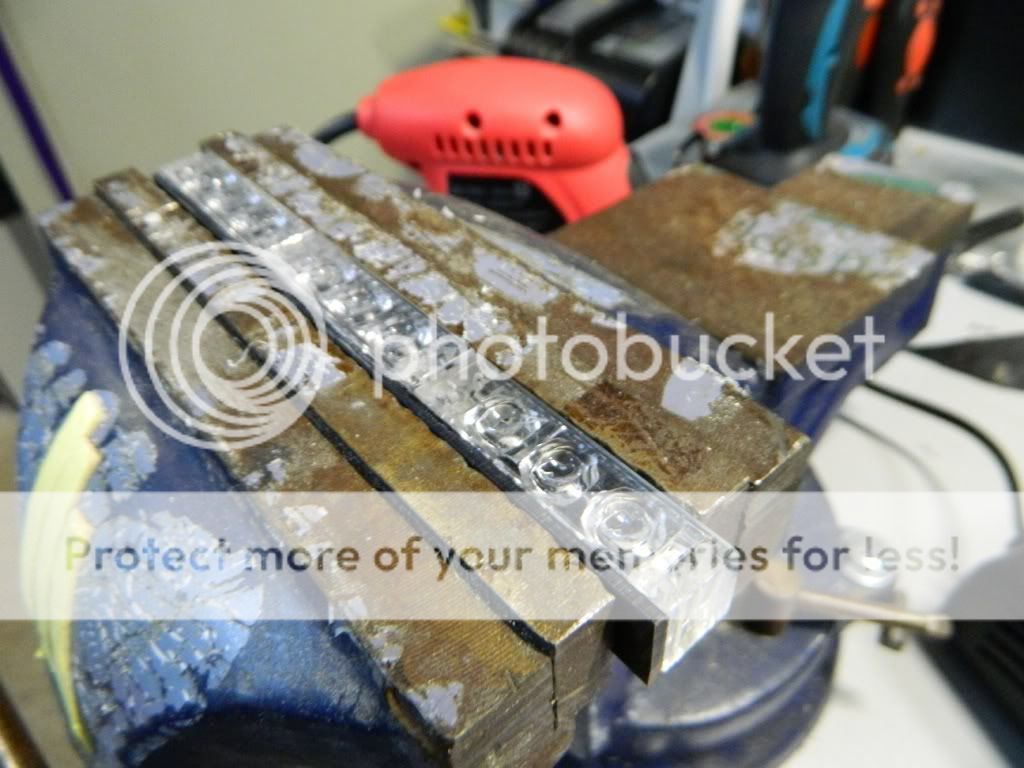
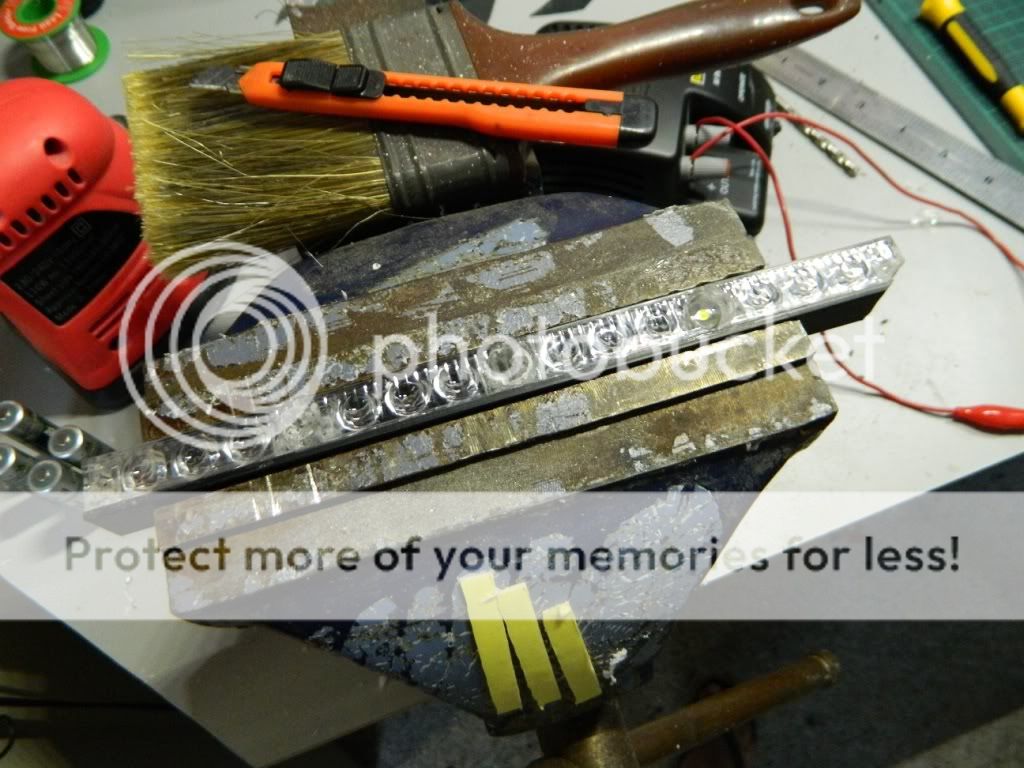
LIGHTING :
For the lighting, I chose the LED strobe lights I had laying around from an earlier project that I had not
used. This will be eventually hooked up, they are quite bright but the RED Perspex will be designed to
dull it down a little?
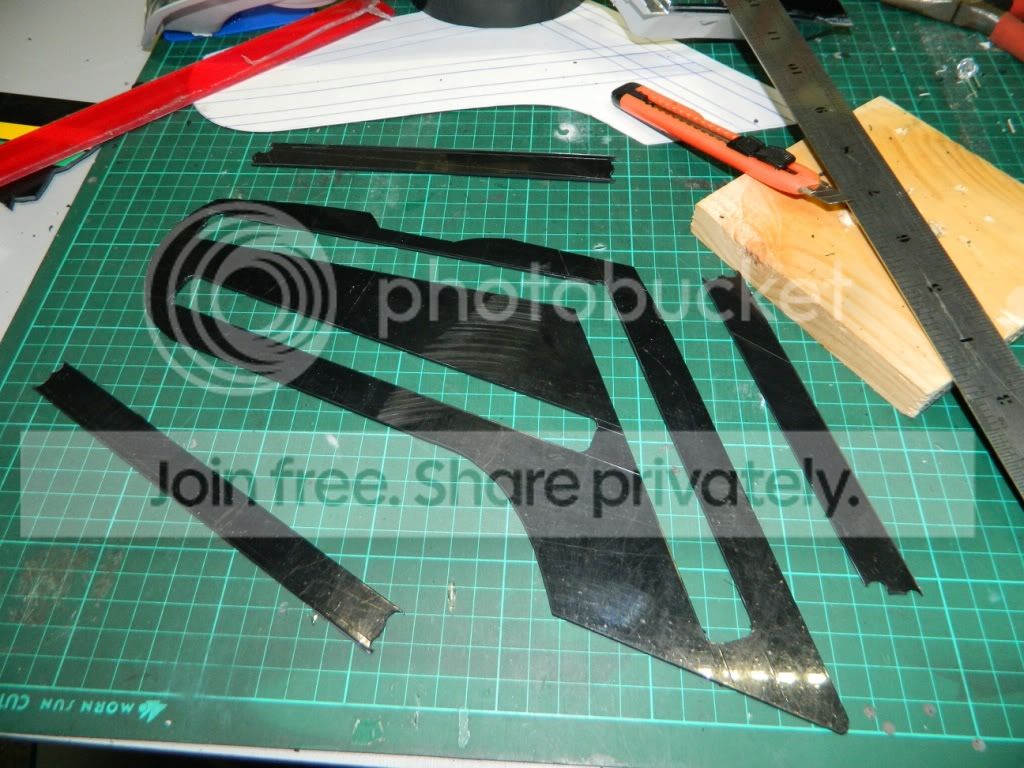
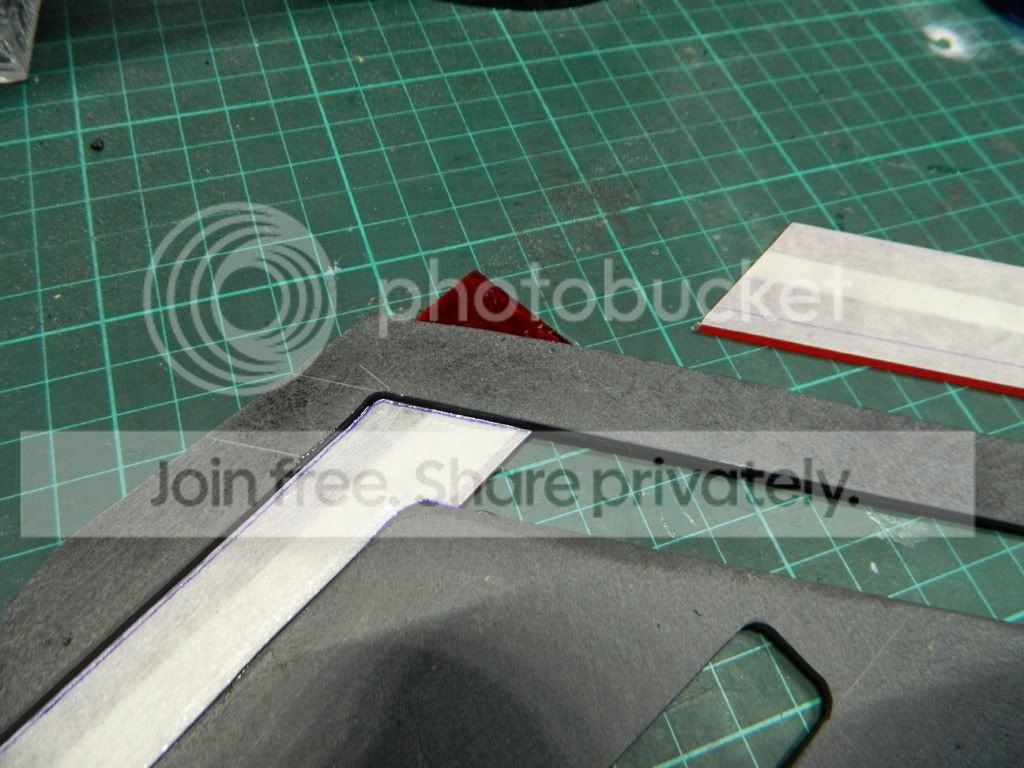
CUSTOM SHROUD :
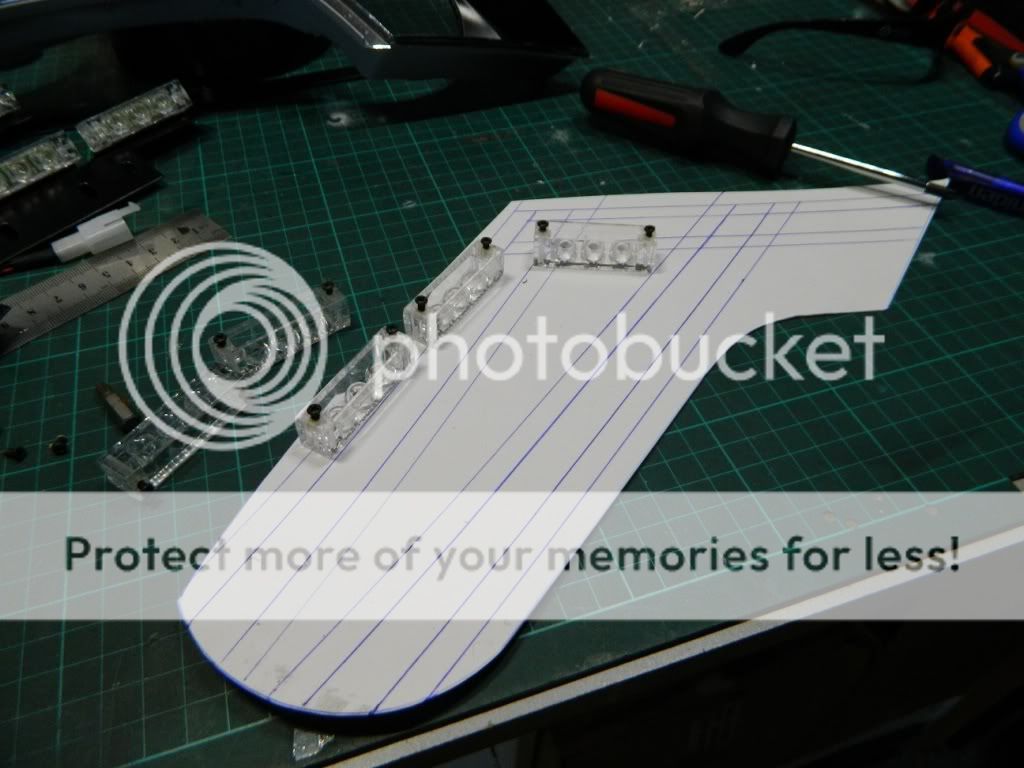
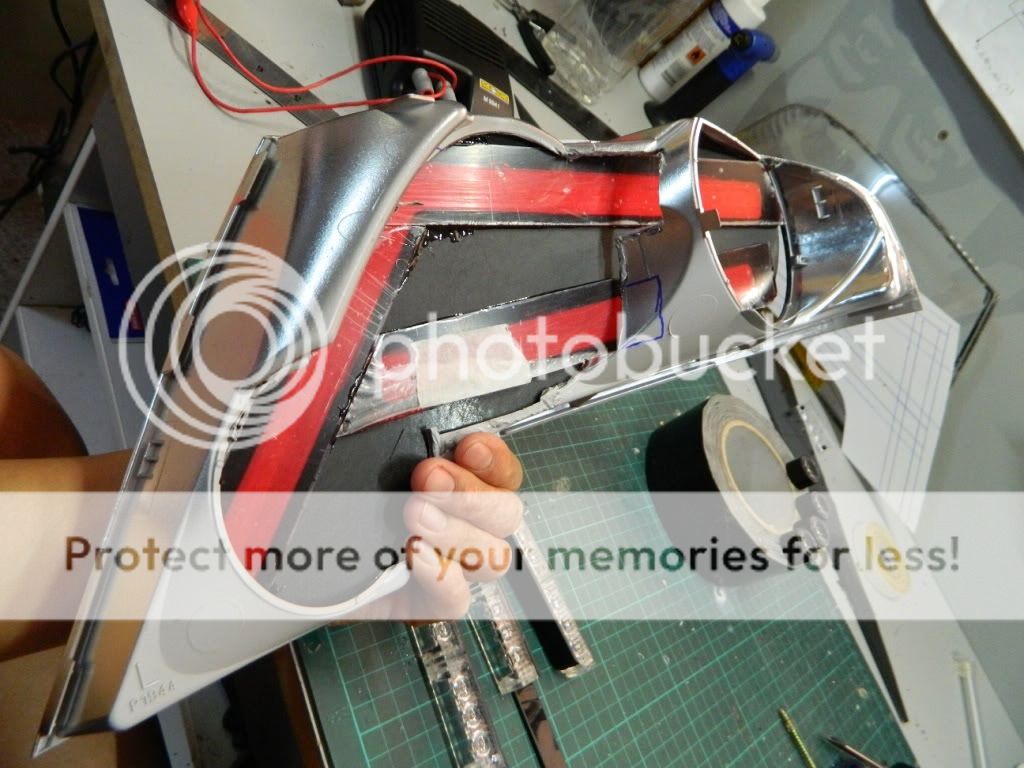
Placing the reflector lens was the next step before transferring the design on the cut-out template that
would shape the lights?
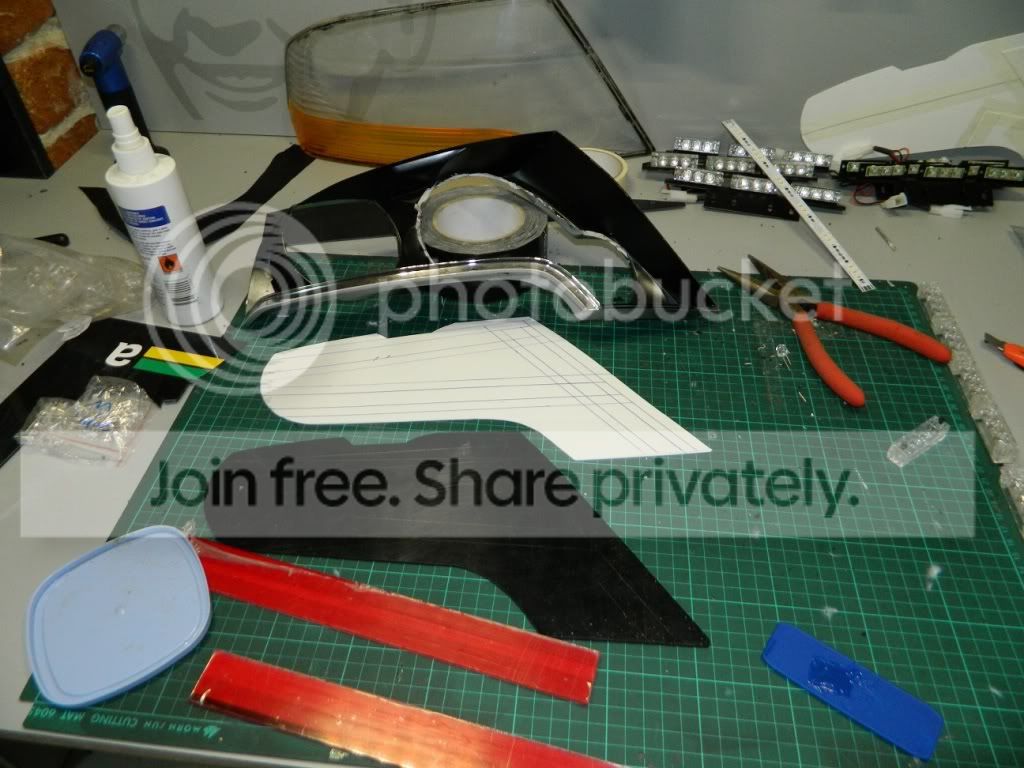
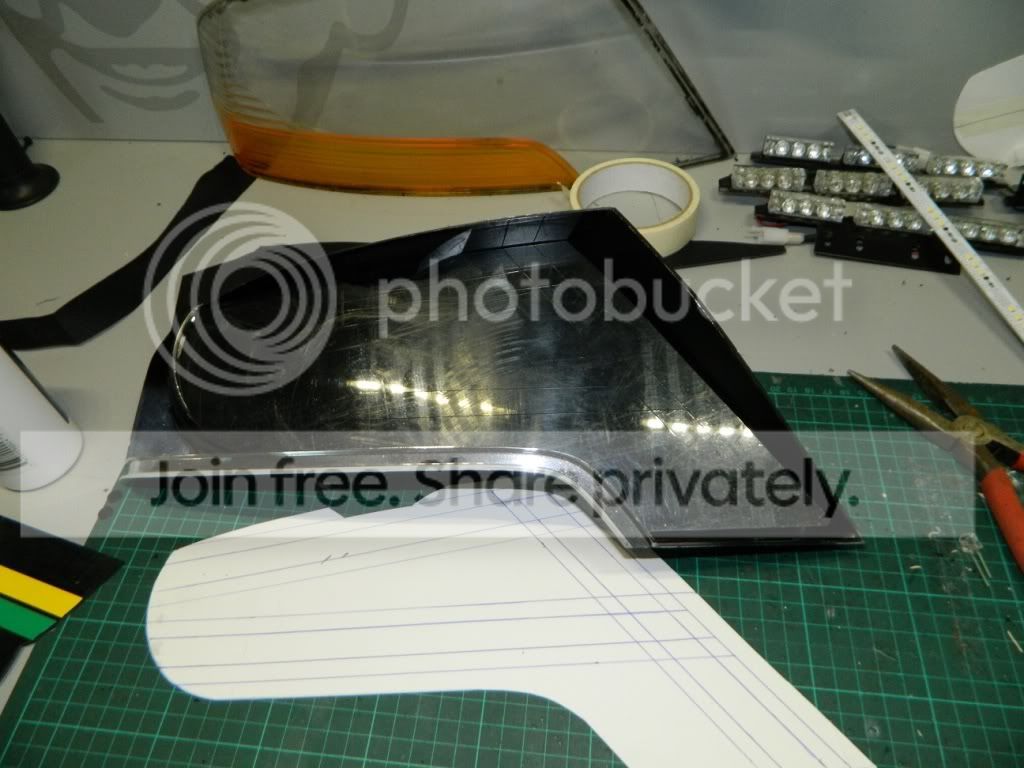
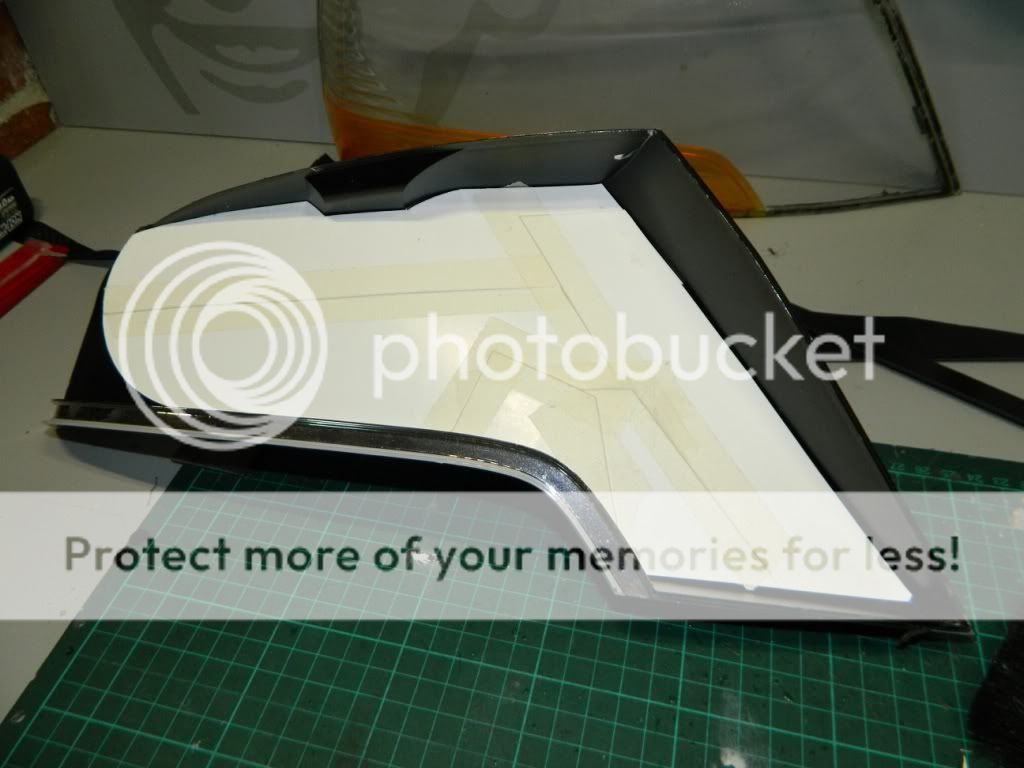
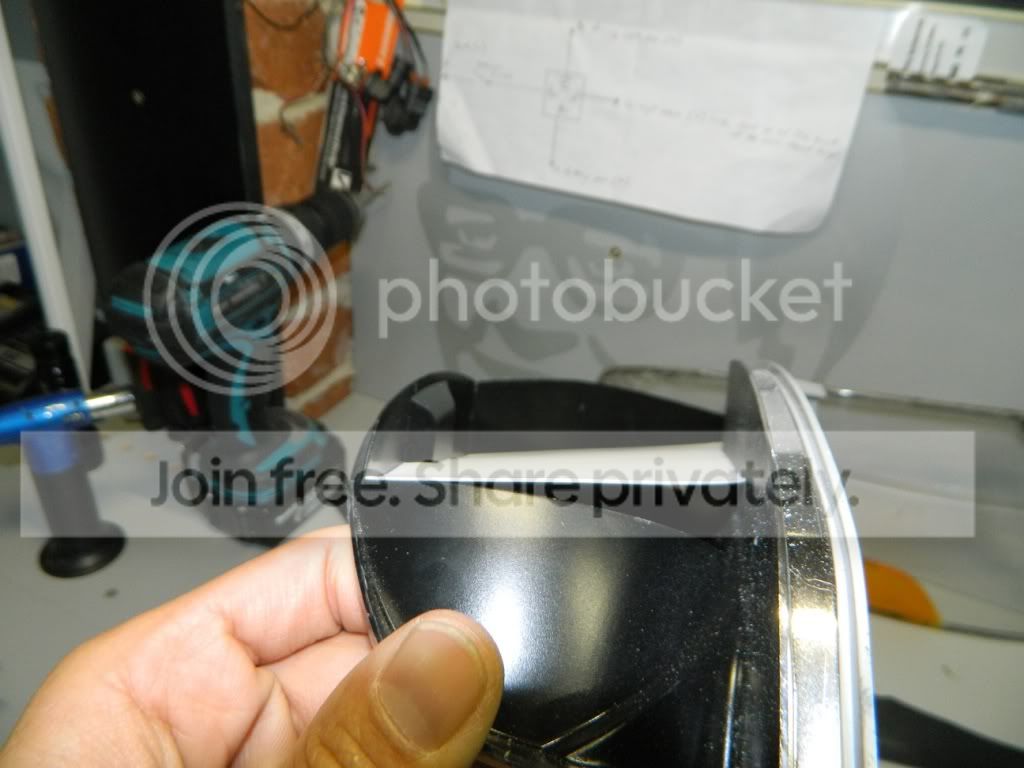
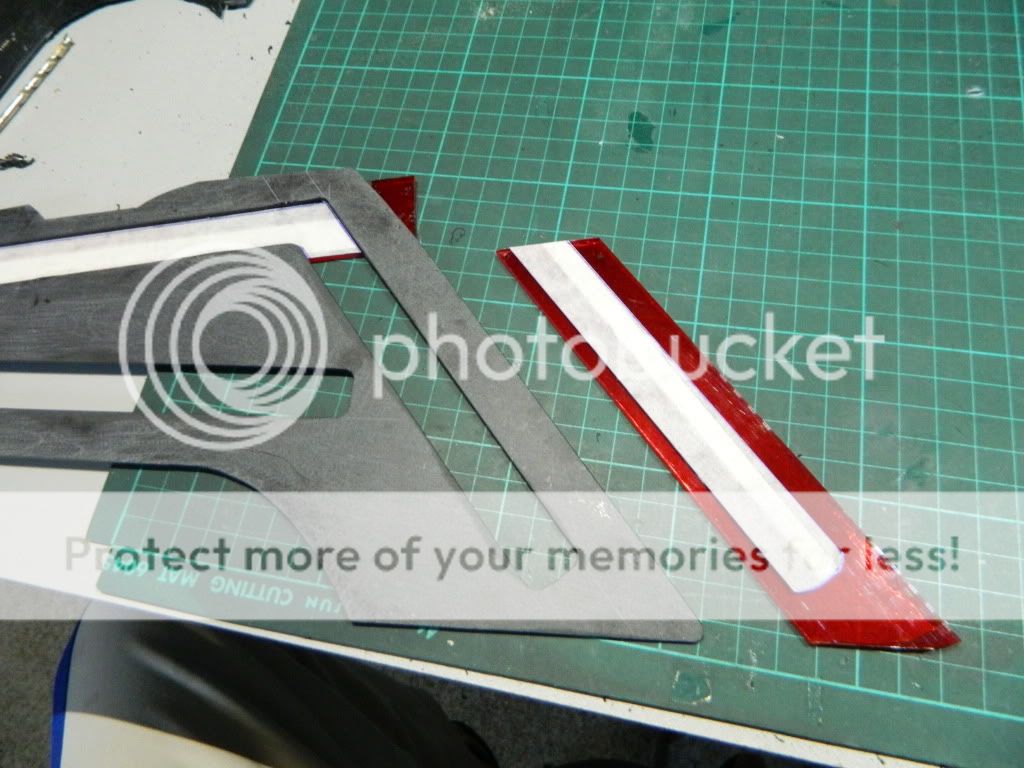
CUT-OUT :
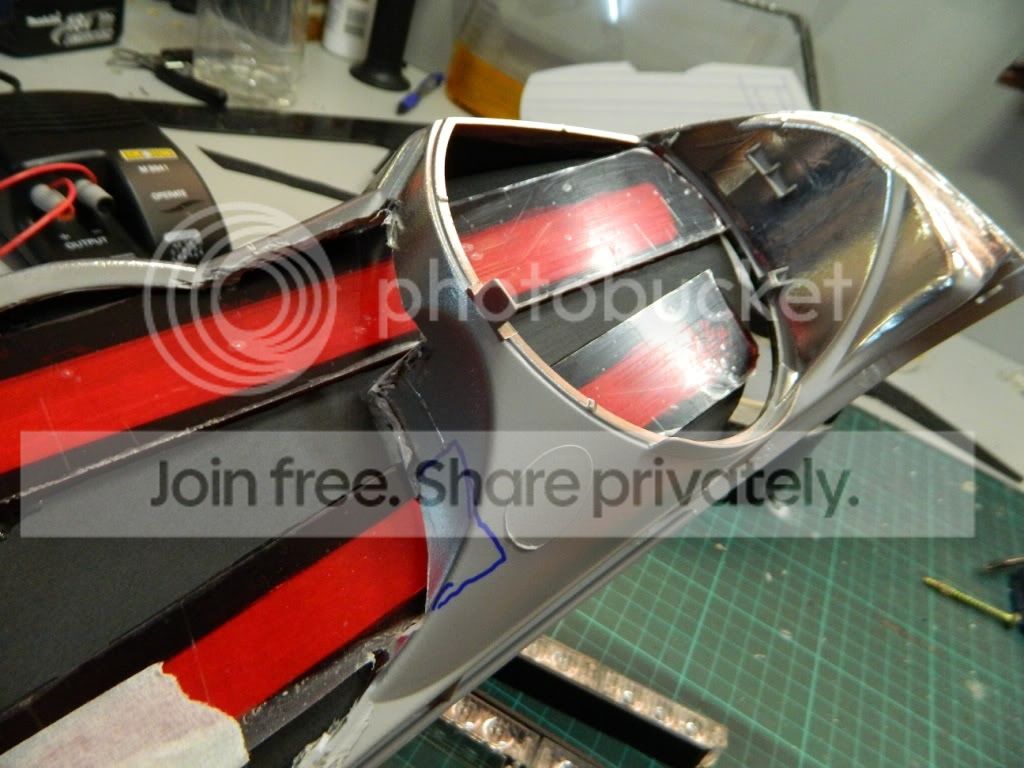
DRY RUN :
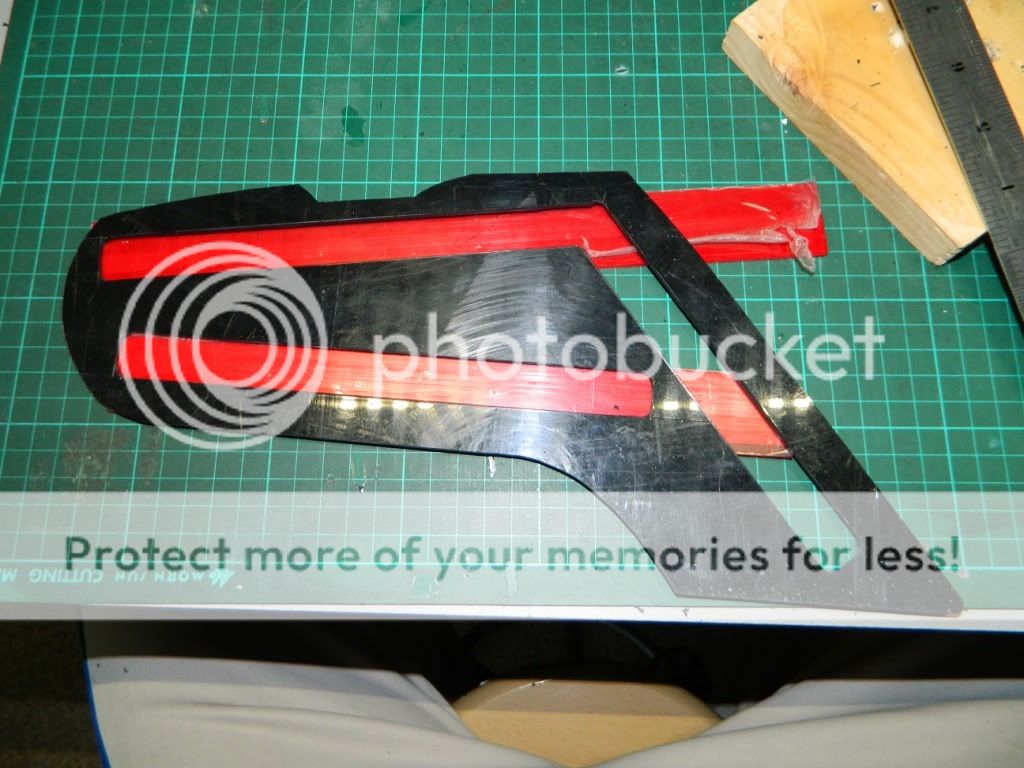
Quick dry to see how things will sit in the casing or how the cover will affect the position of the shroud?
Masking tape to protect the RED Perspex before gluing it to the plastic shroud, also stop it from getting
scratched?

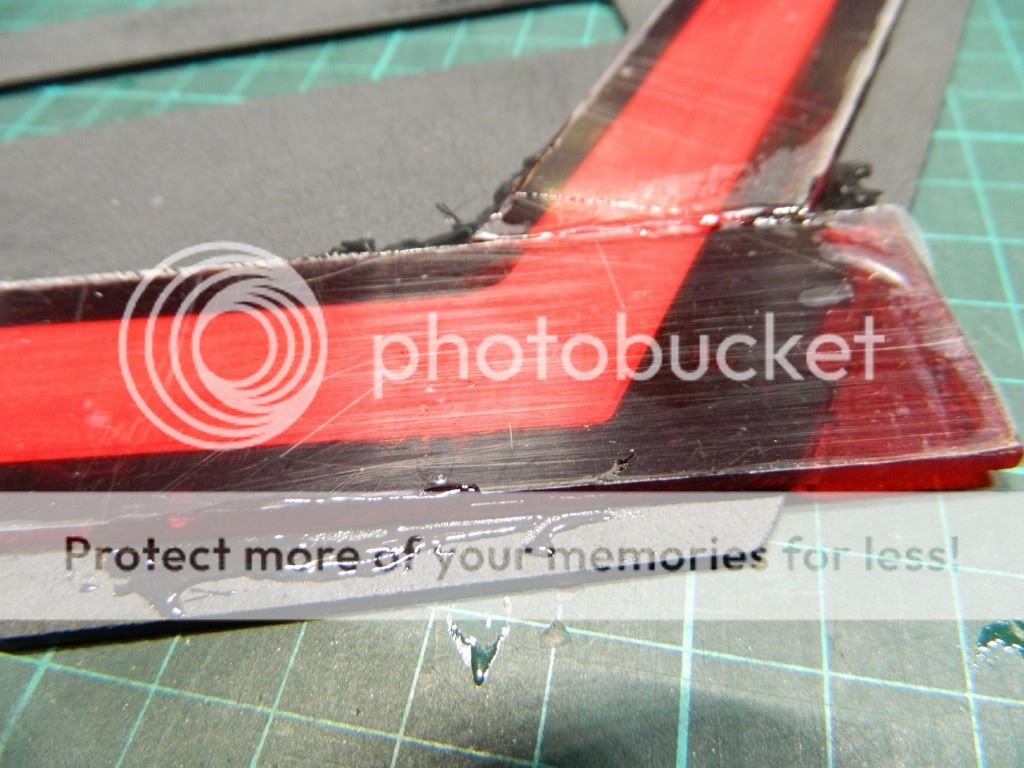
Good help is hard to find?
Joining the reflector lens was the next step because drilling a hole between will be needed to install the
STOP Light LED?
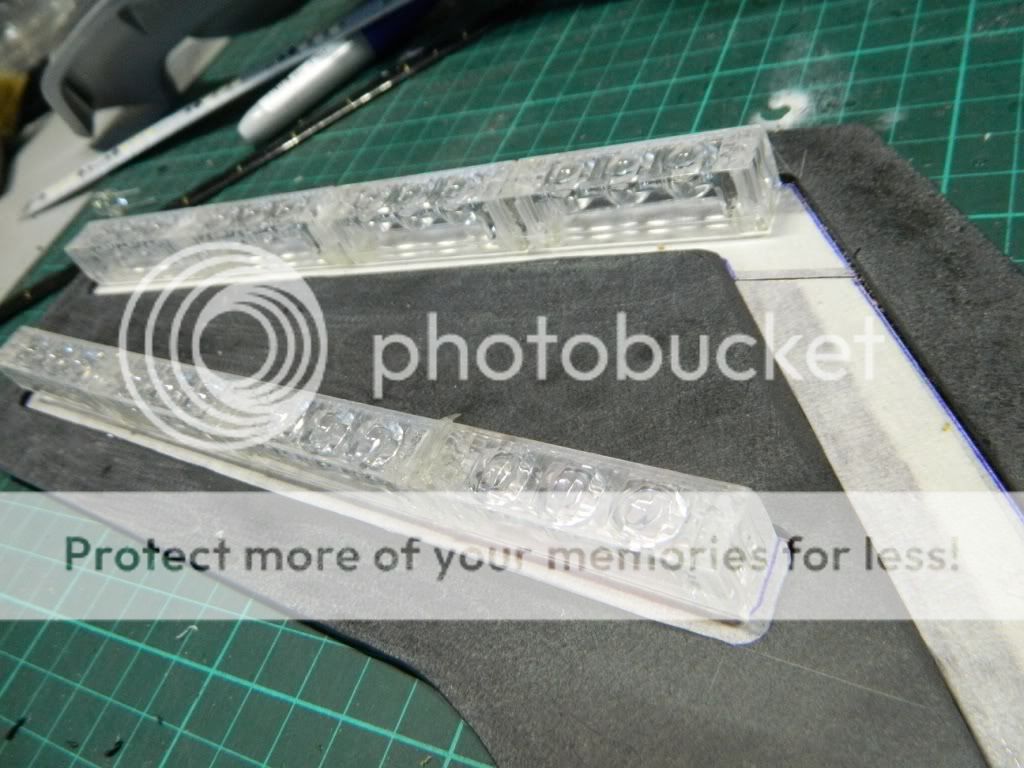
The lens have to have clearing in order to be installed behind the shroud, more bits had to be taken out
via Dremel of course?
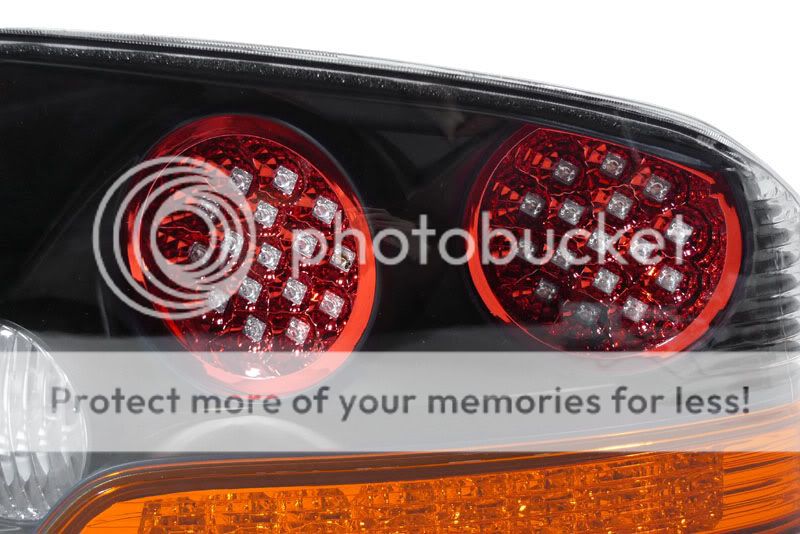
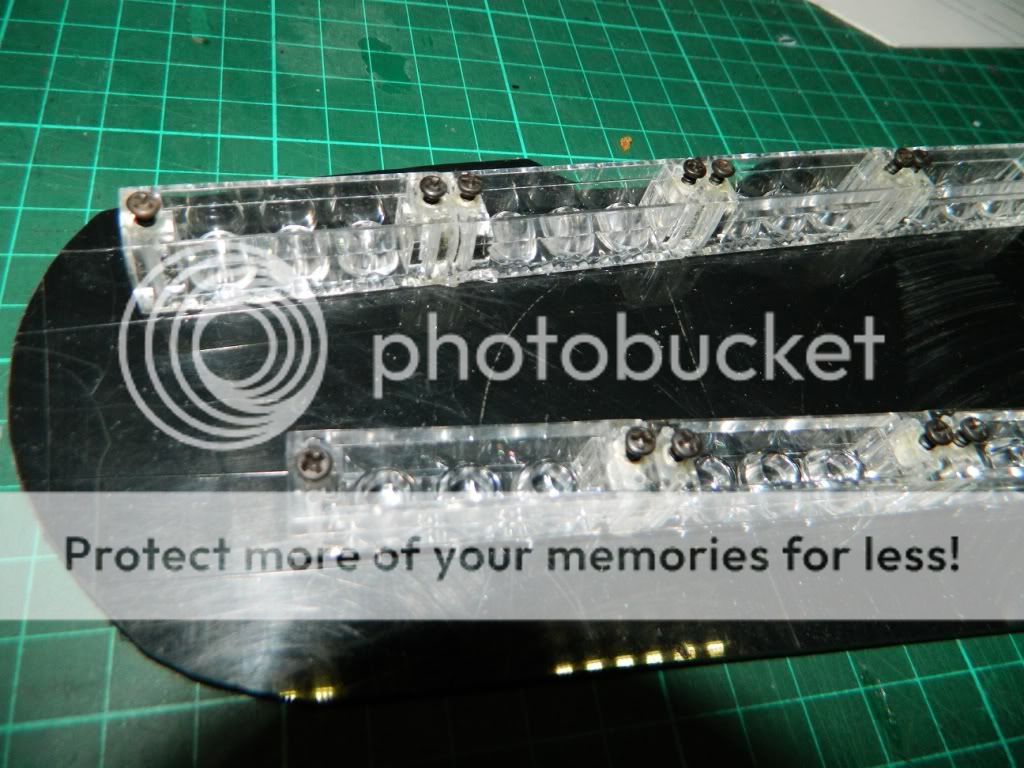
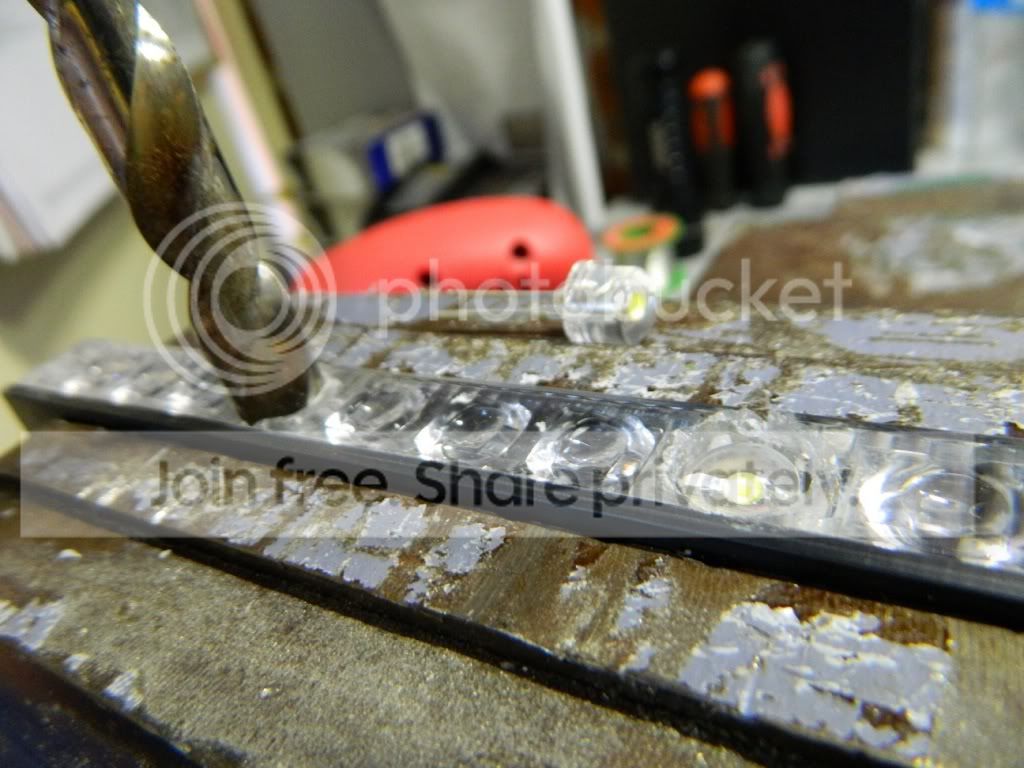
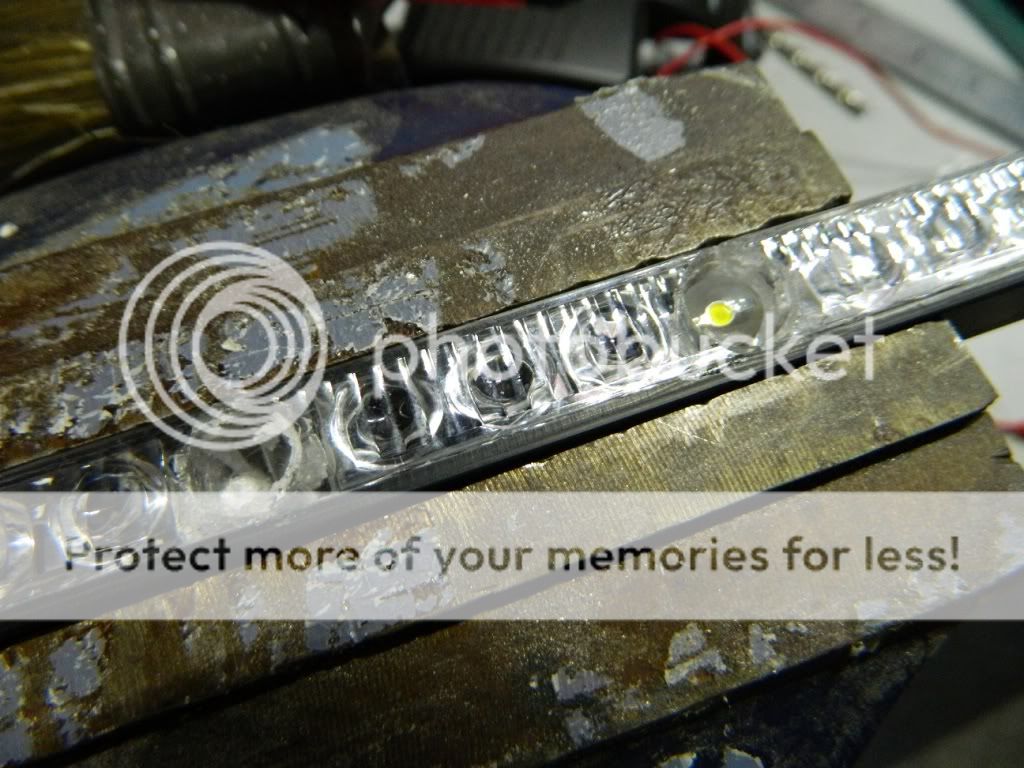
STOP LIGHT :
Stop lights consist of .5watt LED light which have a HIGH brightness output to be installed in-between the
3 cluster LED reflector lens, these will ONLY activate when the brakeSTOP lights come on...
Stay tuned, you'll either like it or hate it :wacko:
The idea was originally to change all the globes to LED in the tail lights, then got thinking and decided to
chuck the idea out. Why not just change the whole look of the tail light, everyone is so focused on changing
the front color headlights to black I thought id try something different?
There are other CT9A tail lights that are full LED, but didn?t do anything for me. Being original is always
better anyway?
LINK : http://www.ebay.com/itm/2003-2006-MITSUBIS...ies&vxp=mtr
CRACKING IT OPEN :
After obtaining 2 sets of the tail lights (EVO8 / EVO8 painted), it was time to crack it open and start the
project? Because the shroud and the main shell are in two parts, it made it easier to make a pattern
and design the template. Using RED Perspex as the main lighting color, positioning the cut-out was the
next step?
Using cardboard, it made the pattern easy to make in 3 parts?
With the design, had to make sure that the NEW panel was on a right angle to maximise the light projection
to the vehicles at the rear both parker lighting and stop lighting?
LIGHTING :
For the lighting, I chose the LED strobe lights I had laying around from an earlier project that I had not
used. This will be eventually hooked up, they are quite bright but the RED Perspex will be designed to
dull it down a little?
CUSTOM SHROUD :
Placing the reflector lens was the next step before transferring the design on the cut-out template that
would shape the lights?
CUT-OUT :
DRY RUN :
Quick dry to see how things will sit in the casing or how the cover will affect the position of the shroud?
Masking tape to protect the RED Perspex before gluing it to the plastic shroud, also stop it from getting
scratched?
Good help is hard to find?
Joining the reflector lens was the next step because drilling a hole between will be needed to install the
STOP Light LED?
The lens have to have clearing in order to be installed behind the shroud, more bits had to be taken out
via Dremel of course?
STOP LIGHT :
Stop lights consist of .5watt LED light which have a HIGH brightness output to be installed in-between the
3 cluster LED reflector lens, these will ONLY activate when the brakeSTOP lights come on...
Stay tuned, you'll either like it or hate it :wacko:
This should be interesting. So far I'm not really digging on the shape of the cutouts. It doesn't seem like it will flow with the body lines of the Evo. But I'm curious to see what it will look like when you're done, I'm might be proven wrong?
I'm unsure about the placement of the led's as well. If the lower cutout was parallel with the upper one it might look better. To me it looks like you just slapped them there cause thats the only way to fit three in. Curious to see it finished.

I think it'd be cooler to re-create something with an outer ring and then a brighter, solid inner circle that glows in both housings
either way, i'm looking forward to your end result
either way, i'm looking forward to your end result

Trending Topics


Was hoping to see the final result.
I applaud you for taking on the project, the shape however keeps knight rider popping in my head.
I couldn't get over how you used question marks instead of periods for every sentence. lol.
I applaud you for taking on the project, the shape however keeps knight rider popping in my head.
I couldn't get over how you used question marks instead of periods for every sentence. lol.