
Installed my Pioneer AVIC F-series

Installed my Pioneer AVIC F-series
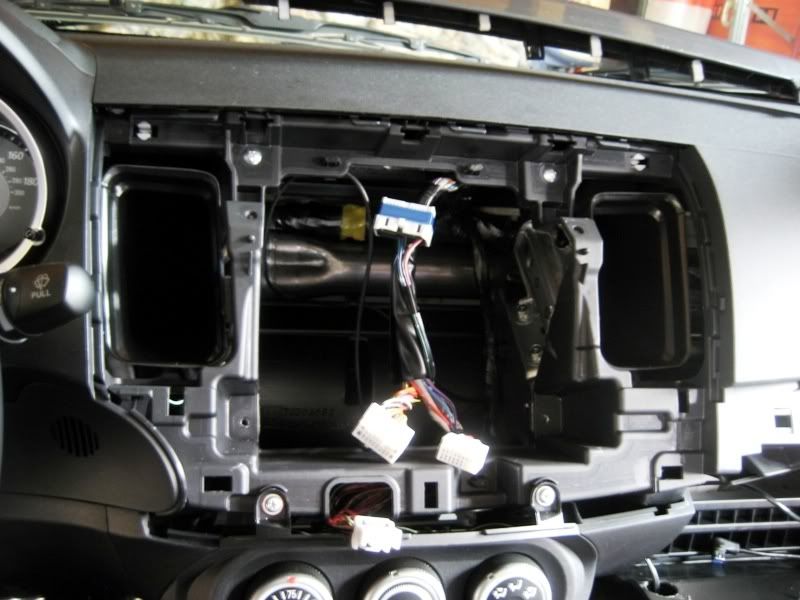
I received my Pioneer AVIC-F700BT today, so finally I could get my radio put in. The full install took me about 3.5 hours, and honestly, it went flawlessly. The Evo is by far the easiest car to work on. There's a ton of room.. and I mean a ton of room (behind the dash, glove box, and places to route cables). Everything snaps apart and back together really easily. I think I only had to use a philips screw driver twice. (for the dash trim piece removal, well, and the radio brackets of course)
This thread could double as a rough tutorial for you guys. It gives a good explanation of where everything needs to go.
Parts:
- Pioneer AVIC F700BT
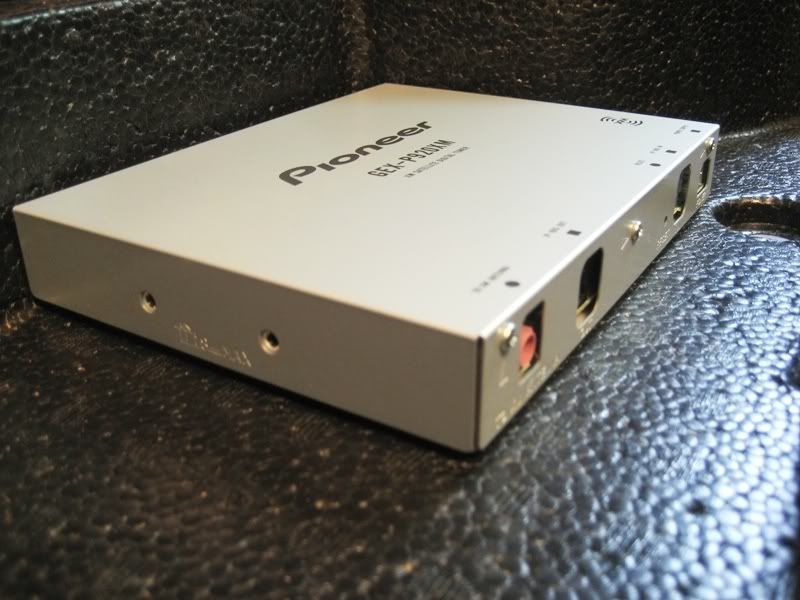
- Pioneer GEX-P920XM
- Scosche Dash Kit
- 2008+ Mitsubishi Radio Harness
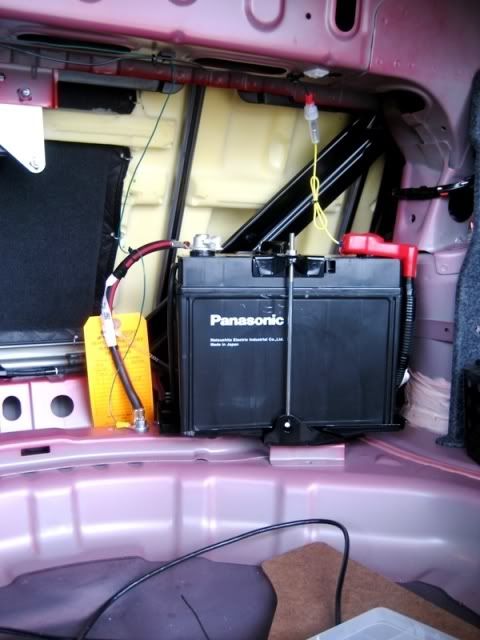
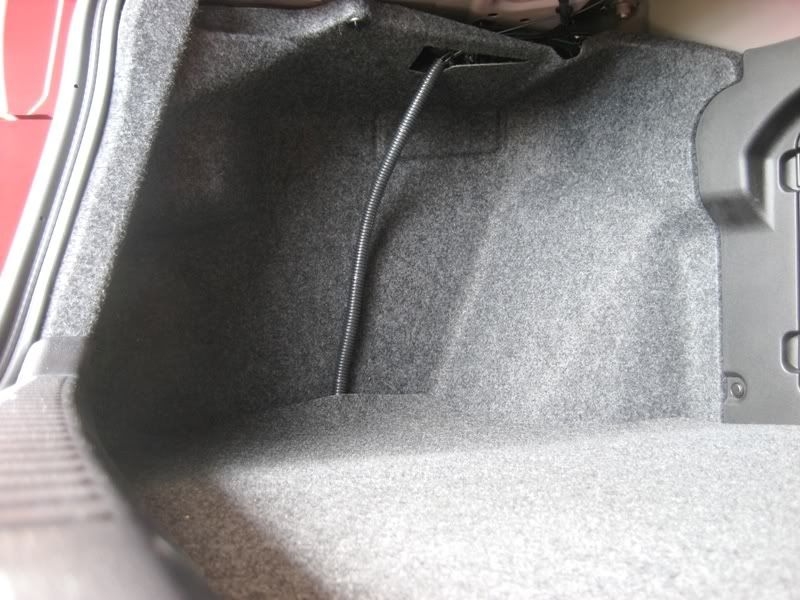
I started in the trunk with installing the XM box to get that out of the way. I found the perfect place for it.
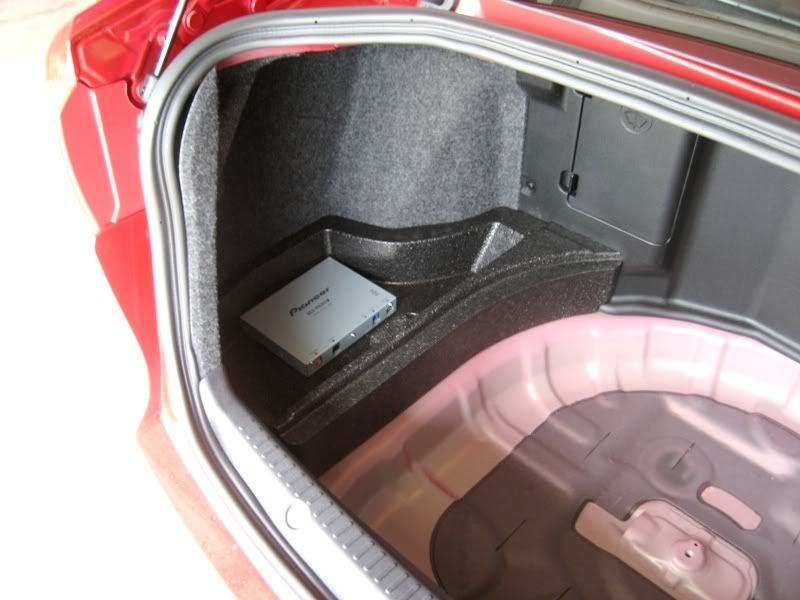
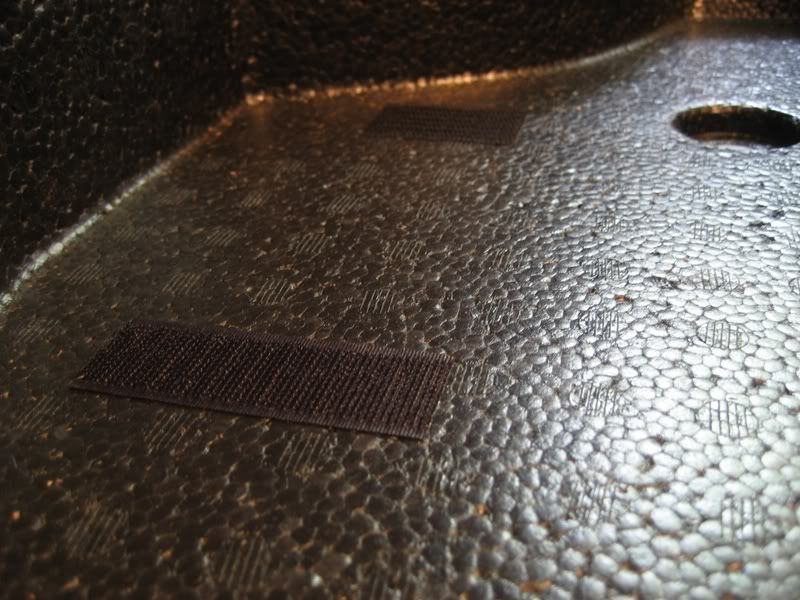
Used velcro to hold it in place...
Then I ran the power and ground over to the battery. The antenna will go straight up on the rear window deck inside. You'll see a picture of that later.
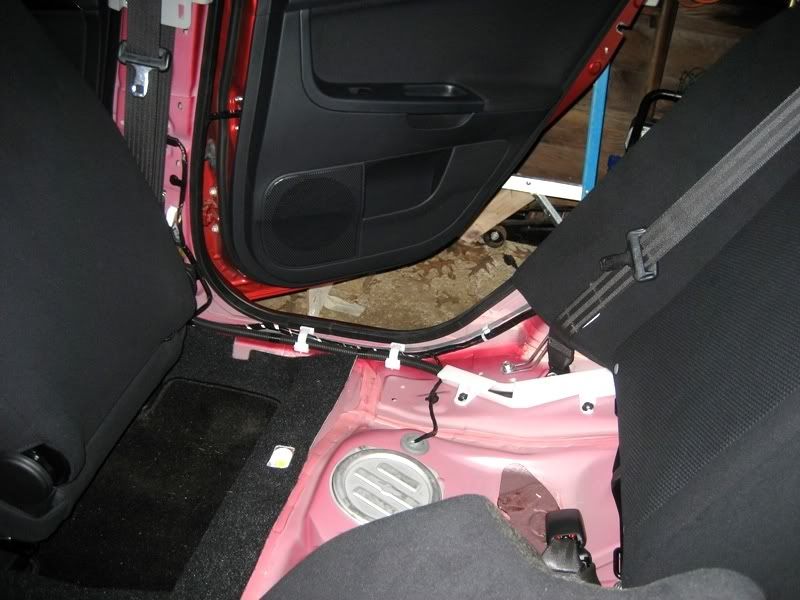
The IP-bus cable for the XM unit has to be routed to the front of the car. I removed the back seat bottom to make routing the cable easy, as well as removing the floor trim pieces. Now you have access to the whole cable run tray. The little holders just snap open and closed, so it makes cable routing super easy.
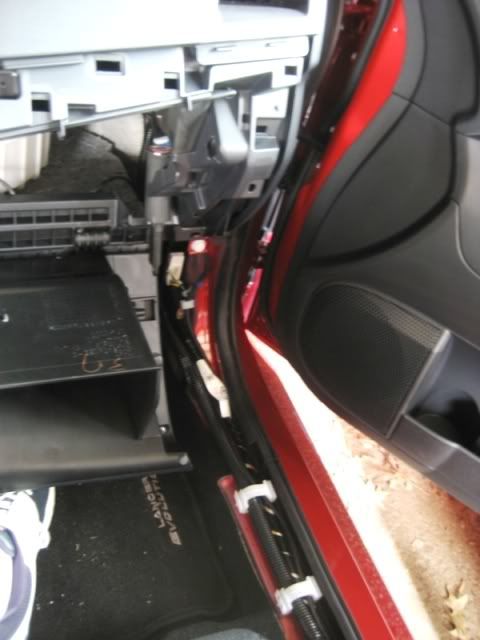
From there, the cable gets routed behind the glove box and into the radio area to be plugged in later. I also ran the GPS antenna for the AVIC at the same time to make things easy. I put that on the rear window deck next to the XM receiver.
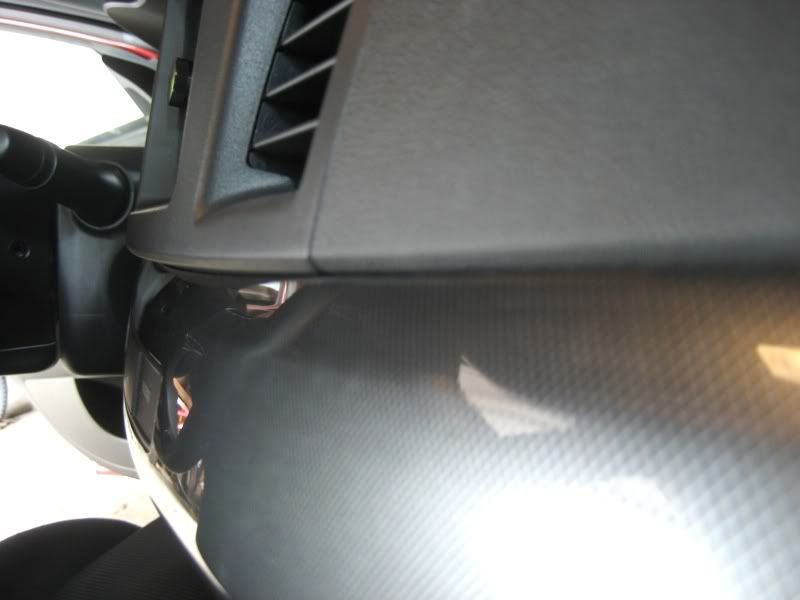
Removed the factory radio.
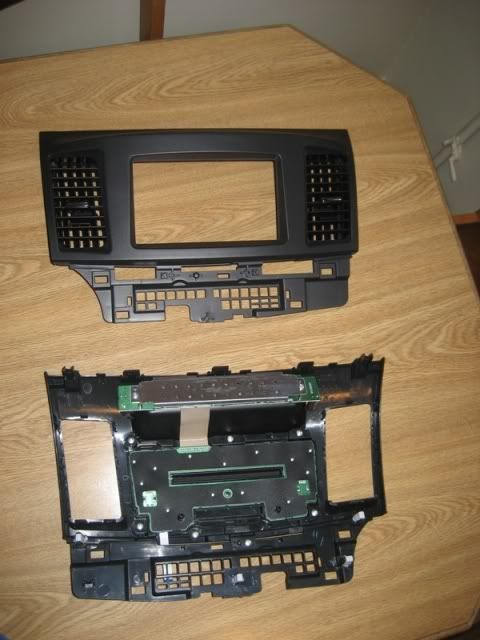
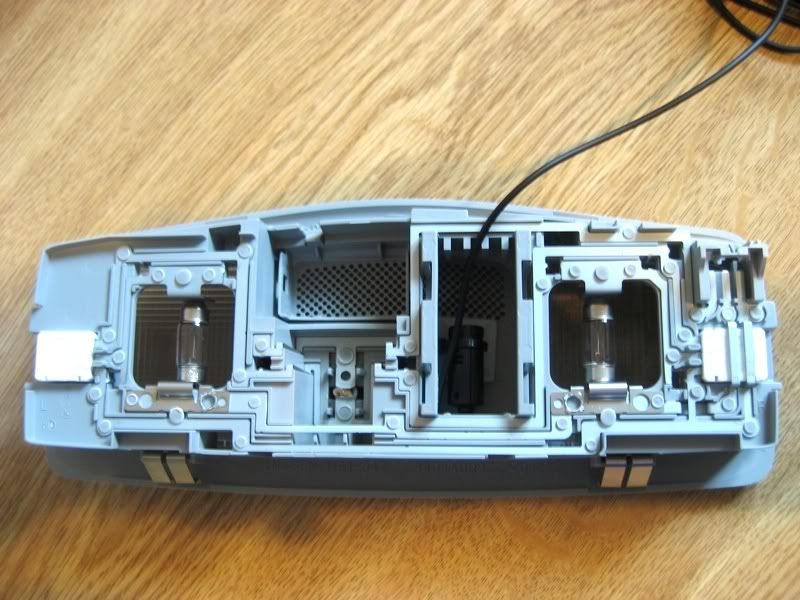
Put the factory vents into the Scosche dash kit.
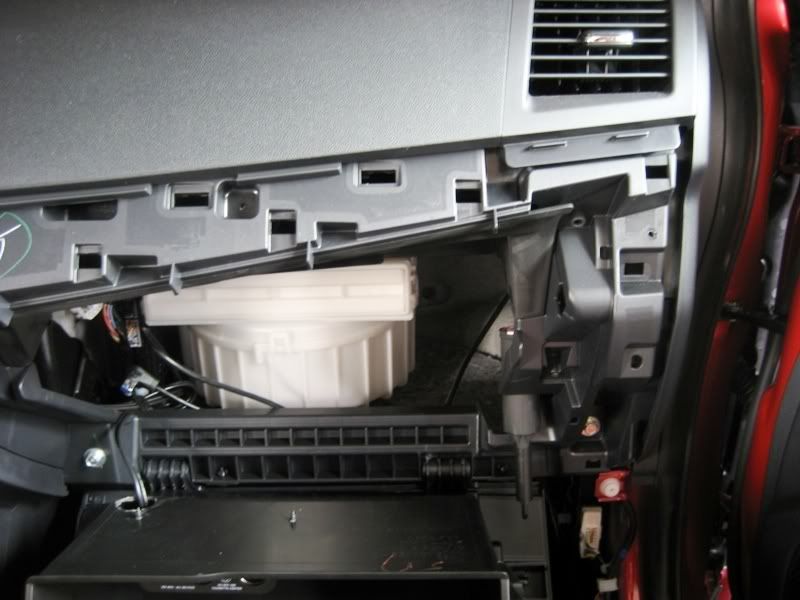
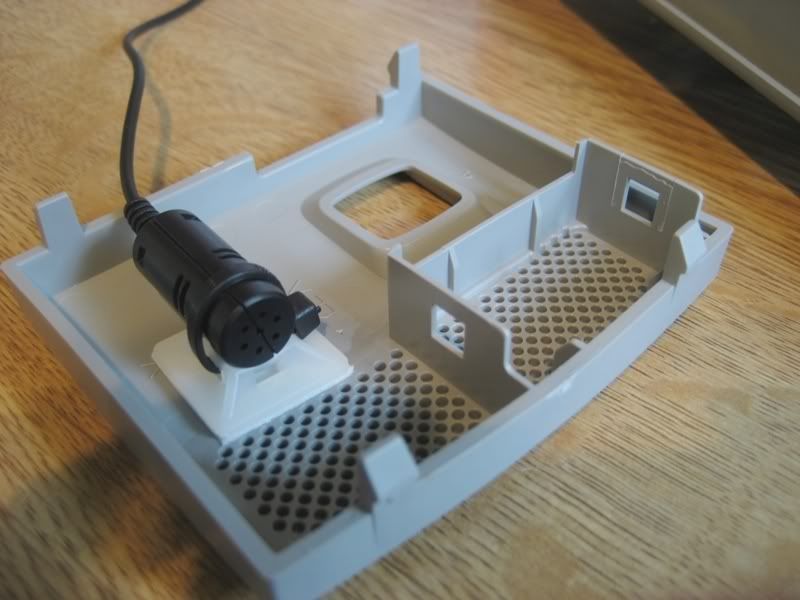
Then I switched gears and felt like running the microphone for the telephone and voice command. I found the perfect spot in the map lights area. It just pops out with no tools required. I routed cable through the headliner and over to the passenger side A-pilar, down behind the rubber stripping, then down behind the glove box and into the radio cavity.
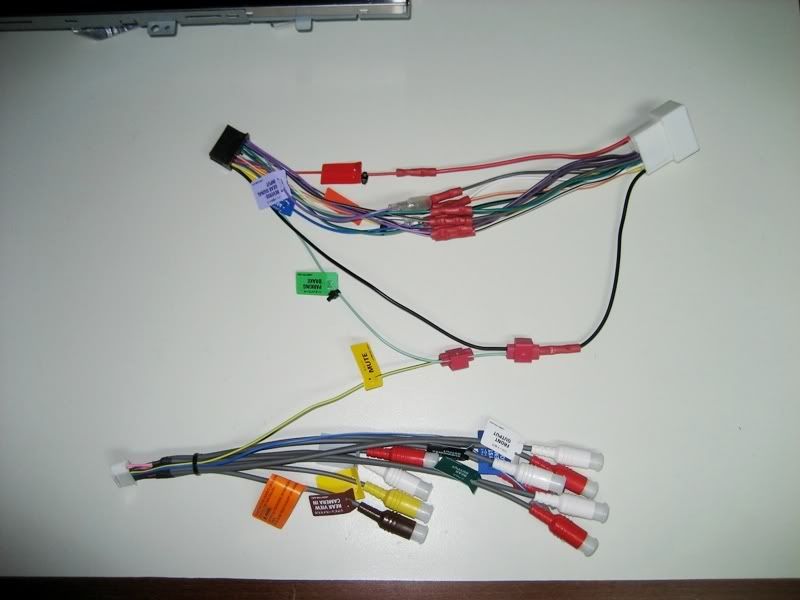
Now all the cables have been routed and they're awaiting install. I took a short break and worked on the wiring harness. Notice I did the video bypass trick by grounding the 'mute' and 'parking brake' wires. You also have to move the mute wire to a different pin on the harness. The tutorial is found here: http://avic411.com/wiki/index.php/Hand_Brake_Bypass
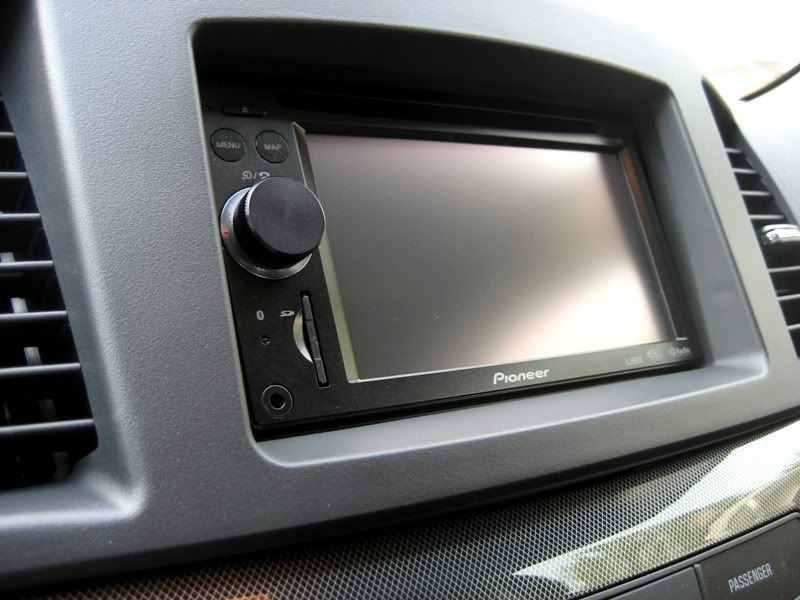
I then went ahead and put the stock brackets onto the AVIC, plugged everything in, screwed the radio in place, and put the Scosche dash kit on. It looks great!

Fitment:
Here's the GPS and XM antennas on the rear window deck. They're coming through the child restraint door. (I removed it)

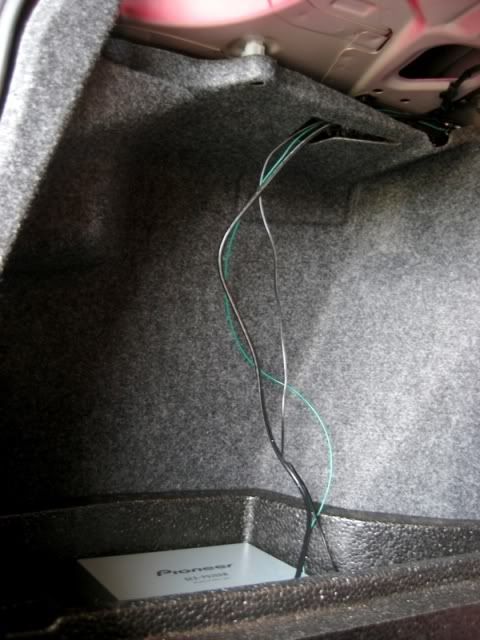
Put the trunk all back together and put some wire loom on the wires coming from the XM unit.
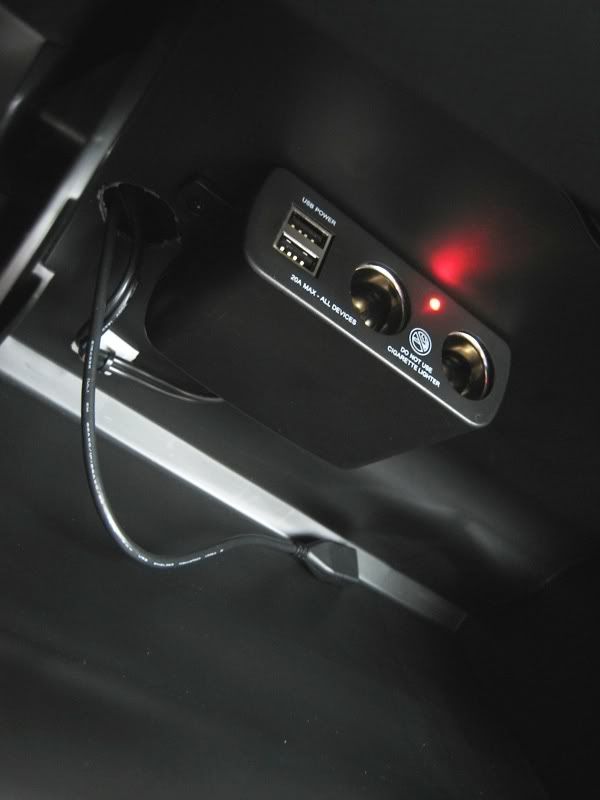
And in case anyone missed it, here's my glove box mod, which enables USB power for connecting a 2.5'' hard drive to the AVIC unit. Tutorial: https://www.evolutionm.net/forums/ev...let-power.html
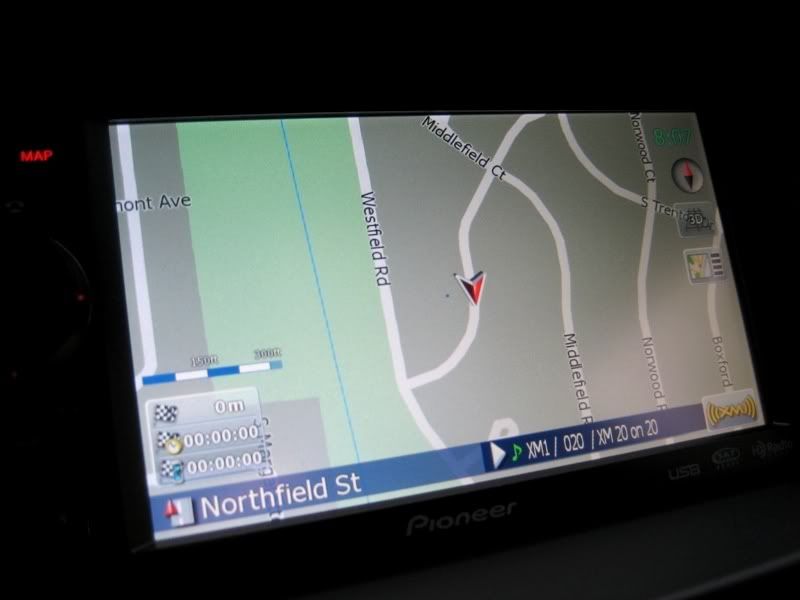
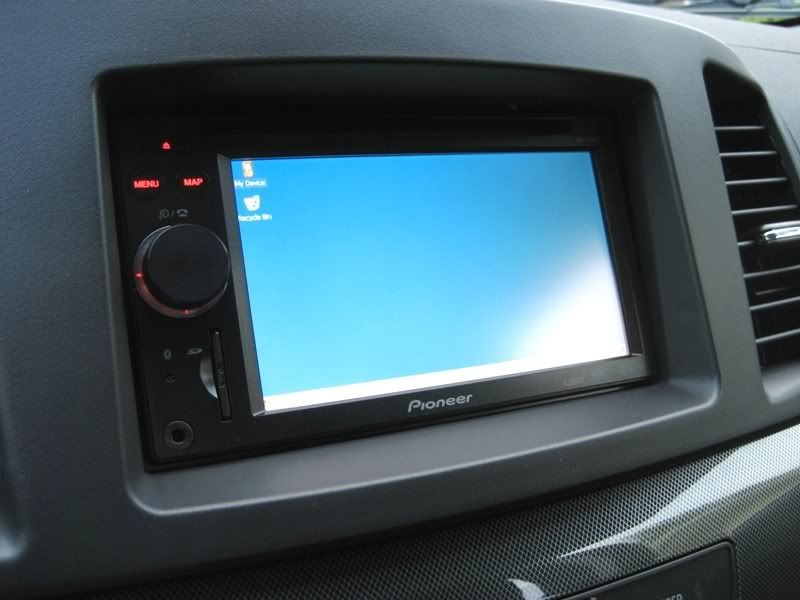
Finally, it's done! I tested for full functionality, GPS, XM, AM, FM, bluetooth...all working!
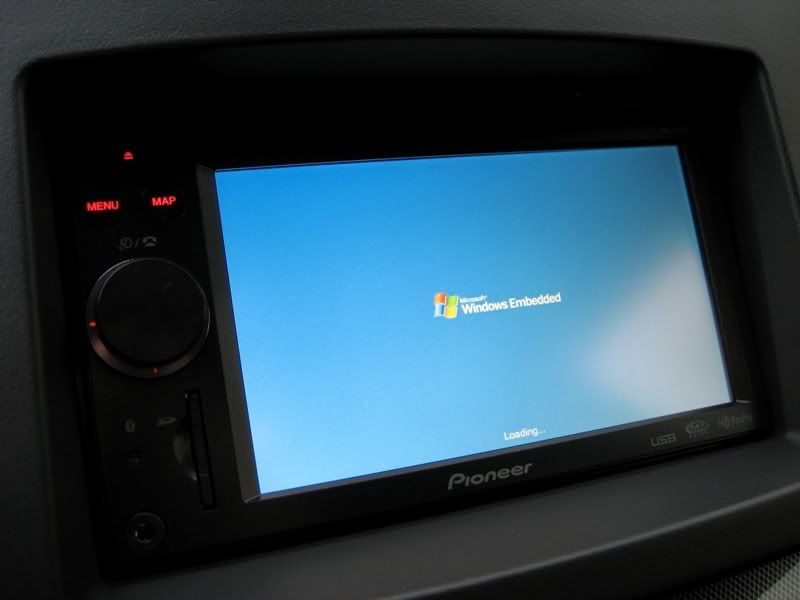
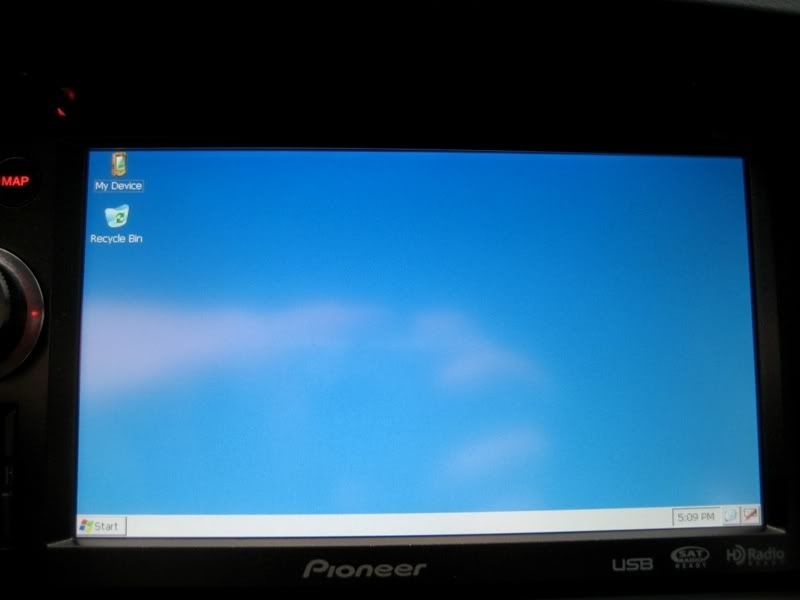
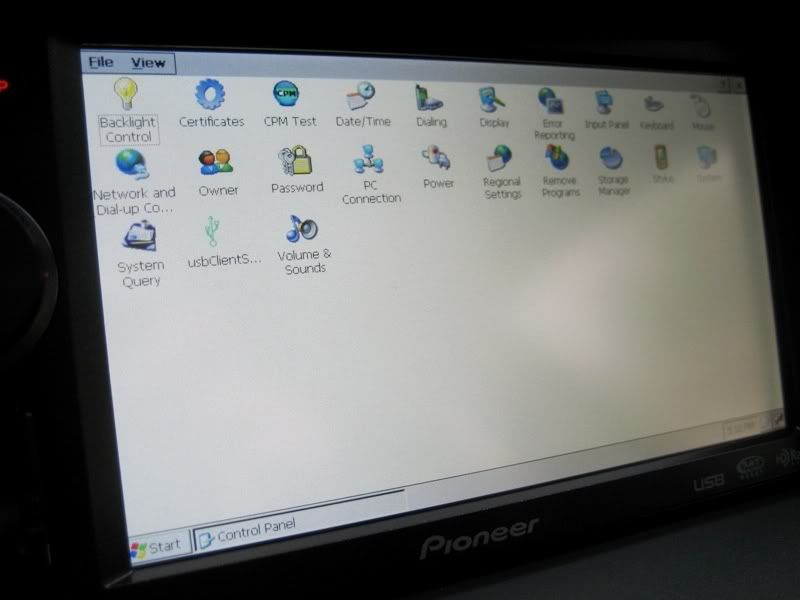
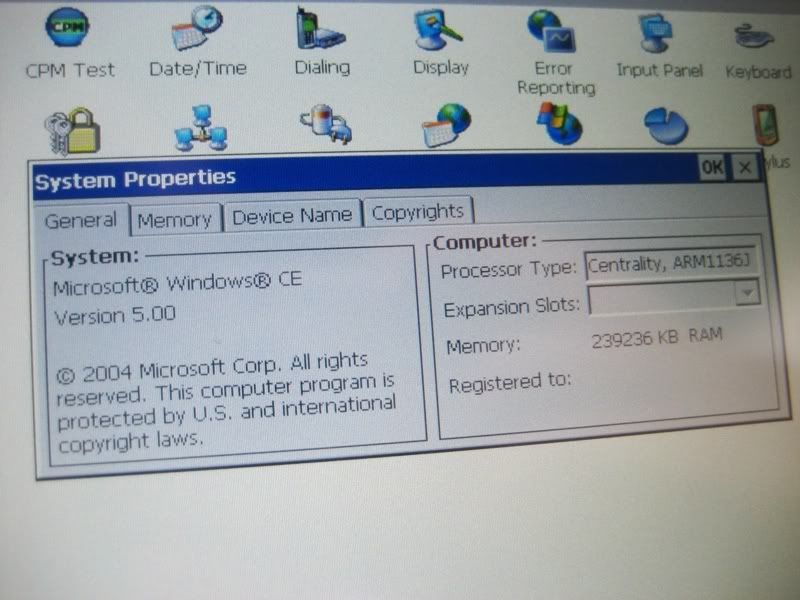
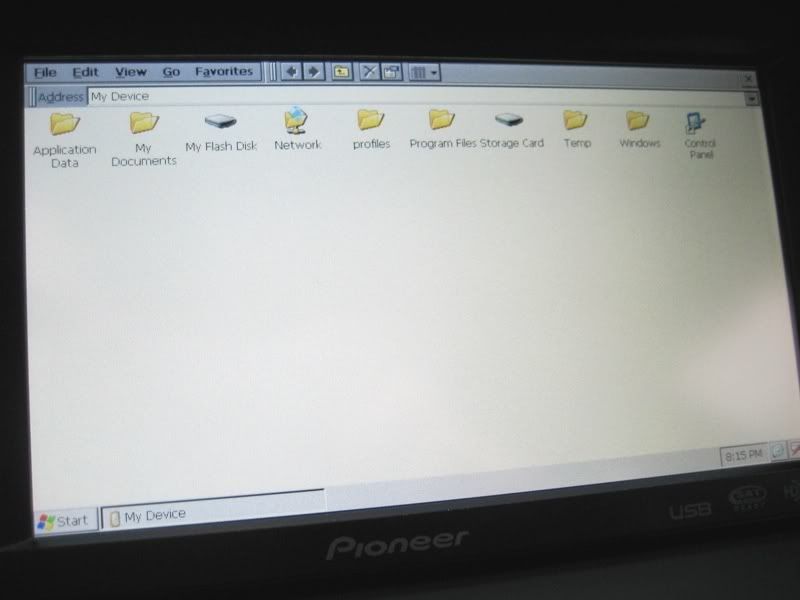
I didn't mess around much.. I threw a custom boot screen on it, put the test mode files on a SD card, then booted it into Windows mode to make some backups of the unit's files before I go about modding it. ^_^

This thread could double as a rough tutorial for you guys. It gives a good explanation of where everything needs to go.
Parts:
- Pioneer AVIC F700BT
- Pioneer GEX-P920XM
- Scosche Dash Kit
- 2008+ Mitsubishi Radio Harness
I started in the trunk with installing the XM box to get that out of the way. I found the perfect place for it.
Used velcro to hold it in place...
Then I ran the power and ground over to the battery. The antenna will go straight up on the rear window deck inside. You'll see a picture of that later.
The IP-bus cable for the XM unit has to be routed to the front of the car. I removed the back seat bottom to make routing the cable easy, as well as removing the floor trim pieces. Now you have access to the whole cable run tray. The little holders just snap open and closed, so it makes cable routing super easy.
From there, the cable gets routed behind the glove box and into the radio area to be plugged in later. I also ran the GPS antenna for the AVIC at the same time to make things easy. I put that on the rear window deck next to the XM receiver.
Removed the factory radio.
Put the factory vents into the Scosche dash kit.
Then I switched gears and felt like running the microphone for the telephone and voice command. I found the perfect spot in the map lights area. It just pops out with no tools required. I routed cable through the headliner and over to the passenger side A-pilar, down behind the rubber stripping, then down behind the glove box and into the radio cavity.
Now all the cables have been routed and they're awaiting install. I took a short break and worked on the wiring harness. Notice I did the video bypass trick by grounding the 'mute' and 'parking brake' wires. You also have to move the mute wire to a different pin on the harness. The tutorial is found here: http://avic411.com/wiki/index.php/Hand_Brake_Bypass
I then went ahead and put the stock brackets onto the AVIC, plugged everything in, screwed the radio in place, and put the Scosche dash kit on. It looks great!
Fitment:
Here's the GPS and XM antennas on the rear window deck. They're coming through the child restraint door. (I removed it)
Put the trunk all back together and put some wire loom on the wires coming from the XM unit.
And in case anyone missed it, here's my glove box mod, which enables USB power for connecting a 2.5'' hard drive to the AVIC unit. Tutorial: https://www.evolutionm.net/forums/ev...let-power.html
Finally, it's done! I tested for full functionality, GPS, XM, AM, FM, bluetooth...all working!
I didn't mess around much.. I threw a custom boot screen on it, put the test mode files on a SD card, then booted it into Windows mode to make some backups of the unit's files before I go about modding it. ^_^
Last edited by wiretap; May 7, 2009 at 06:12 PM.
Windows is the underlying operating system of the radio. I just accessed it by putting some special boot files onto the SD card and turning the radio on. In Windows, you can access the file system of the radio so you can do all sorts of mods with the AVIC software. You can change/update maps, edit skins and color schemes, install other programs, put a new front end software on it, etc.
The ports? The ones in the glove box? I put that in there so I can power a 2.5'' hard drive to play all my music/video content off of. The AVIC can support up to a 250GB drive.
The ports? The ones in the glove box? I put that in there so I can power a 2.5'' hard drive to play all my music/video content off of. The AVIC can support up to a 250GB drive.
Evolving Member
Joined: Apr 2009
Posts: 379
Likes: 0
From: Canada
Windows is the underlying operating system of the radio. I just accessed it by putting some special boot files onto the SD card and turning the radio on. In Windows, you can access the file system of the radio so you can do all sorts of mods with the AVIC software. You can change/update maps, edit skins and color schemes, install other programs, put a new front end software on it, etc.
The ports? The ones in the glove box? I put that in there so I can power a 2.5'' hard drive to play all my music/video content off of. The AVIC can support up to a 250GB drive.
The ports? The ones in the glove box? I put that in there so I can power a 2.5'' hard drive to play all my music/video content off of. The AVIC can support up to a 250GB drive.
How much did you pay for hole package?
Where did you buy it from?
nice prices and great writeup. A lot of people don't realize Windows Embedded is the underlying OS for some of these aftermarket units. This is the same team that worked on the Ford sync, and also with Fiat, and I believe some other companies. They worked the aftermarket angle while slowly moving with the automakers (it takes automakers years to fully develop solutions to ensure they have a highly reliable units in their cars.
Trending Topics


Yes, you can run the wires behind. It requires quite a bit more work though. To make them not visible, you'd have to cut out an area in the styrofoam insert, then put a matching hole on the side panel to run them through. I didn't feel like doing all that, and I think the black wire loom looks fine. It's all a matter of personal preference.


damn that looks real nice, those usb ports are connected to your headunit? can you possibly have like a movie on a usb drive and play it on your headunit? thats a sick setup