
HOW TO: Install Cone Filter

Thread Starter
Newbie
Joined: Mar 2008
Posts: 16
Likes: 0
From: Long Island NY
HOW TO: Install Cone Filter
Parts Required
- Any cone filter. I got one for $20 from my local auto store.
Tools Required
- Phillips (+) and Flathead (-) Screw Drivers
- 10mm Socket and Wrench
- Needle Nose Pliers (optional)
Recommended Number of People
- Just yourself.
Difficulty
- This is a 3 project. It is literally harder to put a vinyl sticker on.
Time to complete
- 15 min max.
Step by Step Instructions
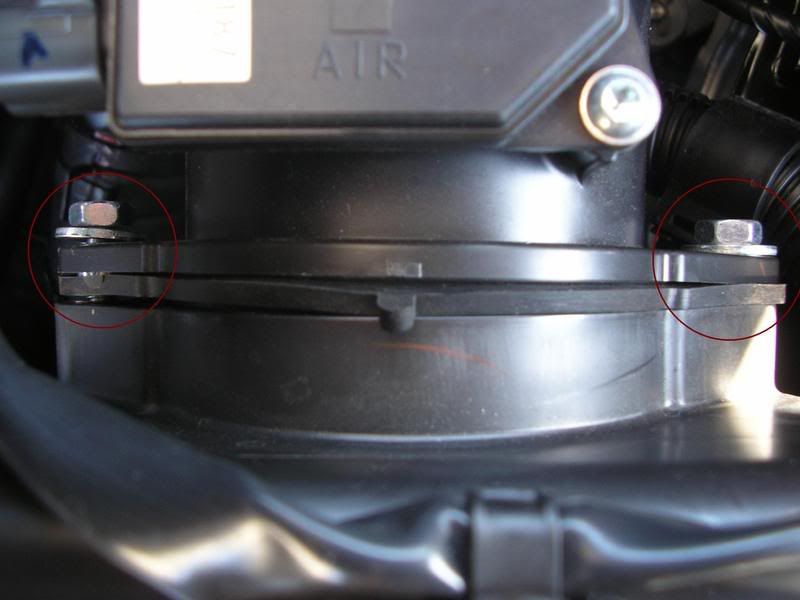
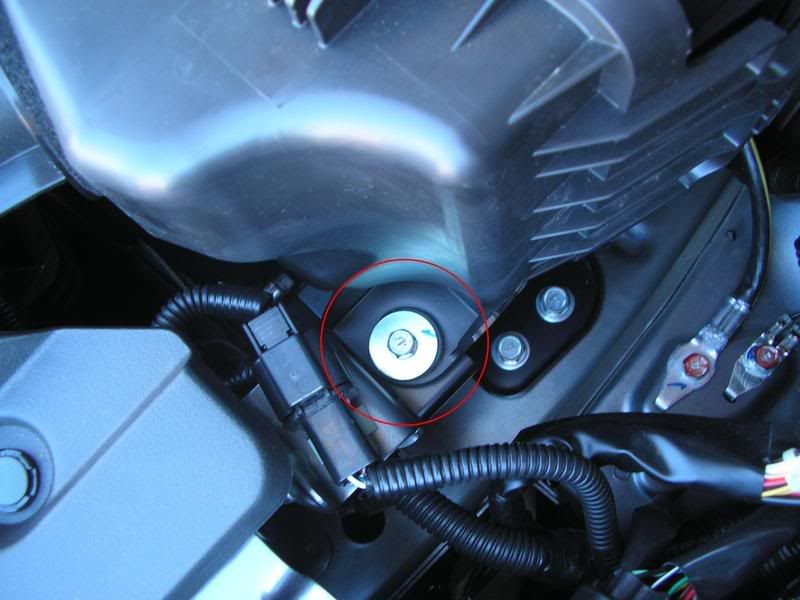
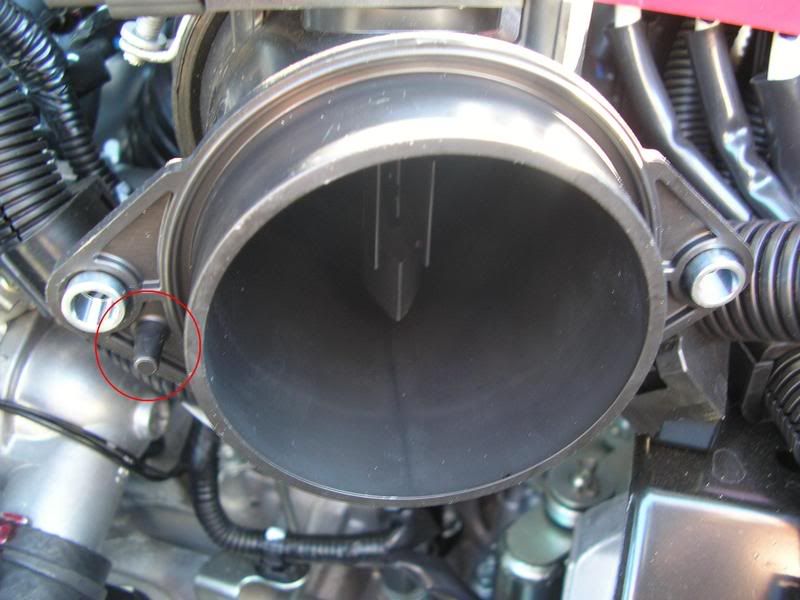
1 - Start by separating your MAF sensor and your Air Box. They are held together by 2 x 10mm bolts.

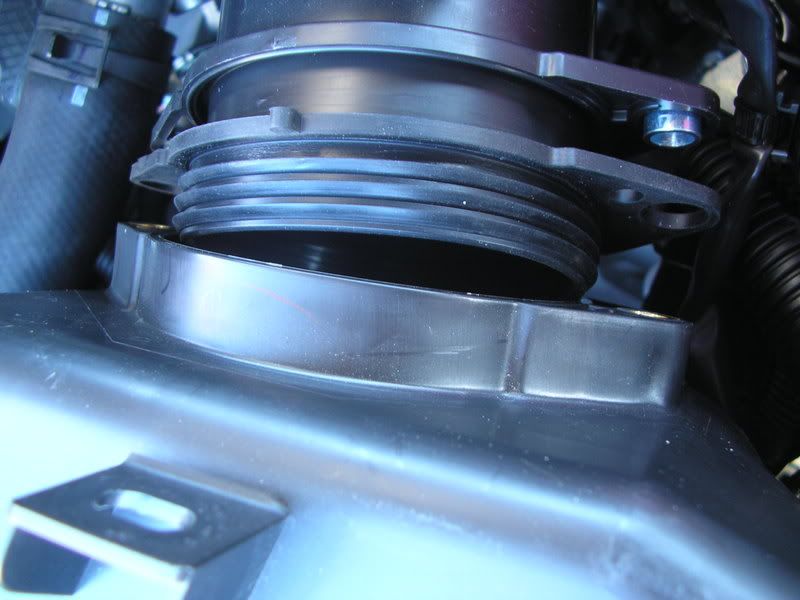
2 - There is a rubber gasket between the 2. You will not need it, but save it.
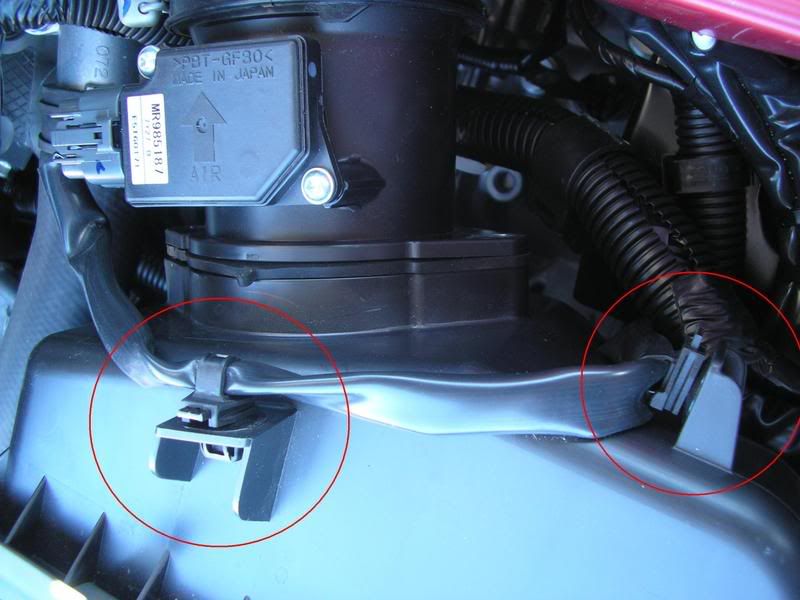
3 - Carefully push out the 2 clips holding the MAF sensor wire to the Air Box with your Needle Nose Pliers. You you can use a screw driver.
4 - Unscrew this 10mm bolt holding down your air box on the right side.
5 - Unscrew 2 x Plastic Spreader Screws (if thats what they are called) with your Phillips (+) Screw Driver.
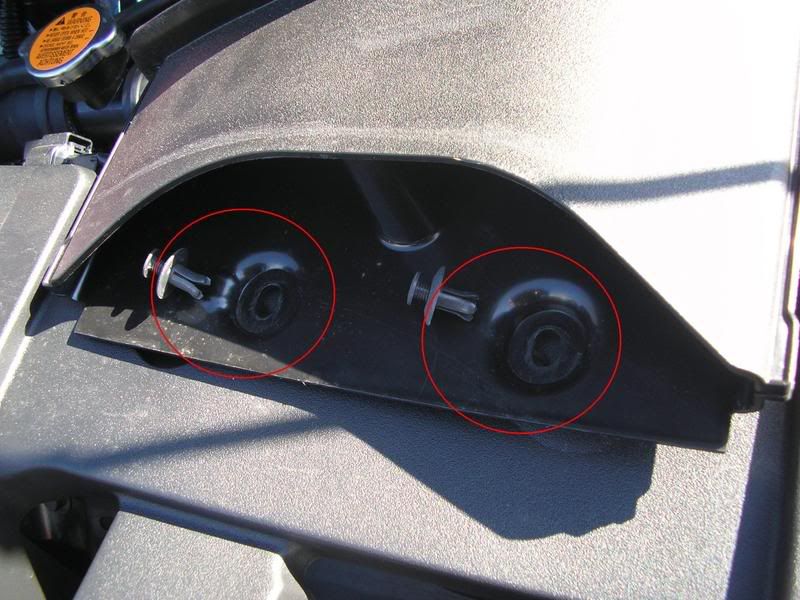
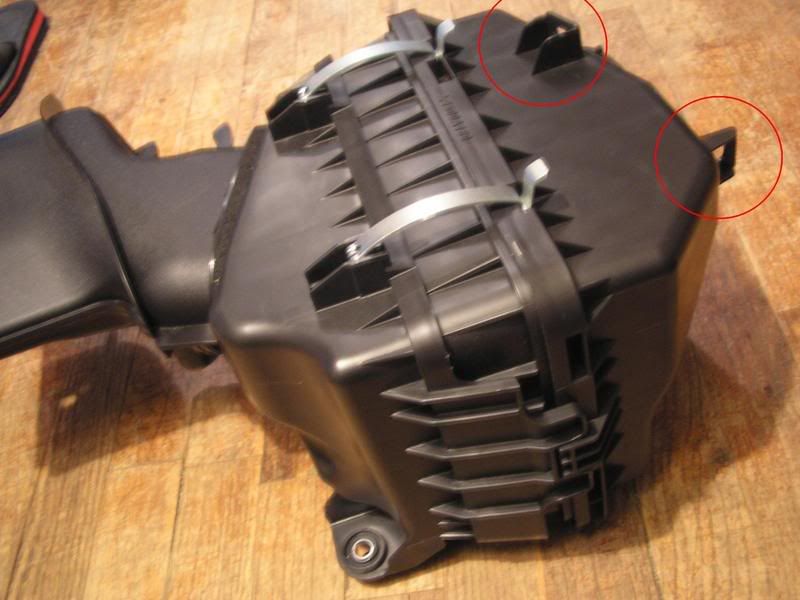
6 - Take out your air box. Screw the 2 x Plastic Spreader Screws back in, and screw in the 10mm bolt that was holding your air box in place, back into the support bracket. Take the rubber grommet and put it your stock airbox. Take out the 2 tall metal cylinder washers out of your MAF sensor and screw the bolts back into your airbox with your grommet and washers in place. You will never lose these, and you can go back to stock just as fast if you want.

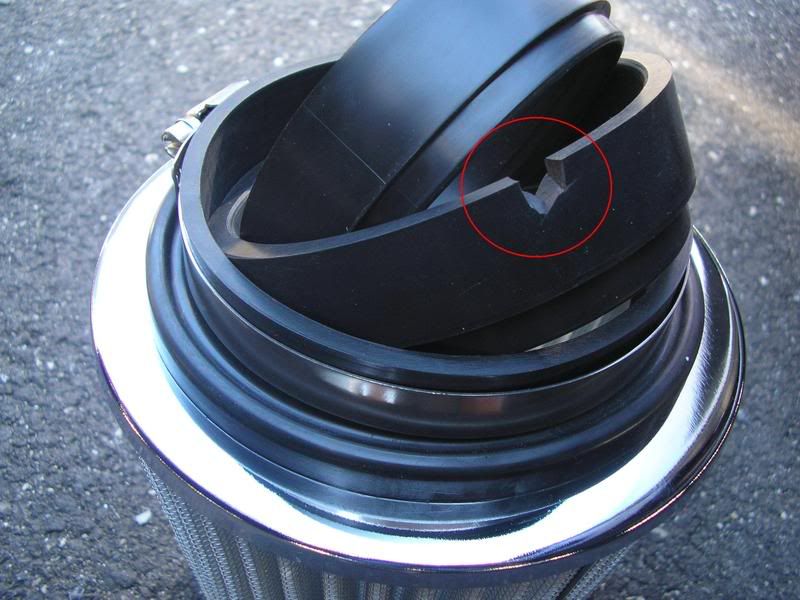
8 - I cut a small hole in the new filter coupler to make room for a little plastic pin that comes out to align the air box and gasket to the MAF sensor.
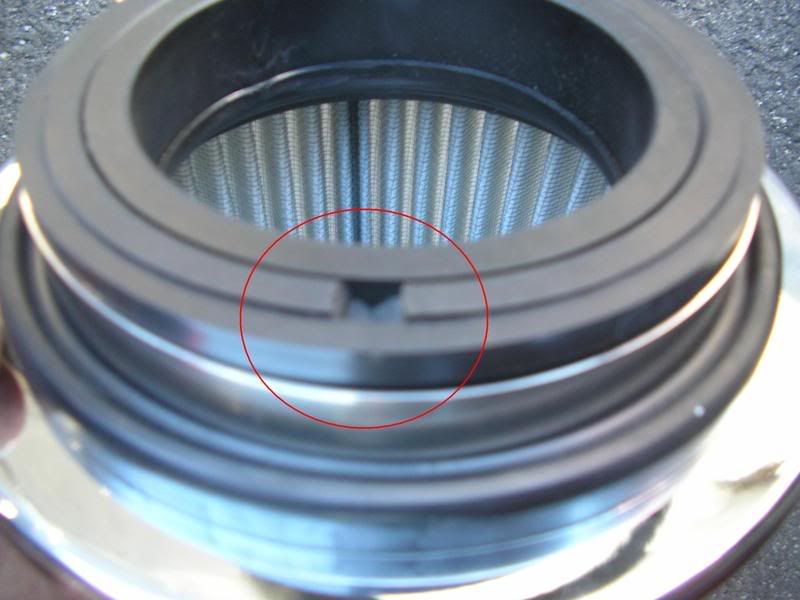
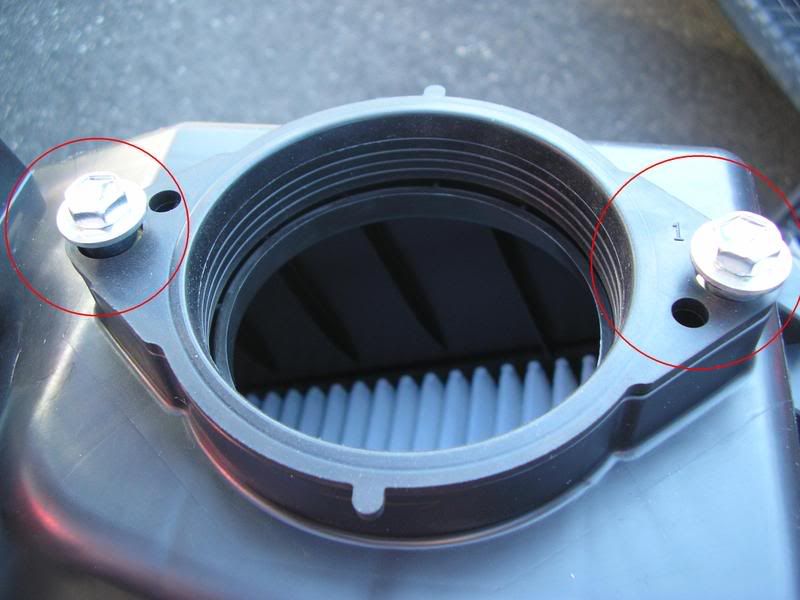
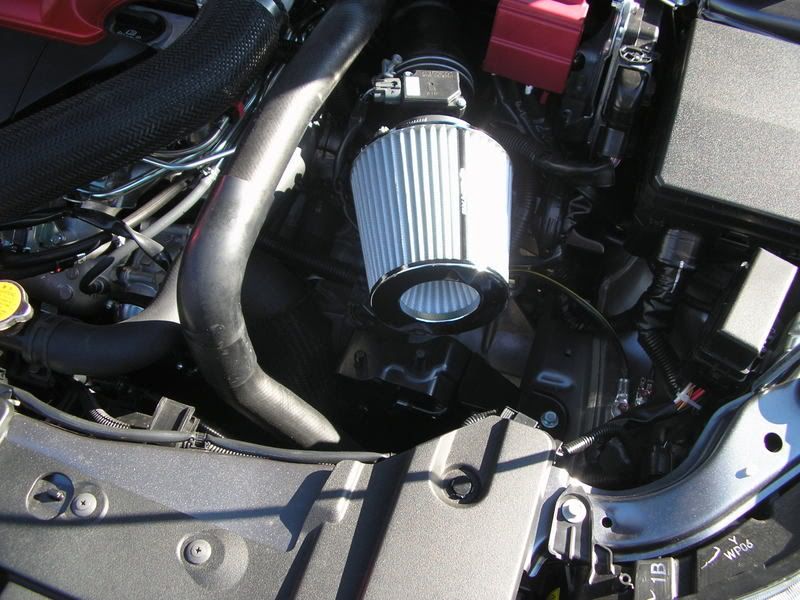
9 - Screw the filter on with the supplied (I hope) coupler and clamp. I tucked the MAF wire under the filter without a problem.
Parts Required
- Any cone filter. I got one for $20 from my local auto store.
Tools Required
- Phillips (+) and Flathead (-) Screw Drivers
- 10mm Socket and Wrench
- Needle Nose Pliers (optional)
Recommended Number of People
- Just yourself.
Difficulty
- This is a 3 project. It is literally harder to put a vinyl sticker on.
Time to complete
- 15 min max.
Step by Step Instructions
1 - Start by separating your MAF sensor and your Air Box. They are held together by 2 x 10mm bolts.
2 - There is a rubber gasket between the 2. You will not need it, but save it.
3 - Carefully push out the 2 clips holding the MAF sensor wire to the Air Box with your Needle Nose Pliers. You you can use a screw driver.
4 - Unscrew this 10mm bolt holding down your air box on the right side.
5 - Unscrew 2 x Plastic Spreader Screws (if thats what they are called) with your Phillips (+) Screw Driver.
6 - Take out your air box. Screw the 2 x Plastic Spreader Screws back in, and screw in the 10mm bolt that was holding your air box in place, back into the support bracket. Take the rubber grommet and put it your stock airbox. Take out the 2 tall metal cylinder washers out of your MAF sensor and screw the bolts back into your airbox with your grommet and washers in place. You will never lose these, and you can go back to stock just as fast if you want.
8 - I cut a small hole in the new filter coupler to make room for a little plastic pin that comes out to align the air box and gasket to the MAF sensor.
9 - Screw the filter on with the supplied (I hope) coupler and clamp. I tucked the MAF wire under the filter without a problem.
Thread Starter
Newbie
Joined: Mar 2008
Posts: 16
Likes: 0
From: Long Island NY

Thread Starter
Newbie
Joined: Mar 2008
Posts: 16
Likes: 0
From: Long Island NY
The flow of air still gets to the filter the way its positioned. With a little plastic wall to partially enclose the filter from the engine, it doesn't suck up all that hot air. Look at the new intakes that cost over $300 for it. That's all it is, 1/2 a wall and a cone filter.

Evolving Member
Joined: Mar 2008
Posts: 219
Likes: 0
From: Forest Park,IL
but you have to understand there's not that much heat in that area as the previous EVO's reason being is that the turbo is now at the firewall not near the radiator so yes you'll still get some IC and radiator heatsoak but it will not be as bad as turbo heatsoak like the other evo becuase it's nowhere near the Turbo.
Trending Topics
Evolved Member
Joined: Mar 2008
Posts: 972
Likes: 0
From: Mid-West IL
I wonder if the HP gains would be the same on this set up as a after market intake from like AMS or anyone else...what you guys think? The video sounds badazz and my car is choking! I need to do something quick.

Evolving Member
Joined: Feb 2005
Posts: 165
Likes: 0
From: VEGAS!
Great Vid! Nice music  I really didn't think (sound wise) it would make that big a difference...now THAT is how an Evo is supposed to sound! BTW, how come you didn't leave the stock air scoop connected?
I really didn't think (sound wise) it would make that big a difference...now THAT is how an Evo is supposed to sound! BTW, how come you didn't leave the stock air scoop connected?
Evolved Member
Joined: Mar 2008
Posts: 972
Likes: 0
From: Mid-West IL
Well, finished this install and I can't believe an intake filter alone can change the sound so much. I am still unsure about the butt dyno though. Sometimes it seems like it could be more powerful and sometimes it just feels like the same thing.
Evolving Member
Joined: Mar 2008
Posts: 219
Likes: 0
From: Forest Park,IL

