
Kungfu's Turbo install guide (compilation)

Thread Starter
Evolved Member
iTrader: (4)
Joined: Jan 2007
Posts: 1,457
Likes: 0
From: Socal~ The Valley (818) <3
Kungfu's Turbo install guide (compilation)
Well, after struggling because I fail at mechanics on so many levels, I decided to take some time and give you guys some helpful hints on how to install an RRM turbo. So that being said i assume no liability if YOU mess your car or your self up using this guide, it is just a reference. 
First I would like to say this is for an RRM non intercooled turbo using the Jpipe/header combo. This means there is no turbo manifold, but rather we adapt our header with a pipe in the shape of a J to route the exhaust through the turbine.
Let me start the install guide by saying two things.
1. If you are installing this kit and you are not CONFIDENT in your skills as a mechanic, do not attempt this on your own. Take it to a professional and it will cost you less in the long run.
2. So you set aside 2 days for this install? Great, now arrange a car for a week to trouble shoot and actually install the thing. It will take you longer than you think.
First things first make sure you have two jackstands that can hold 2 tons just to be safe. These can be had at pep boys or your local auto store for 25-40$ depending on brand You will also need:
full ratchet set
high heat RTV
variety of screw drivers
teflon tape
mechanics gloves
drill
assorted bits and tap set
assorted gaskets.
Let's get this show on the road.
1. Install your FMU:
Materials needed:
Vacuum Tee's: 1
1/4 inch fuel line (can be had at pep boys, cut to length- about 3 feet to be safe)
4 Fuel line clamps, get some nice shiny ones that screw tight not just pinch.
4 zip ties: small ones, for vacuum line work.
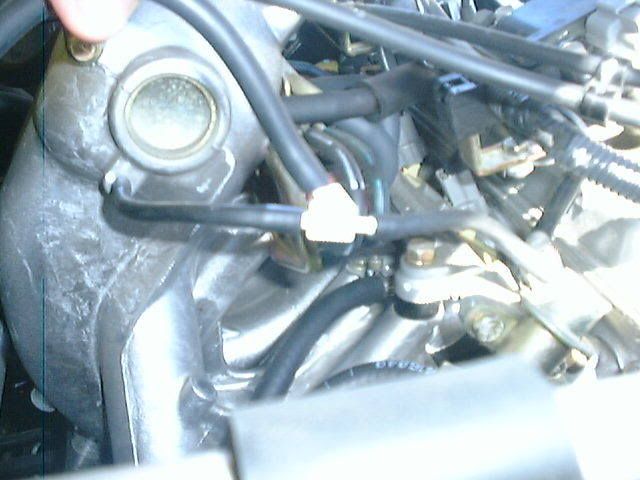
This is my install location, I have a 4g93 manifold so my location will likely not work for you as the plenum design is different. But this will give you an idea of where we are working.
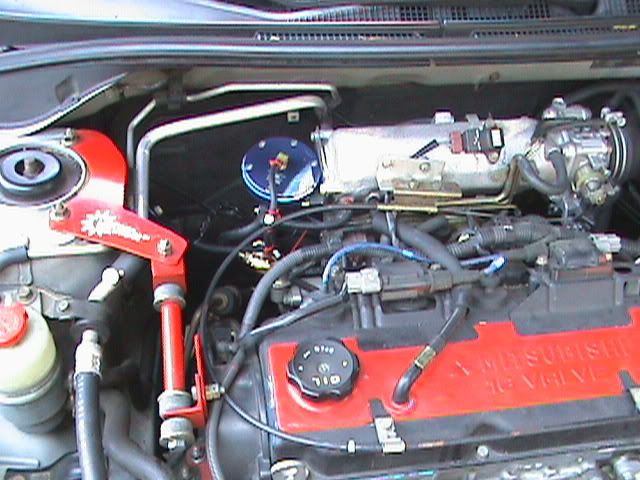
I am borrowing images here so i don't waste everyones time. Credit to ALVB.
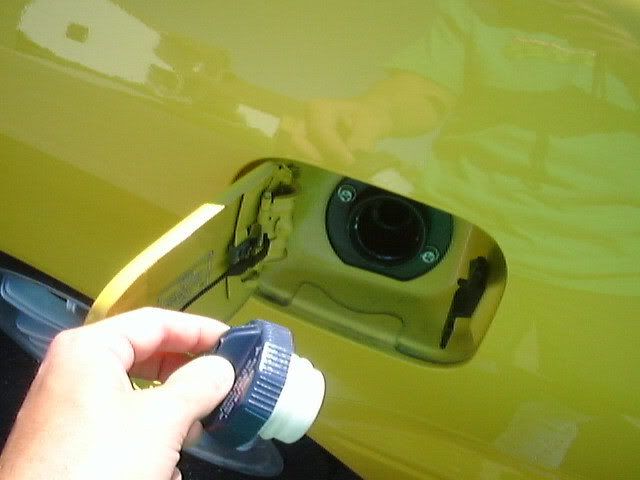
First remove your gas cap. This relieves pressure. I'll give you a pic for my entertainment.
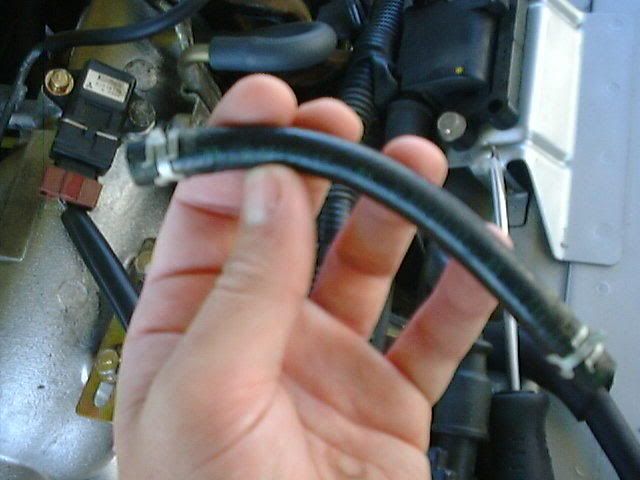
Next take a look at the connections:
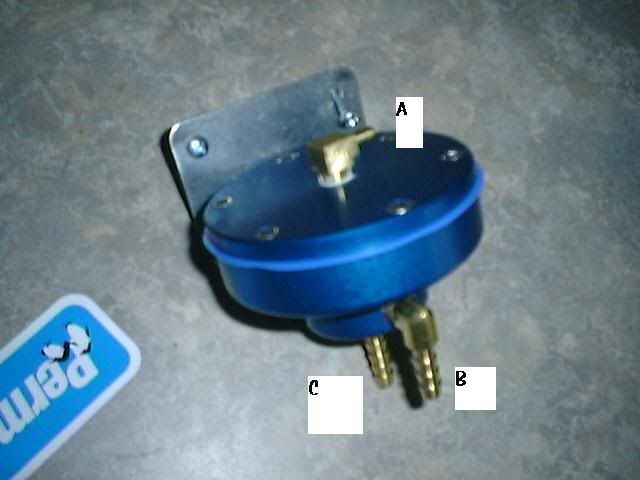
Match em up! of course the top line is the line for the vacuum.
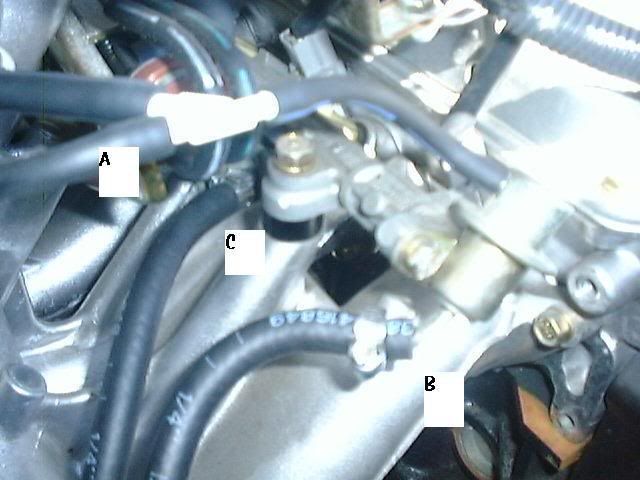
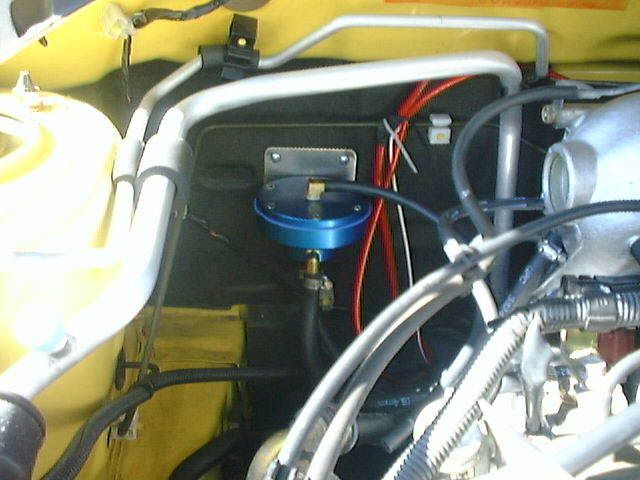
Here is a pic of how the vacuum is tee'd to provide for boost sensing! The line that is going out of the picture goes to the top of the FMU. Make sure to zip tie around each point of connection. 1 around each end of the tee and one to secure it to the stock fuel pressure unit and manifold barb.
Here is a pic of a location to frill into the firewall to place
You will replace all fuel line so just put the stock ones in a nice safe place (trash ) and move on
If all goes well you have installed your FMU. close the gas cap and start her up. She will act the exact same way as before as this device only changes pressure if boost is present.
2. Fuel pump install:
Lets make this simple. This is Rhyzins guide to a gsx fuel pump install. Follow this with your pump and all will be well. Be careful with the bolts on top. They are a bish.
This covers the fuel portion of the instructions
Now jack your car up and make sure its high enough so that the front is high enough to clear your body and have room for your arms to move under the car freely.
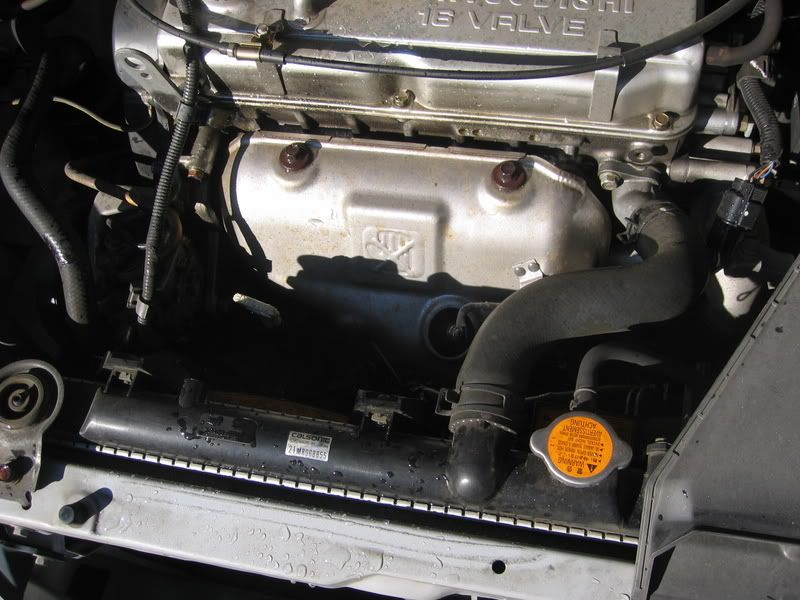
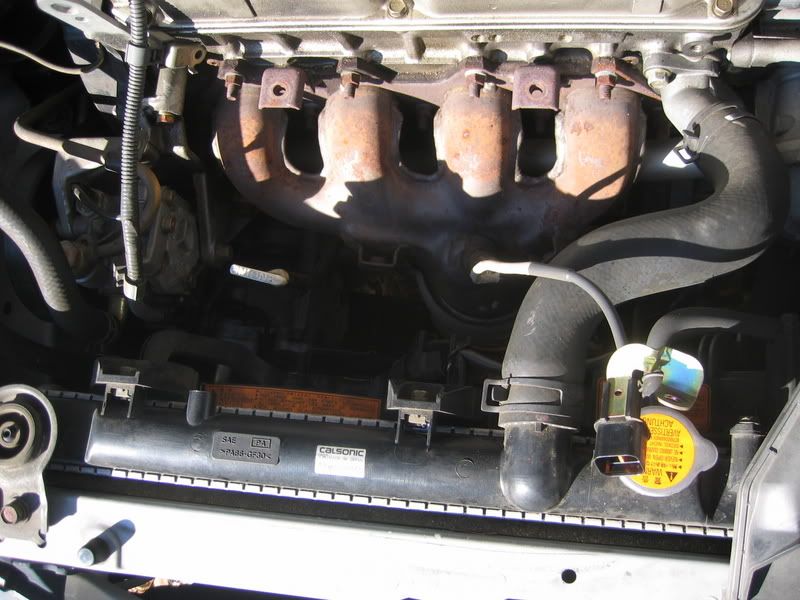
3. Remove your radiator:
1. Drain that bish. First make sure your car is cold. Remove the top radiator cap to relieve pressure. The drain is located on the passenger side on the bottom black portion. It is located above an underside panel so remove to better access under your car. Grab a bucket and let her pour out!
2. Remove the two radiator support brackets. Below it is the ricerific red thing in the bottom left corner. Just remove the bolts and lift out the bracket, it should come right off.
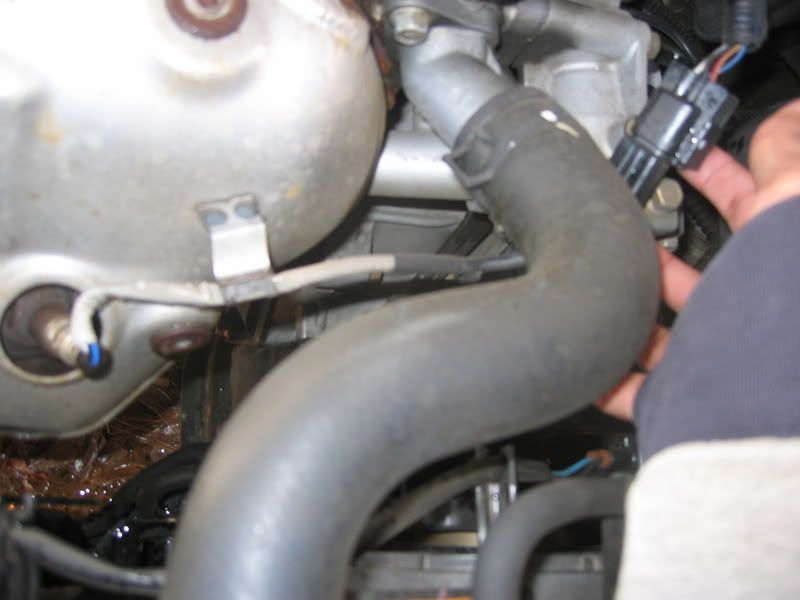
3. Remove the upper hose from the radiator by compressing the bracket and sliding it off the barb.
4. Remove the lower radiator hose from the radiator by applying the same method as above.
5. Remove fan assembly by loosening bolts off the inside top of your radiator (this can be done before or after removal of actual radiator. Remove wiring harness to your control module located on the driver side fan at the minimum to prevent resistance.
6. (conditional) If you have auto, you have two tranny lines running to the radiator at the bottom.. ( not sure about manual) just undo the brackets and slide off the hose.
7. Pull that lady up out of there and also pull up on your reservoir tank to have it all come together. ( if found this easier as i had coolant everywhere from removing the hoses.
8. set the radiator in a safe place. Make sure you don't get rough with it. It is a POS as i learned.
9. Admire your work.
4.Remove header:
Credit to greenbandit!
So now your header is off and you can either use it with the turbo install, or (recommended) toss it aside in favor of a new rrm header.
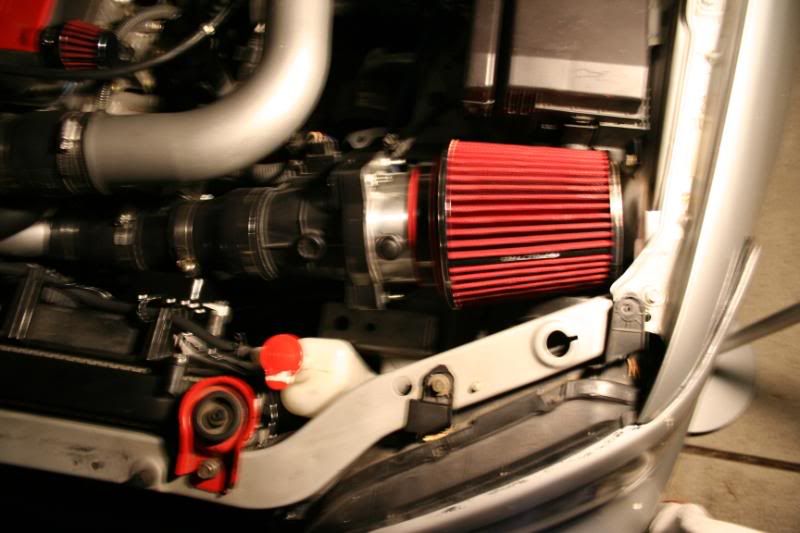
5. Remove intake piping you have on vehicle
How do i say this? Just remove whatever you had on there before. If u need a guide for this.. Stop reading and take your car to a mechanic/ junk yard.
Take your mas out so you can assemble you piping in your comfy house/abode. Please make sure to set it in a safe place.
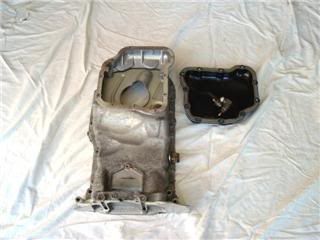
6. Remove your oil pan. THIS IS THE FUN PART.
1. Crawl under your car and drain your oil. The plug is on the black part under your car. This is known as the lower oil pan. The upper pan is silver and spans from your filter to your tranny.
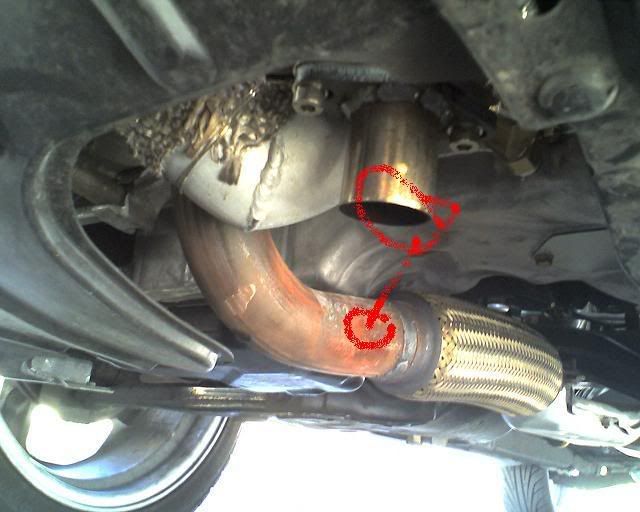
2. Once oil is completely drained, remove your stock downpipe so that it is out of the way.
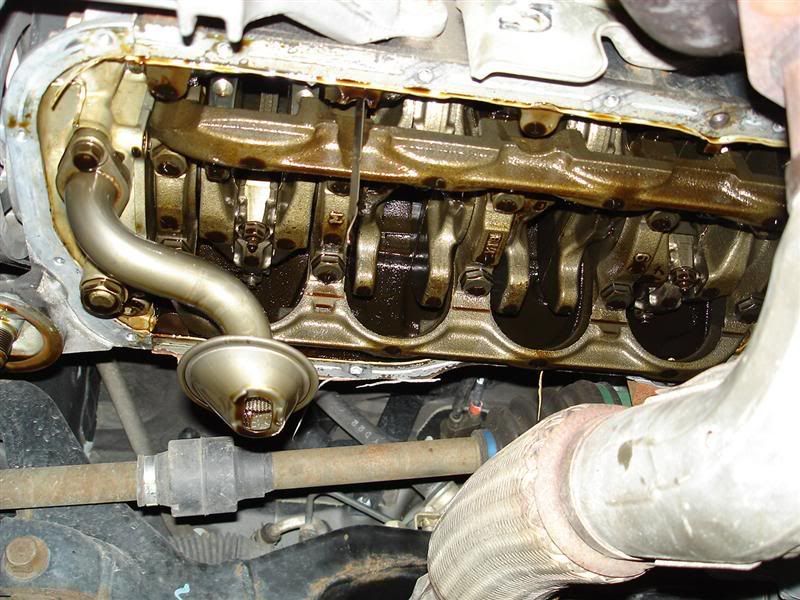
3. You need 10 mm ratchet set and a 10mm tiny box wrench. Begin to remove bolts thats are all the way around the pan. They are a variety of sizes. make sure to label em! use the box wrench around the area above the black pan near the oil filter as they are dificult to reach.
4. Now that all the bolts are removed. take a look at towards the front of the pan near your tranny, there is a slot you can stick a large flathead screwdriver in and pop the seal off.
Now you gotta tap teh pan.
7. Tapp'n teh pan
1. Do you have a 1/2 inch to 5.8 hose barb? YAY. So did I. Order this tap so you can tap that sumbish.
http://www.harborfreight.com/cpi/cta...emnumber=91395
This will thread the hole once you drill it.
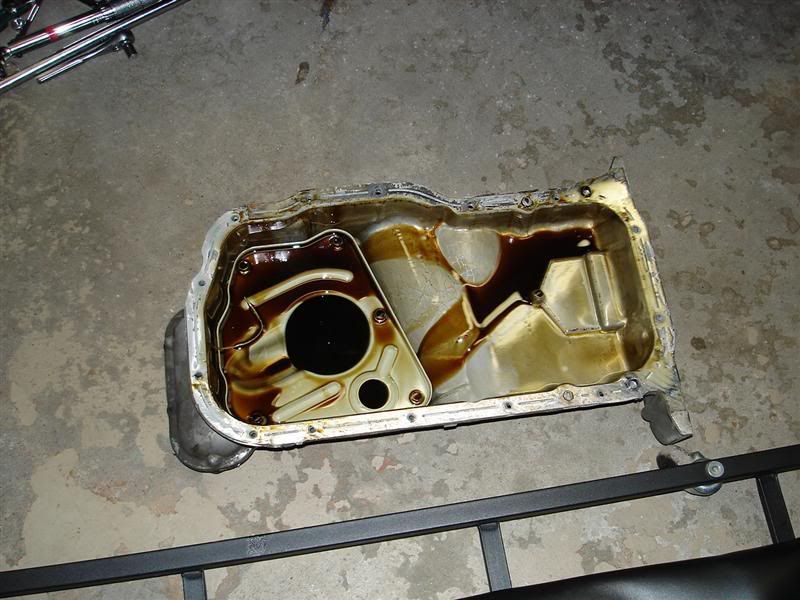
2. Get a 3/4 drill bit. Drill that sumbish in the proper area. THIS IS THE AREA DON'T TRY TO BE A HERO AND TRY SOMETHING DIFFERENT. Your turbo hates backpressure on oil supply.
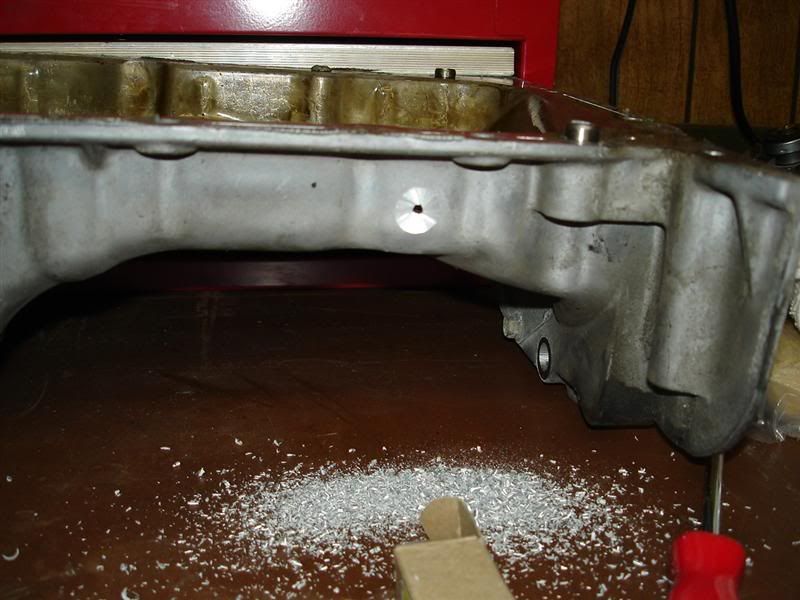
3. once you have your hole, take your tap and slide it onto the hole making sure it is straight on and not crooked. Then take a wrench and use it to turn the square top on the tap, while you are doing this make sure to hold the tap steady. It is a good idea to lube it up with some oil also to make it sexy. Then slowly turn it in till you reach an even thread on the tap and not the beginning which is tapered to start the tap. Now reverse the motion to extract it. Clean it all off and insert your fitting! It should screw in, and be tight (we hope)
4. clean all shavings VERY VERY thoroughly. Make sure NONE are left.
4.5. Mix up some JB weld and goo around your fitting which is now secured. This will prevent leaks.
5. Scrape the edge with a razor to make sure it will work well with new rtv. Also scrape the block under the car and clean it nicely, making sure not to get anything inside the car that could harm it.
6. RTV the hell out of the top of the oil pan. Make sure it is around all bolts and in every area with mad presence.
7. Reinstall pan. place it straight up onto the block push hard and then screw in the bolts to secure it. make sure it's tight but don't go crazy, you don't wanna snap a bolt like me...
7. Oil feed line install.
This part is teh easy.
1. Reach above your oil filter, there is a 8mm hex bolt, be a lady and remove it . It will take some pressure but good times!
2. Get a fitting that goes from the 4 -an braided steel line, and screw it in using teflon tape on every intersection. Bring the line up and run it so it does not hit your belts etc.
3. Place a plastic bag around the top of it for later. Maker sure the side with the 45 degree bend is on the top end that will connect to the turbo. The fitting you get needs to be a 45 degree one.
A good place: http://www.ormebrothers.com/ They can get you line, custom length and fittings.
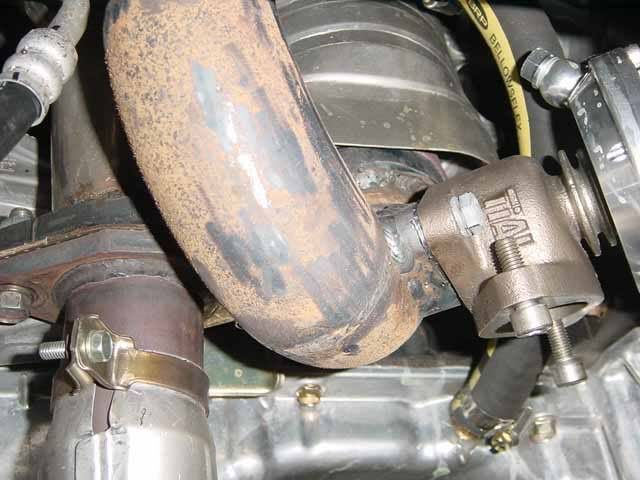
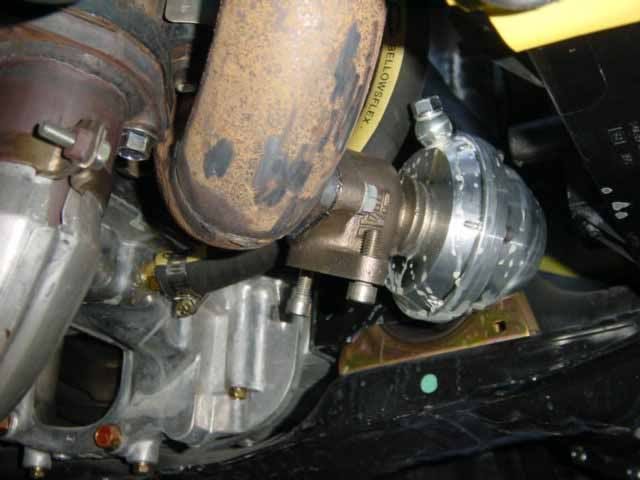
8. Assemble turbo/ header/ dumppipe/ jpipe/ wastegate
Here i was testing it out.
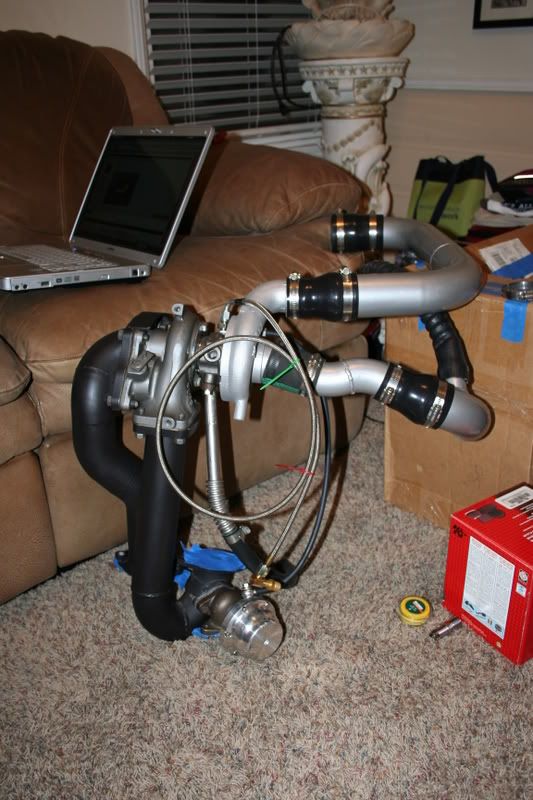
This should be simple. Put all that shizzle together, make sure you have good gaskets, especially on you wastegate. I recommend http://www.roadraceengineering.com/f...andgaskets.htm. Get some extra you won't hate me later for that. Make sure to get a new gasket from mitsu for the oil return line. use some rtv on both sides and make sure it is VERY tight, just not so tight u break the gasket. Also make sure to get extras of the oil return gasket. Just call and ask your dealer for the "95 turbo eclipse turbo return gasket." They will give you what you need. Make sure to run vacuum from turbo to wastegate barb that is on the side of the mushroom and not the top.
9. Install The full assembly, simply the reverse of taking out header. Now that ur radiator is out. To bend dip stick, get a big socket, and a socket extension. Grab the stick and pull it out, set it aside. Now place the socket over the tube and push it aside hard and steady. Don't jolt it or it might break.
Put together Your piping and put it on vehicle. this will cary from vehicle to vehicle and which type of kit you have. If you have questions PM me or a guru for help.
Install piping.
First I would like to say this is for an RRM non intercooled turbo using the Jpipe/header combo. This means there is no turbo manifold, but rather we adapt our header with a pipe in the shape of a J to route the exhaust through the turbine.
Let me start the install guide by saying two things.
1. If you are installing this kit and you are not CONFIDENT in your skills as a mechanic, do not attempt this on your own. Take it to a professional and it will cost you less in the long run.
2. So you set aside 2 days for this install? Great, now arrange a car for a week to trouble shoot and actually install the thing. It will take you longer than you think.
First things first make sure you have two jackstands that can hold 2 tons just to be safe. These can be had at pep boys or your local auto store for 25-40$ depending on brand You will also need:
full ratchet set
high heat RTV
variety of screw drivers
teflon tape
mechanics gloves
drill
assorted bits and tap set
assorted gaskets.
Let's get this show on the road.
1. Install your FMU:
Materials needed:
Vacuum Tee's: 1
1/4 inch fuel line (can be had at pep boys, cut to length- about 3 feet to be safe)
4 Fuel line clamps, get some nice shiny ones that screw tight not just pinch.
4 zip ties: small ones, for vacuum line work.
This is my install location, I have a 4g93 manifold so my location will likely not work for you as the plenum design is different. But this will give you an idea of where we are working.
I am borrowing images here so i don't waste everyones time. Credit to ALVB.
First remove your gas cap. This relieves pressure. I'll give you a pic for my entertainment.
Next take a look at the connections:
Match em up! of course the top line is the line for the vacuum.
Here is a pic of how the vacuum is tee'd to provide for boost sensing! The line that is going out of the picture goes to the top of the FMU. Make sure to zip tie around each point of connection. 1 around each end of the tee and one to secure it to the stock fuel pressure unit and manifold barb.
Here is a pic of a location to frill into the firewall to place
You will replace all fuel line so just put the stock ones in a nice safe place (trash
) and move onIf all goes well you have installed your FMU. close the gas cap and start her up. She will act the exact same way as before as this device only changes pressure if boost is present.
2. Fuel pump install:
Lets make this simple. This is Rhyzins guide to a gsx fuel pump install. Follow this with your pump and all will be well. Be careful with the bolts on top. They are a bish.
HOW TO: '96 Eclipse GSX Fuel Pump Swap

(GSX Pump on the right)
What you'll need:
phillips screwdriver
flathead screwdriver or a knife
8mm open end wrench
Your gas tank to about 1/4 full or less. Mine was empty
---Step 1 (Getting the rear seat off):

Near the middle of each outer seat, you can feel around for where the rear seats attach to the car. Near where they are connected, just yank them out. The seats are clipped in and seem to be sturdy enough to not need to be so gentle.
---Step 2 (Getting the tank cover off):

Use the phillips screwdriver to take out the 4 screws holding the black access panel to the fuel pump.
---Step 3 (Bleeding the system):

Remove the wiring harness to the fuel pump. There is a tab opposite to where the wires enter. Push it while pulling the harness out. With the wiring harness disconnected, start the car and let it die. I only did it once. Take off your gas cap.
---Step 4 (Disconnecting the lines):

The fuel line to the rail is the one with the black harness. The hose with the clamp is the return line. Place a rag under both lines. First take out the line with the black harness. When you move it to the side, you now have room to move the clamp off the return hose and room to tug at it a bit. When tugging at the return line, you can push into it a little before pulling it. This kind of breaks a seal from when it was being clamped. Be careful though because this is all still just plastic.
Step 5 (Taking out the pump):

Remove the outside nuts with the 8mm open end wrench. You kind of have to get at the inside nuts at an angle.
You have to be careful as you might strip the nuts getting at them at an angle. The nuts are actually not torqued down very hard at all.
*Take note as to how much they were torqued down.

You should now just unplug the gray wiring harness from the pump. Push down on the small square while pulling out with your fingernail. Well thats how i did it. Also remove the black wire that clips onto the side of the assembly.
Twist the pump out as you pull on it. It should come out with a few twists and tugs. The only thing on the pump output shaft is a plastic spacer. I didn't use it. A wiring harness should still be attached. Push down on the tab of the wiring harness and pull it out.

(pic taken from vfaq.com)
I'm not sure but i took this step because of the clearance problem of the tank. The fuel filter from the lancer pump should be taken off and put on the GSX pump. Use the flathead or a knife to take off the circle metal clamp thingy. Keep at least one of them intact so you can put it on the new pump.
So with the wiring harness and fuel filter from the lancer brought over to the GSX pump, connect it all into the fuel pump assembly. take the bottom rubber piece from the lancer assembly and use it instead of the thicker GSX piece. Drop the whole assembly back into the tank.
* The assembly is going to stick out a little as if it doesn't fit. Fuggedaboutit! When tightening the nuts back on, it will seal. Since there is no spacer on the outlet shaft of the fuel pump and the bottom rubber piece is in fact rubber, it all squishes down and fits.
Step 6 (Put it all back together):
Installation is the reverse of removal. Note that one of the bolts on the tank has a red mark, as well as the metal plate that holds the fuel pump assembly down. The plate and plastic fuel pump assembly only go in one way so line up the red marks. Make sure you don't torque down those nuts hard as you may strip the threads or the nuts themselves. Probably a weak 5-6 lb's of torque(I don't know exactly). Really weak, but enough for a good seal.
Before putting the black access panel back, take a ride around the block that maybe involves swishing the gas in the tank. When you get back, check for leaks. If no leaks, no worries. Enjoy.
(GSX Pump on the right)
What you'll need:
phillips screwdriver
flathead screwdriver or a knife
8mm open end wrench
Your gas tank to about 1/4 full or less. Mine was empty
---Step 1 (Getting the rear seat off):
Near the middle of each outer seat, you can feel around for where the rear seats attach to the car. Near where they are connected, just yank them out. The seats are clipped in and seem to be sturdy enough to not need to be so gentle.
---Step 2 (Getting the tank cover off):
Use the phillips screwdriver to take out the 4 screws holding the black access panel to the fuel pump.
---Step 3 (Bleeding the system):
Remove the wiring harness to the fuel pump. There is a tab opposite to where the wires enter. Push it while pulling the harness out. With the wiring harness disconnected, start the car and let it die. I only did it once. Take off your gas cap.
---Step 4 (Disconnecting the lines):
The fuel line to the rail is the one with the black harness. The hose with the clamp is the return line. Place a rag under both lines. First take out the line with the black harness. When you move it to the side, you now have room to move the clamp off the return hose and room to tug at it a bit. When tugging at the return line, you can push into it a little before pulling it. This kind of breaks a seal from when it was being clamped. Be careful though because this is all still just plastic.
Step 5 (Taking out the pump):
Remove the outside nuts with the 8mm open end wrench. You kind of have to get at the inside nuts at an angle.
You have to be careful as you might strip the nuts getting at them at an angle. The nuts are actually not torqued down very hard at all.
*Take note as to how much they were torqued down.
You should now just unplug the gray wiring harness from the pump. Push down on the small square while pulling out with your fingernail. Well thats how i did it. Also remove the black wire that clips onto the side of the assembly.
Twist the pump out as you pull on it. It should come out with a few twists and tugs. The only thing on the pump output shaft is a plastic spacer. I didn't use it. A wiring harness should still be attached. Push down on the tab of the wiring harness and pull it out.
(pic taken from vfaq.com)
I'm not sure but i took this step because of the clearance problem of the tank. The fuel filter from the lancer pump should be taken off and put on the GSX pump. Use the flathead or a knife to take off the circle metal clamp thingy. Keep at least one of them intact so you can put it on the new pump.
So with the wiring harness and fuel filter from the lancer brought over to the GSX pump, connect it all into the fuel pump assembly. take the bottom rubber piece from the lancer assembly and use it instead of the thicker GSX piece. Drop the whole assembly back into the tank.
* The assembly is going to stick out a little as if it doesn't fit. Fuggedaboutit! When tightening the nuts back on, it will seal. Since there is no spacer on the outlet shaft of the fuel pump and the bottom rubber piece is in fact rubber, it all squishes down and fits.
Step 6 (Put it all back together):
Installation is the reverse of removal. Note that one of the bolts on the tank has a red mark, as well as the metal plate that holds the fuel pump assembly down. The plate and plastic fuel pump assembly only go in one way so line up the red marks. Make sure you don't torque down those nuts hard as you may strip the threads or the nuts themselves. Probably a weak 5-6 lb's of torque(I don't know exactly). Really weak, but enough for a good seal.
Before putting the black access panel back, take a ride around the block that maybe involves swishing the gas in the tank. When you get back, check for leaks. If no leaks, no worries. Enjoy.
Now jack your car up and make sure its high enough so that the front is high enough to clear your body and have room for your arms to move under the car freely.
3. Remove your radiator:
1. Drain that bish. First make sure your car is cold. Remove the top radiator cap to relieve pressure. The drain is located on the passenger side on the bottom black portion. It is located above an underside panel so remove to better access under your car. Grab a bucket and let her pour out!
2. Remove the two radiator support brackets. Below it is the ricerific red thing in the bottom left corner. Just remove the bolts and lift out the bracket, it should come right off.
3. Remove the upper hose from the radiator by compressing the bracket and sliding it off the barb.
4. Remove the lower radiator hose from the radiator by applying the same method as above.
5. Remove fan assembly by loosening bolts off the inside top of your radiator (this can be done before or after removal of actual radiator. Remove wiring harness to your control module located on the driver side fan at the minimum to prevent resistance.
6. (conditional) If you have auto, you have two tranny lines running to the radiator at the bottom.. ( not sure about manual) just undo the brackets and slide off the hose.
7. Pull that lady up out of there and also pull up on your reservoir tank to have it all come together. ( if found this easier as i had coolant everywhere from removing the hoses.
8. set the radiator in a safe place. Make sure you don't get rough with it. It is a POS as i learned.
9. Admire your work.
4.Remove header:
Credit to greenbandit!
Tools: Of course your gonna need tools. You going to be looking at, at least 1 socket wrench (I used 3) I would use two to have some versatility (A Medium and Large) 10, 12, 14 and 19 mm sockets, the extenders, 14 mm or 9/16 box wrench (for the peel back) a pair of pliers, a rope (for the rope trick)
Disclaimer: I am writing this off of memory so if I get a socket wrong don’t shoot me. Now let’s start! It is not a good idea to work on hot exhaust manifolds soo let your car cool off.
 Now take you medium or large S. Wrench with extender and 12 mm socket and work on the four bolts that are holding on the heat shield.

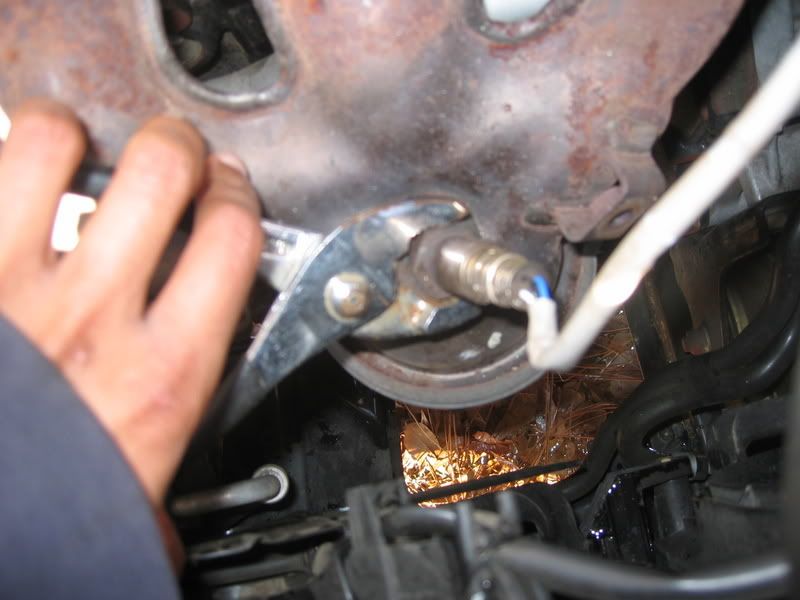
Once those are off look at the O2 sensor.
To be careful (Since O2 sensors cost money) take a 10 MM socket and unbolt it from the point near where it connects to the “snap on point” in the wire and “unsnap it”.
It should be about a foot from where your stocker mani is. Once that is unbolted take your pliers and unscrew the O2 sensor. Unscrew it out carefully; take it out, and PUT IT IN A SAFE PLACE.
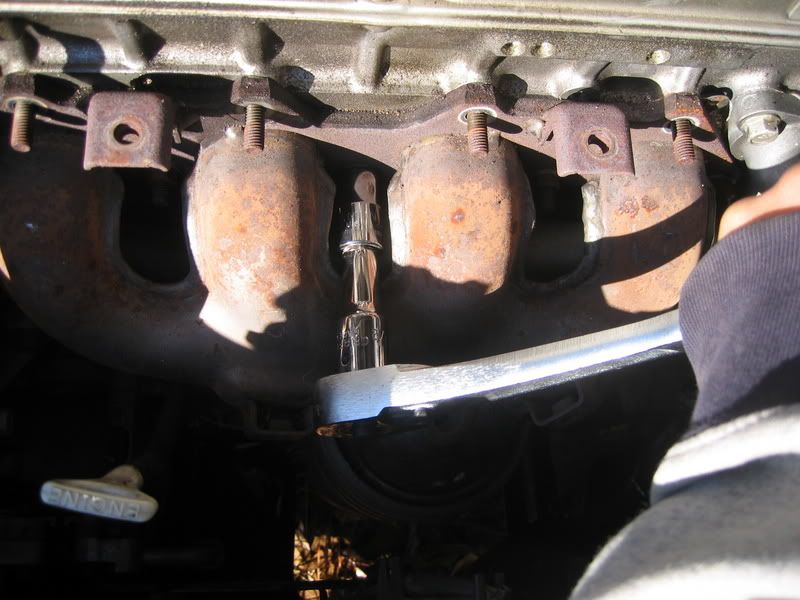
Hell, go ahead and screw them into your new header and put those up. Now take your 12 mm socket again and start working on those nuts that are holding that stocker in place.
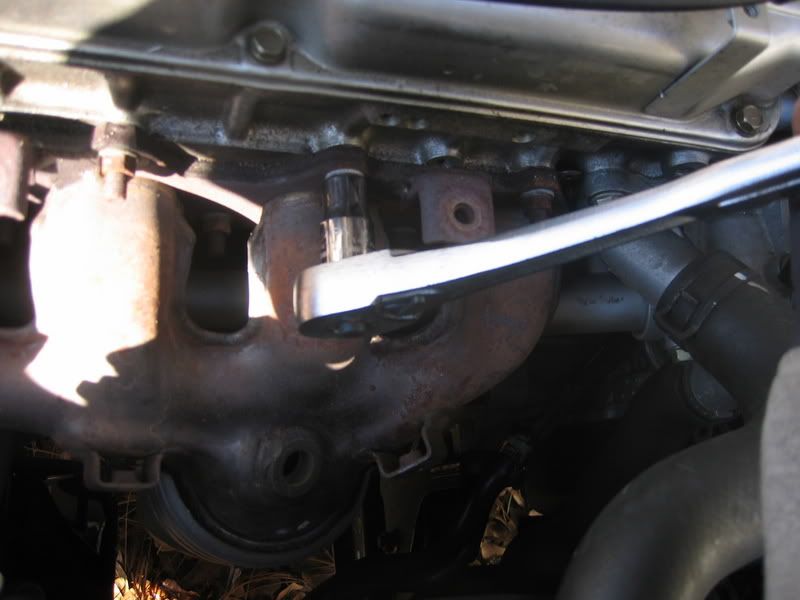
There should be 7 12 mm bolts and two 14 mm bolts with washers. Once you got off the 12 mm bolts its time to go to the 14 mm bolts. You’re going to need the extender for the one on your right but that one is still no problem.
Once that is off it is time for the “Nut from HELL”. You have two options the “rope trick” or the “peel back”. I had more luck with the “peel back” but I’ll cover both. For the “peel back” take you wrench with a 12 mm socket and go to your timing belt cover. There are four bolts that you need to get to. They should be obvious. Once you take off the cover (or move it to the side) you should see the “plate” that is blocking the nut. Take your pliers and turn it and peel it back enough as to where you can get your 14mm box wrench to it.
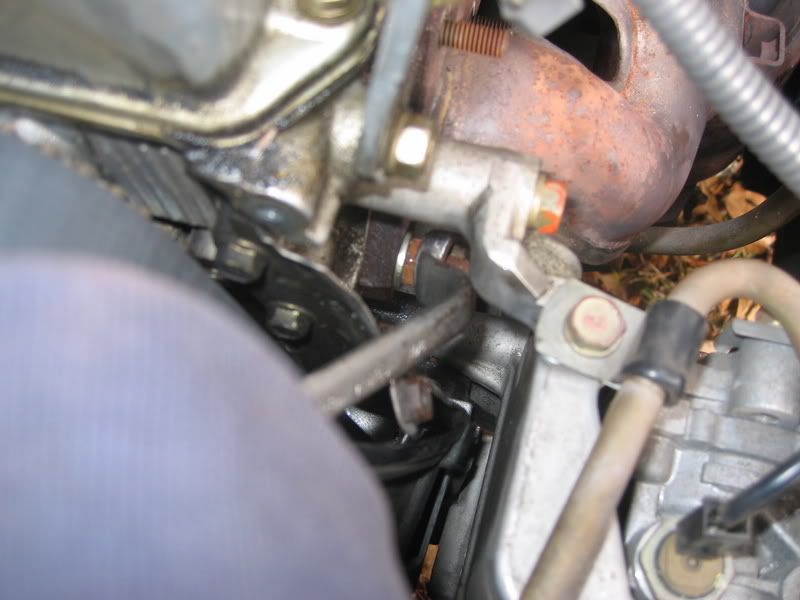
Once you got that wrench on apply that torque and break it loose. WARNING! Be careful when taking off that nut and washer near the open belt cover. If you drop something down there this install is officially over and the situation is out of your hands! To avoid this when taking those things off just reach around and carefully loosen that nut with your hands when you’re able.
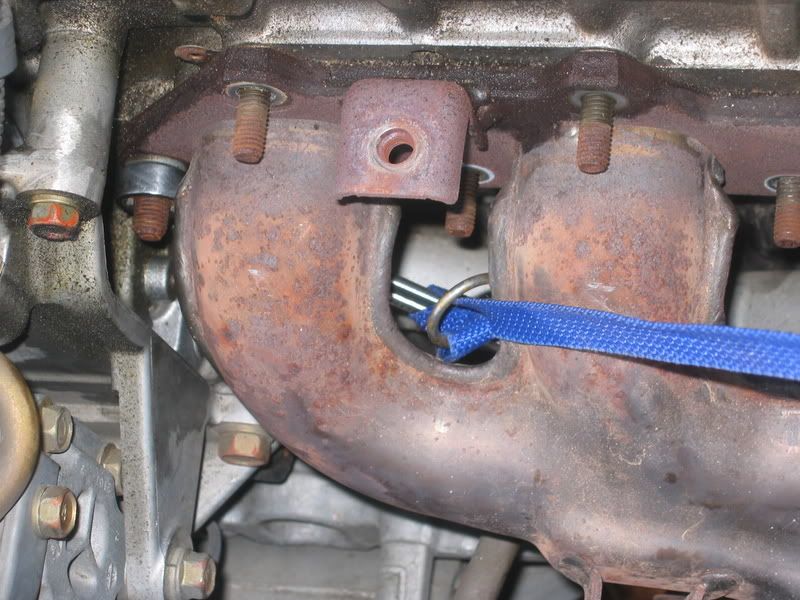
Now for the “rope trick” Umm…take your box wrench which the rope tied to it and place it on the nut as low as you can. Pull the rope trough the runners and…pull. Repeat as necessary.
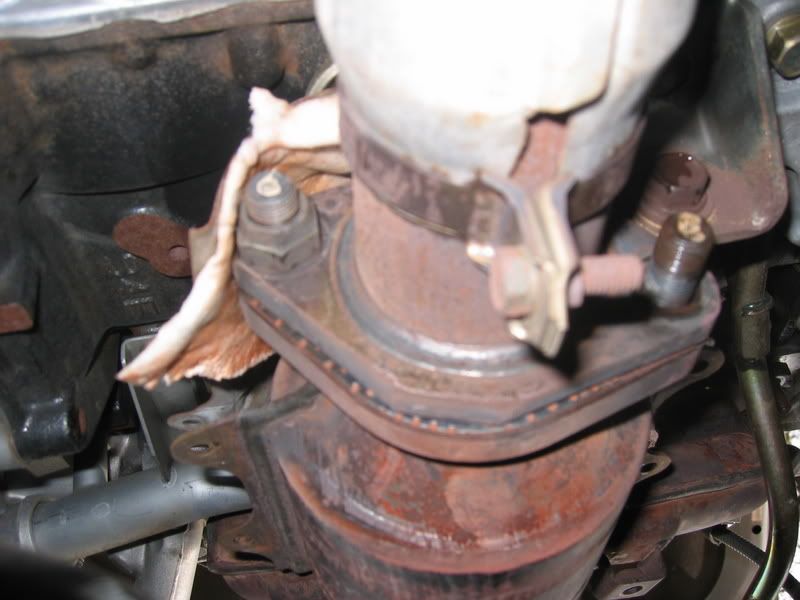
Now that the stocker mani bolts are off its time to get under the car. If you’re a big guy you might need a ramp or something but I fit and had good mobility. Look at your down pipe and loosen up those bolts with your 19 mm socket with extender.
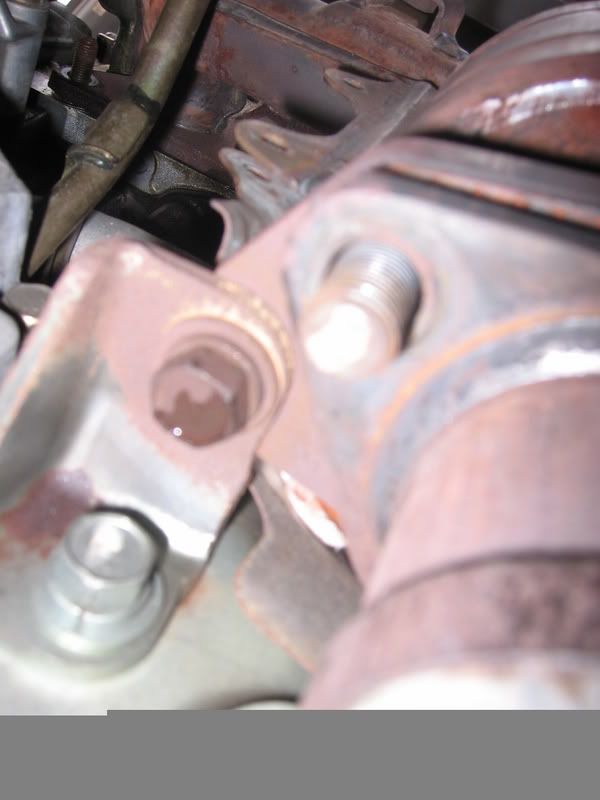
Now that these bolts are off put the 14 mm socket on the wrench of you choice and go to work on the bolt that is holding the down pipe to the block or something.
Disclaimer: I am writing this off of memory so if I get a socket wrong don’t shoot me. Now let’s start! It is not a good idea to work on hot exhaust manifolds soo let your car cool off.
Now take you medium or large S. Wrench with extender and 12 mm socket and work on the four bolts that are holding on the heat shield. Once those are off look at the O2 sensor.
To be careful (Since O2 sensors cost money) take a 10 MM socket and unbolt it from the point near where it connects to the “snap on point” in the wire and “unsnap it”.
It should be about a foot from where your stocker mani is. Once that is unbolted take your pliers and unscrew the O2 sensor. Unscrew it out carefully; take it out, and PUT IT IN A SAFE PLACE.
Hell, go ahead and screw them into your new header and put those up. Now take your 12 mm socket again and start working on those nuts that are holding that stocker in place.
There should be 7 12 mm bolts and two 14 mm bolts with washers. Once you got off the 12 mm bolts its time to go to the 14 mm bolts. You’re going to need the extender for the one on your right but that one is still no problem.
Once that is off it is time for the “Nut from HELL”. You have two options the “rope trick” or the “peel back”. I had more luck with the “peel back” but I’ll cover both. For the “peel back” take you wrench with a 12 mm socket and go to your timing belt cover. There are four bolts that you need to get to. They should be obvious. Once you take off the cover (or move it to the side) you should see the “plate” that is blocking the nut. Take your pliers and turn it and peel it back enough as to where you can get your 14mm box wrench to it.
Once you got that wrench on apply that torque and break it loose. WARNING! Be careful when taking off that nut and washer near the open belt cover. If you drop something down there this install is officially over and the situation is out of your hands! To avoid this when taking those things off just reach around and carefully loosen that nut with your hands when you’re able.
Now for the “rope trick” Umm…take your box wrench which the rope tied to it and place it on the nut as low as you can. Pull the rope trough the runners and…pull. Repeat as necessary.
Now that the stocker mani bolts are off its time to get under the car. If you’re a big guy you might need a ramp or something but I fit and had good mobility. Look at your down pipe and loosen up those bolts with your 19 mm socket with extender.
Now that these bolts are off put the 14 mm socket on the wrench of you choice and go to work on the bolt that is holding the down pipe to the block or something.
5. Remove intake piping you have on vehicle
How do i say this? Just remove whatever you had on there before. If u need a guide for this.. Stop reading and take your car to a mechanic/ junk yard.
Take your mas out so you can assemble you piping in your comfy house/abode. Please make sure to set it in a safe place.
6. Remove your oil pan. THIS IS THE FUN PART.
1. Crawl under your car and drain your oil. The plug is on the black part under your car. This is known as the lower oil pan. The upper pan is silver and spans from your filter to your tranny.
2. Once oil is completely drained, remove your stock downpipe so that it is out of the way.
3. You need 10 mm ratchet set and a 10mm tiny box wrench. Begin to remove bolts thats are all the way around the pan. They are a variety of sizes. make sure to label em! use the box wrench around the area above the black pan near the oil filter as they are dificult to reach.
4. Now that all the bolts are removed. take a look at towards the front of the pan near your tranny, there is a slot you can stick a large flathead screwdriver in and pop the seal off.
Now you gotta tap teh pan.
7. Tapp'n teh pan
1. Do you have a 1/2 inch to 5.8 hose barb? YAY. So did I. Order this tap so you can tap that sumbish.
http://www.harborfreight.com/cpi/cta...emnumber=91395
This will thread the hole once you drill it.
2. Get a 3/4 drill bit. Drill that sumbish in the proper area. THIS IS THE AREA DON'T TRY TO BE A HERO AND TRY SOMETHING DIFFERENT. Your turbo hates backpressure on oil supply.
3. once you have your hole, take your tap and slide it onto the hole making sure it is straight on and not crooked. Then take a wrench and use it to turn the square top on the tap, while you are doing this make sure to hold the tap steady. It is a good idea to lube it up with some oil also to make it sexy. Then slowly turn it in till you reach an even thread on the tap and not the beginning which is tapered to start the tap. Now reverse the motion to extract it. Clean it all off and insert your fitting! It should screw in, and be tight (we hope)
4. clean all shavings VERY VERY thoroughly. Make sure NONE are left.
4.5. Mix up some JB weld and goo around your fitting which is now secured. This will prevent leaks.
5. Scrape the edge with a razor to make sure it will work well with new rtv. Also scrape the block under the car and clean it nicely, making sure not to get anything inside the car that could harm it.
6. RTV the hell out of the top of the oil pan. Make sure it is around all bolts and in every area with mad presence.
7. Reinstall pan. place it straight up onto the block push hard and then screw in the bolts to secure it. make sure it's tight but don't go crazy, you don't wanna snap a bolt like me...
7. Oil feed line install.
This part is teh easy.
1. Reach above your oil filter, there is a 8mm hex bolt, be a lady and remove it
. It will take some pressure but good times!2. Get a fitting that goes from the 4 -an braided steel line, and screw it in using teflon tape on every intersection. Bring the line up and run it so it does not hit your belts etc.
3. Place a plastic bag around the top of it for later. Maker sure the side with the 45 degree bend is on the top end that will connect to the turbo. The fitting you get needs to be a 45 degree one.
A good place: http://www.ormebrothers.com/ They can get you line, custom length and fittings.
8. Assemble turbo/ header/ dumppipe/ jpipe/ wastegate
Here i was testing it out.
This should be simple. Put all that shizzle together, make sure you have good gaskets, especially on you wastegate. I recommend http://www.roadraceengineering.com/f...andgaskets.htm. Get some extra you won't hate me later for that. Make sure to get a new gasket from mitsu for the oil return line. use some rtv on both sides and make sure it is VERY tight, just not so tight u break the gasket. Also make sure to get extras of the oil return gasket. Just call and ask your dealer for the "95 turbo eclipse turbo return gasket." They will give you what you need. Make sure to run vacuum from turbo to wastegate barb that is on the side of the mushroom and not the top.
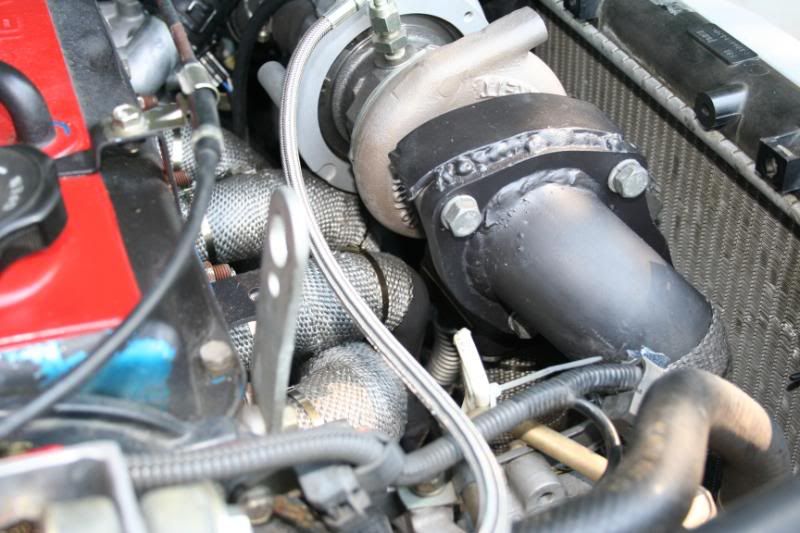
9. Install The full assembly, simply the reverse of taking out header. Now that ur radiator is out. To bend dip stick, get a big socket, and a socket extension. Grab the stick and pull it out, set it aside. Now place the socket over the tube and push it aside hard and steady. Don't jolt it or it might break.
Put together Your piping and put it on vehicle. this will cary from vehicle to vehicle and which type of kit you have. If you have questions PM me or a guru for help.
Install piping.
Last edited by kungfugirl; Nov 11, 2007 at 11:54 PM.
Thread Starter
Evolved Member
iTrader: (4)
Joined: Jan 2007
Posts: 1,457
Likes: 0
From: Socal~ The Valley (818) <3
10. Take out stock plugs, using a long extension and a 5/8 spark plug socket. Be gentle and take out ur plugs. Gap your BKr7e or the plug of your choice to .30 and install.
11. Run Return line. Now rrm says you need to get a 5/8 rubber hose. I say a braided steel one is needed because of the high heat levels of the exhaust. Buy about 12 inches, though you will likely only need about 9 or so. Cut to length, and make sure its on tight using compression fittings.
12. Tee for BOV
Tee into the same line as the fmu is tee'd into. This is simple and it has worked well for me. Run this line to the BOV and attatch. Use zip tie to secure it on barb.
Oil work Take this opportunity to place a breather filter on the crank case. This can be had in the rice section of your local auto store.
Fill the car wit non synthetic 20/50 and unplug your coilpacks from their harness.
You are close to being done. Make sure everything is straight up.
Put your car down from the jacks and crank it to prime the oil line. It may take about 5-6 times to spit out oil into the bag so be patient. I usually crank for about seconds and then wait for about thirty, then repeated. It should spit a couple teaspoons. then hook it up to the turbo and screw er on tight!
DOUBLE CHECK YOUR ****. I cannot stress this enough. Check leaks and fix em.
Reconnect coil packs.
Start engine.
YAY for you. Let it idle for a while, check everything. A little smoke is normal, as with any new part that gets hot.
Now take her out and make sure shes working ok without boost. Boost a little but not hard, NO WOT yet. Check everything again and ensure all is tight.
Go to exhaust shop and get this done.
Thats all folks, I am tired, I will update soon with a custom turbo parts list.

Also, feel free to message me with comments or criticism. I am also here to help, please if you need some advice, pm me and i can give you my contact info so i can help you through it. It can be stressful. Please no guys trying to get fresh, this isn't a sex line. I will not prime your lines for you.
11. Run Return line. Now rrm says you need to get a 5/8 rubber hose. I say a braided steel one is needed because of the high heat levels of the exhaust. Buy about 12 inches, though you will likely only need about 9 or so. Cut to length, and make sure its on tight using compression fittings.
12. Tee for BOV
Tee into the same line as the fmu is tee'd into. This is simple and it has worked well for me. Run this line to the BOV and attatch. Use zip tie to secure it on barb.
Oil work Take this opportunity to place a breather filter on the crank case. This can be had in the rice section of your local auto store.
Fill the car wit non synthetic 20/50 and unplug your coilpacks from their harness.
You are close to being done. Make sure everything is straight up.
Put your car down from the jacks and crank it to prime the oil line. It may take about 5-6 times to spit out oil into the bag so be patient. I usually crank for about seconds and then wait for about thirty, then repeated. It should spit a couple teaspoons. then hook it up to the turbo and screw er on tight!
DOUBLE CHECK YOUR ****. I cannot stress this enough. Check leaks and fix em.
Reconnect coil packs.
Start engine.
YAY for you. Let it idle for a while, check everything. A little smoke is normal, as with any new part that gets hot.
Now take her out and make sure shes working ok without boost. Boost a little but not hard, NO WOT yet. Check everything again and ensure all is tight.
Go to exhaust shop and get this done.
Thats all folks, I am tired, I will update soon with a custom turbo parts list.
Also, feel free to message me with comments or criticism. I am also here to help, please if you need some advice, pm me and i can give you my contact info so i can help you through it. It can be stressful. Please no guys trying to get fresh, this isn't a sex line. I will not prime your lines for you.
Last edited by kungfugirl; Nov 12, 2007 at 07:18 PM.


