
RRM Header: Install, Review, How To, Everything with pictures

Thread Starter
Evolved Member
iTrader: (25)
Joined: Aug 2005
Posts: 1,829
Likes: 5
From: Tallahassee, Fl
Ok, it�s my turn on the plate.  Since we need some good how to�s and reviews I made a promise to myself that everything I put on my car I am going to document and review for the sake of our Lancer community. So, here I go�
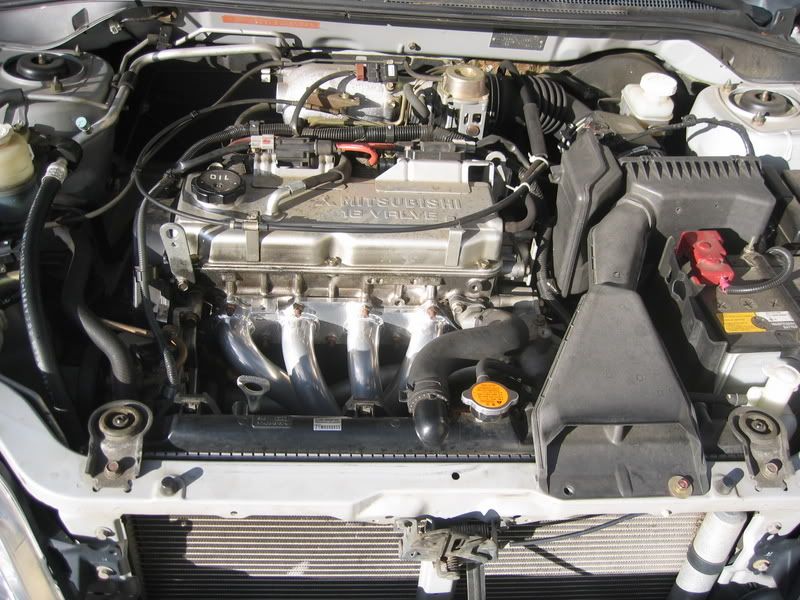
Not to long ago I just bought some RRM headers from another member for a price.
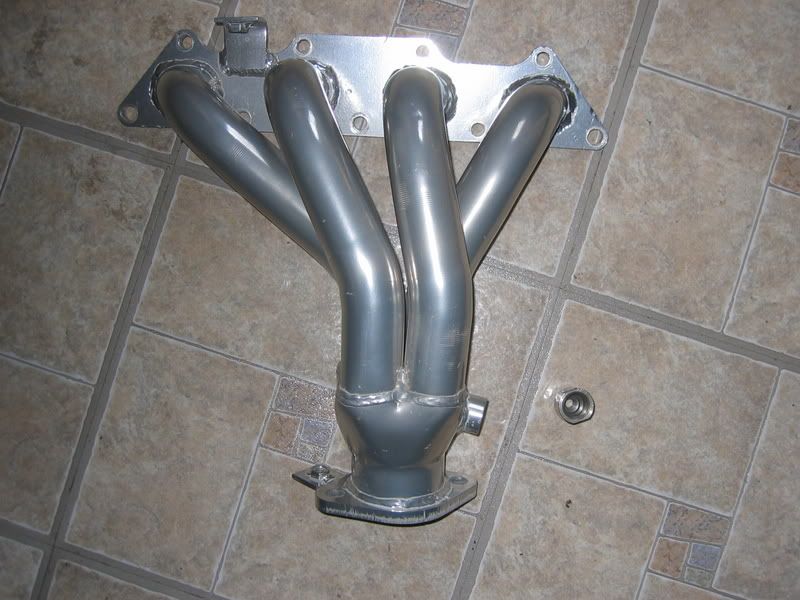
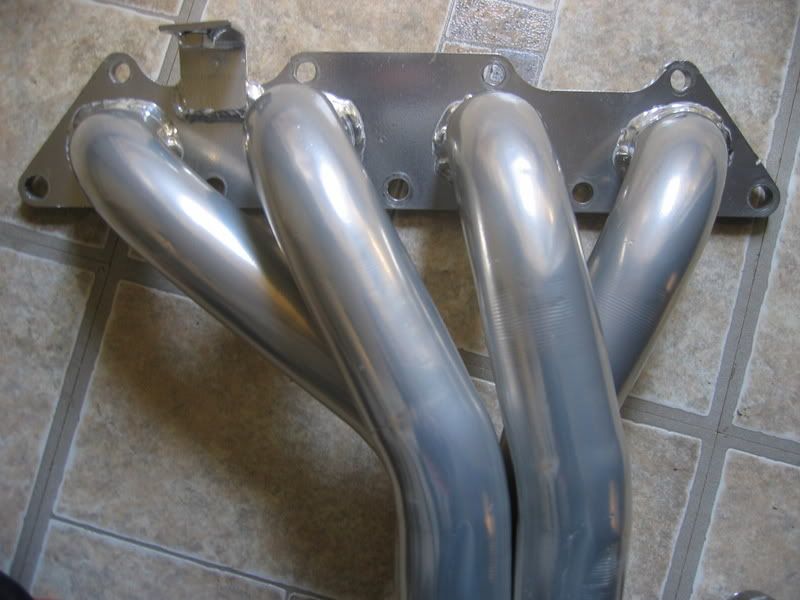
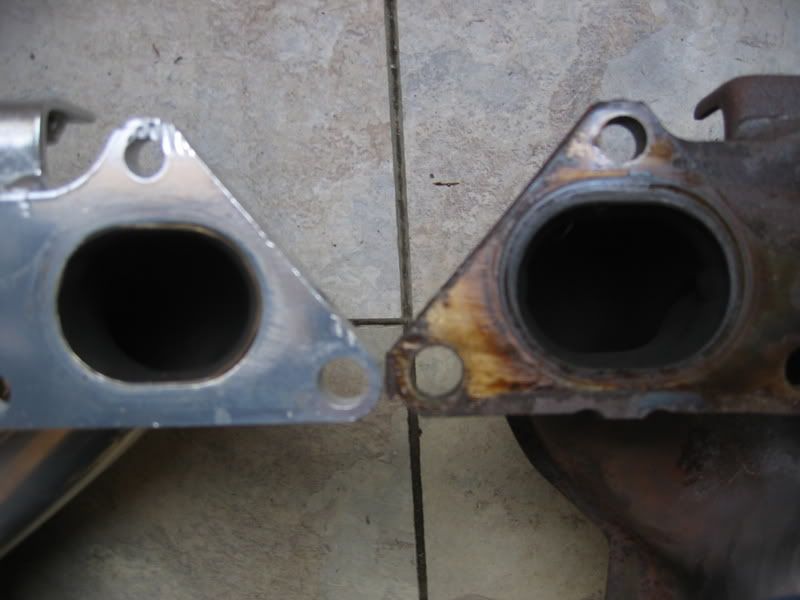
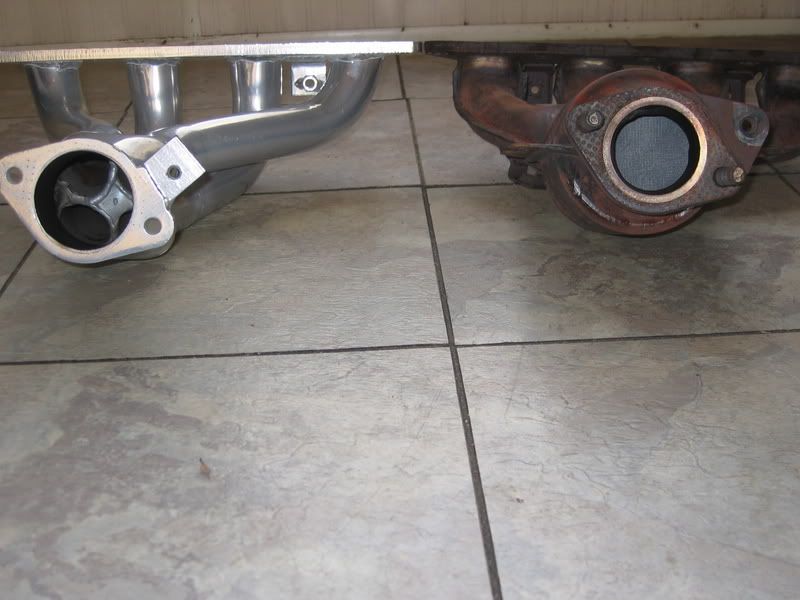
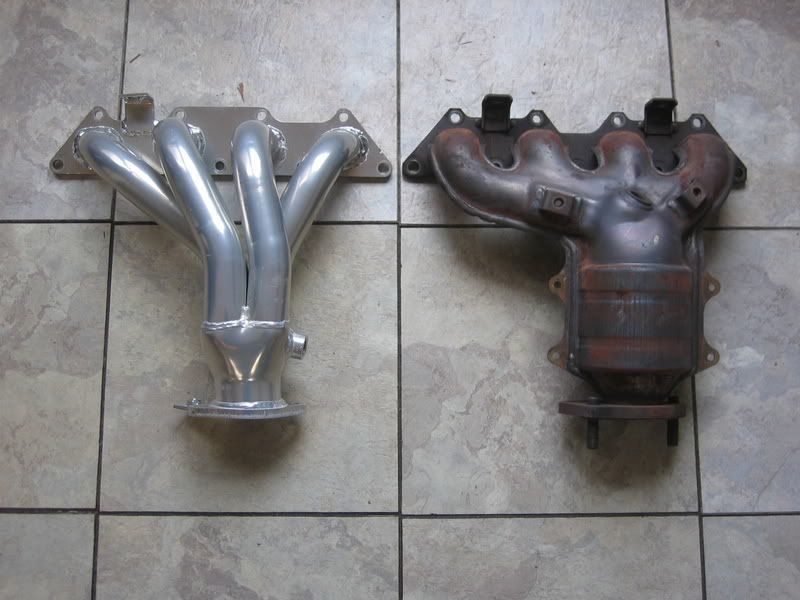
I�m not going to say unless it�s ok with him, but anyways�New they are $300, I paid less than $250. If I would have bought then new at $300 or $350 I would have been a little disappointed because of finishing and other things. For instance on the runners you can kind of see some �imperfections� on them. To me they looked like �screw on metal pipes� were used and kinda welded together to make these headers. Look at the pics and you make the judgments.
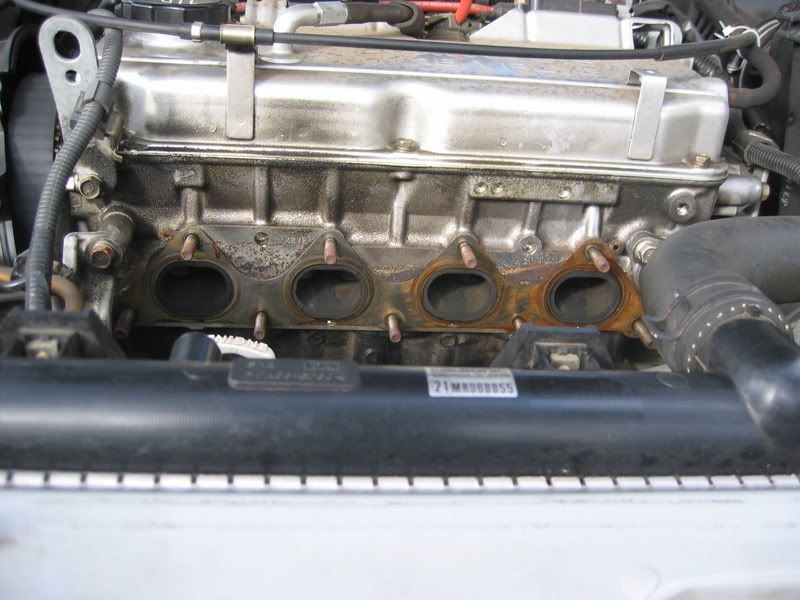
Bottom of header �rings�
Top of header �rings�
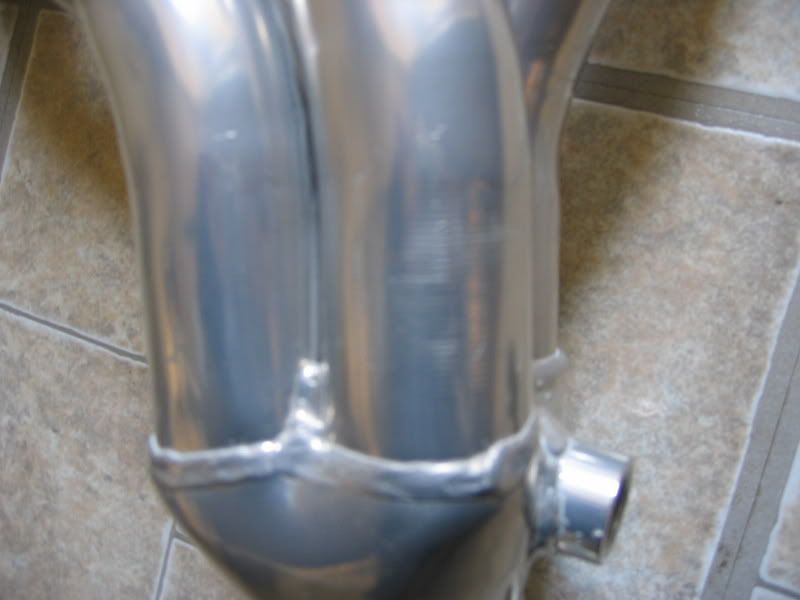
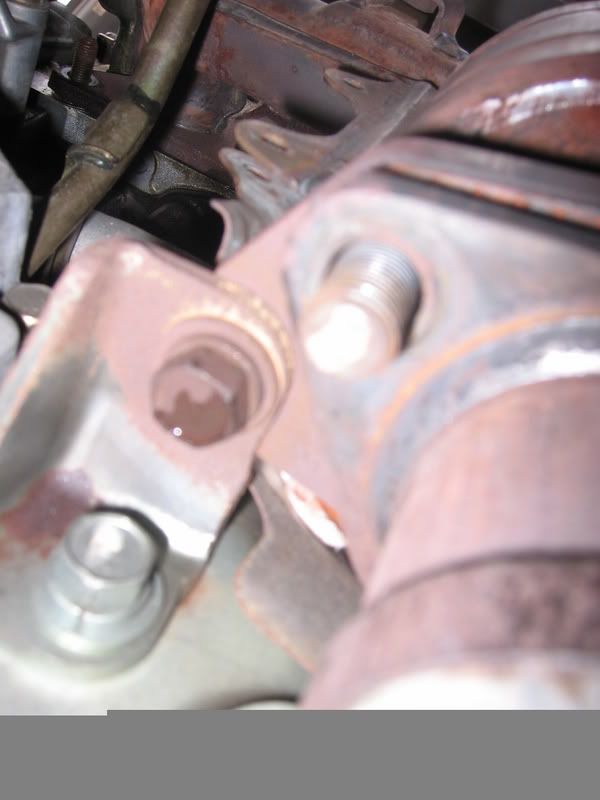
Also the nut at the bottom of the header was not welded all the way around. There was a small gap that was not fully welded to the header.
Bottom bolt �gap�

Now, this would have not compromised the function of this nut but for $300 I would expect everything to be top notch. I�m sure that is understandable. Oh, and they didn�t have �Road Race� etched into them. I could have sworn that I had seen a pic that had RR etched into some headers, maybe I didn�t but if they never were it would be a good idea. Otherwise I think the craftsmanship was fine.
Design/craftsmanship 8.5/10
Install
Tools: Of course your gonna need tools. You going to be looking at, at least 1 socket wrench (I used 3) I would use two to have some versatility (A Medium and Large) 10, 12, 14 and 19 mm sockets, the extenders, 14 mm or 9/16 box wrench (for the peel back) a pair of pliers, a rope (for the rope trick)
Disclaimer: I am writing this off of memory so if I get a socket wrong don�t shoot me. Now let�s start! It is not a good idea to work on hot exhaust manifolds soo let your car cool off.
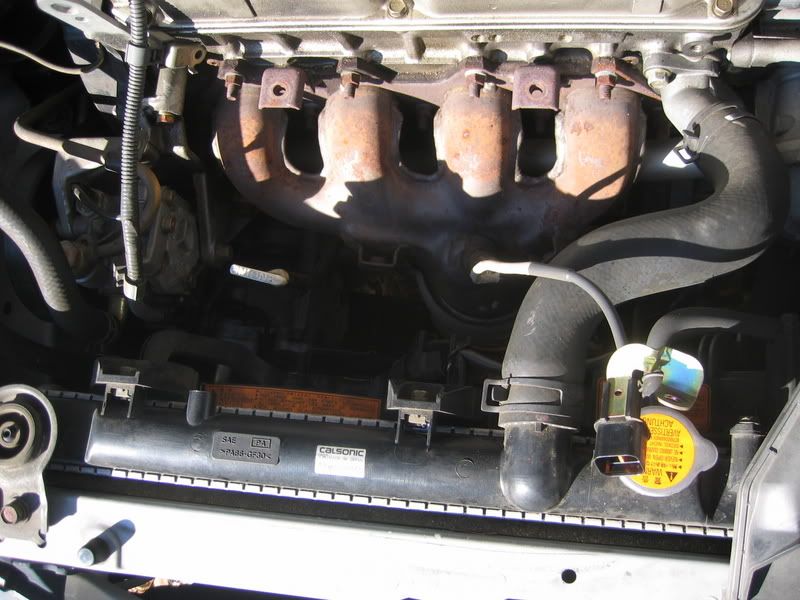
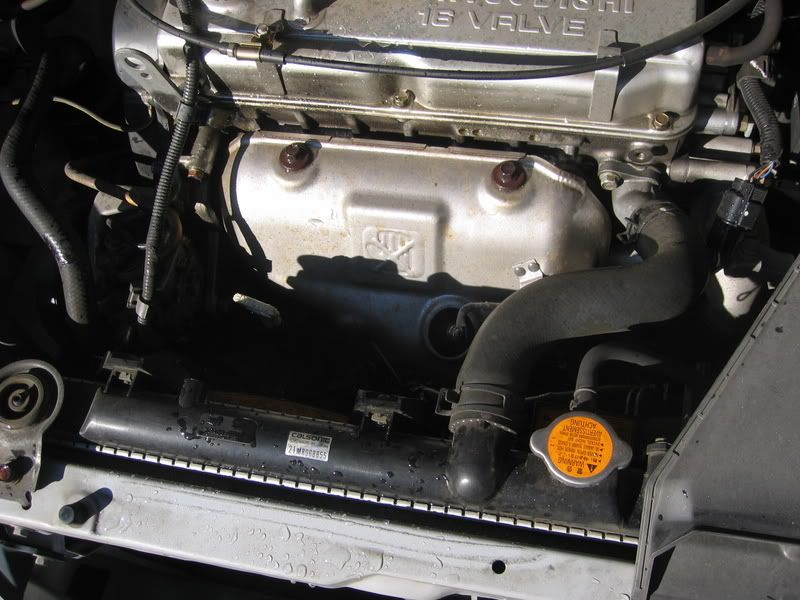 Now take you medium or large S. Wrench with extender and 12 mm socket and work on the four bolts that are holding on the heat shield.

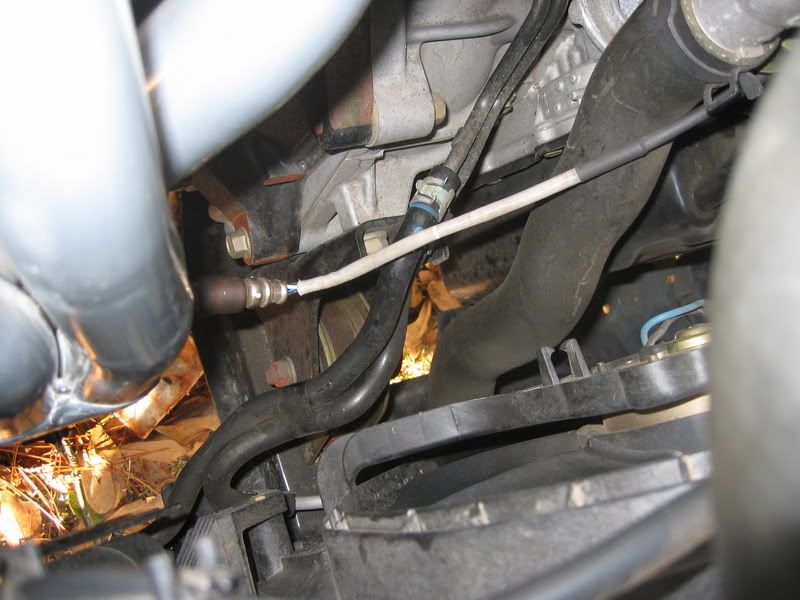
Once those are off look at the O2 sensor.
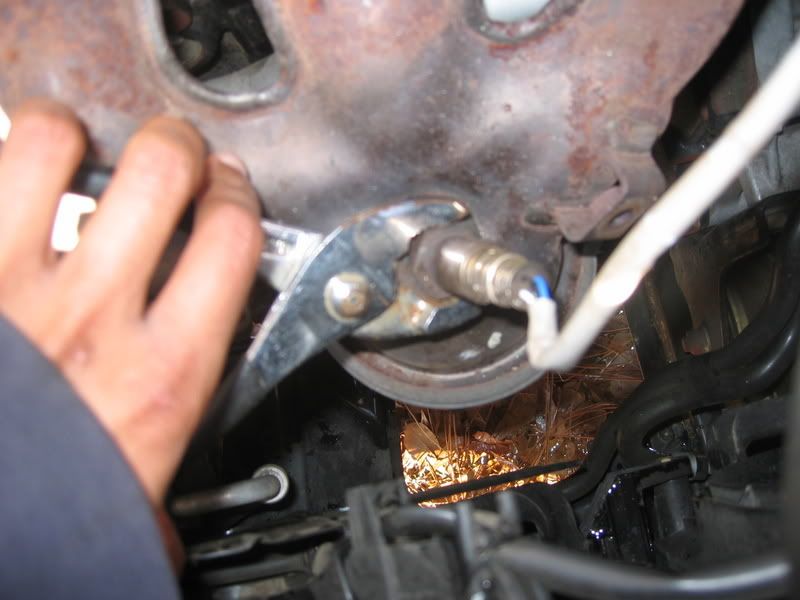
To be careful (Since O2 sensors cost money) take a 10 MM socket and unbolt it from the point near where it connects to the �snap on point� in the wire and �unsnap it�.
It should be about a foot from where your stocker mani is. Once that is unbolted take your pliers and unscrew the O2 sensor. Unscrew it out carefully; take it out, and PUT IT IN A SAFE PLACE.
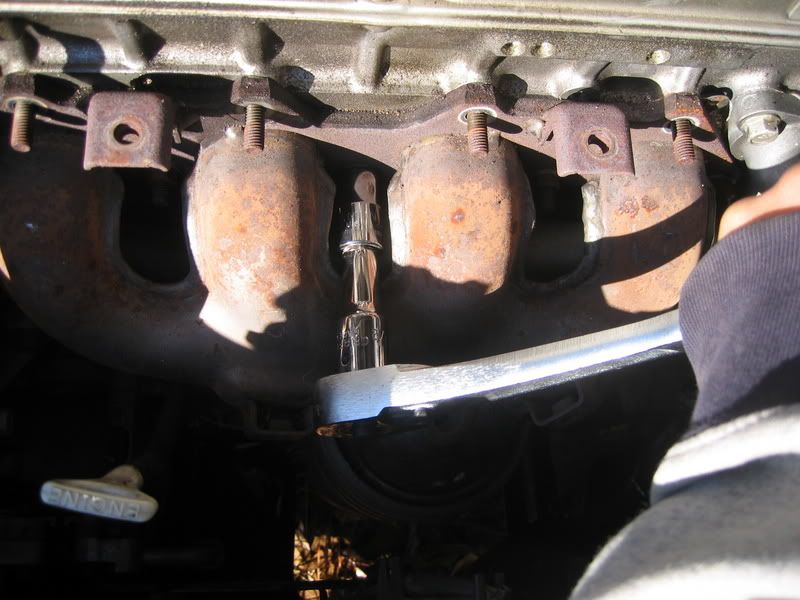
Hell, go ahead and screw them into your new header and put those up. Now take your 12 mm socket again and start working on those nuts that are holding that stocker in place.
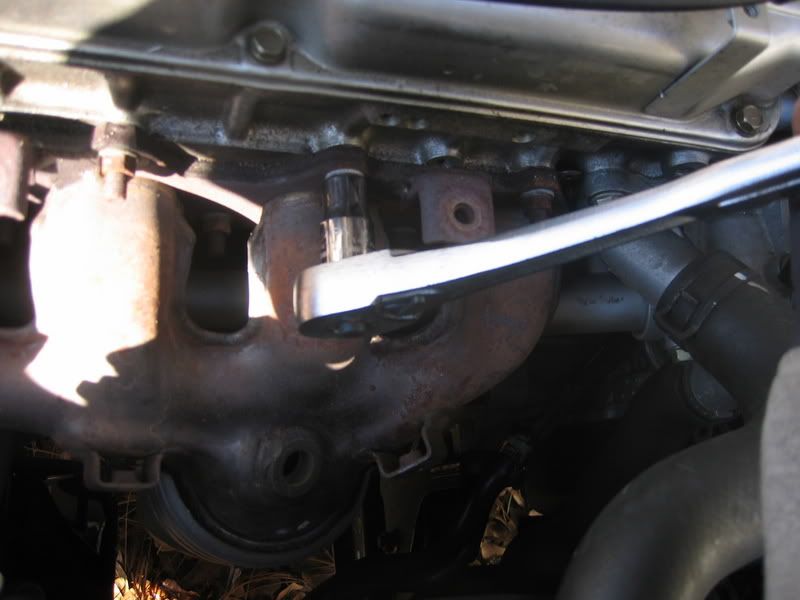
There should be 7 12 mm bolts and two 14 mm bolts with washers. Once you got off the 12 mm bolts its time to go to the 14 mm bolts. You�re going to need the extender for the one on your right but that one is still no problem.
Once that is off it is time for the �Nut from HELL�. You have two options the �rope trick� or the �peel back�. I had more luck with the �peel back� but I�ll cover both. For the �peel back� take you wrench with a 12 mm socket and go to your timing belt cover. There are four bolts that you need to get to. They should be obvious. Once you take off the cover (or move it to the side) you should see the �plate� that is blocking the nut. Take your pliers and turn it and peel it back enough as to where you can get your 14mm box wrench to it.
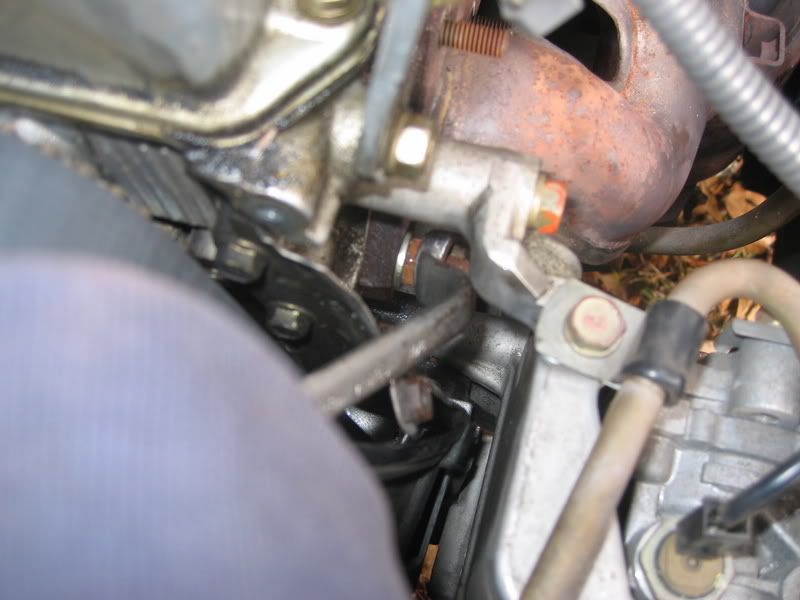
Once you got that wrench on apply that torque and break it loose. WARNING! Be careful when taking off that nut and washer near the open belt cover. If you drop something down there this install is officially over and the situation is out of your hands! To avoid this when taking those things off just reach around and carefully loosen that nut with your hands when you�re able.
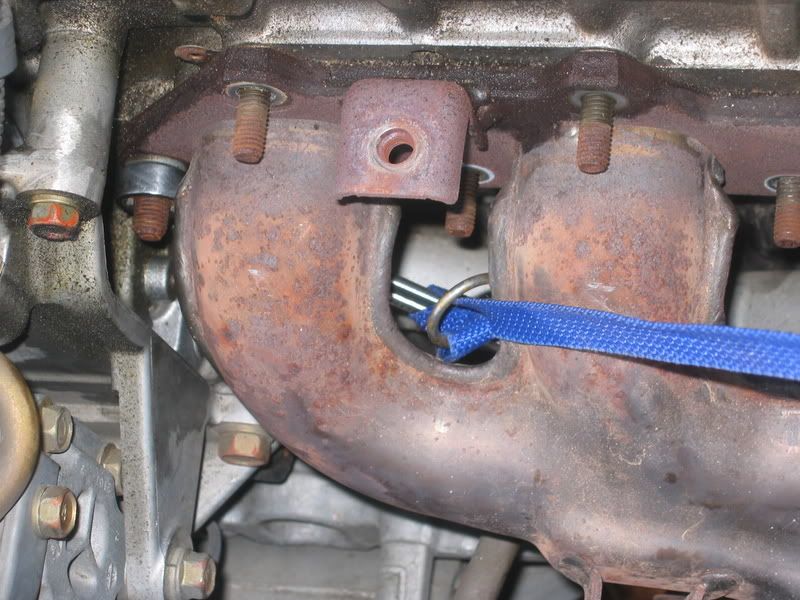
Now for the �rope trick� Umm�take your box wrench which the rope tied to it and place it on the nut as low as you can. Pull the rope trough the runners and�pull. Repeat as necessary.
Now that the stocker mani bolts are off its time to get under the car. If you�re a big guy you might need a ramp or something but I fit and had good mobility. Look at your down pipe and loosen up those bolts with your 19 mm socket with extender.
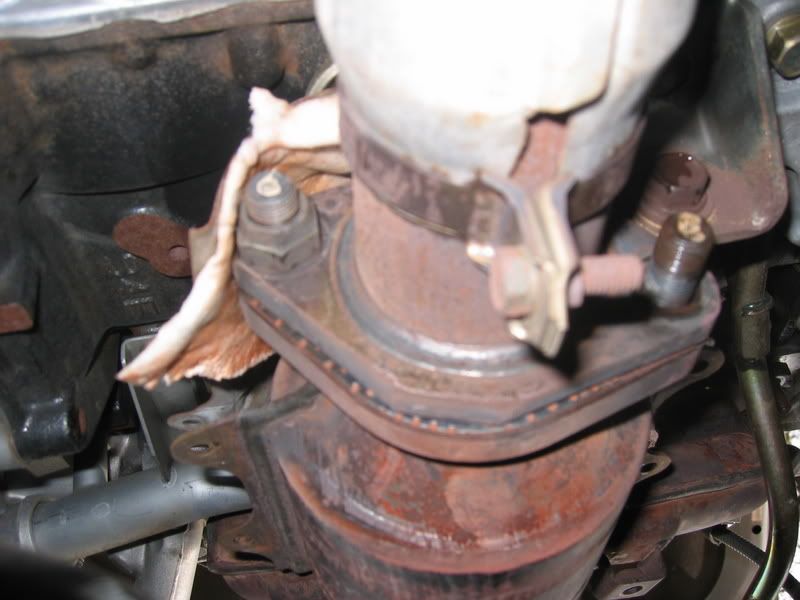
Now that these bolts are off put the 14 mm socket on the wrench of you choice and go to work on the bolt that is holding the down pipe to the block or something.
Off? Cool. Now get back on your feet and take off that mani.
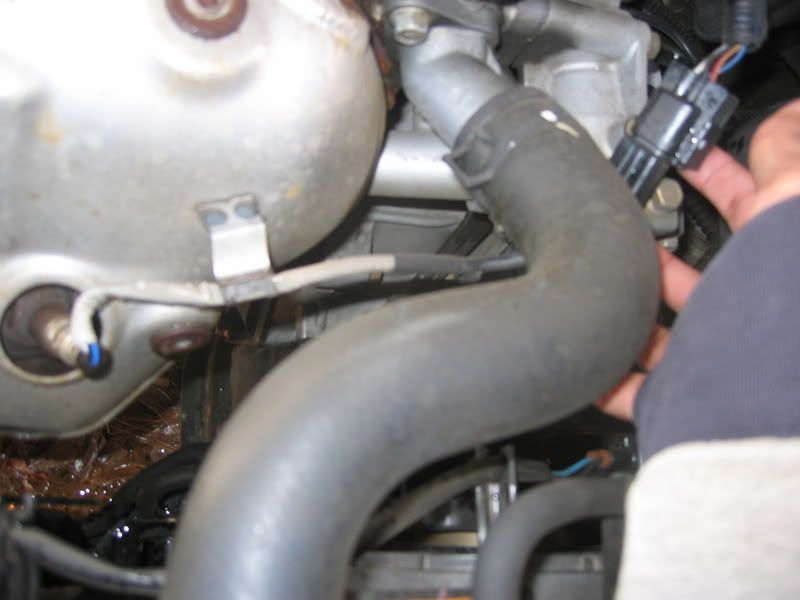
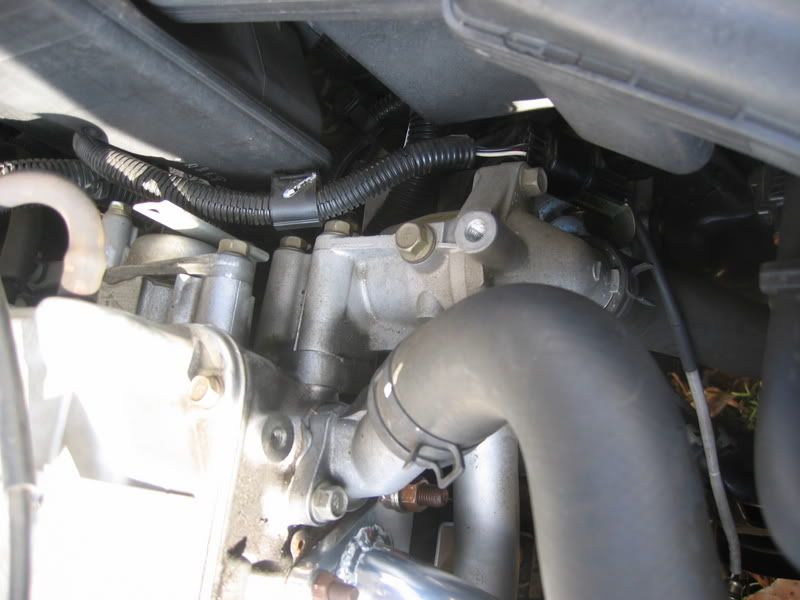
Check your gaskets and MAKE SURE you put them back on your car or you will be doing this install twice (Like yours truly) Put your new mani on tighten the nuts and bolts that you worked with. Here is the kicker; with the way your O2 sensor is sitting it won�t connect back to its original spot. No problem just move the wire around and down on the side coolant pipe.
I don�t think that one gets hot so it should be ok.
And umm�I believe you are done! Double check everything after you disconnect your battery so the ECU can reset (15 minutes) After you double checked everything a second time pat yourself on the back! You are done! Start your car and let it �learn� then go for your well deserved ride!

Install: 4-5/10
Impressions: I�ve read everyone experiences a loss of low end torque. I don�t think I see that. As far as high end Mmmm�.YES! Its there! Around 4K-4.5K ish you�ll feel that extra kick in first gear. It�s not necessarily a big RPM range that I feel the change in but I do notice that my car revs faster. Which equals a HP gain Since I�m an auto and all of you auto owners know 3rd gear sucks soo hard. 3rd gear was long and in dire need of more top end. This does it! It pulls fairly strong through 3rd and if I keep my foot planted a pull to 100 does not suck (Read my mods) It really brought me joy. These new headers though did make my exhaust louder (duh). It didn�t change it raspy or anything like that but it is louder. If you know your car well enough and you go to put these on you WILL hear a change in your exhaust. So, short and simple, it�s louder. If I had to say gain wise maybe 5 HP. Around the same as the pulley (which you better have). But the top end and third gear may make it a little better than the pulley. After around 50 miles for me my �CEL� came on. I have the CEL eliminator but I misplaced it somewhere (and its driving me crazy) so when I find it I�ll put it on. (I found it today!)
  I never thought I would want the RRM headers but since I got them cheaper than the $300 price I could not pass these up and I�m glad they are on my car. I think I may have an exhaust leak though so I need to get back under there and try and tighten the bolt(s) up if I can. Am I happy with them? YES if they were $300 I would be �satisfied� but for the price I got them for I am happy! I feel it is a good product! When I get the piggy I will have an even bigger smile on my face!
Any questions? Ask!
Since we need some good how to�s and reviews I made a promise to myself that everything I put on my car I am going to document and review for the sake of our Lancer community. So, here I go�Not to long ago I just bought some RRM headers from another member for a price.
I�m not going to say unless it�s ok with him, but anyways�New they are $300, I paid less than $250. If I would have bought then new at $300 or $350 I would have been a little disappointed because of finishing and other things. For instance on the runners you can kind of see some �imperfections� on them. To me they looked like �screw on metal pipes� were used and kinda welded together to make these headers. Look at the pics and you make the judgments.
Bottom of header �rings�
Top of header �rings�
Also the nut at the bottom of the header was not welded all the way around. There was a small gap that was not fully welded to the header.
Bottom bolt �gap�
Now, this would have not compromised the function of this nut but for $300 I would expect everything to be top notch. I�m sure that is understandable. Oh, and they didn�t have �Road Race� etched into them. I could have sworn that I had seen a pic that had RR etched into some headers, maybe I didn�t but if they never were it would be a good idea. Otherwise I think the craftsmanship was fine.
Design/craftsmanship 8.5/10
Install
Tools: Of course your gonna need tools. You going to be looking at, at least 1 socket wrench (I used 3) I would use two to have some versatility (A Medium and Large) 10, 12, 14 and 19 mm sockets, the extenders, 14 mm or 9/16 box wrench (for the peel back) a pair of pliers, a rope (for the rope trick)
Disclaimer: I am writing this off of memory so if I get a socket wrong don�t shoot me. Now let�s start! It is not a good idea to work on hot exhaust manifolds soo let your car cool off.
Now take you medium or large S. Wrench with extender and 12 mm socket and work on the four bolts that are holding on the heat shield. Once those are off look at the O2 sensor.
To be careful (Since O2 sensors cost money) take a 10 MM socket and unbolt it from the point near where it connects to the �snap on point� in the wire and �unsnap it�.
It should be about a foot from where your stocker mani is. Once that is unbolted take your pliers and unscrew the O2 sensor. Unscrew it out carefully; take it out, and PUT IT IN A SAFE PLACE.
Hell, go ahead and screw them into your new header and put those up. Now take your 12 mm socket again and start working on those nuts that are holding that stocker in place.
There should be 7 12 mm bolts and two 14 mm bolts with washers. Once you got off the 12 mm bolts its time to go to the 14 mm bolts. You�re going to need the extender for the one on your right but that one is still no problem.
Once that is off it is time for the �Nut from HELL�. You have two options the �rope trick� or the �peel back�. I had more luck with the �peel back� but I�ll cover both. For the �peel back� take you wrench with a 12 mm socket and go to your timing belt cover. There are four bolts that you need to get to. They should be obvious. Once you take off the cover (or move it to the side) you should see the �plate� that is blocking the nut. Take your pliers and turn it and peel it back enough as to where you can get your 14mm box wrench to it.
Once you got that wrench on apply that torque and break it loose. WARNING! Be careful when taking off that nut and washer near the open belt cover. If you drop something down there this install is officially over and the situation is out of your hands! To avoid this when taking those things off just reach around and carefully loosen that nut with your hands when you�re able.
Now for the �rope trick� Umm�take your box wrench which the rope tied to it and place it on the nut as low as you can. Pull the rope trough the runners and�pull. Repeat as necessary.
Now that the stocker mani bolts are off its time to get under the car. If you�re a big guy you might need a ramp or something but I fit and had good mobility. Look at your down pipe and loosen up those bolts with your 19 mm socket with extender.
Now that these bolts are off put the 14 mm socket on the wrench of you choice and go to work on the bolt that is holding the down pipe to the block or something.
Off? Cool. Now get back on your feet and take off that mani.
Check your gaskets and MAKE SURE you put them back on your car or you will be doing this install twice (Like yours truly) Put your new mani on tighten the nuts and bolts that you worked with. Here is the kicker; with the way your O2 sensor is sitting it won�t connect back to its original spot. No problem just move the wire around and down on the side coolant pipe.
I don�t think that one gets hot so it should be ok.
And umm�I believe you are done! Double check everything after you disconnect your battery so the ECU can reset (15 minutes) After you double checked everything a second time pat yourself on the back! You are done! Start your car and let it �learn� then go for your well deserved ride!
Install: 4-5/10
Impressions: I�ve read everyone experiences a loss of low end torque. I don�t think I see that. As far as high end Mmmm�.YES! Its there! Around 4K-4.5K ish you�ll feel that extra kick in first gear. It�s not necessarily a big RPM range that I feel the change in but I do notice that my car revs faster. Which equals a HP gain
Since I�m an auto and all of you auto owners know 3rd gear sucks soo hard. 3rd gear was long and in dire need of more top end. This does it! It pulls fairly strong through 3rd and if I keep my foot planted a pull to 100 does not suck (Read my mods) It really brought me joy. These new headers though did make my exhaust louder (duh). It didn�t change it raspy or anything like that but it is louder. If you know your car well enough and you go to put these on you WILL hear a change in your exhaust. So, short and simple, it�s louder. If I had to say gain wise maybe 5 HP. Around the same as the pulley (which you better have). But the top end and third gear may make it a little better than the pulley. After around 50 miles for me my �CEL� came on. I have the CEL eliminator but I misplaced it somewhere (and its driving me crazy) so when I find it I�ll put it on. (I found it today!) I never thought I would want the RRM headers but since I got them cheaper than the $300 price I could not pass these up and I�m glad they are on my car. I think I may have an exhaust leak though so I need to get back under there and try and tighten the bolt(s) up if I can. Am I happy with them? YES if they were $300 I would be �satisfied� but for the price I got them for I am happy! I feel it is a good product! When I get the piggy I will have an even bigger smile on my face!Any questions? Ask!
Good write up. I have the RRM header as well. Mine didn't have RRM etched on it as well... and I totally agree with your assesment of the quality. Awesome review. Keep it up.
Fox
Fox
Nice writeup. Couple of thoughts:
1. It is probably easiest to deal with the nut from hell first, while the other nuts are tight. It also might be best to take off top nuts in some sort of alternating pattern, I've been told that otherwise it can warp the head (probably not an issue here), but at least it will be easier to get them off if you take off one from the top left side, one from the bottom right, etc.
2. It might be a good idea to put some high-temp anti-seize on the threads of the o2 sensor before you put it into the new header. It's probably not likely to stick, but best to play it safe.
3. I also think it's a good idea to replace the bottom gasket. When I first installed my header, my gasket was no good and I had a leak between the header and the DP. A new one is only a few dollars from the dealer so it couldn't hurt.
Just my .02
Trending Topics


Thread Starter
Evolved Member
iTrader: (25)
Joined: Aug 2005
Posts: 1,829
Likes: 5
From: Tallahassee, Fl
So, I'm driving on the interstate lastnight and decided to git it some gas and everything is cool. I get on the off ramp and pull to the light and all of a sudden I have a truck motor! So, I pull into the nearby McDonalds, pop the hood, and trip the throttle and I see gas fumes. I limp it home which is about 1 mile away. Let the car cool and start feeling around...A damn bolt and washer came off and the second was working its way also! I know I tightened that thing on good  I had to go to Wal-Mart that night and had to fix it this morning before school. Its what ever though, I'm glad it was nothing really bad. Check your nuts!
I had to go to Wal-Mart that night and had to fix it this morning before school. Its what ever though, I'm glad it was nothing really bad. Check your nuts!


i found that the hardest part of this install was getting out my second O2 sensor... damn new england car rust. that thing WON'T come out. my friend might be able to hook me up with access to a lift so i can get a little more leverage on the thing. for now i'm running without the CEL eliminator, and also without a CEL.
it's been two days and maybe 100 miles or so and no CEL... yet.
it's been two days and maybe 100 miles or so and no CEL... yet.