
Custom 'carputer' fabrication // car audio build thread


Custom 'carputer' fabrication // car audio build thread
doncarbone's Custom Car PC
Introduction
22yo webmaster and computer geek...decided some time ago to attempt to get a working computer in my 2003 OZ rally (will soon be doing 2.4L 4G69 swap!) as I wanted to listen to music from my iTunes and maybe put on the odd movie on long trips. There are of course many other reasons I wanted a computer in my car.
A brief back story... Over a year ago, I started by mounting a cheap 3G netbook onto the dash. I bent some aluminum to craft a monitor stand which held in place a 10" netbook laptop which had the monitor flipped the opposite way around (so the keyboard/base was behind the monitor on the dash). I powered this with a 300W inverter and connected the laptop's sound to an AUX-in on a single pre-out JVC head-unit that I bought for around $50. Since then, and after being laughed at by passengers, I've decided to try and do something a little more 'complete' and higher quality.
So that being said, let me present to you my work-in-progress car computer build!
Components/Materials:
- Kinetik HC1400 power cell (front/starter)
- Kinetik HC800 power cell (rear auxiliary)
- Stinger 300amp isolator
- 10.2" Xenarc 1020TSV touchscreen monitor
- 300W inverter (from before, will power the monitor and be used for misc)
- Griffin Powermate programmable dial
- Opus Solutions 350W 12V power supply
- PC with 4GB DDR3 ram, Dual Core 2.4Ghz athlon cpu, 120GB solid state drive, Creative X-Fi sound card + two 120mm blue led fans (fabricated in trunk)
- Focal 165A1 components/tweeters
- Focal 165CA1 coaxials
- Two 10" Image Dynamics IDQ10V3 2ohm subwoofers
- Hertz EP4X 4-channel amplifier (150W x 4)
- Alpine MRP-MR1000 Monoblock amplifier (500+ x 2)
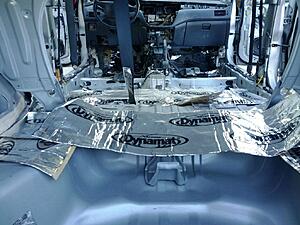
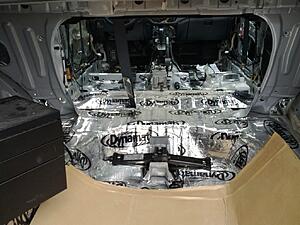
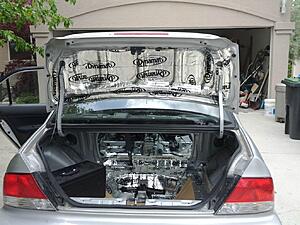
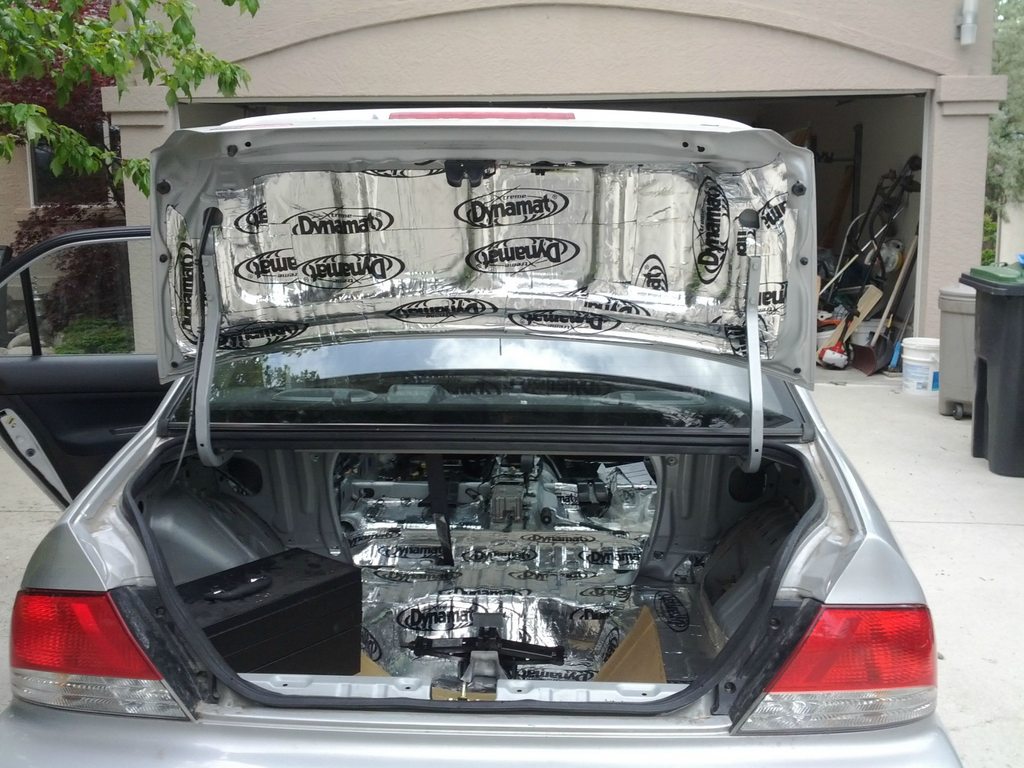
- Dynamatted the entire interior/trunk/doors
- Applied 0.5" thick neoprene foam throughout the vehicle to absorb road/engine noise
- Two 60mm Prosport volt gauges (for each battery)
- 3-way USB hub
- key/lockable LED valet switch for PC power
Pictures:
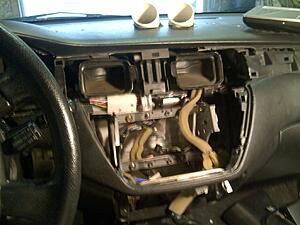
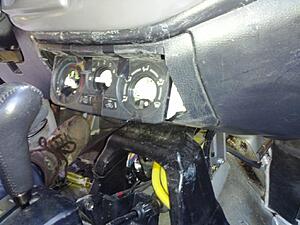
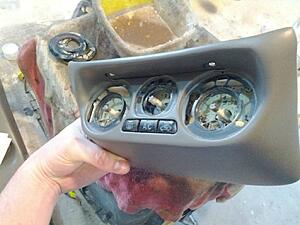
Removed entire dash panel / climate control / stereo / trim, two PVC pipes where gauges will eventually go. At this point i was Noob Level I.
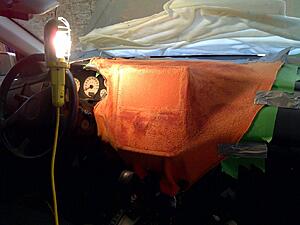
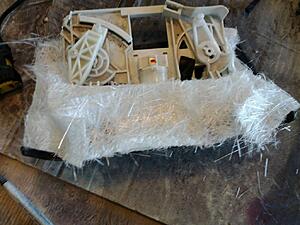
Metal screen frame glued in place and fleece fabric stretched over top...i think at this point i said to myself more than once "what the **** am i thinking?" Mixed my first ever batch of fiberglass resin for this step.
Glued the frame in place, cut mold
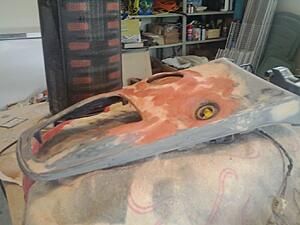
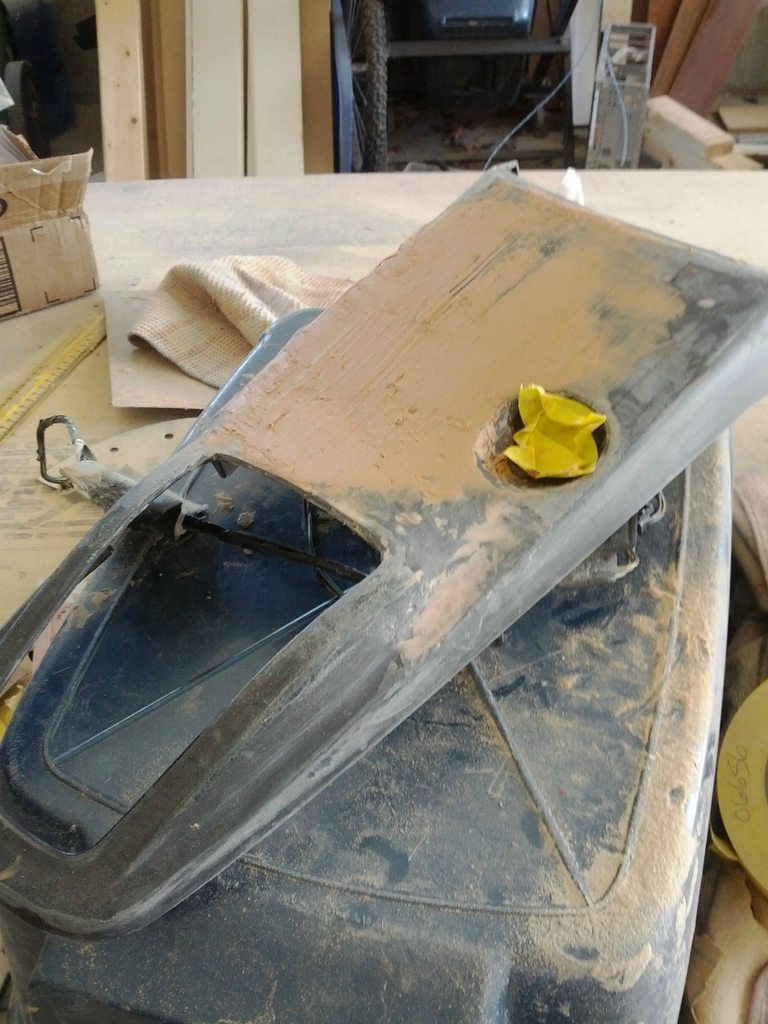
"Well it will look strange if the rest of the panels dont match?" - ah screw it so started smearing fiber-enforced filler across.
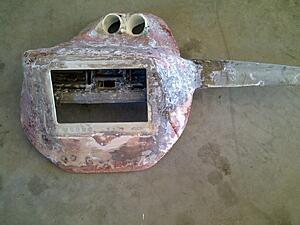
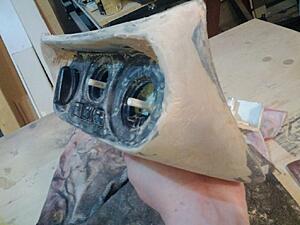
Starting to take shape, added the gauge pods above
Sanded a bit and testing fitment...decided to have it stretch overtop the instrument/gauge cluster above steering wheel
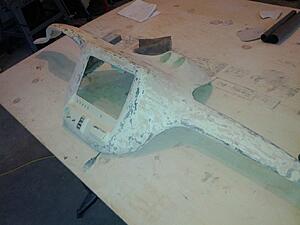
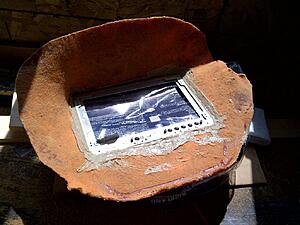
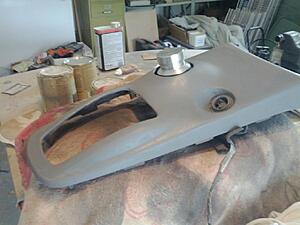
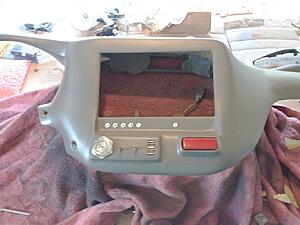
Wish i took some pics between this pic and the last, added in USB ports from hub, hole for valet switch, hazard light and 2 component switches

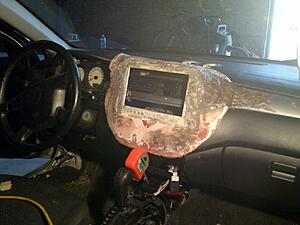
Primed and sanded, still lots of dents and scuffs
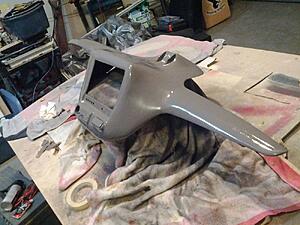
painted, bit too glossy, I have since applied quite a few layers of dead flat toner
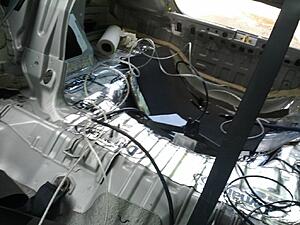
stripped interior, time for dynamat -__-
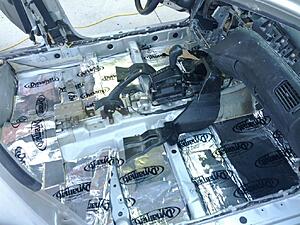
have dynamatted the entire floor, front doors, trunk and doubled up on trunk lid
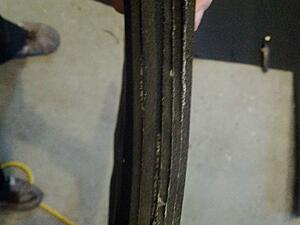
Neoprene, 1/8" strips glued together, this particular piece went in the door. Couldnt find thicker neoprene from a Canadian dealer, so went with the only roll on amazon.ca (1/8")
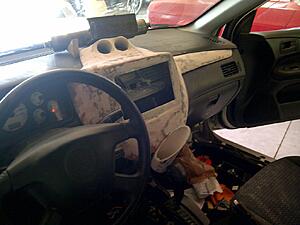
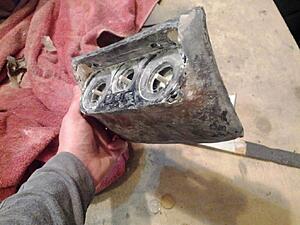
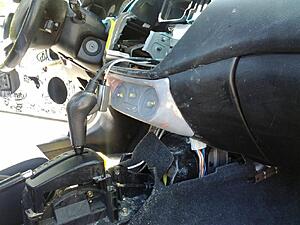
Now to move the climate control panel
i hate working with this stuff
-__-
bit better
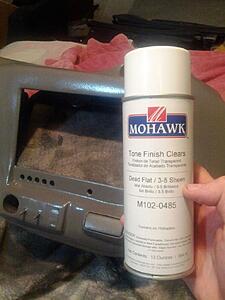
in the meantime, will spray on some toner
looks a lot better, i think since taking this pic ive used more toner

new battery, 0 gauge, inline fuses and isolator all fixed in place
all internal wiring fed underneath the carpet, two USB extenders, monitor cable, monitor power cable and 0 gauge from front to rear battery fed through
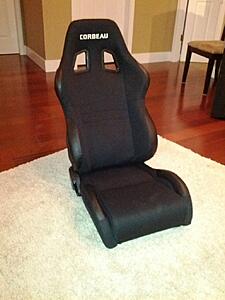
side note, since i spilled resin on my front seats and they are pretty poor seats in the OZ rally, i bought these new ones! very comfortable and the bolster support is great! (in anticipation for the 4G69 + mods)
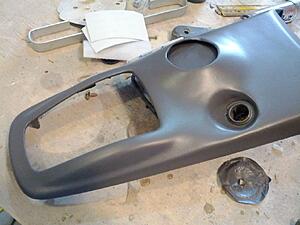
climate control relocation starting to come together
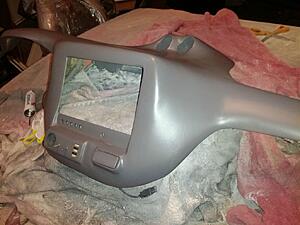
painted, still needs toner to match dash

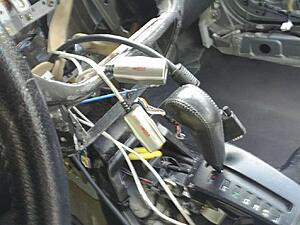
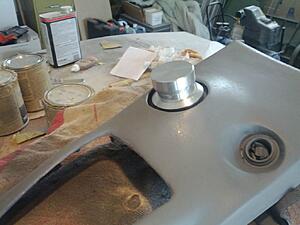
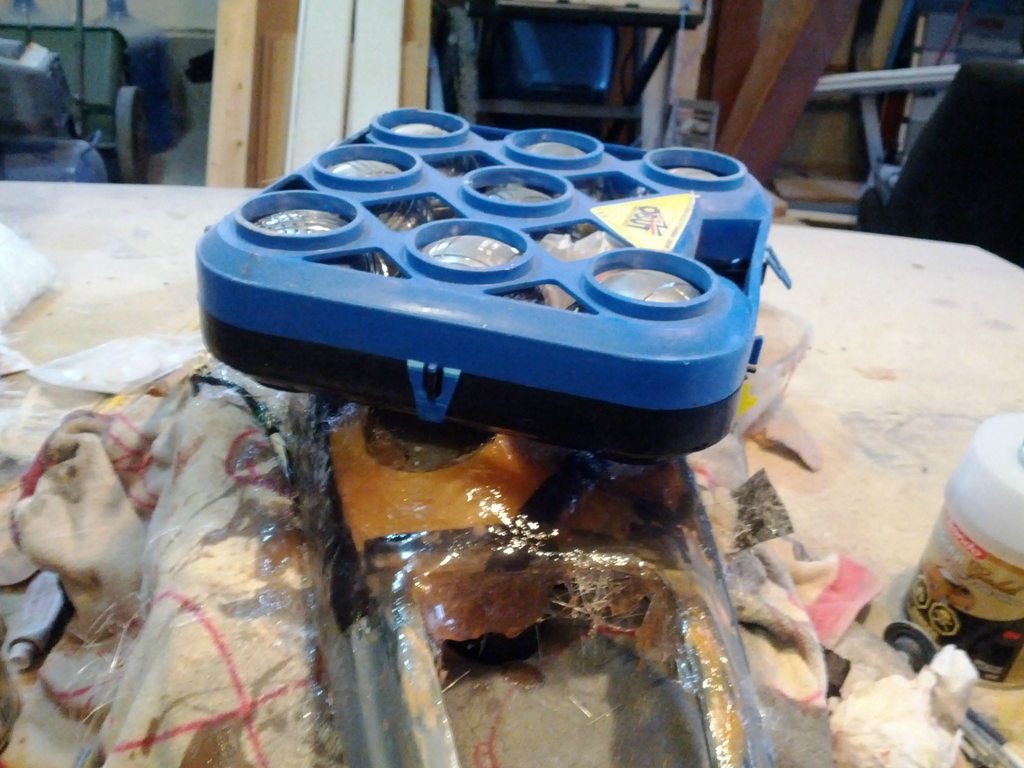
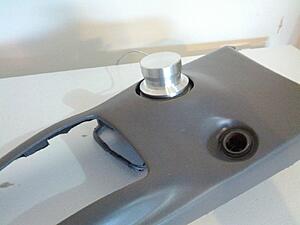
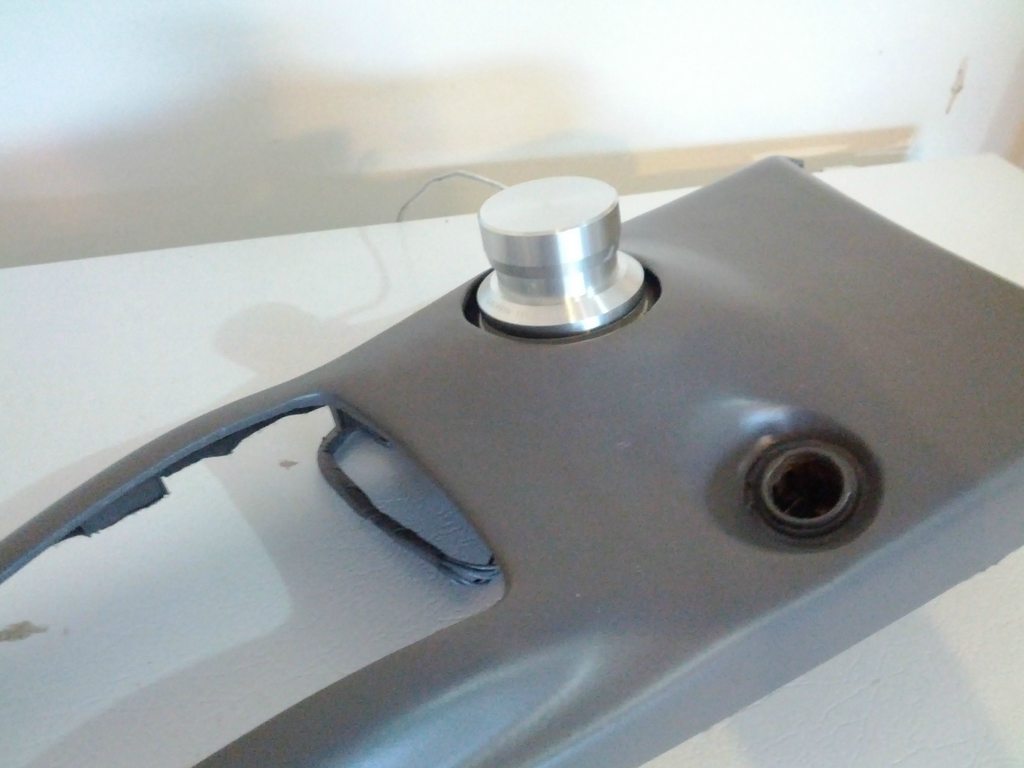
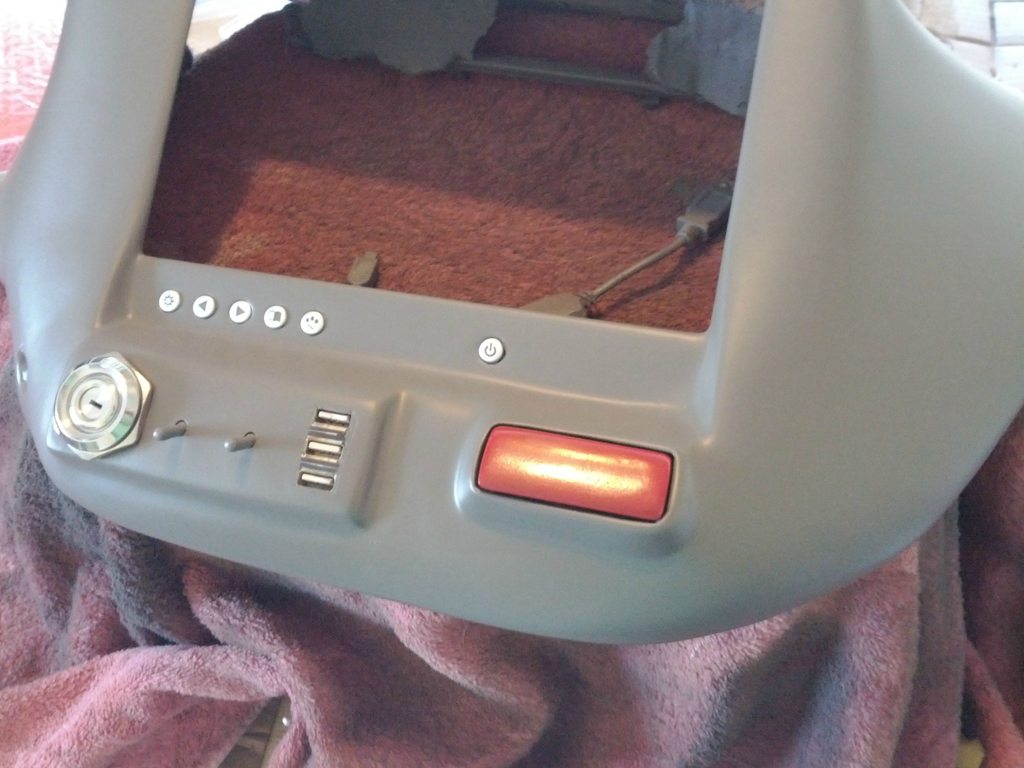
more madness! filled over where ash tray used to be, time to get the griffin dial mounted
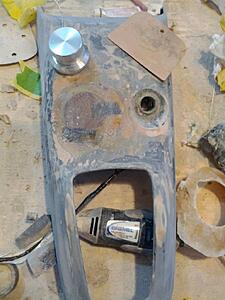
angled base toward driver, griffin pictured top
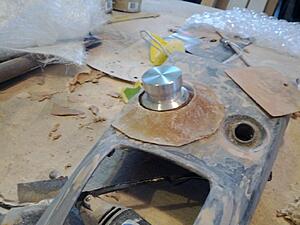
light guard and some finish (this dial has a very bright blue LED on its base, i wanted to contain it a bit with a guard)

getting the guard in place
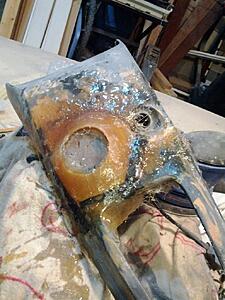
what a mess
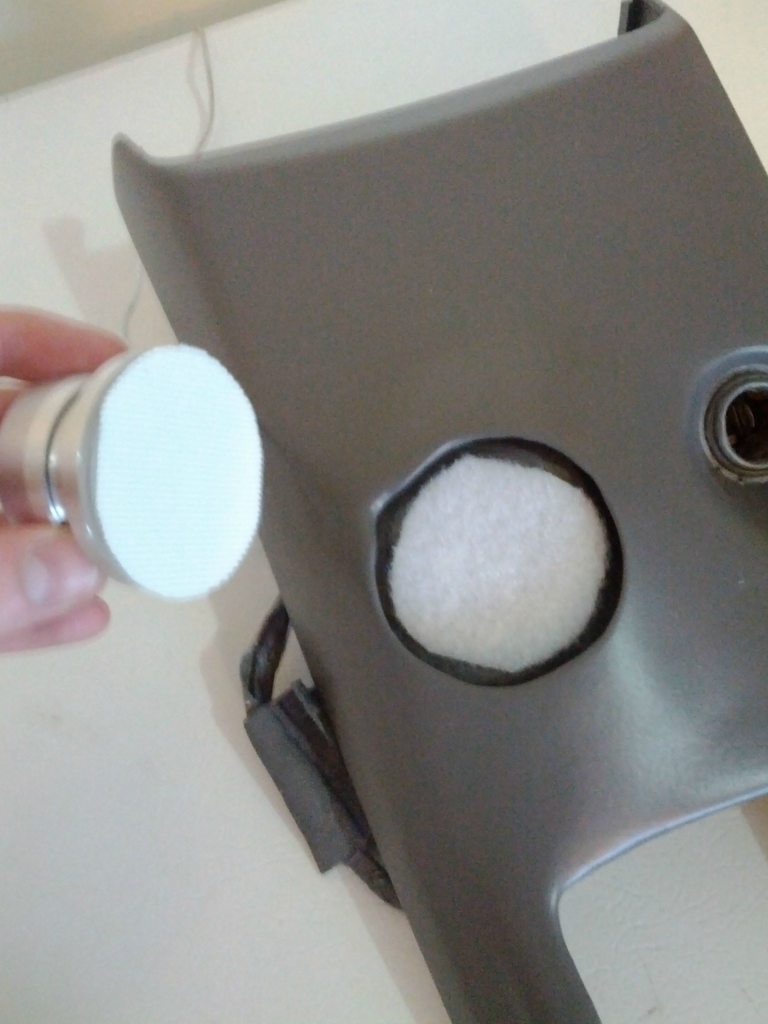
cleaned up a bit, good ol' bondo
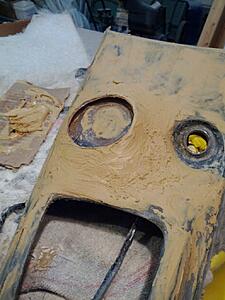
spot putty and some sanding
primed, griffin in place, will be attaching it to the base via velcro
And there we have it, that's all I have for now, will update as I go!
- Don
Introduction
22yo webmaster and computer geek...decided some time ago to attempt to get a working computer in my 2003 OZ rally (will soon be doing 2.4L 4G69 swap!) as I wanted to listen to music from my iTunes and maybe put on the odd movie on long trips. There are of course many other reasons I wanted a computer in my car.
A brief back story... Over a year ago, I started by mounting a cheap 3G netbook onto the dash. I bent some aluminum to craft a monitor stand which held in place a 10" netbook laptop which had the monitor flipped the opposite way around (so the keyboard/base was behind the monitor on the dash). I powered this with a 300W inverter and connected the laptop's sound to an AUX-in on a single pre-out JVC head-unit that I bought for around $50. Since then, and after being laughed at by passengers, I've decided to try and do something a little more 'complete' and higher quality.
So that being said, let me present to you my work-in-progress car computer build!
Components/Materials:
- Kinetik HC1400 power cell (front/starter)
- Kinetik HC800 power cell (rear auxiliary)
- Stinger 300amp isolator
- 10.2" Xenarc 1020TSV touchscreen monitor
- 300W inverter (from before, will power the monitor and be used for misc)
- Griffin Powermate programmable dial
- Opus Solutions 350W 12V power supply
- PC with 4GB DDR3 ram, Dual Core 2.4Ghz athlon cpu, 120GB solid state drive, Creative X-Fi sound card + two 120mm blue led fans (fabricated in trunk)
- Focal 165A1 components/tweeters
- Focal 165CA1 coaxials
- Two 10" Image Dynamics IDQ10V3 2ohm subwoofers
- Hertz EP4X 4-channel amplifier (150W x 4)
- Alpine MRP-MR1000 Monoblock amplifier (500+ x 2)
- Dynamatted the entire interior/trunk/doors
- Applied 0.5" thick neoprene foam throughout the vehicle to absorb road/engine noise
- Two 60mm Prosport volt gauges (for each battery)
- 3-way USB hub
- key/lockable LED valet switch for PC power
Pictures:

Removed entire dash panel / climate control / stereo / trim, two PVC pipes where gauges will eventually go. At this point i was Noob Level I.

Metal screen frame glued in place and fleece fabric stretched over top...i think at this point i said to myself more than once "what the **** am i thinking?" Mixed my first ever batch of fiberglass resin for this step.

Glued the frame in place, cut mold

"Well it will look strange if the rest of the panels dont match?" - ah screw it so started smearing fiber-enforced filler across.

Starting to take shape, added the gauge pods above

Sanded a bit and testing fitment...decided to have it stretch overtop the instrument/gauge cluster above steering wheel

Wish i took some pics between this pic and the last, added in USB ports from hub, hole for valet switch, hazard light and 2 component switches

Primed and sanded, still lots of dents and scuffs

painted, bit too glossy, I have since applied quite a few layers of dead flat toner

stripped interior, time for dynamat -__-

have dynamatted the entire floor, front doors, trunk and doubled up on trunk lid


Neoprene, 1/8" strips glued together, this particular piece went in the door. Couldnt find thicker neoprene from a Canadian dealer, so went with the only roll on amazon.ca (1/8")

Now to move the climate control panel

i hate working with this stuff

-__-

bit better

in the meantime, will spray on some toner

looks a lot better, i think since taking this pic ive used more toner

new battery, 0 gauge, inline fuses and isolator all fixed in place

all internal wiring fed underneath the carpet, two USB extenders, monitor cable, monitor power cable and 0 gauge from front to rear battery fed through


side note, since i spilled resin on my front seats and they are pretty poor seats in the OZ rally, i bought these new ones! very comfortable and the bolster support is great! (in anticipation for the 4G69 + mods)

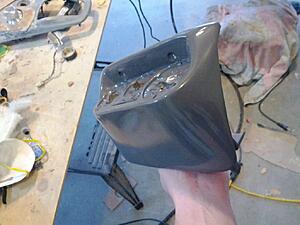
climate control relocation starting to come together

painted, still needs toner to match dash
more madness! filled over where ash tray used to be, time to get the griffin dial mounted

angled base toward driver, griffin pictured top

light guard and some finish (this dial has a very bright blue LED on its base, i wanted to contain it a bit with a guard)
getting the guard in place

what a mess

cleaned up a bit, good ol' bondo

spot putty and some sanding

primed, griffin in place, will be attaching it to the base via velcro

And there we have it, that's all I have for now, will update as I go!
- Don
Last edited by doncarbone; Jun 28, 2012 at 05:20 AM.
Found some time today to paint the climate control mold and the mold around shift boot..also velcro'd the griffin powermate in place too
looks a lot better with the toner on it

oh ya this notch in the top left is for the wire, less of a hump for the wire, will make for a cleaner install
will be interesting to see it illuminate once in car
i'll have both these in the car tomorrow


looks a lot better with the toner on it
oh ya this notch in the top left is for the wire, less of a hump for the wire, will make for a cleaner install
will be interesting to see it illuminate once in car
i'll have both these in the car tomorrow
Last edited by doncarbone; Jun 24, 2012 at 01:26 AM.


I've cut corners money-wise where I was able to...PC was built mainly from old, scrap parts from previous PC builds, fiberglass and filler i've used is basically the stuff you get at Canadian tire (no special/premium stuff)...borrowed a friend's air compressor and die-grinder...USB cables and all wiring I bought from www.monoprice.com ..speakers/amps, dynamat on sale from a www.woofersetc.com, paint from industrial paint and plastic, local store that mixed the paint for me at a good price.
this project has been on-and-off for around a year now, only recently have I been going strong again working on it consistently, so i've definitely had time to save money and find the right components
Last edited by doncarbone; Jun 24, 2012 at 09:41 PM.
Trending Topics
update:
have attached to the mold bolts to connect to dash securely. bolts are held in place with JB weld front/back and lock washers

Since doing this I've filled over holes/scruffs on front, painted, applied toner:


pc power switch (not mounted yet), monitor switches, usb ports visible but they need work, might see about painting around edges or getting some sort of trim for that
as well as 3 bolts on right side that have been stealthily hidden, I had to drill 2 bolt holes on the left.
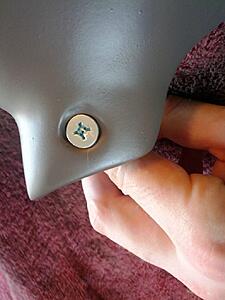
u can't see these bolts, basically out of view and sort of behind the steering wheel...but just to make it cleaner i'll paint em to match dash and see if i can clip on a plastic covering
more to come soon!
have attached to the mold bolts to connect to dash securely. bolts are held in place with JB weld front/back and lock washers


Since doing this I've filled over holes/scruffs on front, painted, applied toner:

pc power switch (not mounted yet), monitor switches, usb ports visible but they need work, might see about painting around edges or getting some sort of trim for that

as well as 3 bolts on right side that have been stealthily hidden, I had to drill 2 bolt holes on the left.

u can't see these bolts, basically out of view and sort of behind the steering wheel...but just to make it cleaner i'll paint em to match dash and see if i can clip on a plastic covering
more to come soon!


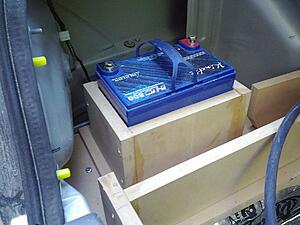
so far this weekend been working on the trunk:
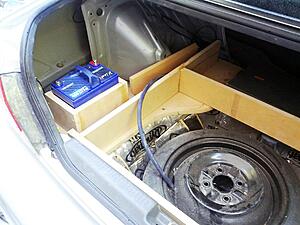
3/4" mdf, battery holder to keep it from moving (thing is so tight i can barely get the battery back out lol)...will add trunk floor on top of frame, underneath are all my components, small latch eventually to get to spare tire
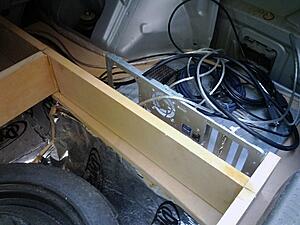
comp will sit on this side, will make a custom fiberglass casing for it and connect in-take and exhaust fans

3/4" mdf, battery holder to keep it from moving (thing is so tight i can barely get the battery back out lol)...will add trunk floor on top of frame, underneath are all my components, small latch eventually to get to spare tire


comp will sit on this side, will make a custom fiberglass casing for it and connect in-take and exhaust fans