
How To: Spring install

Thread Starter
EvoM Staff Alumni
iTrader: (88)
Joined: Aug 2003
Posts: 8,733
Likes: 3
From: Concord Township, Ohio
How To: Spring install
Tools:
12mm wrench/socket
14mm wrench/socket
17mm wrench/socket
19mm wrench/socket
Impact wrench (not mandatory, but very hard without)
Crescent wrench, screwdriver (flathead), etc are good to have handy
Fronts
1. Jack up front of car; put on jackstands.
2. Remove front wheels.
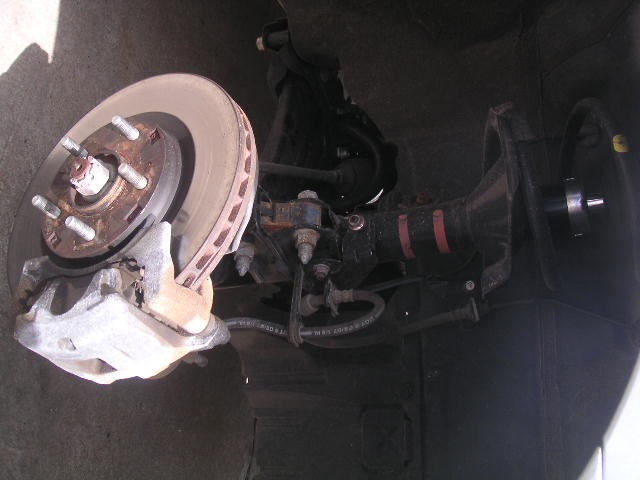
3. Remove the nut holding on the brake hose (12mm). Pull away from strut (speed sensor bracket comes with, just make sure to pull the tabs out).
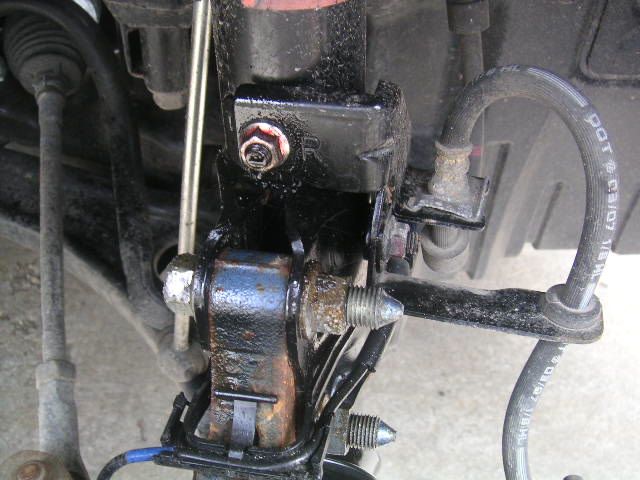
4. Remove the swaybar endlink from the strut (14mm); easiest with an impact.
5. Hold bolt head, loosen nuts on bottom strut bolts (19mm IIRC, 17mm if not).

6. Remove the 3 nuts holding the strut top to the car (have a buddy hold the strut up so it doesn't fall!) (14mm).
7. Pull whole strut assembly out.
8. Put on spring compressors if you have them.
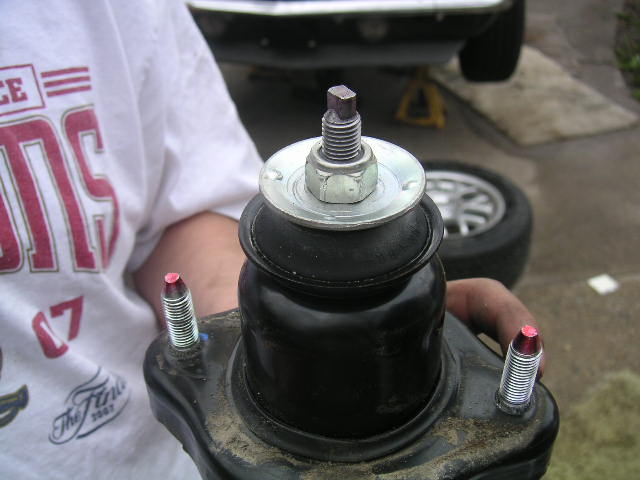
9. Use 17mm socket and impact to remove the nut off the top of the strut. Make sure to point it away from you just in case.
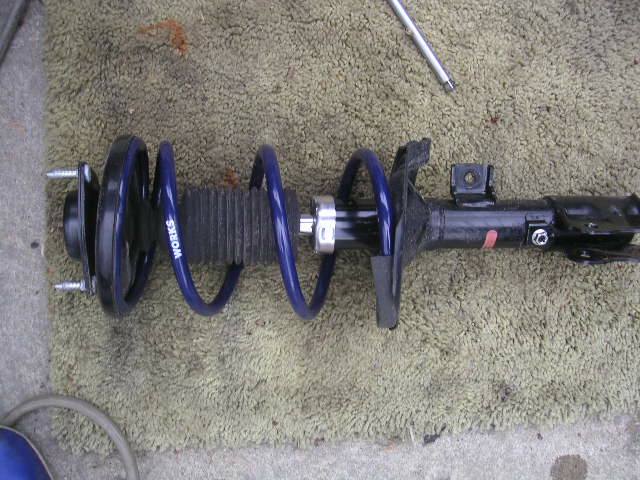
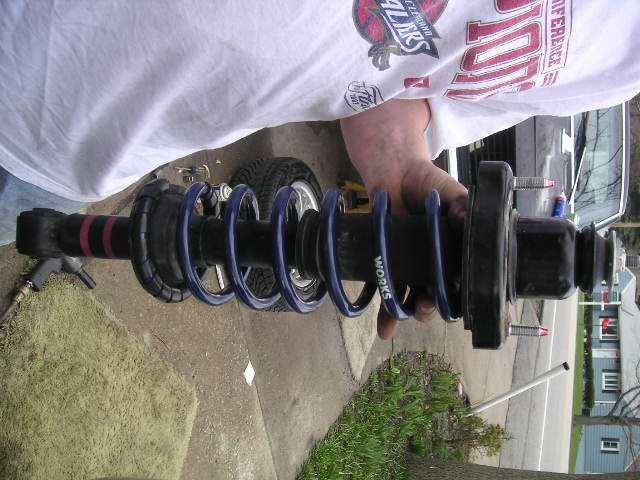
10. Remove stock spring, replace with aftermarket spring (if using Works, make sure the word WORKS is facing up).
11. Put the spring top on as it was on when stock.
12. Push down, thread the top nut (from #9). Tighten to 45 ft-lbs.
13. Put the strut back in.
14. Replace the 3 nuts on top, tightening them to 33 ft-lbs.
15. Replace the bottom strut bolts, tigthening them to 81 ft-lbs.
16. Replace the swaybar endlink, tightening to 29 ft-lbs.
17. Replace the speed sensor bracket (put tabs in holes), put brake hose bracket back on, tighten nut to 10 ft-lbs.
18. Put wheel back on, tighten lugnuts to 75 ft-lbs.
19. Return car to ground.
12mm wrench/socket
14mm wrench/socket
17mm wrench/socket
19mm wrench/socket
Impact wrench (not mandatory, but very hard without)
Crescent wrench, screwdriver (flathead), etc are good to have handy
Fronts
1. Jack up front of car; put on jackstands.
2. Remove front wheels.
3. Remove the nut holding on the brake hose (12mm). Pull away from strut (speed sensor bracket comes with, just make sure to pull the tabs out).
4. Remove the swaybar endlink from the strut (14mm); easiest with an impact.
5. Hold bolt head, loosen nuts on bottom strut bolts (19mm IIRC, 17mm if not).
6. Remove the 3 nuts holding the strut top to the car (have a buddy hold the strut up so it doesn't fall!) (14mm).
7. Pull whole strut assembly out.
8. Put on spring compressors if you have them.
9. Use 17mm socket and impact to remove the nut off the top of the strut. Make sure to point it away from you just in case.
10. Remove stock spring, replace with aftermarket spring (if using Works, make sure the word WORKS is facing up).
11. Put the spring top on as it was on when stock.
12. Push down, thread the top nut (from #9). Tighten to 45 ft-lbs.
13. Put the strut back in.
14. Replace the 3 nuts on top, tightening them to 33 ft-lbs.
15. Replace the bottom strut bolts, tigthening them to 81 ft-lbs.
16. Replace the swaybar endlink, tightening to 29 ft-lbs.
17. Replace the speed sensor bracket (put tabs in holes), put brake hose bracket back on, tighten nut to 10 ft-lbs.
18. Put wheel back on, tighten lugnuts to 75 ft-lbs.
19. Return car to ground.
Thread Starter
EvoM Staff Alumni
iTrader: (88)
Joined: Aug 2003
Posts: 8,733
Likes: 3
From: Concord Township, Ohio
Rears
1. Lift the car, support with jackstands.
2. Remove rear wheels.
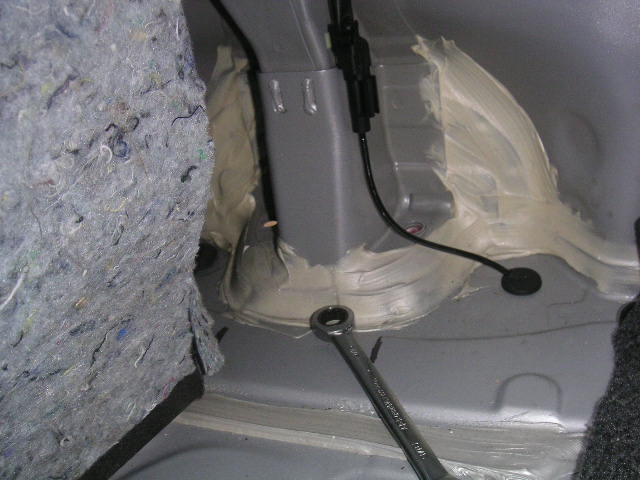
3. Pull back trunk sides to access top nuts (easiest if you start from the rear seats rather than the back of the trunk).
4. Remove the 2 nuts on top of the strut. (14mm)
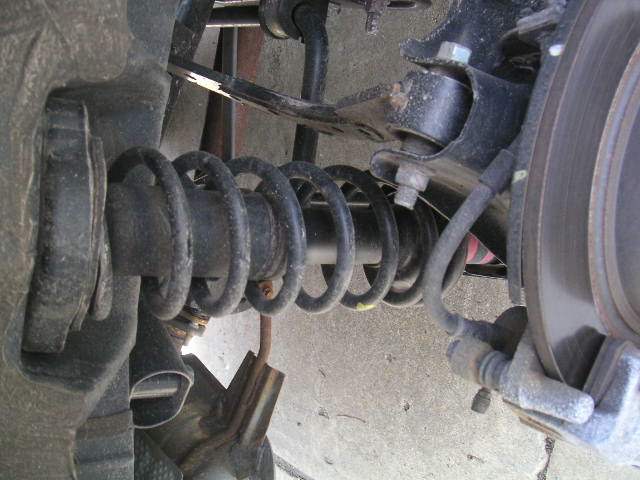
5. Remove nut & bolt holding strut to lower control arm. (19mm IIRC)
6. Remove complete assembly from car. May need a friend to push down on the rotor to make room (worked for me).
7. Put on spring compressors.
8. Use 17mm with impact to remove top nut from assembly (again, point away from people for safety).
9. Reassembly assembly with new spring (again, you want the WORKS facing up if you're using Works springs). Tighten top nut to 19 ft-lbs.
10. Put the assembly back in.
11. Tighten the top nuts to . . . I don't have the TQ specs, so I assume them to be 33 ft-lbs like the front.
12. Tighten the bottom nut/bolt to . . . again, no specs. Again, I'll assume it's the same as front and guess 81 ft-lbs. Someone correct me if I'm wrong...
13. Put the trunk sides back (replacing any clips you removed).
14. Put rear wheels back on.
15. Lower the car.
-------------------
After spring install:
1. Drive carefully.
2. Give the springs some time to settle. Maybe a week.
3. Get an alignment. Installing new parts completely screwed up your stock alignment, so you NEED a fresh one from a mechanic. Otherwise, your tires will be toast.
1. Lift the car, support with jackstands.
2. Remove rear wheels.
3. Pull back trunk sides to access top nuts (easiest if you start from the rear seats rather than the back of the trunk).
4. Remove the 2 nuts on top of the strut. (14mm)
5. Remove nut & bolt holding strut to lower control arm. (19mm IIRC)
6. Remove complete assembly from car. May need a friend to push down on the rotor to make room (worked for me).
7. Put on spring compressors.
8. Use 17mm with impact to remove top nut from assembly (again, point away from people for safety).
9. Reassembly assembly with new spring (again, you want the WORKS facing up if you're using Works springs). Tighten top nut to 19 ft-lbs.
10. Put the assembly back in.
11. Tighten the top nuts to . . . I don't have the TQ specs, so I assume them to be 33 ft-lbs like the front.
12. Tighten the bottom nut/bolt to . . . again, no specs. Again, I'll assume it's the same as front and guess 81 ft-lbs. Someone correct me if I'm wrong...
13. Put the trunk sides back (replacing any clips you removed).
14. Put rear wheels back on.
15. Lower the car.
-------------------
After spring install:
1. Drive carefully.
2. Give the springs some time to settle. Maybe a week.
3. Get an alignment. Installing new parts completely screwed up your stock alignment, so you NEED a fresh one from a mechanic. Otherwise, your tires will be toast.


Thread Starter
EvoM Staff Alumni
iTrader: (88)
Joined: Aug 2003
Posts: 8,733
Likes: 3
From: Concord Township, Ohio
No, I bought good springs... 
No, unfortunately I don't. I stupidly forgot to take before pics. I do apologize. I hadn't even taken pics of the current wheels on the car, so I'm totally worthless in that dept. There are some posted by the cosworth in my review thread.
Last edited by Blacksheepdj; Apr 13, 2008 at 12:31 PM.
Trending Topics
Evolved Member
iTrader: (16)
Joined: Oct 2007
Posts: 1,710
Likes: 0
From: Daytona Beach/Melbourne, Florida
This may be a dumb question, and goes for more than just replacing springs, but what is an easy way to tell how many ft. lbs. you have tightened nuts to? Like how can I tell if my lugs are 75, and if all that is mentioned here are to their right torque?
Evolved Member
Joined: Jan 2008
Posts: 614
Likes: 1
From: North NJ
The other way is to be an experienced technician so you can feel it if it's at the right torque or otherwise just buy a torque wrench. I just broke a lug stud yesterday because I tightened it too much.
Evolved Member
Joined: Sep 2007
Posts: 721
Likes: 0
From: Edmonton, Canada
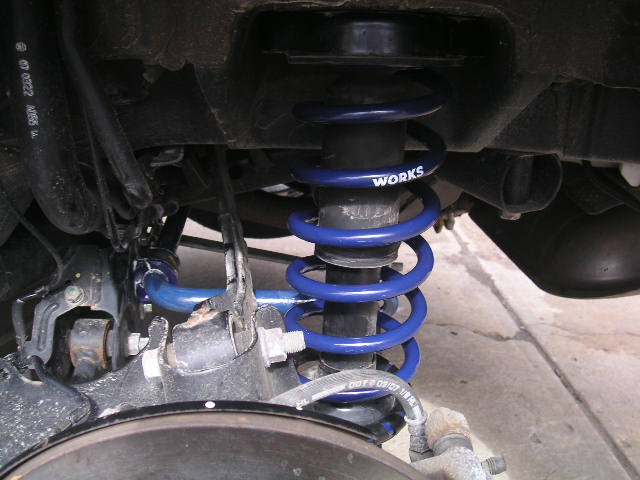
Ok I just had the springs installed today. Finally. Really love the look. It doesnt look "slammed" or crude. Looks like this is how it should've come from the factory. Has a really sporty 'OEM' look to it.
Anyhow, how long should I wait for the springs to settle, before taking it for alignment?
Anyhow, how long should I wait for the springs to settle, before taking it for alignment?