
This is the car that Billy's NW chat photo is from. I am Timm, the builder. Feel free to comment, ask questions, whatever. I even accept donations 
Anyway... here it is.
__________________________________________________ _______
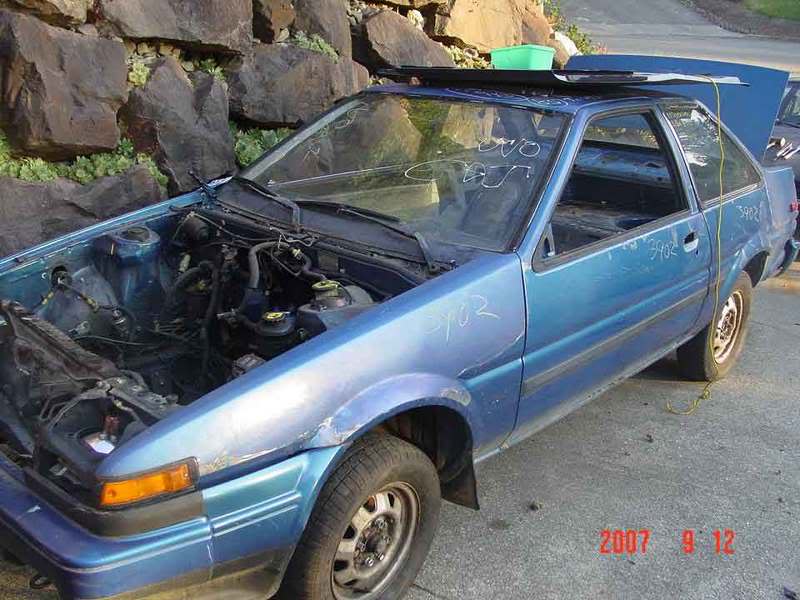
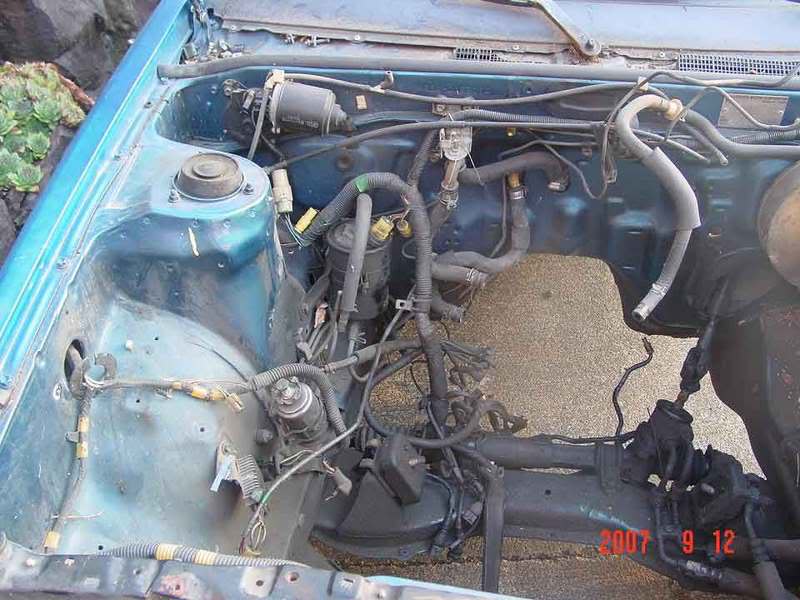
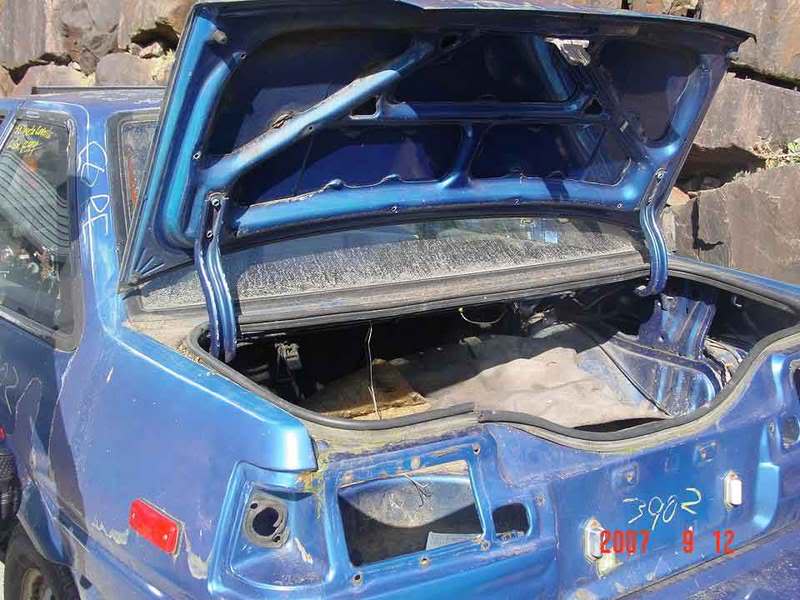
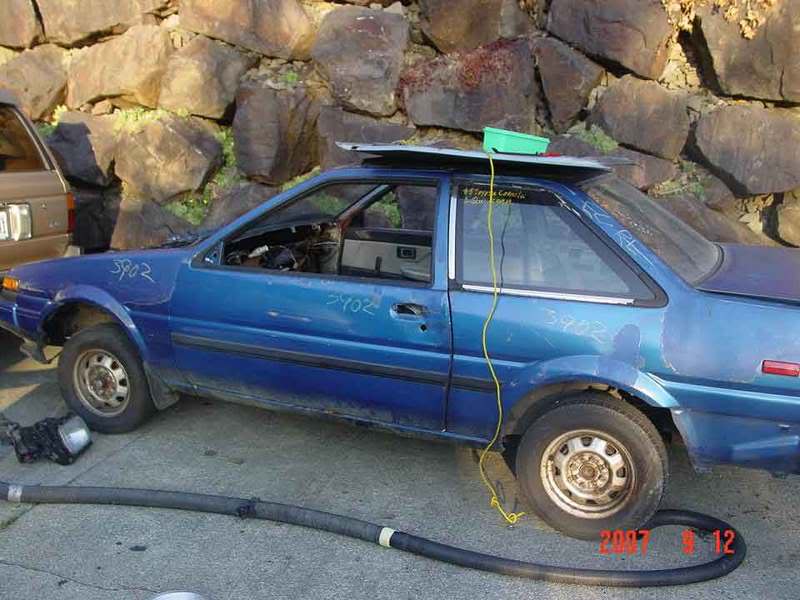
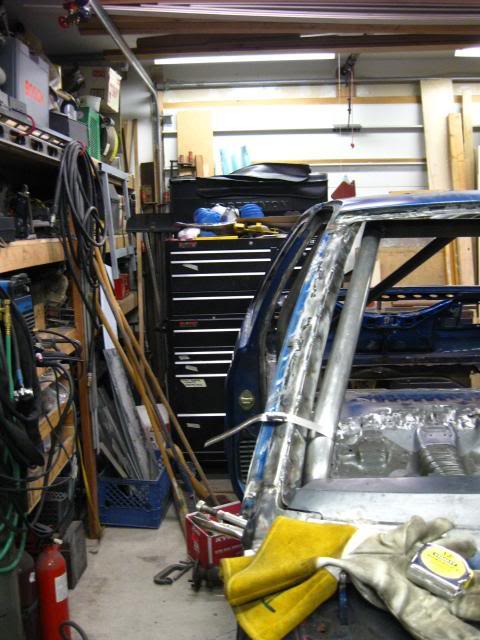
Ok, Heres the car as I got it, and the engine bay...
And finally, the one action shot my brother got....
Anyway... here it is.
__________________________________________________ _______
Ok, Heres the car as I got it, and the engine bay...
And finally, the one action shot my brother got....
Cool, its up now. Here is the rest of the build.
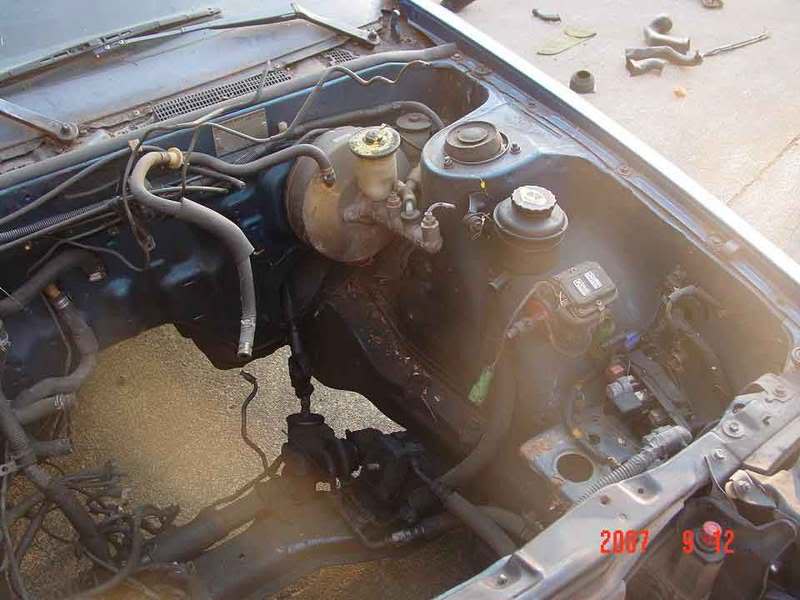
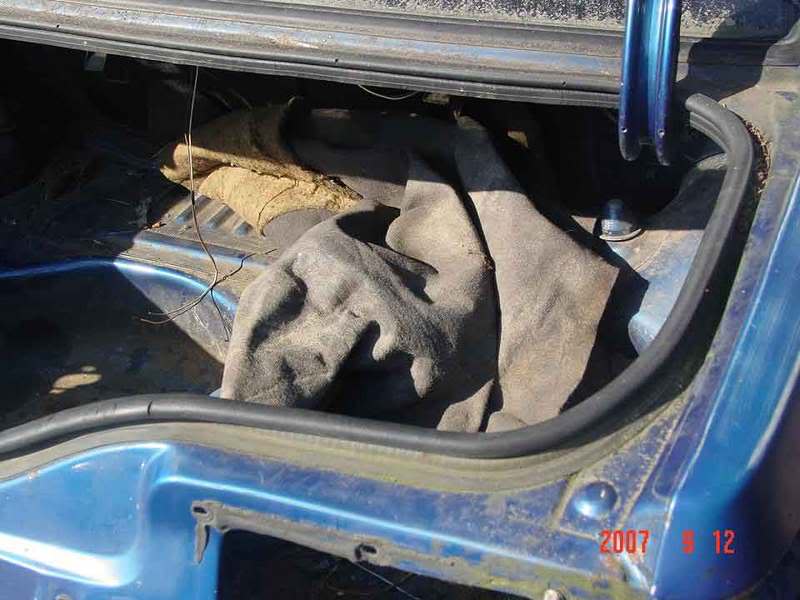
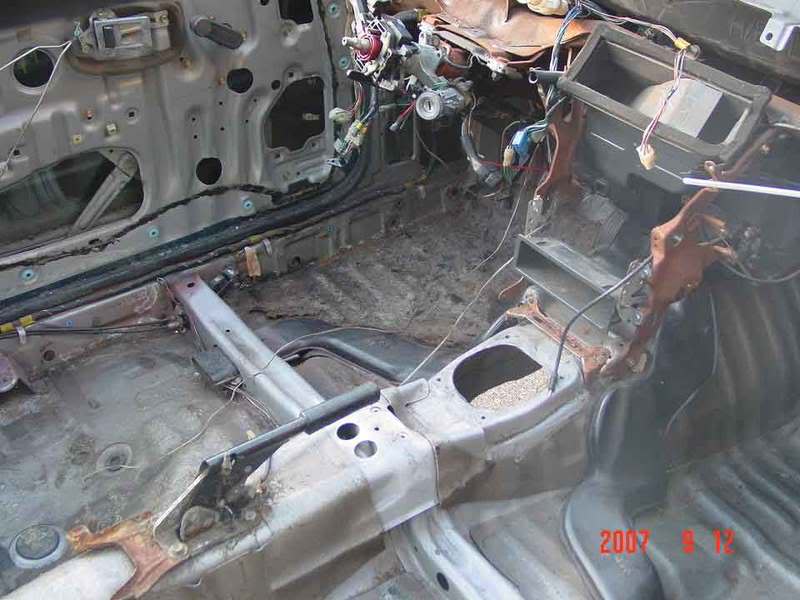
Heres some of the car before the gutting. Luckily that didnt take too long, as there wasnt much of an interior to begin with.
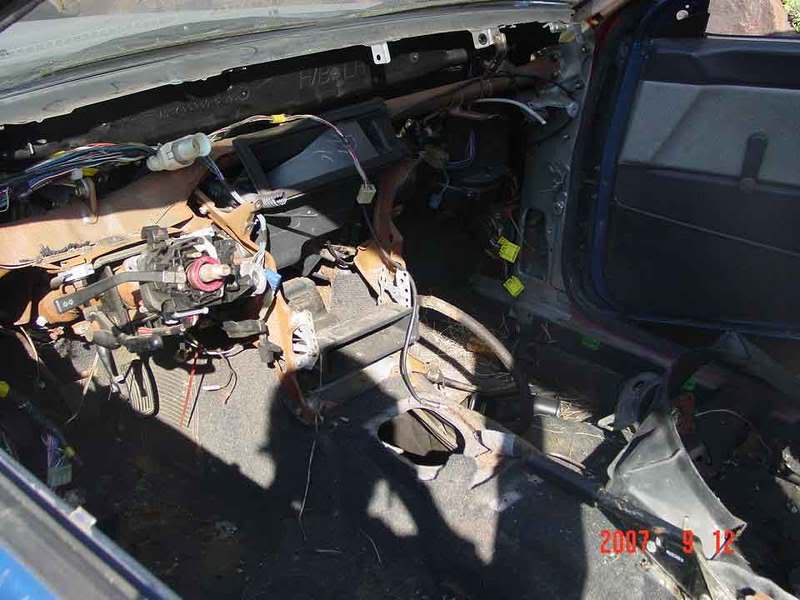
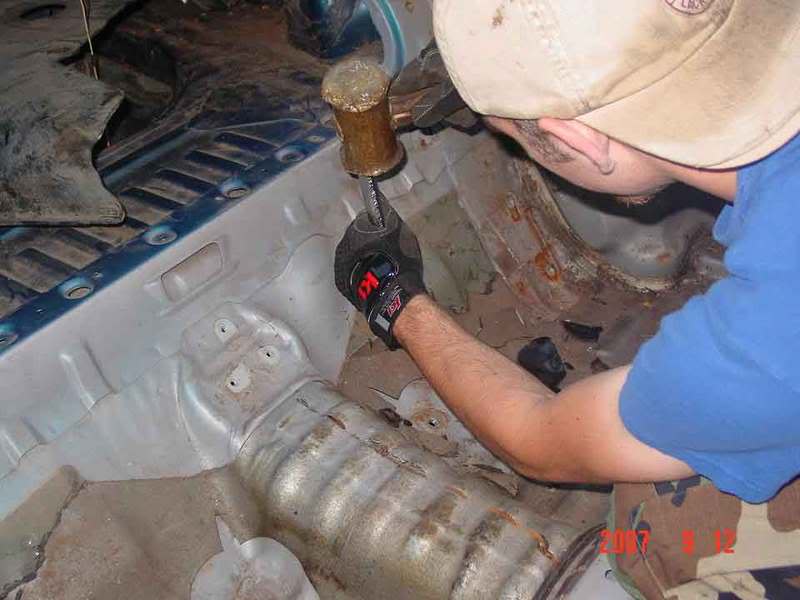
And here are the "gutted" pics. And yes, if it's visable... I know I missed that one bracket behind the drivers door. haha. I'll get it!
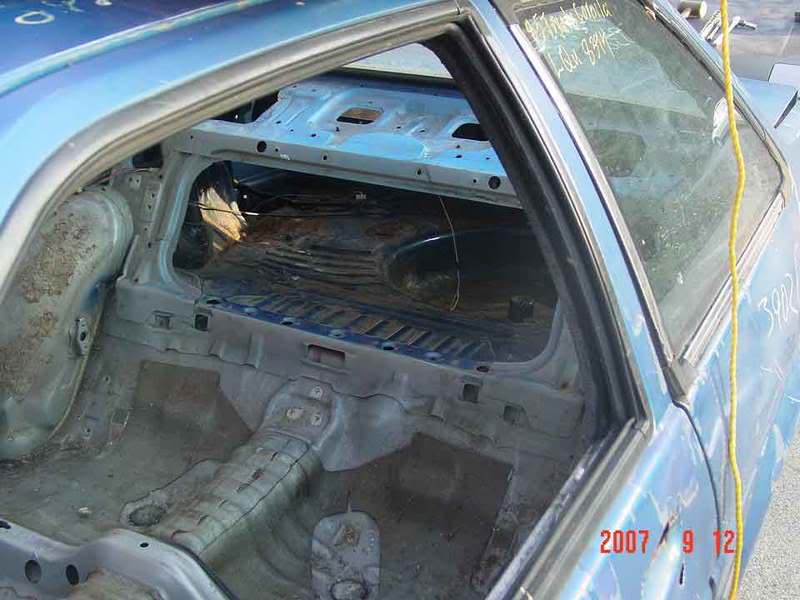
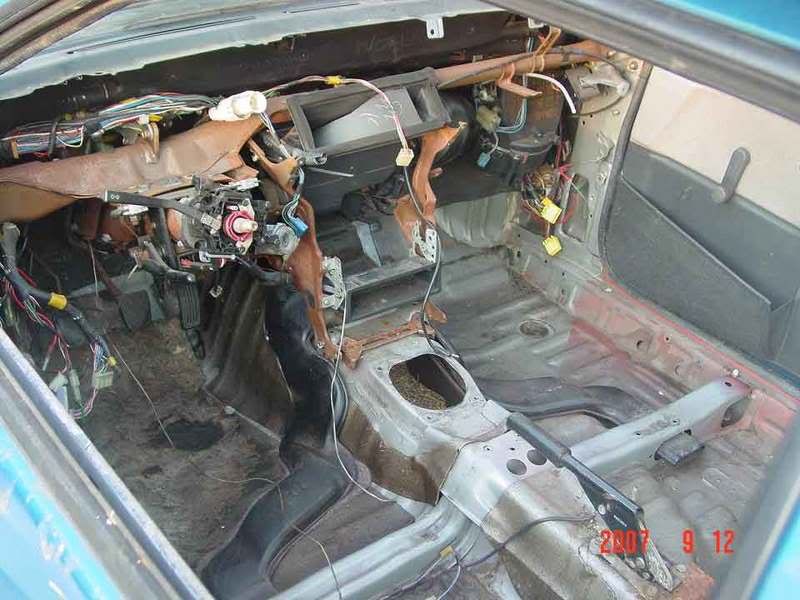
Heres some of the car before the gutting. Luckily that didnt take too long, as there wasnt much of an interior to begin with.
And here are the "gutted" pics. And yes, if it's visable... I know I missed that one bracket behind the drivers door. haha. I'll get it!
Evolved Member
That hammer should keep Billy in line! a few smacks to the head a day should do it.
Sounds like it's going to be a kickass project, need more pics of the cage!
Sounds like it's going to be a kickass project, need more pics of the cage!
More pics are definitely on the way, I just need this spam guard to go away 
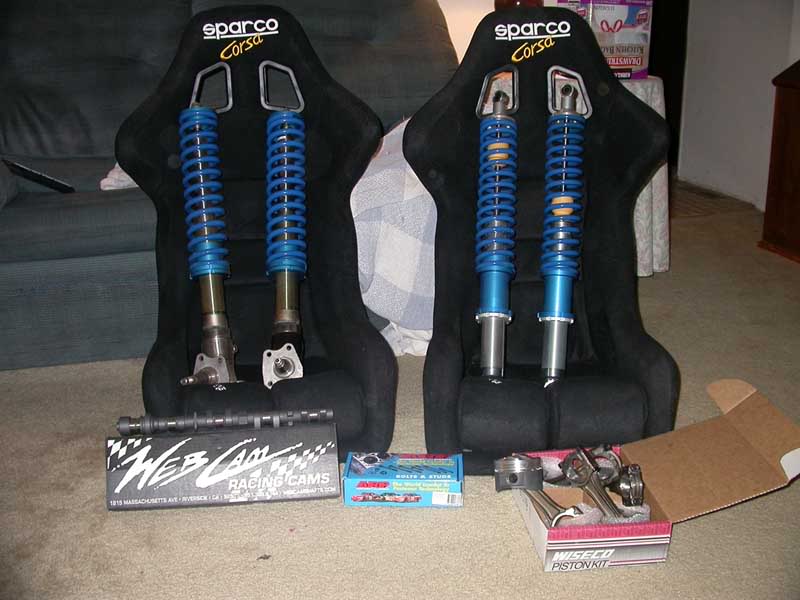
Some quick specs:
Toyota 4ag 1.6l engine DOHC. N/A. Its actually 1628cc with the pistons in it.
Small port head for higher intake velocity
Individual throttle body intake. Custom air plenum eventually.
WEB Cams, 110 Grind. 256 @.050 and about 10.1mm of lift.
Wiesco Forged pistons, 81.5mm and ~12:1 static compression. Might be a bit lower, I need to re measure everything, its been awhile.
Stock redtop con rods. These engines were designed to spin to ludicrous speed. Stock con rods are fine.
Toda valve springs. Can we say 9.5 redline? (shouldnt have to go that high. I really hope not... lol)
Yaris 1 piece bucket lifter conversion. The stock setup uses shims on top, and the lobey shaft can flip them off and destroy everything.
Stock crank. See con rod description.
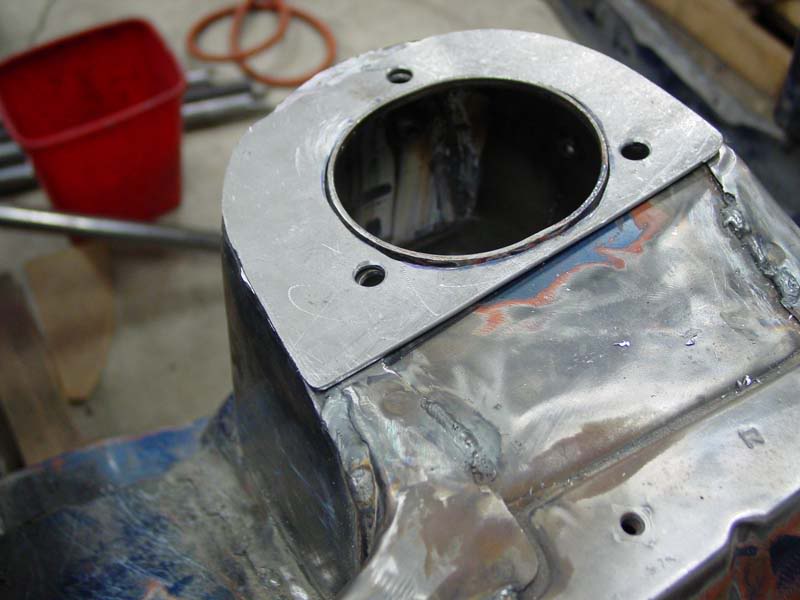
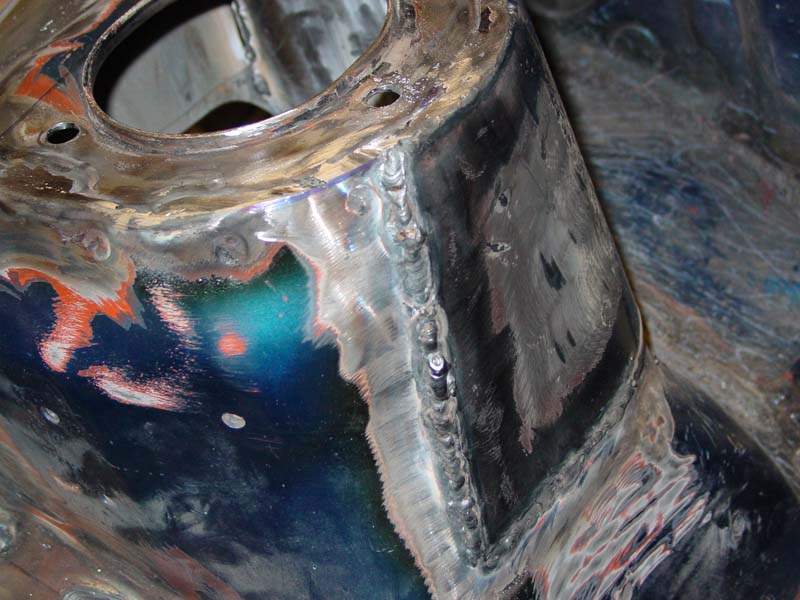
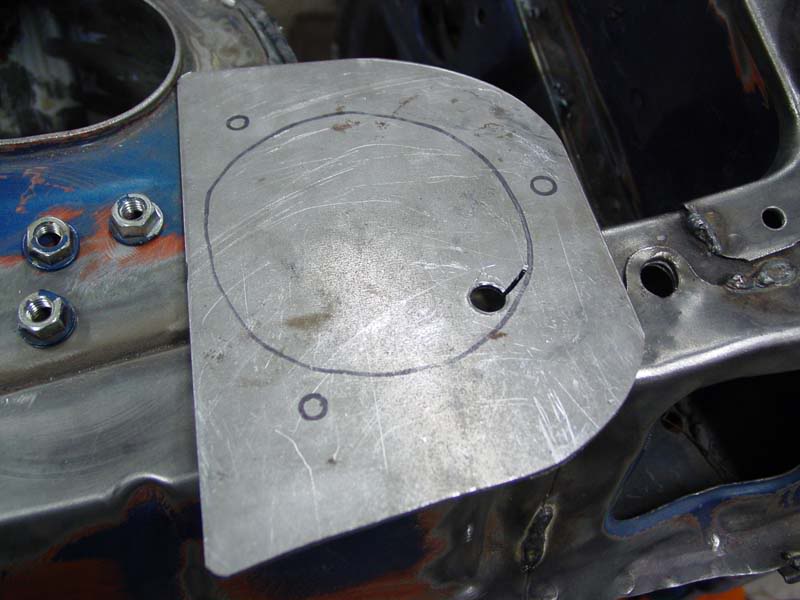
Rebaffled oil pan w/ small port head's oil drain attachment.
Modified stock valve covers to have 2 breather fittings for my catch can
Either a TRD 4-1 or OBX copy 4-1 or custom tri Y exhaust header. I think. The jury is still out on this one.
I think thats it. I'm sure I've missed something.
ViPEC v44 ECM
Direct injection
Direct or wasted spark. Haven't decided yet.
Custom Wilwood Powerlite brake system up front
1st gen celica supra rear brakes.
Dual master cylinders, tilton
Custom pedal for the DC made with a wilwood balance bar.
Hydraulic hand brake
Inline limiter
Fully stitch welded body shell
Full 10pt roll cage as per NASA rally rules
Custom dead pedal
Custom Co driver foot rest
Custom Steering column support bracket
Turreted rear suspension
Custom Seat pans to get the floor lower
Custom Seat rails to take full advantage of lower floor
Lexan rear quarter windows
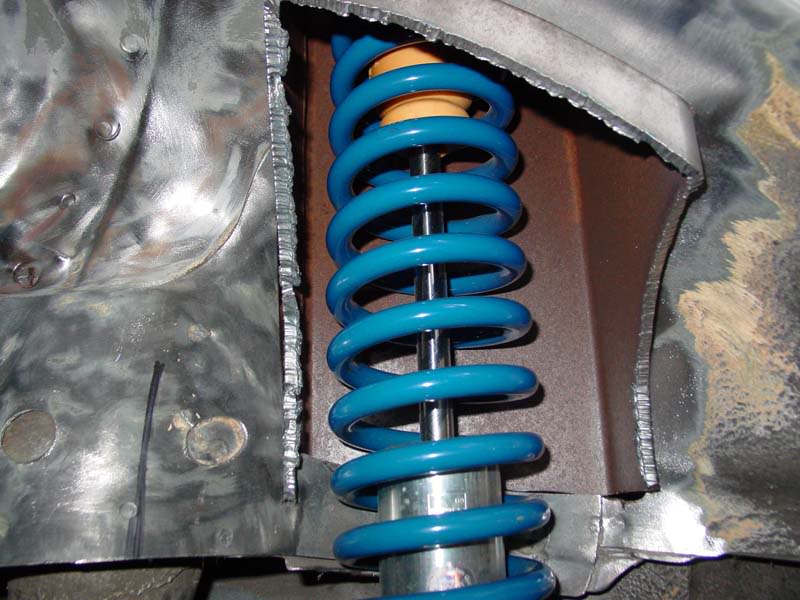
JVAB Rally Spec Coil overs for all 4 corners.
Reinforced front control arms
Stitch welded crossmember w/ welds on steering rack brackets
Custom 4 link setup in the rear
1st gen Celica Supra rear axle, 7.5" as opposed to 6.7" Stock LSD for now, Kaaz in future
Stock 5spd T50 tranny
ACT HD 4 puck solid center clutch
Custom driveshaft
Fuel cell and all aeroquip lines
SARD fuel pressure regulator
Walbro Fuel pump(s)
Some sort of bigger injectors. Maybe 7mge 330cc/min
Custom wiring harnesses and a bit of new switches and toggles for various things
Aux lights
Custom exhaust
Hi flow cat
Aluminum sump guard
HDPE underbody
All sharp edges skiplated
Shock thread protection
That's what I remember so far. I'm sure I'm missing something. Or a few things, haha.
Some quick specs:
Toyota 4ag 1.6l engine DOHC. N/A. Its actually 1628cc with the pistons in it.
Small port head for higher intake velocity
Individual throttle body intake. Custom air plenum eventually.
WEB Cams, 110 Grind. 256 @.050 and about 10.1mm of lift.
Wiesco Forged pistons, 81.5mm and ~12:1 static compression. Might be a bit lower, I need to re measure everything, its been awhile.
Stock redtop con rods. These engines were designed to spin to ludicrous speed. Stock con rods are fine.
Toda valve springs. Can we say 9.5 redline? (shouldnt have to go that high. I really hope not... lol)
Yaris 1 piece bucket lifter conversion. The stock setup uses shims on top, and the lobey shaft can flip them off and destroy everything.
Stock crank. See con rod description.
Rebaffled oil pan w/ small port head's oil drain attachment.
Modified stock valve covers to have 2 breather fittings for my catch can
Either a TRD 4-1 or OBX copy 4-1 or custom tri Y exhaust header. I think. The jury is still out on this one.
I think thats it. I'm sure I've missed something.
ViPEC v44 ECM
Direct injection
Direct or wasted spark. Haven't decided yet.
Custom Wilwood Powerlite brake system up front
1st gen celica supra rear brakes.
Dual master cylinders, tilton
Custom pedal for the DC made with a wilwood balance bar.
Hydraulic hand brake
Inline limiter
Fully stitch welded body shell
Full 10pt roll cage as per NASA rally rules
Custom dead pedal
Custom Co driver foot rest
Custom Steering column support bracket
Turreted rear suspension
Custom Seat pans to get the floor lower
Custom Seat rails to take full advantage of lower floor
Lexan rear quarter windows
JVAB Rally Spec Coil overs for all 4 corners.
Reinforced front control arms
Stitch welded crossmember w/ welds on steering rack brackets
Custom 4 link setup in the rear
1st gen Celica Supra rear axle, 7.5" as opposed to 6.7" Stock LSD for now, Kaaz in future
Stock 5spd T50 tranny
ACT HD 4 puck solid center clutch
Custom driveshaft
Fuel cell and all aeroquip lines
SARD fuel pressure regulator
Walbro Fuel pump(s)
Some sort of bigger injectors. Maybe 7mge 330cc/min
Custom wiring harnesses and a bit of new switches and toggles for various things
Aux lights
Custom exhaust
Hi flow cat
Aluminum sump guard
HDPE underbody
All sharp edges skiplated
Shock thread protection
That's what I remember so far. I'm sure I'm missing something. Or a few things, haha.
And here are some more pics...
This is the axle after some clean up
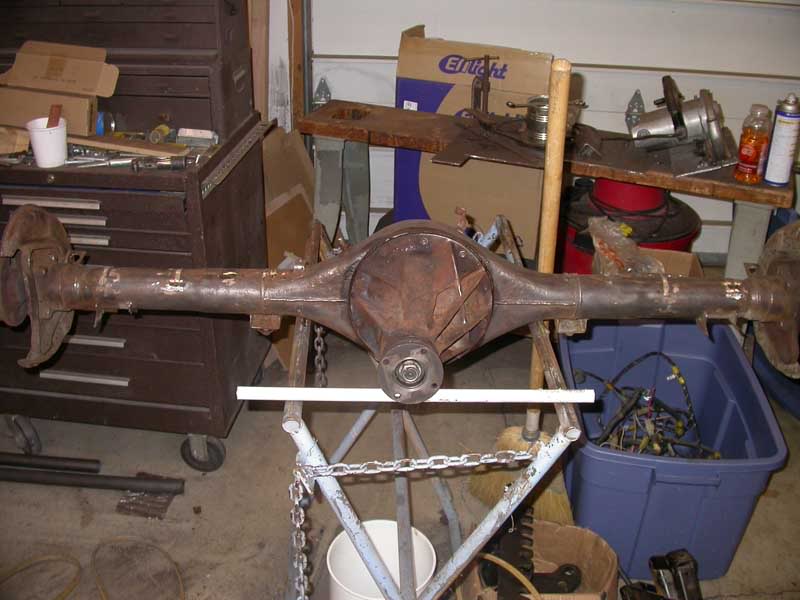
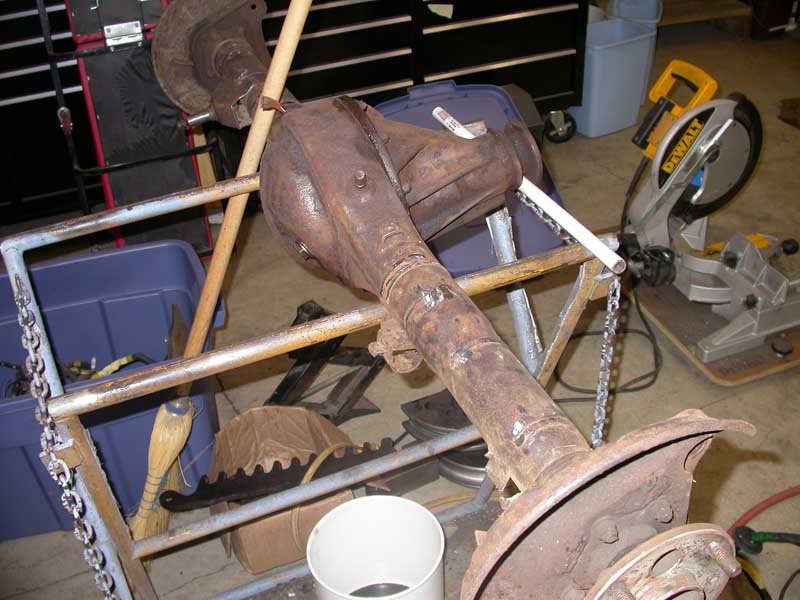
Basically, I've just cut off the stock 4 link brackets but left the pan hard and sway bar mounts. I've also been grinding the remains down to the axle level and wire wheeling away the rust. It was only a lot of flakey surface rust, so nothing too bad
Heres the "artistic rally parts shot" haha
This is the axle after some clean up
Basically, I've just cut off the stock 4 link brackets but left the pan hard and sway bar mounts. I've also been grinding the remains down to the axle level and wire wheeling away the rust. It was only a lot of flakey surface rust, so nothing too bad
Heres the "artistic rally parts shot" haha
This is the usual steering lock/ignition bracket on the steering column. Note the little "Bridge." This is where the lock lug lives. Well, to steal a corolla, erm, I mean, to disable it for legal purposes, you can just cut the bridge, and pop the lug out.
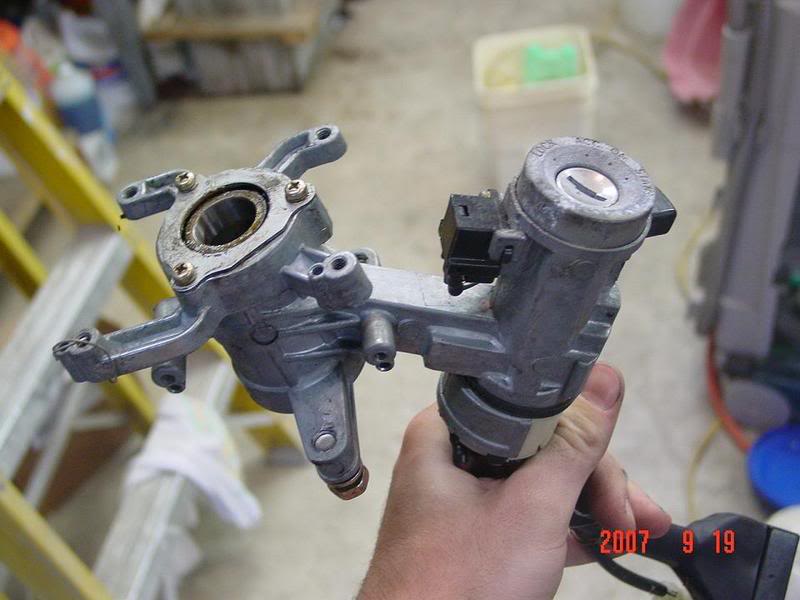
Well, in rally, you cant have the steering lock, and as I'm too lazy to turn a ket to start my car... I've modified that bracket a bit.
Presto Chango we have-o a steering column *spacer* as the turn signal lever bolts to this peice.
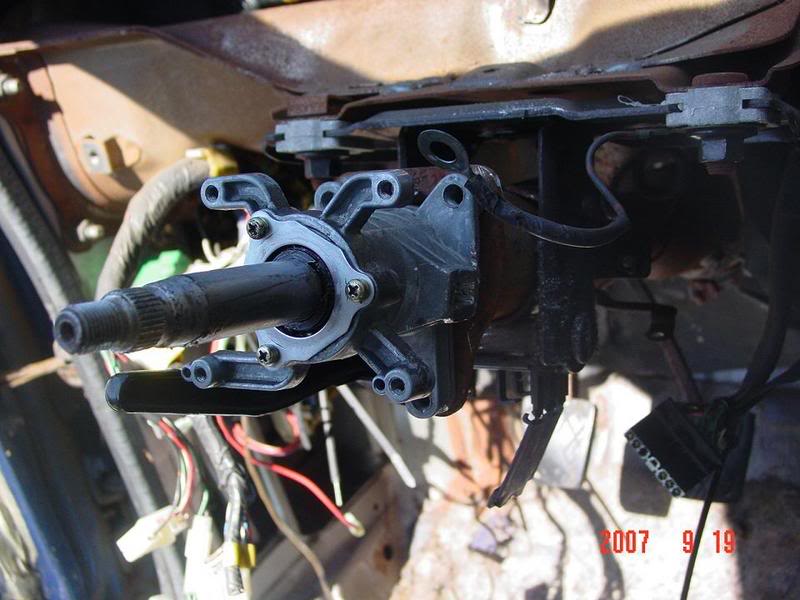
As you can see, I no longer have the "bridge" or the turn key section.
Well, in rally, you cant have the steering lock, and as I'm too lazy to turn a ket to start my car... I've modified that bracket a bit.
Presto Chango we have-o a steering column *spacer* as the turn signal lever bolts to this peice.
As you can see, I no longer have the "bridge" or the turn key section.
Here is the heater box problem..
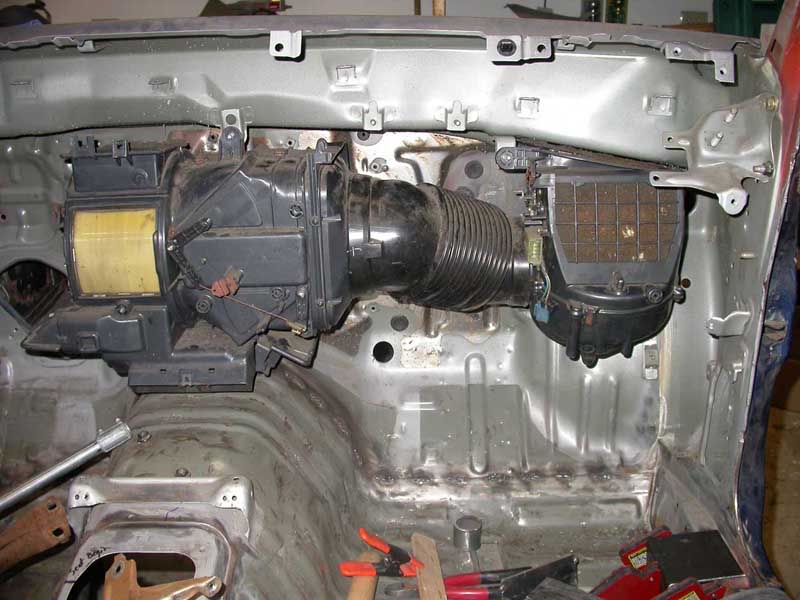
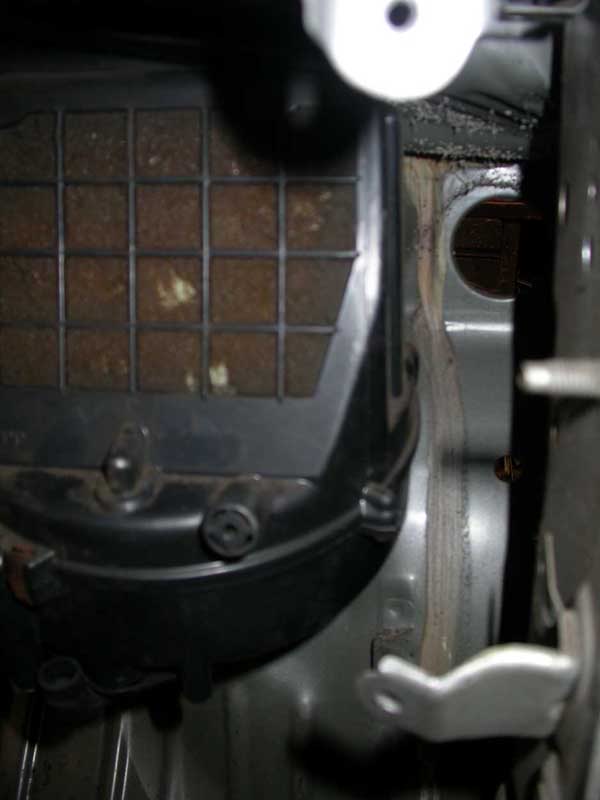
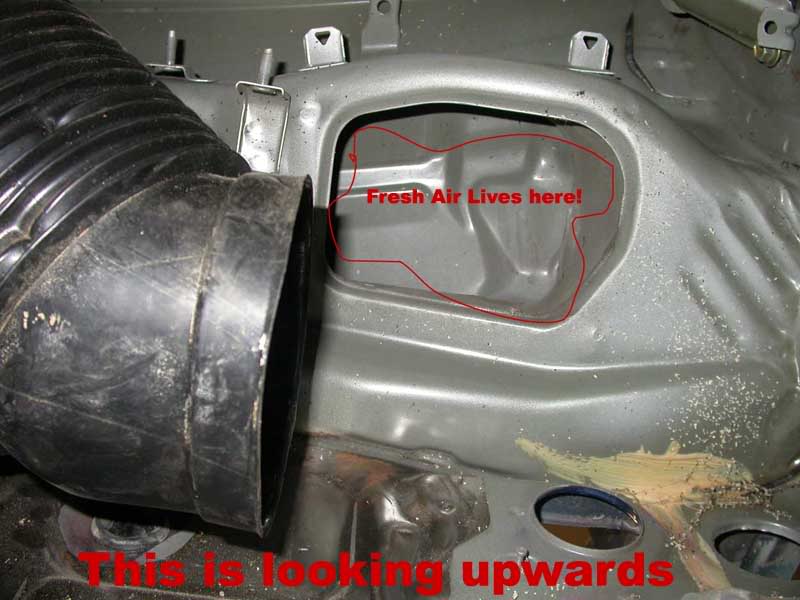
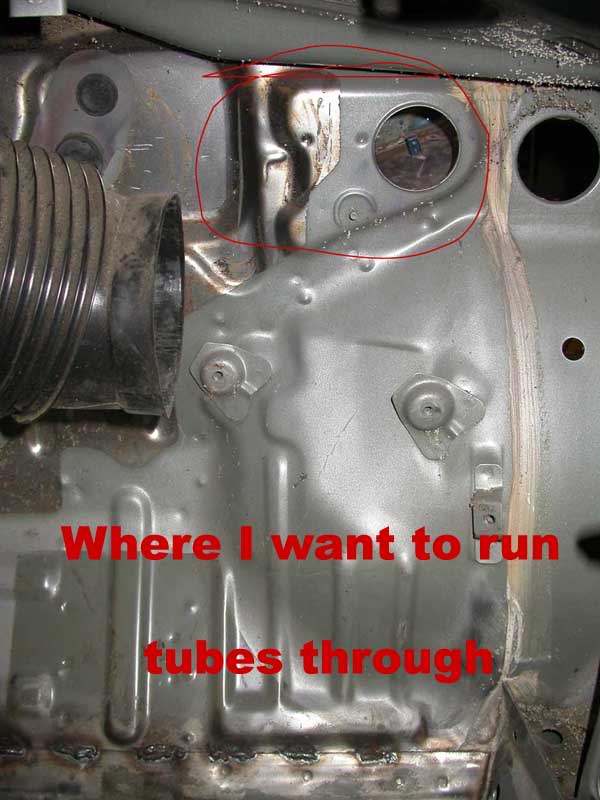
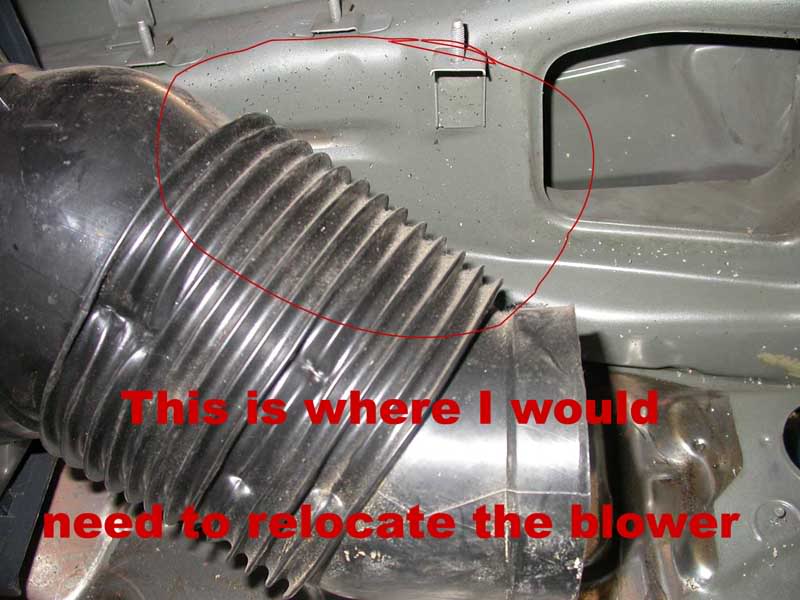
So there lies the problem. If its possible to move the blower those few inches inward, I would just do that, but I dont know how feasible it would be... I think instead of trying to fab a new hole, or make a duct I would rather just get a smaller, lighter, heater for the defrosting purposes.
So there lies the problem. If its possible to move the blower those few inches inward, I would just do that, but I dont know how feasible it would be... I think instead of trying to fab a new hole, or make a duct I would rather just get a smaller, lighter, heater for the defrosting purposes.
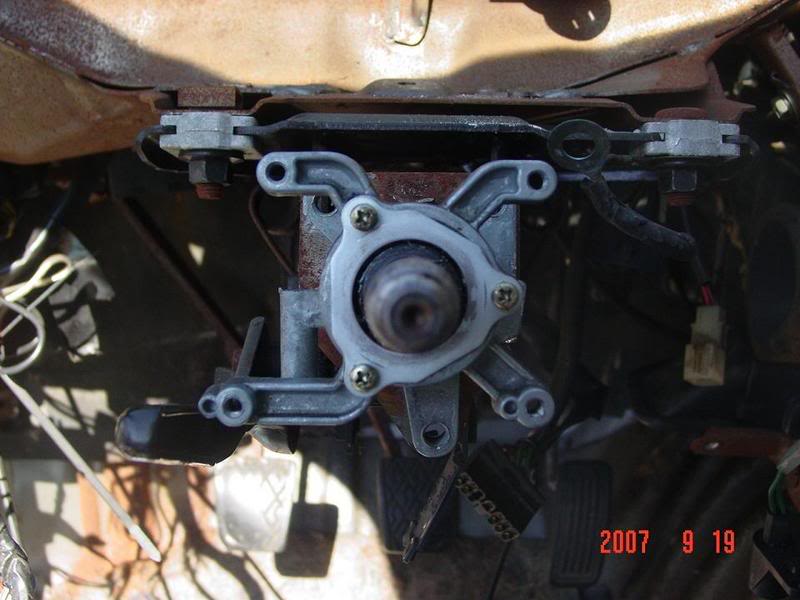
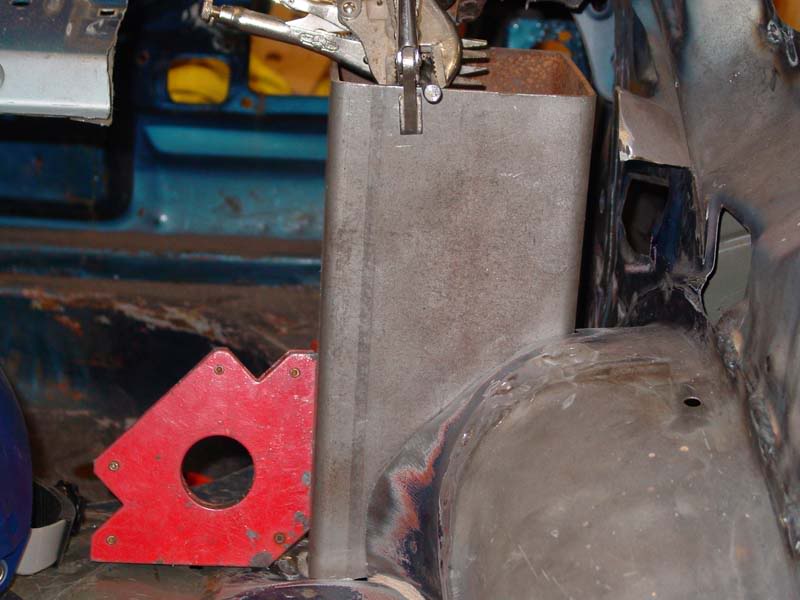
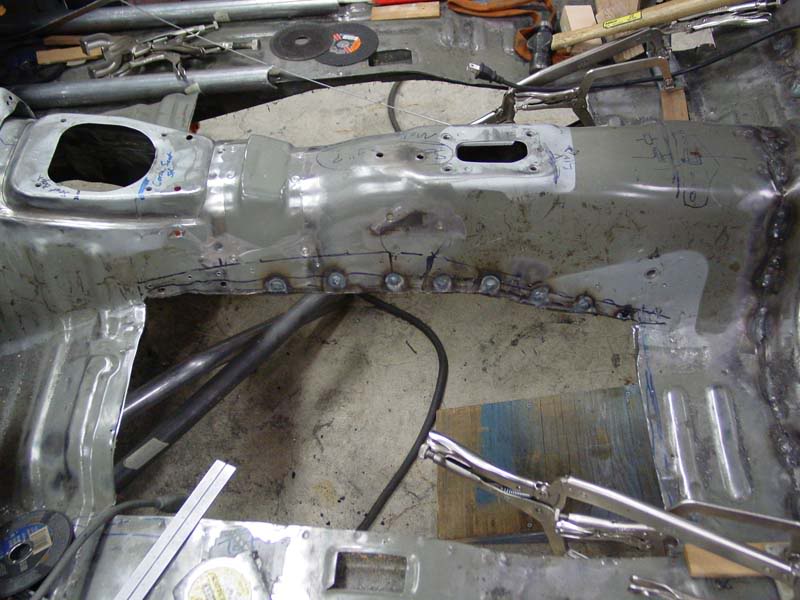
Ok, these are the strut tower reinforcements. The plate on the side is for the roll cage tubes that come through the firewall. (Take that Jesse! haha) The other peices are to help with the constant pounding the tops will take.
These are the 30 inch links... There are also some shots of the brackets (I'll get better ones later)
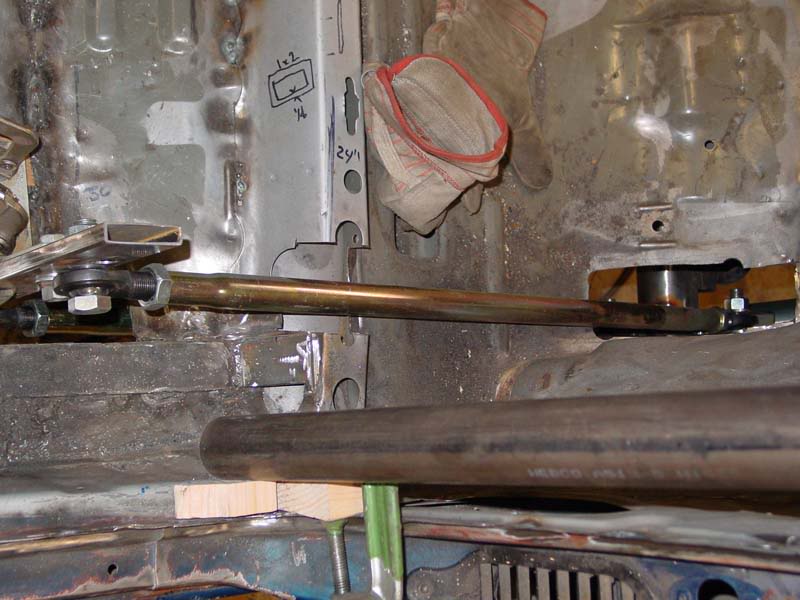
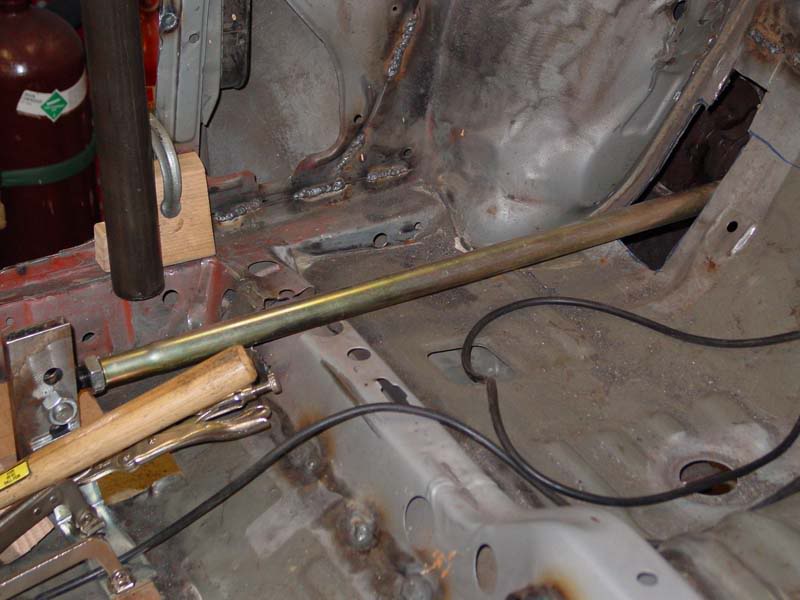

These are the 30 inch links... There are also some shots of the brackets (I'll get better ones later)
Here is the rear turret. I've only got the right side done so far
And the boxed control arm
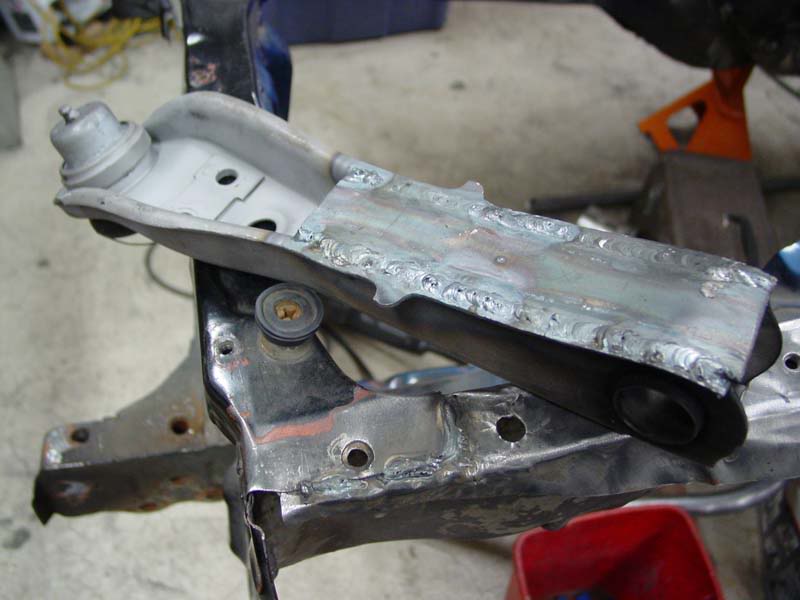
And the boxed control arm
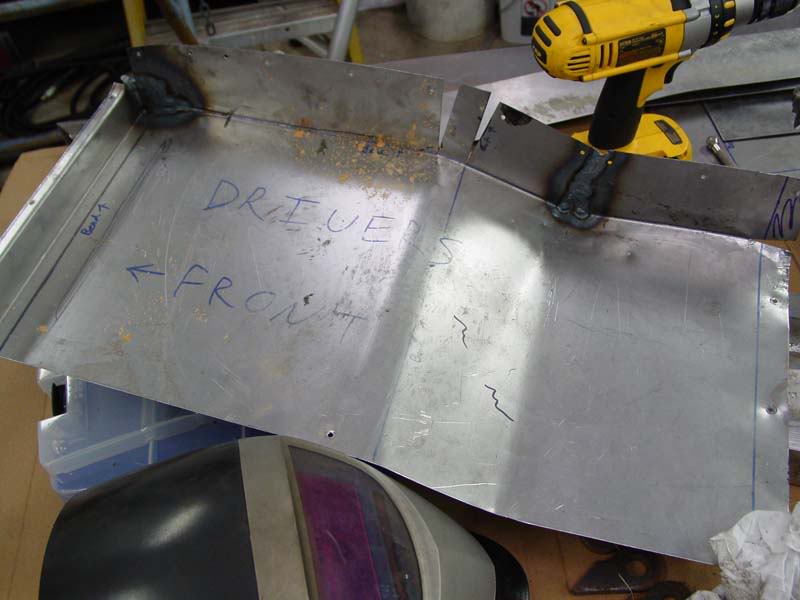
Ok, here's what im doing to get my seats lower. As you can obviously tell, I chop giant hole in floor... and insert new floor pan i bent up.
I took my LSD apart, time for a rebuild and some shimming
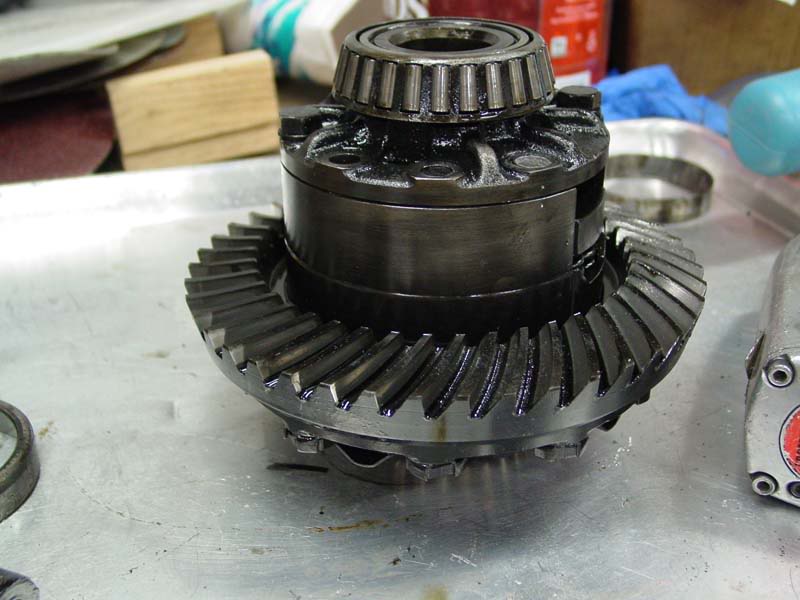

And before anyone asks, No, it will NOT be put back together in that mess of an area.
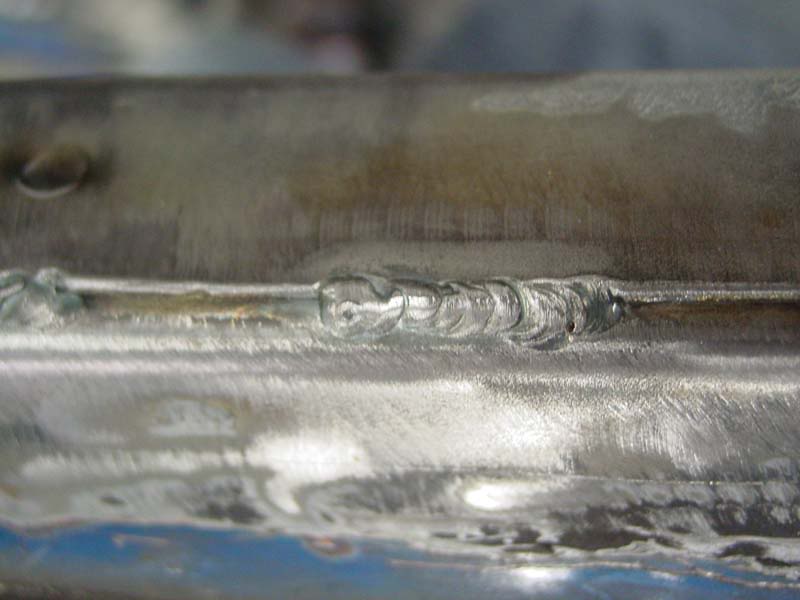
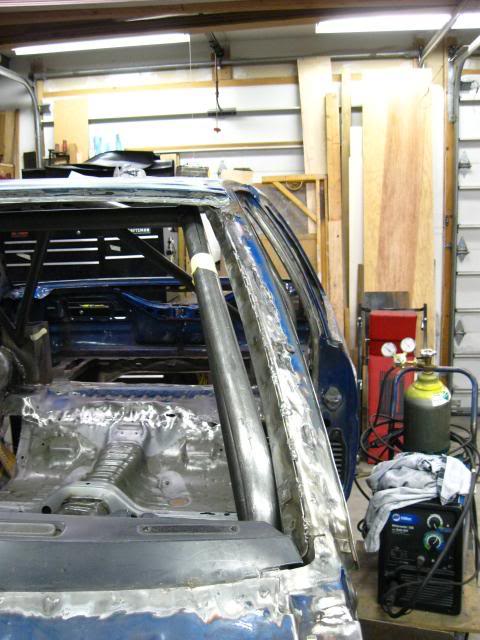
And a random pic of my stitch welding. This is with my TIG PS on the A piller
I took my LSD apart, time for a rebuild and some shimming
And before anyone asks, No, it will NOT be put back together in that mess of an area.
And a random pic of my stitch welding. This is with my TIG
PS on the A piller Brake stuff came yesterday... and I got around to tigging the brackets to the rear end. Oh, and the cage is more completed. Pics soon, tonight if photobucket doesnt hate me.
OK, here are the pics!
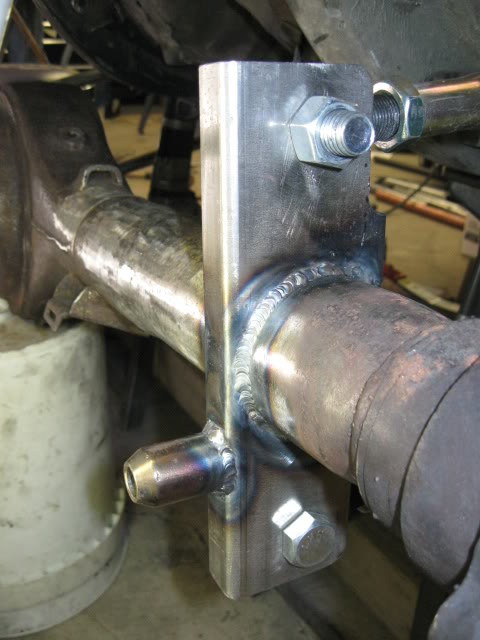
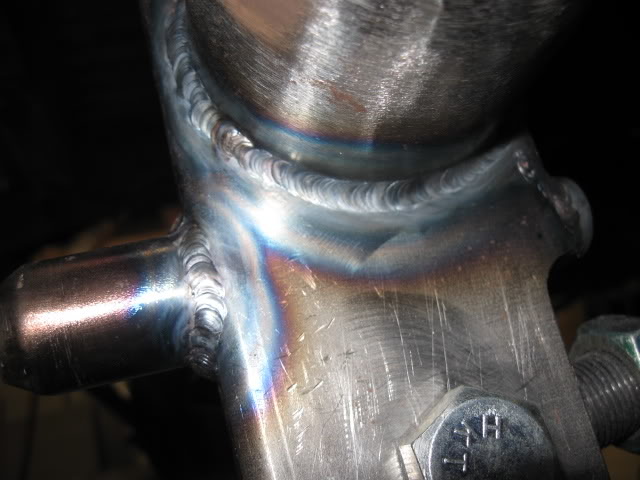
Tig'd on 4 link brackets...
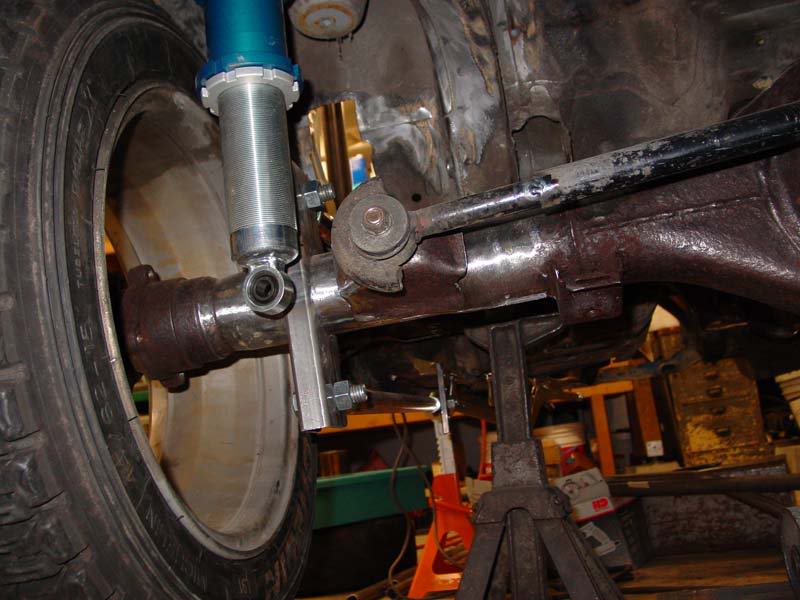
The brakes.
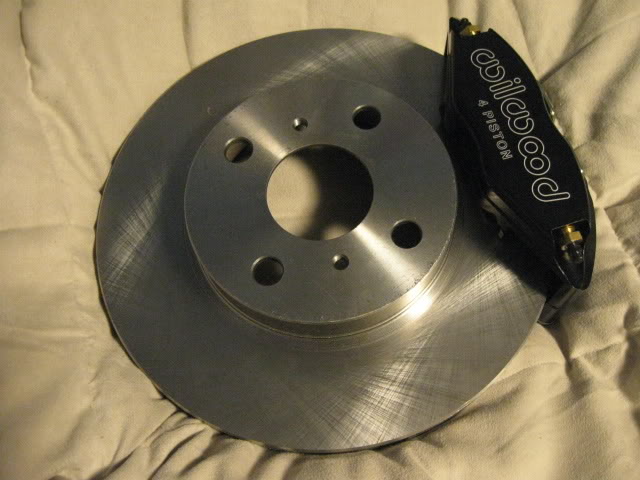
I'll be using those for the front, and stock supra axle brakes for the rear. That gives me slightly less then 50/50 bias (towards the rear) so then I'll just dial in the braking I want with the limiter and balance bar, and be good to go.
I also bought one of these...

OK, here are the pics!
Tig'd on 4 link brackets...
The brakes.
I'll be using those for the front, and stock supra axle brakes for the rear. That gives me slightly less then 50/50 bias (towards the rear) so then I'll just dial in the braking I want with the limiter and balance bar, and be good to go.
I also bought one of these...
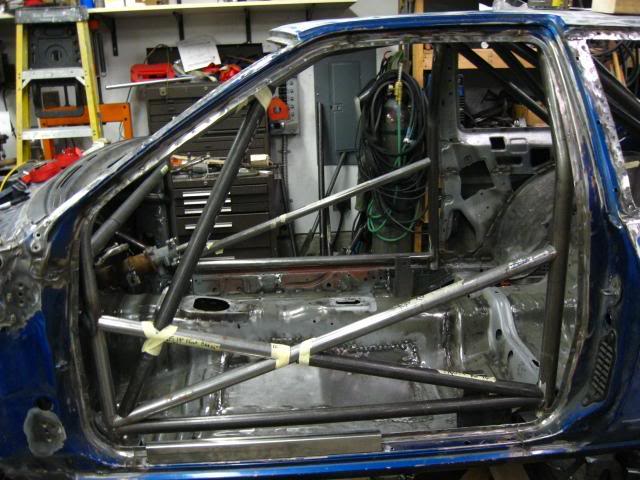
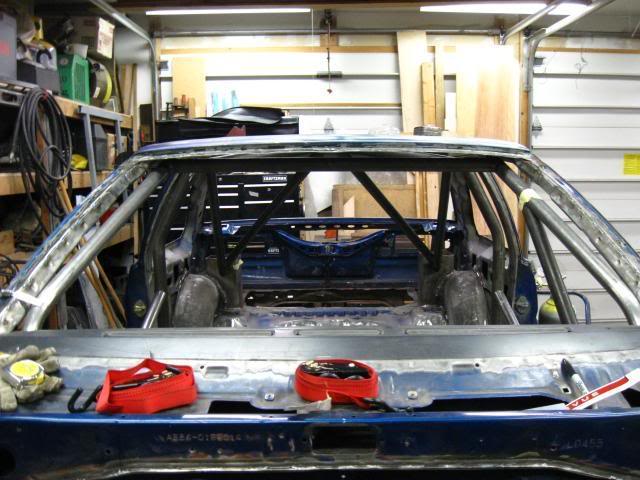
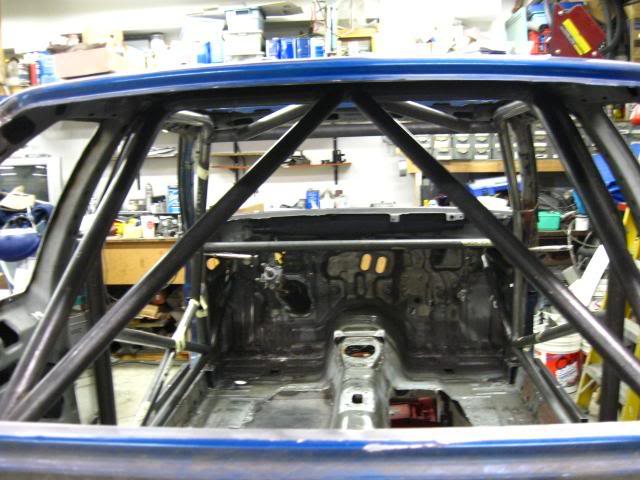
Here are some pictures of the cage so far. The door bars, the upper half of the sill bar, the A pillar support bar, and the main X/harness bars are not welded in yet. This is so I have an easier time getting around inside the car to install the seat mounts and covers for the 4 links. Hopefully next sunday the car will be getting its logbook, meaning the cage will be DONE. Finally. Its been long... and hopefully its drawing to an end.

More to come.
Oh, I also ordered a ViPEC ecm from Bob and will be running that
Double OH, Koyo Radiator came too. Well, and I guess technically the master cylinders TRIED to come... but they sent the wrong ones... so, hopefully the RIGHT ones get here soon. then I can start fabbing the pedal mods...
More to come.
Oh, I also ordered a ViPEC ecm from Bob and will be running that
Double OH, Koyo Radiator came too. Well, and I guess technically the master cylinders TRIED to come... but they sent the wrong ones... so, hopefully the RIGHT ones get here soon.
then I can start fabbing the pedal mods...Heres the difference in brake diameters.
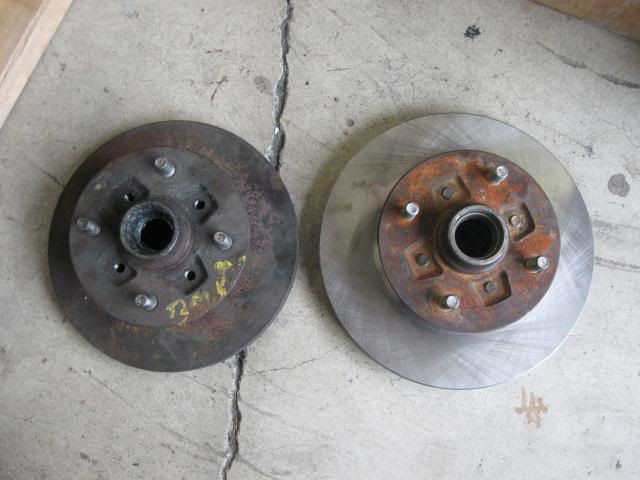
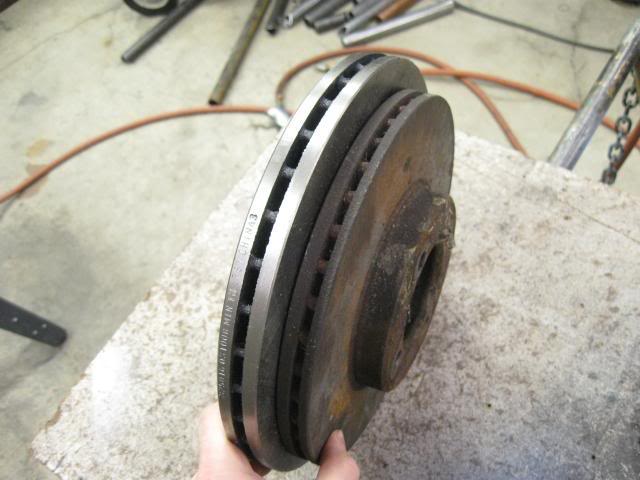
Ok, so in order to get more powerful brakes with an increase in heat capacity (thermal mass), I had to get different calipers and rotors. The thermal mass part is easy, a wider disc, or a bigger diameter disc, or both. However, because a larger diameter disc will also effect FR RR bias, I didnt JUST want to get some massive disc. Besides, this being a race car, why should I care how cool it looks? lol. Anyway, another consideration was the wheels I want to run. The rallies here are run on gravel, so clearance around the outside edge of the caliper is important, otherwise you eat the calipers faster. All of this went into deciding a caliper to use, and a rotor diameter.
I choose the powerlite because it would fit well, and a 10.04 rotor because, well, thats the closest rotor I could find that I could make work without having to buy expensive AP 254mm x 20.1mm rotors. Even though thats the size I was aiming for. We found rotors from a camry, I think it was that were 10.04in in diameter, and .86 in thick. The problem was not many rotors that bolt to the back of hubs are small enough, and the ones that slip over the lugs are the wrong bolt pattern (as in this case).
So... I threw it on a bridgeport and bored my own 87mm bolt pattern in it to bolt it to my hubs, and bored out the center hole so it would FIT on the hub.
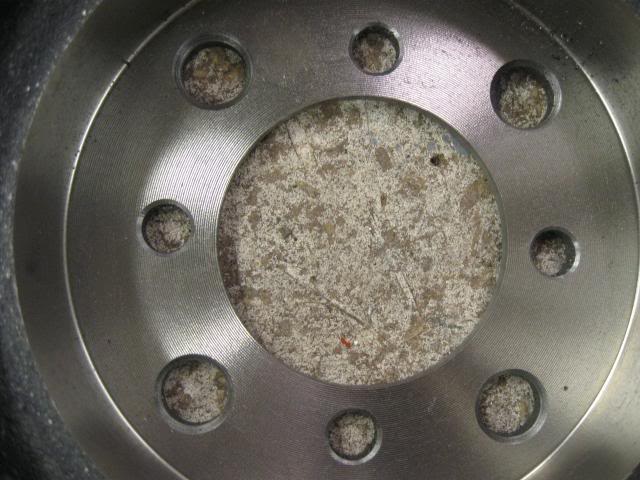
Insto rotor for 35 bucks.
The rear of the car has the stock supra rear end rotors and calipers. The rotors are a 10in disc as well, but only .38 wide. Plenty, for the rear brakes.
The front calipers are a 4x1.38in piston and the stock supra are a slider with a 1.6875in piston. I dont remember stock sizes... they might be in my other post.
The other cool thing is by using the stock supra rears, they are iron, and the gravel wont eat them as fast. Good for RWD. Also, I can use the stock parking brake and not have to figure out how to make my hydro handbrake lock, haha. (Fun fact, the STI I crew for, its parking brake is a bungee cord from the handle to the steering wheel.... 75k rally car... and its got a bungee cord, haha)
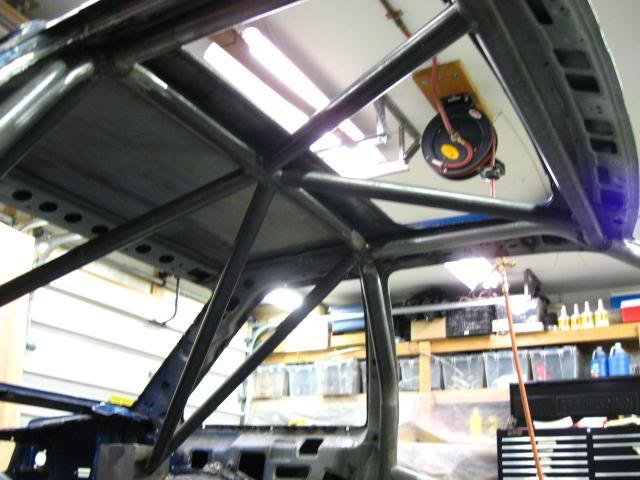
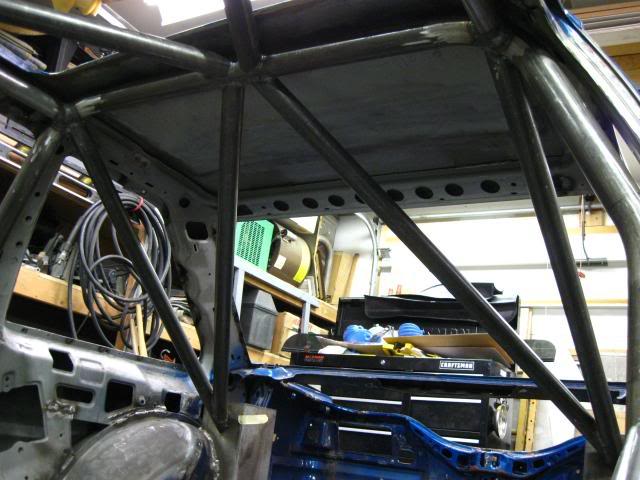
More Cage pics
Ok, so in order to get more powerful brakes with an increase in heat capacity (thermal mass), I had to get different calipers and rotors. The thermal mass part is easy, a wider disc, or a bigger diameter disc, or both. However, because a larger diameter disc will also effect FR RR bias, I didnt JUST want to get some massive disc. Besides, this being a race car, why should I care how cool it looks? lol. Anyway, another consideration was the wheels I want to run. The rallies here are run on gravel, so clearance around the outside edge of the caliper is important, otherwise you eat the calipers faster. All of this went into deciding a caliper to use, and a rotor diameter.
I choose the powerlite because it would fit well, and a 10.04 rotor because, well, thats the closest rotor I could find that I could make work without having to buy expensive AP 254mm x 20.1mm rotors. Even though thats the size I was aiming for. We found rotors from a camry, I think it was that were 10.04in in diameter, and .86 in thick. The problem was not many rotors that bolt to the back of hubs are small enough, and the ones that slip over the lugs are the wrong bolt pattern (as in this case).
So... I threw it on a bridgeport and bored my own 87mm bolt pattern in it to bolt it to my hubs, and bored out the center hole so it would FIT on the hub.
Insto rotor for 35 bucks.
The rear of the car has the stock supra rear end rotors and calipers. The rotors are a 10in disc as well, but only .38 wide. Plenty, for the rear brakes.
The front calipers are a 4x1.38in piston and the stock supra are a slider with a 1.6875in piston. I dont remember stock sizes... they might be in my other post.
The other cool thing is by using the stock supra rears, they are iron, and the gravel wont eat them as fast. Good for RWD. Also, I can use the stock parking brake and not have to figure out how to make my hydro handbrake lock, haha. (Fun fact, the STI I crew for, its parking brake is a bungee cord from the handle to the steering wheel.... 75k rally car... and its got a bungee cord, haha)
More Cage pics
Oh snap!
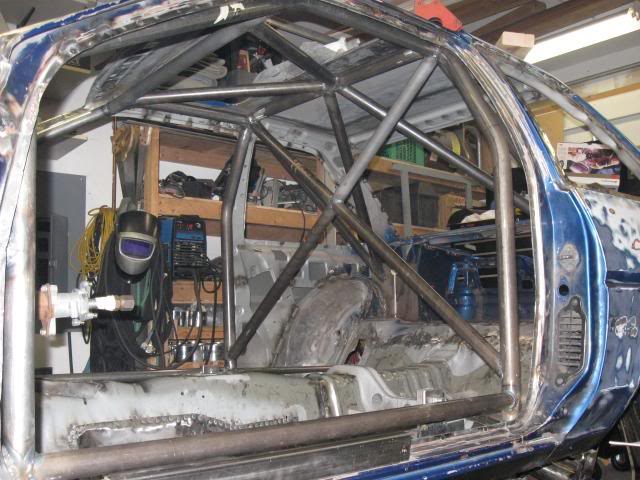
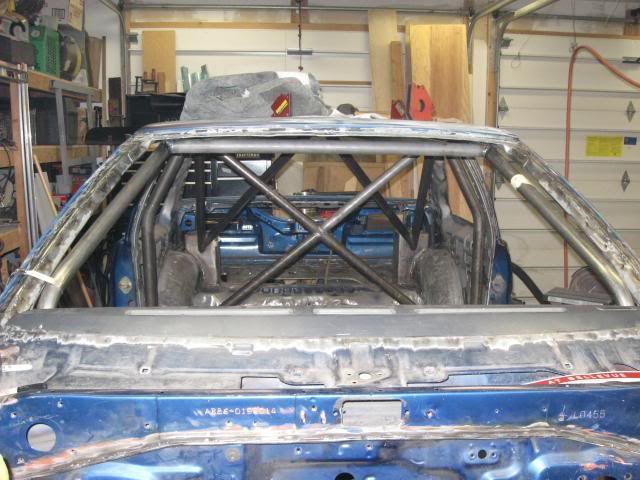
Standby for door bar pics. Both continuous bars are in... And soon one of the lower bars. A few gussets are made.
Standby for door bar pics. Both continuous bars are in... And soon one of the lower bars. A few gussets are made.