
The Pursuit: Evo IX SE Rebuild


The Pursuit: Evo IX SE Rebuild
Hey EvoM,
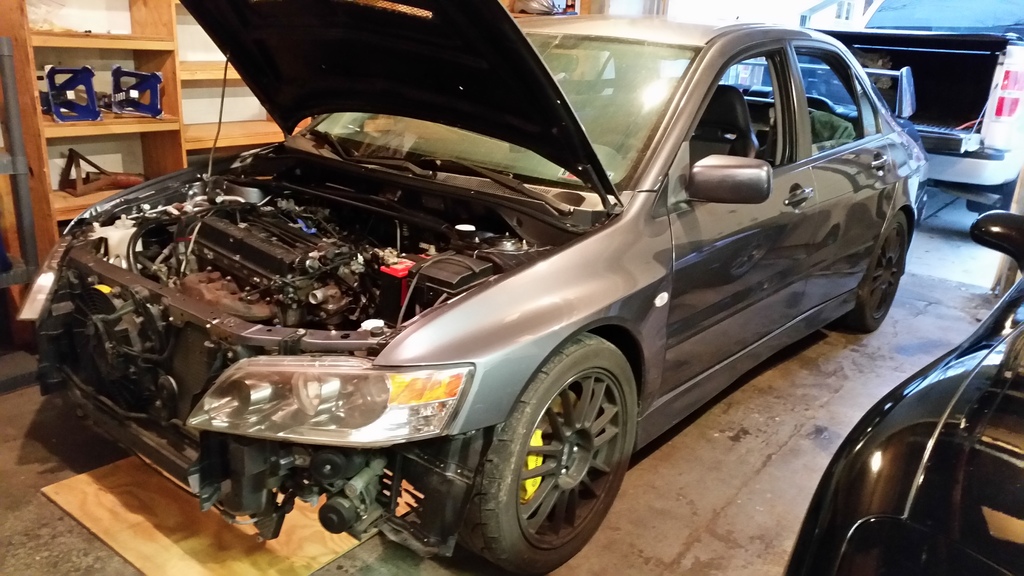
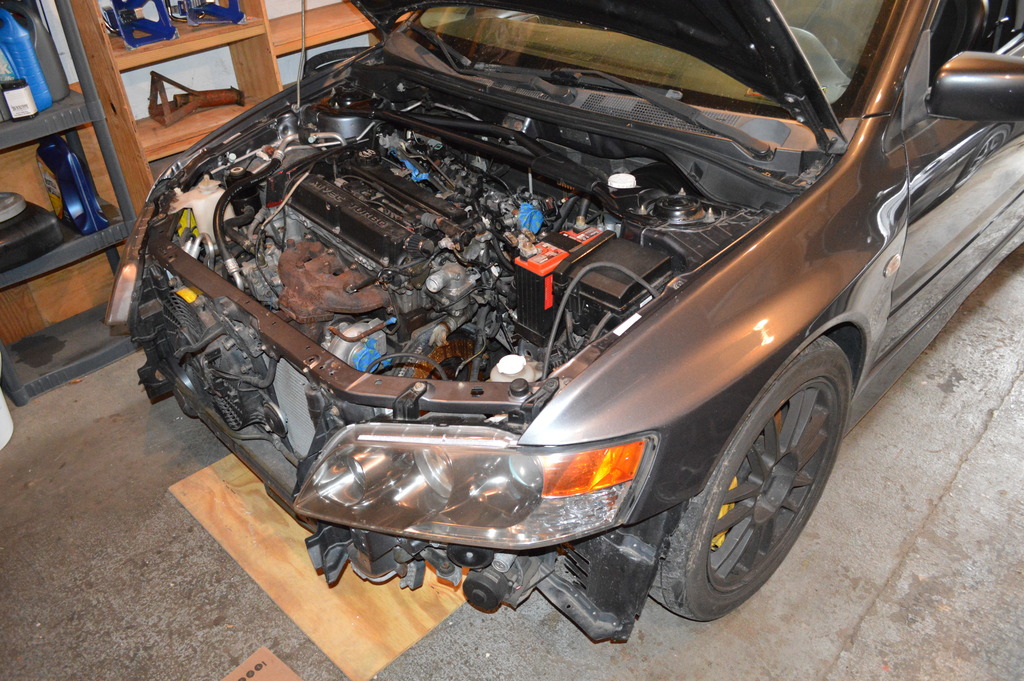
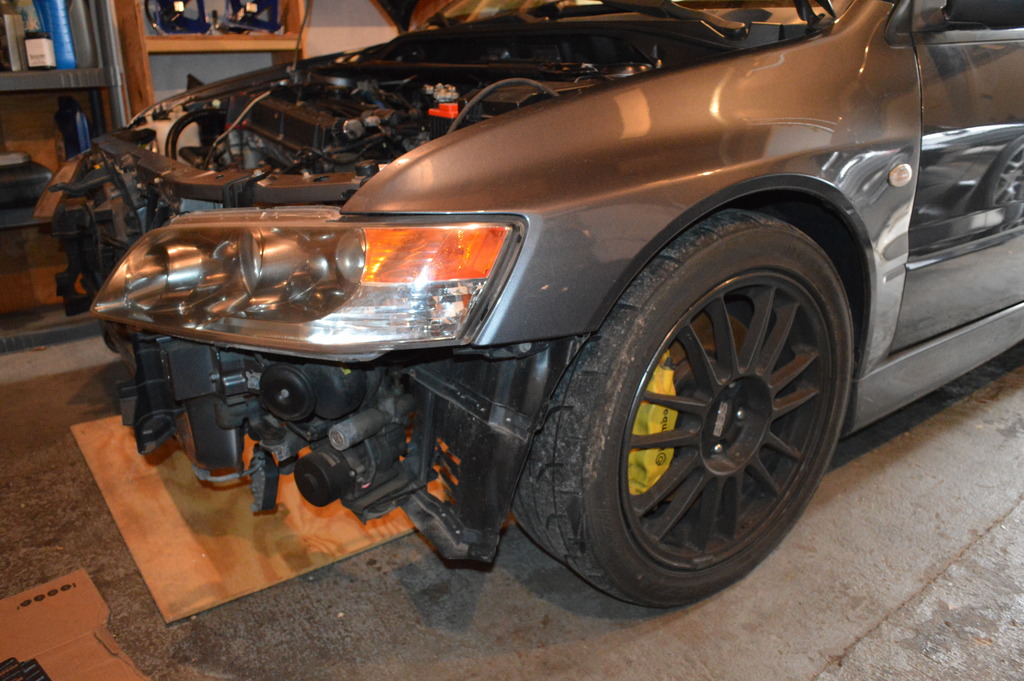
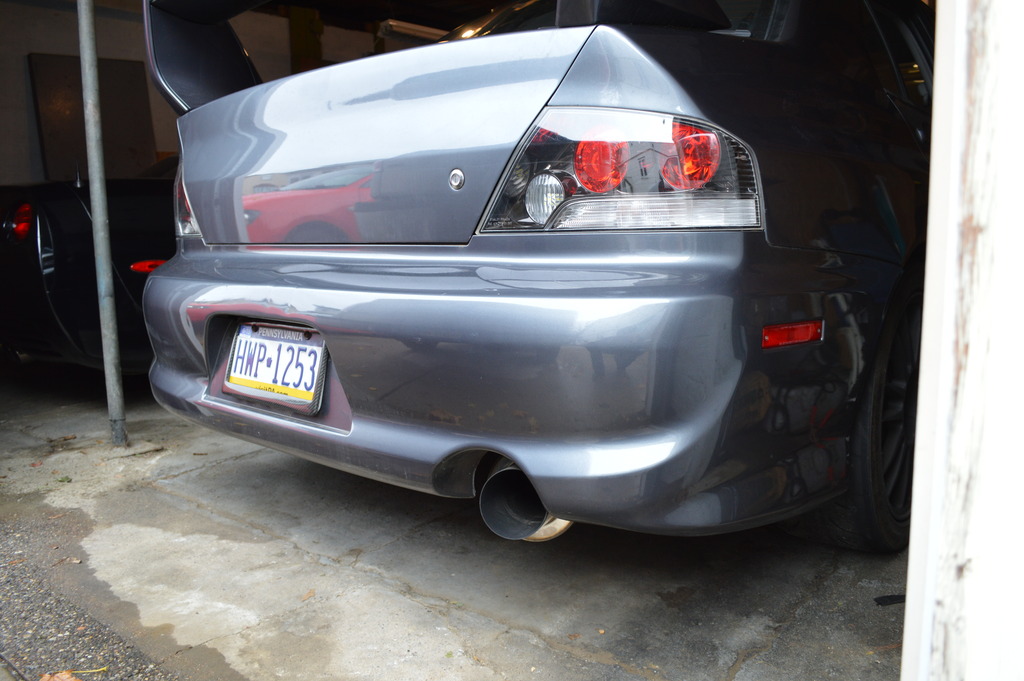
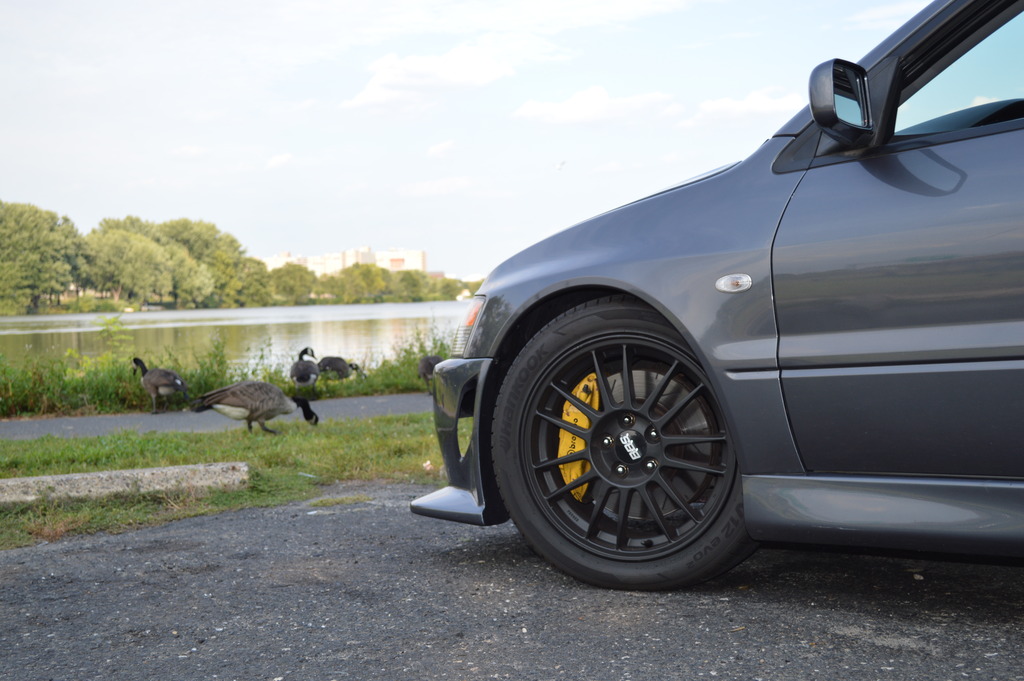
I just picked up a beautiful graphite grey Evo IX SE this past weekend from a fellow EvoM member. His thread can be found here: https://www.evolutionm.net/forums/sa...es-modded.html.
The car was a full bolt-on build (6266 top mount, ETS race front mount, ETS 3.5" exhaust w/ vibrant muffler, EvoDan double pumper fuel setup, big injectors, GSC S2 cams, speed density tune from TS Comp, etc.) but still had a stock bottom end. The Evo is currently in a state of disrepair as some pieces were removed and sold off to be replaced with stock parts. The prior owner was in the process of restoring it back to stock when he decided to put it up for sale. That's where I come in.
I have not decided what I will do with the car at this time but the immediate goal is to clean it up and get it running. It came with a bunch of stock parts like the front mount, 5-speed tranny, IX turbo, fuel pump w/ hanger, etc. The only thing it was missing was a clutch kit as the prior owner sold off the one he was using.
I have already placed an order with ExtremePSI for a new clutch and flywheel bolts. I'll be placing another order tonight or tomorrow for tranny / xfer case fluid along with other various bolts. For the clutch I went with the Competition Clutch Stage 2 kit. I went with this kit for two reasons: it is rated to hold a reasonable amount of torque (around 400 at the wheels) and...it was on sale.
I've never had the opportunity to document a build of any kind (I understand that this is not a very exciting "build" to most) but I thought some may enjoy following along. Please let me know if there's anything I'm missing here and/or you want to see pictures of something in particular as I move forward.
Here are some pics for your view pleasure:


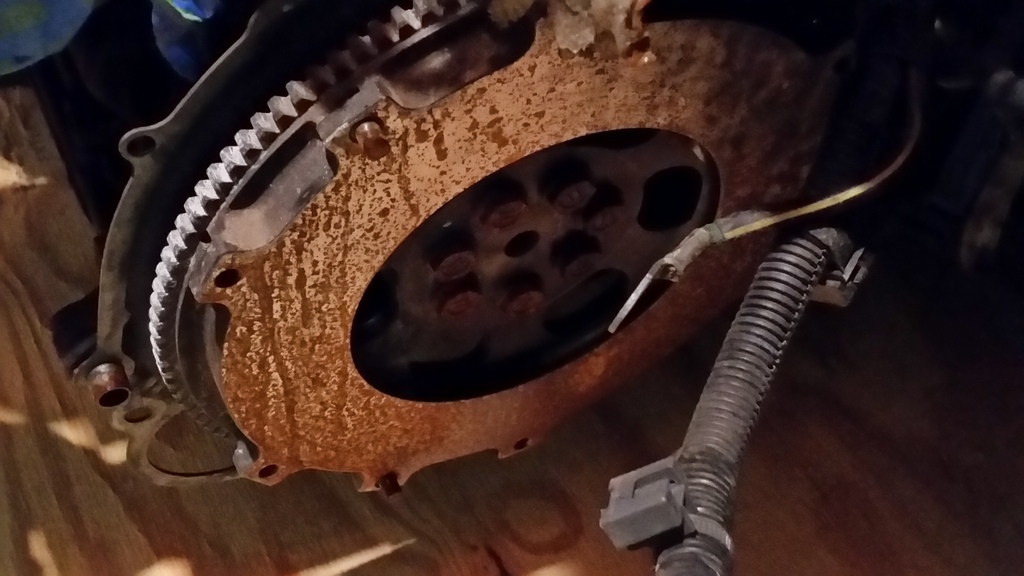
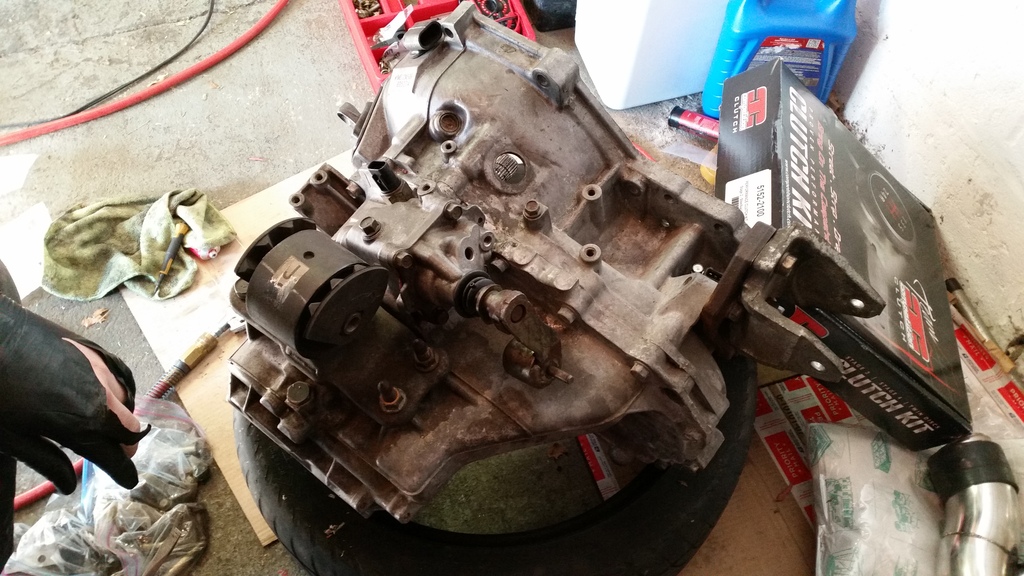
So, my very first task was to remove the flywheel to have it resurfaced because, as you can see in the photos above, it is covered with rust and because I don't know for sure the condition it is in. It would be really frustrating to install a brand new clutch kit and there be something wrong with the flywheel.
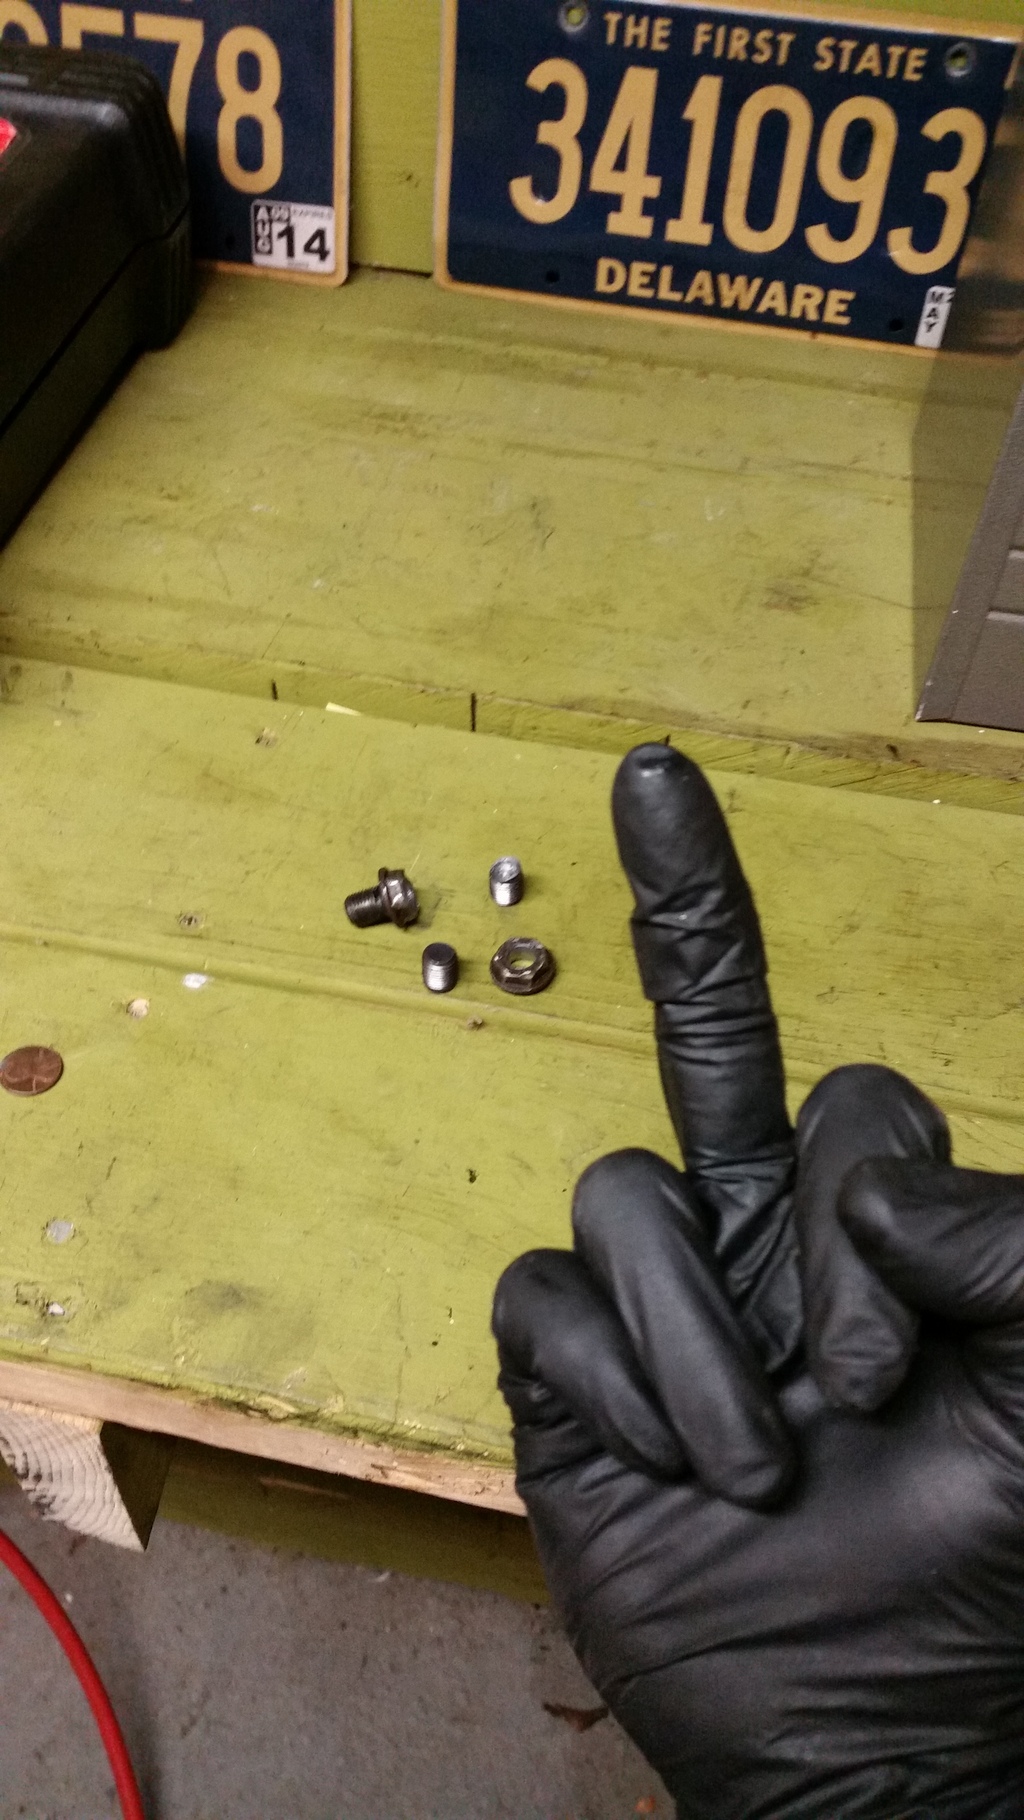
So, I attempted to remove the flywheel on Sunday. I bet you're saying, "No big deal, the tranny is already off!" That's what I said and guess what? Not so easy. Three out of the seven bolts rounded. I used a 12-point 17 mm socket with a breaker bar and extension (good ol' jack handle to the rescue!) to get four of those suckers off but the last three would NOT come off. Needless to say I was pissed. I hopped on the interwebz and found out that the "easiest" way to remove the bolts was to drill them out. I happen to have a nice Ryobi cordless drill with a set of bits so I decided to give it a try.
I am extremely paranoid and was very worried about damaging both the crank and the flywheel so I took my time with the first bolt. It legitimately took me almost an hour to get the first one out. After that I honed the process and the other two were out in about 30 minutes. So after roughly two hours of work I had the flywheel off! Good thing I ordered new flywheel bolts. So now I just need to find a local machine shop to inspect and machine it so when my clutch comes in I can throw the tranny back on!
On to the pics!
I nicknamed him Rusty!
The one-finger salute to those damn bolts!
So, I attempted to remove the flywheel on Sunday. I bet you're saying, "No big deal, the tranny is already off!" That's what I said and guess what? Not so easy. Three out of the seven bolts rounded. I used a 12-point 17 mm socket with a breaker bar and extension (good ol' jack handle to the rescue!) to get four of those suckers off but the last three would NOT come off. Needless to say I was pissed. I hopped on the interwebz and found out that the "easiest" way to remove the bolts was to drill them out. I happen to have a nice Ryobi cordless drill with a set of bits so I decided to give it a try.
I am extremely paranoid and was very worried about damaging both the crank and the flywheel so I took my time with the first bolt. It legitimately took me almost an hour to get the first one out. After that I honed the process and the other two were out in about 30 minutes. So after roughly two hours of work I had the flywheel off! Good thing I ordered new flywheel bolts. So now I just need to find a local machine shop to inspect and machine it so when my clutch comes in I can throw the tranny back on!
On to the pics!
I nicknamed him Rusty!

The one-finger salute to those damn bolts!

Not much to report today boys and girls. Except I ordered some parts. Specifically, I picked up:
- OEM Pressure plate bolts (x6 - I think this is the correct amount)
- OEM injector o-rings (upper and lower)
- OEM fuel pump filter
- OEM exhaust manifold heat shield (there is no heat shield on it currently)
- AMSOIL Signature Series 10W-30 Synthetic Motor Oil (ATMQT)
- AMSOIL Synthetic Manual Transmission and Transaxle Gear Lube (75w-90) API GL-4
- AMSOIL SEVERE GEAR 75w-90 Synthetic EP Lubricant (for the xfercase and rear diff)
I also located a machine shop who is semi-local who will resurface and check the tolerances on my flywheel. Win!
Once the parts start rolling in I will be able to get more done. I expect to get a fair number of things done this coming weekend as a buddy from Virginia is coming up to help do some wrenching (and lifting as that transmission is HEAVY).
Stay tuned!
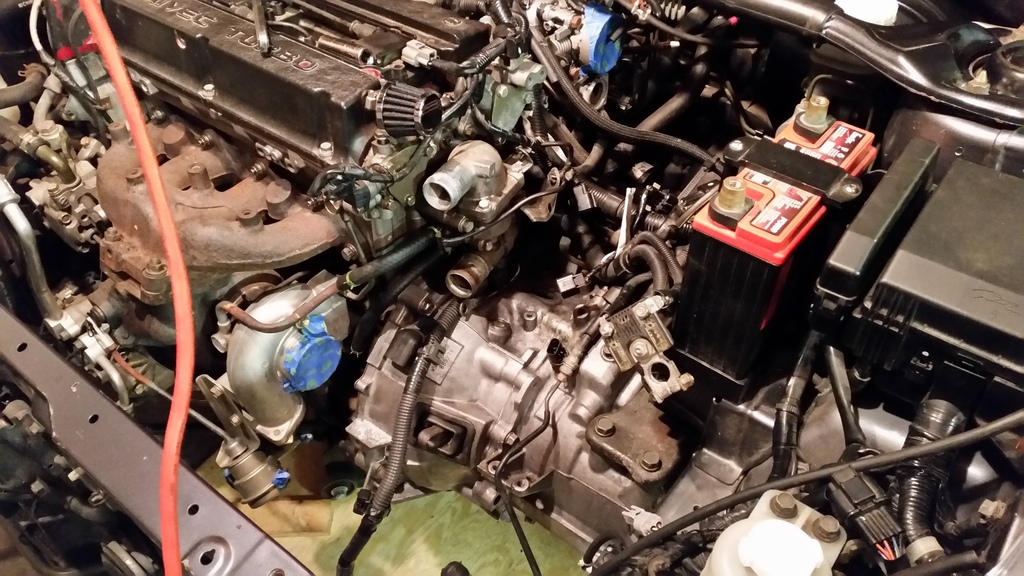
Transmission and transfer case are in!
Alright guys and gals,
I spent this entire past weekend installing the transmission, transfer case, both transmission motor mounts, the inspection plate, starter, etc. I'm not going to lie, it was not very fun. I had to borrow my neighbor's jack (I only have one currently) and had a friend come over to help me get the transmission bolted up to the block. I used the clutch install guide on EvoMoto to give me an idea of how this works on an Evo. I've done my fair share of transmission pulls and installs on the old DSM's but it has been awhile. A little tip for those who will attempt this in the future: Do yourself a favor and secure the transfer case as far out of the way towards the passenger side (it can rest on the subframe while still attached to the driveshaft) as possible. Also make sure your rear transmission mount bracket is installed right side up! If not, it makes aligning everything impossible (obviously) and will cause you much grief.
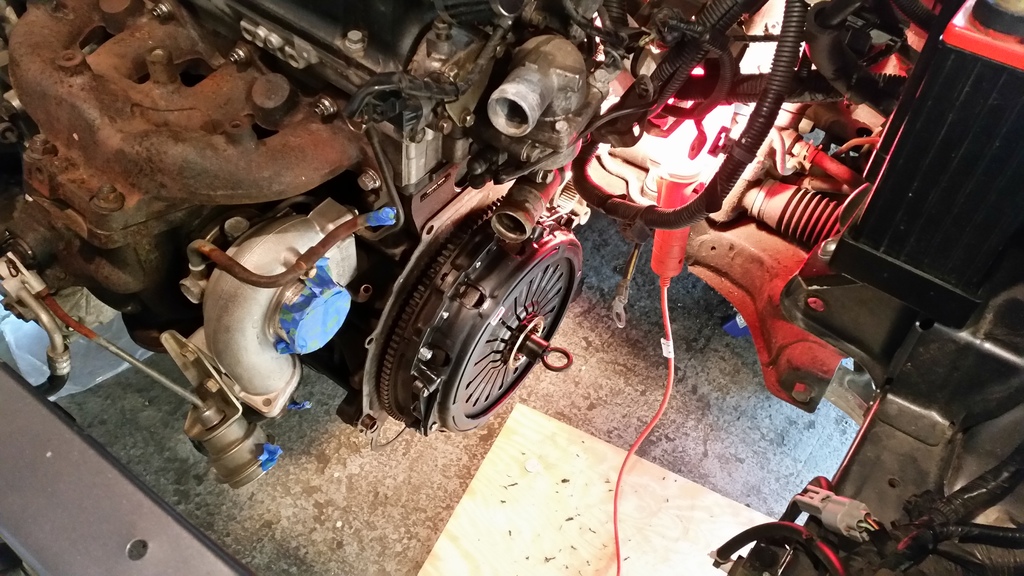
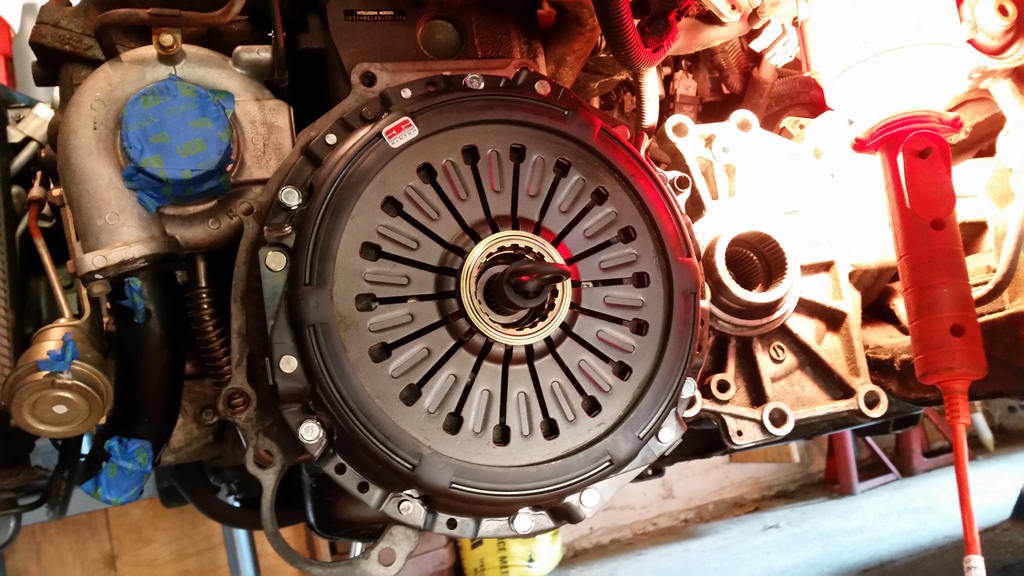
I forgot to take pictures of the flywheel, but I had it machined / resurfaced at Medford Speed, Inc. in Medford, New Jersey. Their prices are reasonable and they seemed to do a nice job. The flywheel and clutch install went pretty smoothly. The only snag we hit was when we went to replace the throwout bearing (TOB). The pin that the shift release fork sits on was a bear to remove. Also, we had to install the return springs and felt pads/spacers as well.
I still have to install the banjo bolt with the newly purchased copper crush washers on the top of the transfer case. I attempted this for a few minutes last night before calling it a night and wrapping up.
In the end everything went together and I'm happy to have that major project pretty much finished. Pictures will follow later today!
Thanks for reading!
I spent this entire past weekend installing the transmission, transfer case, both transmission motor mounts, the inspection plate, starter, etc. I'm not going to lie, it was not very fun. I had to borrow my neighbor's jack (I only have one currently) and had a friend come over to help me get the transmission bolted up to the block. I used the clutch install guide on EvoMoto to give me an idea of how this works on an Evo. I've done my fair share of transmission pulls and installs on the old DSM's but it has been awhile. A little tip for those who will attempt this in the future: Do yourself a favor and secure the transfer case as far out of the way towards the passenger side (it can rest on the subframe while still attached to the driveshaft) as possible. Also make sure your rear transmission mount bracket is installed right side up! If not, it makes aligning everything impossible (obviously) and will cause you much grief.
I forgot to take pictures of the flywheel, but I had it machined / resurfaced at Medford Speed, Inc. in Medford, New Jersey. Their prices are reasonable and they seemed to do a nice job. The flywheel and clutch install went pretty smoothly. The only snag we hit was when we went to replace the throwout bearing (TOB). The pin that the shift release fork sits on was a bear to remove. Also, we had to install the return springs and felt pads/spacers as well.
I still have to install the banjo bolt with the newly purchased copper crush washers on the top of the transfer case. I attempted this for a few minutes last night before calling it a night and wrapping up.
In the end everything went together and I'm happy to have that major project pretty much finished. Pictures will follow later today!


Thanks for reading!
Last edited by RelentlessEVO; Dec 7, 2015 at 04:00 PM.


Decided where you want to ultimately end up with this car yet?
Well done on getting those old flywheel bolts, I don't envy you that job.
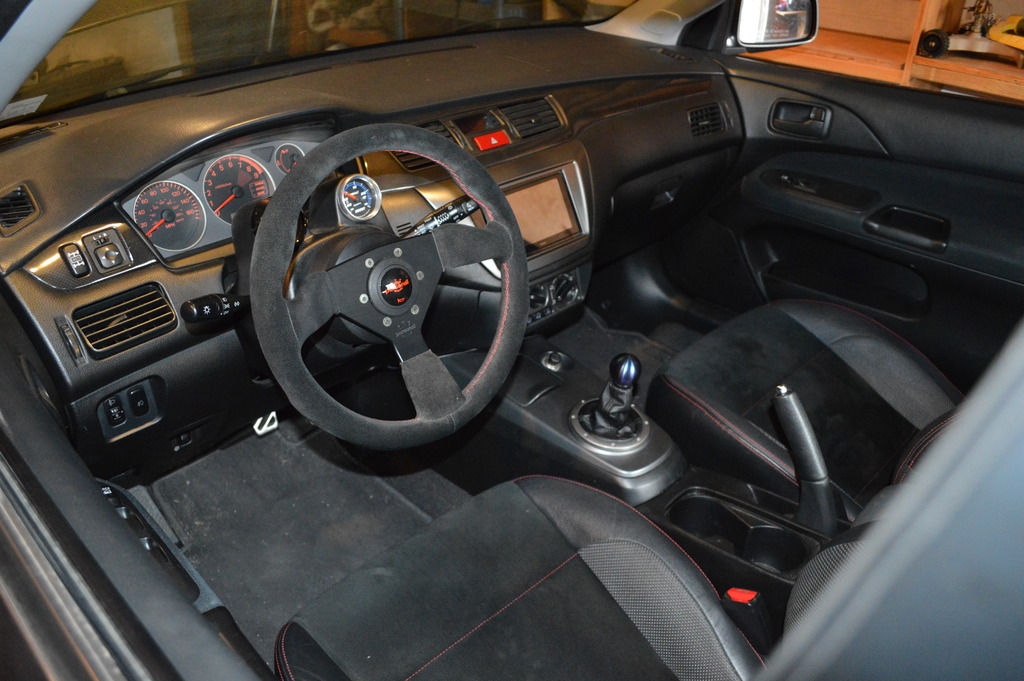
Looks like it's got a nice double din stereo in there, what's the condition of that? I'm currently in the process of working on a nexus 7 in-dash for mine so I'm interested to see what others have done as we tend to be a lot more focused on performance stuff around here.
Well done on getting those old flywheel bolts, I don't envy you that job.
Looks like it's got a nice double din stereo in there, what's the condition of that? I'm currently in the process of working on a nexus 7 in-dash for mine so I'm interested to see what others have done as we tend to be a lot more focused on performance stuff around here.
Thanks Jmills!
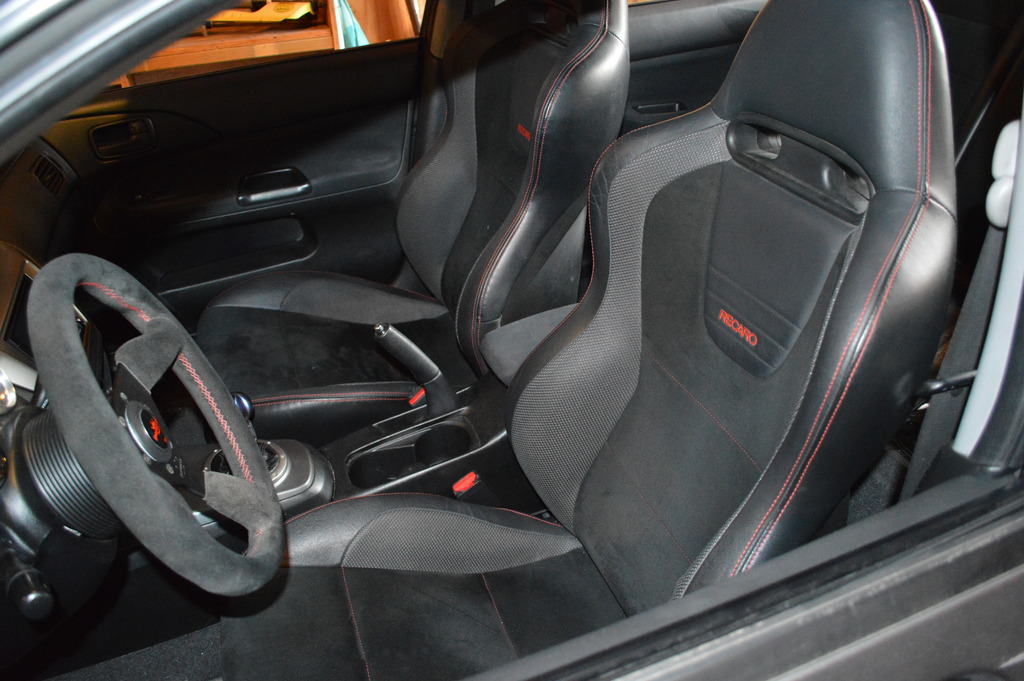
It's a VERY clean car. There's still a lot of little things to do. I have a running list of things to do and parts to purchase. The only big thing I feel like I have to do is installing the front axles.
It's a VERY clean car. There's still a lot of little things to do. I have a running list of things to do and parts to purchase. The only big thing I feel like I have to do is installing the front axles.
Trending Topics
Decided where you want to ultimately end up with this car yet?
Well done on getting those old flywheel bolts, I don't envy you that job.
Looks like it's got a nice double din stereo in there, what's the condition of that? I'm currently in the process of working on a nexus 7 in-dash for mine so I'm interested to see what others have done as we tend to be a lot more focused on performance stuff around here.
Yeah, the flywheel bolts sucked a lot. I was very careful not to damage the flywheel or the crank and I'm very glad to say I was successful in that endeavor.
I've only had the car turned on twice since I've had it; once when I picked it up and then once when I got it home to roll down the windows. I'm not even sure whether it's a HU or tablet. I'll try and take some pictures for you and I'll post a link of what it is too.
Thanks for the reply and please let me know if you (or anyone) has any more questions!
Quick update! I'm heading out shortly to pick up a low mileage OEM steering wheel to replace the fixed aftermarket one that's in the car now. I also received my order from LancerShop. The order consisted of just two items: (1) OEM exhaust manifold heat shield; and (2) in-tank fuel filter. When I ordered the fuel filter I was attempting to purchase the filter that attaches to the fuel pump itself. What I got from LancerShop is a cylindrical fuel filter (Mitsu part # MB129895) which is not what I wanted / needed. Luckily RockAuto has the part and because I ordered it early enough in the day it's already been shipped. So that's some good news. I don't even know if I need to replace the fuel pump filter "sock" but I figure since it's out of the car I might as well do it.
I also am trying to organize a time to pick up the crossmember that the front motor mount is attached to along with a downpipe from the prior owner. I may or may not make the long drive tonight to pick those items up. We will see. Regardless, I should make some pretty decent headway this coming weekend.
I spent a few hours on the car last night and was able to get the banjo bolt on top of the transfercase installed along with the fuel injectors and rail. I also bolted up the shifter cables bracket and the slave cylinder bracket. Slowly but surely getting there.
Stay tuned!
Last edited by RelentlessEVO; Dec 8, 2015 at 04:23 PM.
So, I did spend some time on the Evo this past weekend. I was able to install both front axles, which wasn't really difficult but it sure wasn't fun either. I had to go buy the appropriate sized socket because my largest one was too small.
I also was able to install the fuel pump assembly, with the new fuel filter sock, and my homemade high pressure feed fuel lines. Essentially, the PO had an EvoDan double pumper setup and had removed / replaced the OEM high pressure feed line so I simply installed 3/8" fuel hose from Pep Boys. I am going to have to verify when I first start it that it's not leaking anywhere back there.
The Evo IX steering wheel I referenced above turned out to be a bust. I drove an hour to the guy's place to pick it up and it looks great, however, when I got home and attempted to install it I learned that the splines on the steering wheel were completely trashed. Lucky for me the seller was a stand-up guy and he returned all of my money in exchange for the ruined wheel. So, I ordered another one from an EvoM forum member and that one turned out to be excellent. I installed the good steering wheel last night. That's one more thing crossed off on the to-do list!
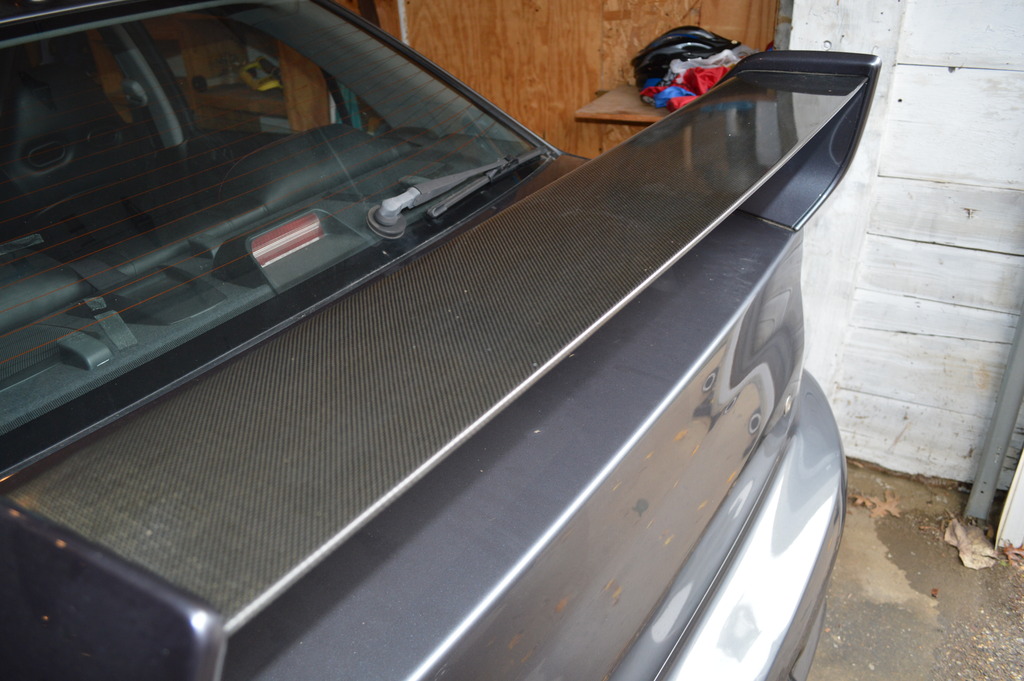
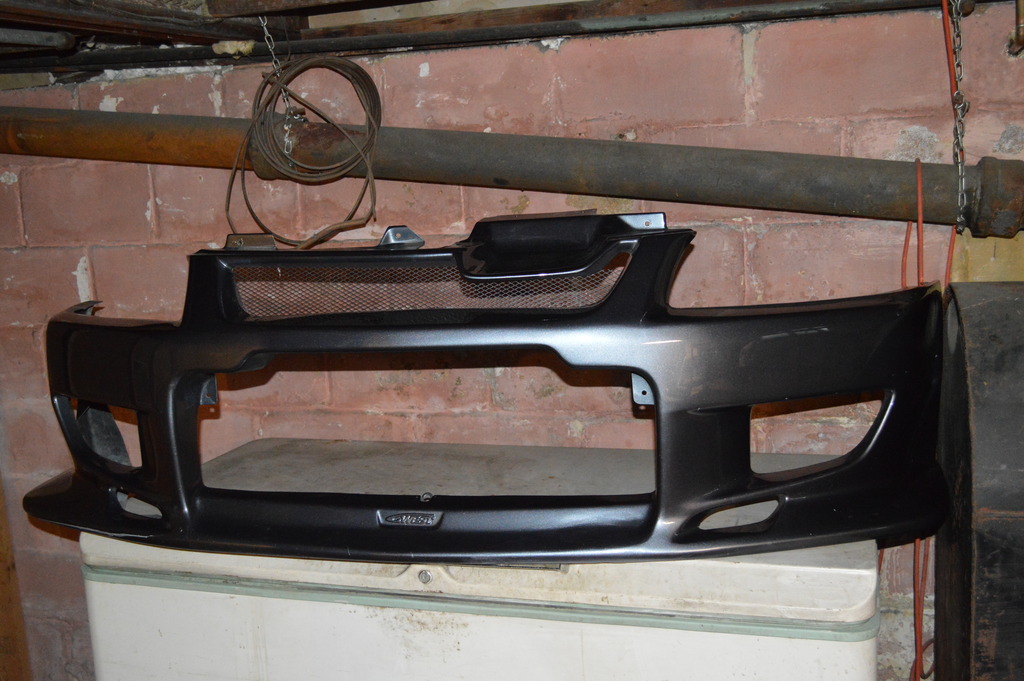
At this point, I need to buy a hi-flo cat, pick up the parts from the PO, and fill the transmission, xfercase (and bleed), and engine. I hope I can get her started for the first time this coming weekend. I do still need to figure out if I am going to just run the C West front bumper and Seibon hood or spend the scratch to pick up an OEM bumper and hood.
I'll post some pictures later today. Thanks for reading!
I also was able to install the fuel pump assembly, with the new fuel filter sock, and my homemade high pressure feed fuel lines. Essentially, the PO had an EvoDan double pumper setup and had removed / replaced the OEM high pressure feed line so I simply installed 3/8" fuel hose from Pep Boys. I am going to have to verify when I first start it that it's not leaking anywhere back there.
The Evo IX steering wheel I referenced above turned out to be a bust. I drove an hour to the guy's place to pick it up and it looks great, however, when I got home and attempted to install it I learned that the splines on the steering wheel were completely trashed. Lucky for me the seller was a stand-up guy and he returned all of my money in exchange for the ruined wheel. So, I ordered another one from an EvoM forum member and that one turned out to be excellent. I installed the good steering wheel last night. That's one more thing crossed off on the to-do list!
At this point, I need to buy a hi-flo cat, pick up the parts from the PO, and fill the transmission, xfercase (and bleed), and engine. I hope I can get her started for the first time this coming weekend. I do still need to figure out if I am going to just run the C West front bumper and Seibon hood or spend the scratch to pick up an OEM bumper and hood.
I'll post some pictures later today. Thanks for reading!


Update
Wow, I really meant to keep this thread going but of course life gets crazy and I totally forgot.
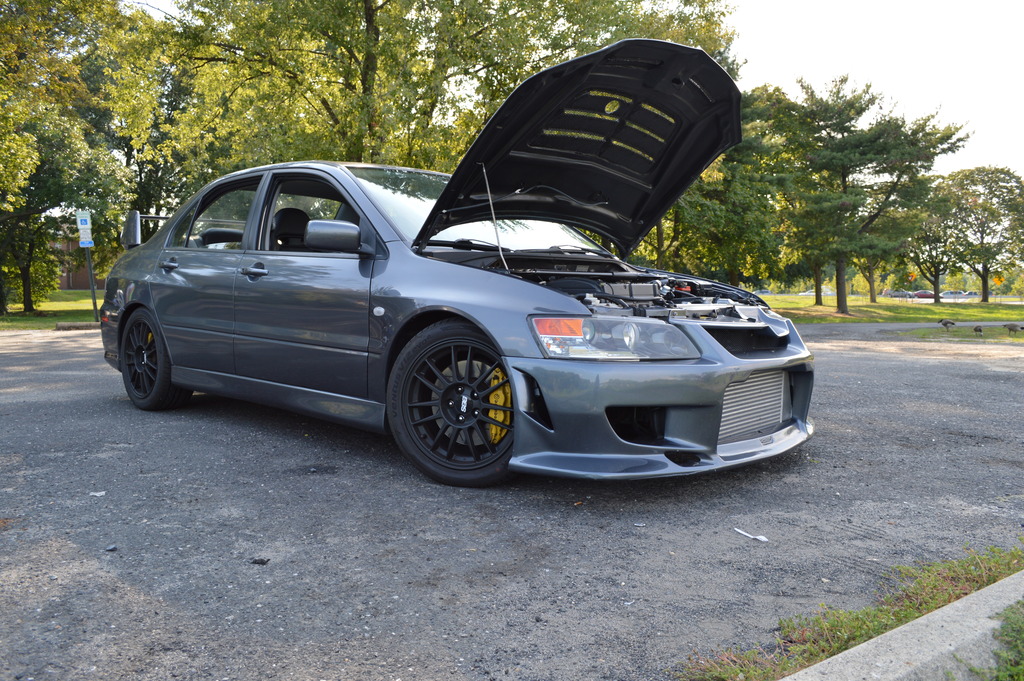
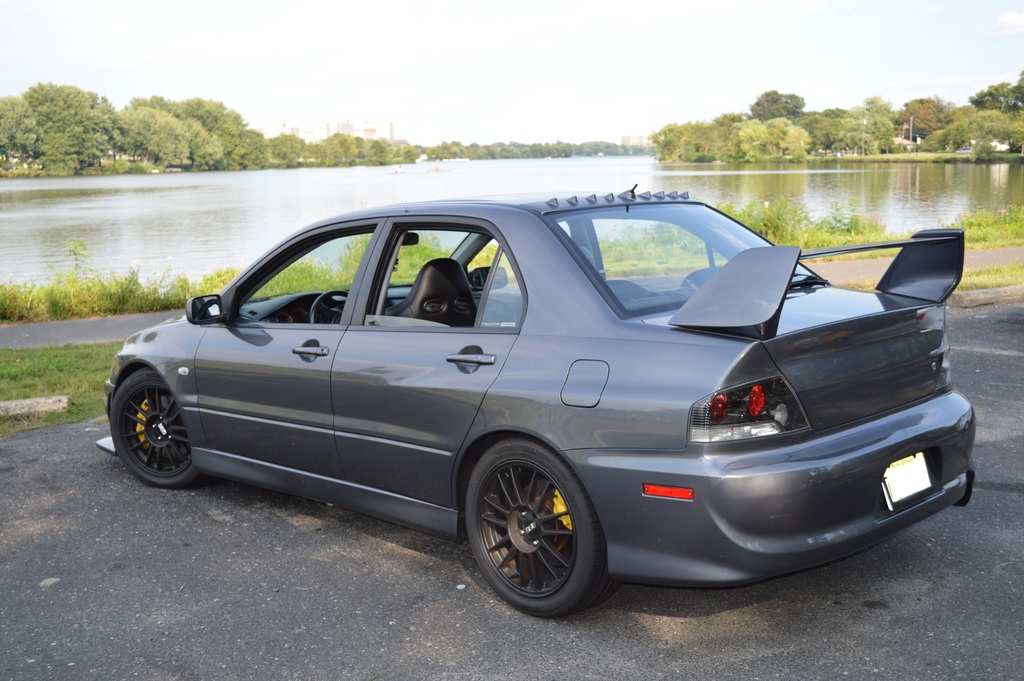
The update is that the car has been up and running since May and I just finally got all the wrinkles ironed out. I really love this car and I now plan on keeping it for a very long time. I'll post a mod list below as well as some pictures of the current set up. Thanks for following up and please let me know if there's anything you would like to know more about the car.
Pics:

Mods:
Engine:
- BR ported intake manfifold
- GSC S3 cams
- GSC springs and retainers
- Amsoil Signature Series oil w/ OEM filter
Intake:
- SD intake w/ Amsoil Filter
- ETS 3" wide FMIC w/ short route piping and OEM BPV
Fuel:
- Stock pump and injectors (this will addressed in the near future)
Exhaust:
- Full 3" turbo-back exhaust w/ hi-flo cat
- Megan o2 housing
Drivetrain:
- Comp Clutches stage II clutch kit
- New OEM slave cylinder
- Resurfaced OEM flywheel
- Amsoil gear oil in transmission and transfercase
- New front wheel speed sensors (they suck to replace, btw)
Interior:
- AEM UEGO wideband A/F gauge
- Prosport Boost gauge
- Short shifter
- Binary engineering seat lowering bracket for driver's seat
- Parrot headunit / tablet
Exterior:
- C West front bumper
- Seibon carbonfiber hood
- Plastidipped stock BBS wheels
The update is that the car has been up and running since May and I just finally got all the wrinkles ironed out. I really love this car and I now plan on keeping it for a very long time. I'll post a mod list below as well as some pictures of the current set up. Thanks for following up and please let me know if there's anything you would like to know more about the car.
Pics:


Mods:
Engine:
- BR ported intake manfifold
- GSC S3 cams
- GSC springs and retainers
- Amsoil Signature Series oil w/ OEM filter
Intake:
- SD intake w/ Amsoil Filter
- ETS 3" wide FMIC w/ short route piping and OEM BPV
Fuel:
- Stock pump and injectors (this will addressed in the near future)
Exhaust:
- Full 3" turbo-back exhaust w/ hi-flo cat
- Megan o2 housing
Drivetrain:
- Comp Clutches stage II clutch kit
- New OEM slave cylinder
- Resurfaced OEM flywheel
- Amsoil gear oil in transmission and transfercase
- New front wheel speed sensors (they suck to replace, btw)
Interior:
- AEM UEGO wideband A/F gauge
- Prosport Boost gauge
- Short shifter
- Binary engineering seat lowering bracket for driver's seat
- Parrot headunit / tablet
Exterior:
- C West front bumper
- Seibon carbonfiber hood
- Plastidipped stock BBS wheels
Oil Leaks - Possible Solutions
A little update, I created a thread about a burning clutch smell only on aggressive take-offs and a possibly related oil leak, which can be found here: https://www.evolutionm.net/forums/ev...-oil-leak.html. Since posting that thread, I took it to a local performance shop and they determined that the oil leak was coming from a breather filter I had on the PCV line on the driver's side of the valve cover. They also said that they believed that there MAY be a high spot on the flywheel which causes the clutch to burn just a little on aggressive starts. They also said it could just be me slipping the clutch too much.
So, they advised me to install a catch can for the oil leak and try practicing my launches and see if the smell goes away. When he informed me that my oil leak was from the pcv vent on the valve cover I was shocked and specifically asked him, "how confident are you that the oil leak is coming from the pcv breather on the valve cover?" and his response was that he was absolutely sure and they traced the leak from the bottom of the bell housing to the filter on the pcv breather valve on the valve cover. I was skeptical but relieved that it didn't appear to be serious.
They recommended that I install the Weapon R catch can. So, I blindly followed their advice, ordered, and installed the Weapon R catch can. Yup, you guessed it, it did not solve my oil leak.
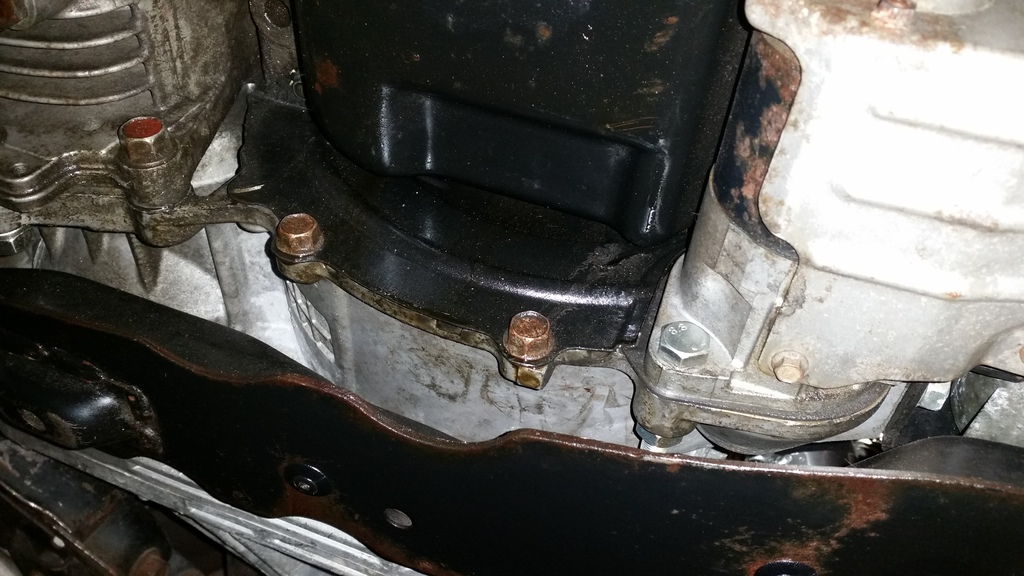
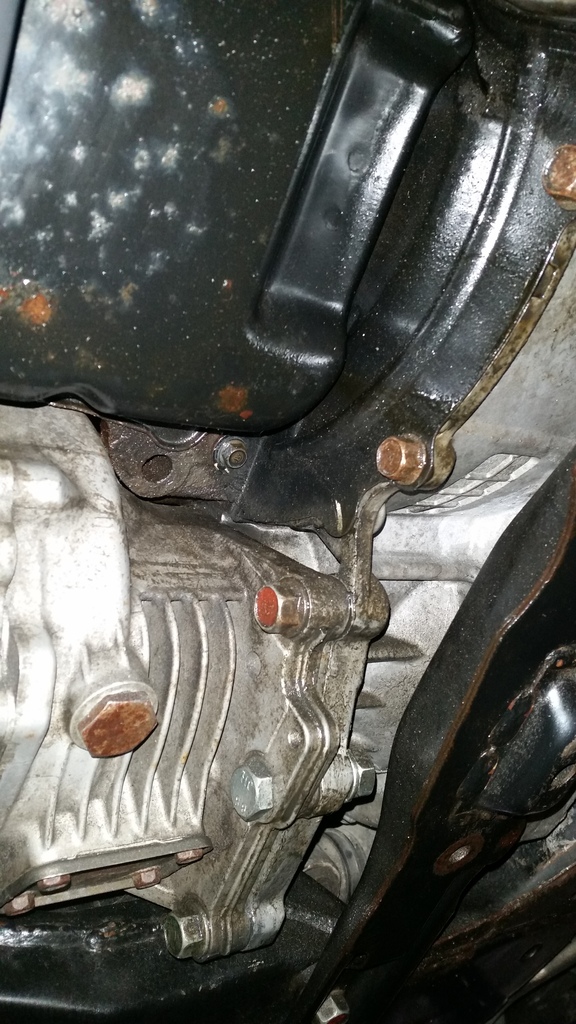
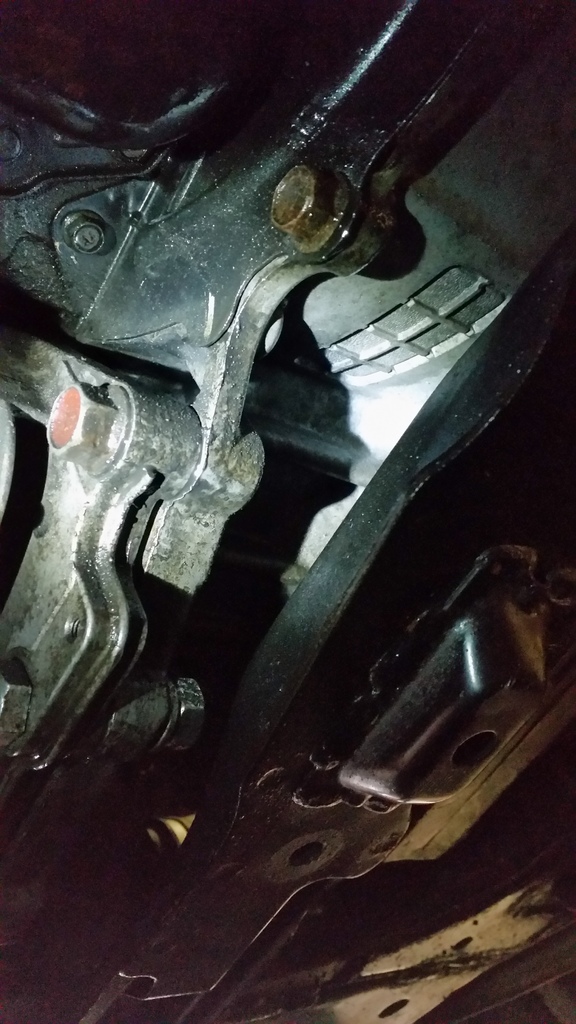
So, this past weekend I jacked the car up and really took my time trying to diagnose where the oil was coming from. I think it's actually coming from more than one place. There appears to be a leak from the oil pan gasket, where the block meets the transmission. I don't THINK it's the rear main seal because when I removed the inspection plate, it wasn't covered in oil. It was dirty, but more like a thin film of dirt, not wet with oil. I could be wrong and it could be a RMS, but I'm not convinced. Another reason I'm not convinced is because my clutch does not slip AT ALL and does not "burn" unless I'm starting aggressively in 1st gear. So, I will be dropping my oil pan and resealing it in the near future. Here are some pictures of what I saw when I was under the car:
The other source of oil leaking appears to be from between the head and the exhaust manifold. When I had the car jacked up last weekend I re-torqued all the bolts and nuts (the prior owner installed very nice APR fastners) to the factory torque spec. I also cleaned the flange and head with brake cleaner and shop towels. Unfortunately for me, I checked this afternoon and the head and flange are already coated in a new film of oil. My assumption is that the exhaust manifold studs that screw into the head were not coated in permatex and therefore oil is leaking through the studs and out onto the flange and head. Does that sound correct to anyone else?
So, I'm hoping between removing and resealing both the oil pan and the exhaust manifold studs that that will solve most, if not all, of my oil leaks. Also, to be clear, it's not even enough of an oil leak to leave spots on the ground. It just coats the bottom of side of the bellhousing and sump but I don't like seeing the oil there and if it just takes doing those two things then it's totally worth doing.
So, they advised me to install a catch can for the oil leak and try practicing my launches and see if the smell goes away. When he informed me that my oil leak was from the pcv vent on the valve cover I was shocked and specifically asked him, "how confident are you that the oil leak is coming from the pcv breather on the valve cover?" and his response was that he was absolutely sure and they traced the leak from the bottom of the bell housing to the filter on the pcv breather valve on the valve cover. I was skeptical but relieved that it didn't appear to be serious.
They recommended that I install the Weapon R catch can. So, I blindly followed their advice, ordered, and installed the Weapon R catch can. Yup, you guessed it, it did not solve my oil leak.
So, this past weekend I jacked the car up and really took my time trying to diagnose where the oil was coming from. I think it's actually coming from more than one place. There appears to be a leak from the oil pan gasket, where the block meets the transmission. I don't THINK it's the rear main seal because when I removed the inspection plate, it wasn't covered in oil. It was dirty, but more like a thin film of dirt, not wet with oil. I could be wrong and it could be a RMS, but I'm not convinced. Another reason I'm not convinced is because my clutch does not slip AT ALL and does not "burn" unless I'm starting aggressively in 1st gear. So, I will be dropping my oil pan and resealing it in the near future. Here are some pictures of what I saw when I was under the car:


The other source of oil leaking appears to be from between the head and the exhaust manifold. When I had the car jacked up last weekend I re-torqued all the bolts and nuts (the prior owner installed very nice APR fastners) to the factory torque spec. I also cleaned the flange and head with brake cleaner and shop towels. Unfortunately for me, I checked this afternoon and the head and flange are already coated in a new film of oil. My assumption is that the exhaust manifold studs that screw into the head were not coated in permatex and therefore oil is leaking through the studs and out onto the flange and head. Does that sound correct to anyone else?
So, I'm hoping between removing and resealing both the oil pan and the exhaust manifold studs that that will solve most, if not all, of my oil leaks. Also, to be clear, it's not even enough of an oil leak to leave spots on the ground. It just coats the bottom of side of the bellhousing and sump but I don't like seeing the oil there and if it just takes doing those two things then it's totally worth doing.
Cam Swap and Timing Belt Job
So, if my oil leaks weren't enough to do I am also going to swap out the GSC S3 cams and Kiggly springs and retainers with the OEM cams, springs, and retainers. I'm swapping them out because I plan on staying on the stock turbo for the foreseeable future and I want to eliminate the driveability issues (i.e., rough cold start, high idle, and the stalling on deceleration with the A/C on) with these really aggressive cams. Based on my research, it appears that the timing belt will need to be removed in order for me to swap the cams along with the valvetrain. If that is not correct, someone please stop me haha.
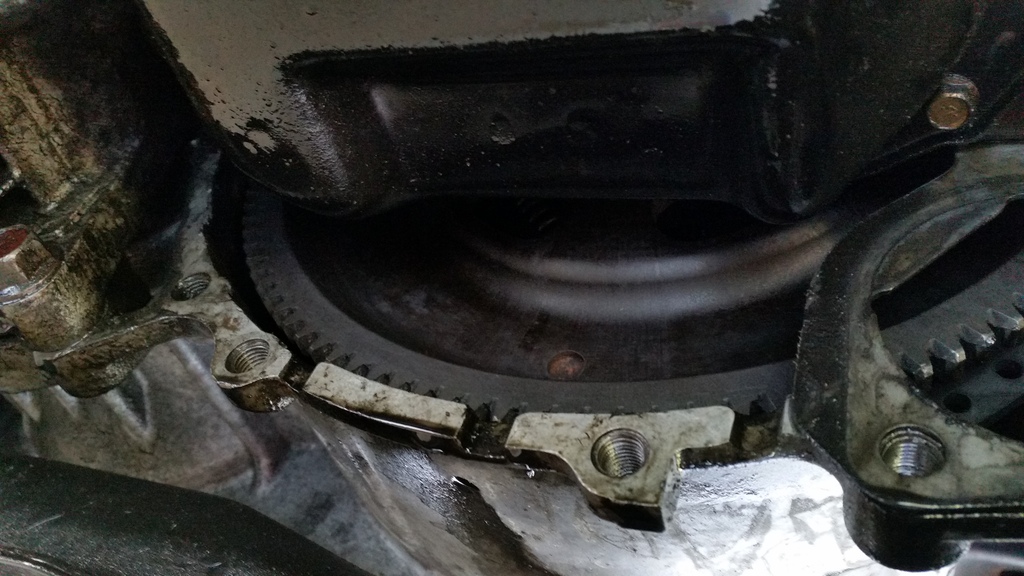
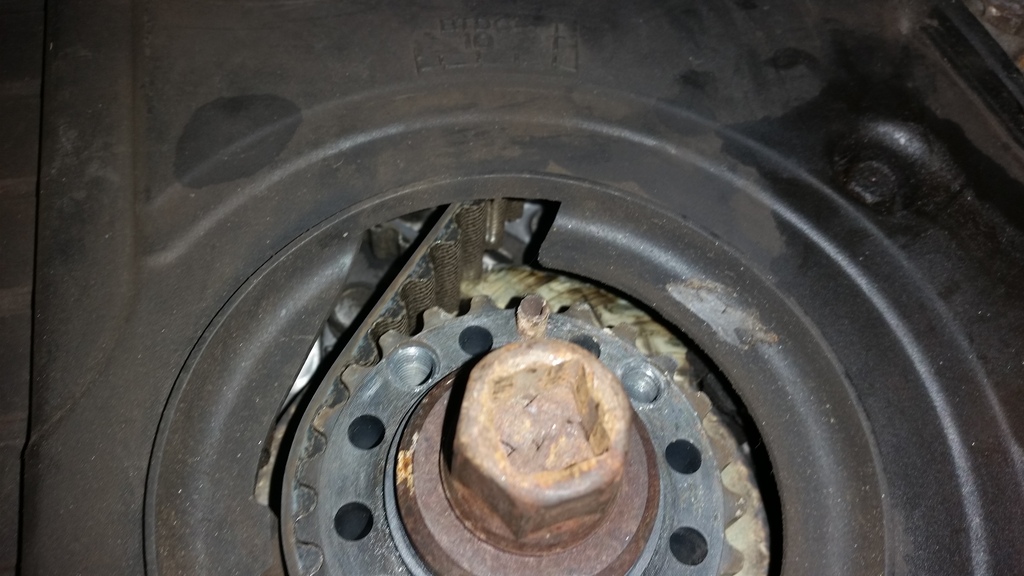
I got started today by removing the upper and lower timing covers. As with any project, I've already ran into a small possible issue. When removing the accessory belt tensioner some of the threads appears to have come out with it. As you can see here:
Also, I have a few questions on the condition of my timing belt and the related components. It appears pretty dirty for a belt that was probably changed less than 15k miles ago. Does that mean that the front seal may be leaking? What else would cause this area to be so dirty?
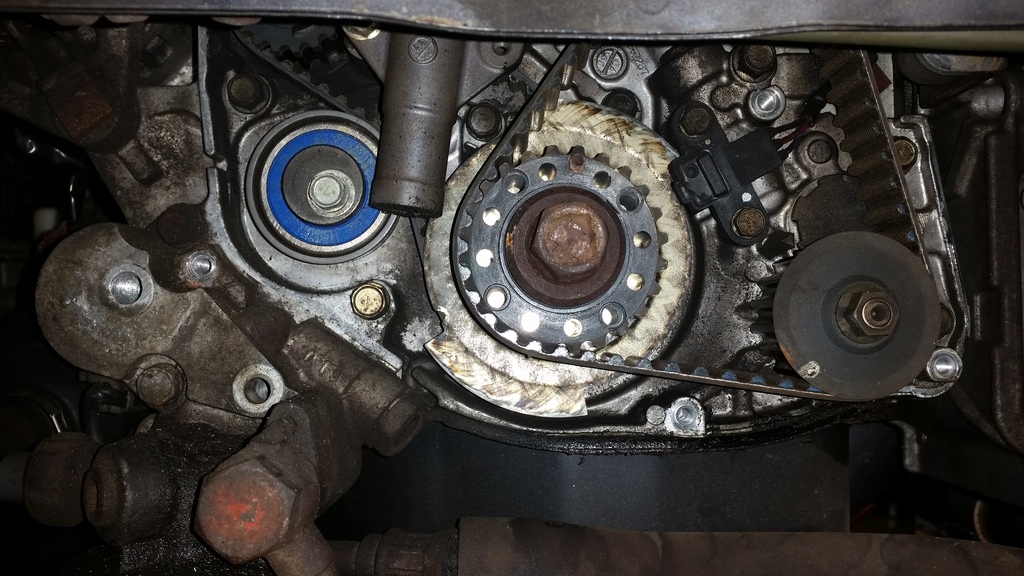
Also, before I took the timing belt covers off, I snapped these pics of the crank and cam gears in relation to the timing marks. The cams appear to be 5 teeth off of the timing marks on the valve cover, is that normal for GSC S3 cams? Here is what I'm talking about:
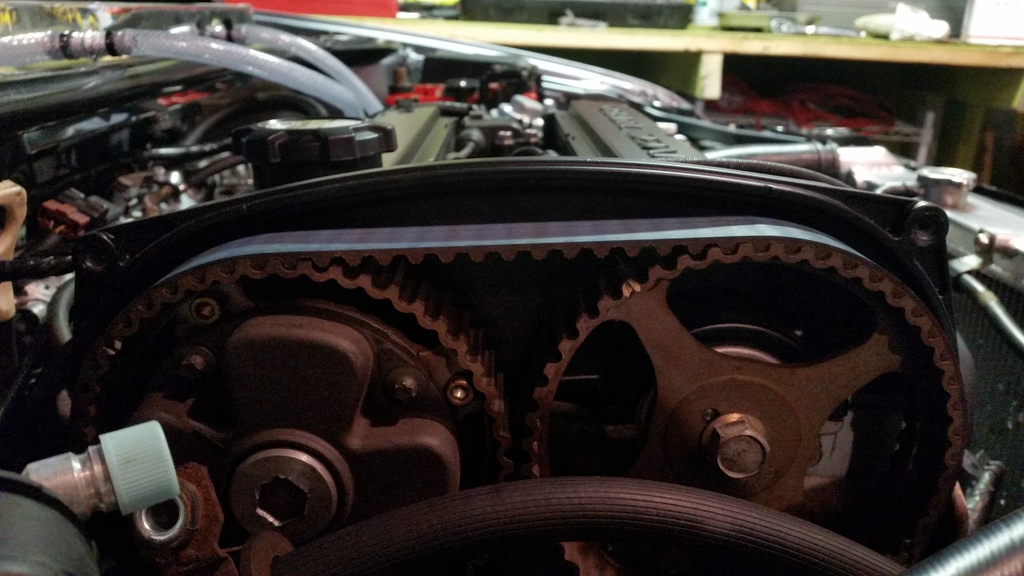
If anyone has any advice on if I should go ahead and replace everything, including the front main seal and/or why both cams seem to be 5 teeth off, I would really appreciate it.
Thanks!
I got started today by removing the upper and lower timing covers. As with any project, I've already ran into a small possible issue. When removing the accessory belt tensioner some of the threads appears to have come out with it. As you can see here:

Also, I have a few questions on the condition of my timing belt and the related components. It appears pretty dirty for a belt that was probably changed less than 15k miles ago. Does that mean that the front seal may be leaking? What else would cause this area to be so dirty?
Also, before I took the timing belt covers off, I snapped these pics of the crank and cam gears in relation to the timing marks. The cams appear to be 5 teeth off of the timing marks on the valve cover, is that normal for GSC S3 cams? Here is what I'm talking about:


If anyone has any advice on if I should go ahead and replace everything, including the front main seal and/or why both cams seem to be 5 teeth off, I would really appreciate it.
Thanks!
Nice progress on this,
Looks like you're right about the oil pan and the exhaust manifold studs. I see lot's of brake cleaner in your near future. The good news is, everything will be spotless once you are done with it. I used Permatex Ultra Black RTV sealant for the oil pan and have not had any leaks yet (knock on wood). You can also use it for where the thermostat water housing mates to the head if you're in a pinch.
I would really check that rear main seal and front main seal with a flashlight to see if it really isn't leaking. I didn't know that the exhaust manifold studs pass through oil galleys in the cylinder head, interesting...
Not to cause alarm, but that's what my timing belt looked like when I had a front main seal leak.
Your crank is not in TDC right now so you can't determine if the cams are off or not. Rotate the crank clockwise until the timing mark lines up and then you can see if the cam gears are out of timing.
-pal215
Last edited by Pal215; Nov 8, 2016 at 03:53 PM.