
Lancer Mini Battery kit install

Lancer Mini Battery kit install
This is the install of the PPI Lancer Mini Battery kit:
Tools needed:
10mm open wrench
8mm Allen
6mm Allen
5mm Allen
Red Loctite (271 or 277)
1st: Remove the 0EM battery.
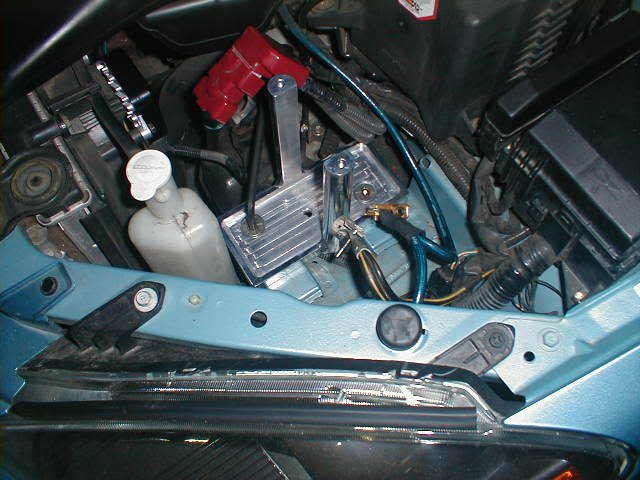
2nd: Remove the plastic tray: take care of removing the rubber line attached to it. There is also a plug attached to the lower corner of the tray. This will be a good time to clean the area below the tray.
3rd Install the lower part of the mini battery tray with the provided adapters using the 8mm Allen, you will use the two big holes were the plastic tray used to be:
4th: Install the 0dyssey PC680:
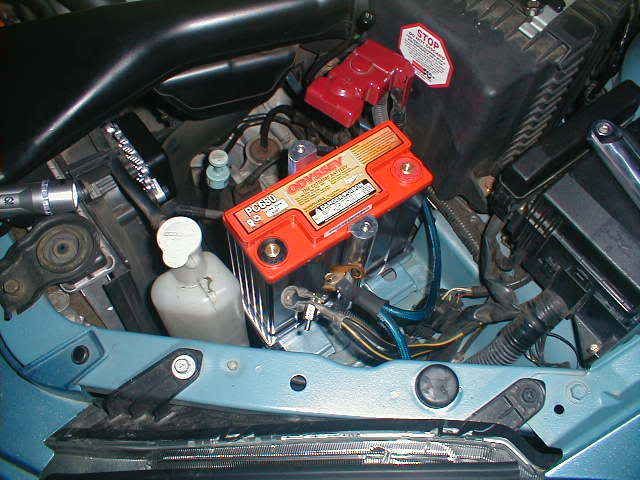
5th: Secure the battery with the top part of the tray using the 6mm Allen:
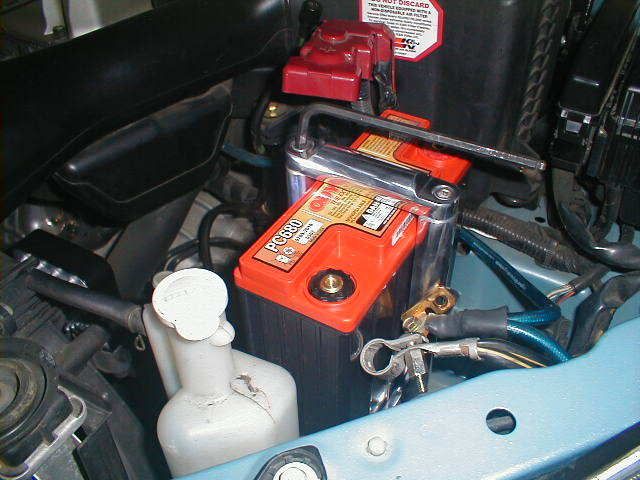
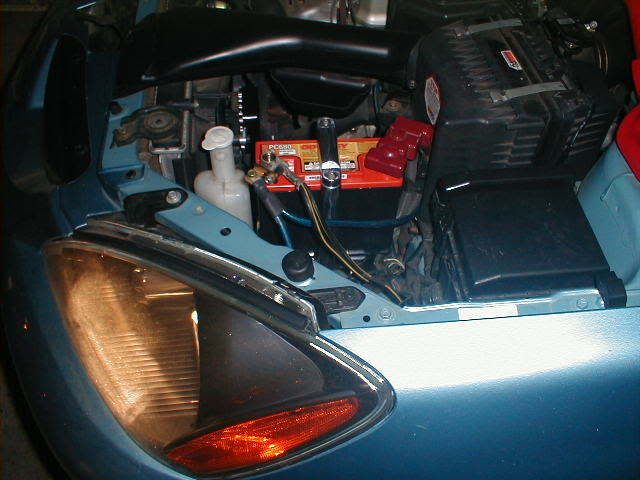
6th: Install the battery terminals with the 5mm Allen (put a small drop of loctite in the threads of the battery post cap screw) . Take note that the bigger one is the positive side (+/red) terminal. Then install the positive and negative cables and secure them with the 10mm wrench. ENJ0Y!

Tools needed:
10mm open wrench
8mm Allen
6mm Allen
5mm Allen
Red Loctite (271 or 277)
1st: Remove the 0EM battery.
2nd: Remove the plastic tray: take care of removing the rubber line attached to it. There is also a plug attached to the lower corner of the tray. This will be a good time to clean the area below the tray.
3rd Install the lower part of the mini battery tray with the provided adapters using the 8mm Allen, you will use the two big holes were the plastic tray used to be:
4th: Install the 0dyssey PC680:
5th: Secure the battery with the top part of the tray using the 6mm Allen:
6th: Install the battery terminals with the 5mm Allen (put a small drop of loctite in the threads of the battery post cap screw) . Take note that the bigger one is the positive side (+/red) terminal. Then install the positive and negative cables and secure them with the 10mm wrench. ENJ0Y!
Last edited by ThyPunko_PR; May 30, 2007 at 07:19 AM.


Just finished installing mine. Overall it went well and was pretty simple, took about 20 minutes or so. Only two problems I ran into involved the positive terminal. First I had to remove my RRM heat shield because it was getting in the way and second the terminal just did not want to clamp down to the battery. After a few swears and some negotiation though I got the terminal to tighten down without popping off and all is good.

Regarding aftermarket car stereos and this mini battery kit, how nicely does this play with aftermarket stereos? I assume not so well. At the risk of sounding like a magnificent moron, I'll still just ask: I'm running the UDP and S & S with a second 350 watt amp to drive a pair of 12's in the trunk. I can only assume that this smaller battery may not drive all of that so well. Is that a poor assumption? Thanks as always for the patient answer.

Trending Topics
The battery's primary purpose is to start the car. Once the car is running, all electrical stuff, including stereo, are running off the alternator. I have the UDP and the minibattery, with a 1000w system, and I have no issues with power supply. The tradeoff, though, is if you like to sit there and listen to your stereo with the car turned off. The mini-battery has less reserve power than the stock one.


Thread
Thread Starter
Forum
Replies
Last Post
FS[West]: 2006 Lancer Evolution IX MR For Sale
nomoretransam
For Sale - Cars For Sale
1
Apr 19, 2017 09:11 PM
seven10
For Sale - Wheels / Tires
4
Apr 4, 2017 09:36 PM
jlldetroit
For Sale/WTB - Engine / Drivetrain / Power
1
Aug 11, 2016 07:14 PM
BriK
For Sale/WTB - Engine / Drivetrain / Power
0
Sep 16, 2013 01:06 PM