
Building the CT9A 4g63 Evo Engine by TTP-Engineering

Thread Starter
Account Disabled
iTrader: (465)
Joined: May 2005
Posts: 8,824
Likes: 2
From: Central FL
Building the CT9A 4g63 Evo Engine by TTP-Engineering
Well I started off actually wanting to post a few pictures to support our 2.0L Race Engine Program, but I got a little carried away in the description process. There are a few companies that offer engine building services for the Evo and besides a few website descriptions and one photo, it hardly justifies enough information for a purchase of that value.
What we wanted to convey is some of the process of what we do when building an Evo Engine so a customer or member would know exactly what to expect when searching for a high performance engine.
Having someone that wants to upgrade their engine and being able to see exactly the components that go into it and where they go hopefully will educate some members in the process of showing how we put an engine together.
Anyhow, here it is:
What is TTP-Engineering actually doing when they take in a core or build an engine from a good core?
First of all we start with only the best cores. Running the car out of oil, overheating the engine, oil starvation issues never make it in the door here. We meticulously choose only the best cores to start with.
Some of the work we do to prepare the components for assembly prior to install are :
*HAND WASH BLOCK
*R&R FREEZE PLUGS
*INSTALL BALANCE SHAFT ELIMINATOR RACE BLOCKOFF BEARINGS
*CLEAN, MIC AND POLISH CRANK
*BALANCE CRANKSHAFT
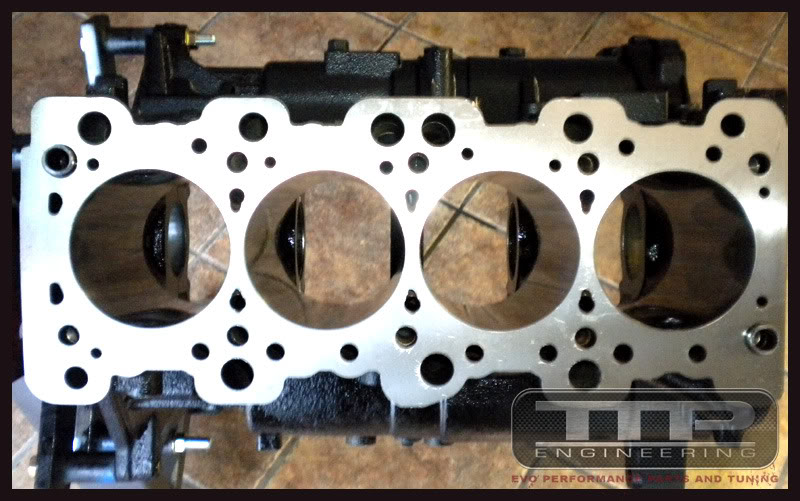
*BORE AND HONE CYLINDERS+.20 OVER
*DECK BLOCK FLAT
*ALIGN HONE MAINS, INSTALL ARP MAIN STUDS
*FIT ROD BEARINGS
*FIT MAIN BEARINGS
*FILE TO FIT RINGS, SET END GAPS
*INSTALL PISTONS ON RODS
*PIN FIT RODS
*PIN FIT PISTONS
*INSTALL ACL RACE BEARINGS MAINS
*INSTALL ACL RACE BEARINGS RODS
*REPLACE 7 EXPANSION PLUGS 35MM, 2 BRASS PLUGS IN BLOCK *ASSEMBLY ROTATING ASSEMBLY
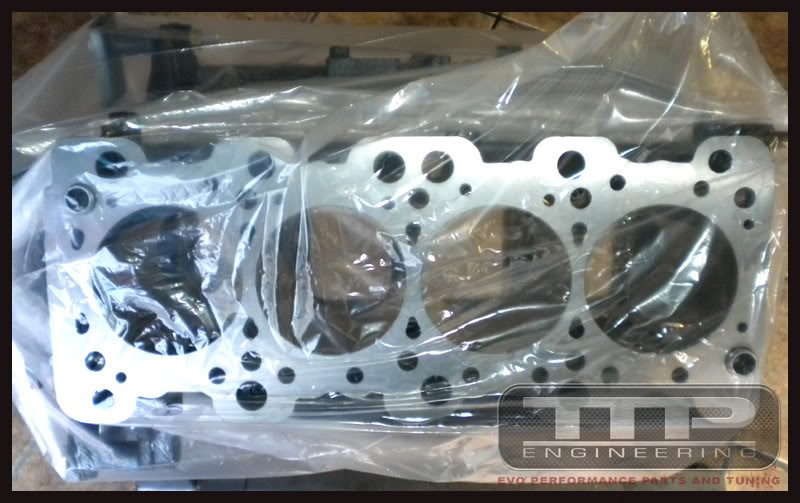
Cleanliness is TOP PRIORITY! Motors are never exposed to open air until its time to assemble. Even after machining and hot tanking, hand washing is done at the machinist, it gets done again prior to assembly. No stone left unturned. It doesn't take but a single grain of sand to damage an engine.
When precisely measuring the tolerances in the main bearing and crank journals, the girdle is installed and torqued. Line boring the mains after the ARP main studs are installed are a must. At this point the blockoff bearings have already been installed and oriented and every freeze plug on the car has been replaced with new ones.


We disassemble and remove the girdle which allows us easy access to the oil squirters.

Once the oil squirters are installed and torqued to spec, the crank can drop in. We torque to spec all of the mains in the proper order, stepping up to our final torque figure.

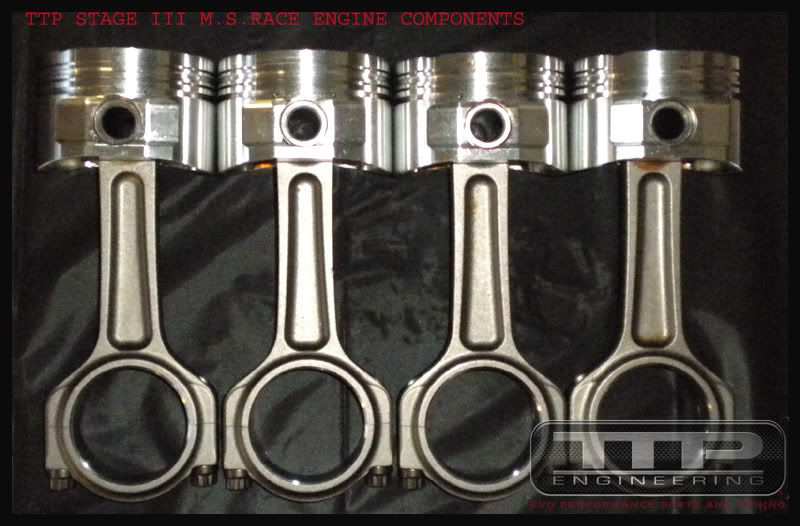
Depending on which version Stage III Shortblock we are building, we with either use the M.S. Components,
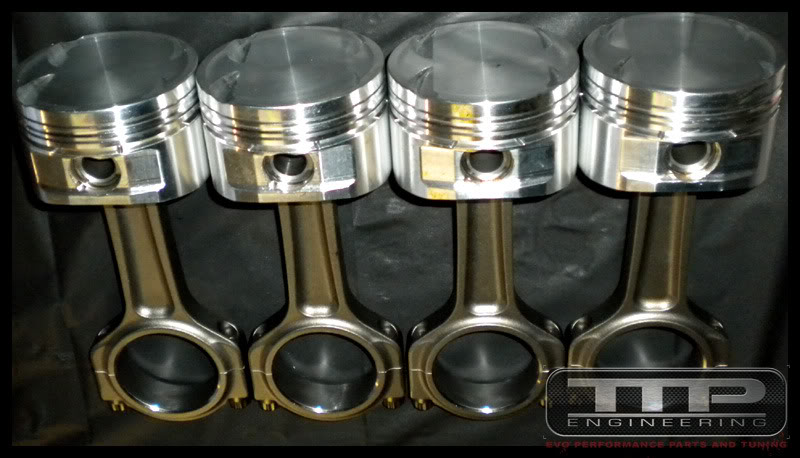
Or our G.A. Components pictured here:
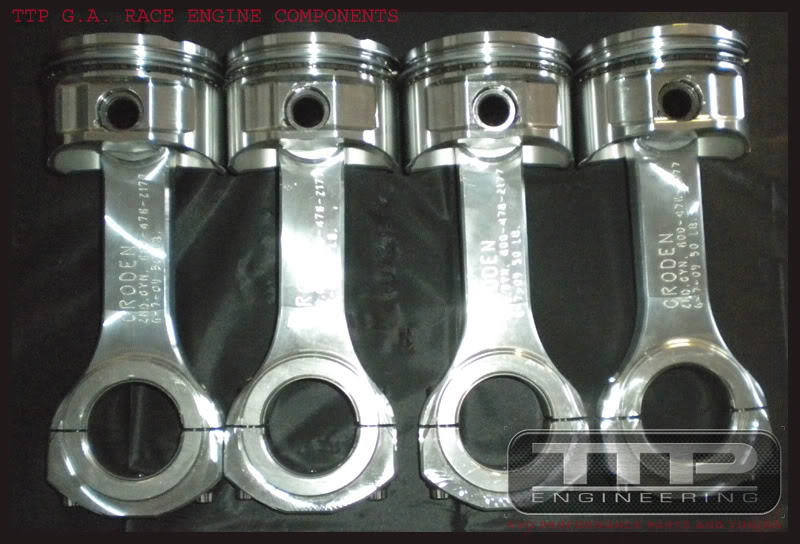
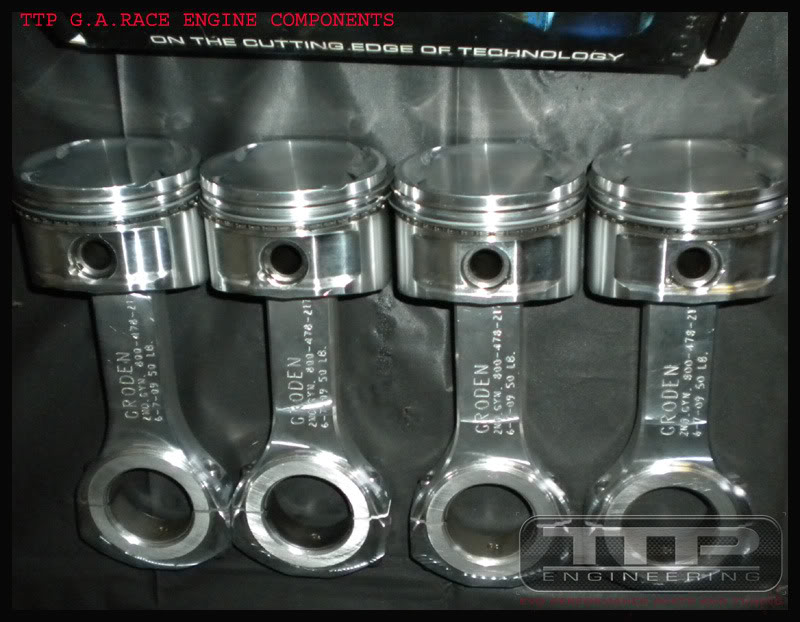
Regardless of the components used in the engines, contrary so some people's belief, you cannot just grab the parts out of the box and assemble them. The rods, pistons and pins need to be precisely pin fit together and in most cases the clearances out of the box are no where close to where they should be on a stock engine, let alone a high performance shortblock.
Once we have selected the components based on the customer's choice, its time to install the pistons and rods. Each piston and rod has been spec'd to a specific cylinder bore and marked on each rod and piston assembly. This insures the engine remains balanced and the file to fit rings end up in the correct bores.
The ring end gap orientation is set and the pistons are installed one at a time.
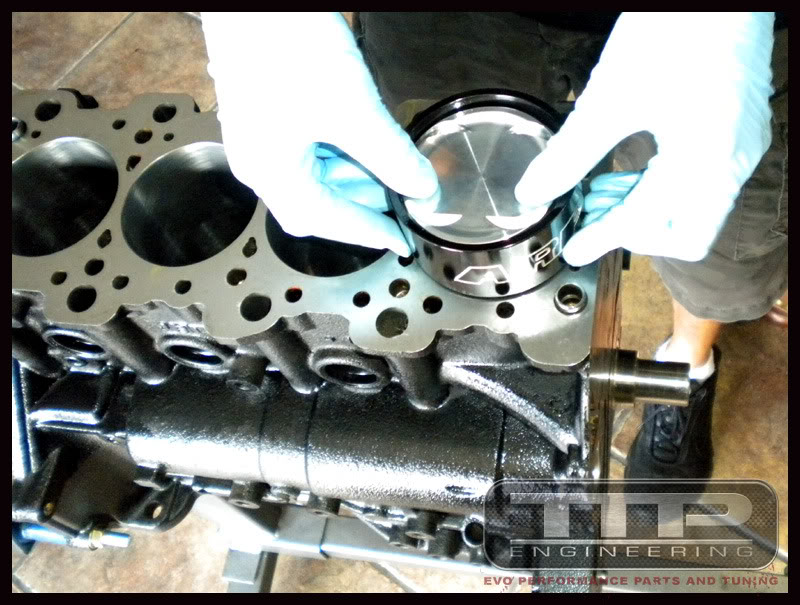
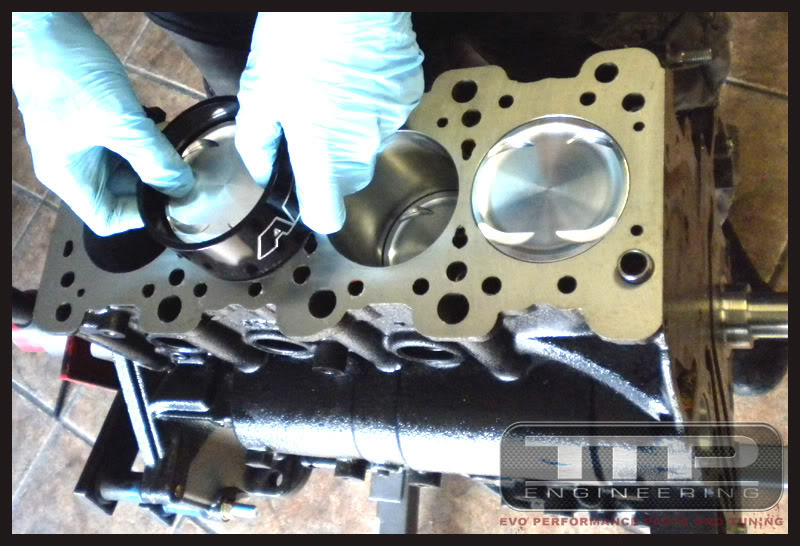
Each piston that is installed in its bore then gets its rod cap installed and torqued to spec, carefully alternating between each side and then stepping up the torque 10ft-lbs at a time until the final tq is yielded.

Once the the rod caps are all installed and torqued to spec, the crank key is installed and you have a rotating assembly.
At this point we include the AMS Race Concentric Shaft in every one of our racing engines. With the race shaft, the stock balance shafts can be removed from the engine and this shaft will replace the front balance shaft connected to the oil pump. Removing this weight from the engine means the crank no longer has to turn these shafts, therefore releasing more power to the wheels. Furthermore several lbs are shed from the removal of the shafts, the rear balance shaft belt gets removed so there is no concern for the small rear shaft belt breaking and getting caught up in your timing belt, wrecking your new engine.
This concentric shaft also will not allow the timing belt to pull the oil pump gear sideways from using a mirage stub shaft, making it eat into the frontcase and leading to a failed oil pump and aluminum in your engine oil.
Its a win win situation.

The rotating assembly is well lubed with thick assembly lube and wrapped up, crated for shipping at this point.
If we were building it for an on-site customer who was getting it installed at our facility, we would continue building the engine with the swapping of the Race Shaft into the NEW OIL PUMP AND FRONT CASE.
The freeze plug would block off the area where the rear balance shaft used to reside and the front case would bolt on.

After the frontcase and gasket is on with the raceshaft, the rear main seal housing can be installed and then the windage tray and oil pickup tube.
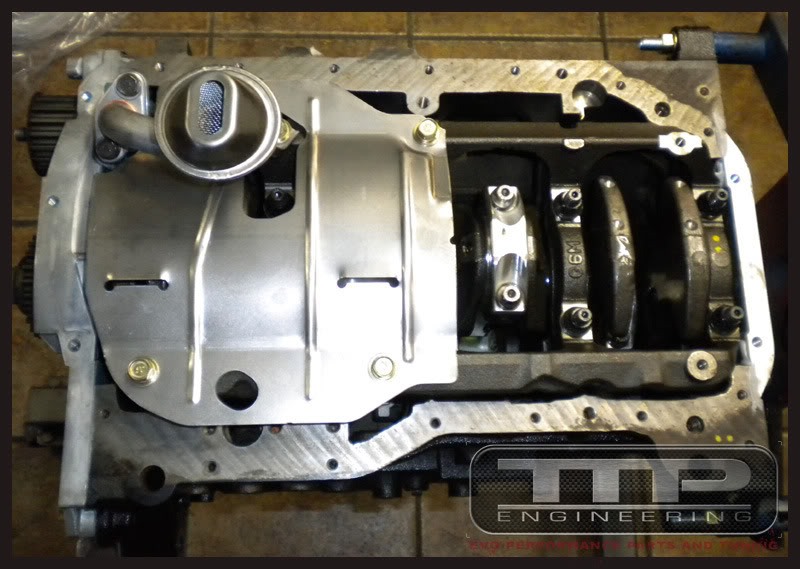
Lastly the oil pan to seal it up and the bottom end is ready for the oil filter housing and timing components.

Last edited by TTP Engineering; Jul 14, 2009 at 04:10 PM.

You should tension the fasteners by measuring the bolt stretch. It's really the only way to be sure you've reached the yield point of the fastener.
Do you use a deck plate when boring/honing?
You guys make me smile
Does Groden etch their name in their rods? It seems to me that they wouldn't want to be inducing stress risers into their Hi-Po con rod.
Do you use a deck plate when boring/honing?
You guys make me smile
Does Groden etch their name in their rods? It seems to me that they wouldn't want to be inducing stress risers into their Hi-Po con rod.
Thread Starter
Account Disabled
iTrader: (465)
Joined: May 2005
Posts: 8,824
Likes: 2
From: Central FL
These engines are clearanced for use in the 30-55psi boost range.
Thread Starter
Account Disabled
iTrader: (465)
Joined: May 2005
Posts: 8,824
Likes: 2
From: Central FL

As I recall, Buschur Racing has an option for the same rods in some of his engines also.
Trending Topics
Thread Starter
Account Disabled
iTrader: (465)
Joined: May 2005
Posts: 8,824
Likes: 2
From: Central FL


