
Make your front sway bar adjustable.

I'd like to give this a try in conjunction with an aftermarket rear bar. Instead of spending money and spending all the time and effort putting the front sway bar, I'll just drill two holes. I'd probably get some beefy endlinks though. It seems like it may cause some extra stress on the stock endlinks.
jebjkey, post back when you get results. I'm really looking foward to seeing if this helps with body roll.
jebjkey, post back when you get results. I'm really looking foward to seeing if this helps with body roll.
So here are my pictures
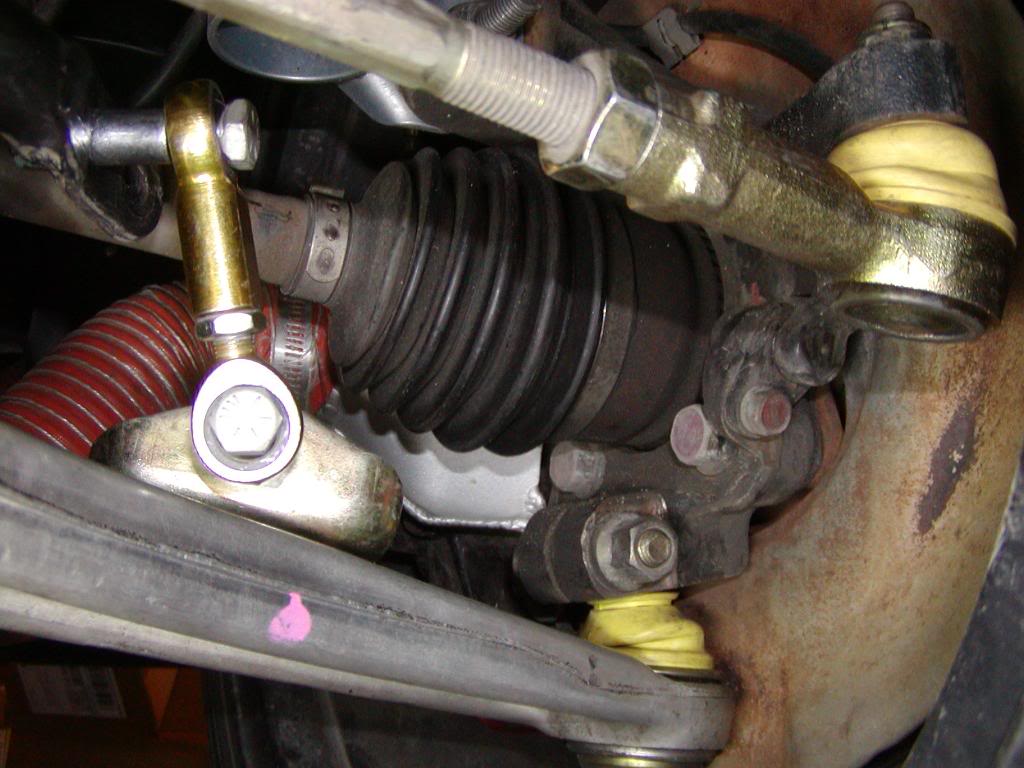
Front
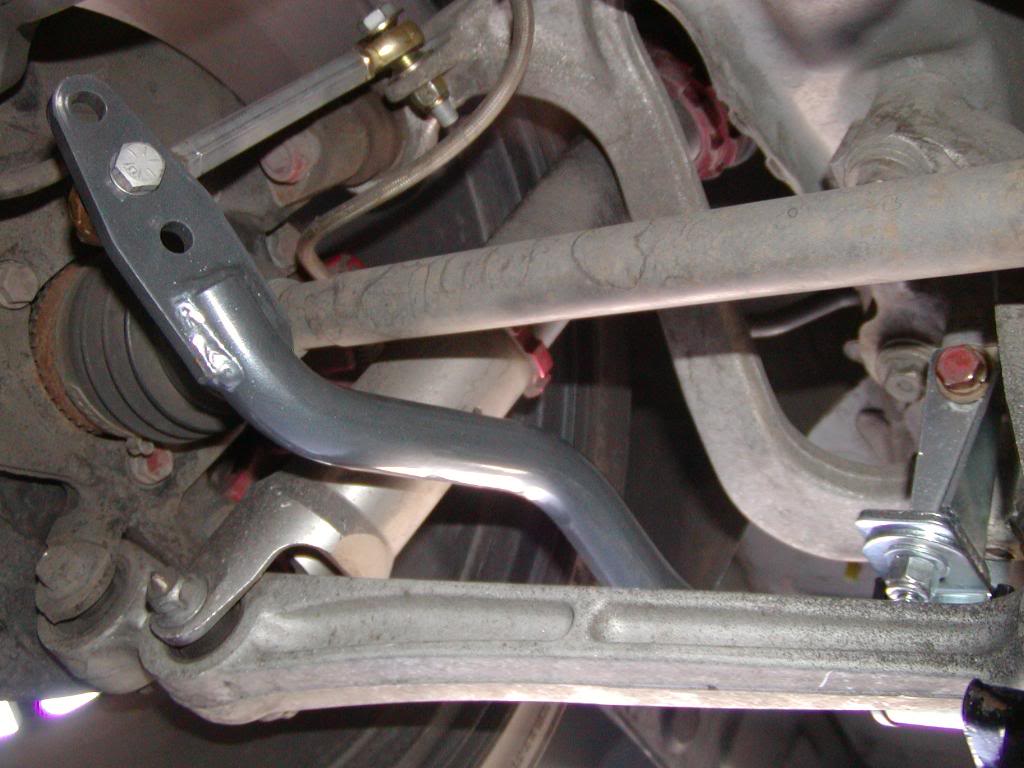
Rear
I drilled the front so that they were both equal distance to the new hole, I did not have to flatten out any part of the sway bar. The flat part on each side of the front sway is a different size (kinda odd if you ask me) which is why it looks like there is plenty of extra flat area in this picture. For the rear sway I drilled the hole further back and then grinded flat enough area to bolt the endlink correctly.
Here are screen shots from auto-x runs before and after drilling the sway bars and swaping the front camber bolts for -2 degrees of front camber.
Before

After
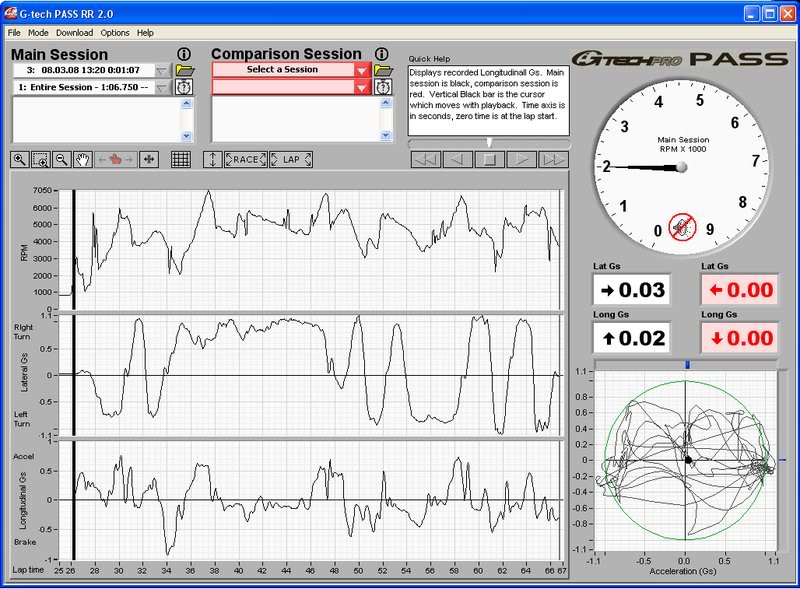
Although the cone track was different, they were both at the same place so the surface is identical. You can see that the average g's are higher after the modifications. I am not really sure that with the drilled sway bars alone you will see a marked change in how much the car leans in the turns. I am sure that it leans less, but it is hard to tell going around the track in the car, I am paying attention to the track, not the suspension. At some time I hope to put some stiffer springs on the car, but that costs a lot more than a few drill bits sacrificed for better handling. It is all up to when my wife will approve the funding for the springs.
Front
Rear
I drilled the front so that they were both equal distance to the new hole, I did not have to flatten out any part of the sway bar. The flat part on each side of the front sway is a different size (kinda odd if you ask me) which is why it looks like there is plenty of extra flat area in this picture. For the rear sway I drilled the hole further back and then grinded flat enough area to bolt the endlink correctly.
Here are screen shots from auto-x runs before and after drilling the sway bars and swaping the front camber bolts for -2 degrees of front camber.
Before
After
Although the cone track was different, they were both at the same place so the surface is identical. You can see that the average g's are higher after the modifications.
I am not really sure that with the drilled sway bars alone you will see a marked change in how much the car leans in the turns. I am sure that it leans less, but it is hard to tell going around the track in the car, I am paying attention to the track, not the suspension. At some time I hope to put some stiffer springs on the car, but that costs a lot more than a few drill bits sacrificed for better handling. It is all up to when my wife will approve the funding for the springs.
Last edited by jebjkey; Aug 9, 2008 at 03:48 PM.

Anyone add the poly bushings? Doing a search showed that one side required a lot of work to get the bushing in.
Looking to do this mod at some point, hopefully soon. AFAI can tell, this shouldn't induce push - on the contrary, it should help turn-in (just don't yank the wheel to turn). Look at the wear on the side of your front tires when driven hard. My tires are rolling over unless I use major psi. That's because the car leans waaayyy too much. With less lean, we should get more tread to the ground = more grip! jebjkey's results are proof, at least for his setup
Looking to do this mod at some point, hopefully soon. AFAI can tell, this shouldn't induce push - on the contrary, it should help turn-in (just don't yank the wheel to turn). Look at the wear on the side of your front tires when driven hard. My tires are rolling over unless I use major psi. That's because the car leans waaayyy too much. With less lean, we should get more tread to the ground = more grip! jebjkey's results are proof, at least for his setup


I did this OEM front swaybar mod a while back, but I wanted to actually drive the car at the track before I posted my impressions.
Now that I've tried it, my opinion is that it's worth doing, but don't expect a night and day difference. I feel it's an easy way to limit roll at the front end, and unless you're running high spring rates (at least 600#/in up front), you could probably use more front bar to keep your roll center under control. And, I figure even $30 worth of drill bits is definitely cheaper than a $150 swaybar.
My Evo's setup:
My experience with drilling the front bar
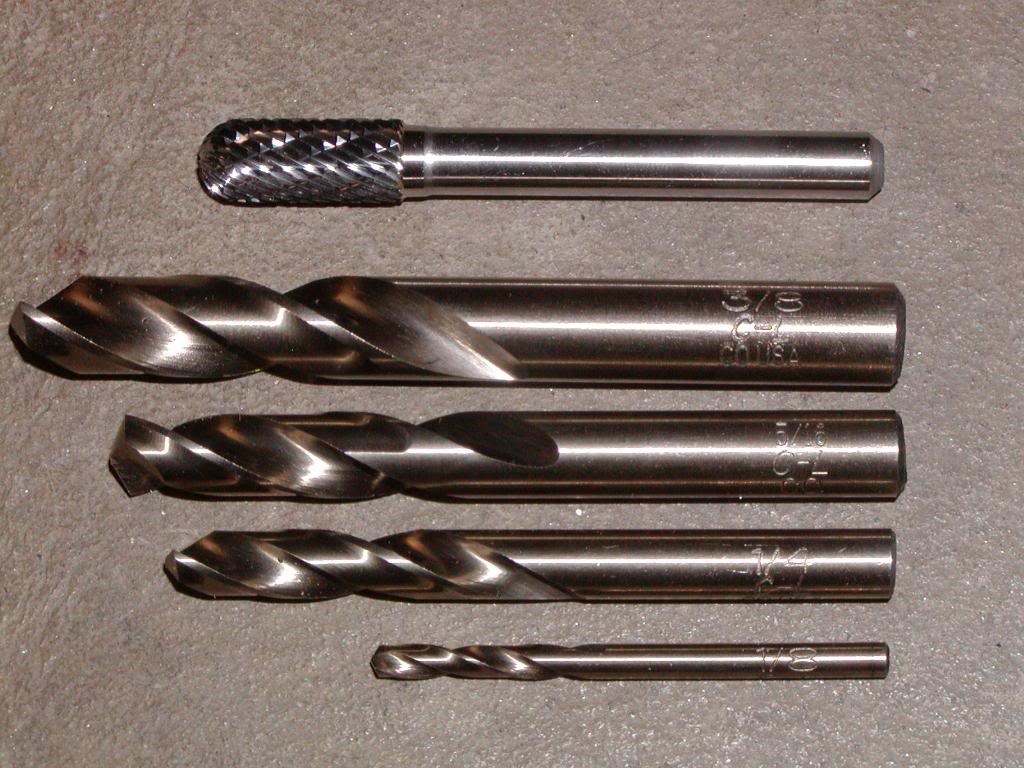
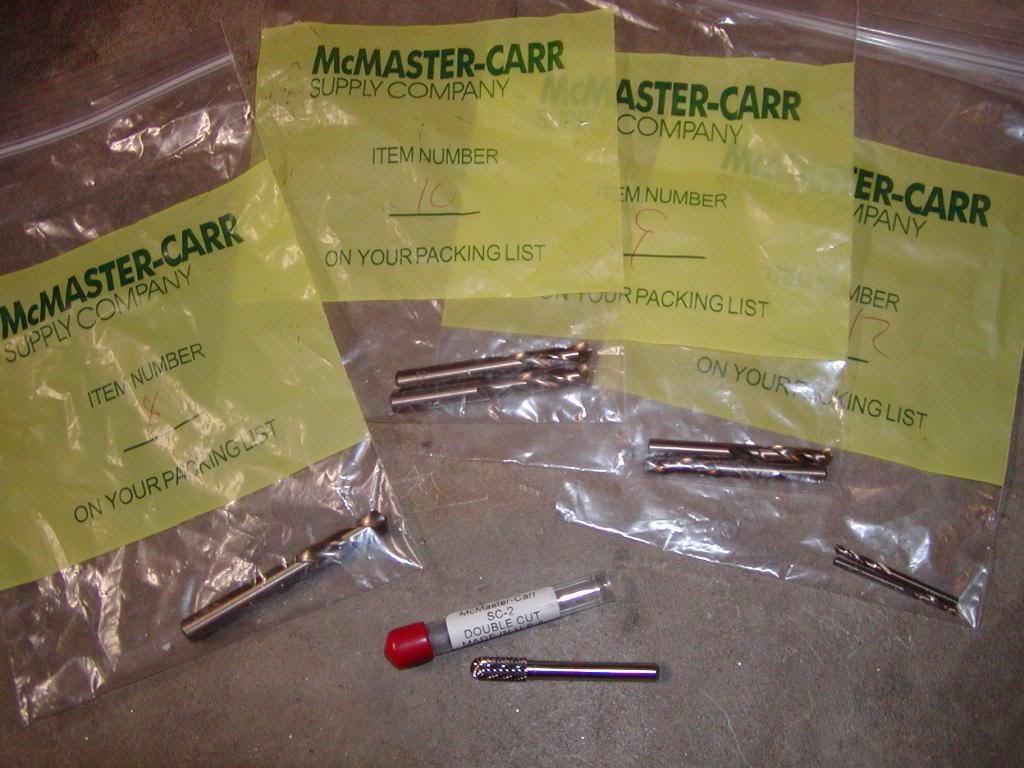
Based on the info earlier in this thread, I decided to order a bunch of cobalt drill bits (in a range of sizes from 1/8" up to 3/8") as well as a 5/16" diameter carbide burr from McMaster-Carr... having spent a lot of garage time in the past being frustrated cutting or drilling with inadequate tool bits, I wanted the best shot at minimal issues getting through the swaybar material.
Drilling the front bar did take some time, even with a full assortment of cobalt drill bits from McMaster-Carr... I used 1/8", 1/4", 5/16", and 3/8". If I were to do this again, I'd probably pass on buying the 3/8" cobalt bit... that was over $7 by itself, and I had to rely on the 5/16" carbide burr to get the holes opened up to a full 3/8" anyway.
The first side took about an hour, with a lot of careful eyeballing and rechecking throughout the process, and the second side maybe 30 minutes.
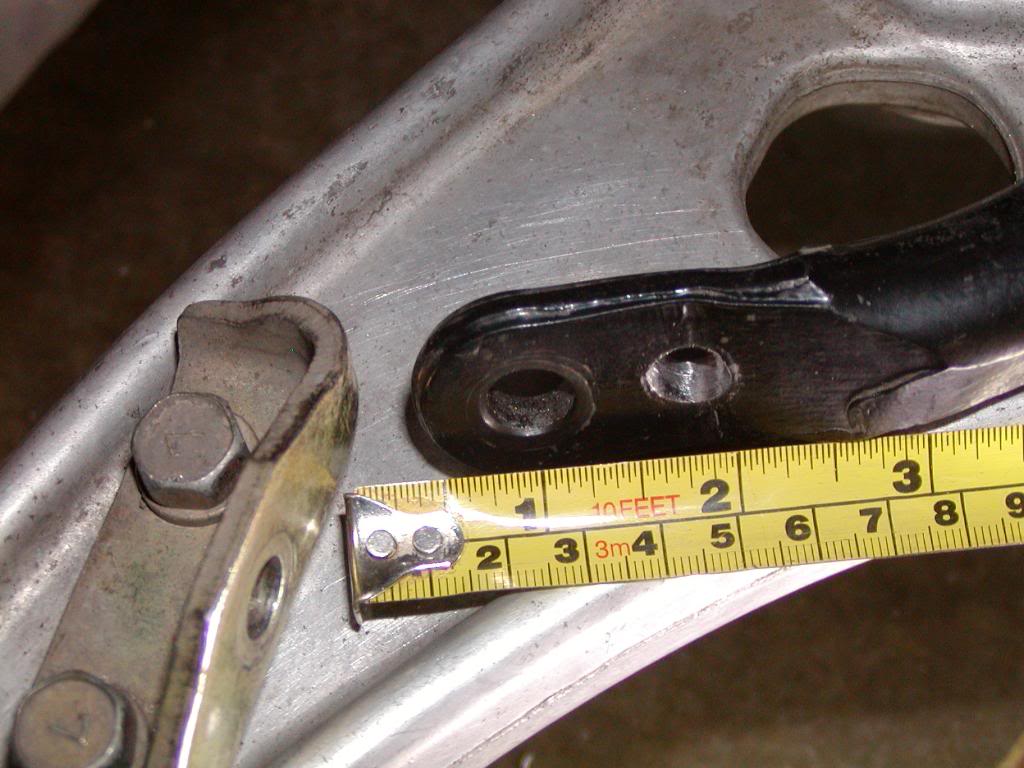
I was able to move the endlink mounting hole about 13/16" to 7/8" inboard on both sides. That's probably as far as you can go; I wanted maximum increase in bar rate.
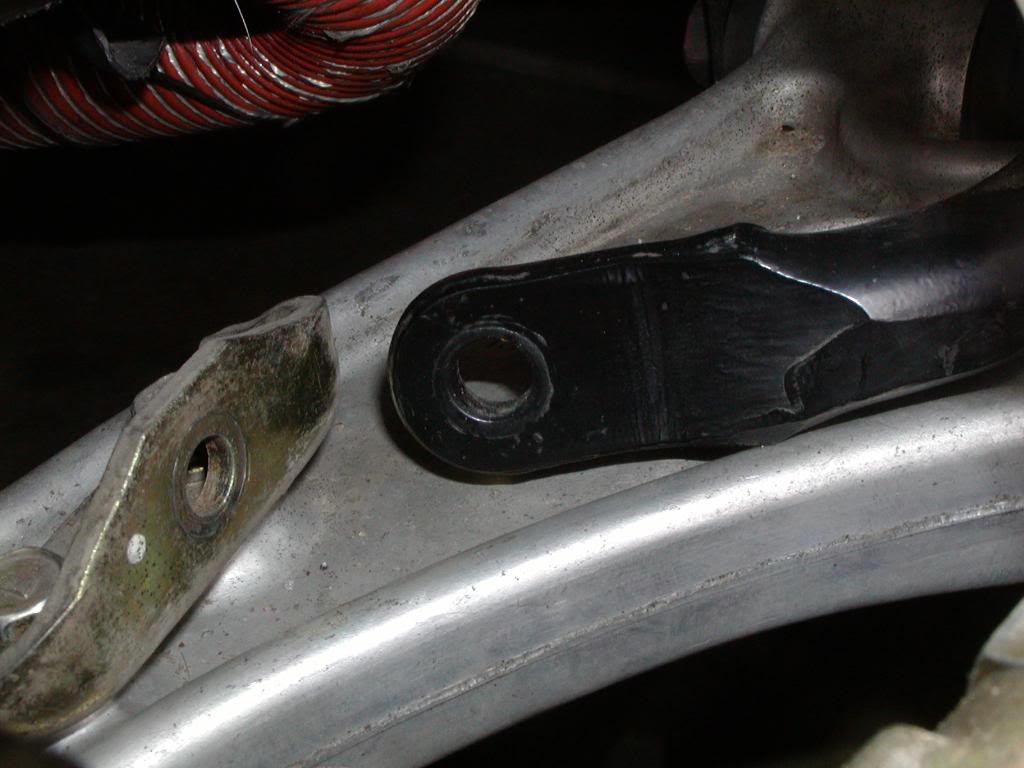
Driver's side, before I started:
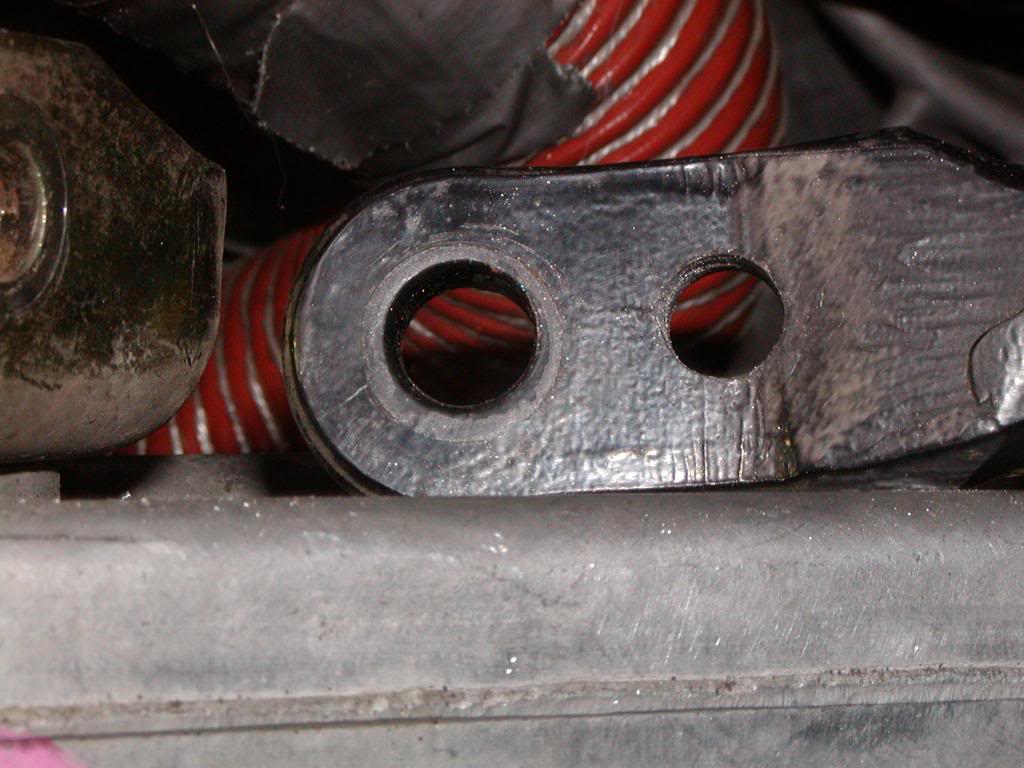
Passenger side (don't ask what happened to the end of the swaybar on this side; the car came that way to me... something that happened in a the course of an accident, I'd guess)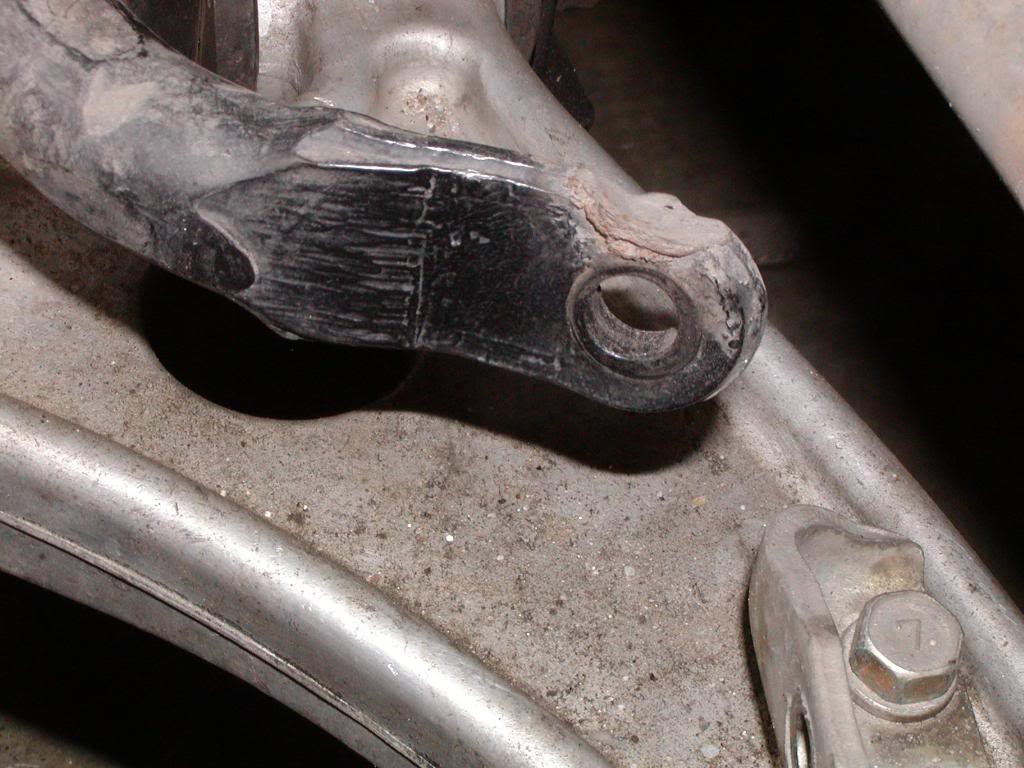
Making my pilot mark with an automatic punch:

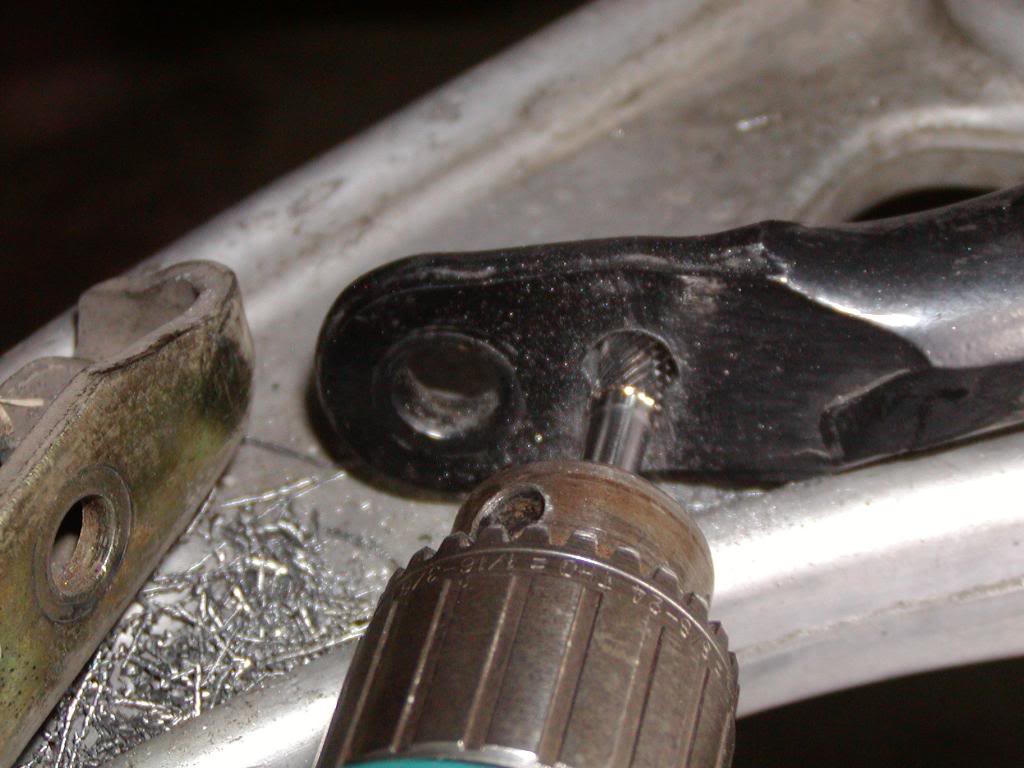
The 1/8" bit went through very easily. The 1/4" bit went through the swaybar even faster. But when I started with the 5/16", I only got about halfway through before it basically stopped:
So, I cheated... carbide bur time:
Done!
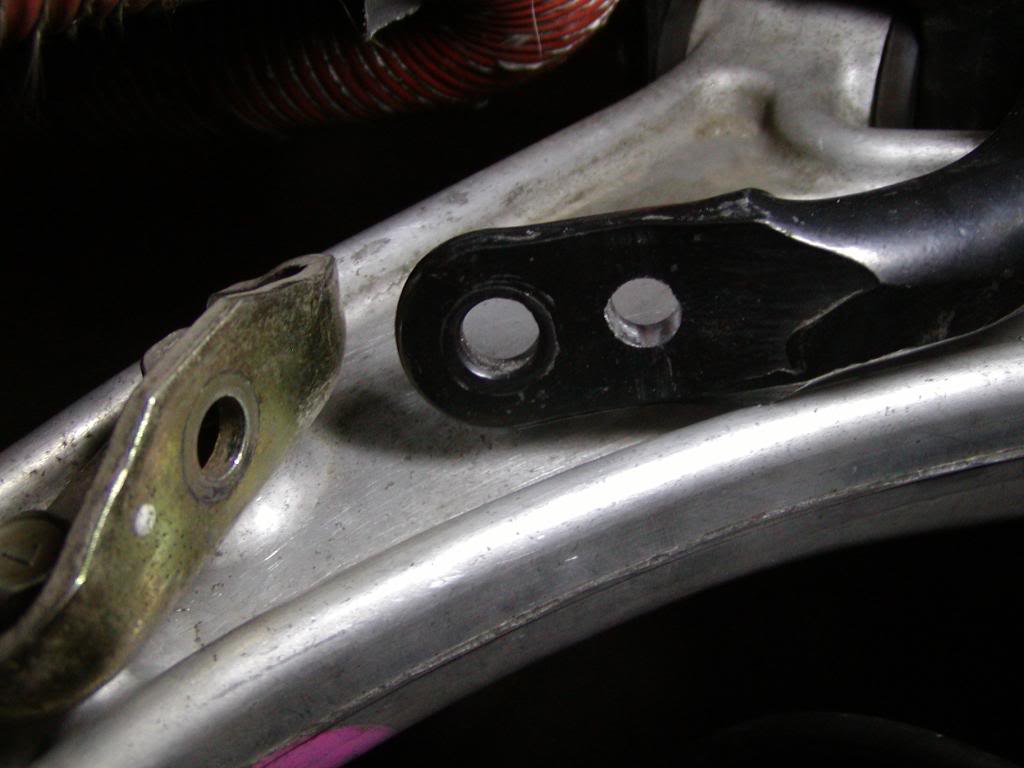
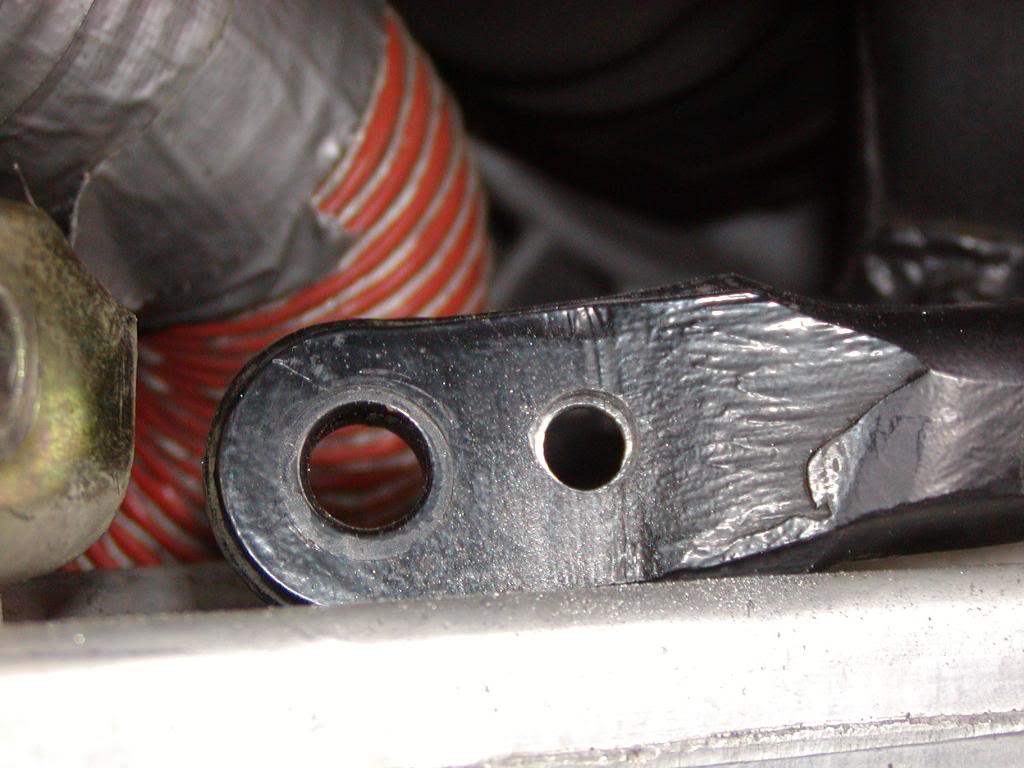
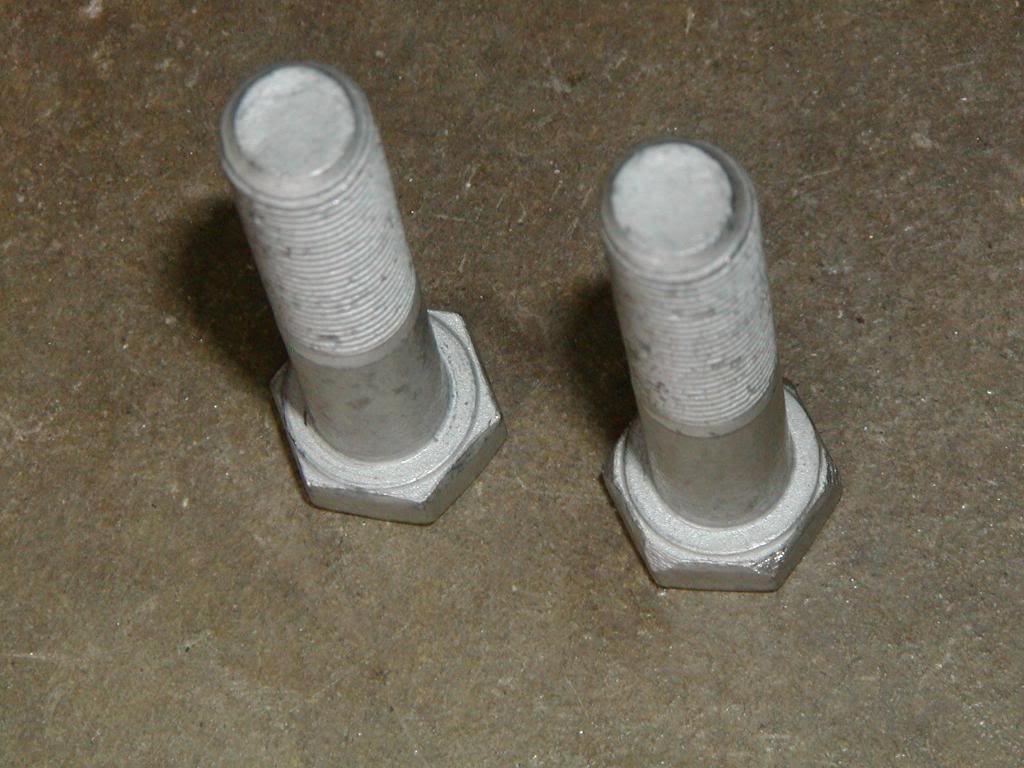
Here's the passenger side drilled:

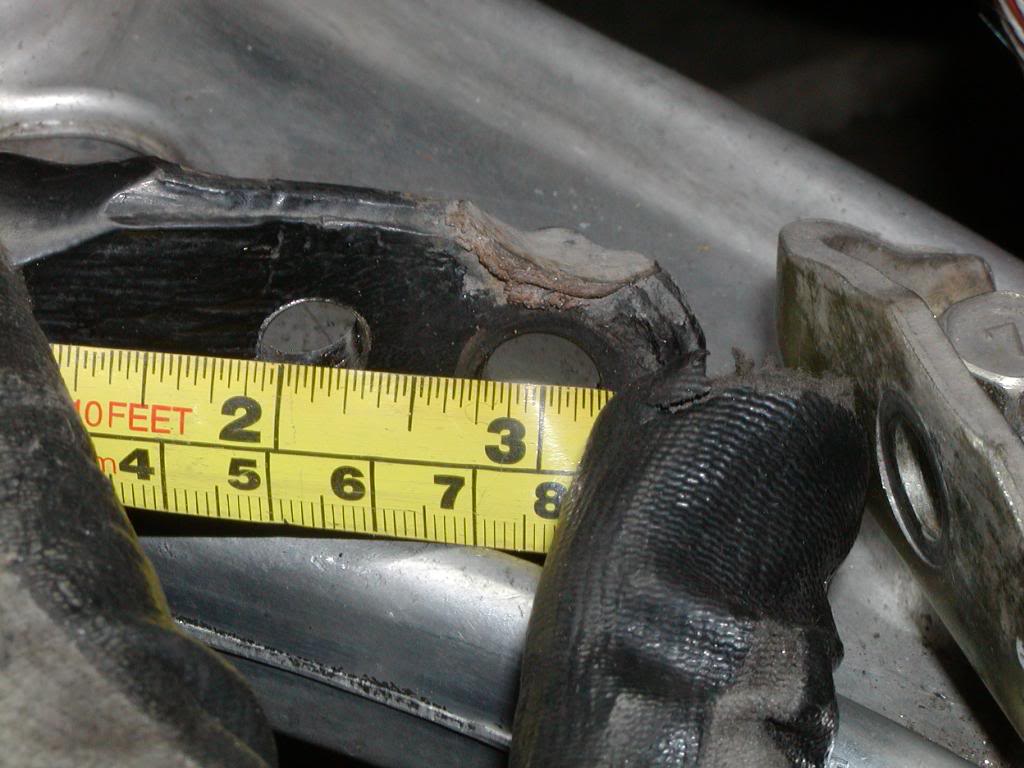
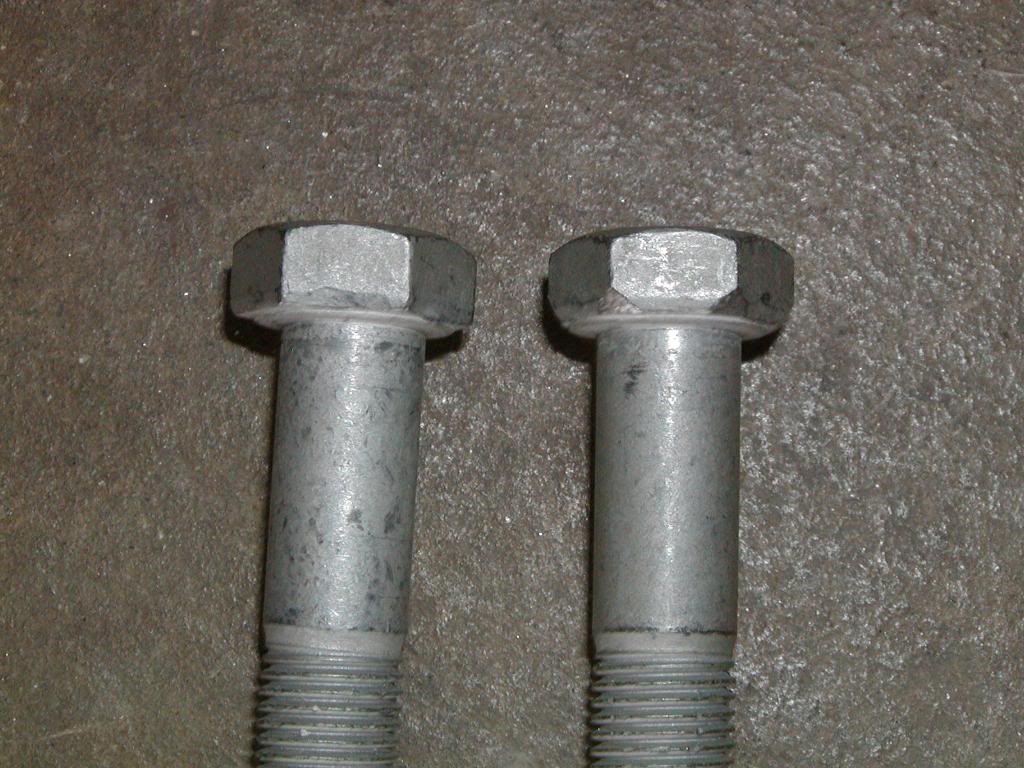
Measurement to the original holes (note that the new holes are smaller, because I was planning on using 3/8" bolts for the new endlinks anyway):
I'm using the DIY endlinks described here: http://www.cs.unm.edu/~donour/cars/evo_endlinks/
These are cheaper than the commercially-available endlinks from Whiteline, Agency Power, and Perrin (typically $115-120/pair X 2, whereas the components for building all four endlinks from McMaster-Carr/Pegasus parts are about $130 total).
Another big plus: replacement spherical bearings are readily available, should any of the balljoint ends seize up.
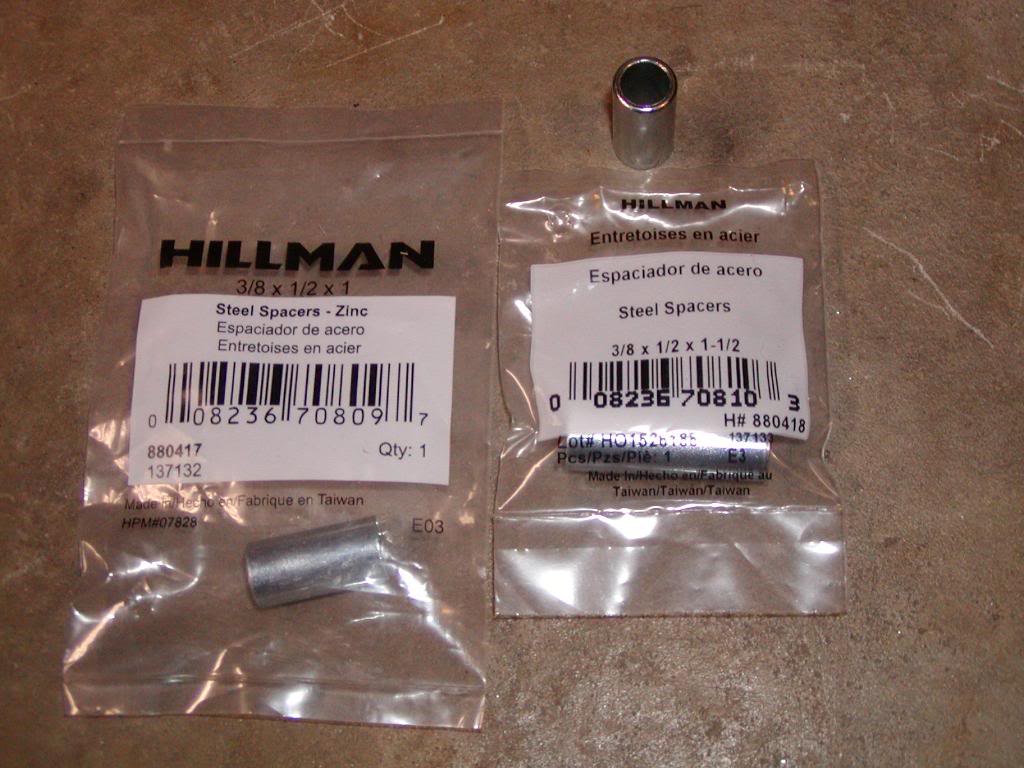
For the DIY endlinks, I found I had to use long spacers I got at Lowes in order to reduce the angle of the endlinks... there's no where near enough articulation to install them without spacers. I used an entire 1" spacer on the bottoms, and took a 1 1/2" spacer and cut it in half to create 3/4" spacers for the top:
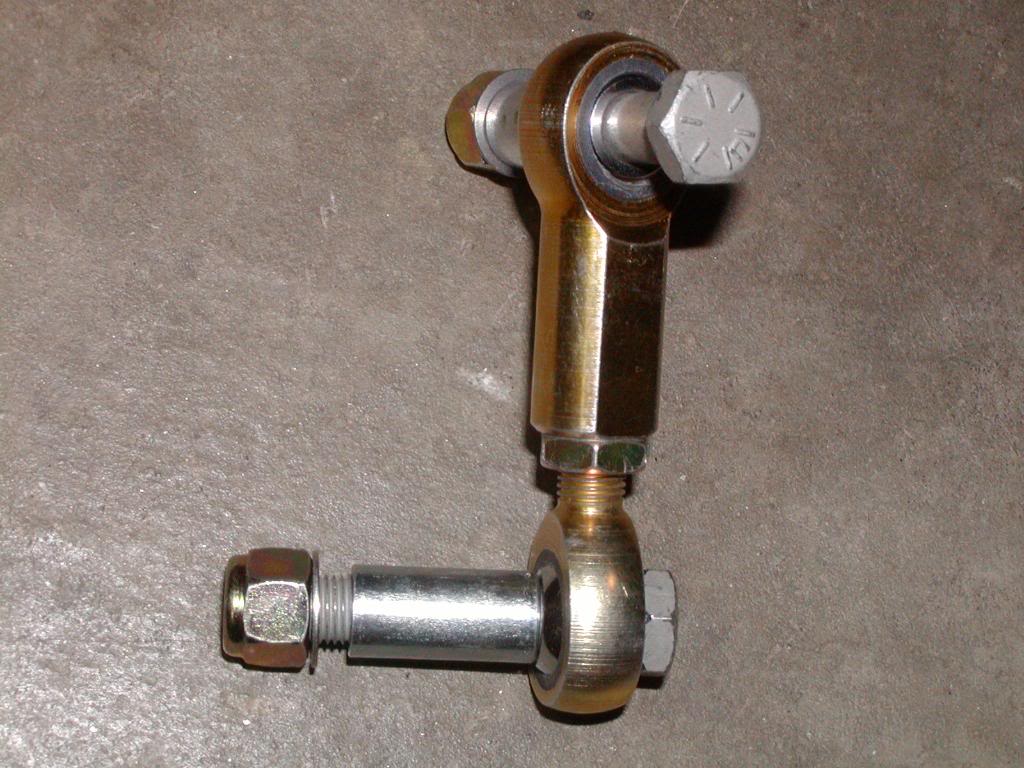
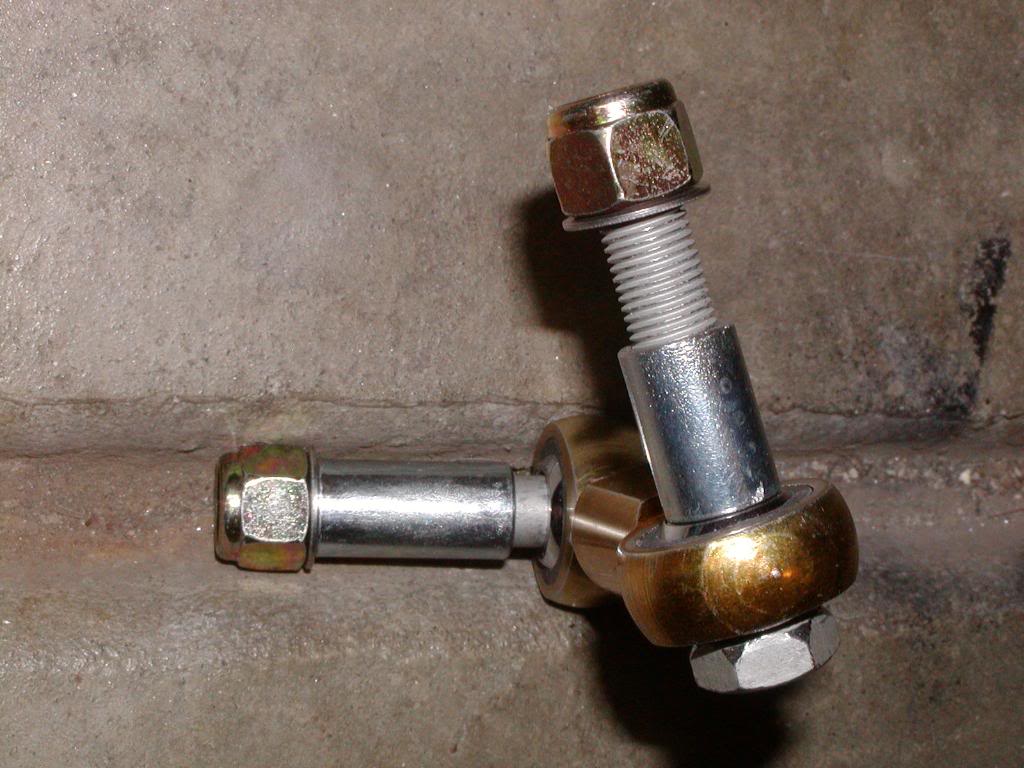
I also rounded the insides of both the upper and lower bolt heads to give the endlinks more room to move without binding:
And here they are installed:

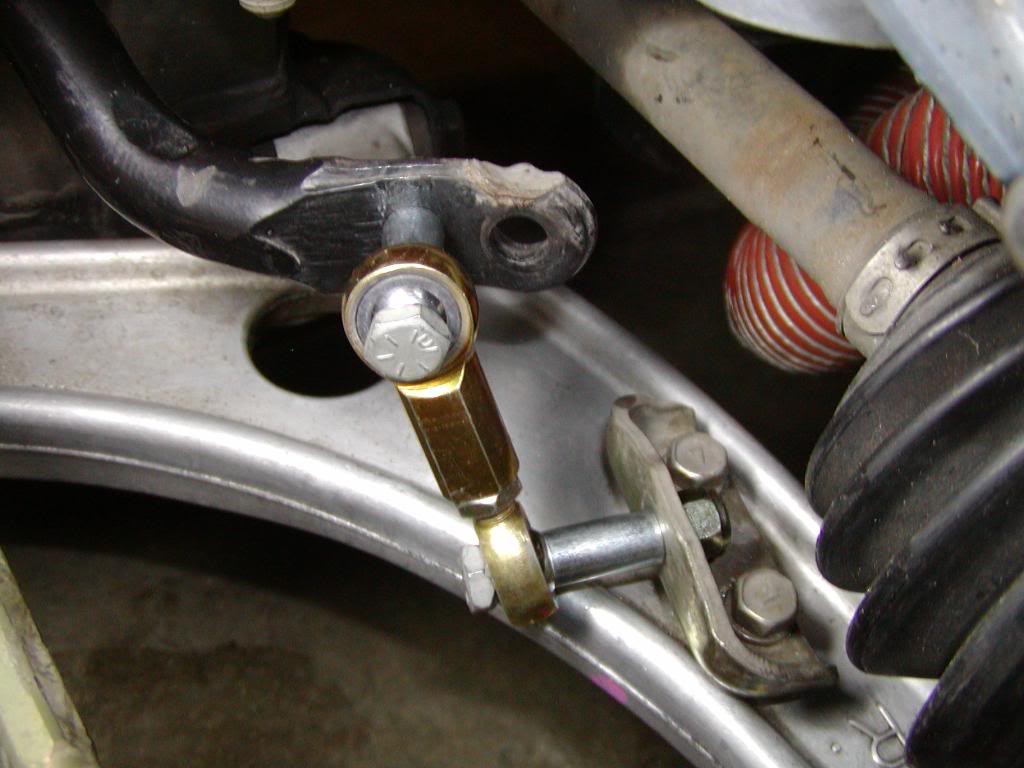
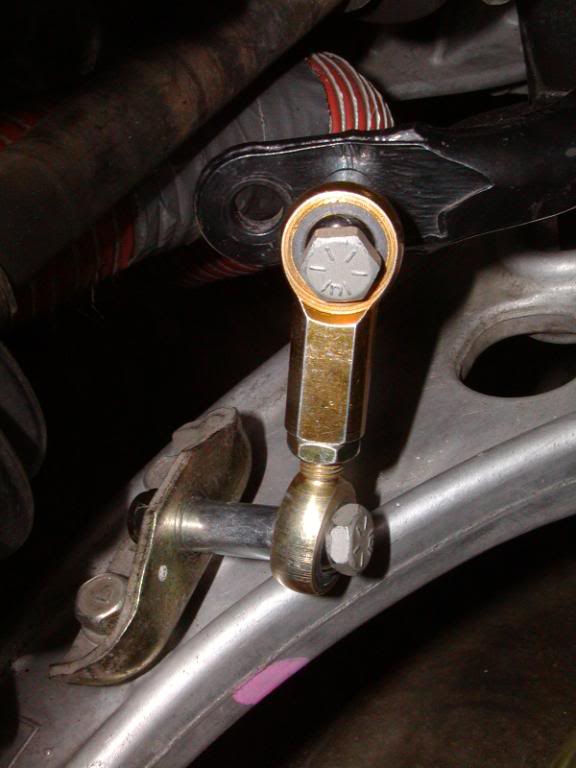
Here's a nice shot of the front endlinks installed, with my Whiteline roll center correction components and brake ducting:
Rear endlinks installed w/ Progress bar:
I realize that having the endlinks acting on the ends of the bolts 3/4" to 1" away from the actual attachment points is not ideal. However, after recent a track day where I beat on the car for about 110 miles on course - on fairly wide R-comp tires - the bolts are still perfectly straight. So far, seems like the bolts are strong enough. I may have to upgrade the bolts to higher strength versions once I start autocrossing on Hoosiers A6s though, as the loads from left to right might be higher than on the road course.
The best solution for the front would be to replace those gold-colored OEM 90-degree brackets to the aluminum LCA with new custom brackets that locate/align the endlink exactly where it needs to be so the spacers aren't necessary.
Last thing: In this thread, I posted my method for taking the preload out of the swaybar endlinks: https://www.evolutionm.net/forums/ev...-question.html
Now that I've tried it, my opinion is that it's worth doing, but don't expect a night and day difference. I feel it's an easy way to limit roll at the front end, and unless you're running high spring rates (at least 600#/in up front), you could probably use more front bar to keep your roll center under control. And, I figure even $30 worth of drill bits is definitely cheaper than a $150 swaybar.
My Evo's setup:
- About 2930 lb. empty
- 514# F, 600# rear
- 3 degrees F, 1.4 degrees R camber; zero toe all around
- Whiteline front roll center kit (KCA395), Whiteline rear bumpsteer kit (KCA388) installed eccentric down
- OEM front bar with extra hole, Progress 25mm rear bar, middle/middle setting
- McMaster-Carr DIY adjustable swaybar endlinks
- Nitto NT01 275/35-18 on Rota DPT wheels, 35mm offset, 5mm front spacers
My experience with drilling the front bar
Based on the info earlier in this thread, I decided to order a bunch of cobalt drill bits (in a range of sizes from 1/8" up to 3/8") as well as a 5/16" diameter carbide burr from McMaster-Carr... having spent a lot of garage time in the past being frustrated cutting or drilling with inadequate tool bits, I wanted the best shot at minimal issues getting through the swaybar material.
Drilling the front bar did take some time, even with a full assortment of cobalt drill bits from McMaster-Carr... I used 1/8", 1/4", 5/16", and 3/8". If I were to do this again, I'd probably pass on buying the 3/8" cobalt bit... that was over $7 by itself, and I had to rely on the 5/16" carbide burr to get the holes opened up to a full 3/8" anyway.
The first side took about an hour, with a lot of careful eyeballing and rechecking throughout the process, and the second side maybe 30 minutes.
I was able to move the endlink mounting hole about 13/16" to 7/8" inboard on both sides. That's probably as far as you can go; I wanted maximum increase in bar rate.
Driver's side, before I started:
Passenger side (don't ask what happened to the end of the swaybar on this side; the car came that way to me... something that happened in a the course of an accident, I'd guess)
Making my pilot mark with an automatic punch:
The 1/8" bit went through very easily. The 1/4" bit went through the swaybar even faster. But when I started with the 5/16", I only got about halfway through before it basically stopped:
So, I cheated... carbide bur time:
Done!
Here's the passenger side drilled:
Measurement to the original holes (note that the new holes are smaller, because I was planning on using 3/8" bolts for the new endlinks anyway):
I'm using the DIY endlinks described here: http://www.cs.unm.edu/~donour/cars/evo_endlinks/
These are cheaper than the commercially-available endlinks from Whiteline, Agency Power, and Perrin (typically $115-120/pair X 2, whereas the components for building all four endlinks from McMaster-Carr/Pegasus parts are about $130 total).
Another big plus: replacement spherical bearings are readily available, should any of the balljoint ends seize up.
For the DIY endlinks, I found I had to use long spacers I got at Lowes in order to reduce the angle of the endlinks... there's no where near enough articulation to install them without spacers. I used an entire 1" spacer on the bottoms, and took a 1 1/2" spacer and cut it in half to create 3/4" spacers for the top:
I also rounded the insides of both the upper and lower bolt heads to give the endlinks more room to move without binding:
And here they are installed:
Here's a nice shot of the front endlinks installed, with my Whiteline roll center correction components and brake ducting:
Rear endlinks installed w/ Progress bar:
I realize that having the endlinks acting on the ends of the bolts 3/4" to 1" away from the actual attachment points is not ideal. However, after recent a track day where I beat on the car for about 110 miles on course - on fairly wide R-comp tires - the bolts are still perfectly straight. So far, seems like the bolts are strong enough. I may have to upgrade the bolts to higher strength versions once I start autocrossing on Hoosiers A6s though, as the loads from left to right might be higher than on the road course.
The best solution for the front would be to replace those gold-colored OEM 90-degree brackets to the aluminum LCA with new custom brackets that locate/align the endlink exactly where it needs to be so the spacers aren't necessary.
Last thing: In this thread, I posted my method for taking the preload out of the swaybar endlinks: https://www.evolutionm.net/forums/ev...-question.html


Did the mod today and thanks to the warnings of those who did it before, my experience was completely trouble free.
I used a $50 dollar Bosch electric drill, some lubricating/cutting wax, and a single good bit and did both sides in less than 25 minutes.
Car is not together yet so I can't comment on how it works, but will let you all know as soon as I can.
I used a $50 dollar Bosch electric drill, some lubricating/cutting wax, and a single good bit and did both sides in less than 25 minutes.
Car is not together yet so I can't comment on how it works, but will let you all know as soon as I can.
I'd like to know what kind of Bosch drill you used, or what anybody recommends.
Also I got the Diy endlinks,and was wondering if you where gonna put any boots around the joint area, or just keep lube, and clean em every once in awhile.
Doing this friday. Got an autoX event sunday so we'll see how it goes.


I just instructed a track day with the bar modded vs standard position back to back and the car felt totally different. If you are looking for a cost effective way to add some front grip this is the way to go.
Rotation in is very managable and it actually helps the rear not to snap rotate (on whiteline race on mid setting). A+ and still holding up with the oem endlink for over 9K miles now.
Rotation in is very managable and it actually helps the rear not to snap rotate (on whiteline race on mid setting). A+ and still holding up with the oem endlink for over 9K miles now.

^That would be correct but you do not have to remove the tie rod. I just unbolted both end links and then that allowed me to swing the sway bar up a little and I had ample room to drill it. As others stated pick up a good bit and you'll have no problem getting through it. I thought I was going to be drilling forever but it ended up taking me <1 hour from start to finish.
^That would be correct but you do not have to remove the tie rod. I just unbolted both end links and then that allowed me to swing the sway bar up a little and I had ample room to drill it. As others stated pick up a good bit and you'll have no problem getting through it. I thought I was going to be drilling forever but it ended up taking me <1 hour from start to finish.
As far as jacking the car, the original direction in 1st post say jack at control arms. do you really have to jack or support it at the control arms? Or jack strands at the jacking points is fine?
Thanks
Yeah did mine without touching the tie rods. Not really sure what he meant by supporting the LCA with the jack. My best guess is bc he removed the tie rod that helped to support the knuckle?
I woulnd't get hung up on that though. Jack up the front from the front jack point place the car on jackstands and go to town. Dont overthink it, it's really not a hard job...
I woulnd't get hung up on that though. Jack up the front from the front jack point place the car on jackstands and go to town. Dont overthink it, it's really not a hard job...

Thread
Thread Starter
Forum
Replies
Last Post
jbigelow
Evo How To Requests / Questions / Tips
150
Oct 16, 2013 02:43 PM