
Install a Whiteline KCA395 roll center correction kit on an Evo without a shop press


Install a Whiteline KCA395 roll center correction kit on an Evo without a shop press
I purchased the Whiteline roll center correction kit because my Evo is lowered substantially, and my very basic understanding of the Evo’s suspension geometry is that once your control arms are close to parallel with the ground, as opposed to sloping downwards from the centerline of the car, your car’s roll center is going to be underground, which actually exacerbates the car’s tendency to roll when cornering. This results in reduced front end grip.
As a person who uses his Evo for track days and autox, I’m always interested in maximizing grip.
Installing the KCA395 kit requires pressing out the OEM ball joints and installing the Whiteline parts in their place. You also need to replace the tie rod ends, but that’s super-easy, as long as you have a Pitman arm tool to pop out the OEM parts (easily available at most car parts stores, or from Harbor Freight Tools: Harbor Freight tie rod end/Pitman arm puller, #1752-2VGA).
Most shops or professionals would use a shop press to install ball joints. I don’t have one, the closest friend with a press was over 50 miles away, and I didn’t feel like spending $80-150 to buy my own, so this was my solution.
This thread documents how I did it, and it went fairly easily, with no major problems. Standard disclaimer: What you do on your car is your own responsibility. Make sure your Evo is properly supported with jackstands before working on it (and especially UNDER it). Take all sensible precautions not to injure yourself, or your car (NOTE: the control arms on the Evo are aluminum, and it IS possible to crack them when pressing bushing in/out of them).
Also, I wrote this tutorial many weeks after the actual job, so I may have accidentally left out a detail or two. This is intended as a general installation guide, not a comprehensive how-to. Of course, you can refer to the direction sheet that Whiteline includes with the KCA395 for more information.
If there’s any inaccuracies in my post/information, please point them out (politely is preferred).
Pics of the Whiteline KCA395 kit:
There’s basically two alternatives to using a shop press to press out the OEM ball joints from your control arms:
I considered both, but finding the right size deep socket is a wild goose chase I’ve been on before, and bigass sockets like that aren’t cheap either. Using the C-clamp kit allows for more controlled pressure, and a smaller chance of damaging something. Plus, it’s free to get the tool kit from an autoparts store, as long as you return it and get a full refund.
I used a ball joint tool kit I "rented" (i.e., bought from, with the option to return it for a full refund) from Advance Auto. It costs $149.98 + tax to take it home. Not every parts store (i.e., Checker, Auto Zone) has this kit! The smaller kits often won’t have all the parts and adapters you need to make it work.
Here's the exact kit I used:
It's a Powerbuilt 648617, also know as an Alltrade 648617:
http://shop.advanceautoparts.com/web..._T|GRP2083____
I still had to add my own Harbor Freight 21mm impact socket to the mix to get it done though, as you’ll see later.
Technically, you COULD use this tool to press the ball joints in and out with the lower control arms still on the car, but it would be a PITA to try to make it work. It’s hard enough to get all the pieces of the C-clamp tool to line up properly when it’s lying on the ground. I think I’d be almost impossible to do it up in the air, with the LCA still attached to the car. So, I took the LCAs out (about 15 minutes’ work per side):
I don’t recall the exact size, but I think it’s just two 19mm-head bolts per LCA, after you’ve removed the small bolts for the swaybar attachment brackets, plus a 14? mm headed bolt that secures the ball joint.
To prepare for removing the OEM ball joints, you first have to pop off the black rubber dustboots, and then remove the retaining snap rings (you can see one set of them removed and on the concrete floor in the picture above).
Pressing the ball joints in/out was actually pretty easy compared to removing/reinstalling the snap rings. I used a combination of a couple of small pry bars, a big flathead screwdriver, and a pick tool to get the factory snap rings off. There was a lot of foul language too, and a little loss of skin. Good luck with that. Be prepared to get frustrated, but as with most stuff, once you get the first one, the second one will only take about 1/4 of the time.
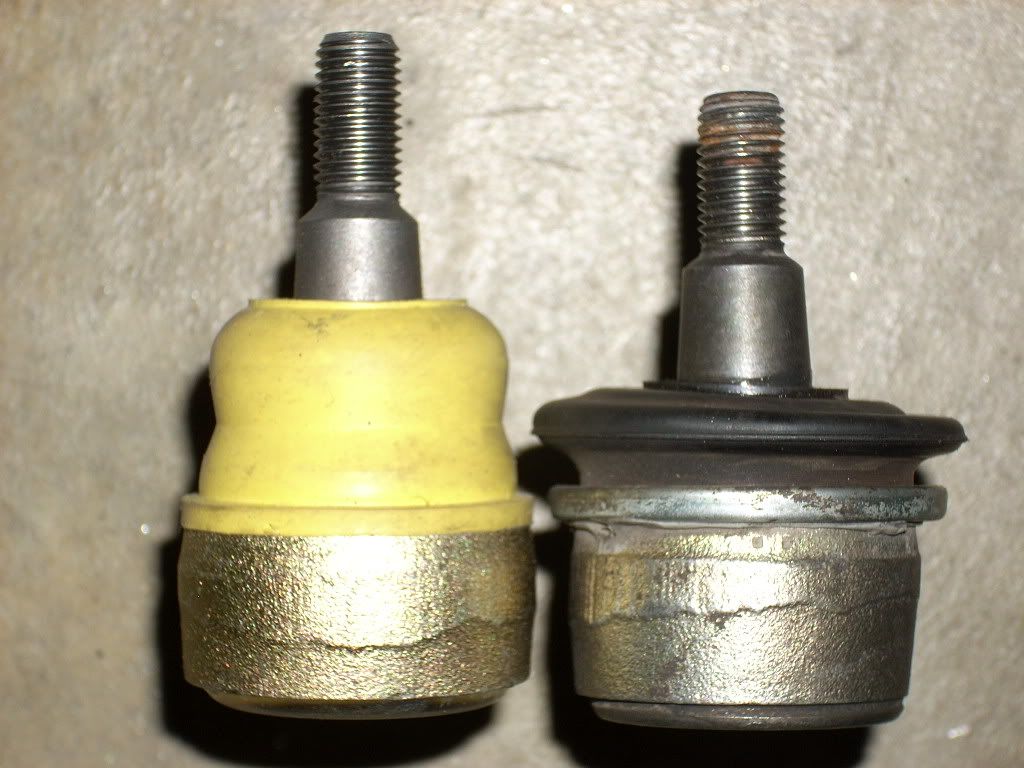
Here’s what the OEM ball joint looks like with the dust boot and snap ring removed (on the left). Yes, the factory dust boot is filled with black grease:
Once you’ve got the snap ring off, you’re ready to press the OEM ball joint out of the control arm. First, note the orientation of the slot in the ball joint – it’d be best if you mark which way it faces on the control arm, so when you go to press in the Whiteline part, you’ll have a reference point. Yes, you can turn the ball joint later, but you still need to know which way it faces to get it right on the first try.
A comparison of the OEM ball joint with the taller Whiteline part:
Take a look at the pictures below to see which parts from the ball joint tool kit I used, in conjunction with a 21mm Harbor Freight impact socket:
I used a �” breaker bar and a piece of pipe for extra leverage to get the ball joint moving out of the LCA (once it starts to press out, you won’t need that much leverage):
Go easy at first, and keep monitoring the alignment of the parts within the clamp as you tighten down to make sure everything is straight and applying pressure as you want it to, not slipping and getting cockeyed.
Here are the parts lined up in order, after the ball joint has been pressed out:

Another comparison of the ball joints... you can see the Whiteline part is about �" taller:

When you set up the ball joint tool to press in the Whiteline part, put a light coat of grease inside the LCA opening to help ease the new ball joint in, and remember: set the “notch” in the shaft of the ball joint in the right direction so it’ll line up with the pinch bolt on the knuckle when you go to reinstall the LCA.
Pressing the new ball joint in:

This is what it should look like when you’ve pressed it in all the way (remember, the groove around the top of the ball joint needs to be fully exposed for you to install the new snap ring):

I used a snap-ring pliers to set the new snap rings that Whiteline supplied… it’s not that easy with the tool, so I’m not sure how you’d do it without them:
When you’ve got the snapring in place, use an appropriately-sized tube-shaped piece from the ball joint kit to set the yellow dust boot in place. I filled the top of the ball joint with grease from the OEM part before putting the dust boot on (see previous picture):
Once you’ve got both ball joints pressed in and out, and the new snap rings installed, you’re done with all the hard stuff – again, assuming the new ball joints line up with the pinch bolt on the knuckles properly.
If you’re off a little, and you try to force that pinch bolt through, you’ll end up stripping all the threads on the bolt, like I did on one side") :
:
For some reason, I had a lot of trouble getting the new ball joint aligned right so it would go back up into the kunckle of the car on one side - that took 35-40 minutes just for that seemingly no-brainer procedure. The weight of the suspension parts makes it hard to get it aligned, especially when you can’t see what the hold-up is. This probably would have been a lot easier with a helper.
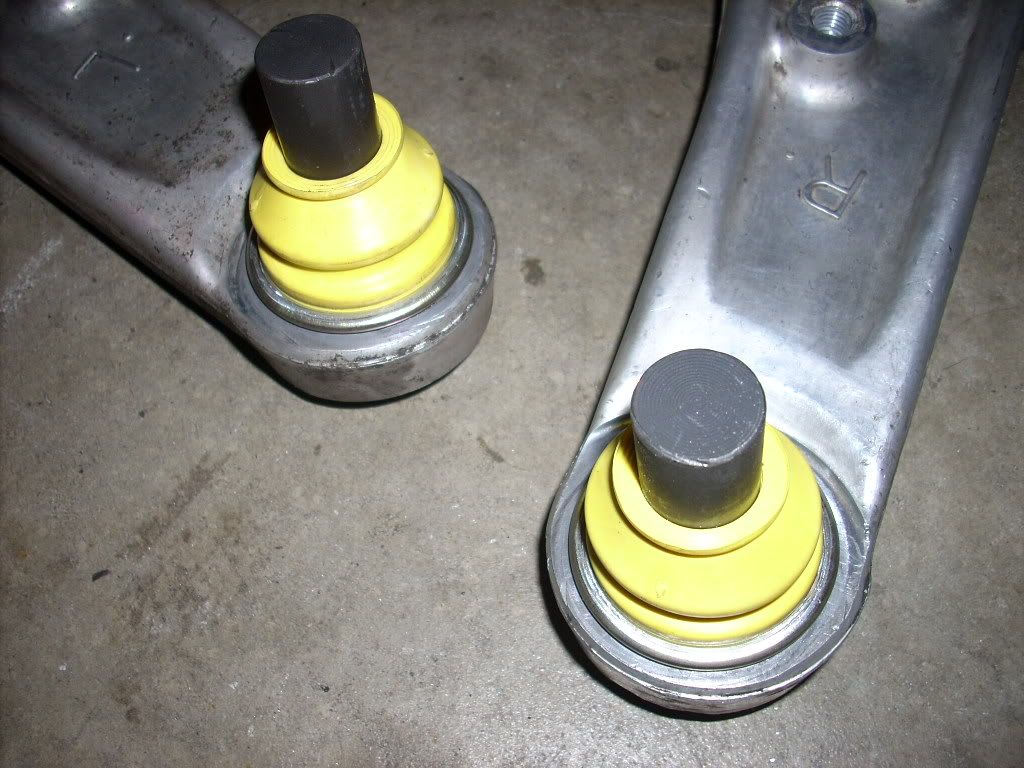
Two finished LCAs with the new Whiteline ball joints installed:
When you R&R the tie rod ends, make note of how far the OEM tie rod ends are threaded on before you loosen and remove them – the Whiteline parts are nearly identical in length from the center of the pivot point to the physical end of the part, so you get your alignment roughly even by matching how the OEM parts were before:
A look of the height differences of the tie rod ends:
Not that anyone probably cares, but here is a weight comparison for the tie rod ends – 380 grams each for the OEM one, 340 grams for the Whiteline part… a total .18 pound weight savings! (I forgot to weigh/compare the ball joints):
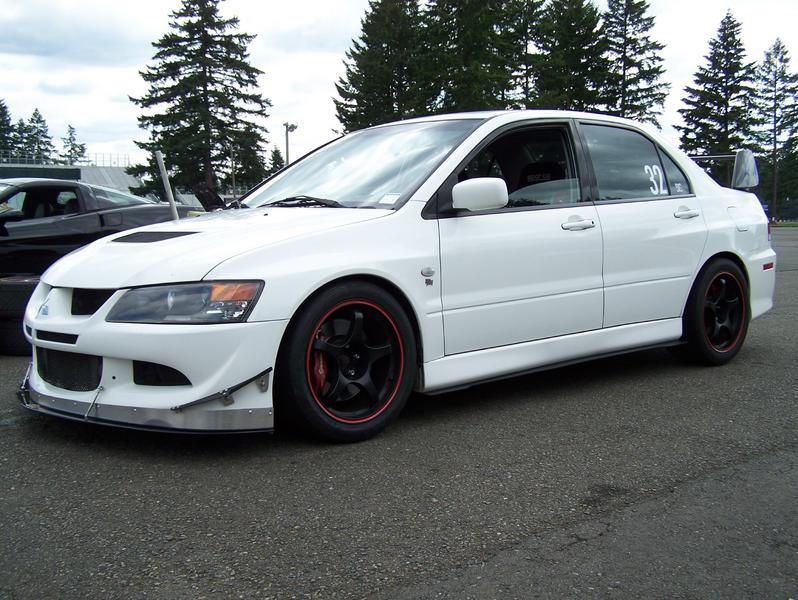
What your car should look like when you’re done:
Make sure to torque all fasteners properly before finishing the job and slapping your front wheels back on. You should get your car re-aligned ASAP after installing these parts, especially if you’re concerned about tire wear.
From my subjective impressions, installing the KCA395 roll correction kit seems REDUCE the static negative camber somewhat, so to get optimal handling, you’re definitely going to need to set your camber again, and correct your toe settings as well.
As a person who uses his Evo for track days and autox, I’m always interested in maximizing grip.
Installing the KCA395 kit requires pressing out the OEM ball joints and installing the Whiteline parts in their place. You also need to replace the tie rod ends, but that’s super-easy, as long as you have a Pitman arm tool to pop out the OEM parts (easily available at most car parts stores, or from Harbor Freight Tools: Harbor Freight tie rod end/Pitman arm puller, #1752-2VGA).
Most shops or professionals would use a shop press to install ball joints. I don’t have one, the closest friend with a press was over 50 miles away, and I didn’t feel like spending $80-150 to buy my own, so this was my solution.
This thread documents how I did it, and it went fairly easily, with no major problems. Standard disclaimer: What you do on your car is your own responsibility. Make sure your Evo is properly supported with jackstands before working on it (and especially UNDER it). Take all sensible precautions not to injure yourself, or your car (NOTE: the control arms on the Evo are aluminum, and it IS possible to crack them when pressing bushing in/out of them).
Also, I wrote this tutorial many weeks after the actual job, so I may have accidentally left out a detail or two. This is intended as a general installation guide, not a comprehensive how-to. Of course, you can refer to the direction sheet that Whiteline includes with the KCA395 for more information.
If there’s any inaccuracies in my post/information, please point them out (politely is preferred).
Pics of the Whiteline KCA395 kit:
There’s basically two alternatives to using a shop press to press out the OEM ball joints from your control arms:
- Use a ball joint "C clamp" kit
- Get a deep socket that fits over the ball joint, but is just a touch smaller in diameter than the ball joint’s pressed-in area, and pound it out with a sledgehammer
I considered both, but finding the right size deep socket is a wild goose chase I’ve been on before, and bigass sockets like that aren’t cheap either. Using the C-clamp kit allows for more controlled pressure, and a smaller chance of damaging something. Plus, it’s free to get the tool kit from an autoparts store, as long as you return it and get a full refund.
I used a ball joint tool kit I "rented" (i.e., bought from, with the option to return it for a full refund) from Advance Auto. It costs $149.98 + tax to take it home. Not every parts store (i.e., Checker, Auto Zone) has this kit! The smaller kits often won’t have all the parts and adapters you need to make it work.
Here's the exact kit I used:
It's a Powerbuilt 648617, also know as an Alltrade 648617:
http://shop.advanceautoparts.com/web..._T|GRP2083____
I still had to add my own Harbor Freight 21mm impact socket to the mix to get it done though, as you’ll see later.
Technically, you COULD use this tool to press the ball joints in and out with the lower control arms still on the car, but it would be a PITA to try to make it work. It’s hard enough to get all the pieces of the C-clamp tool to line up properly when it’s lying on the ground. I think I’d be almost impossible to do it up in the air, with the LCA still attached to the car. So, I took the LCAs out (about 15 minutes’ work per side):
I don’t recall the exact size, but I think it’s just two 19mm-head bolts per LCA, after you’ve removed the small bolts for the swaybar attachment brackets, plus a 14? mm headed bolt that secures the ball joint.
To prepare for removing the OEM ball joints, you first have to pop off the black rubber dustboots, and then remove the retaining snap rings (you can see one set of them removed and on the concrete floor in the picture above).
Pressing the ball joints in/out was actually pretty easy compared to removing/reinstalling the snap rings. I used a combination of a couple of small pry bars, a big flathead screwdriver, and a pick tool to get the factory snap rings off. There was a lot of foul language too, and a little loss of skin. Good luck with that. Be prepared to get frustrated, but as with most stuff, once you get the first one, the second one will only take about 1/4 of the time.
Here’s what the OEM ball joint looks like with the dust boot and snap ring removed (on the left). Yes, the factory dust boot is filled with black grease:
Once you’ve got the snap ring off, you’re ready to press the OEM ball joint out of the control arm. First, note the orientation of the slot in the ball joint – it’d be best if you mark which way it faces on the control arm, so when you go to press in the Whiteline part, you’ll have a reference point. Yes, you can turn the ball joint later, but you still need to know which way it faces to get it right on the first try.
A comparison of the OEM ball joint with the taller Whiteline part:
Take a look at the pictures below to see which parts from the ball joint tool kit I used, in conjunction with a 21mm Harbor Freight impact socket:
I used a �” breaker bar and a piece of pipe for extra leverage to get the ball joint moving out of the LCA (once it starts to press out, you won’t need that much leverage):
Go easy at first, and keep monitoring the alignment of the parts within the clamp as you tighten down to make sure everything is straight and applying pressure as you want it to, not slipping and getting cockeyed.
Here are the parts lined up in order, after the ball joint has been pressed out:
Another comparison of the ball joints... you can see the Whiteline part is about �" taller:
When you set up the ball joint tool to press in the Whiteline part, put a light coat of grease inside the LCA opening to help ease the new ball joint in, and remember: set the “notch” in the shaft of the ball joint in the right direction so it’ll line up with the pinch bolt on the knuckle when you go to reinstall the LCA.
Pressing the new ball joint in:
This is what it should look like when you’ve pressed it in all the way (remember, the groove around the top of the ball joint needs to be fully exposed for you to install the new snap ring):
I used a snap-ring pliers to set the new snap rings that Whiteline supplied… it’s not that easy with the tool, so I’m not sure how you’d do it without them:
When you’ve got the snapring in place, use an appropriately-sized tube-shaped piece from the ball joint kit to set the yellow dust boot in place. I filled the top of the ball joint with grease from the OEM part before putting the dust boot on (see previous picture):
Once you’ve got both ball joints pressed in and out, and the new snap rings installed, you’re done with all the hard stuff – again, assuming the new ball joints line up with the pinch bolt on the knuckles properly.
If you’re off a little, and you try to force that pinch bolt through, you’ll end up stripping all the threads on the bolt, like I did on one side
:For some reason, I had a lot of trouble getting the new ball joint aligned right so it would go back up into the kunckle of the car on one side - that took 35-40 minutes just for that seemingly no-brainer procedure. The weight of the suspension parts makes it hard to get it aligned, especially when you can’t see what the hold-up is. This probably would have been a lot easier with a helper.
Two finished LCAs with the new Whiteline ball joints installed:
When you R&R the tie rod ends, make note of how far the OEM tie rod ends are threaded on before you loosen and remove them – the Whiteline parts are nearly identical in length from the center of the pivot point to the physical end of the part, so you get your alignment roughly even by matching how the OEM parts were before:
A look of the height differences of the tie rod ends:
Not that anyone probably cares, but here is a weight comparison for the tie rod ends – 380 grams each for the OEM one, 340 grams for the Whiteline part… a total .18 pound weight savings! (I forgot to weigh/compare the ball joints):
What your car should look like when you’re done:
Make sure to torque all fasteners properly before finishing the job and slapping your front wheels back on. You should get your car re-aligned ASAP after installing these parts, especially if you’re concerned about tire wear.
From my subjective impressions, installing the KCA395 roll correction kit seems REDUCE the static negative camber somewhat, so to get optimal handling, you’re definitely going to need to set your camber again, and correct your toe settings as well.
Last edited by EGbeater; Jan 9, 2010 at 07:55 AM.

Hsun and I were discussing his install of this kit, and a question came up.
Heres an FYI for this kit which we discussed:

Heres a quick picture of the camber curve. The blue line is where the control arm is level, and the red, below level (and you can picture the same line for the arm being above level.)
If your control arm was level or close to level before, and is now angled farther down, you will have less static camber. The top of the strut is fixed, so you can see how moving the pickup point in (by the control arm being up or down) at the bottom decreases static camber.
BUT: once you start to roll, you are gaining negative camber via the camber curve until the control arm is level. The kit also adds roll stiffness, due to the way the control arm moves through its arc and camber curve.
Heres an FYI for this kit which we discussed:
Heres a quick picture of the camber curve. The blue line is where the control arm is level, and the red, below level (and you can picture the same line for the arm being above level.)
If your control arm was level or close to level before, and is now angled farther down, you will have less static camber. The top of the strut is fixed, so you can see how moving the pickup point in (by the control arm being up or down) at the bottom decreases static camber.
BUT: once you start to roll, you are gaining negative camber via the camber curve until the control arm is level. The kit also adds roll stiffness, due to the way the control arm moves through its arc and camber curve.
Last edited by RaNGVR-4; May 27, 2009 at 11:58 AM.

Nice write up! Does anyone have Torque specs for all the bolts to put it all back together? The Whiteline instructions don't have the torque specs either.
1) Control Arm bottom bolt
2) Control Arm side bolt
3) Sway bar end link bolt
4) Ball joint bolt
5) Tie rod bolt
Edit. Started another thread and got the info. Adding link here for others: https://www.evolutionm.net/forums/ev...ml#post7116449
1) Control Arm bottom bolt
2) Control Arm side bolt
3) Sway bar end link bolt
4) Ball joint bolt
5) Tie rod bolt
Edit. Started another thread and got the info. Adding link here for others: https://www.evolutionm.net/forums/ev...ml#post7116449
Last edited by xtnct; May 30, 2009 at 05:54 PM.

Newbie
Joined: Apr 2008
Posts: 3
Likes: 0
From: Pinole, CA
i installed these today and now the LCA is rubbing on our brakes.. could this be because we have stoptech brakes? or simply and alignment issue? what could i have done wrong? has anyone else heard of this happening
qualifying is tomorrow so if anyone has ideas please let me know or i have to to this all over again tomorrow putting the stock ones in.
qualifying is tomorrow so if anyone has ideas please let me know or i have to to this all over again tomorrow putting the stock ones in.
Do you mean you've got Stoptech rotors, or a Stoptech big brake kit? If you've got OEM-replacement Stoptech rotors, should be no different. If you have a big brake kit that uses a thicker-than-OEM rotor, maybe there's a clearance issue.
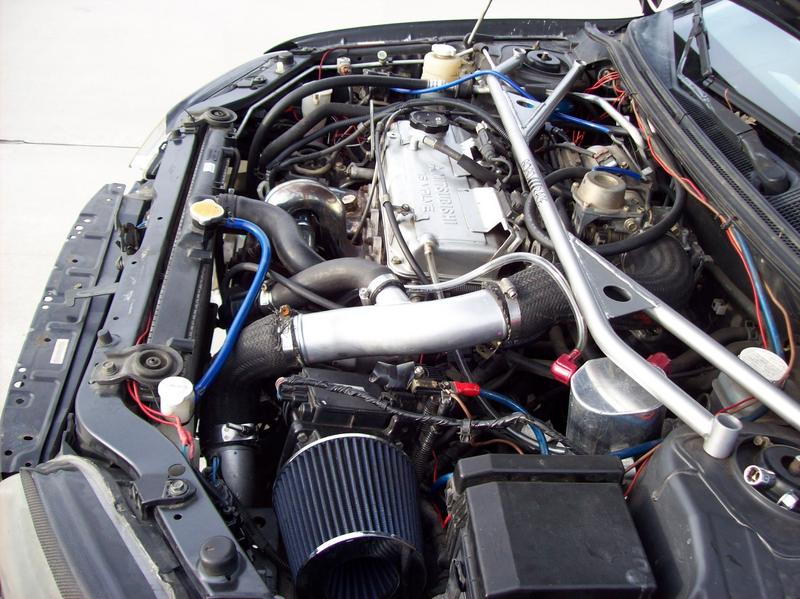
As you can see in this picture, the clearance between the end of the LCA and the OEM dust shield is pretty tight, but if you remove that, there should be plenty of room:

Trending Topics

ok.. let's back up a step.. here's my question since i'm doing the same thign right now.. there's a access panel for the rear lower bolt on passenger's side. but i can't find one on driver's side.. is there something i'm missing.. or is the driver's side setup differently.. ??in middle of doing it right now if anybody can assist i'd greatly appreciate it..
ok.. let's back up a step.. here's my question since i'm doing the same thign right now.. there's a access panel for the rear lower bolt on passenger's side. but i can't find one on driver's side.. is there something i'm missing.. or is the driver's side setup differently.. ?
Who said anything about removing the oil filter? What "access panel" is involved with removing the LCAs?

Anyone else had trouble with this? I had a shop press in my new RCA ball joints, and they aren't long enough - meaning I can't get the snap ring on. I'm clueless at this point.

FLCA bushings were easier to press in with a c-clamp than the actual press! haha
the whiteline ball joints pressed in very easily. I ended up using some TiAL v-band weld flanges to press them in Mine pressed all the way in and I was able toput the snap ring on very easily.
I did clean the inside with scotch brite and cleaned the working surfaces that the press contacted (and snap ring) before pressing in the new bushing. Putting on the new snap ring was a breeze with my snap ring pliers.
Go get a bump steer measurement tool from Long Acre and check it yourself lol. They certainly DO work.
the whiteline ball joints pressed in very easily. I ended up using some TiAL v-band weld flanges to press them in
Mine pressed all the way in and I was able toput the snap ring on very easily.I did clean the inside with scotch brite and cleaned the working surfaces that the press contacted (and snap ring) before pressing in the new bushing. Putting on the new snap ring was a breeze with my snap ring pliers.
Go get a bump steer measurement tool from Long Acre and check it yourself lol. They certainly DO work.