
Install a Whiteline KCA395 roll center correction kit on an Evo without a shop press


Now my question to anyone who has performed the install...How hard was it to get the old ball joints out? I am have a real tough time using a c-clamp setup...Did any of you have to use heat? I am skeptical about applying heat since they are aluminum. Any suggestions or thoughts? Thanks
I think applying pressure properly would be more effective than applying heat to try to get the surrounding control arm to expand, but that's just me guessing.

Newbie

Joined: Aug 2001
Posts: 89
Likes: 4
From: Nagorno-Karabakh
Not sure I understand your question... the whole point of the Whiteline roll correction kit is to REPLACE the OEM ball joints in order to improve the angle of the LCA for better grip when the car is lowered. As newevil posted/explained on page 2 of this thread:
I took this picture to show the subtle but distinct difference between the Whiteline replacement part and the OEM ball joint:
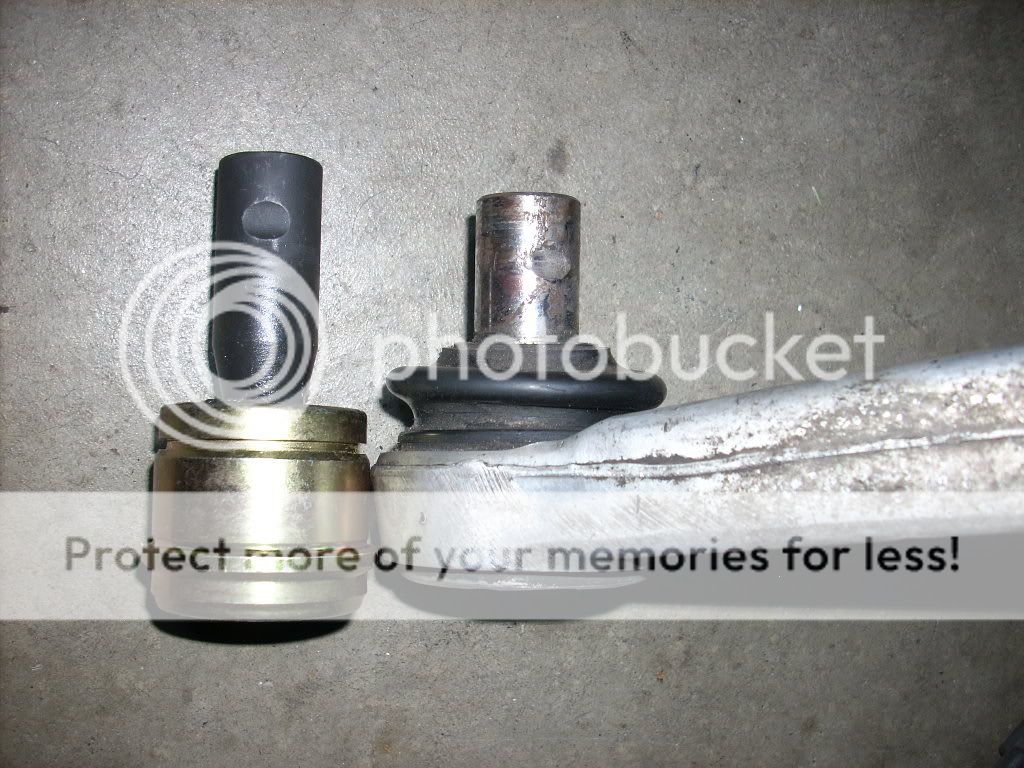
I took this picture to show the subtle but distinct difference between the Whiteline replacement part and the OEM ball joint:
No. Whiteline provides replacement ball joints and tie rod ends in the kit. I installed mine last week. Very happy with it.
All day. It takes awhile to remove the old ball joint and install the new one with the C Clamp kit, especially when you have to stop every hour or so and run to the parts store to buy tools/parts. Now that I've done it, next time would take no more than 3-4 hours though. If you're planning to do it yourself, be prepared to perform an oil change. The inner front bolt to the LCA on the passenger side can not be removed without removing the oil filter.
Depends on the type of the oil filter you're using. I did not have to remove the oil filter to pull the passenger side lower LCA bolt. I believe I was using an OEM Mitsubishi oil filter at the time of my Whiteline roll correction kit install, but I honestly don't remember.
Depends on the type of the oil filter you're using. I did not have to remove the oil filter to pull the passenger side lower LCA bolt. I believe I was using an OEM Mitsubishi oil filter at the time of my Whiteline roll correction kit install, but I honestly don't remember.

OP: First, thank you very much for taking the time and posting this. These DIY write-ups are invaluable and greatly add value to the community.
Can you list the sizes of the adapter pieces that you used from the Ball Joint Service Kit? I want to make sure I rent the right kit, they have their kits broken down to the c-clamp, a few pieces and then a bunch of other pieces for different makes (Honda, Ford, etc) but nothing specific to Mitsubishi.
Just to add to this (I'm researching doing this in my evo here soon) you can rent all the tools you need from O'Reilly Auto Parts for free (you get your deposit back) as long as you return them within two days.
So it's the same concept only without any guilt.
Here's the exact kit I used:
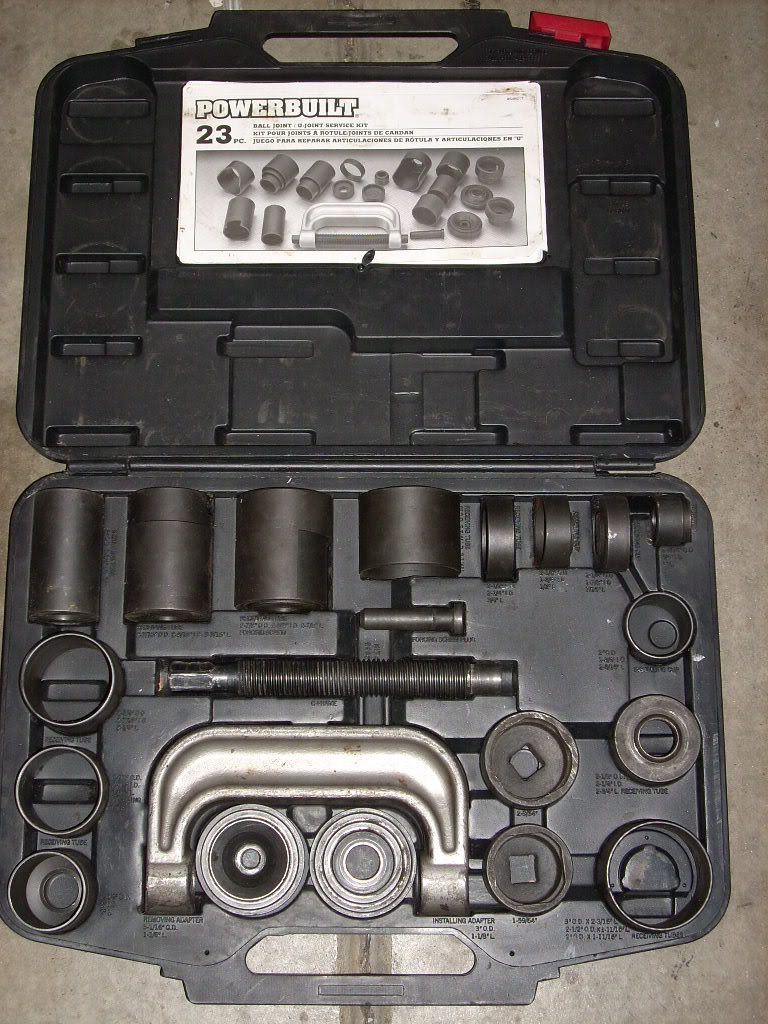
It's a Powerbuilt 648617, also know as an Alltrade 648617:
http://shop.advanceautoparts.com/web..._T|GRP2083____
I still had to add my own Harbor Freight 21mm impact socket to the mix to get it done though, as you’ll see later.
It's a Powerbuilt 648617, also know as an Alltrade 648617:
http://shop.advanceautoparts.com/web..._T|GRP2083____
I still had to add my own Harbor Freight 21mm impact socket to the mix to get it done though, as you’ll see later.
Last edited by EGbeater; Oct 6, 2011 at 10:47 PM.

Did it take much work getting the LCAs off? Did you need to use a pickle fork? I'm trying to find a write-up on front LCA removal. I don't know what else that entails.
Got a copy of the factory service manual, so now I have a better idea as to what's going in there before I even start worrying about pressing out the ball joints.
Did you have to dremel off some of the aluminum on the LCA?
Did you have to dremel off some of the aluminum on the LCA?
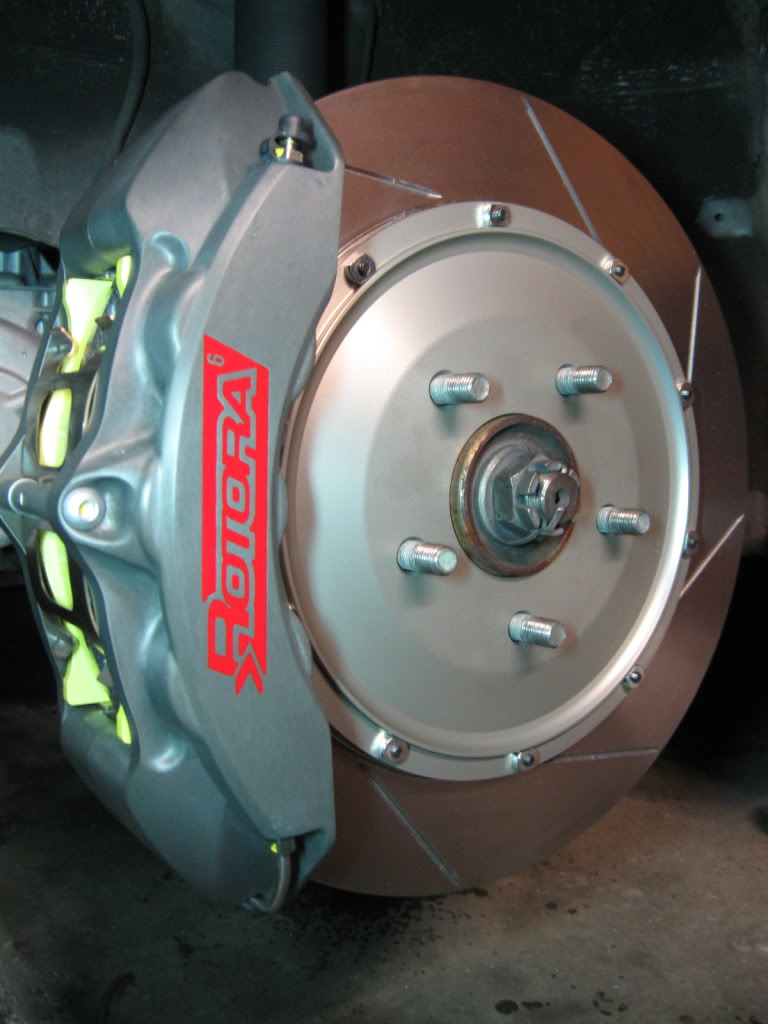
Not at the time to accommodate the Whiteline roll center kit, no. But I have now, because I've since installed a Rotora 6-piston caliper, 355mm rotor big brake kit, and the clearance to the rotor is not the same.
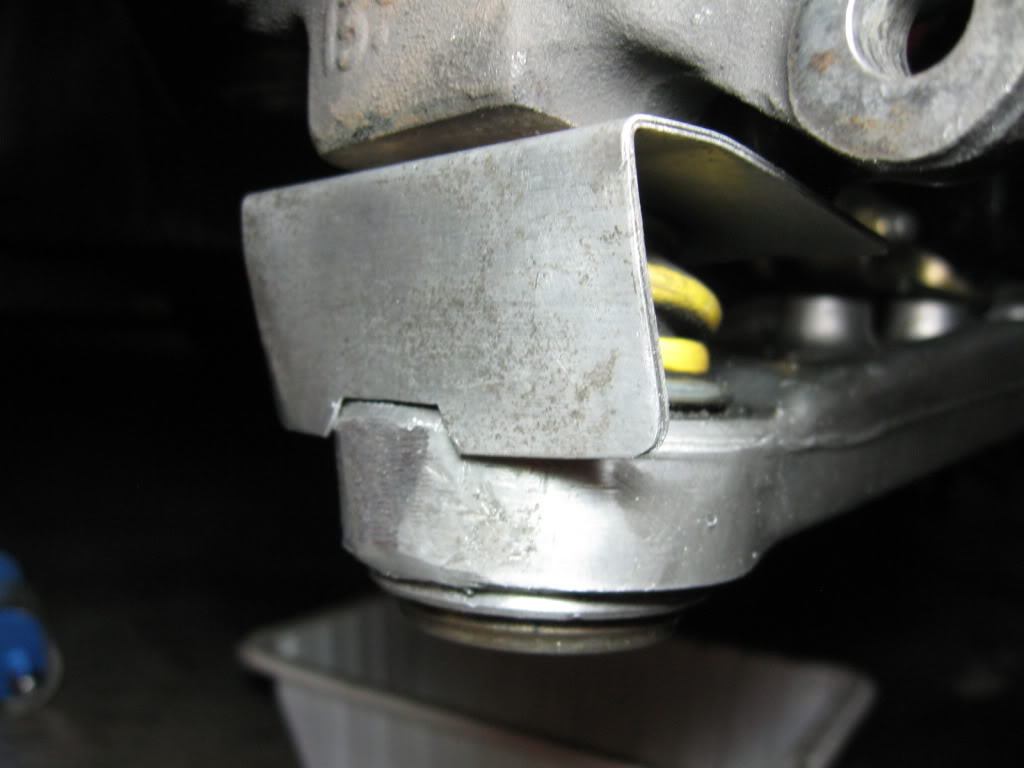
I also cut a trapezoid-shaped "notch" in my custom aluminum heat shield for the ball joint, which I documented the DIY for here:
https://www.evolutionm.net/forums/ev...atshields.html
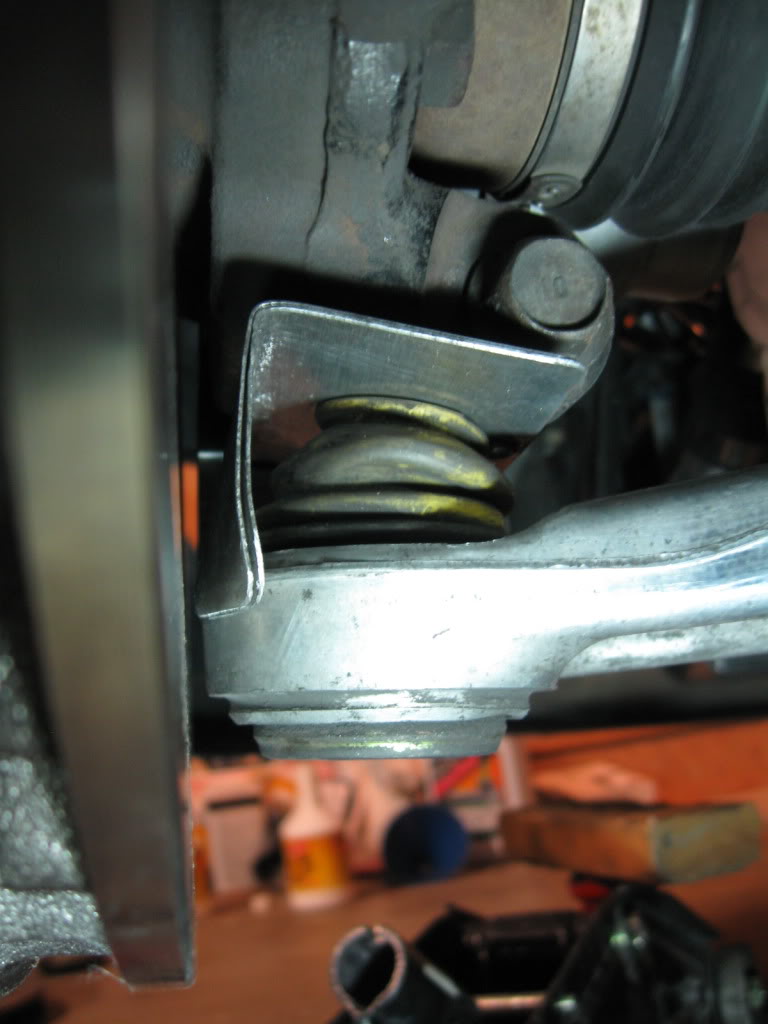
Modified heat shield and end of aluminum LCA filed down for more clearance:
About 2.5mm of clearance to the rotor:
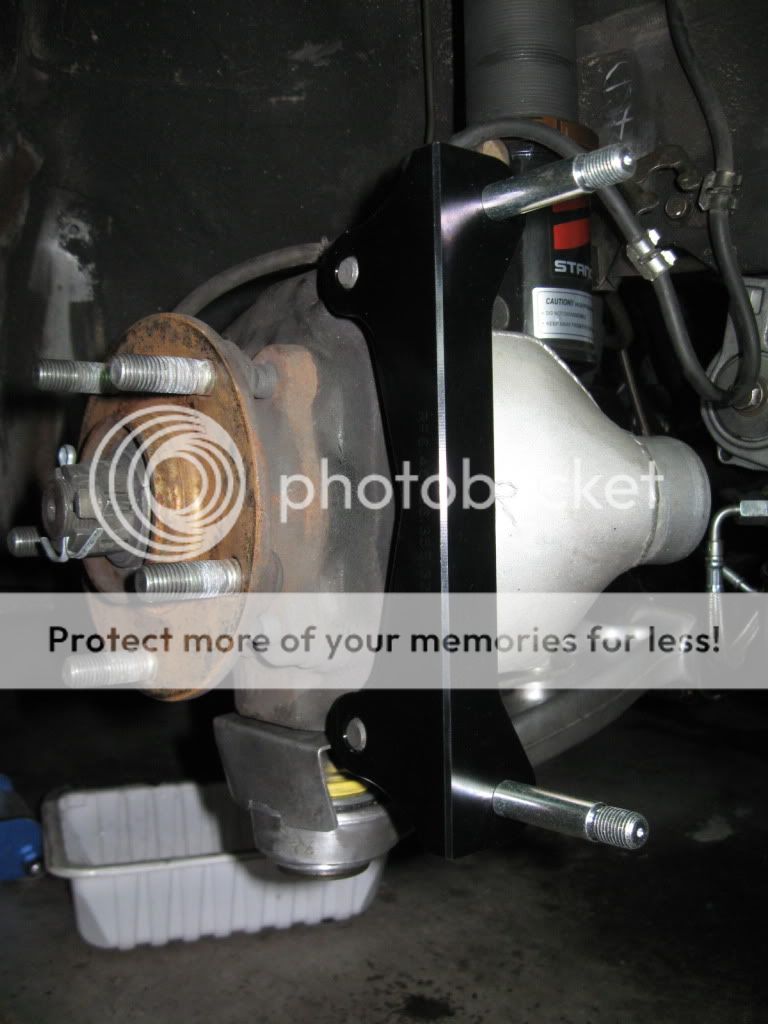
The mounting adapter bracket, before the rotor and caliper get slapped on:
Voila:
I also cut a trapezoid-shaped "notch" in my custom aluminum heat shield for the ball joint, which I documented the DIY for here:
https://www.evolutionm.net/forums/ev...atshields.html
Modified heat shield and end of aluminum LCA filed down for more clearance:
About 2.5mm of clearance to the rotor:
The mounting adapter bracket, before the rotor and caliper get slapped on:
Voila: