
How to: HorsePower Freaks 2.5" LICP install*Pics

Thread Starter
Evolved Member
iTrader: (18)
Joined: Mar 2005
Posts: 1,235
Likes: 1
From: La Jolla, CA
How to: HorsePower Freaks 2.5" LICP install*Pics
Before you start make sure you get the following tools together and have about 1 to 1 1/2 hours of work time:
10mm socket (deep well)
12mm socket
7/16th socket (deep well)
Ratchet
Small Phillips screwdriver
Flat head screwdriver
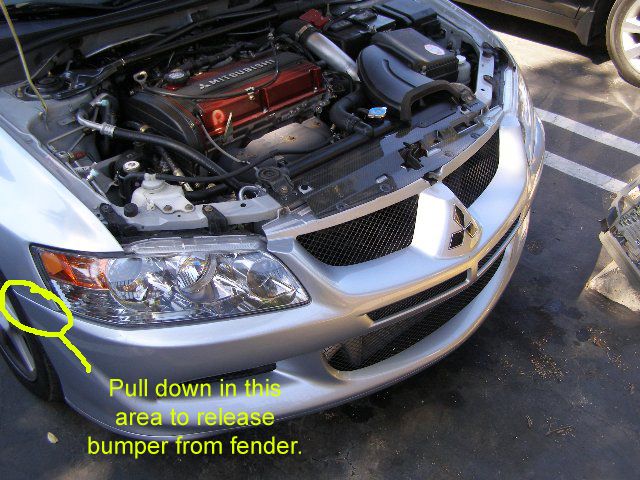
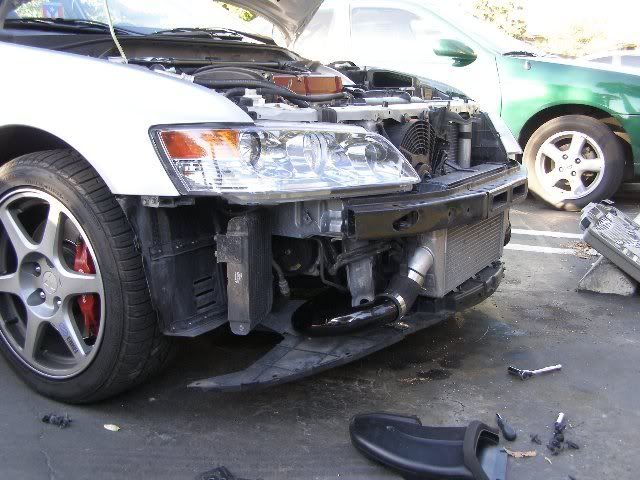
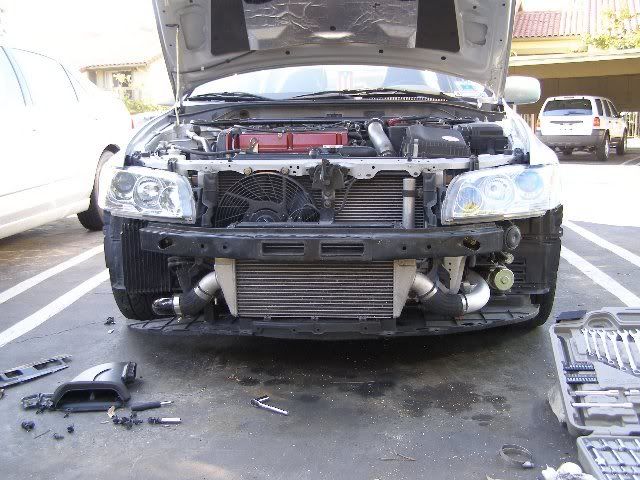
1. Remove all your fastners (lost count in YELLOW on pic), screws (2 on under tray for tow hook cover) and bolts (2 in wheel well and 4 on front side of bumper in RED on pic) connected to the bumper from the under tray, wheel wells, and front of car (If you have a radiator shroud, also remove the air scoop and top radiator mounts with shroud)

2. Once you are done removing all the fastners, screws, and bolts, you are ready to remove the bumper. Carefully pull down on the bumper where the bumper and the fender meet (refer to markings on pic below). Once you release the bumper from the fender, grab the front on the bumper where the nose is and work the bumper off the car.
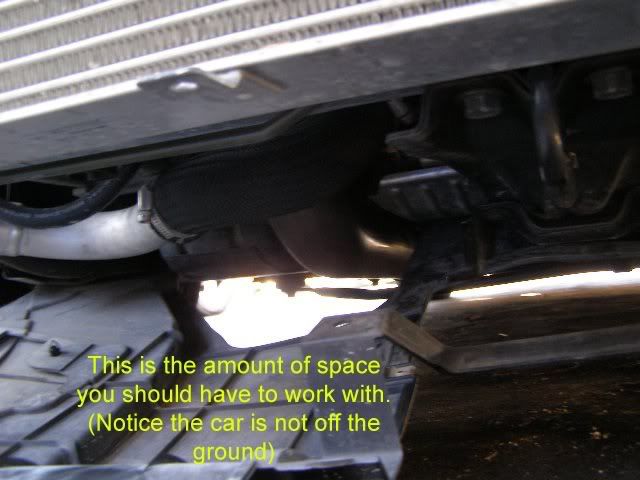
*Note: The under tray will not have to be removed completely (just enough space to work the LICP off the turbo outlet), but if your under tray doesn�t look the pic below, make sure you remove whatever fastners needed to finish your work.
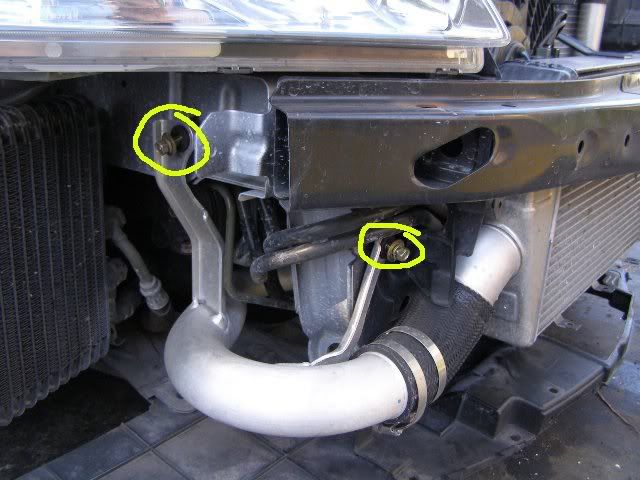
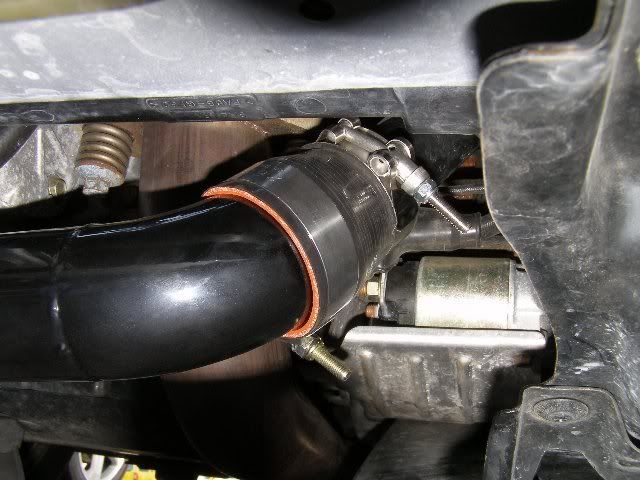
3. Now the fun part. Loosen up the stock clamps off the turbo outlet and adapter on the intercooler. Once those are loose, go ahead and remove the two bolts supporting the stock LICP and pull off the LICP (Refer to pic below) (These two bolts and stock clamps will not be needed anymore).
4. Mount the new LICP to the turbo outlet and intercooler (make sure that your t-bolt clamps and stock turbo inner adapter are on the couplers prior to mounting, refer to pic below for inner adapter placement) and tighten down your t-bolt clamps. The stock coupler was reused to apply the new LICP to the stock intercooler since the HPF package comes with a coupler for a straight connection.
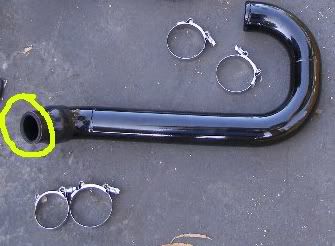
*Note: When tightening down the t-bolt clamps, make sure that the LICP doesn�t hang too low (If not you will see the under tray bulge down a bit when that is put back together). Work the pipe to sit high like the stock LICP when tightening down the t-bolt clamps to avoid this from happening.
5. LICP is now on vehicle. Before you go and put your bumper back on, turn on your vehicle and rev it high to make sure that your pipe doesn�t blow off (I was building 17-19 lbs of boost revving up to 6500 rpms at a stand still). If your car passes this test your LICP will be complete. Go ahead and work back words from step 2 to get your bumper and undertray secured to your rest of your vehicle. The install will now be complete (all that should be left over is the stock LICP, stock clamps, and two bolts holding up the stock LICP).
*VERY IMPORTANT NOTE*
If you have any kind of boost controller, make sure you drop the setting down as to vehicle will build a bit more boost (at least this happened to me). Then modify your setting till you reach your previous boost levels (I was building 25lbs on 91 oct after install, BIG NO NO�lol)
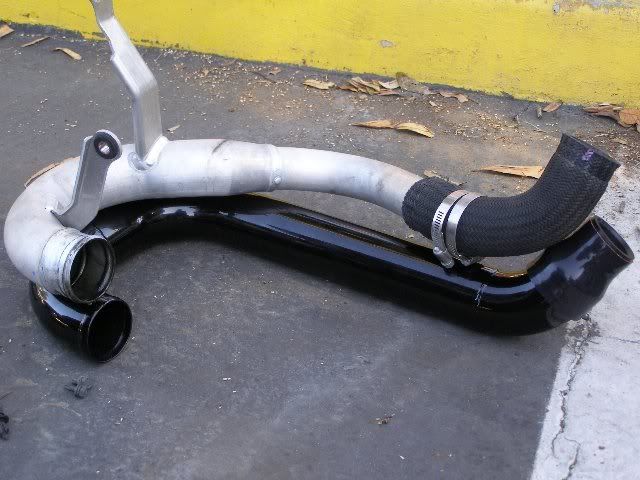
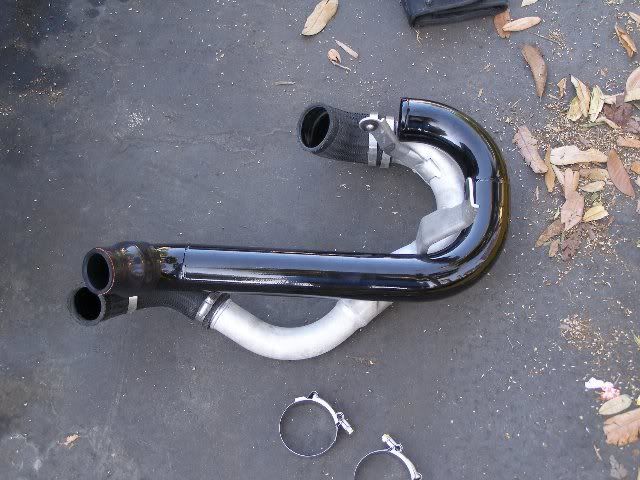
Here are some side by side comparisons of the two LICP�s: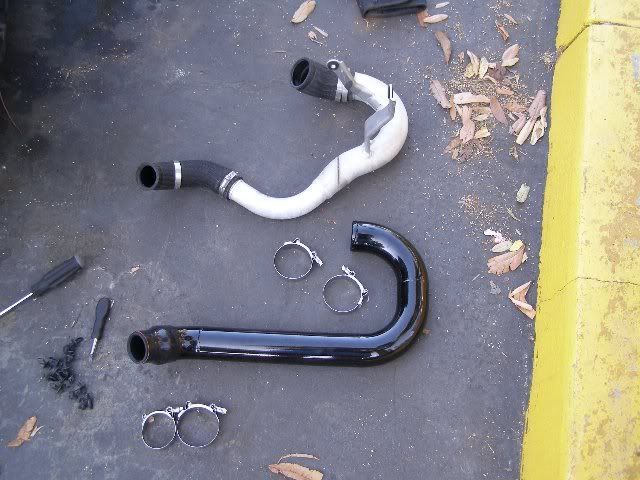
Link to purchase this Lower intercooler pipe (LICP) from Horsepower Freaks (HPF):
https://www.evolutionm.net/forums/sh...d.php?t=195067
Any questions, comments, or concerns are welcomed�Please feel free to PM me about the How To or (HPF Tom or HPF Eric) about their product.
10mm socket (deep well)
12mm socket
7/16th socket (deep well)
Ratchet
Small Phillips screwdriver
Flat head screwdriver
1. Remove all your fastners (lost count in YELLOW on pic), screws (2 on under tray for tow hook cover) and bolts (2 in wheel well and 4 on front side of bumper in RED on pic) connected to the bumper from the under tray, wheel wells, and front of car (If you have a radiator shroud, also remove the air scoop and top radiator mounts with shroud)
2. Once you are done removing all the fastners, screws, and bolts, you are ready to remove the bumper. Carefully pull down on the bumper where the bumper and the fender meet (refer to markings on pic below). Once you release the bumper from the fender, grab the front on the bumper where the nose is and work the bumper off the car.
*Note: The under tray will not have to be removed completely (just enough space to work the LICP off the turbo outlet), but if your under tray doesn�t look the pic below, make sure you remove whatever fastners needed to finish your work.
3. Now the fun part. Loosen up the stock clamps off the turbo outlet and adapter on the intercooler. Once those are loose, go ahead and remove the two bolts supporting the stock LICP and pull off the LICP (Refer to pic below) (These two bolts and stock clamps will not be needed anymore).
4. Mount the new LICP to the turbo outlet and intercooler (make sure that your t-bolt clamps and stock turbo inner adapter are on the couplers prior to mounting, refer to pic below for inner adapter placement) and tighten down your t-bolt clamps. The stock coupler was reused to apply the new LICP to the stock intercooler since the HPF package comes with a coupler for a straight connection.
*Note: When tightening down the t-bolt clamps, make sure that the LICP doesn�t hang too low (If not you will see the under tray bulge down a bit when that is put back together). Work the pipe to sit high like the stock LICP when tightening down the t-bolt clamps to avoid this from happening.
5. LICP is now on vehicle. Before you go and put your bumper back on, turn on your vehicle and rev it high to make sure that your pipe doesn�t blow off (I was building 17-19 lbs of boost revving up to 6500 rpms at a stand still). If your car passes this test your LICP will be complete. Go ahead and work back words from step 2 to get your bumper and undertray secured to your rest of your vehicle. The install will now be complete (all that should be left over is the stock LICP, stock clamps, and two bolts holding up the stock LICP).
*VERY IMPORTANT NOTE*
If you have any kind of boost controller, make sure you drop the setting down as to vehicle will build a bit more boost (at least this happened to me). Then modify your setting till you reach your previous boost levels (I was building 25lbs on 91 oct after install, BIG NO NO�lol)
Here are some side by side comparisons of the two LICP�s:
Link to purchase this Lower intercooler pipe (LICP) from Horsepower Freaks (HPF):
https://www.evolutionm.net/forums/sh...d.php?t=195067
Any questions, comments, or concerns are welcomed�Please feel free to PM me about the How To or (HPF Tom or HPF Eric) about their product.

Thread
Thread Starter
Forum
Replies
Last Post
alan678
Evo How To Requests / Questions / Tips
22
Oct 2, 2011 02:31 PM
alan678
ExtremeTurboSystems.com � WA
34
May 24, 2008 05:52 AM
alan678
Evo Engine / Turbo / Drivetrain
22
Aug 27, 2006 12:08 PM