Rewiring OEM fog lights on an Evo IX for TOTAL CONTROL
 Apr 8, 2009, 10:54 PM
#1
Rewiring OEM fog lights on an Evo IX for TOTAL CONTROL
Perhaps you’re like me, and would like to run your OEM fog lights on your Evo whenever you want... not only with lowbeams on.
And, you did your research on Evom, and found this thread, which sounded REALLY complicated, and unreliable:
https://www.evolutionm.net/forums/ev...s-anytime.html
- and this thread, which forces you to have your fog lights on automatically anytime you have your parking lights on:
https://www.evolutionm.net/forums/ev...ng-lights.html
I personally didn’t want my fogs on every time my parking lights were on, and when I tried this modification on my Evo9, it didn’t work – all it did was make my fog lights not work at all.
So, I decided to rewire the OEM fog light circuit on my Evo IX completely, so that I can control their operation. If you can follow directions, route a few wires and use a wire crimper, you can easily do this modification on your Evo.
Advantages:
You can have the fog lights on or off at your discretion, either with your parking lights on or off... with low beams, or low beams & high beams
Your fog lights will turn off automatically when you pull your key out of the ignition after driving
No issues or side effects that will cause any factory fuses to blow or any kind of electrical weirdness (if you wire everything correctly, of course)
The parts required for this modification cost less than $10 (or might already be in your garage)
Disadvantages:
You’ll have to install an aftermarket switch somewhere on your dash (I opted to install it in the OEM location)
You’ll have to do some very basic wiring work, including running one or two wires from the engine compartment into the interior
The wiring/relay for this setup will add about 5 ounces of weight to your car
If you want to have the OEM fog light indicator in the instrument cluster to light up w fog lights, you’ll have to pull the cluster and wire that lamp into the new circuit as well (I didn't do this; you're have to figure that out for yourself)
Parts needed:
Tools needed:
Disclaimer:
This worked great on my car, and I think it’s a sound way to enable full control over your OEM parking lights. You may disagree. If you wire things wrong, bad things could happen. What you do on your car is your responsibility.
Also, if you run your fog lights along with your highbeams, you’ll probably get some dillholes offended and they’ll feel compelled to flash their highbeams at you. I’d ignore them if I were you.
Here’s the overview of the install: basically, this will completely eliminate the car’s control of the fog lights, and you’ll be creating a new "stand-alone circuit" to run the fogs. There is only one tie-in to the OEM wiring, and that’s the circuit that triggers the relay and allows the foglights to turn on. In my car and the following pictures, I used the parking light circuit, which means the parking lights must be on for the fog lights to be activated.
However, you could also easily use a ignition circuit, which would mean you’d be able to turn on the foglights whenever the ignition key is inserted and turned to the “ignition” position, whether the engine is on or not, or if any of the other light circuits are on.
The only 12-volt power source that’s tied to the ignition circuit in the fusebox under the hood is the radio circuit, and I didn’t feel comfortable trying to tap into that source because of the weird yellow plastic "box" that couples that 10-amp fuse with another circuit. I may run another wire into the car to tap an ignition-controlled power source in the future, so I don't have to have the parking lights on to have the fog lights light up.
This picture shows an overview of what the wiring you need to create looks like, and its overall orientation in the car:
There will be two wires that go from the fuse box under the hood to the relay. From the relay, there’s one lead that will bring power to the foglight bulbs, as well as a wire that goes to the aftermarket switch inside the car. The switch will need a ground wire, which can be grounded to any bare metal point attached to the unibody of the car. And, each fog light bulb needs a short ground wire too. That’s it!
These two pictures show you where you need to tap into the fuse box. The thin 18-gauge wire simply has the last 1 1/4" of insulation stripped off, and it’s wrapped around one leg of the mini-fuse for the parking light circuit. The thicker, 10-gauge black wire is from a standard fuseholder you can get at any car stereo install shop, and that goes to the main power feed in the fusebox, on the right side of the big, 60-amp fuse.

If you’re sketched out by the hokey connection of the blue wire to the fuse box, there’s no need to be… when you put the 7.5-amp minifuse back into the fusebox, it actually clamps that bare wire into place, and there’s nothing around it to short out on. The plastic fusebox and the top of the fuse itself protect the bare wire you’ve wrapped around the leg of the fuse from contacting anything.
Also, all that blue wire does is feed a low-current signal to activate the coil in the relay – that’s NOT where the power that runs the foglights themselves comes from. That comes through the fuseholder’s much thicker wire, which is secured with a ring terminal under the OEM 10mm-headed bolt.
A view of the connections to the fusebox, plus the Bosch relay and fuseholder:

And this is how the wiring to the individual fog lamp bulbs (H11 type, BTW) look in the car:
Driver’s side:
Passenger side:

Note that there’s a handy spot right on the insides of the headlamp assembly area that serves as a great grounding wire location. It’s a 10mm headed bolt.
Okay, this is how you wire the relay (the bottom of the relay has the identifying #s molded into the plastic case, right next to each tab):
87a (middle tab): nothing
85: blue wire to parking light circuit in fusebox (7.5A fuse) OR any ignition-controlled 12+ source
86: blue wire to the aftermarket fog light switch in-car
87: white wire to fog light bulbs (both of them)
30: thick black wire of the aftermarket fuseholder that is connected to the 60A constant 12+ circuit in fusebox
And here’s a close-up pic of the relay, to help you see where each color goes:

To connect the power and ground wires to the fog light bulbs, you’ll need some "half-size" female spade connectors. They’re a perfect fit for the prongs of the bulb. These connectors are a little hard to find – I went to auto parts stores like Checker and couldn’t find them.
I got them from a car stereo store’s install bay, but I don’t know if every shop would have them. They’re the same size as the small prong on a typical aftermarket car stereo speaker, so worst case scenario, you could make use of one side of the white/gray wiring that usually comes with a set of car audio speakers. Most car stereo shops throw away about 20 packs of that included wiring every day, so if you ask nicely, they’d probably give you that stuff for free.

In this picture, you can see how the white wire from the 87 tab of the relay is connected with a red wire that feeds power over to the passenger-side fog light bulb:
The ground wire is exactly the same for both bulbs. And there’s no polarity with the bulbs – you can use either of the prongs for the "hot" lead or for ground; it doesn’t matter.
You can route the wire between the two fog light bulbs in wire loom, and it’ll fit nicely along the top of the radiator, like this:
Here’s how the wiring looks in the car all covered with loom:
Driver’s side:
Passenger side:
This is the wiring that goes to the switch I used – just a cheapie leftover switch from some aftermarket fog light kit:
The two most difficult or labor-intensive parts of this project is routing the wire to the control switch from the engine compartment to the interior, and making the aftermarket switch fit the OEM fog light switch cutout. You of course don’t need to do it like this, but I did.
This is where I chose to route the power wire for the switch through the firewall. It’s right next to the rubber grommet/hole where the throttle cable goes through:
I’d already drilled a hole in the sheet metal next to the throttle cable opening for my boost gauge line. A 1/4" drill bit is more than big enough. Then, tape the wire for the switch to the end of a wire coat hanger that you’ve straightened out, and shove it on through.
Making a nice-looking mounting plate for the aftermarket switch to fit into the OEM foglight switch plate took longer than the entire rest of the rewiring project.
The switch I used was just the right size to poke through the rectangular opening of the factory piece, but shaping the ABS plastic of the aftermarket switch’s mounting plate to fit took a long time.
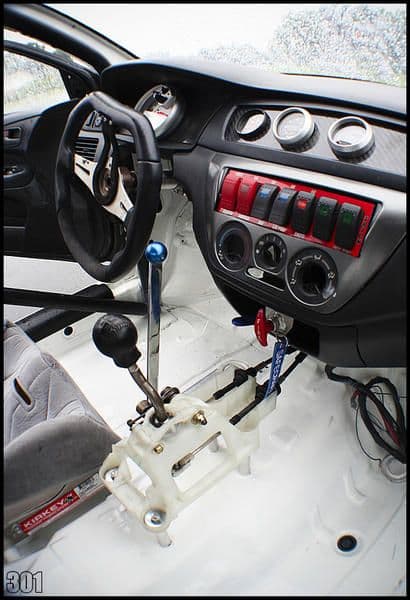
Here’s the OEM plate for the HID beam adjuster, with the OEM foglight switch removed (it’s just held in place by a couple of plastic tabs on the side of the switch. The plate can be removed from the dash by gently prying underneath the edge of it):

I did some measuring of the backside of the OEM switchplate with some cheapie plastic Harbor Freight "calipers," then used a finetip Sharpie to mark where I’d have to grind down the ABS plate for the aftermarket switch with the bench grinder:

Due to the complex shape of the back of the OEM plate, the mounting plate for the aftermarket switch needs to fairly tweaky too to fit right. Note that it has to be slightly "off-center" in order for the new switch to be centered in the opening:

The results are pretty good though, if I may say so myself:
I used a little hotglue to secure the plate in place from the back, after flexing it and bending it a bit get it to contour to the OEM piece better:
And here’s the switch in the car, powered down and lit up (the switch lights up when the fog lights are on):
Here’s proof of roughly what the wiring and the relay weighs:
And proof it really works, just in case you don't believe me.
Fog lights on with just parking lights:

Fog lights with low beams (just like factory):

Fog lights with low & high beams:

And finally, one shot of fog lights with parking lights, this time with Nokya "Hyper Yellow" H11 bulbs installed, for that ricy, JDM-biter look:

I think this how-to is pretty clear, but let me know if you have any questions. I hope this is helpful to anyone who wants an alternative method to control the factory fog lights on their Evo IX (I’m assuming the VIII is very similar if not identical, but I don’t know).
Also, for more info on how relays work and how to wire them, this website is very helpful: http://www.the12volt.com/relays/relays.asp
Moderator, if you feel this writeup is worthy, please sticky it in the How Tos/Installations subforum!
And, you did your research on Evom, and found this thread, which sounded REALLY complicated, and unreliable:
https://www.evolutionm.net/forums/ev...s-anytime.html
- and this thread, which forces you to have your fog lights on automatically anytime you have your parking lights on:
https://www.evolutionm.net/forums/ev...ng-lights.html
I personally didn’t want my fogs on every time my parking lights were on, and when I tried this modification on my Evo9, it didn’t work – all it did was make my fog lights not work at all.
So, I decided to rewire the OEM fog light circuit on my Evo IX completely, so that I can control their operation. If you can follow directions, route a few wires and use a wire crimper, you can easily do this modification on your Evo.
Advantages:
You can have the fog lights on or off at your discretion, either with your parking lights on or off... with low beams, or low beams & high beams
Your fog lights will turn off automatically when you pull your key out of the ignition after driving
No issues or side effects that will cause any factory fuses to blow or any kind of electrical weirdness (if you wire everything correctly, of course)
The parts required for this modification cost less than $10 (or might already be in your garage)
Disadvantages:
You’ll have to install an aftermarket switch somewhere on your dash (I opted to install it in the OEM location)
You’ll have to do some very basic wiring work, including running one or two wires from the engine compartment into the interior
The wiring/relay for this setup will add about 5 ounces of weight to your car
If you want to have the OEM fog light indicator in the instrument cluster to light up w fog lights, you’ll have to pull the cluster and wire that lamp into the new circuit as well (I didn't do this; you're have to figure that out for yourself)
Parts needed:
- 1 standard Bosch-type SPDT (single polarity dual throw) automotive relay
- About 20’ of 18-gauge wiring, multiple colors preferred
- About 10 standard crimp-on female spade connectors
- 3 crimp-on spade or ring terminals
- 1 ATC-type fuseholder (or you can make one out of female spade connectors)
- 1 10 or 15-amp ATC-type fuse
- Zipties and wire loom (optional, to make things pretty)
Tools needed:
- Wire stripper
- Crimper
- 10mm socket & ratchet or 10mm box wrench
- Multimeter (optional, but nice to have handy)
- Bench grinder, utility knife, file (for modifying an aftermarket switch to fit the OEM location)
- Drill & drill bits, wire coat hanger (for routing wires into the cabin)
Disclaimer:
This worked great on my car, and I think it’s a sound way to enable full control over your OEM parking lights. You may disagree. If you wire things wrong, bad things could happen. What you do on your car is your responsibility.
Also, if you run your fog lights along with your highbeams, you’ll probably get some dillholes offended and they’ll feel compelled to flash their highbeams at you. I’d ignore them if I were you.
Here’s the overview of the install: basically, this will completely eliminate the car’s control of the fog lights, and you’ll be creating a new "stand-alone circuit" to run the fogs. There is only one tie-in to the OEM wiring, and that’s the circuit that triggers the relay and allows the foglights to turn on. In my car and the following pictures, I used the parking light circuit, which means the parking lights must be on for the fog lights to be activated.
However, you could also easily use a ignition circuit, which would mean you’d be able to turn on the foglights whenever the ignition key is inserted and turned to the “ignition” position, whether the engine is on or not, or if any of the other light circuits are on.
The only 12-volt power source that’s tied to the ignition circuit in the fusebox under the hood is the radio circuit, and I didn’t feel comfortable trying to tap into that source because of the weird yellow plastic "box" that couples that 10-amp fuse with another circuit. I may run another wire into the car to tap an ignition-controlled power source in the future, so I don't have to have the parking lights on to have the fog lights light up.
This picture shows an overview of what the wiring you need to create looks like, and its overall orientation in the car:
There will be two wires that go from the fuse box under the hood to the relay. From the relay, there’s one lead that will bring power to the foglight bulbs, as well as a wire that goes to the aftermarket switch inside the car. The switch will need a ground wire, which can be grounded to any bare metal point attached to the unibody of the car. And, each fog light bulb needs a short ground wire too. That’s it!
These two pictures show you where you need to tap into the fuse box. The thin 18-gauge wire simply has the last 1 1/4" of insulation stripped off, and it’s wrapped around one leg of the mini-fuse for the parking light circuit. The thicker, 10-gauge black wire is from a standard fuseholder you can get at any car stereo install shop, and that goes to the main power feed in the fusebox, on the right side of the big, 60-amp fuse.
If you’re sketched out by the hokey connection of the blue wire to the fuse box, there’s no need to be… when you put the 7.5-amp minifuse back into the fusebox, it actually clamps that bare wire into place, and there’s nothing around it to short out on. The plastic fusebox and the top of the fuse itself protect the bare wire you’ve wrapped around the leg of the fuse from contacting anything.
Also, all that blue wire does is feed a low-current signal to activate the coil in the relay – that’s NOT where the power that runs the foglights themselves comes from. That comes through the fuseholder’s much thicker wire, which is secured with a ring terminal under the OEM 10mm-headed bolt.
A view of the connections to the fusebox, plus the Bosch relay and fuseholder:
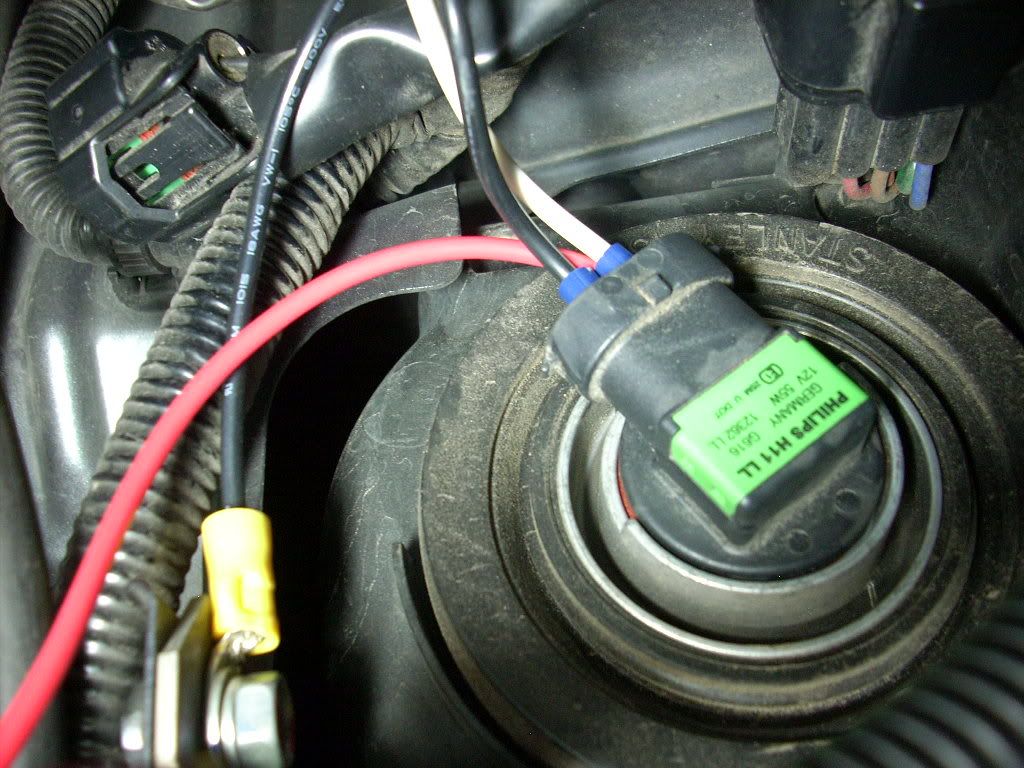
And this is how the wiring to the individual fog lamp bulbs (H11 type, BTW) look in the car:
Driver’s side:
Passenger side:
Note that there’s a handy spot right on the insides of the headlamp assembly area that serves as a great grounding wire location. It’s a 10mm headed bolt.
Okay, this is how you wire the relay (the bottom of the relay has the identifying #s molded into the plastic case, right next to each tab):
87a (middle tab): nothing
85: blue wire to parking light circuit in fusebox (7.5A fuse) OR any ignition-controlled 12+ source
86: blue wire to the aftermarket fog light switch in-car
87: white wire to fog light bulbs (both of them)
30: thick black wire of the aftermarket fuseholder that is connected to the 60A constant 12+ circuit in fusebox
And here’s a close-up pic of the relay, to help you see where each color goes:
To connect the power and ground wires to the fog light bulbs, you’ll need some "half-size" female spade connectors. They’re a perfect fit for the prongs of the bulb. These connectors are a little hard to find – I went to auto parts stores like Checker and couldn’t find them.
I got them from a car stereo store’s install bay, but I don’t know if every shop would have them. They’re the same size as the small prong on a typical aftermarket car stereo speaker, so worst case scenario, you could make use of one side of the white/gray wiring that usually comes with a set of car audio speakers. Most car stereo shops throw away about 20 packs of that included wiring every day, so if you ask nicely, they’d probably give you that stuff for free.
In this picture, you can see how the white wire from the 87 tab of the relay is connected with a red wire that feeds power over to the passenger-side fog light bulb:
The ground wire is exactly the same for both bulbs. And there’s no polarity with the bulbs – you can use either of the prongs for the "hot" lead or for ground; it doesn’t matter.
You can route the wire between the two fog light bulbs in wire loom, and it’ll fit nicely along the top of the radiator, like this:
Here’s how the wiring looks in the car all covered with loom:
Driver’s side:
Passenger side:
This is the wiring that goes to the switch I used – just a cheapie leftover switch from some aftermarket fog light kit:
The two most difficult or labor-intensive parts of this project is routing the wire to the control switch from the engine compartment to the interior, and making the aftermarket switch fit the OEM fog light switch cutout. You of course don’t need to do it like this, but I did.
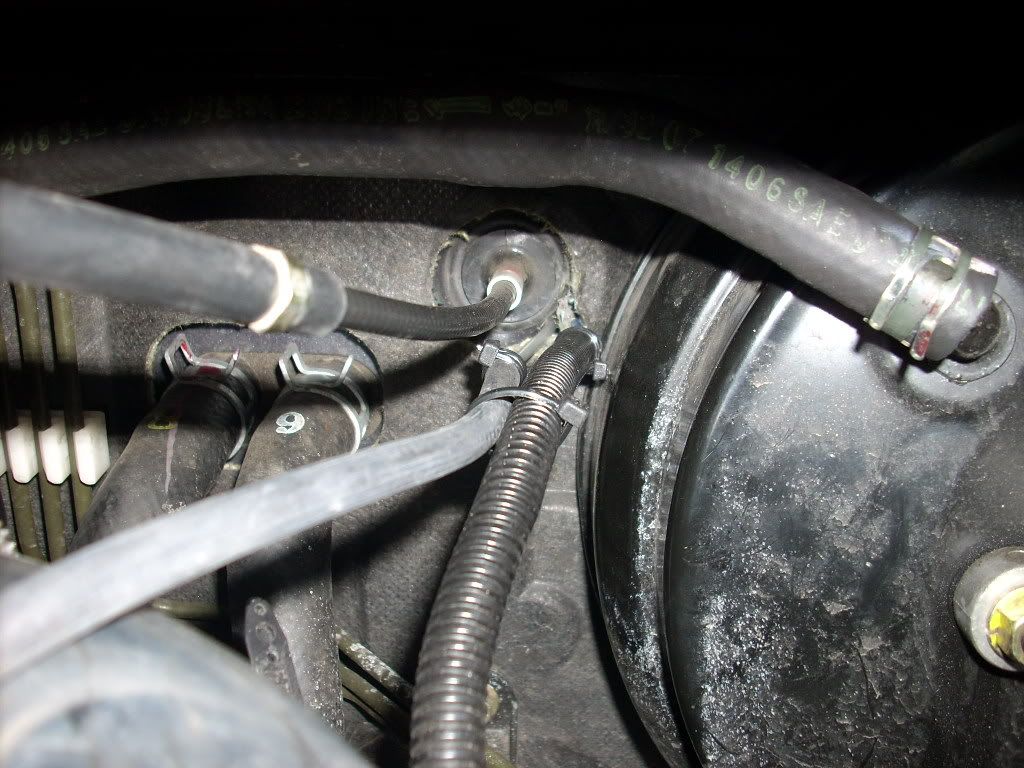
This is where I chose to route the power wire for the switch through the firewall. It’s right next to the rubber grommet/hole where the throttle cable goes through:
I’d already drilled a hole in the sheet metal next to the throttle cable opening for my boost gauge line. A 1/4" drill bit is more than big enough. Then, tape the wire for the switch to the end of a wire coat hanger that you’ve straightened out, and shove it on through.
Making a nice-looking mounting plate for the aftermarket switch to fit into the OEM foglight switch plate took longer than the entire rest of the rewiring project.
The switch I used was just the right size to poke through the rectangular opening of the factory piece, but shaping the ABS plastic of the aftermarket switch’s mounting plate to fit took a long time.
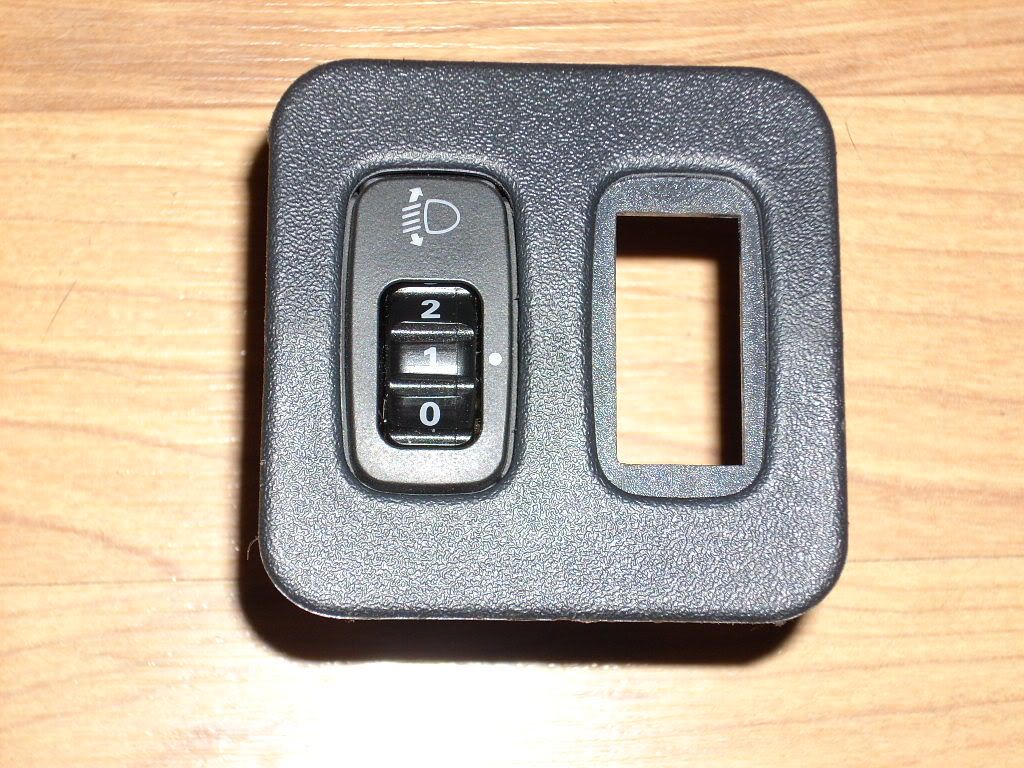
Here’s the OEM plate for the HID beam adjuster, with the OEM foglight switch removed (it’s just held in place by a couple of plastic tabs on the side of the switch. The plate can be removed from the dash by gently prying underneath the edge of it):
I did some measuring of the backside of the OEM switchplate with some cheapie plastic Harbor Freight "calipers," then used a finetip Sharpie to mark where I’d have to grind down the ABS plate for the aftermarket switch with the bench grinder:
Due to the complex shape of the back of the OEM plate, the mounting plate for the aftermarket switch needs to fairly tweaky too to fit right. Note that it has to be slightly "off-center" in order for the new switch to be centered in the opening:
The results are pretty good though, if I may say so myself:
I used a little hotglue to secure the plate in place from the back, after flexing it and bending it a bit get it to contour to the OEM piece better:
And here’s the switch in the car, powered down and lit up (the switch lights up when the fog lights are on):
Here’s proof of roughly what the wiring and the relay weighs:
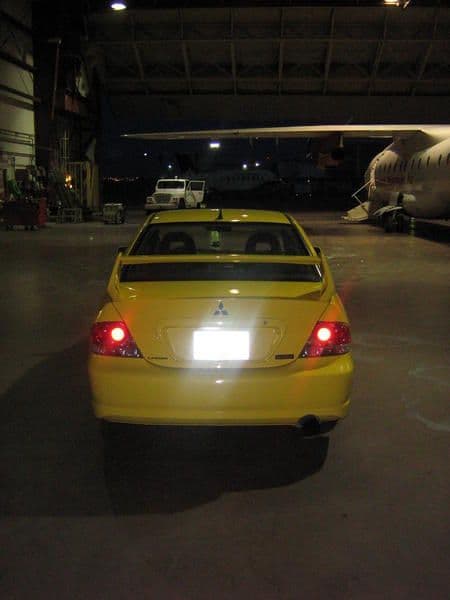
And proof it really works, just in case you don't believe me.
Fog lights on with just parking lights:
Fog lights with low beams (just like factory):
Fog lights with low & high beams:
And finally, one shot of fog lights with parking lights, this time with Nokya "Hyper Yellow" H11 bulbs installed, for that ricy, JDM-biter look:
I think this how-to is pretty clear, but let me know if you have any questions. I hope this is helpful to anyone who wants an alternative method to control the factory fog lights on their Evo IX (I’m assuming the VIII is very similar if not identical, but I don’t know).
Also, for more info on how relays work and how to wire them, this website is very helpful: http://www.the12volt.com/relays/relays.asp
Moderator, if you feel this writeup is worthy, please sticky it in the How Tos/Installations subforum!


Thread
Thread Starter
Forum
Replies
Last Post
EGbeater
Evo Electrical / Audio / Security
28
Jul 18, 2019 01:24 PM
EGbeater
Evo How Tos / Installations
20
Jul 23, 2016 08:16 AM
EGbeater
Evo Engine / Turbo / Drivetrain
38
Apr 25, 2015 10:22 AM
EGbeater
Evo How To Requests / Questions / Tips
23
Apr 20, 2015 10:46 AM
EGbeater
Evo How Tos / Installations
21
Oct 12, 2011 07:42 AM
aftermarket, bulb, changing, control, evo, fog, fog lights, fuse, light, oem, relay, replacement, rewire, side, sizes