
Replacing the stock RF stereo

Thread Starter
Evolved Member
Joined: Apr 2008
Posts: 1,016
Likes: 0
From: Denver, CO
Thank you for that! I shall not cover it over, lol.
It has been a very long night. My sound material did not arrive due to our massive snow storm, so hopefully tomorrow. So, I decided to rip apart the dash and put in the camera and the new amp. Got the camera in and working with no issues. Looks great. I've got a ton of pics that I will eventually put up.
I got the new amp 100% hooked up, with the new JL crossovers. Even though I haven't changed the speakers, holy hell do they ever sound fabulous! And the gain on the amp is all the way down! The M4300 fits PERFECTLY under the seat with a little bit of a modification to the heater vent. Other people cut it off completely, but I modified it so it blows over the amp, rather than directly into it.
Tomorrow I'll work on getting edead all over the inside of the car (as long as I receive it). Then I have to finish running the video wire for the backup cam, then I can move on to replacing door speakers!
This is a blast, and my Evo is in pieces.
Thread Starter
Evolved Member
Joined: Apr 2008
Posts: 1,016
Likes: 0
From: Denver, CO
Update with lots of pictures.
Last night was pure success! Here's my pics
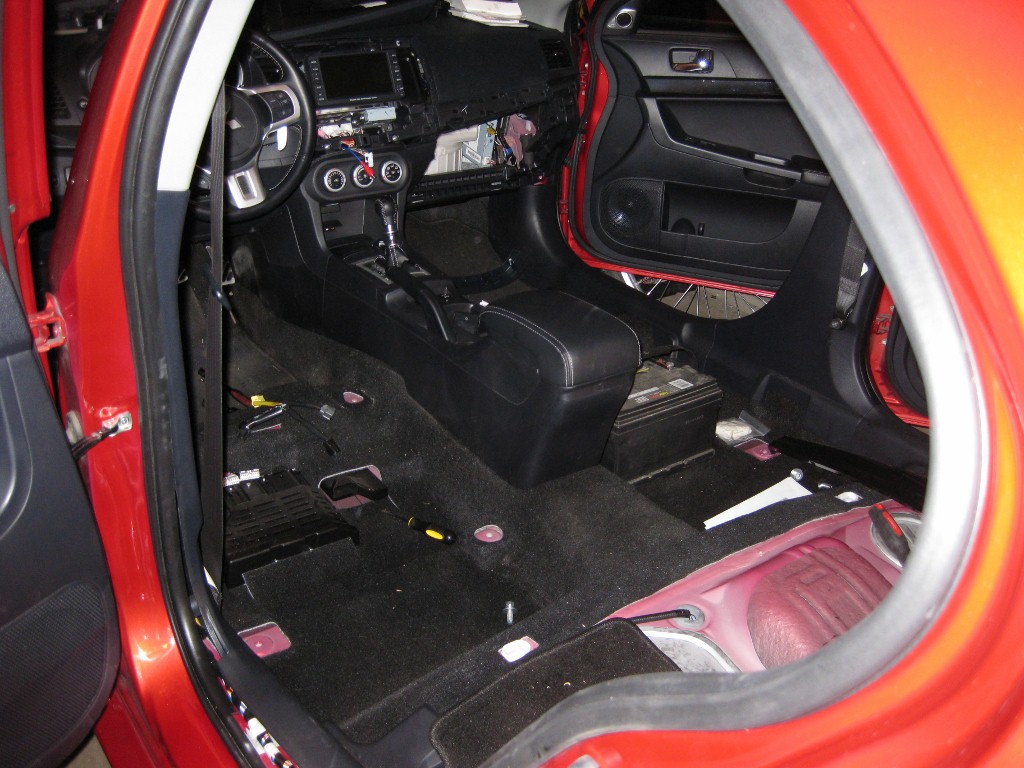
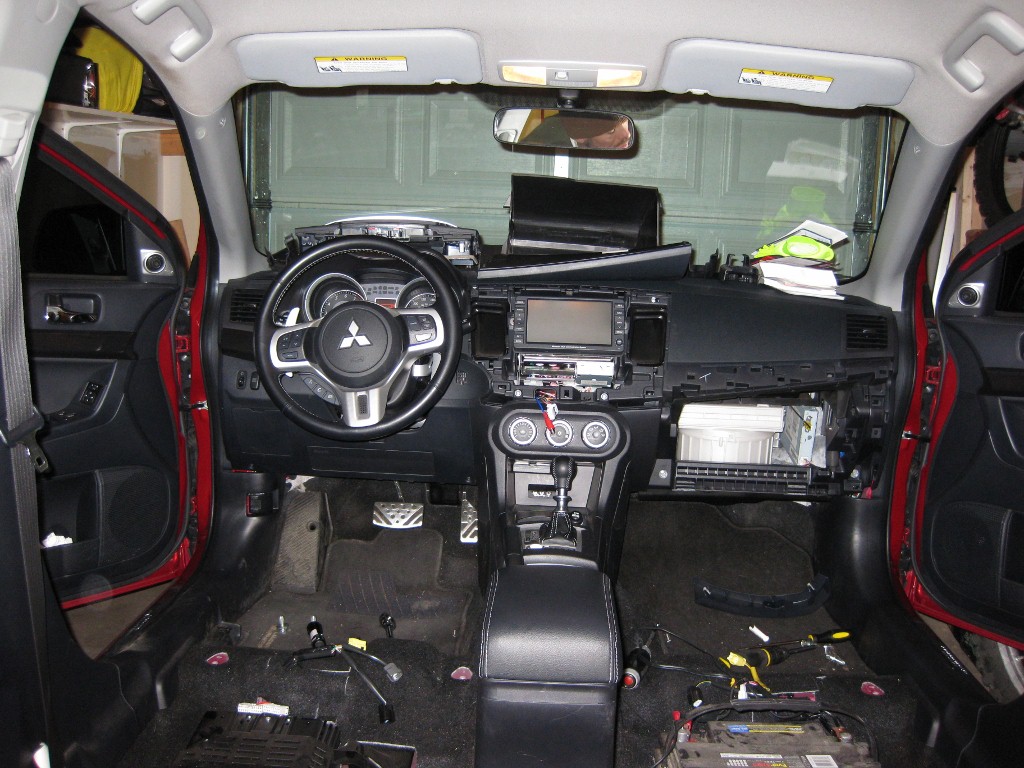
Car nearly gutted
HA! I made it in the picture, lol
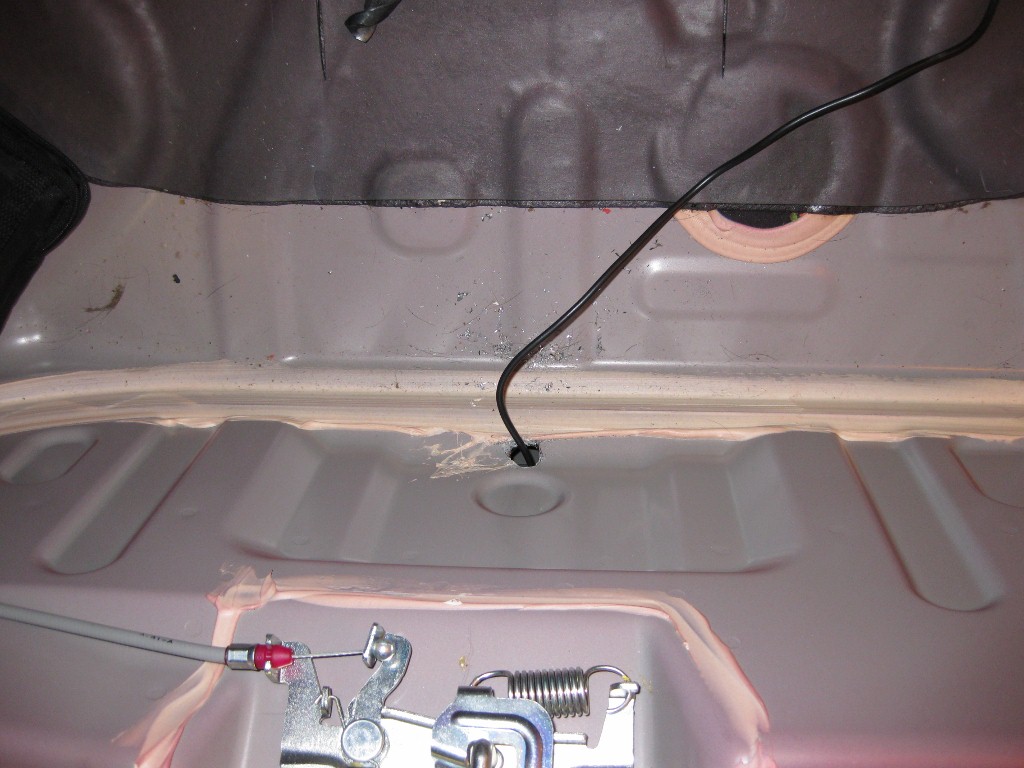
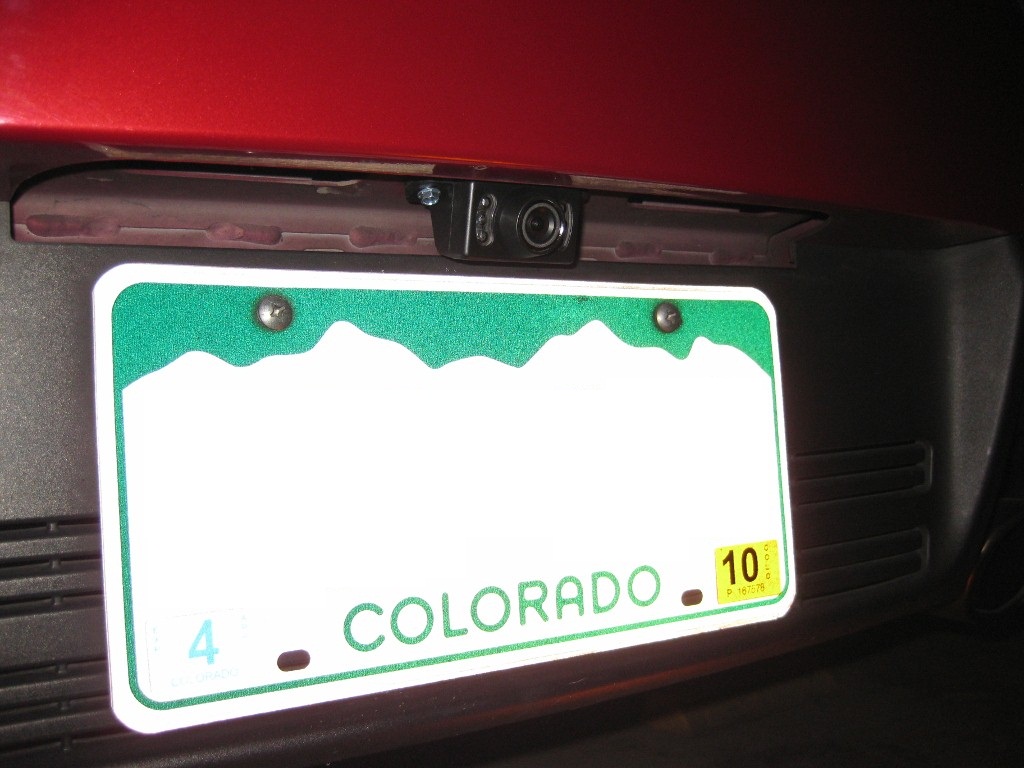
This is the inside of the trunk where I ran the backup camera wire. If you drill in this EXACT location, it meets up with a hole behind it that comes out right above the license plate. It's tricky to get it through there, but it worked! I will fill this with some silicone tonight.
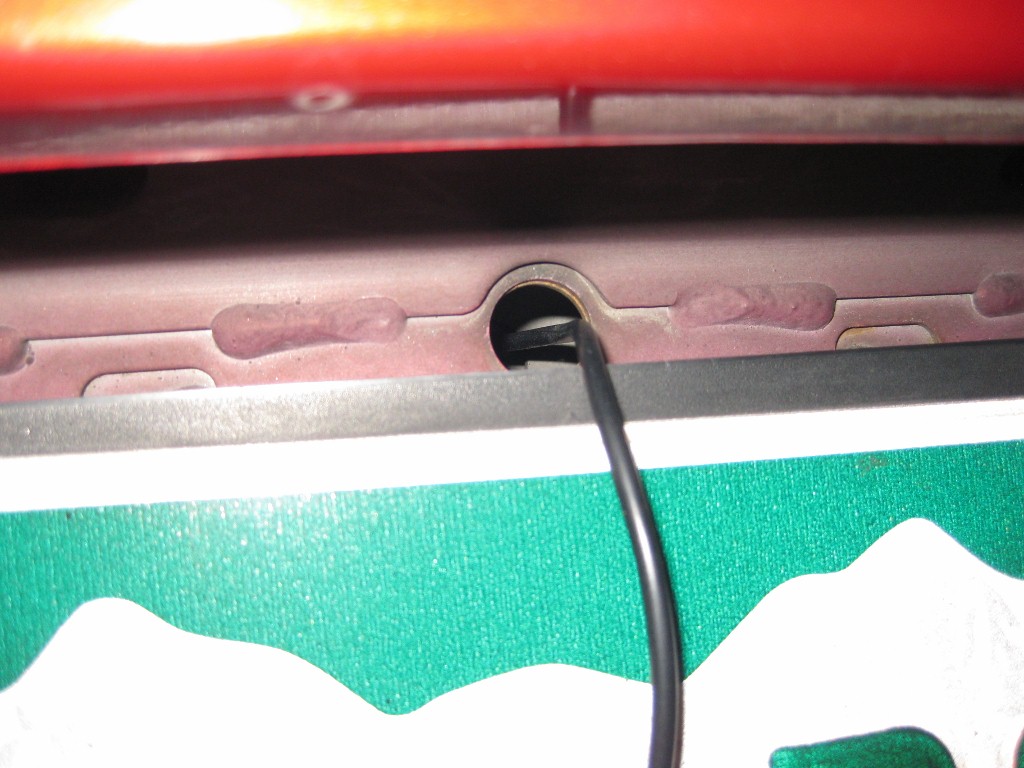
Here's the outisde where the wire comes out
And here's the camera all installed
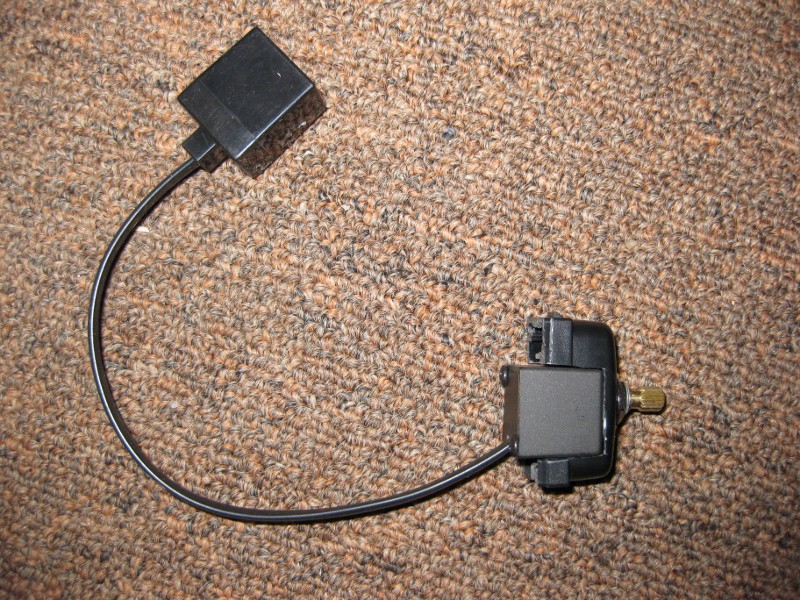
Now, on to the stereo. Since my edead didn't show up, I figured I'd just make the stereo work. I installed my remote bass control knob.
First I had to modify the blank panel that was in the center console, because the RBC box is as wde as the panel, and the panel is like 1.5" deep. After much cutting, I ended up with this
Here it is installed in the panel
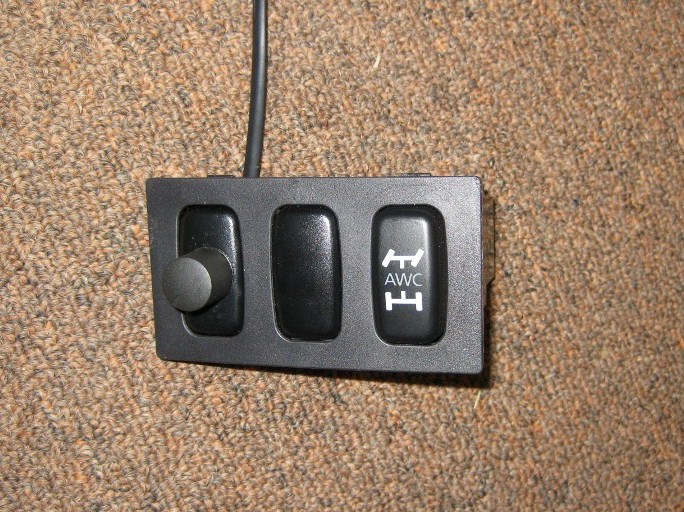
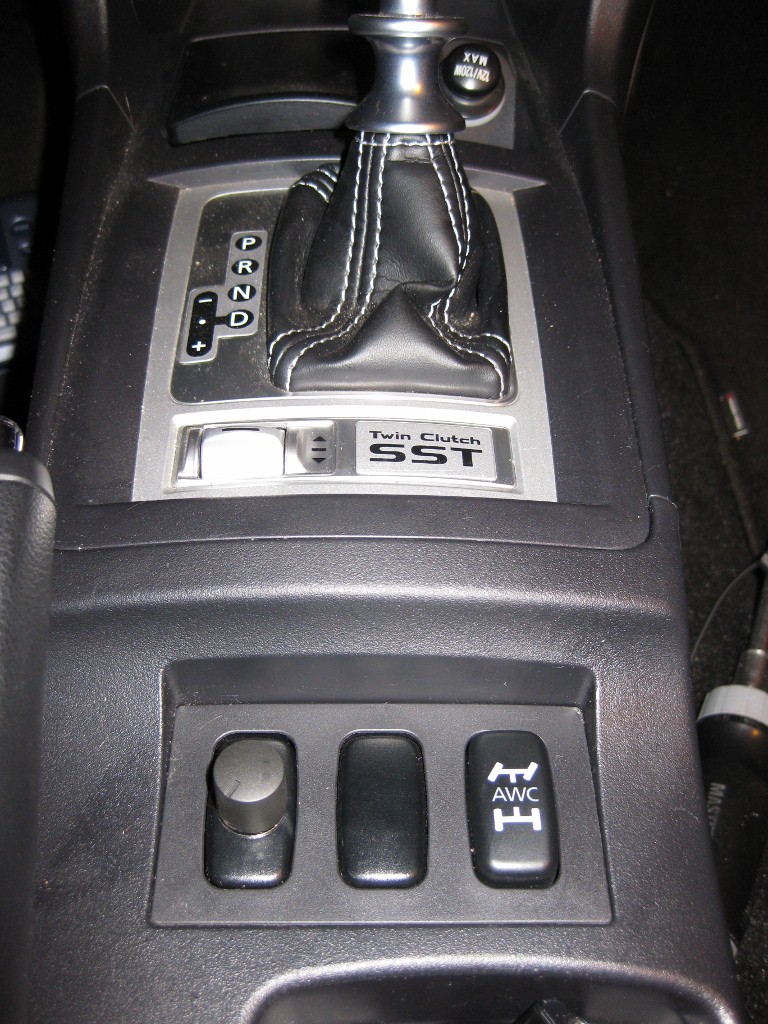
And the final
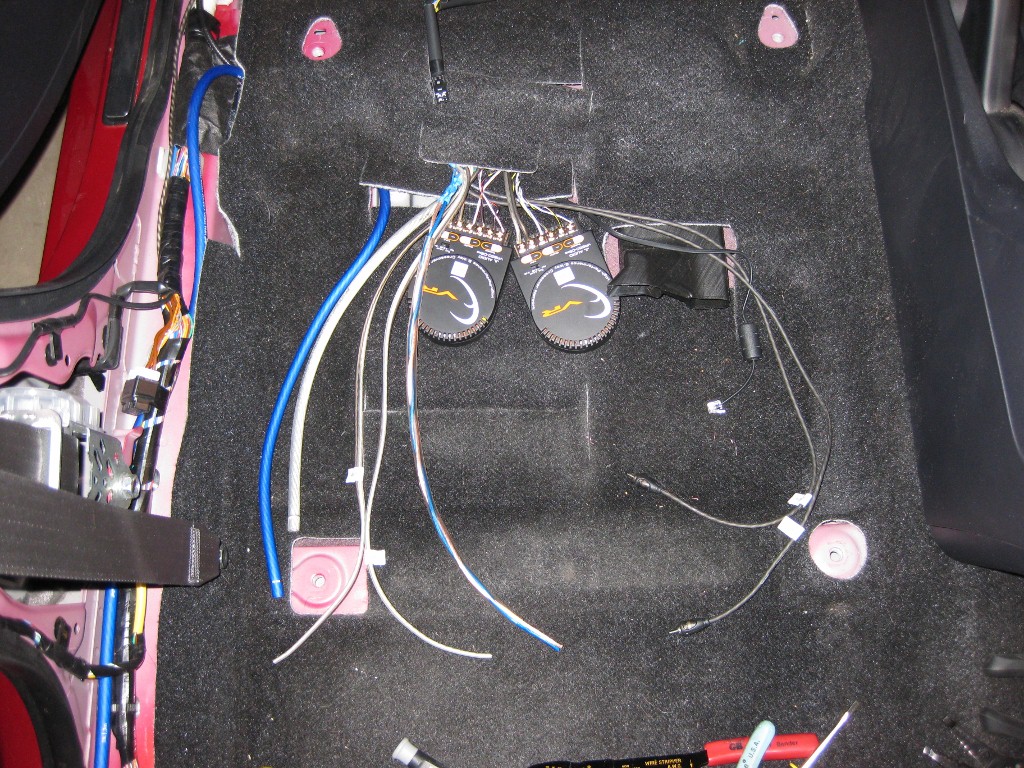
Here's all the new wiring in place for the new amp, with the new crossovers for the front speakers.
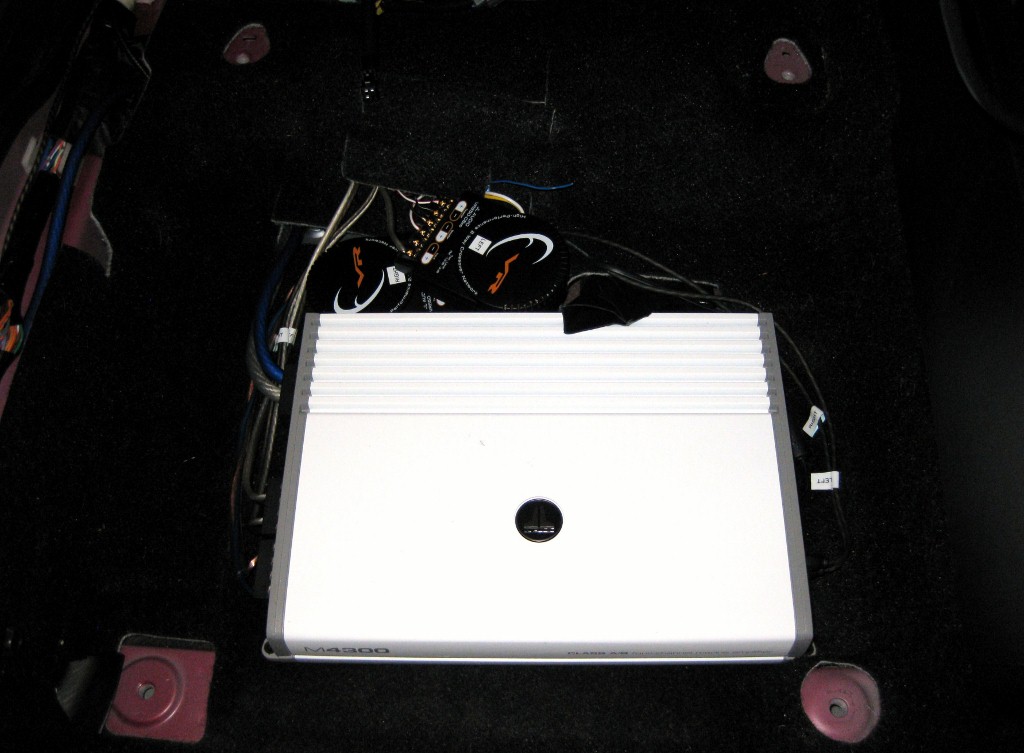
And the amp in place. This pic sucks because it's so dark, and the amp is WHITE (because it's a marine version)
Thanks to this thread:
https://www.evolutionm.net/forums/ev...d-oem-amp.html, every wire was hooked up perfectly the FIRST time.
More work tonight!!
Last night was pure success! Here's my pics
Car nearly gutted
HA! I made it in the picture, lol
This is the inside of the trunk where I ran the backup camera wire. If you drill in this EXACT location, it meets up with a hole behind it that comes out right above the license plate. It's tricky to get it through there, but it worked! I will fill this with some silicone tonight.
Here's the outisde where the wire comes out
And here's the camera all installed
Now, on to the stereo. Since my edead didn't show up, I figured I'd just make the stereo work. I installed my remote bass control knob.
First I had to modify the blank panel that was in the center console, because the RBC box is as wde as the panel, and the panel is like 1.5" deep. After much cutting, I ended up with this
Here it is installed in the panel
And the final
Here's all the new wiring in place for the new amp, with the new crossovers for the front speakers.
And the amp in place. This pic sucks because it's so dark, and the amp is WHITE (because it's a marine version)
Thanks to this thread:
https://www.evolutionm.net/forums/ev...d-oem-amp.html, every wire was hooked up perfectly the FIRST time.
More work tonight!!
Thread Starter
Evolved Member
Joined: Apr 2008
Posts: 1,016
Likes: 0
From: Denver, CO
Oh, and another thing. I'm EXTREMELY impressed with the stinger wiring. The power cable came in a braided shield for what would normally be under the hood. Wiring is ridiculously flexible, and it has lots of connectors included. Enough to hook up a capacitor if you had one. Fuse block is really well made, and easy to get set up.
Thread Starter
Evolved Member
Joined: Apr 2008
Posts: 1,016
Likes: 0
From: Denver, CO
Alright! I got the eDead juat a few minutes ago, so I'll be covering the car with it tonight. I want to get the trunk done and back together before I start ripping the doors apart, due to lack of room in my garage.
Thread Starter
Evolved Member
Joined: Apr 2008
Posts: 1,016
Likes: 0
From: Denver, CO
I feel like I got nothing done last night. I got the entire trunk covered with edead, which took me forever, and then got the trunk reassembled. Also got the amp tuned so that I can put my seat back in. But before that can happen, I have to find a remote wire for the amp, and run the backup cam to the nav. TGIF
Thread Starter
Evolved Member
Joined: Apr 2008
Posts: 1,016
Likes: 0
From: Denver, CO
I think I just had a change of heart with the wicked cas box
Last night while tuning the amp, I think I may have already destroyed that sub in the car, if not I'm going to get there quickly. I thought about just getting a cheap sub to stick in there, and started researching. Come to find out that the 10W3 and 10W2 JL audio subs, each require 17.7 liters of airspace. The W3 displaces 1.39 liters of airspace, and the W1 displaces 0.71 liter. Even with a 10W3, that's only a requirement of 19.1 liters of airspace. The stock box is 21 liters. There's no reason to have 27 liters of airspace (wicked cas 10" box) when the sub requirement is 19. The more exact, the better. Then if you move up in the wicked cas box to the 12", it's the same amount of airspace, and a 12" driver displaces more air space. Most JL 12" subs require about 35 liters of airspace. Clearly not enough room in the wicked cas box. There's one thing I've come to learn about airspace requirements, especially with JL Audio. Get as close as possible to airspace requirements, and you will get the best possible sound out of the sub.
I have a 10w1v2 in my truck, so I may pop it out and see how it sounds in the car.
Evolving Member
Joined: Mar 2009
Posts: 118
Likes: 1
From: Chino Hills, CA
I have an SSS package and wanted to replace the head unit and all speakers (except the sub), do I need to run a new set of speaker wires from the new aftermarket stereo all the way to the door speakers?
Thread Starter
Evolved Member
Joined: Apr 2008
Posts: 1,016
Likes: 0
From: Denver, CO
Thread Starter
Evolved Member
Joined: Apr 2008
Posts: 1,016
Likes: 0
From: Denver, CO
More updates and pictures. Last couple of nights have been hectic. I've been busy tonight. Got the Car all back together on the inside, and am preparing to do the speakers next.
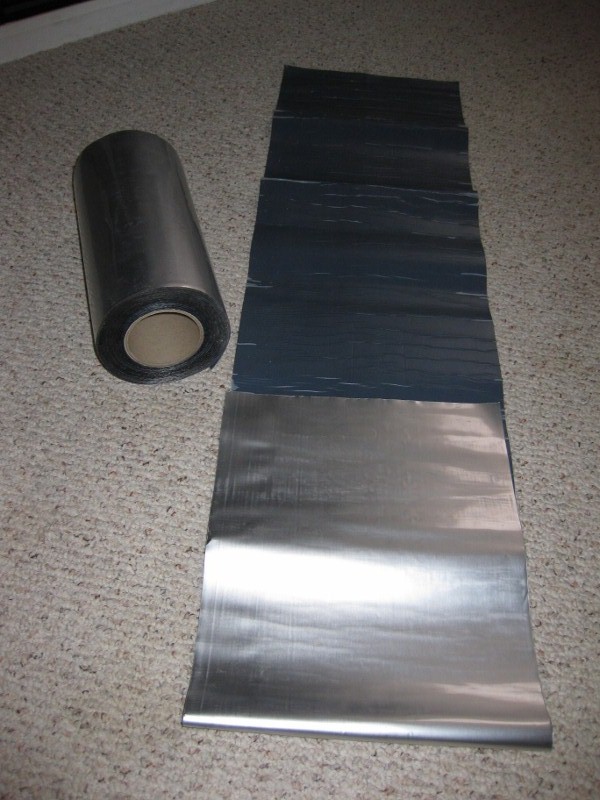
Here's a pic of the eDead sound damping material that I got. I used it all over the place.
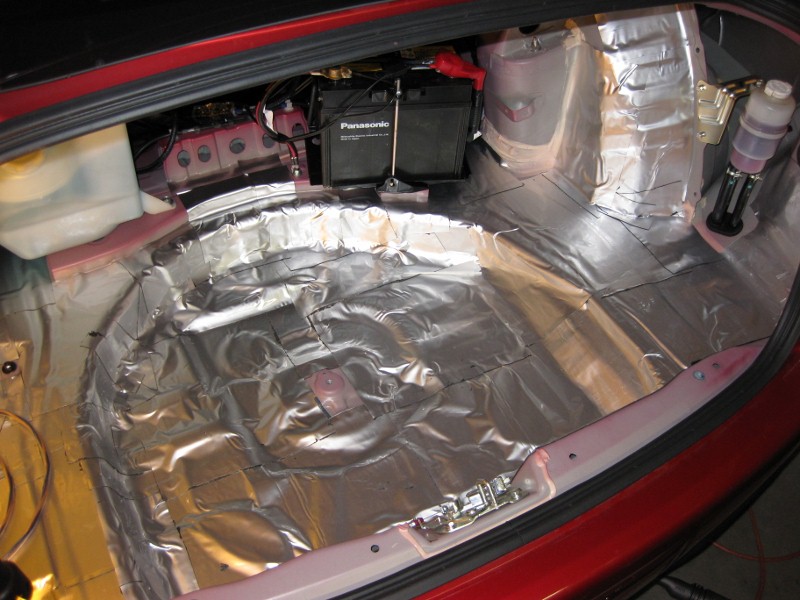
Here's the trunk covered with eDead
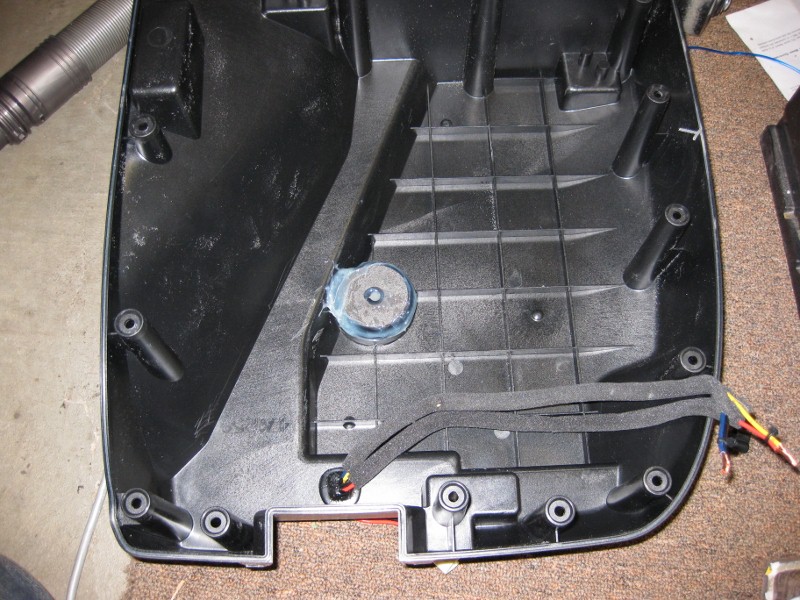
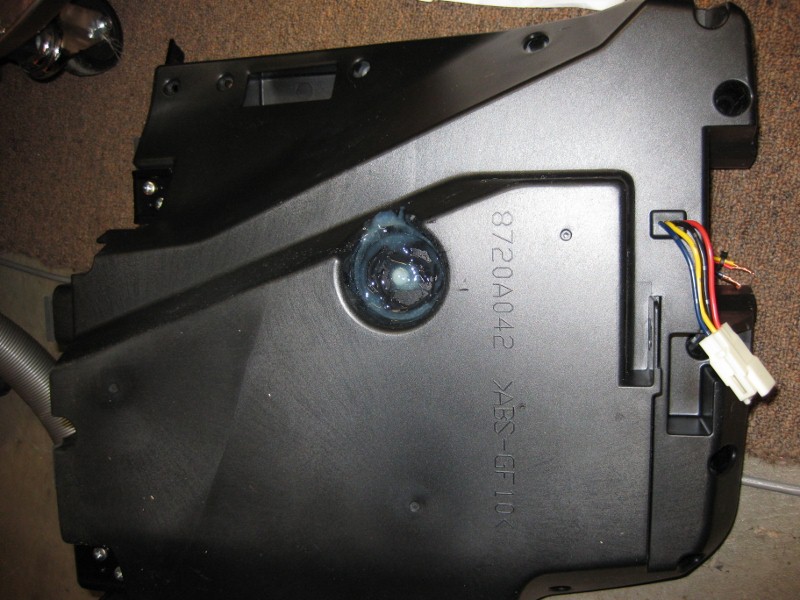
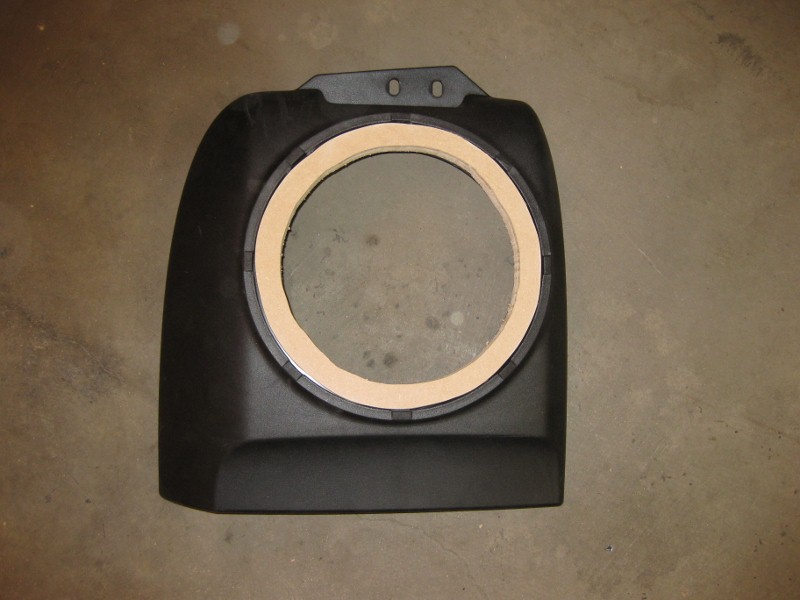
I decided to buy a JL Audio 10W3v3, and put it in the box. Opening the box revealed a tube in the back that needed to be removed, for depth. I cut it off with a hacksaw, then used the end of that tube to fill the gap, then put epoxy all over it to seal it back up. This is just the back half of the sub box:
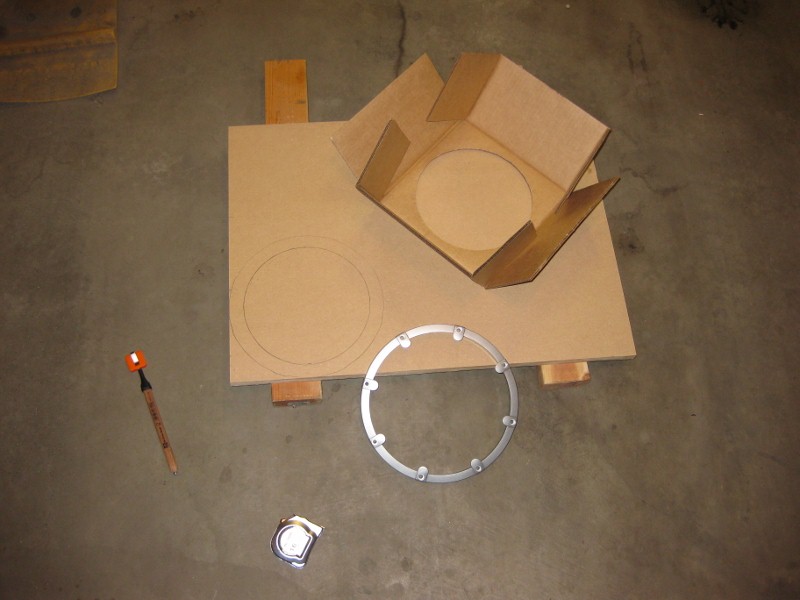
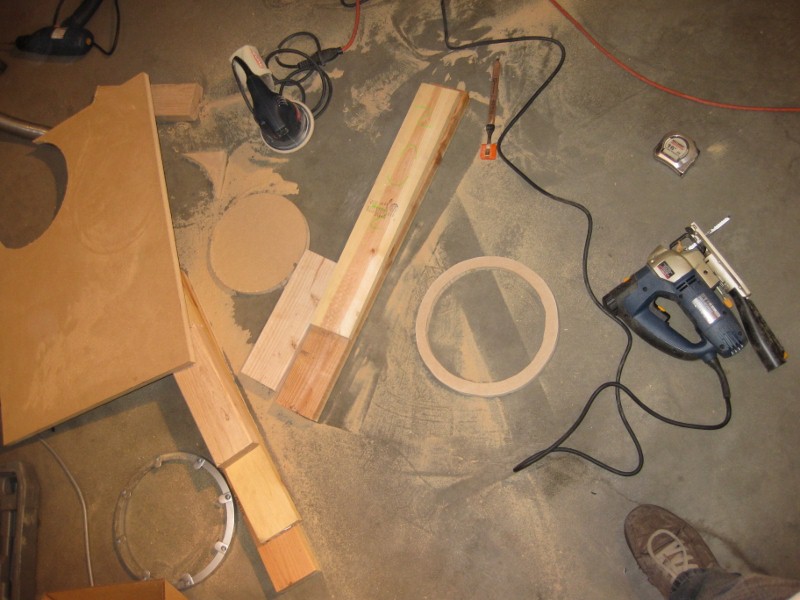
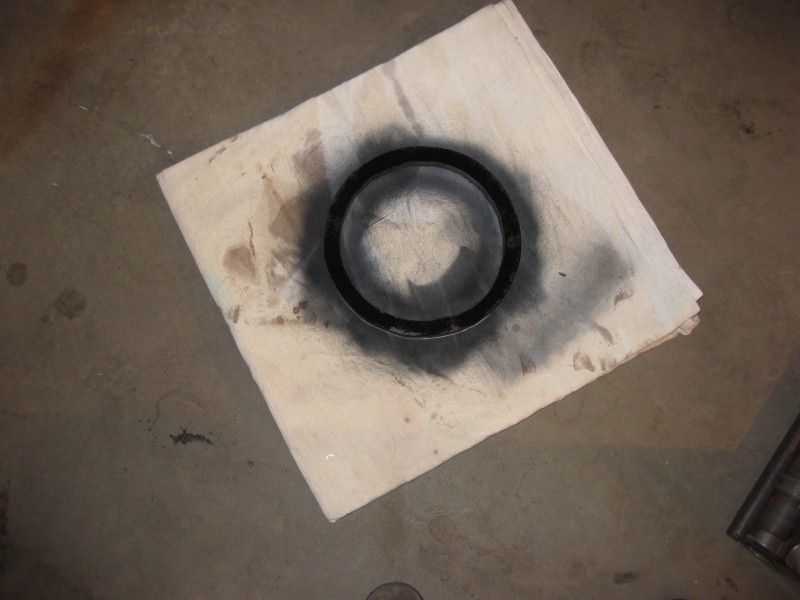
Once I was done with that modification, I discovered that the box was STILL not quite deep enough. Somewhere I read it was 6.5", but in reality it's about 5.7-5.8" the W3 mounting depth is 5.93". So, with no other alternative, I decided to build a spacer ring with 3/4" MDF. Quick like:
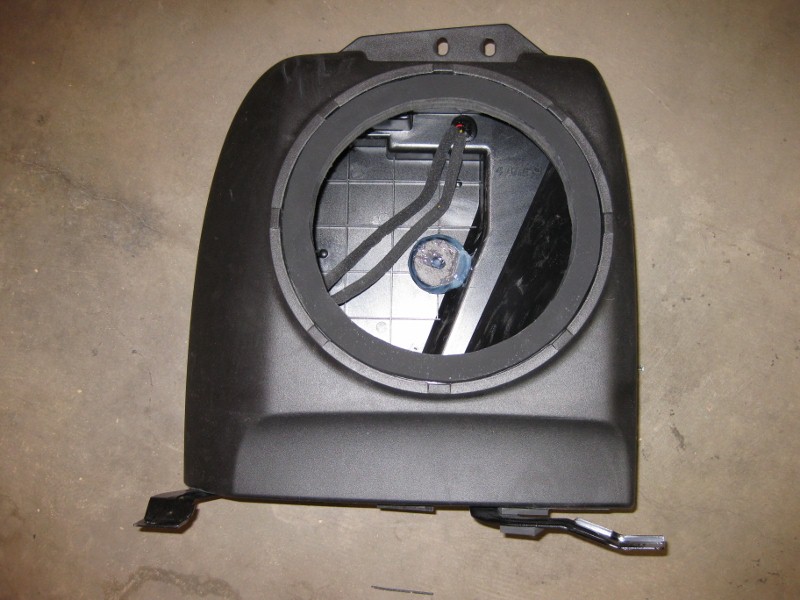
And here's the sub box with the sub in it, but nothing screwed in yet.
Going to look for some screws tomorrow to make up for the extra length. This stereo is almost complete! Next step is door speakers!
BTW, I already blew the stock sub.... too much power, lol
Here's a pic of the eDead sound damping material that I got. I used it all over the place.
Here's the trunk covered with eDead
I decided to buy a JL Audio 10W3v3, and put it in the box. Opening the box revealed a tube in the back that needed to be removed, for depth. I cut it off with a hacksaw, then used the end of that tube to fill the gap, then put epoxy all over it to seal it back up. This is just the back half of the sub box:
Once I was done with that modification, I discovered that the box was STILL not quite deep enough. Somewhere I read it was 6.5", but in reality it's about 5.7-5.8" the W3 mounting depth is 5.93". So, with no other alternative, I decided to build a spacer ring with 3/4" MDF. Quick like:
And here's the sub box with the sub in it, but nothing screwed in yet.
Going to look for some screws tomorrow to make up for the extra length. This stereo is almost complete! Next step is door speakers!
BTW, I already blew the stock sub.... too much power, lol
Thread Starter
Evolved Member
Joined: Apr 2008
Posts: 1,016
Likes: 0
From: Denver, CO
Well, I'm finished with the car for now. The only thing that hasn't been done is the dack door speakers. I may just leave them, but I don't like that they are 2 ohm speakers, therefore putting a 3 ohm load on my amp with my new set of 4ohm JL speakers.
Anyway, here's my last sets of pictures.
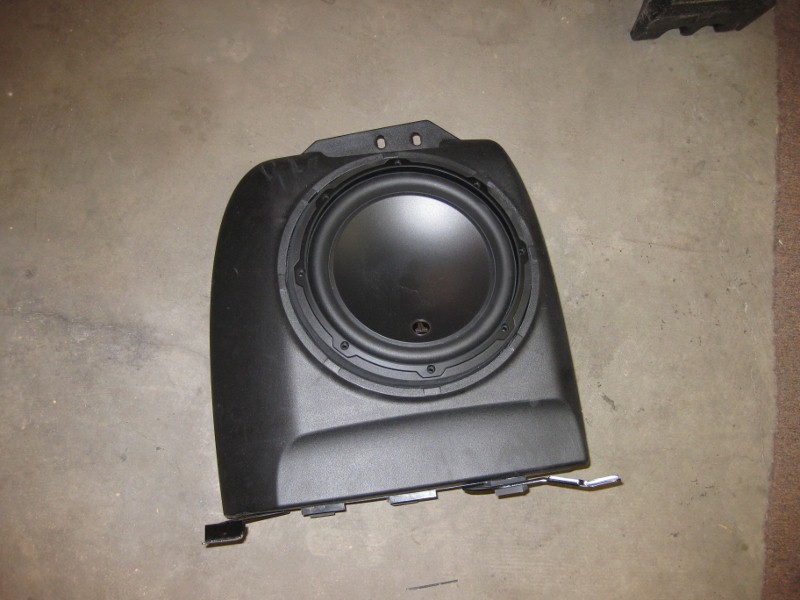
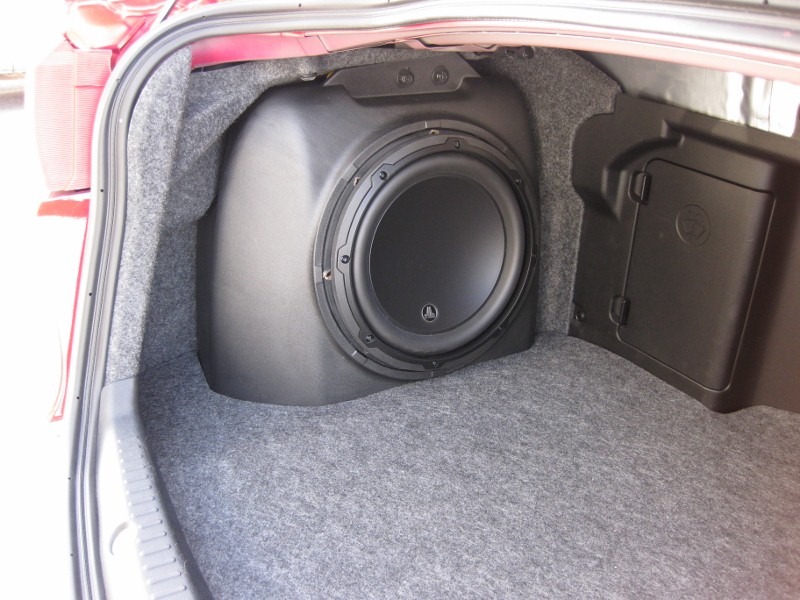
Here's the sub all finished and installed. Looks great, and sounds great too.
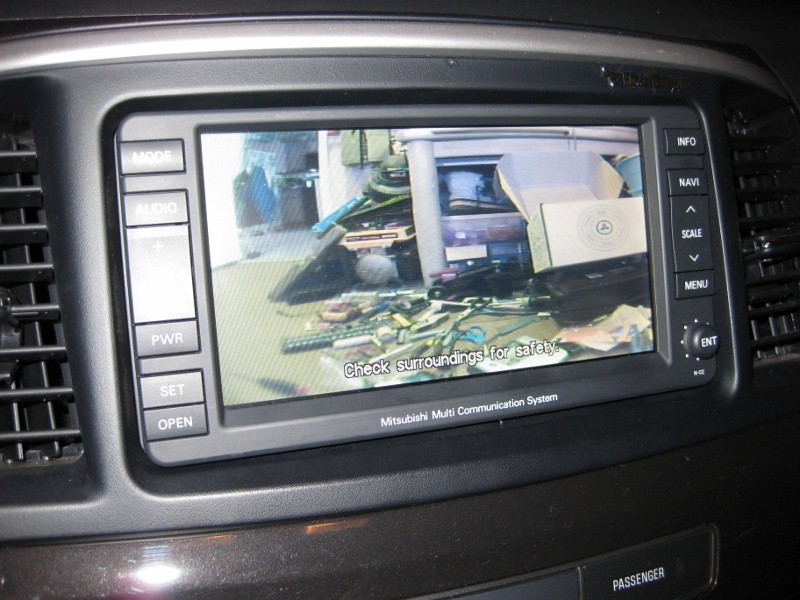
Here's the backup camera working from the nav screen. Works great after a bit of adjustment to the camera.
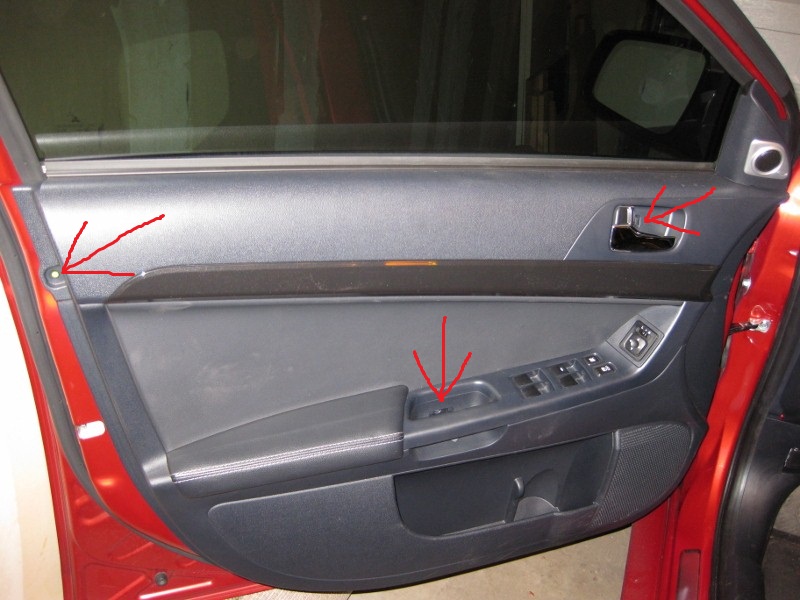
Here's some instructions on how to remove the door panels:
First, remove the screws at the 3 locations pointed out in this picture
Remove the tweeter pod by pulling outward on the top of it. It comes out very easily/
Start at the bottom and pull out on the door panel VERY HARD. It's just snap clips all the way around. Once you get the panel off, disconnect wire harnesses. The door handle is attached to the panel with 2 screws. Remove the screws to free the panel.
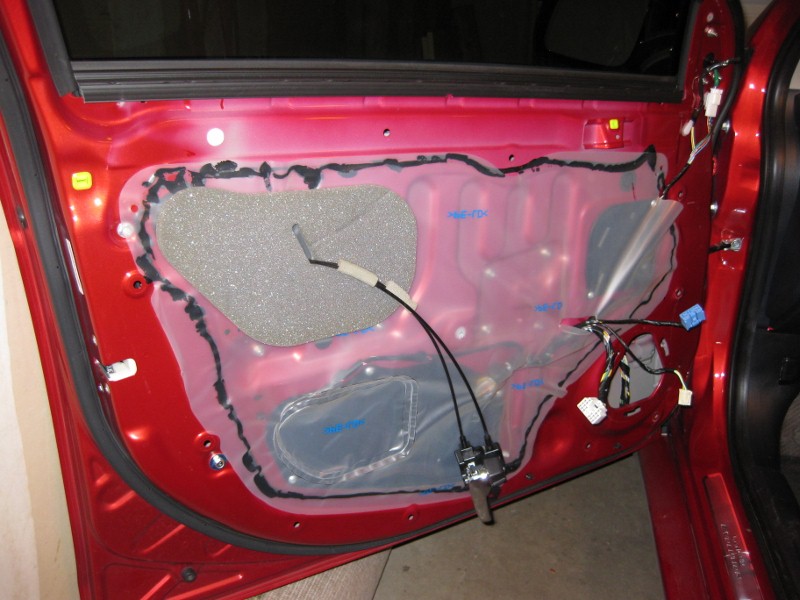
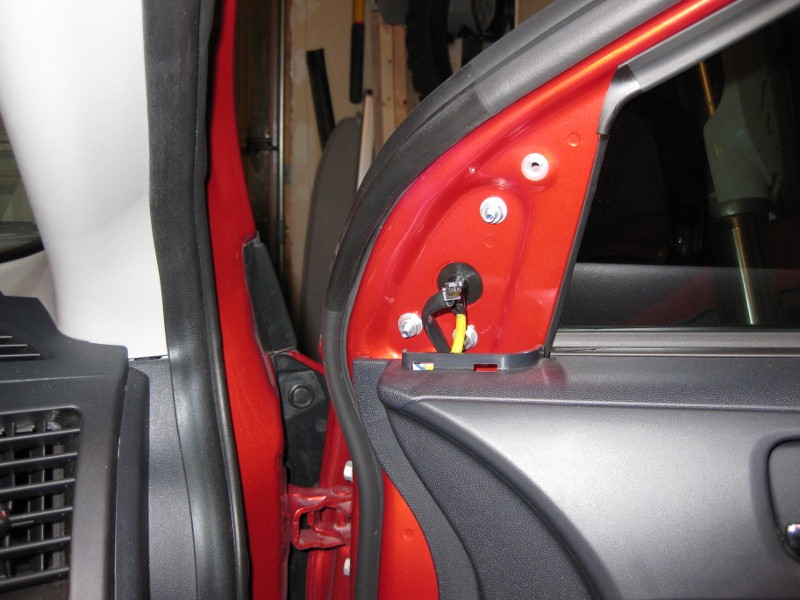
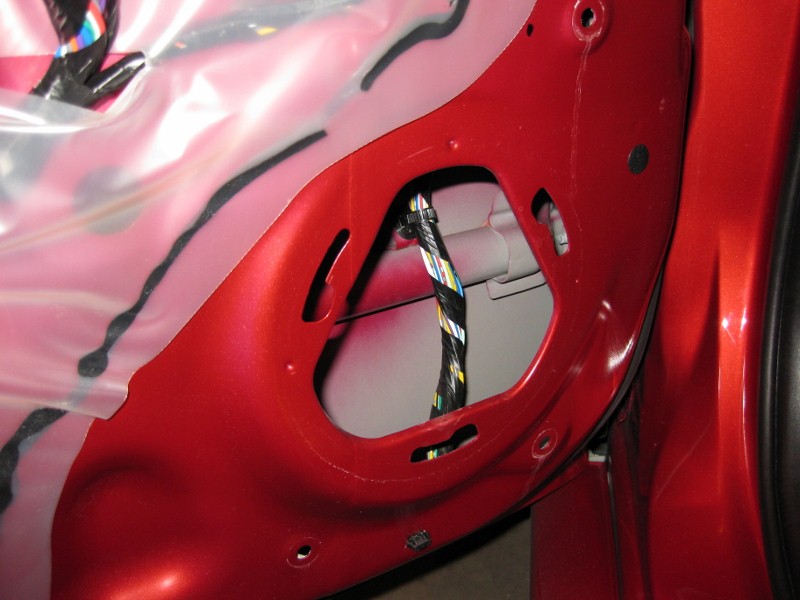
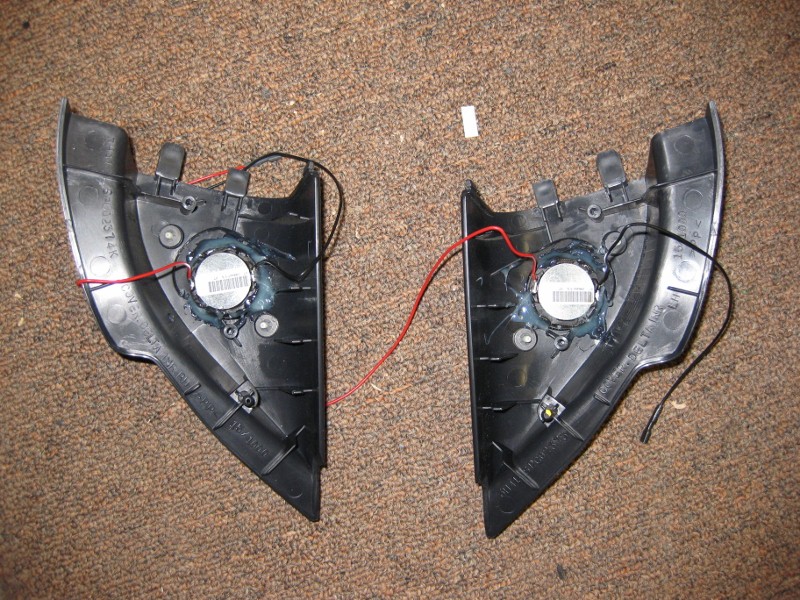
Here is why it's difficult to mount a speaker in the Lancer door:
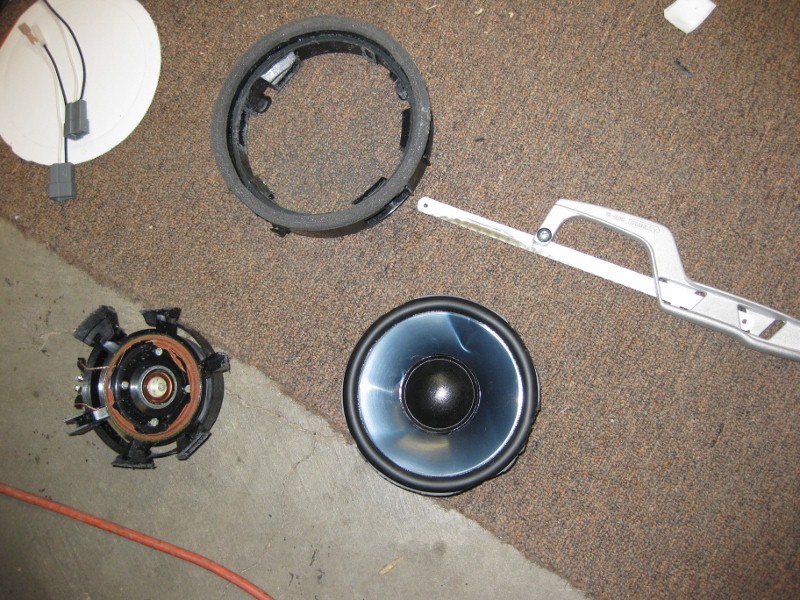
Using the stock speaker, I tore it apart to make a mount for the new speakers
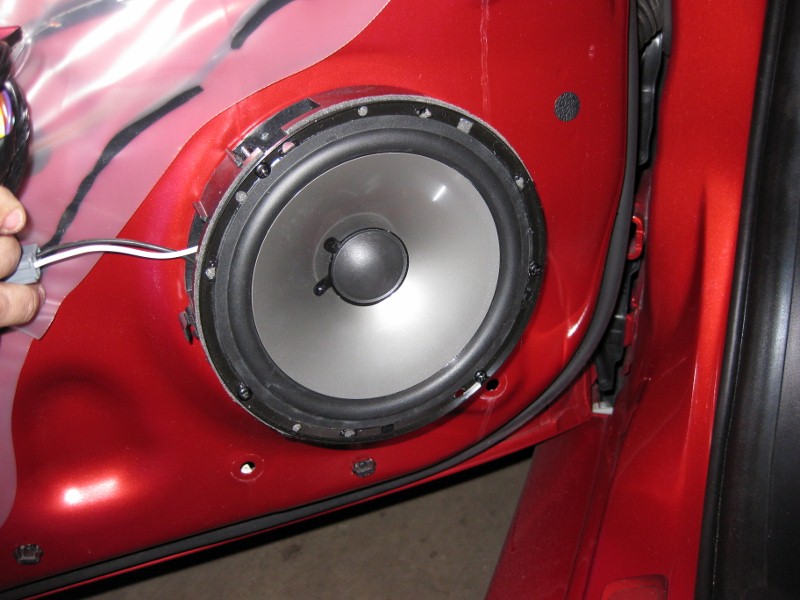
I mounted the new speaker in it, then mounted it back in the car:
Last, I mounted the tweeters on the tweeter pods with epoxy:
After all is assembled, it looks just like stock! But it sure doesn't sound like it!!
Anyway, here's my last sets of pictures.
Here's the sub all finished and installed. Looks great, and sounds great too.
Here's the backup camera working from the nav screen. Works great after a bit of adjustment to the camera.
Here's some instructions on how to remove the door panels:
First, remove the screws at the 3 locations pointed out in this picture
Remove the tweeter pod by pulling outward on the top of it. It comes out very easily/
Start at the bottom and pull out on the door panel VERY HARD. It's just snap clips all the way around. Once you get the panel off, disconnect wire harnesses. The door handle is attached to the panel with 2 screws. Remove the screws to free the panel.
Here is why it's difficult to mount a speaker in the Lancer door:
Using the stock speaker, I tore it apart to make a mount for the new speakers
I mounted the new speaker in it, then mounted it back in the car:
Last, I mounted the tweeters on the tweeter pods with epoxy:
After all is assembled, it looks just like stock! But it sure doesn't sound like it!!
Evolving Member
Joined: Apr 2007
Posts: 430
Likes: 0
From: New York
Once I was done with that modification, I discovered that the box was STILL not quite deep enough. Somewhere I read it was 6.5", but in reality it's about 5.7-5.8" the W3 mounting depth is 5.93". So, with no other alternative, I decided to build a spacer ring with 3/4" MDF. Quick like:
From the looks of your pic, I sawed off the tube piece a lot lower than you did. I actually had more problems with the 10" opening than I did with the mounting depth. The upper outside cage of the speaker prevented the speaker from going all the way down into the 10" opening. I had to trim plenty of plastic away from the 10' opening. At first I couldn't figure out why it wouldn't fit, Then I realized that it wasn't the mounting depth that was the problem, it was actually the 10"opening.
Is that a 1" tweeter? I used 1" tweeters which fit perfectly to the stock attachment piece. This preserved the angling of the tweeters. not that it matters
 . Good job BTW. I'm glad that I'm not the only one using the stock box with another woofer. The Wicked Cas box wasn't an option and to be honest? I don't think would sound $350 better.
Last edited by Spoonie; Mar 29, 2010 at 09:35 AM.
Thread Starter
Evolved Member
Joined: Apr 2008
Posts: 1,016
Likes: 0
From: Denver, CO
I was the one who said that the mounting depth of the stock speaker box(with the tube hacked off) was 6.5 inches, and I stand by it. I based that off of the fact that I was able to mount a Rainbow Ambross 10" woofer in there (mounting depth of 6.5 inches). It was a tight fit, so tight that if the speaker wire is wedged between the rear of the magnet and the inside the box, it wouldn't fit flush.
From the looks of your pic, I sawed off the tube piece a lot lower than you did. I actually had more problems with the 10" opening than I did with the mounting depth. The upper outside cage of the speaker prevented the speaker from going all the way down into the 10" opening. I had to trim plenty of plastic away from the 10' opening. At first I couldn't figure out why it wouldn't fit, Then I realized that it wasn't the mounting depth that was the problem, it was actually the 10"opening.
From the looks of your pic, I sawed off the tube piece a lot lower than you did. I actually had more problems with the 10" opening than I did with the mounting depth. The upper outside cage of the speaker prevented the speaker from going all the way down into the 10" opening. I had to trim plenty of plastic away from the 10' opening. At first I couldn't figure out why it wouldn't fit, Then I realized that it wasn't the mounting depth that was the problem, it was actually the 10"opening.
Is that a 1" tweeter? I used 1" tweeters which fit perfectly to the stock attachment piece. This preserved the angling of the tweeters. not that it matters . Good job BTW. I'm glad that I'm not the only one using the stock box with another woofer. The Wicked Cas box wasn't an option and to be honest? I don't think would sound $350 better.
. Good job BTW. I'm glad that I'm not the only one using the stock box with another woofer. The Wicked Cas box wasn't an option and to be honest? I don't think would sound $350 better.The Wicked cas box is a great, idea, but NOT for JL Audio subs. Being that the intermediate 10" subs require .65 cu ft of airspace, and the wicked cas box has .95, means there's too much airspace. The intermediate 12" JL subs require 1.25cu ft. The 12" wicked cas box does not actually grow in airspace over the 10" box. So, there's actually too little airspace for the 12" subs. 15 years of experience with JL Audio stereo equipment has taught me that when JL Audio says the speaker should have .65 cu ft of airspace, you get as close as possible for the optimal sound. Too much airspace can make the sub sound muddy.