
How to: RRM SRI install

Thread Starter
EvoM Staff Alumni
iTrader: (88)
Joined: Aug 2003
Posts: 8,733
Likes: 3
From: Concord Township, Ohio
How to: RRM SRI install
Tools needed:
10mm tool - I mostly used a rachet/socket with an extension to reach.
Phillips screwdriver
Flathead screwdriver
T15 wrench
3mm Allen wrench
1. Remove a battery cable; I prefer the negative terminal (shown) because it's easier to get to. This keeps you safe from electricity and makes the car relearn the A/F faster. Use a 10mm socket or wrench for this.

2. Remove the two fasteners holding down the ram scoop with a Phillips screwdriver. Just pull it off the airbox.

3. Pull the wiring harness off the MAF sensor (just push down on the tab and gently pull). Now is also a good time to grab a pair of pliers and remove the wiring from the airbox (sorry, forgot to get a picture of that, but it's right on the front of the airbox).

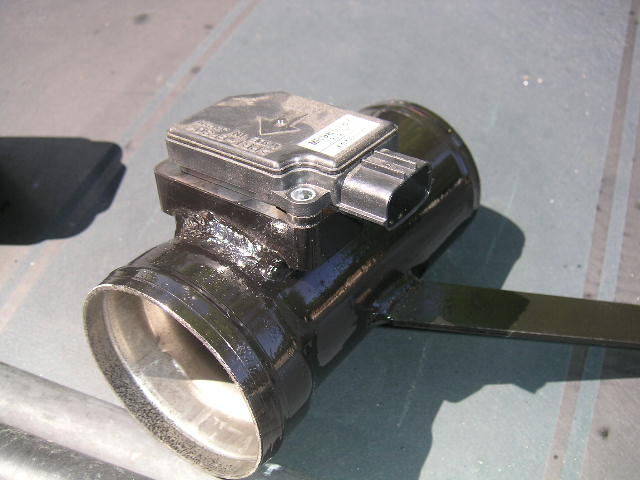
4. Using a T15 wrench, remove the two bolts holding the MAF onto the airbox. Save them, because the RRM kit has it's own bolts. Simply pull the MAF up and out, GENTLY.

5. Next, remove the 10mm bolt holding the front of the airbox down.

6. Now use the 10mm wrench/socket to loosen the hose clamp holding the rubber tube to the airbox.

7. Pull the rubber hose off the airbox. Now just gently pull the whole box up and out. You're left with this.

(The back of the airbox is just sitting on a plastic grommet. If your monitor has the right brightness, you can see it in the below picture...)

8. Put the MAF in place in the RRM SRI and gently tighten the supplied bolts using a 3mm Allen wrench.
9. Install the SRI onto the rubber hose, use the 10mm to tighten the hose clamp.

10. Now, using the hole leftover from the stock airbox,

bolt down the arm of the RRM SRI (using the included bolt and washer) with a 10mm.

11. Last step - grab the included filter and hose clamp, (cool friend not included) and tighten with either a wrench or a Flathead screwdriver.

You're done.

12. OK, I lied. Put the battery cable back on now.
13. Now, start the car and let it idle for about 15 minutes so it can learn the new amounts of air coming in. Then go for a drive and enjoy.
10mm tool - I mostly used a rachet/socket with an extension to reach.
Phillips screwdriver
Flathead screwdriver
T15 wrench
3mm Allen wrench
1. Remove a battery cable; I prefer the negative terminal (shown) because it's easier to get to. This keeps you safe from electricity and makes the car relearn the A/F faster. Use a 10mm socket or wrench for this.
2. Remove the two fasteners holding down the ram scoop with a Phillips screwdriver. Just pull it off the airbox.
3. Pull the wiring harness off the MAF sensor (just push down on the tab and gently pull). Now is also a good time to grab a pair of pliers and remove the wiring from the airbox (sorry, forgot to get a picture of that, but it's right on the front of the airbox).
4. Using a T15 wrench, remove the two bolts holding the MAF onto the airbox. Save them, because the RRM kit has it's own bolts. Simply pull the MAF up and out, GENTLY.
5. Next, remove the 10mm bolt holding the front of the airbox down.
6. Now use the 10mm wrench/socket to loosen the hose clamp holding the rubber tube to the airbox.
7. Pull the rubber hose off the airbox. Now just gently pull the whole box up and out. You're left with this.
(The back of the airbox is just sitting on a plastic grommet. If your monitor has the right brightness, you can see it in the below picture...)
8. Put the MAF in place in the RRM SRI and gently tighten the supplied bolts using a 3mm Allen wrench.
9. Install the SRI onto the rubber hose, use the 10mm to tighten the hose clamp.
10. Now, using the hole leftover from the stock airbox,
bolt down the arm of the RRM SRI (using the included bolt and washer) with a 10mm.
11. Last step - grab the included filter and hose clamp, (cool friend not included) and tighten with either a wrench or a Flathead screwdriver.
You're done.
12. OK, I lied. Put the battery cable back on now.
13. Now, start the car and let it idle for about 15 minutes so it can learn the new amounts of air coming in. Then go for a drive and enjoy.
Last edited by Blacksheepdj; Nov 8, 2007 at 10:19 AM. Reason: Fixed bad info
 It was red. UL colors are red and white/black. Great post either way, though!
Trending Topics

Thread Starter
EvoM Staff Alumni
iTrader: (88)
Joined: Aug 2003
Posts: 8,733
Likes: 3
From: Concord Township, Ohio
It IS stickied in the main How-To forum. This is just the thread for discussion in case someone has a comment or question.
Thanks for all the compliments. I wish I'd gotten more and better pictures but I kept forgetting because I was busy installing. Should've made Kevin hold the camera...
Thanks for all the compliments. I wish I'd gotten more and better pictures but I kept forgetting because I was busy installing.
Should've made Kevin hold the camera...
Evolved Member
iTrader: (16)
Joined: Oct 2007
Posts: 1,710
Likes: 0
From: Daytona Beach/Melbourne, Florida
is there anywhere where i can get that SRI module ONLY, so i can put a K&N intake on? No offense, to RRM, because thats the system i really want, but its out of my price range. if you can, e-mail to me...yitzac1990@yahoo.com
