
Wicked Awesome Splitter Action

Thread Starter
Evolved Member
iTrader: (62)
Joined: Feb 2004
Posts: 3,336
Likes: 6
From: Redmond - Lake Tapps ,WA
Wicked Awesome Splitter Action
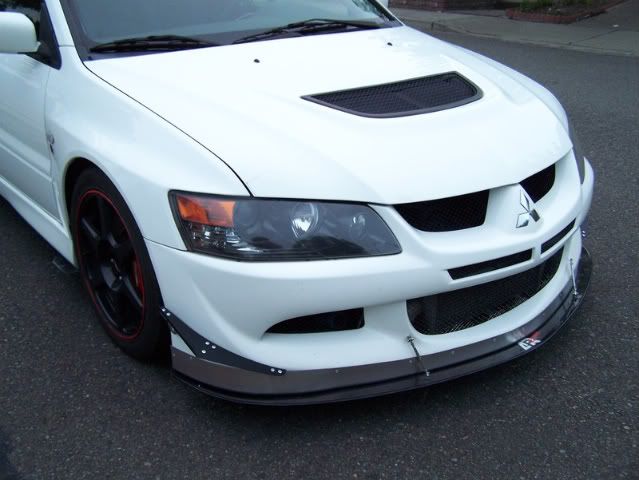
So I've been screwing with aero parts on and off for the past year, slowly adding and improving things. I got an APR splitter last year and only had time to mount it in the stock, lame APR fashion - to the bumper. The angle of attack was +4 degrees and it really didn't stick out that far. Here's a picture of what it looked like when I first mounted it with my original air dam.
I'm planning on building myself a GT wing, and thus I need to be able to balance it out in the front with a legit splitter. So over the past 3 weeks I've been reworking the APR.
This is now the splitter that I've wanted to build for years now. It mounts to ONLY the chassis. It's adjustable while mounted. You can stand on it. It sticks out so far, and is low enough that you better not drive on the street with it. It mounts at the track in 10 mins.
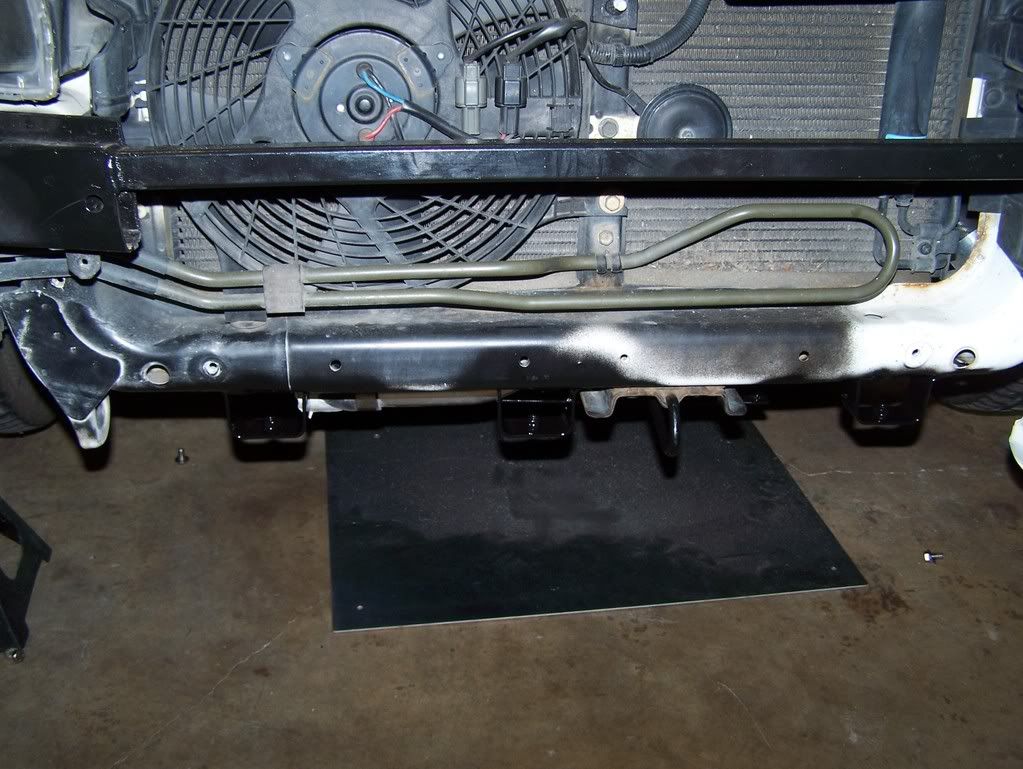
Chassis mounts at the radiator support.
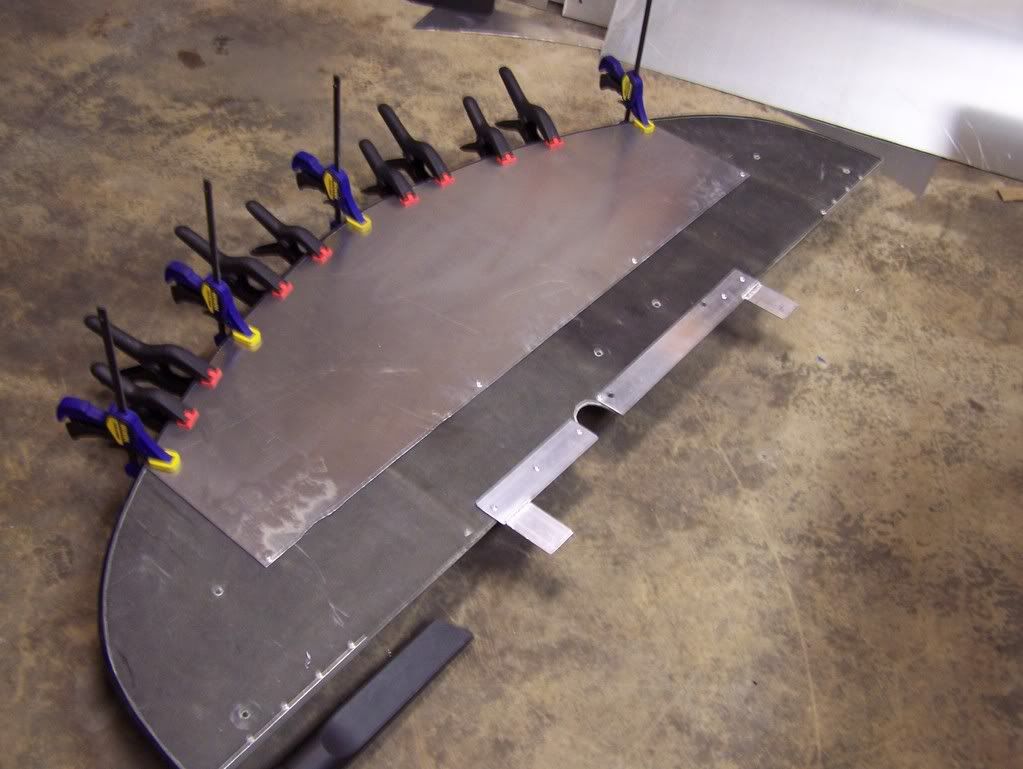
Aluminum reinforcement bonded with aerospace grade 3M DP 460 epoxy.
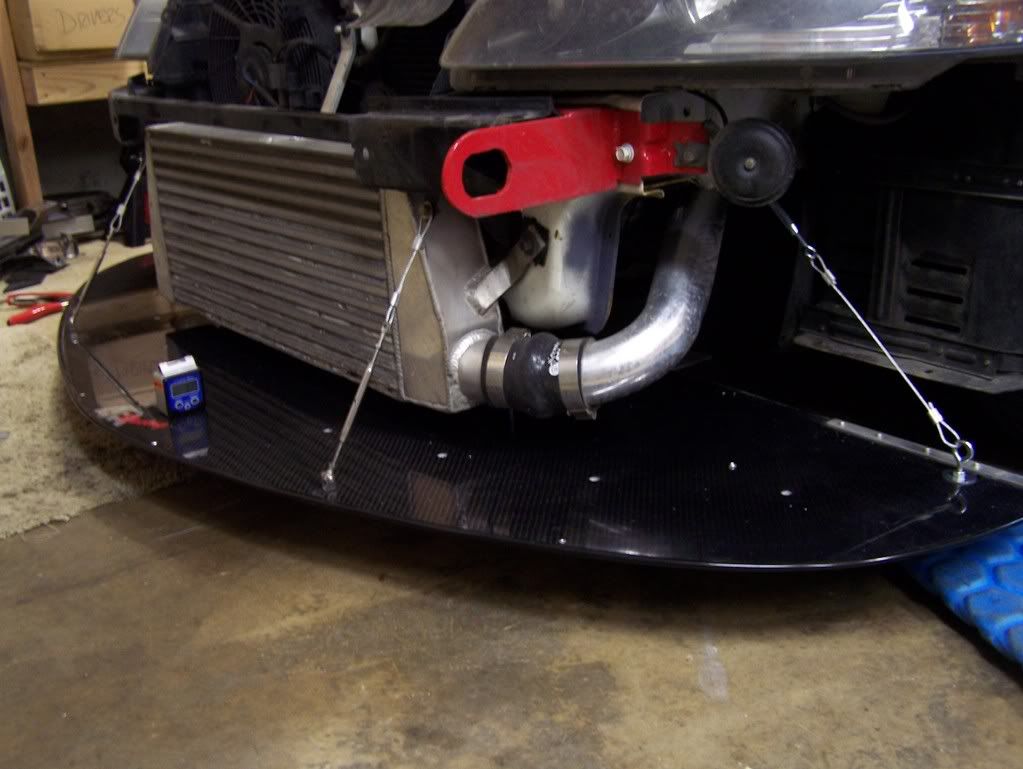
Hanging from 4 cables, and 5 bolts to the chassis. It's setup to adjust between -2 degrees and zero. A change in spacer blocks can make it go from -4 to -2 degrees as well. But that gets it pretty low at the tip. I'm going to start at the -2 to zero range.
Modified my air dam to be a two piece sliding joint, change the angle of attack and the air dam self adjusts - no taping or adjusting flashing.

Completed splitter off the car. The wood blocks are used as spacers to set the basic angle of attack with respect to the chassis.

I'm planning on building myself a GT wing, and thus I need to be able to balance it out in the front with a legit splitter. So over the past 3 weeks I've been reworking the APR.
This is now the splitter that I've wanted to build for years now. It mounts to ONLY the chassis. It's adjustable while mounted. You can stand on it. It sticks out so far, and is low enough that you better not drive on the street with it. It mounts at the track in 10 mins.
Chassis mounts at the radiator support.
Aluminum reinforcement bonded with aerospace grade 3M DP 460 epoxy.
Hanging from 4 cables, and 5 bolts to the chassis. It's setup to adjust between -2 degrees and zero. A change in spacer blocks can make it go from -4 to -2 degrees as well. But that gets it pretty low at the tip. I'm going to start at the -2 to zero range.
Modified my air dam to be a two piece sliding joint, change the angle of attack and the air dam self adjusts - no taping or adjusting flashing.
Completed splitter off the car. The wood blocks are used as spacers to set the basic angle of attack with respect to the chassis.
Last edited by jid2; Mar 1, 2009 at 12:27 AM.


Very nice mounting setup. It would be interesting to see how a flat splitter/undertray combo would compare with the Voltex 3-D undertay (no splitter element). I wonder what would make more downforce - the high pressure zone on top of the splitter element (like your setup) or the low pressure zone on the bottom side of a 3-D Voltex or DHP-style undertray. I also wonder which one would have a greater impact on drag. . .
That is a very nice rework of a one nearly useless APR splitter! I need to get some time to do this as well, now that we have a new road course around.
Evolutionary:
A splitter+ flat bottom will make more downforce than just an undertray. quite a bit actually. Not only do you have forces pressing down on the front of the splitter, but it keeps even more air from entering underneath the car, lowering pressure even more, creating more downforce.
Evolutionary:
A splitter+ flat bottom will make more downforce than just an undertray. quite a bit actually. Not only do you have forces pressing down on the front of the splitter, but it keeps even more air from entering underneath the car, lowering pressure even more, creating more downforce.

Trending Topics

Thread Starter
Evolved Member
iTrader: (62)
Joined: Feb 2004
Posts: 3,336
Likes: 6
From: Redmond - Lake Tapps ,WA
Once that's finished I'll move on to a rear diffuser, and then the GT wing.