
Wicked Awesome Splitter Action


Newbie
Joined: Jan 2015
Posts: 11
Likes: 0
From: El paso
Parts
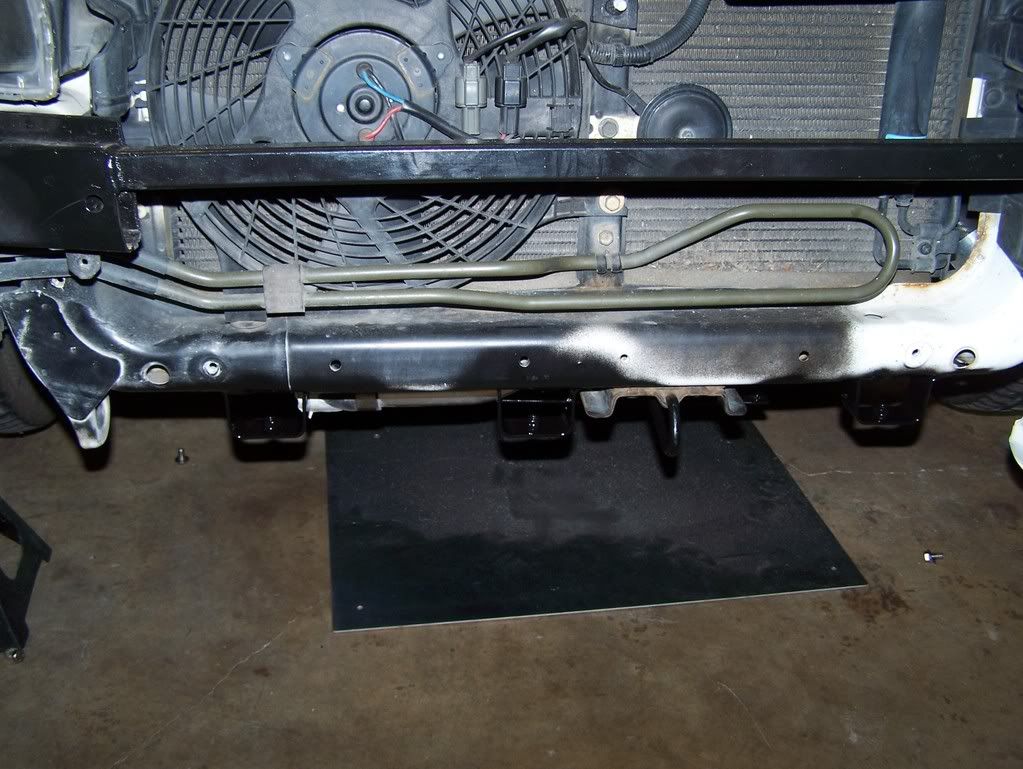
So I've been screwing with aero parts on and off for the past year, slowly adding and improving things. I got an APR splitter last year and only had time to mount it in the stock, lame APR fashion - to the bumper. The angle of attack was +4 degrees and it really didn't stick out that far. Here's a picture of what it looked like when I first mounted it with my original air dam.

I'm planning on building myself a GT wing, and thus I need to be able to balance it out in the front with a legit splitter. So over the past 3 weeks I've been reworking the APR.
This is now the splitter that I've wanted to build for years now. It mounts to ONLY the chassis. It's adjustable while mounted. You can stand on it. It sticks out so far, and is low enough that you better not drive on the street with it. It mounts at the track in 10 mins.
Chassis mounts at the radiator support.
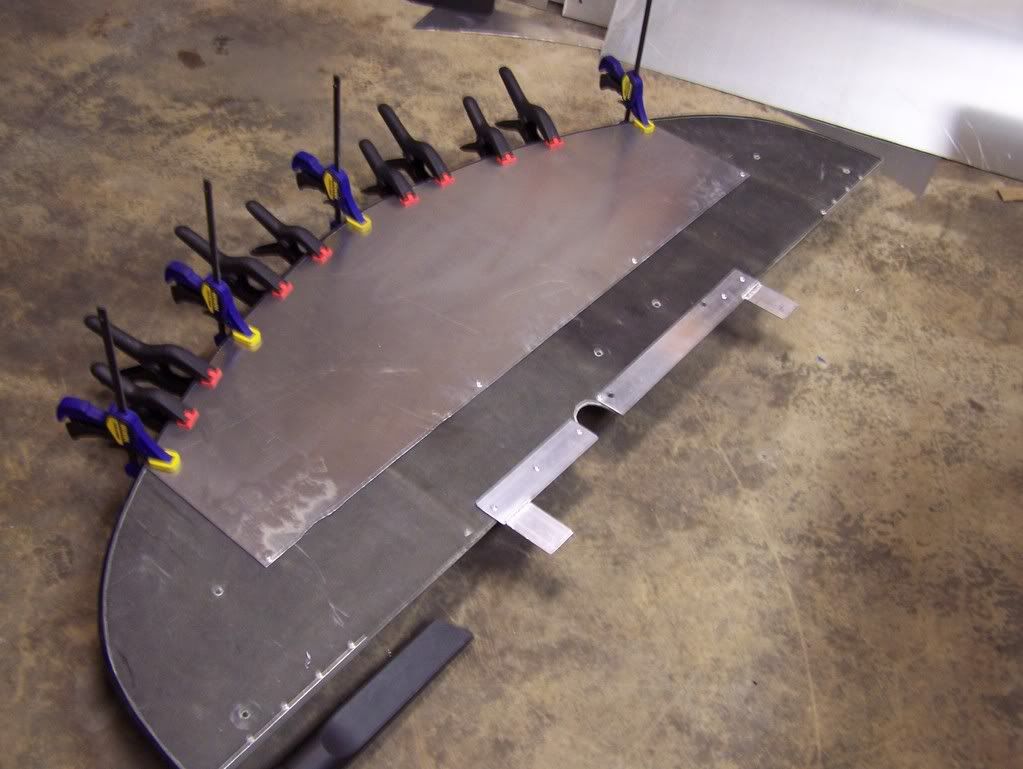
Aluminum reinforcement bonded with aerospace grade 3M DP 460 epoxy.
Hanging from 4 cables, and 5 bolts to the chassis. It's setup to adjust between -2 degrees and zero. A change in spacer blocks can make it go from -4 to -2 degrees as well. But that gets it pretty low at the tip. I'm going to start at the -2 to zero range.
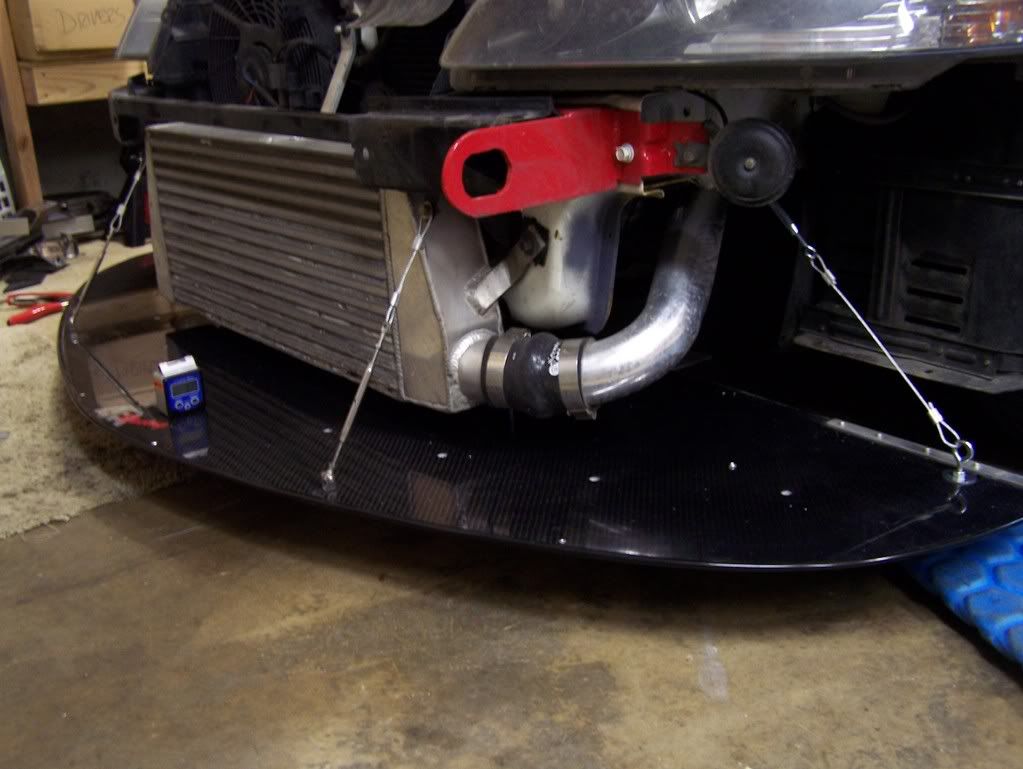
Modified my air dam to be a two piece sliding joint, change the angle of attack and the air dam self adjusts - no taping or adjusting flashing.

Completed splitter off the car. The wood blocks are used as spacers to set the basic angle of attack with respect to the chassis.

I'm planning on building myself a GT wing, and thus I need to be able to balance it out in the front with a legit splitter. So over the past 3 weeks I've been reworking the APR.
This is now the splitter that I've wanted to build for years now. It mounts to ONLY the chassis. It's adjustable while mounted. You can stand on it. It sticks out so far, and is low enough that you better not drive on the street with it. It mounts at the track in 10 mins.
Chassis mounts at the radiator support.
Aluminum reinforcement bonded with aerospace grade 3M DP 460 epoxy.
Hanging from 4 cables, and 5 bolts to the chassis. It's setup to adjust between -2 degrees and zero. A change in spacer blocks can make it go from -4 to -2 degrees as well. But that gets it pretty low at the tip. I'm going to start at the -2 to zero range.
Modified my air dam to be a two piece sliding joint, change the angle of attack and the air dam self adjusts - no taping or adjusting flashing.
Completed splitter off the car. The wood blocks are used as spacers to set the basic angle of attack with respect to the chassis.

Thread
Thread Starter
Forum
Replies
Last Post