
EVOlutionary's DIY Lexan Window Kit

EVOlutionary's DIY Lexan Window Kit
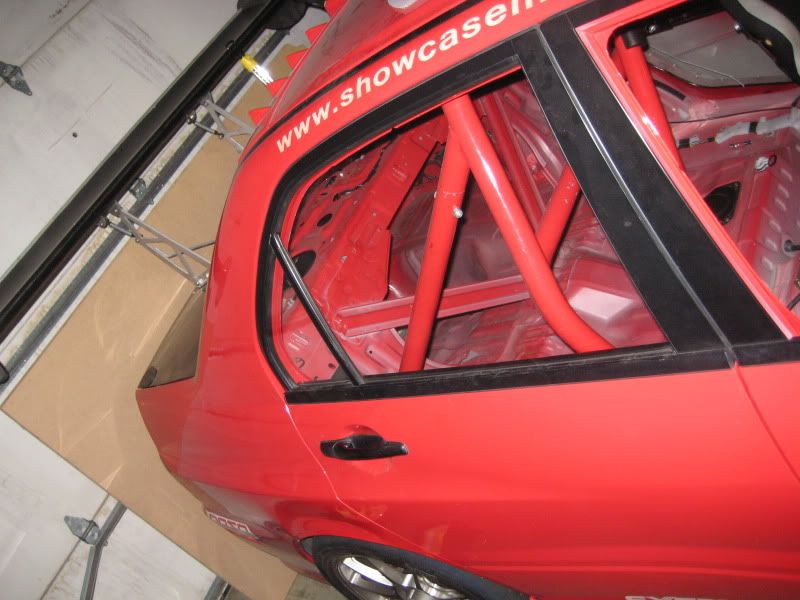
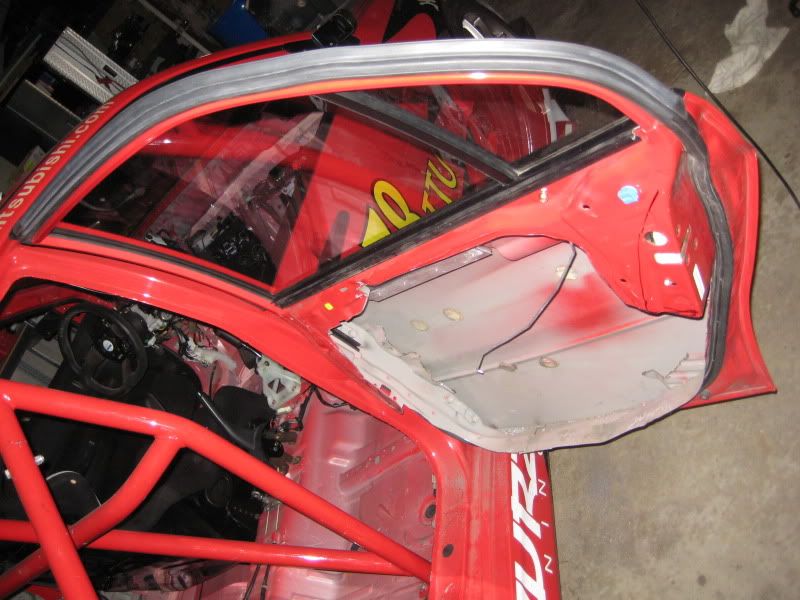
In my neverending quest to add lightness to my EVO I finally decided to tackle the doors and windows. Over the winter I gutted/chopped the rear doors and the front passenger side door. I'm leaving the driver side door stock until I have a full cage built next winter.
After chopping the doors there was no provision to hold the stock glass in place, so I set about making some polycarbonate (also called Lexan) windows that are quickly removeable. The rears will stay in most of the time, but the front I want to be able to remove quickly at the track, or put them in quickly if it starts to rain.
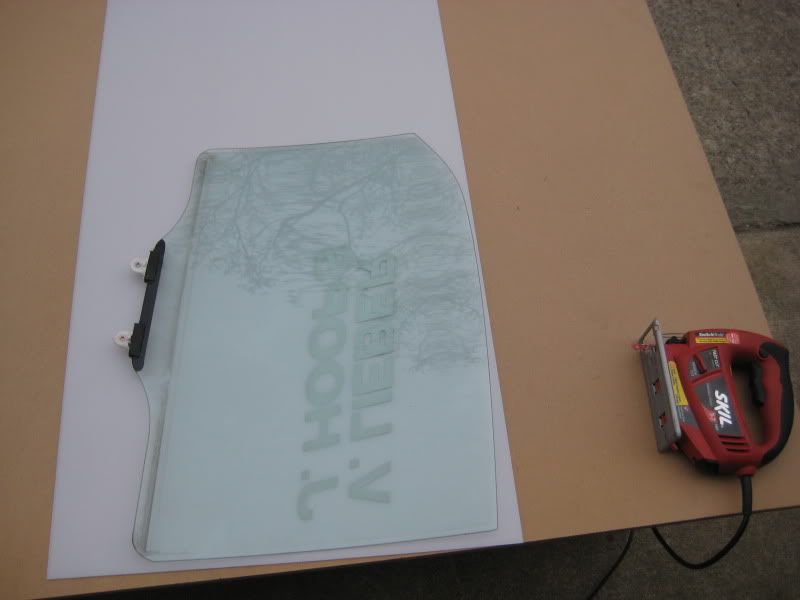
Tracing out the shape of the OEM glass onto the polycarbonate. The PC comes with a protective sheet on both sides to keep it from getting scratched up. . .
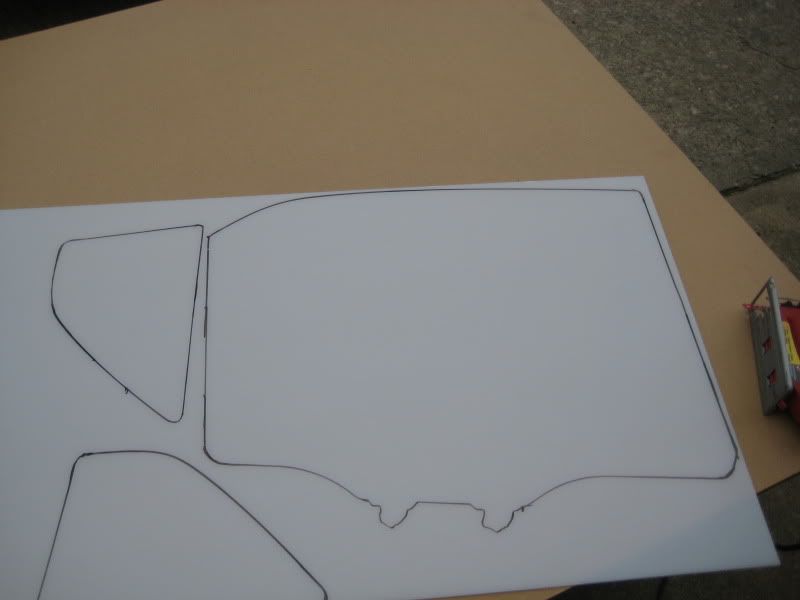
Rear window and quarter glass traced out and ready to cut . . .
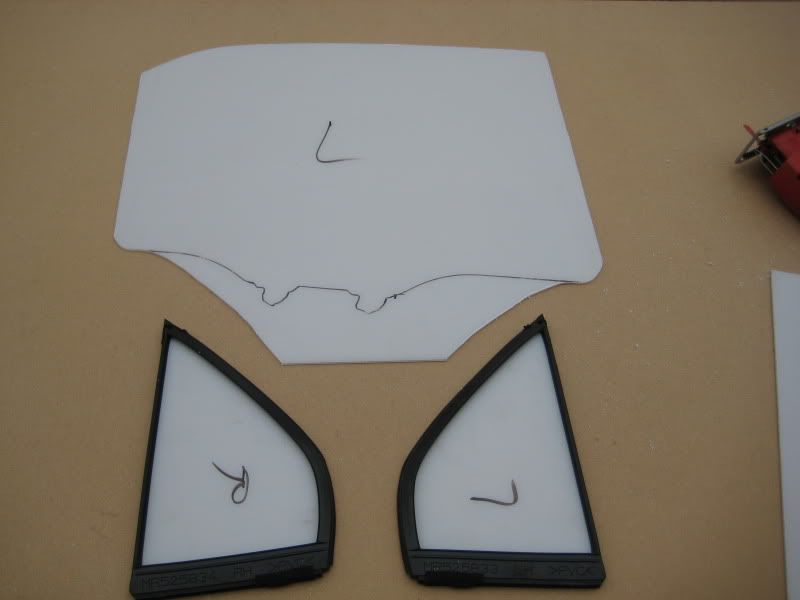
Cutting done. I left extra material at the bottom. Will trim it after final test fit. I used a jigsaw with a fine-tooth HSS blade. . .
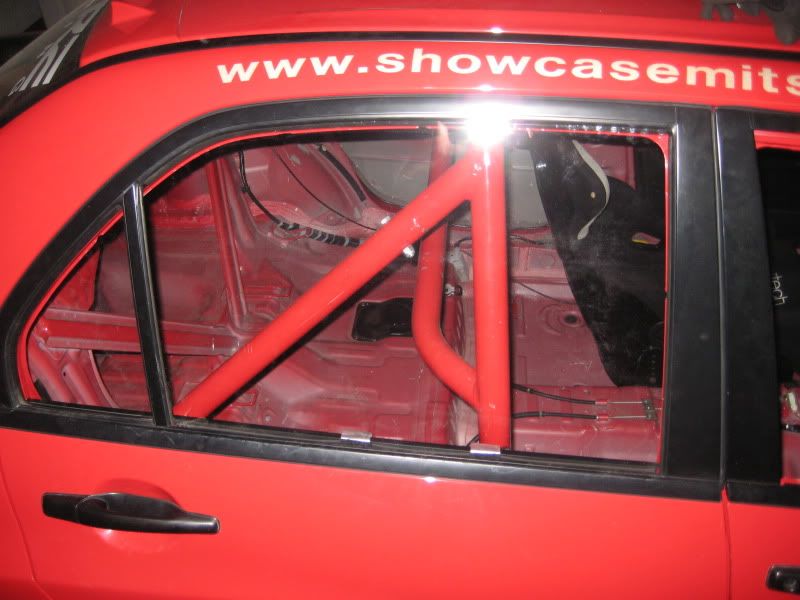
Quarter-glass installed. . .
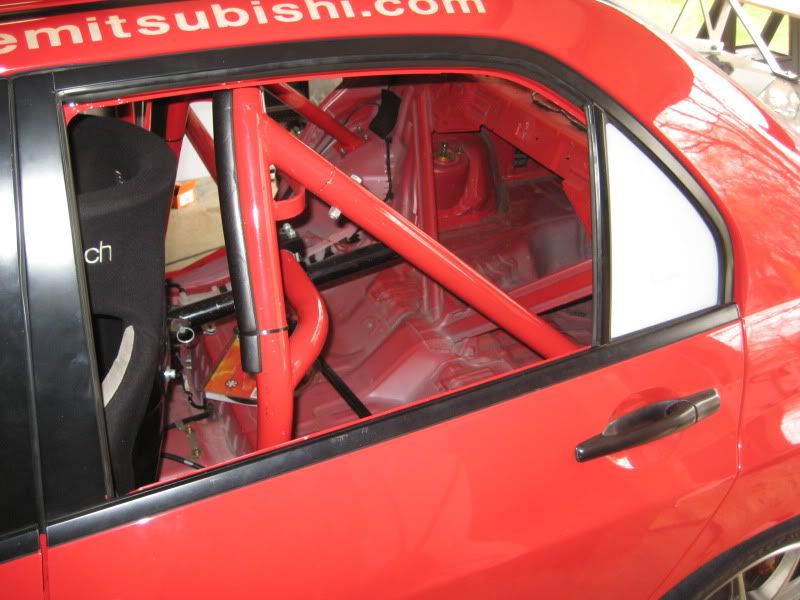

Main windows installed. They slide in from the bottom. . .
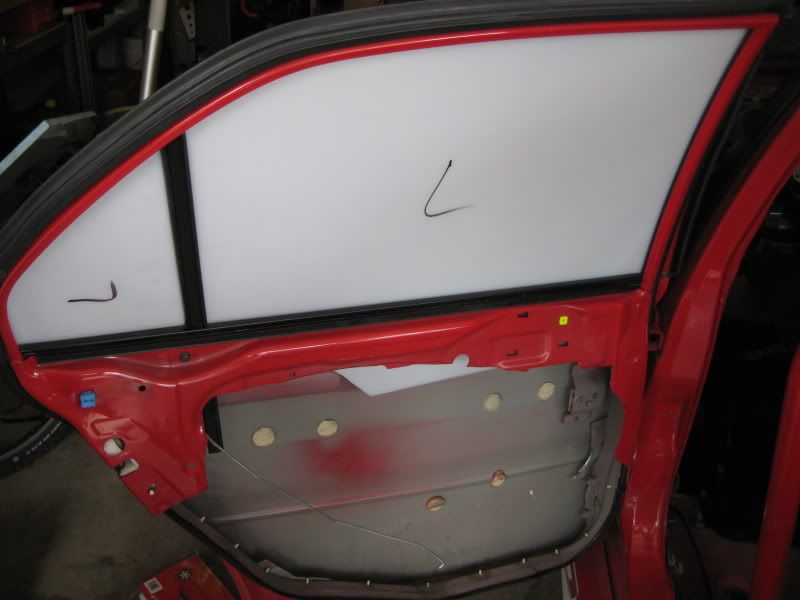
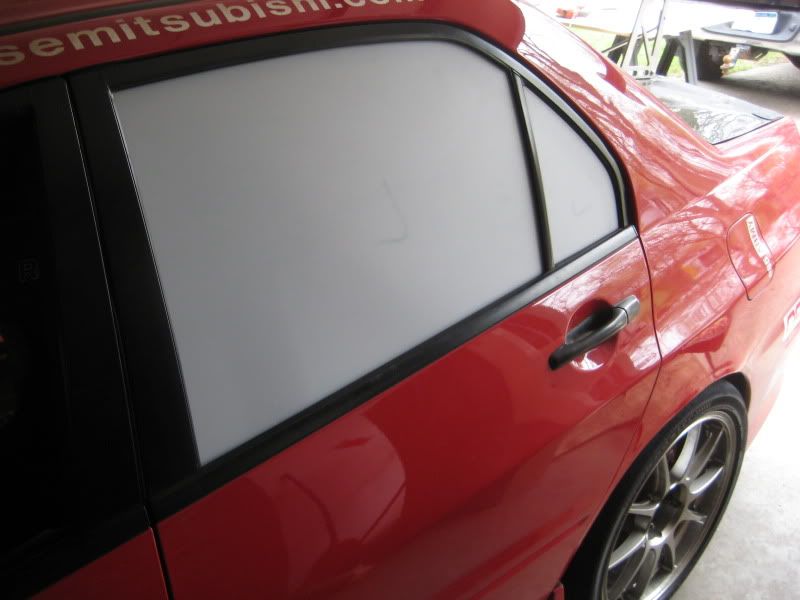
Film removed. . .
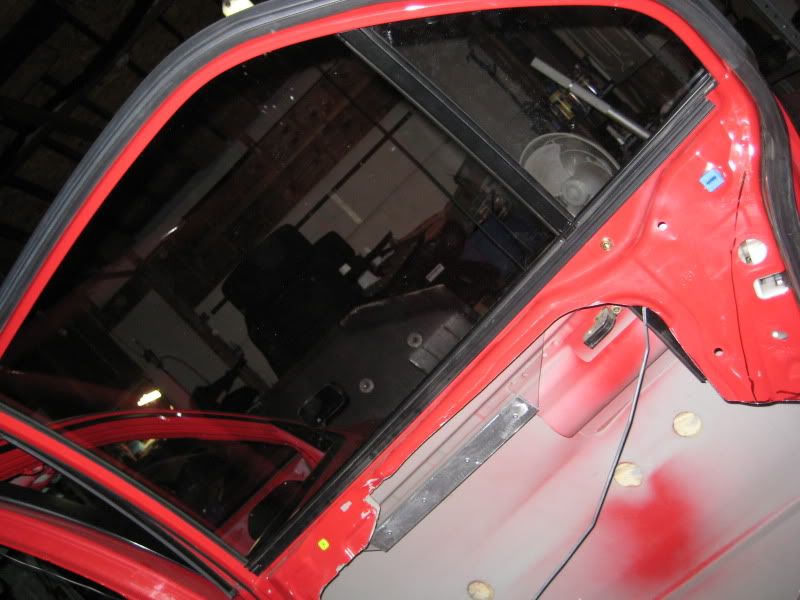
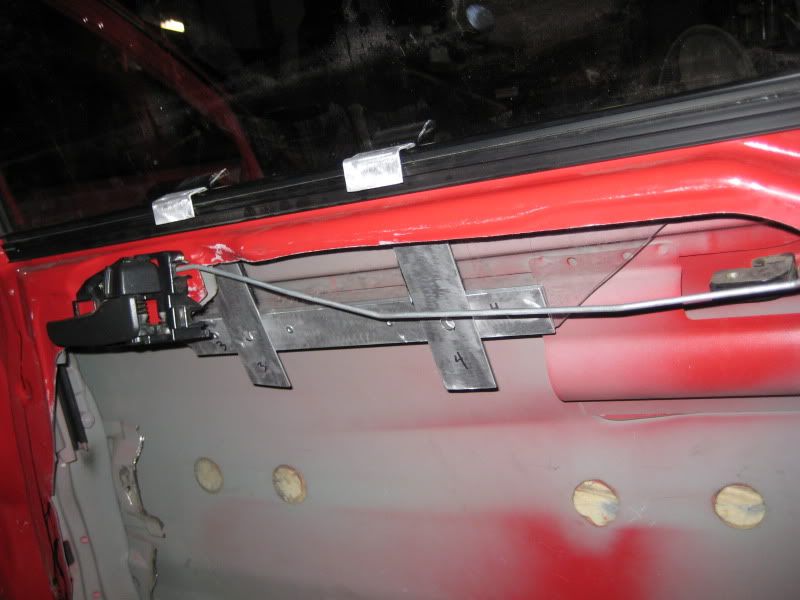
Here are the brackets I fabbed that will hold the window up and in place. Two per side . . .
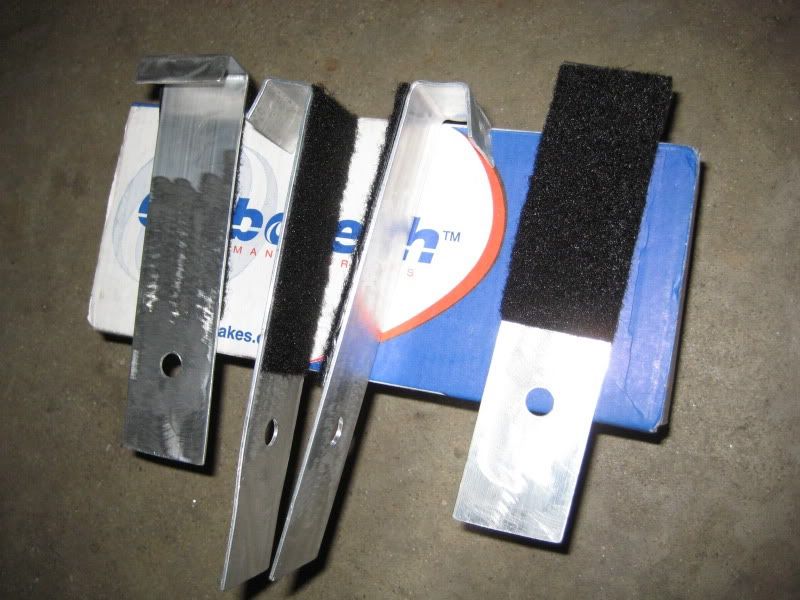
The brackets slide down from the top and attach to the window at the bottom with a clevis pin (pins not shown) . . .
Total cost for this was less than half of what some shops charge for ONE window. I'm sure my kit is not as nice as the higher end kits. We'll see how long it lasts before it gets scratched up too bad for my liking and I have to replace it. I have more polycarbonate sheet on the way so I can do the front windows. Later this season I think I will also do the rear window, then the front windshield next year after I have a cage installed.
EVOlutionary
After chopping the doors there was no provision to hold the stock glass in place, so I set about making some polycarbonate (also called Lexan) windows that are quickly removeable. The rears will stay in most of the time, but the front I want to be able to remove quickly at the track, or put them in quickly if it starts to rain.
Tracing out the shape of the OEM glass onto the polycarbonate. The PC comes with a protective sheet on both sides to keep it from getting scratched up. . .
Rear window and quarter glass traced out and ready to cut . . .
Cutting done. I left extra material at the bottom. Will trim it after final test fit. I used a jigsaw with a fine-tooth HSS blade. . .
Quarter-glass installed. . .
Main windows installed. They slide in from the bottom. . .
Film removed. . .
Here are the brackets I fabbed that will hold the window up and in place. Two per side . . .
The brackets slide down from the top and attach to the window at the bottom with a clevis pin (pins not shown) . . .
Total cost for this was less than half of what some shops charge for ONE window. I'm sure my kit is not as nice as the higher end kits. We'll see how long it lasts before it gets scratched up too bad for my liking and I have to replace it. I have more polycarbonate sheet on the way so I can do the front windows. Later this season I think I will also do the rear window, then the front windshield next year after I have a cage installed.
EVOlutionary

Polycarbonate is about 1/2 the weight of glass. I'm going to pull a door this weekend to weigh the whole thing to see just how much I saved total over a stock door/crank/glass/trim combo. . .
I'd also like to know the difference in weight of just the glass. I currently have some cheap plexi-glass windows for my fronts which come out at the track. But I'm still running the stock rear glass. Wondering how much it will save me.

Trending Topics
If it's worth it (and I'm sure it is) - I might commission you to do the same for me later this summer!
Next time I take the window out I'll weigh them. If someone wants a similar setup it would be pretty easy to make them bolt into the stock window crank mechanism so you can roll them up and down.
I would like to have them mount with Dzus fasteners or something similar . . . maybe if I do a V2.0
I would like to have them mount with Dzus fasteners or something similar . . . maybe if I do a V2.0
Can't remember where I pulled these numbers from, but it may have been from the weight reduction thread or off the AMS website:
Part---------------OEM----Lexan
Front Door-------10.4----6.0
Rear Door--------12.4----5.0
Rear Wnidow----13.2----6.0
Windshield-------24.6----14.0
Keep in mind also that the Evo uses thinner glass than most cars, so the weight reduction we see isn't as substantial as you might expect. Also pay particular attention to the groups you'll be racing with, as some specify the minimum thickness.
I've run lexan on rally cars in the past, and its cleaning the windows that seems to do the most damage to them. If you can, hit the windows with compressed air first to get most of the dust off, then use plenty of water to clean further.
I made my own windows last summer before Pikes Peak but never got around to installing them. I opted for tinted lexan so the windows will be pre-tinted. Was only 10% more expensive than the clear stuff and saves me $200 on another tint job that'd get ruined in short order.
One last note - lexan will grow and contract based on temperatures, so you may find when you leave it in the sun that it'll start to bow out in some places. Not much of a deal with the door windows, but keep that in mind when you're planning on how to attach the rear window.
Dave


Cool, nice job  . Most of the Porsche racers I know are actually going back to glass windshields becuase of the PITA lexan is to keep clean and unscratched, even the expensive "anti scratch" stuff. Something to keep in mind.
. Most of the Porsche racers I know are actually going back to glass windshields becuase of the PITA lexan is to keep clean and unscratched, even the expensive "anti scratch" stuff. Something to keep in mind.
Just an idea for the fronts, I think it was 1968 Hemi Dart Super Sport (or something like that) used this method for manual windows.
Leave the window tracks in and then use a piece of seat belt material, connecting from the outer skin/window rail, wrap under the window, then back up out of the interior window rail. Use two or three snaps on the belt and one on the interior door panel. This will allow the window to be fully up, fully down and some where in the middle if you like.
Light, simple, and still lets the windows go up and down.
Rear driver side door weighs in now at 30# exactly. I can still take a few pounds of metal off it, so maybe I can get it down to 25#.
I think next year I'm going to have solid carbon door skins made up for the rear doors (no glass) and mount them with Dzus fasteners. 5# sounds a lot better than 25#
I think next year I'm going to have solid carbon door skins made up for the rear doors (no glass) and mount them with Dzus fasteners. 5# sounds a lot better than 25#