
Antilag_200 attempts a Wire Tucking Project

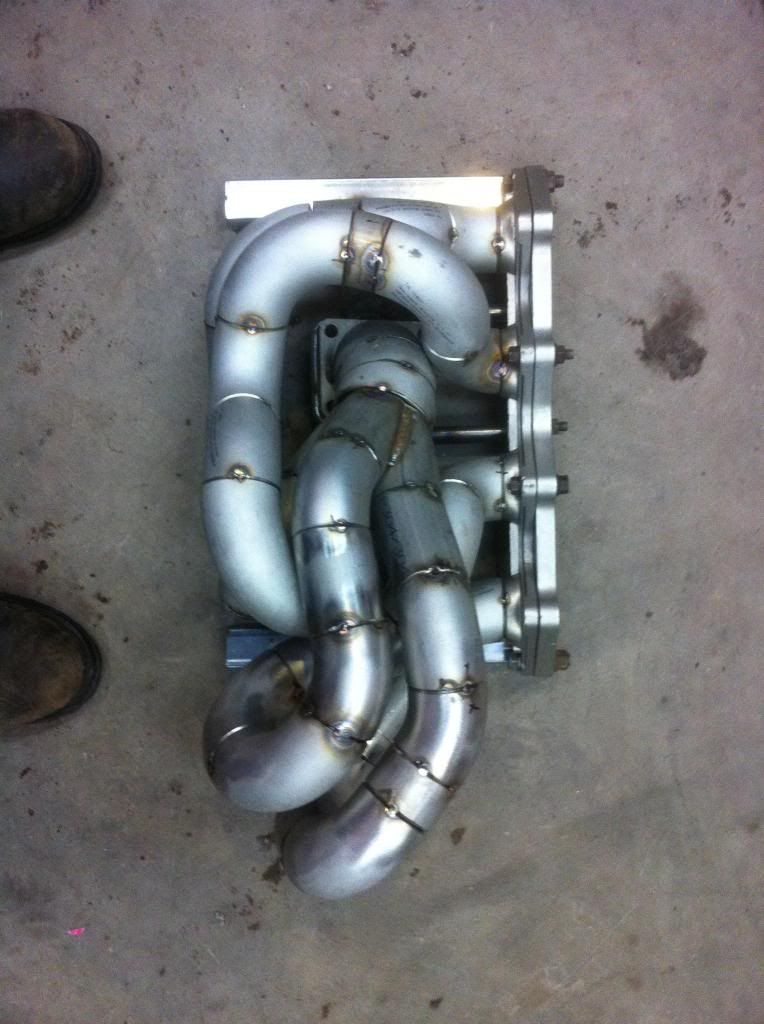
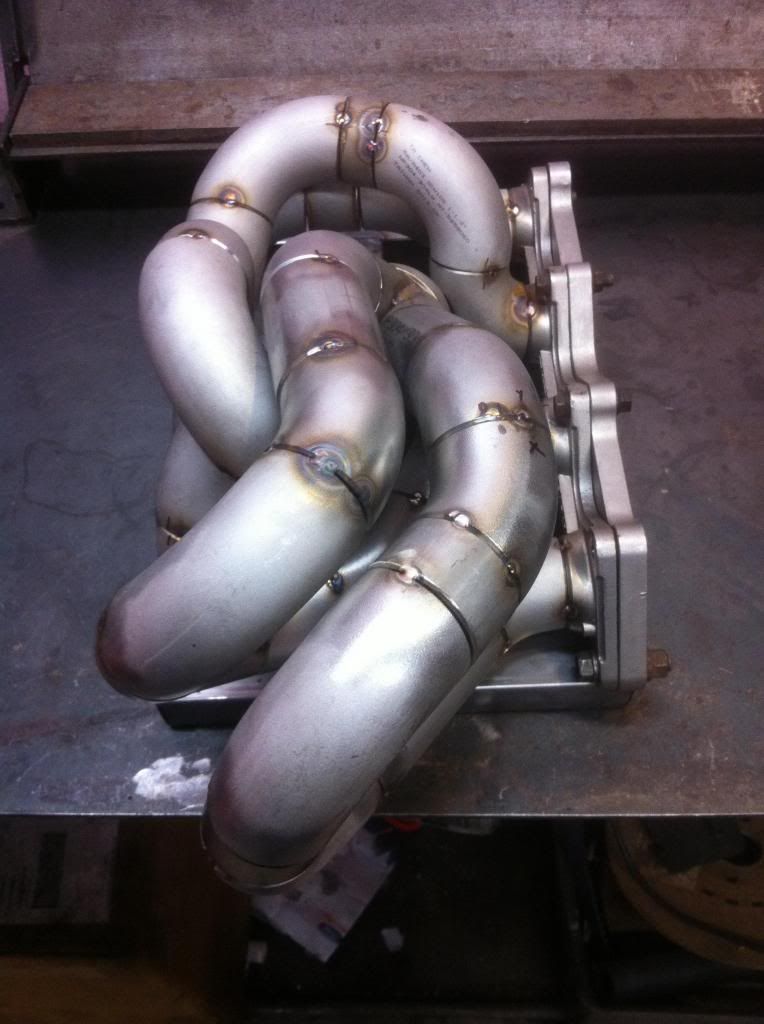
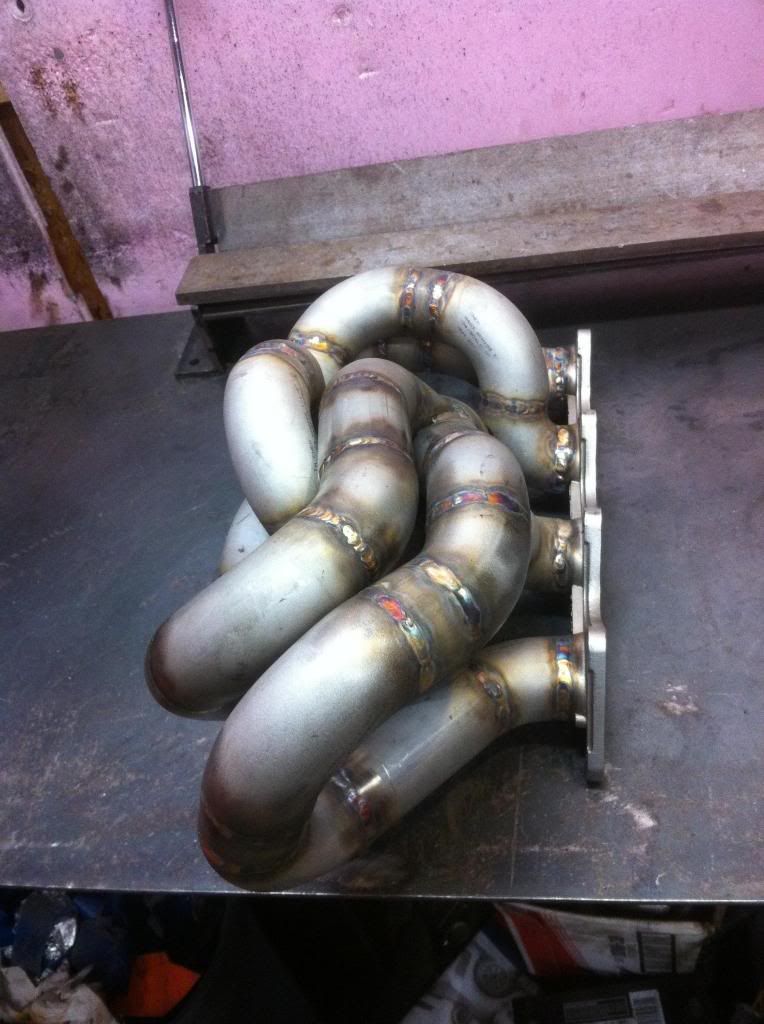
No updates on my evo, still waiting on the machine shop, however I have been having an absolute blast building my header for the colt. Some of you have expressed interested in seeing it complete, so here you go all tacked up and getting ready for dismantiling so I can weld it. I think it looks radical for my first header
TOP VIEW
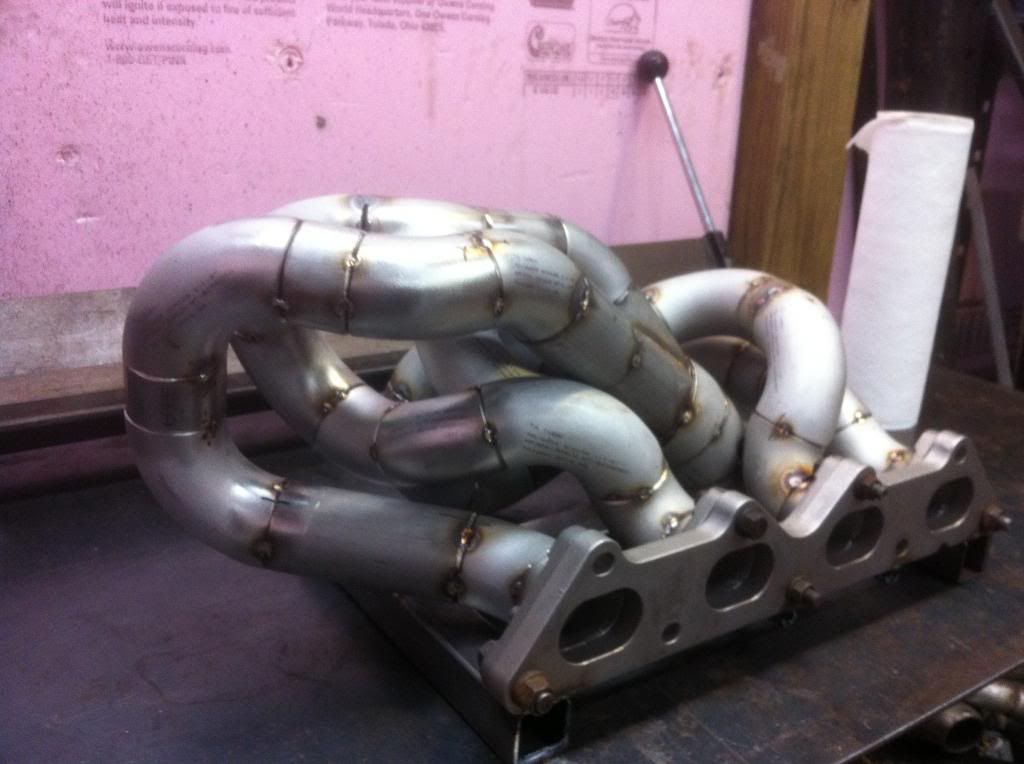
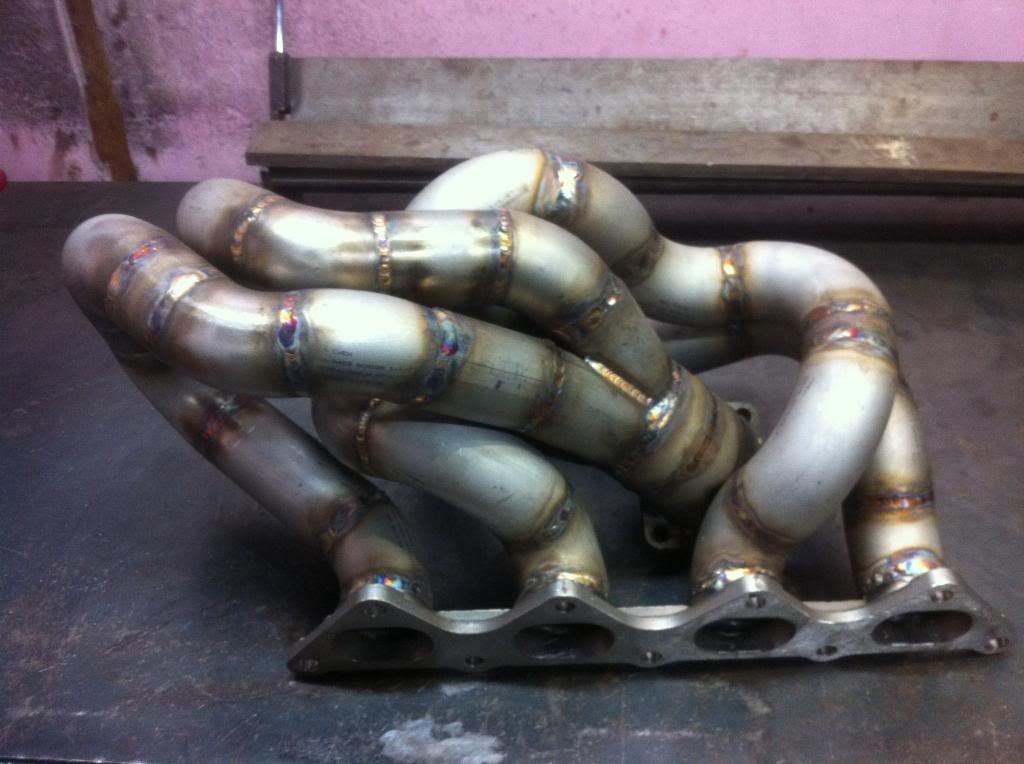
Front view ( if you were standing infront of car)
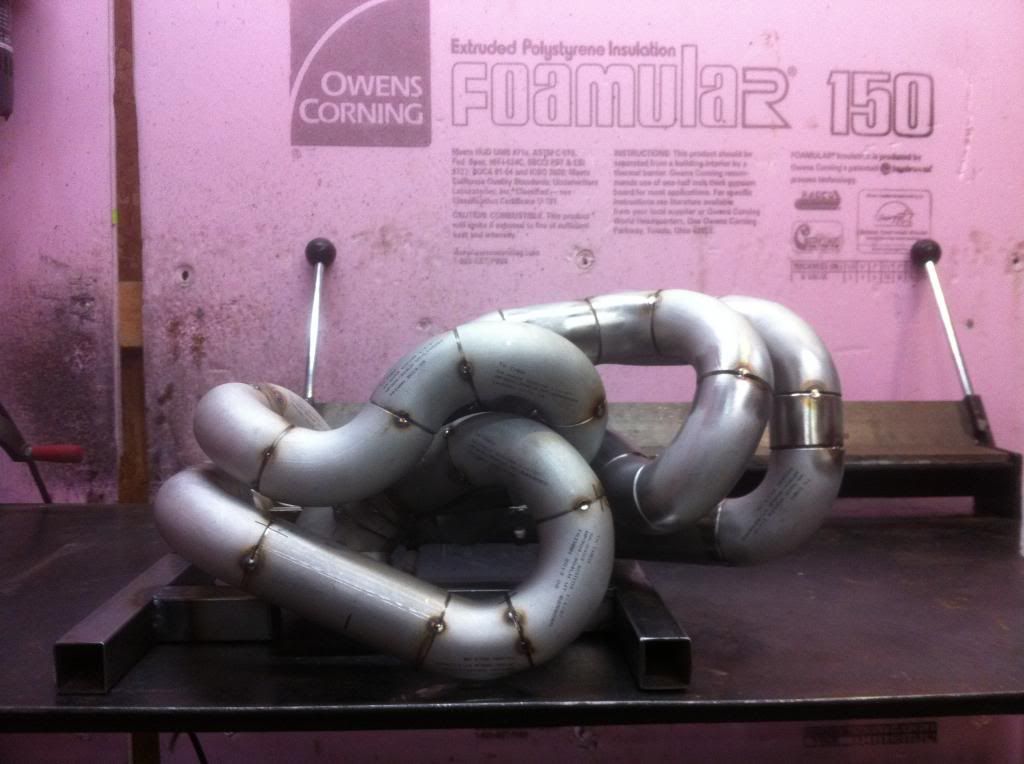
Side View ( from timing belt side)
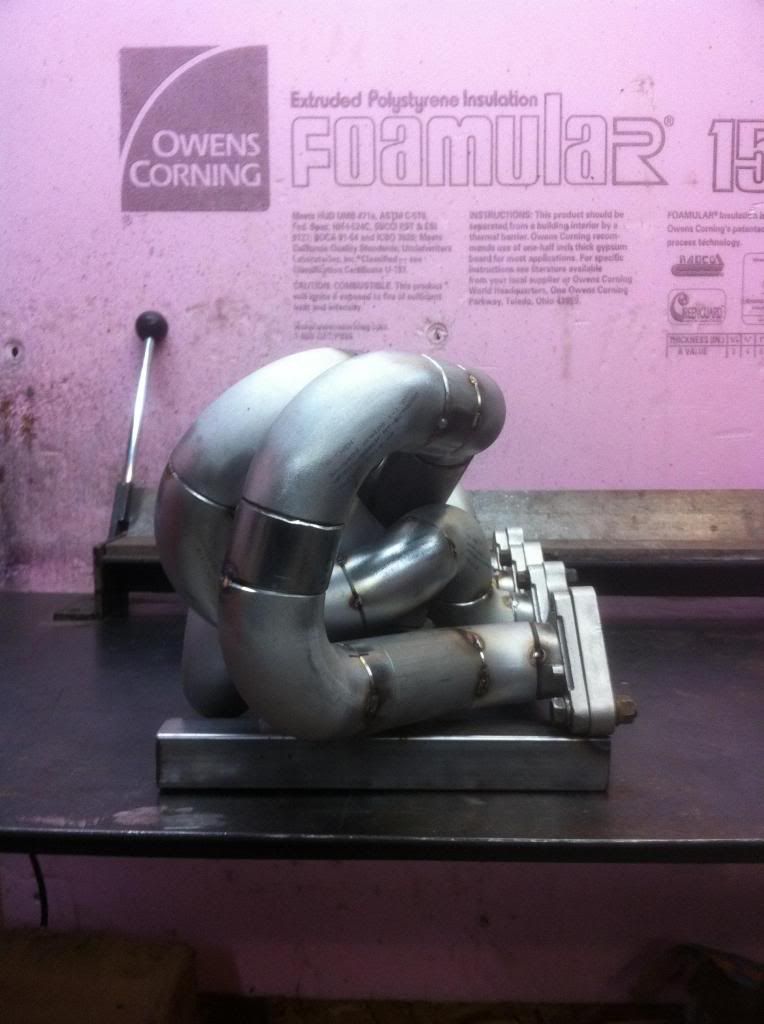
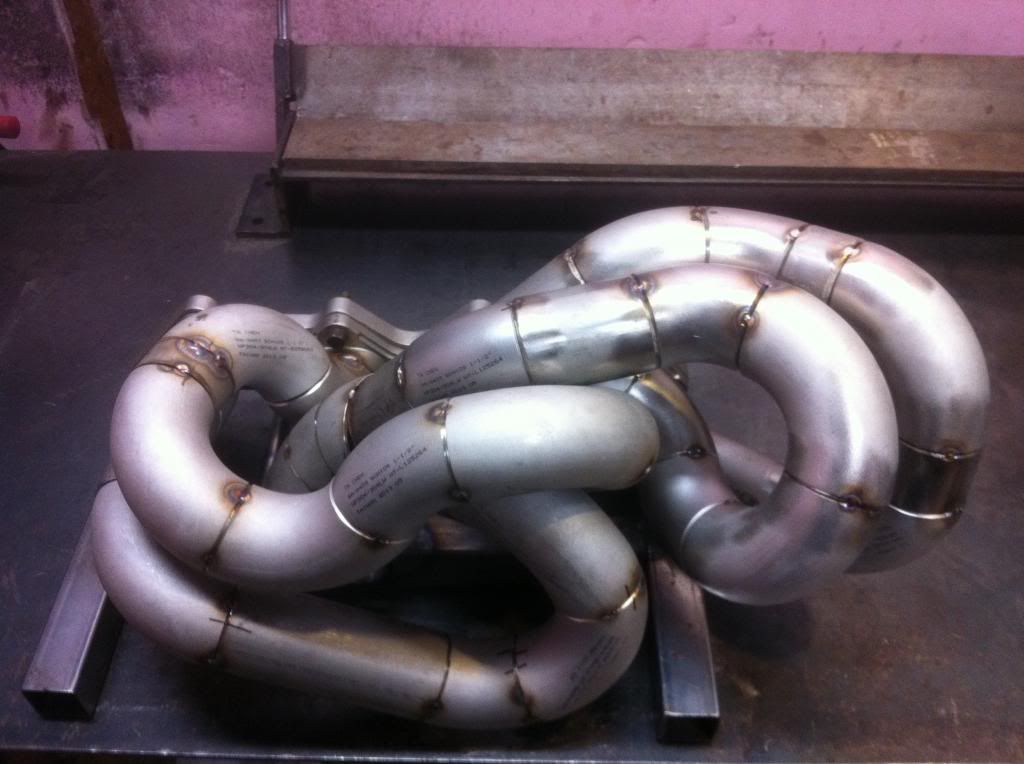
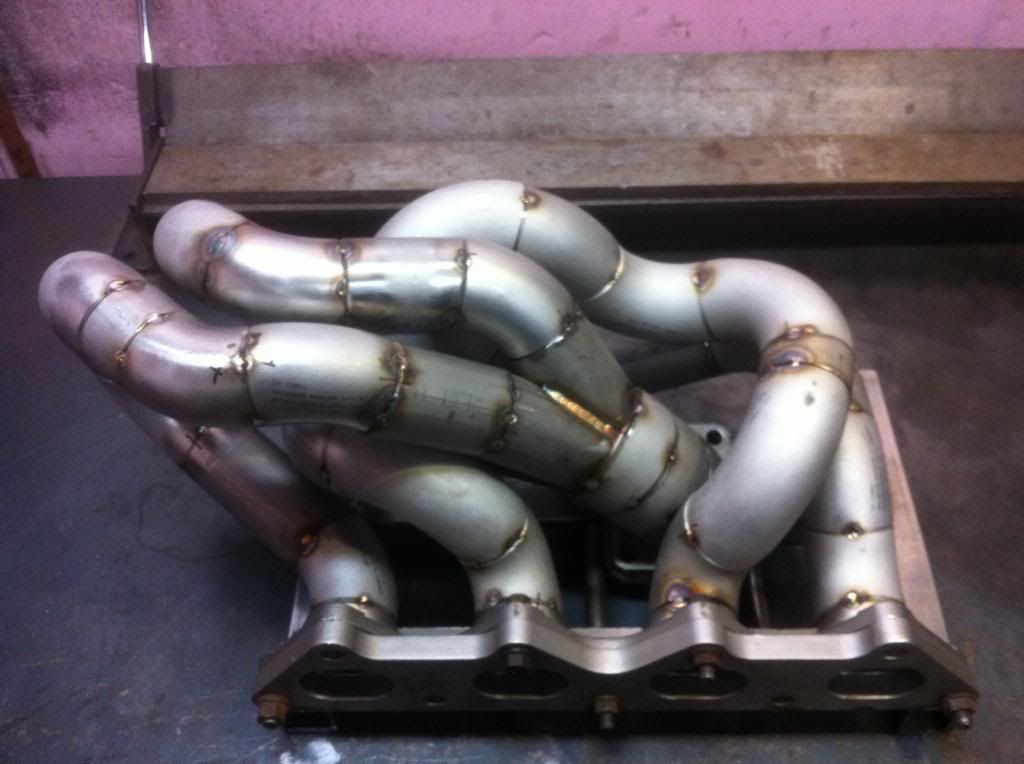
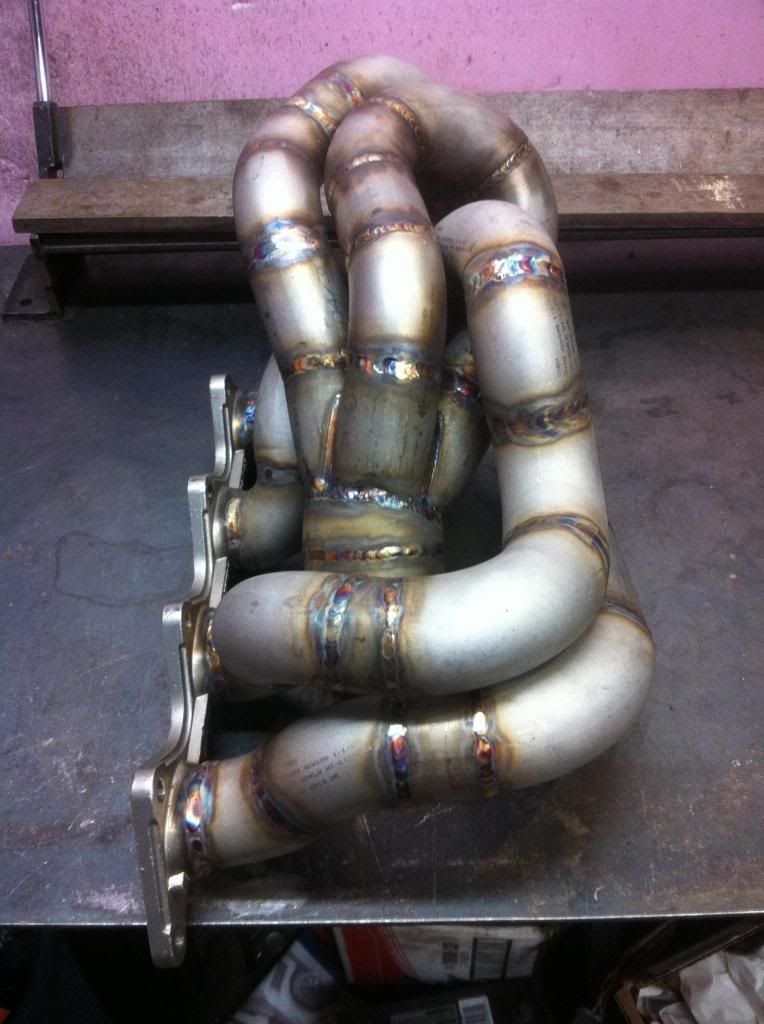
Side View ( 45 degree top view from timing belt side)
rear view 45 degree from timing belt side
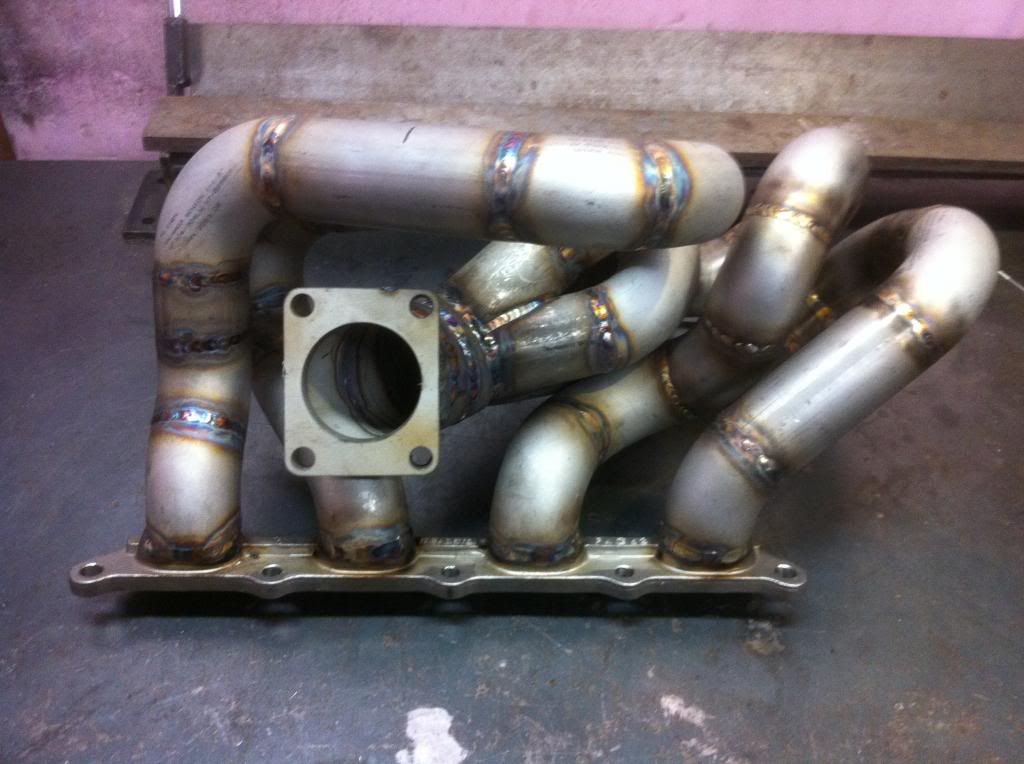
full rear view ( from behind engine)
One day I will build a cool header for the evo.
TOP VIEW

Front view ( if you were standing infront of car)


Side View ( from timing belt side)

Side View ( 45 degree top view from timing belt side)

rear view 45 degree from timing belt side

full rear view ( from behind engine)

One day I will build a cool header for the evo.
Pretty epic read and build. I just finished a shaved bay on my evo and was going to do a wire tuck upon install. I spent a good part of yesterday researching mil spec connectors but found myself frustrated at my total wire count. I had about 87 connections for the main harness with 3 of those wires being thicker gauge 12-14. I'm just working with the main harness at this point after the abs module. I have acd and don't want to get into bypassing my abs completely so I will leave that ecu plugged in as a relay. I need to further disassemble my main harness to see what other sensors I can drop off to get a better wire count.
What was your end wire count?
What did you bypass or not run through your mil spec plug?
What were the raychem sizes you used?
What was the trick in de pinning all the factory plugs? I assume you de pinned for wrapping them up?
Did you have to lengthen anything or were they too long? If you lengthened I assume you made all new one piece runs?
Sorry for the bombardment but I literally spent half a day yesterday scheming this out and then I stumbled on this thread!
Rob

I'm a Navy avionics and solder tech and that wiring makes my head hurt... I've never seen those crimpers though. I have a feeling if i had em they woulda made quite a few jobs easier and re wiring and re pinning those cannon plugs SUCCCCCKKKKKSSSS!!!!
Responses to your questions are below
Yes depinning the cannon plugs can be a challenge with the plastic removal tool.
What was your end wire count?
I believe it was 52 running through the connector
What did you bypass or not run through your mil spec plug?
I split and bypassed each headlight assembly and fan power as well. The power steering switch wire was also ran through the fenders
What were the raychem sizes you used?
I think I used all the sizes up to 1 inch
What was the trick in de pinning all the factory plugs? I assume you de pinned for wrapping them up?
Really, there are no tricks, just get some very small picks and dislodge the locking tabs and consequently pull the pins out
Did you have to lengthen anything or were they too long? If you lengthened I assume you made all new one piece runs?
Most of the lengthening was for the headlights and fan stuff. Its really hard to tell, because your set up will be different than mine was
Sorry for the bombardment but I literally spent half a day yesterday scheming this out and then I stumbled on this thread!
No problem ask away. it gave me anxiety too, believe me I know... I spent a few sleepless nights either researching this stuff, or actually executing it
Rob
Last edited by antilag_200; Jan 31, 2014 at 09:26 AM.
Evolved Member
Joined: Jul 2002
Posts: 630
Likes: 4
From: Auckland, New Zealand
 , I have 1 pin I can't use because of that.
Wow, thanks a lot for the response sir!
I've got my main harness all taken apart now and have pulled out a lot of stuff but am forgetting where a couple plugs went so I'm stuck at the moment. I believe they are ac and power steering related but need to confirm on another car since mine is in pieces lol.
I will throw up more questions as they come about, but this has been super helpful!
I'm in the process of organizing my rats nest. I'm starting to realize that there is little to do without depinning the harness. I really didn't want to have to disconnect the harness inside the cabin (where does it disconnect?)
I REALLY DON'T WANT TO JUST CUT ANY WIRES OUT.

I REALLY DON'T WANT TO JUST CUT ANY WIRES OUT.
Yeah I see it go into the firewall. It's nearly deloomed up until that point and I though after delooming I could organize but in reality you need to depin to Seperate and organize the way mitsu tangled them up in the main trunk of the wiring harness is unmanageable.
So now I completely remove to depin or just run it like this till I build a Seperate harness.
I deleted abs, ac, and all emissions so I need to plug all the functioning sensors back in and label before I start ripping it out completely.
So now I completely remove to depin or just run it like this till I build a Seperate harness.
I deleted abs, ac, and all emissions so I need to plug all the functioning sensors back in and label before I start ripping it out completely.
How did you depin and relocate the smaller part of the fuse box? The relay box?
I'm stuck trying to get through the extra 3' of wire. I have all my sensors trimmed and pinned for my connector, just need to shorten the rest of the harness.
Thanks
I'm stuck trying to get through the extra 3' of wire. I have all my sensors trimmed and pinned for my connector, just need to shorten the rest of the harness.
Thanks

Most of the stuff was sourced on ebay.
Not in a mood to talk, as it is 1:04am and I still cant sleep, hammered away at the manifold for a solid 4 hours, she is finished . I will talk about some of the challenges that I had with it later.,
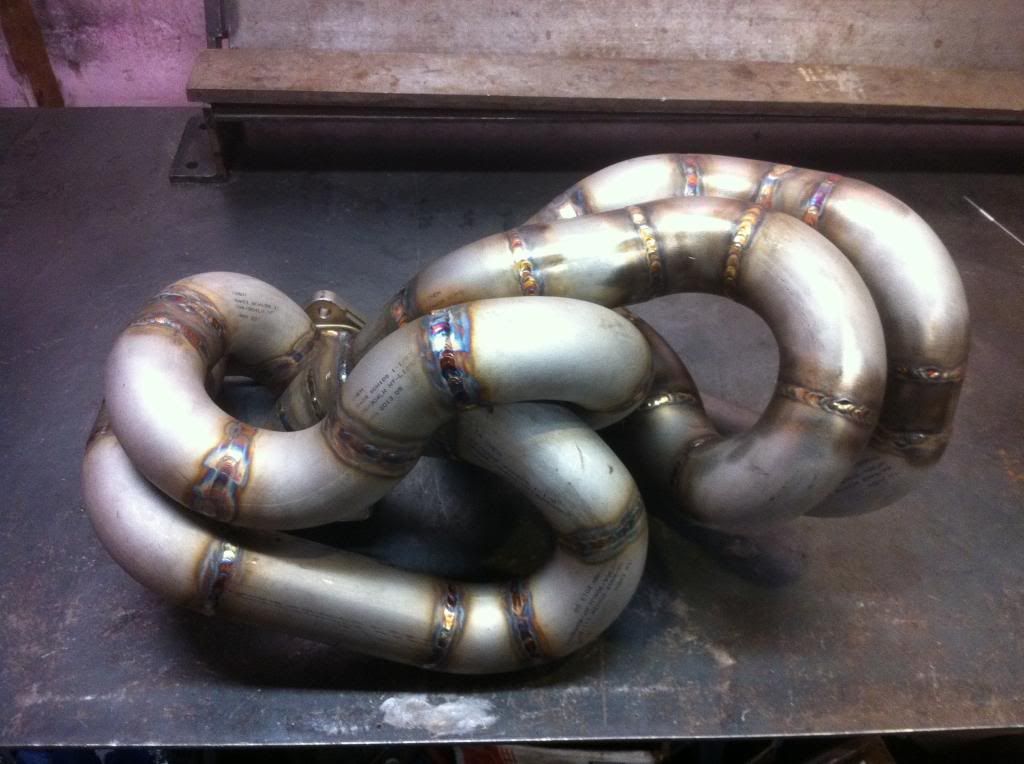
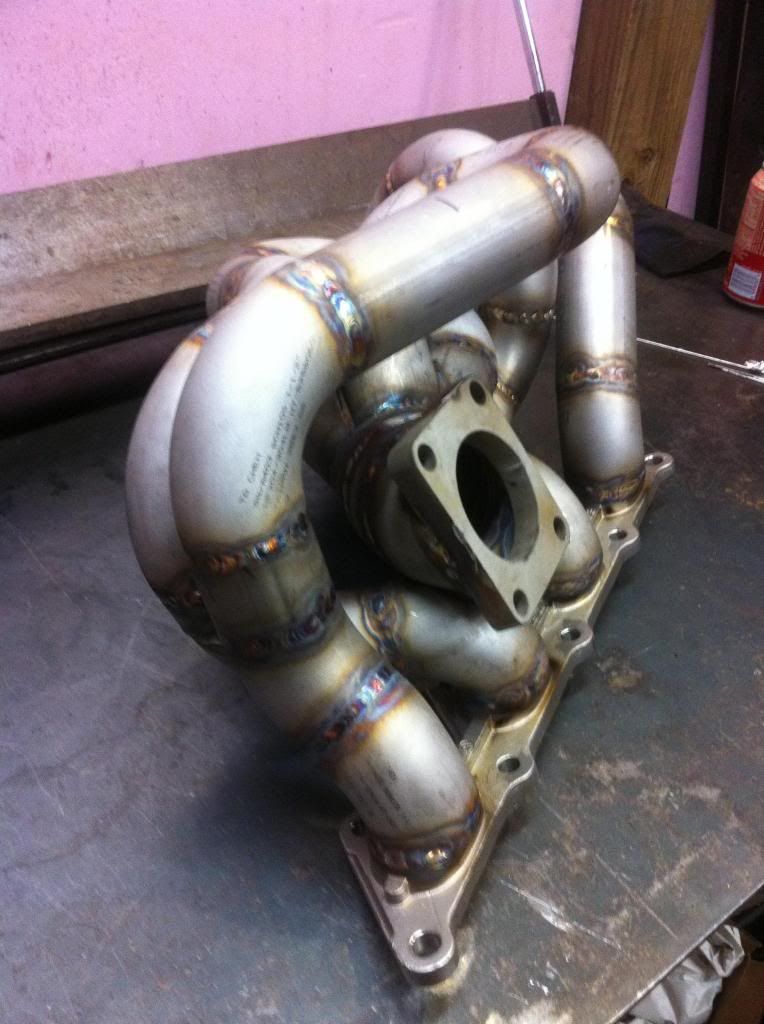
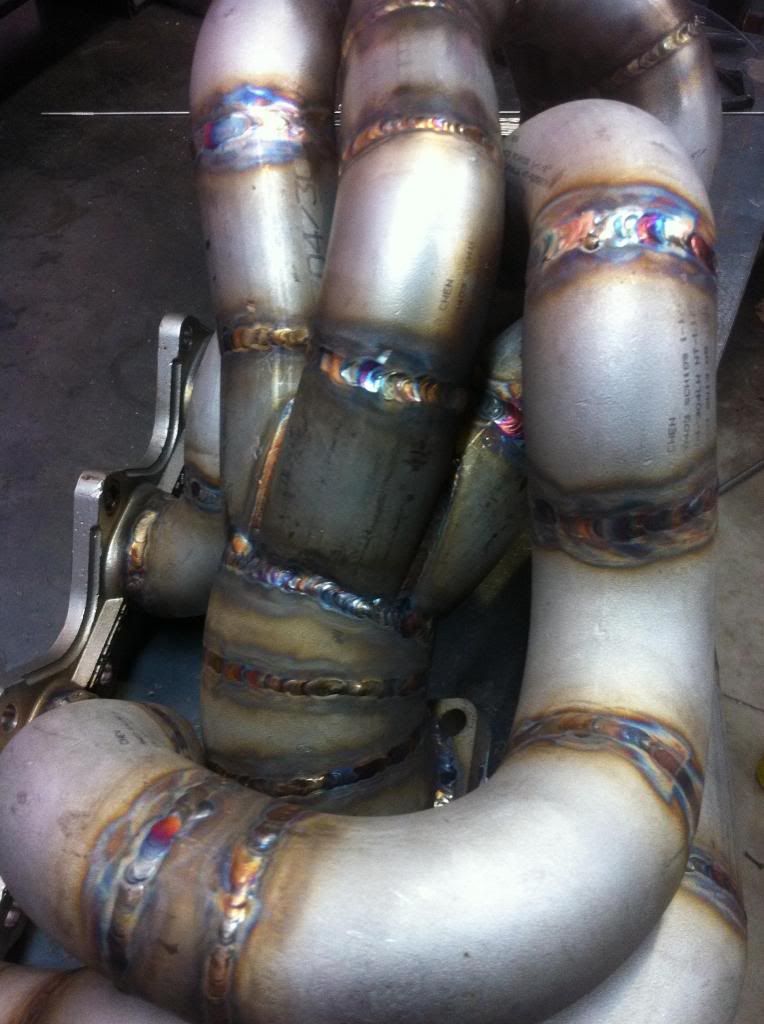
next quick quality control on the welds, then off to machine shop to true up flanges, then coating.
see ya later , its has been an adventure. Time for a new chapter to start


next quick quality control on the welds, then off to machine shop to true up flanges, then coating.
see ya later , its has been an adventure. Time for a new chapter to start

The level of complexity was high with this manifold, given its location, length and general design, I can't wait either to see it on the car. The 3065 should look mean hanging off that spagetti mess 