When you click on links to various merchants on this site and make a purchase, this can result in this site earning a commission. Affiliate programs and affiliations include, but are not limited to, the eBay Partner Network.
The 1.01 a/r v-band TS is equivalent to a 1.01 a/r OS in terms of cross sectional flow area so it is significantly larger than a 1.06 a/r TS that is probably equivalent to a 0.75 a/r OS in terms of cross sectional flow area.
word around the campfire is you multiply the traditional twin scroll a/r by 60% to get an approximate open scroll equivalent, so T4 TS 1.06 a/r x 60% = T4 OS 0.636 a/r.
I�m curious, because I�ve been searching having no luck, where did you find the quoted info?
word around the campfire is you multiply the traditional twin scroll a/r by 60% to get an approximate open scroll equivalent, so T4 TS 1.06 a/r x 60% = T4 OS 0.636 a/r.
I�m curious, because I�ve been searching having no luck, where did you find the quoted info?
not sure of the actual percentage because it will be different for each manufacturer. Only trying to convey it�s smaller.
used to work for Honeywell so I had a direct line into the aftermarket turbo group I don�t think it�s public info although I was told I could share.
I was able to get the oil pump and water pump on yesterday after receiving the OEM rebuild kit.
By the end of the day I have almost completed the short block. Most if my time is occupied with cleaning the old parts in my part washer and cleaning bolts with the ultrasonic cleaner. Should have it just about wrapped up tomorrow, but have a few little things I have to order.
So it is understandable that I don't make much progress when I spend 2 hours prepping and painting the coolant tube. Looks much better and the black wrinkle finish will carry over to some other parts as I put this thing back together.
Other than the coolant pipe, I was able to install the head and torque as well as put on the thermostat housing. I spent several hours this morning chasing down a packet of ARP lube so probably better to make sure I have everything before getting started.
I am just waiting on my rocker arms to show up and I can get this thing finished in a matter of ~4hrs.
I should have the engine back in the car tomorrow and will start gettin' er done.
Pick up some Nissan Bond (ThreeBond) in a caulk tube if you like to make your life easier during the build.
Engine done and ready to join the trans. I decided to go back to the stock pulleys and will be selling the Unorthodox aluminum pulley set. Man is that stock dampener heavy! I also went back to the stock exhaust cam gear so I have an adjustable AEM if anyone is interested.
Engine and trans on the lift table.
Raise the car a few inches and it goes in like butter.
😮 That�s awesome! I can�t wait to hear about this motor.
I�m going to see if my GSX will allow the motor/trans through from below like that.
I have the same lift table that I use to work on my Yamaha Banshee.
Last edited by Strm Trpr; Jan 12, 2019 at 07:38 PM.
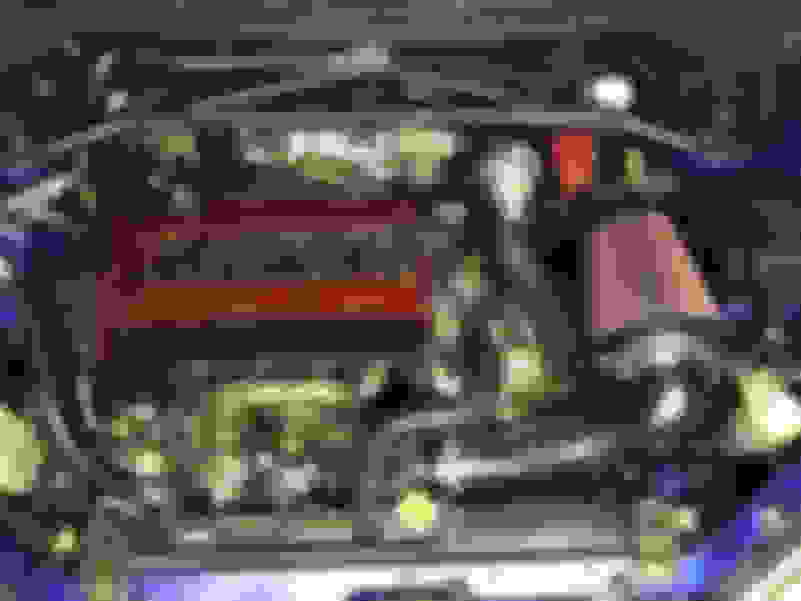
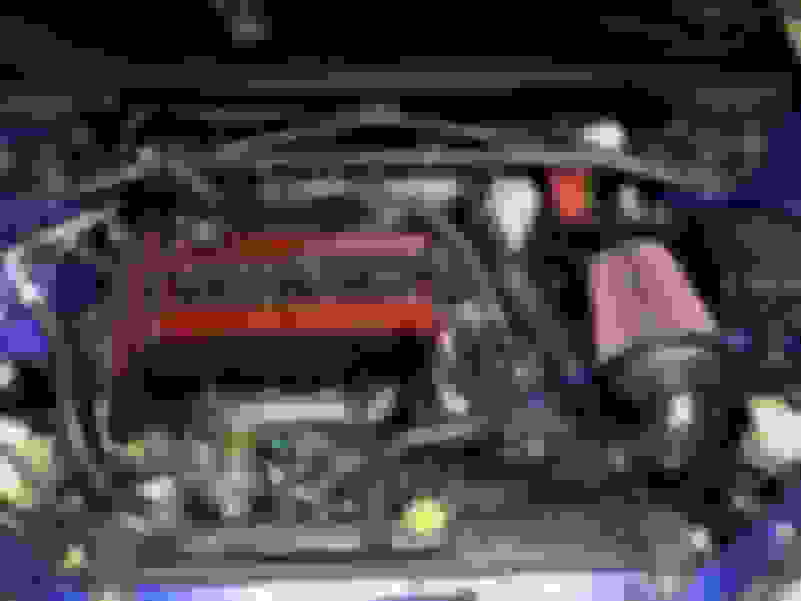
Motor has been in the car since Sunday and I have been slowly putting it back together. Most of my time is spent cleaning the damn bolts in the ultrasonic cleaner as well as just generally redoing little things that bother me. Completely cleaned the custom COP plate as well as the piping from the intercooler to the TB and then primed and painted with black wrinkle finish. Just trying to make it all clean instead of the oily aluminum that plagued the engine compartment.
Next item on the list is to repair the exhaust manifold that cracked about 1 year ago, but since it didn't seem to be spitting any exhaust I just left it alone. Gonna clean tomorrow and throw on my jig to reweld and ensure the flange stays straight. Then off to the machine shop to stick in on the belt sander.
I did for about $10 of metal from Lowes, which also required some welding and cutting. Not so much a valve cover heat shield as it directs the heat through the hood vent. It used to have another part to it when I ran the custom top mount setup.
I did for about $10 of metal from Lowes, which also required some welding and cutting. Not so much a valve cover heat shield as it directs the heat through the hood vent. It used to have another part to it when I ran the custom top mount setup.
Nice. Been thinking about doing something like this too.
Header repaired and flanges decked so I put on fresh gaskets and got the turbo installed.
Decided to return to the stock radiator vs the thinner one I used for the top mount setup. The thinner radiator works fine, but in the middle of the summer when temps are 100F, the radiator can't keep up if the car is running and parked and the temps start to climb. It quickly lowers once you start driving, but I don't want to deal with it. Because of this change I need to purchase a Spal 12" low profile fan (2" thick) so I have enough clearance for the 4" intake. I am also going to move the intake up towards the batter post and try to make a cold air inlet. This will require that I purchase a new filter (current is 10" long with 6" opening / going with 8" long with 6" opening).
Got the new intake fabricated today and then took it apart, sanded the tube and bracket, and then painted with black wrinkle finish. It still uses the 6" velocity stack, which is mounted with a bracket to the ACD pump reservoir.
I also installed the new SPAL 2" thick 12" diameter fan today and it was just enough to give the clearance needed.
I'll have more updates tomorrow as I get this thing put together and hopefully fired up late Sunday.
Added some 3/8" weather stripping to seal off the radiator. 3/8" works well on the sides, but the top needs 1/2" so I will be adding another strip to the top section.
Decided to wrap some heat resistant material on the lower intercooler pipe right by the downpipe.
Added the TurboSmart oil pressure regulator that limits pressure to the turbo at 40psi. I also routed the oil back to the valve cover.
The engine is more or less ready to be started, but for one small issue. The threads on the turbo oil supply port need to be chased with a tap because I can't get the oil fitting to start. When I removed the old fitting it was jacked for some reason so likely just need to clean it up. Thread is 7/16-24 so I had to order online and it is supposed to be here tomorrow. Don't mind the make shift PCV, I will make something more effective, but need to get this thing going.