How to: Installing JDM Plate Bracket with JDM hardware

Thread Starter

Joined: May 2007
Posts: 3,619
Likes: 29
From: @ a track near you
Anyone here using the JDM plate bracket? I picked one of these up from MitsubishiParts.net and I have no idea how to install it.

Looking at a few threads that show the USDM bracket, doesn't really reveal how it would bolt up since the holes don't line up.


I'm at a loss as to how this bolts up.
Any ideas?
I guess I'll have to pull the JDM bumper off and see if I can fab something up.

Looking at a few threads that show the USDM bracket, doesn't really reveal how it would bolt up since the holes don't line up.
I'm at a loss as to how this bolts up.
Any ideas?
I guess I'll have to pull the JDM bumper off and see if I can fab something up.


Thread Starter
Joined: May 2007
Posts: 3,619
Likes: 29
From: @ a track near you
Rear. Sorry, I wasn't clear enough.
I wonder if that's a JDM/EDM piece? Since mine was a USDM bumper originally, it might be lacking that specific bracket.

I'm willing to bet that the JDM license bracket bolts right up to that bumper bracket in your pics.
I wonder if that's a JDM/EDM piece? Since mine was a USDM bumper originally, it might be lacking that specific bracket.
I'm willing to bet that the JDM license bracket bolts right up to that bumper bracket in your pics.
Thread Starter
Joined: May 2007
Posts: 3,619
Likes: 29
From: @ a track near you
8 1/4" or 210mm
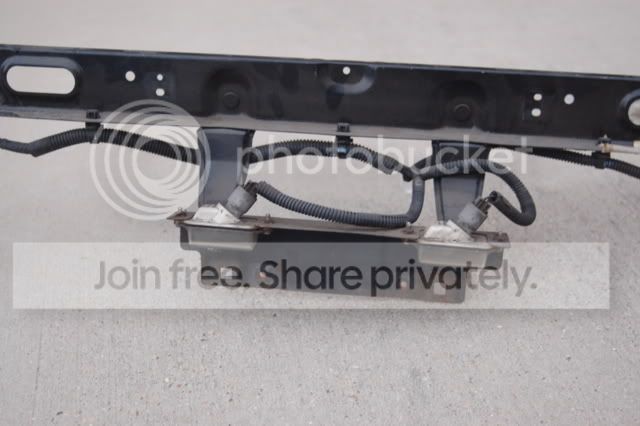
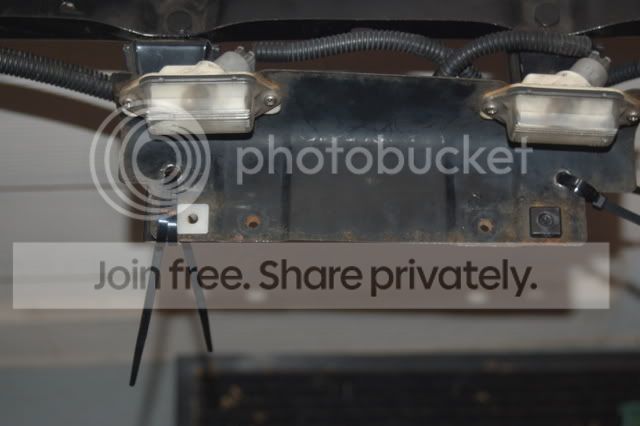
So the part that I think is different between the USDM and the JDM/EDM to hold the lisence plate bracket is #11 "Reinforcement" in the below pic:
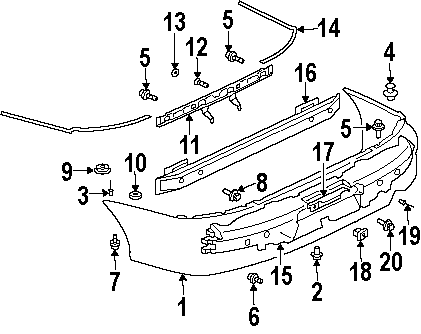
So the part that I think is different between the USDM and the JDM/EDM to hold the lisence plate bracket is #11 "Reinforcement" in the below pic:
- Bumper cover
- Fastener Fastener Either Side
- Bumper cover Rivet
- Retainer clip Retainer clip Either Side
- Bumper cover Bolt
- Screw #1 Either Side
- Screw #2 Either Side
- Screw #3 Either Side
- Grommet Grommet Either Side
- Gasket Gasket Either Side
- Reinforcement
- Reinforcement Bolt
- Gasket Gasket Either Side
- Upper plate Left
- Absorber
- Impact bar
- License bracket
- License bracket Nut
- License bracket Rivet
- License bracket Bolt
Last edited by golgo13; Sep 24, 2011 at 09:49 AM.
Evolved Member
Joined: May 2011
Posts: 964
Likes: 0
From: New Zealand
Finally decided to get off my *** and measure it for you. Perfect fit 210mm.
It looks to me like the USDM has separated the reinforcement (11) and the licence bracket (17). It appears to be one piece on the JDMS.
It looks to me like the USDM has separated the reinforcement (11) and the licence bracket (17). It appears to be one piece on the JDMS.
Trending Topics
Thread Starter
Joined: May 2007
Posts: 3,619
Likes: 29
From: @ a track near you
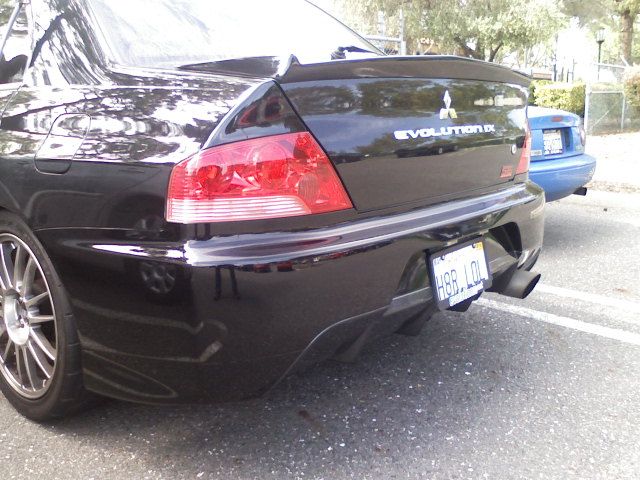
I have the USDM one modified and it looks ghetto and unfinished in my opinion. I want the proper JDM part back there if I'm going to be running the bumper.

Thanks, I'm going to contact Russell at MitsubishiParts.net and see if he can source one.
Cheers!

Cheers!
Thread Starter
Joined: May 2007
Posts: 3,619
Likes: 29
From: @ a track near you
Yeah, turns out I just didn't see it:
$40 + shipping

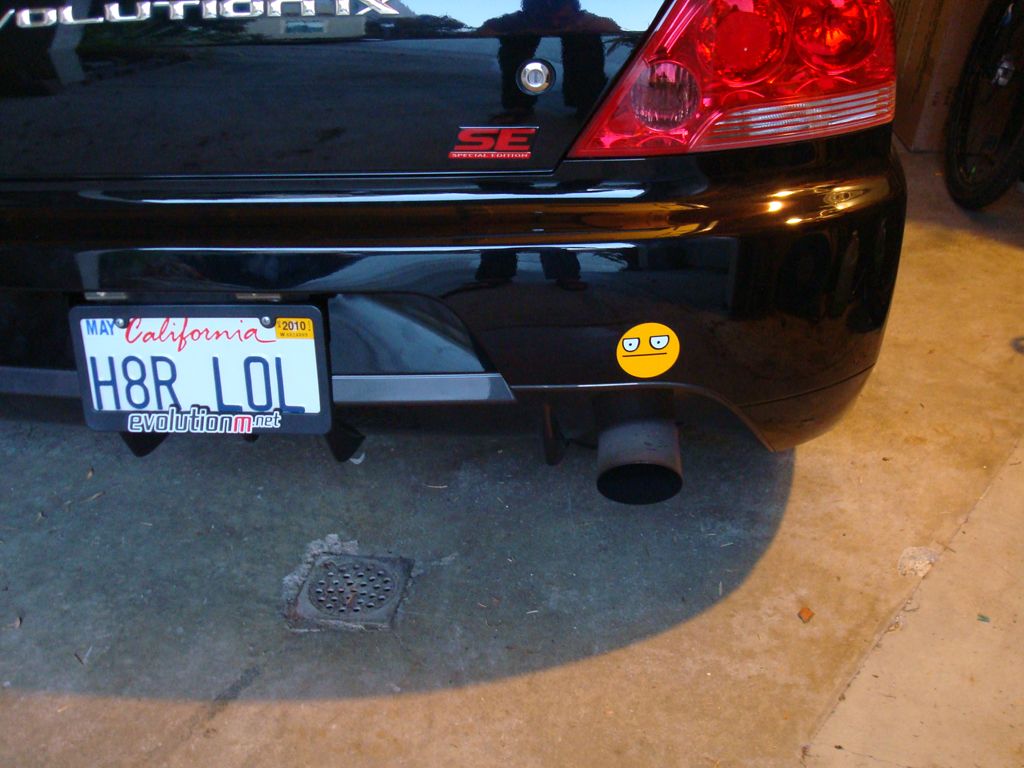
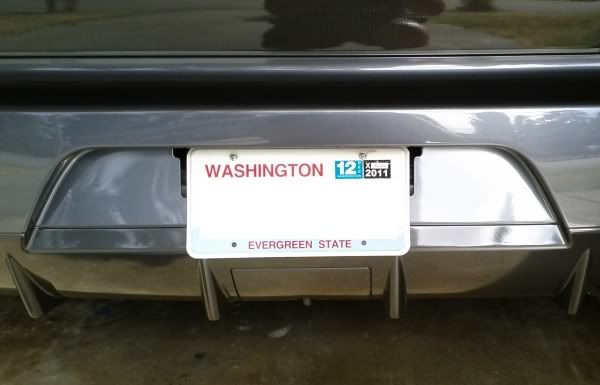
I remember bending the two arms down vertical with the bumper then using duct tape to lign it up so the plate looked perfect, then drilled holes and used the rivet gun (that I used for the rest of the install) to rivet the license plate holder back onto the retainer. A beer or two later and it's perfect:
Thread Starter
Joined: May 2007
Posts: 3,619
Likes: 29
From: @ a track near you
Sorry for the OT and I know this doesn't help you attach the JDM plate mount - but you if you can still salvage your USDM one it's easy to make it look OEM. I followed this thread - https://www.evolutionm.net/forums/ev...ar-bumper.html
I remember bending the two arms down vertical with the bumper then using duct tape to lign it up so the plate looked perfect, then drilled holes and used the rivet gun (that I used for the rest of the install) to rivet the license plate holder back onto the retainer. A beer or two later and it's perfect:
I remember bending the two arms down vertical with the bumper then using duct tape to lign it up so the plate looked perfect, then drilled holes and used the rivet gun (that I used for the rest of the install) to rivet the license plate holder back onto the retainer. A beer or two later and it's perfect:
The plate is held to the bumper at the bottom with 3M double sided tape, it's crooked and looks sloppy in my opinion.

I paid over $800 for the bumper, I'm going to get it right even if it kills me.