
BR solid shifter bushing install

BR solid shifter bushing install
Buschur just released these last week.

Very affordable and simple to install.
All you need is a phillips head screw driver, an 8mm & 12mm socket wrench, and pliers.
First off, you need to remove the center console. Piece of cake. Open up the arm rest and remove the 2 phillips screws inside.
Lift up your e-brake handle as high as it will go and lift up on the rear section of the center console. There are 2 tabs which hold in in place where the cup holders meet the shifter shifter piece. Lift straight up and set the whole assembly aside.
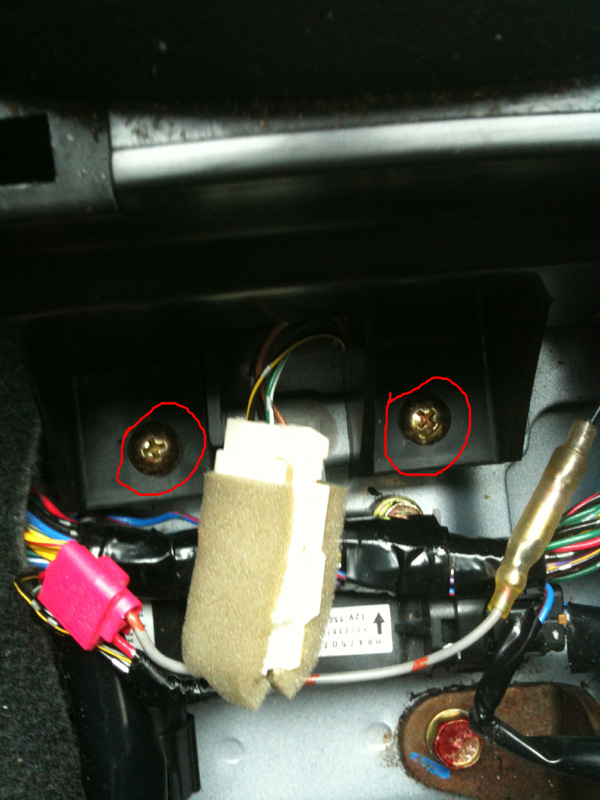
Now these 2 screws will be exposed. Go ahead and remove them. Unplug the white harness between them as well.

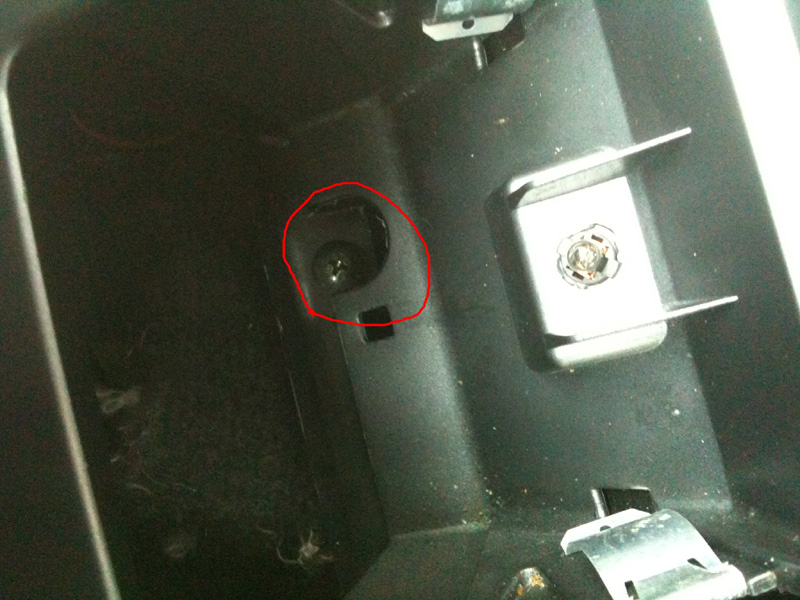
Open up the ashtray and pull it out. This will expose another screw for you to remove.
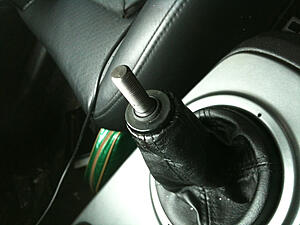
Next, unscrew your shift knob by turning it counterclock wise and set it aside.
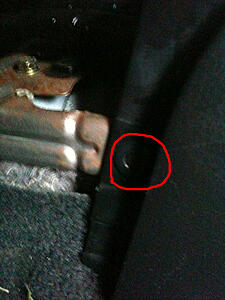
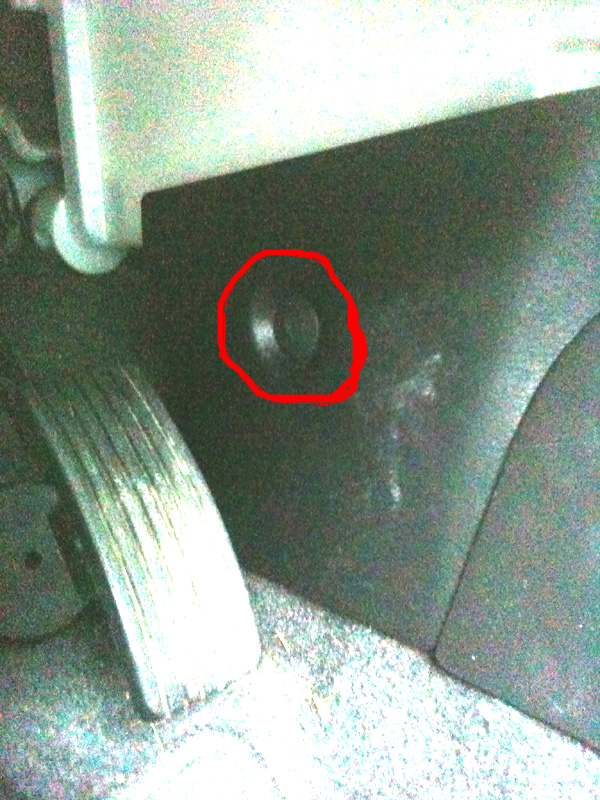
Okay, now you get to open the door and sit on the ground on your knees. Take a peek down on the ground near the gas pedal. Remove that plastic phillips screw.

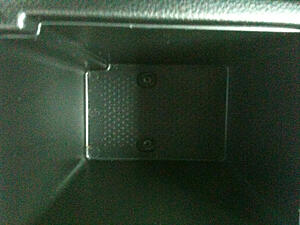
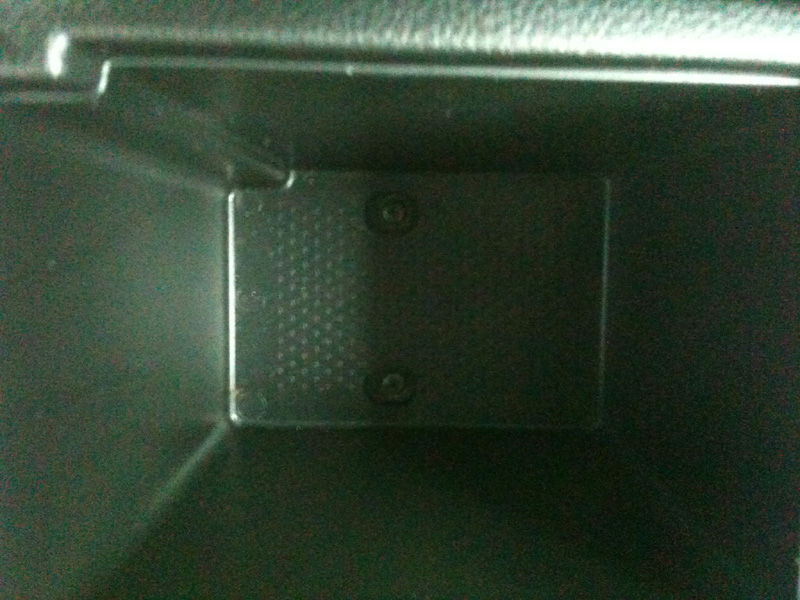
After the screw is removed, remove that whole plastic piece. This is what you'll see after its removed.

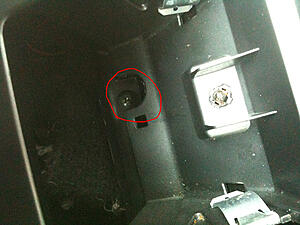
Look close and you'll see a plastic push pin. Take your phillips screw driver and press in the center of it. The whole piece should then pull out.
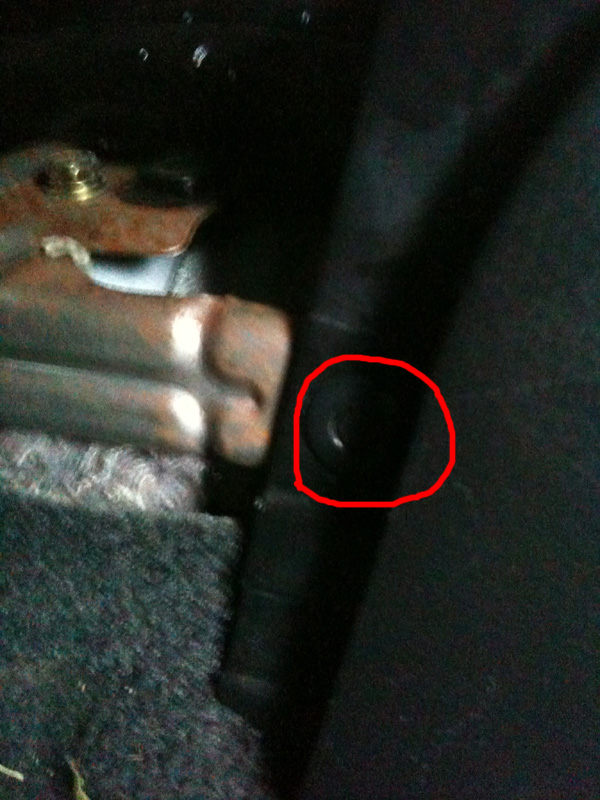
Repeat for the passenger side. There isn't a plastic phillips screw. Just grap that plastic cover and pull it straight off.
At this point, you should be able to just pull out the shifter console entirely.

Very affordable and simple to install.
All you need is a phillips head screw driver, an 8mm & 12mm socket wrench, and pliers.
First off, you need to remove the center console. Piece of cake. Open up the arm rest and remove the 2 phillips screws inside.
Lift up your e-brake handle as high as it will go and lift up on the rear section of the center console. There are 2 tabs which hold in in place where the cup holders meet the shifter shifter piece. Lift straight up and set the whole assembly aside.
Now these 2 screws will be exposed. Go ahead and remove them. Unplug the white harness between them as well.
Open up the ashtray and pull it out. This will expose another screw for you to remove.
Next, unscrew your shift knob by turning it counterclock wise and set it aside.

Okay, now you get to open the door and sit on the ground on your knees. Take a peek down on the ground near the gas pedal. Remove that plastic phillips screw.
After the screw is removed, remove that whole plastic piece. This is what you'll see after its removed.

Look close and you'll see a plastic push pin. Take your phillips screw driver and press in the center of it. The whole piece should then pull out.
Repeat for the passenger side. There isn't a plastic phillips screw. Just grap that plastic cover and pull it straight off.
At this point, you should be able to just pull out the shifter console entirely.
Last edited by Monochrome; Sep 11, 2009 at 01:56 PM.
Okay, now say hello to your shifter assembly. Take your 12mm and remove the 4 gold bolts which hold it to the frame.
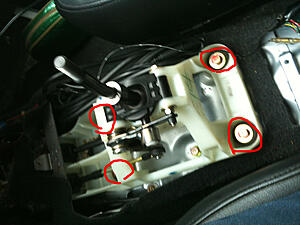
You'll notice, the shifter cable towards the drivers side gets in the way of one of the bolts. You'll need to remove the cotter pin which holds that cable. Grab your pliers and pull it out. Manly hands should be able to remove it without the pliers.

Slide the cable off the mount, push it down and around to the back side of the shifter like so.
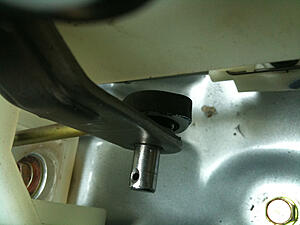
You should have easy access to that 4th bolt now.
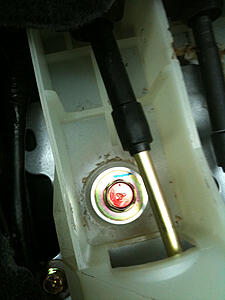
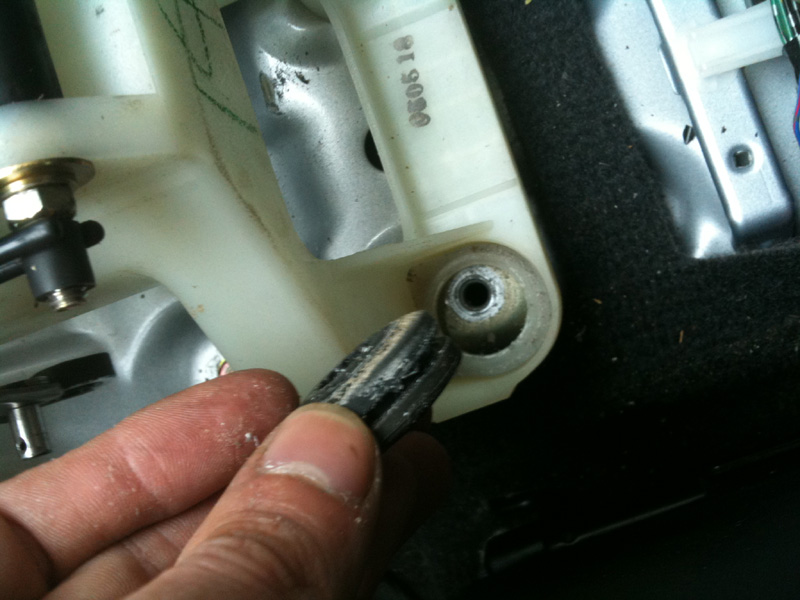
Alright, now take your 8mm socket and press out the metal insert inside the bushing.
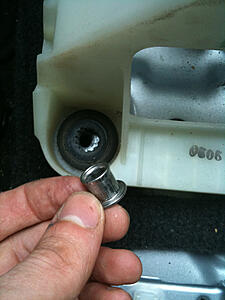
With the inserts removed you can now easily remove the rubber bushing.

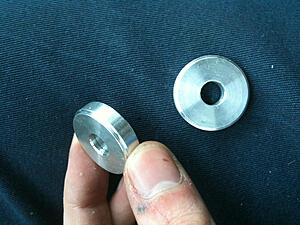
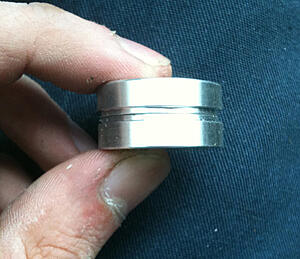
BR gives you 8 pieces. 2 per mount. One goes on top of the other like so.
The bushing should hug the plastic assembly. I found it easiest to do the 2 front bushings before the rear. Slide the bottom bushing into place, lower the shifter assembly onto it, set the top bushing over it, insert the 12mm bolt and thread it in just a couple turns. Leaving it loose makes it much easier to install the others.
Tighten everything down, put the interior back together, and go for a drive.
Aren't those shifts much more crisp? Thanks Buschur!
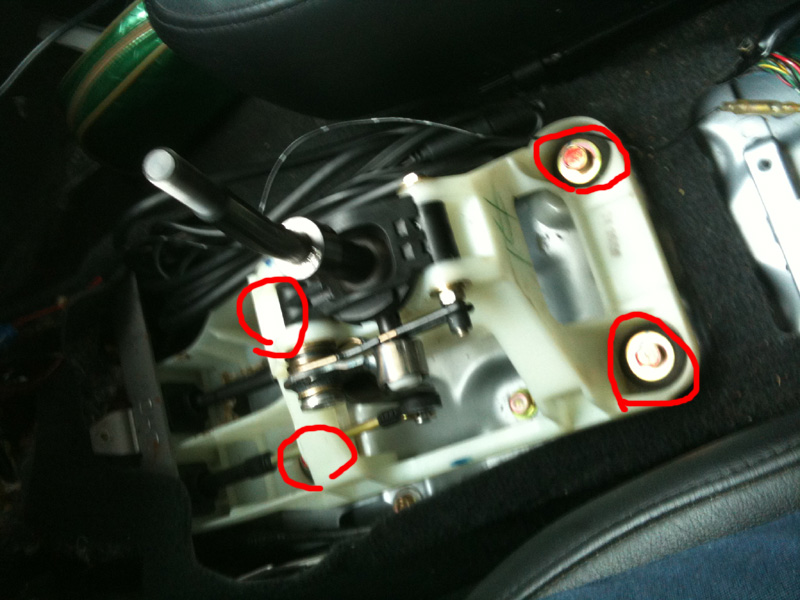
You'll notice, the shifter cable towards the drivers side gets in the way of one of the bolts. You'll need to remove the cotter pin which holds that cable. Grab your pliers and pull it out. Manly hands should be able to remove it without the pliers.
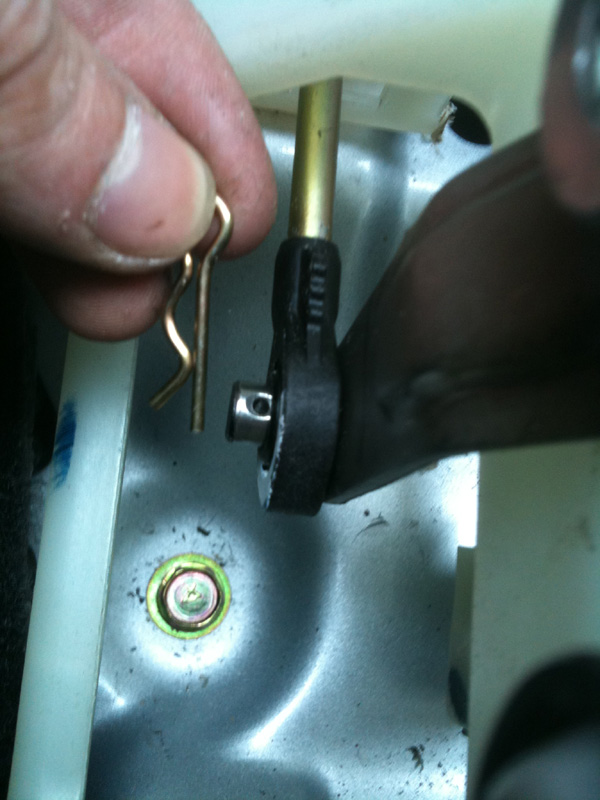
Slide the cable off the mount, push it down and around to the back side of the shifter like so.
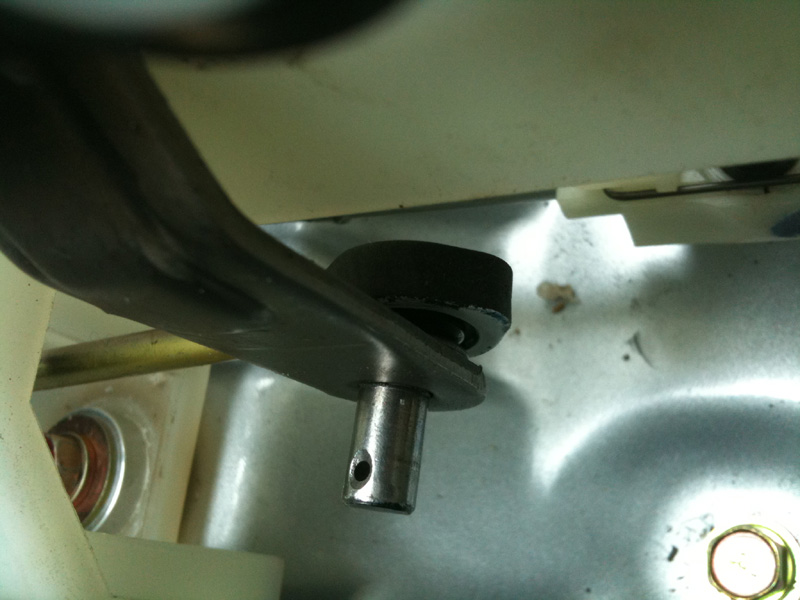
You should have easy access to that 4th bolt now.

Alright, now take your 8mm socket and press out the metal insert inside the bushing.

With the inserts removed you can now easily remove the rubber bushing.
BR gives you 8 pieces. 2 per mount. One goes on top of the other like so.

The bushing should hug the plastic assembly. I found it easiest to do the 2 front bushings before the rear. Slide the bottom bushing into place, lower the shifter assembly onto it, set the top bushing over it, insert the 12mm bolt and thread it in just a couple turns. Leaving it loose makes it much easier to install the others.
Tighten everything down, put the interior back together, and go for a drive.
Aren't those shifts much more crisp?
Thanks Buschur!
Last edited by Monochrome; Sep 11, 2009 at 02:04 PM.

Thread
Thread Starter
Forum
Replies
Last Post
tjwphoto
09+ Ralliart How-To/Installations
67
Apr 4, 2020 02:32 PM
i64X
Evo X How Tos / Installations
138
Feb 27, 2016 03:30 PM
webguy330i
Evo How Tos / Installations
2
Apr 12, 2004 11:53 PM