
How-To: installing 6-point race harness (driver's side only)


How-To: installing 6-point race harness (driver's side only)
Installing a 6-point racing harness seems very simple: It's just four attachment points to the car (assuming you have a roll bar, roll cage, or harness bar, the shoulder belts just wrap around the harness bar, so that's a no-brainer). How hard could it be? Well, it's not difficult at all, but as I found out, because of specifics of the Evo 8/9's floorpan, picking the exact mounting points (which aren't ideal) is more complicated then I imagined.
Here's a great reference for proper installation of a racing harness... makes it clear that doing it right takes careful thought and consideration about where (and how) you attach the mounting points: http://www.schrothracing.com/sdocs/2...structions.pdf
I chose a G-Force harness (#7001BK) because I felt it was the better option between the two least expensive cam-lock harnesses on the market (G-Force and Crow Enterprizes). I've played with Crow cam-lock and it felt like it released too easily... I could imagine accidentally flipping the lever and causing the latch to come undone with some sort of totally random and unintended hand movement while driving. The G-Force, on the other hand, feels very positive, and you have to rotate the latch a full 90 degrees to release it.
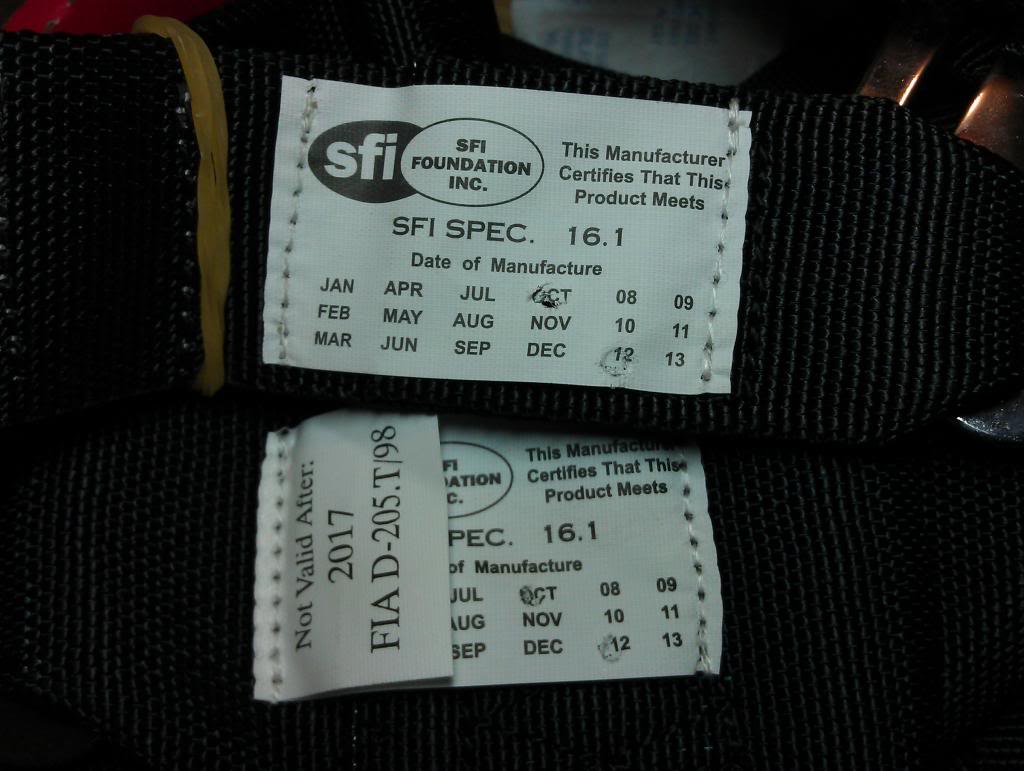
There are two options with the G-Force Pro cam-lock six-point harness: pull up or pull down tightening. I went with the traditional pull-down style, because the pull-down harness is not only SFI 16.1 certified, but also FIA certified, which gives you five years of track approval with SCCA racing, as opposed to only two years with the SFI rating. The safety certification of racing harnesses is only good for a limited time from the date of manufacture because the nylon webbing will degrade and weaken with age, so you have to get harnesses "rewebbed" after they expire... annoying, but the rule is in place to help minimize the chance of injury or death in racing incidents, so it is what it is.
In retrospect, now that I've actually installed it, I can see that I should have opted for the pull-up style, because with the pull-down style belt, the buckles end up crammed against the edges of the seat, right on top of your hip bones, and it's virtually impossible to adjust or tighten the lap belts once you're sitting in the seat. You have to adjust the lap belts prior to sitting down into the seat. It's acceptable for a single-driver car, but it would not work at all for a race car that had to accommodate different-sized drivers and quick driver changeovers.
Last note: the difference between a five-point and six-point belt is that six-point belt reduces the chance of the anti-submarine belts (i.e., the belt(s) that go down through the seat to the floor, between your legs) injuring your nuts in the case of an accident. Doesn't sound pretty, and it does happen, but it's still better than a severe injury to your internal organs if your body manages to slide down during the accident, and the lap belt rides up higher than your hip bones, which is what the anti-sub belts prevent from happening.
A video that shows submarining in a head-on collision:
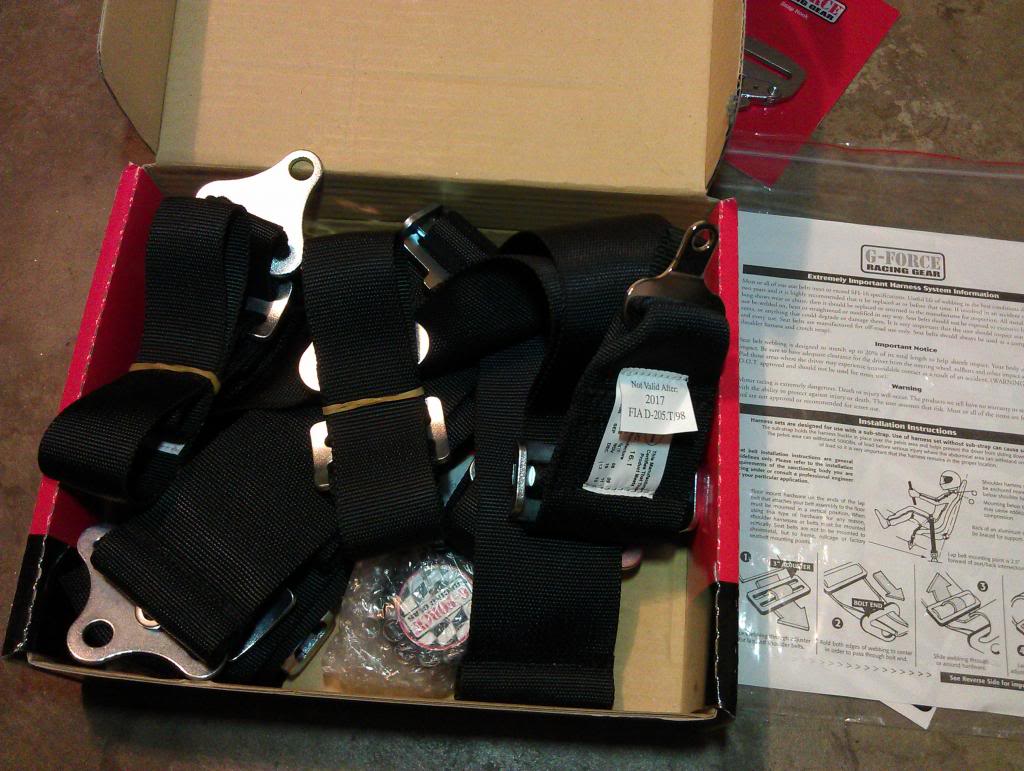
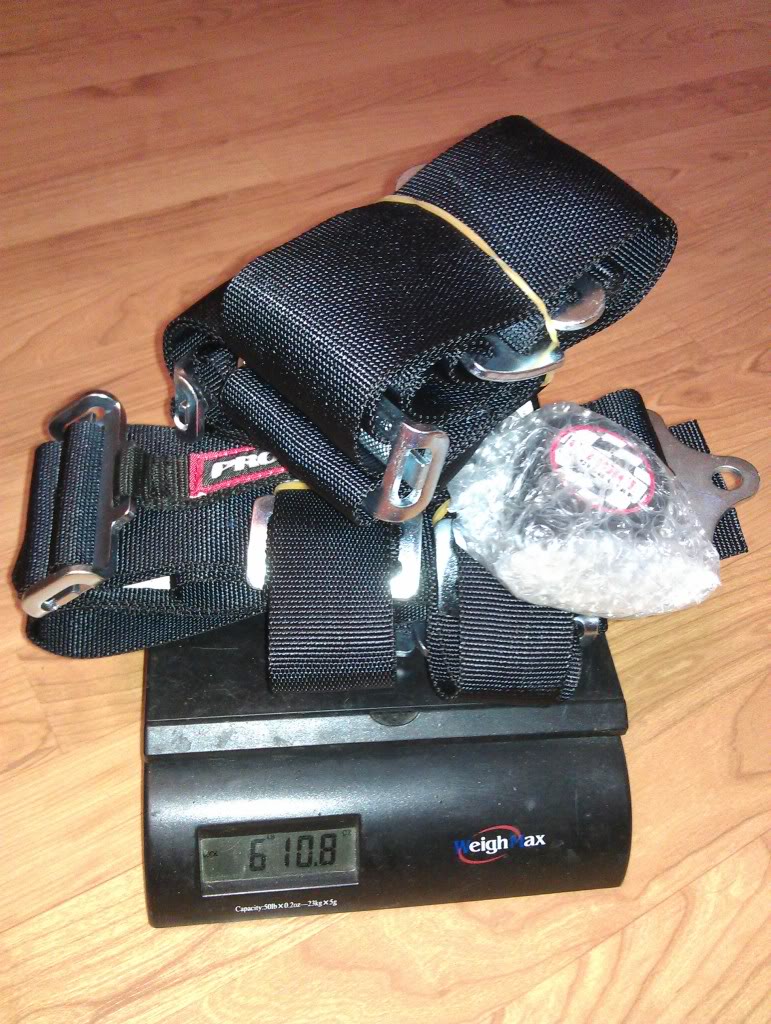
Here's the G-Force belts, pre-install. They weighed 6.68 pounds (without the snap-hook belt ends):
And their certification tags:
Obviously, you can't determine the proper mount points for the harness until you get the seat mounted, as the angles of the belts relative to the seat/body position will change depending on how far forward or back you sit when you're driving. This makes choosing your mounting points more of a compromise if you'll have sliders and drivers with vastly different length legs.
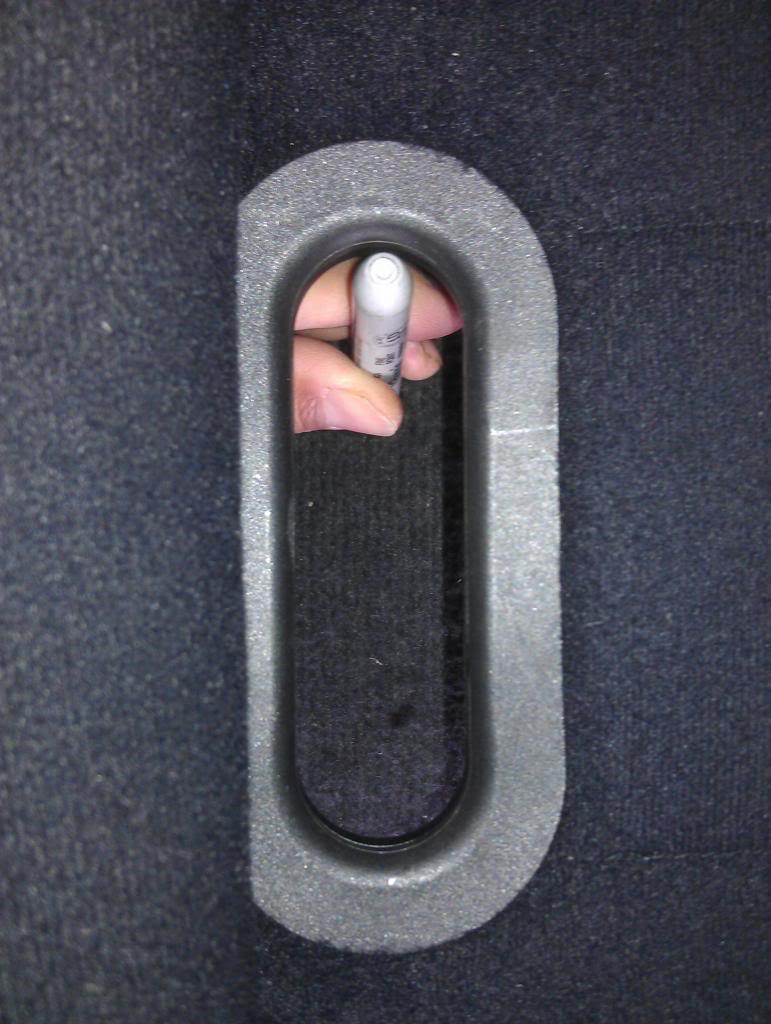
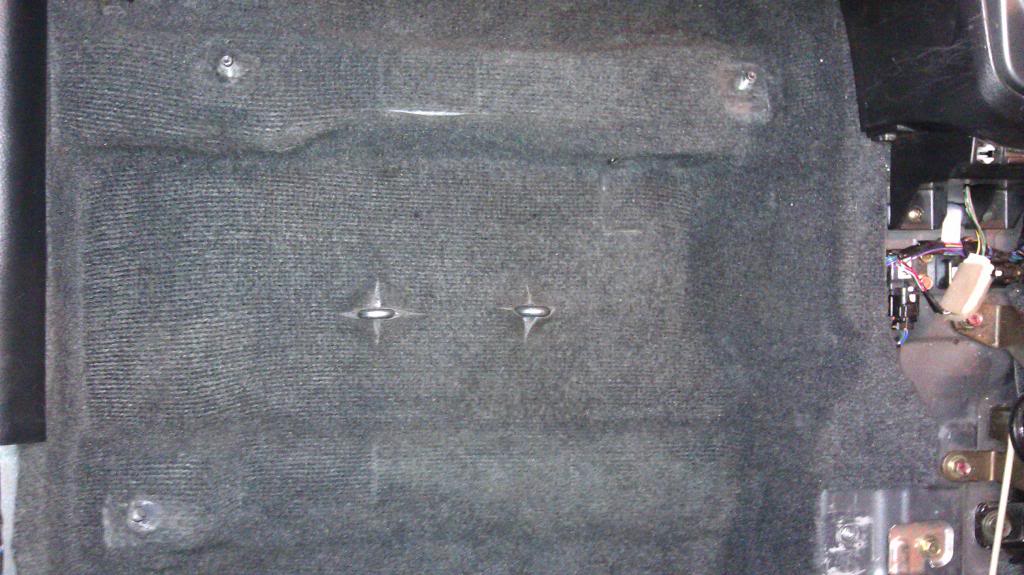
For the two anti-sub belts, I followed the guidelines in the Schroth racing harness instruction PDF and set them a little back of the seat opening so that under tension, the angle of the anti-sub belts will be at about 20 degrees from vertical. I used a black Sharpie to mark the carpet, about 4" apart:
I decided to use eyebolts combined with snap-hook belt ends to attach the lap belts and anti-sub belts (the shoulder belts just got wrapped around the integrated harness bar of the Autometer roll bar). The eyelets allows for the belts to be oriented properly to the body, and the snap ends allows for convenient quick-connecting. Plus it was how the harnesses were set up in my friend's NASA GTS3-spec race car, so I followed his example.
The G-Force harness set doesn't come with the QR snap-hook type belt ends, so I ordered them separately (from Summit Racing via eBay is the cheapest, they're about 4 bucks each). The part numbers are 107H (2" for the anti-sub belts) and 107W (3" wide for the lap belts):

Just like with the feet of a bolt-in roll bar, you have to have a backing plate/nut assembly to minimize the chance of the eyebolt ripping through the floor. You can get the eyebolts and backing plates from places like HRPworld.com or pegasusautoracing.com.
https://www.pegasusautoracing.com/gr...oupID=HARNHARD
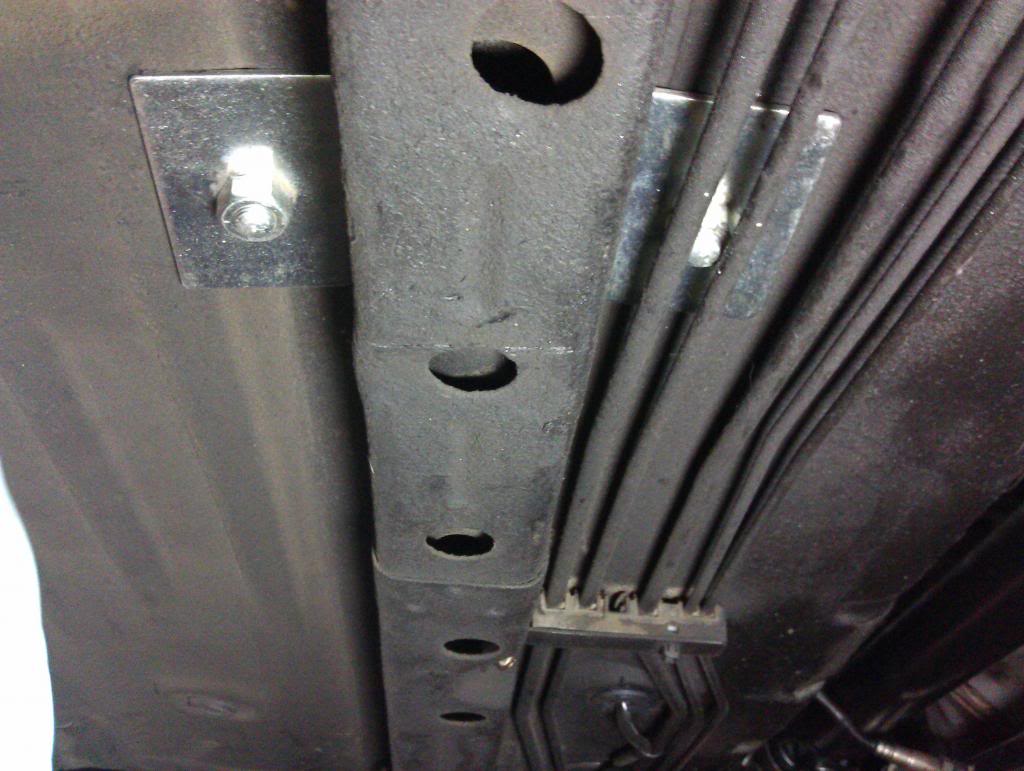
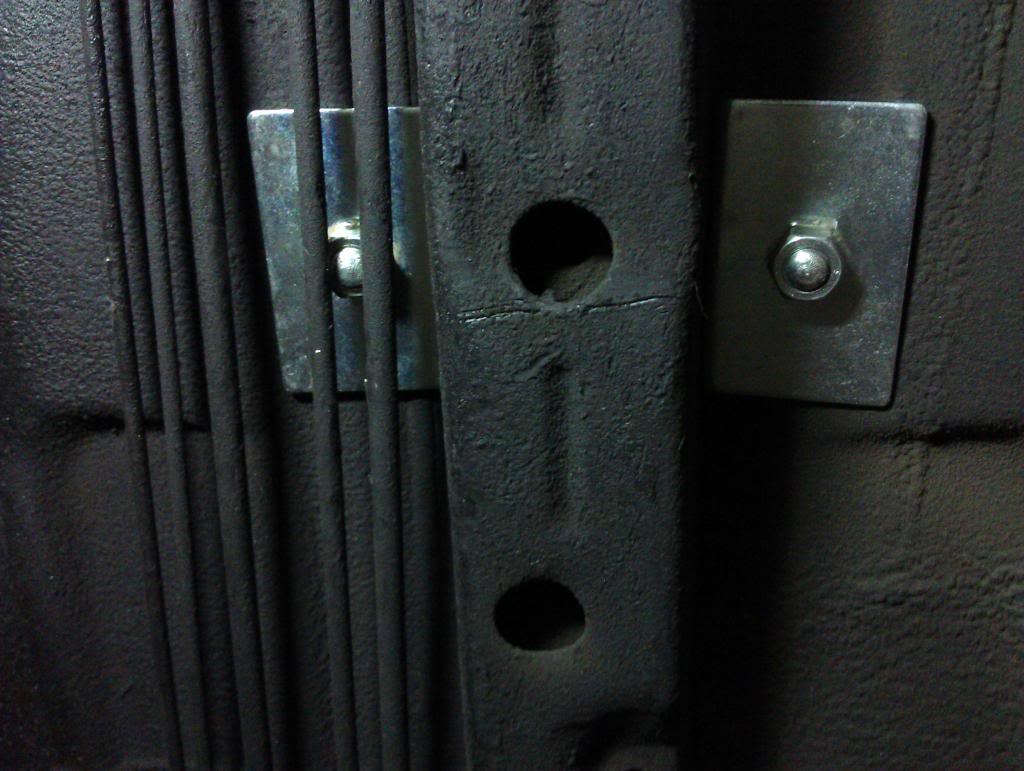
And here's where the eyebolts for the anti-sub belts ended up, inside the car:
And you can see that the backing plates end up right next to that rectangular support beam running longitudinally down the car—and that on one side, the plate is mounted right ABOVE the brake lines! Obviously, you must take great care not to puncture these when you're using the awl and drill to make the hole for the eyebolt:
For the left-side lap belt, I went with an eyebolt that threaded directly into the OEM bolt hole for the OEM shoulder/lap belt, at the bottom of the pillar. It's not in the right location to achieve the ideal 60-degree-from-horizontal mounting angle that the lap belts are supposed to be at, but it's pretty close, and I figure the OEM threaded nut that's integrated into the unibody as a seat belt fixing point is probably as strong or stronger than drilling a hole through the sheetmetal and putting a smallish backing plate behind it.
The proper size for the eyebolt that threads into the OEM seat belt attachment point is a M11 x 1.25, definitely an oddball size. One of the few places to order Takata eyebolts that fit most Japanese cars' OEM seat bolt attachment points is HeelToe Automotive, and yes, everyone sells the Takata eyebolts for 10 bucks each:
http://www.heeltoeauto.com/takata-sa...t-eb-02-u.html

However, I've since learned that M11 x 1.25 is virtually identical to SAE 7/16"-20, and so you should be able to use a OMP 7/16"-20 eyebolt (part # DB/420) too, which are about half the price @ $5 each.
On the right side, I decided to drill through the floor and create my own mount, rather than use the OEM seat bracket mounting point, for two reasons: number one, the eye bolt would interfere with the re-installation of the center console, because the right-rear mounting point of the seat bracket is UNDER the storage cubby of the console; and number two, the seat bracket mounting point is too far forward to create the proper angle for the lap belt.
I had to choose the location for the right-side lap belt eyebolt carefully, because of the design of the driveshaft tunnel under the car. Basically, there's only one good spot that's flat enough for the backing plate to rest against, and provides enough clearance for the protruding end of the eyebolt and nut to the driveshaft (a bigger problem on my car than most Evos because I have a larger-diameter aluminum driveshaft).
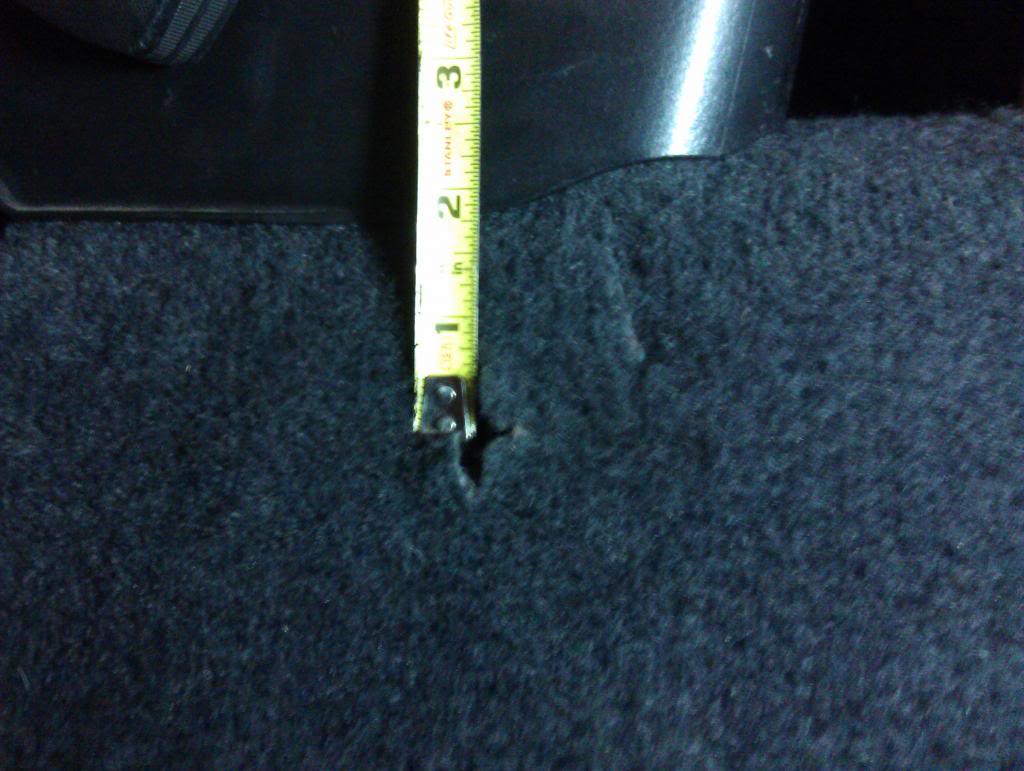
The spot I went with is about 6 1/4" back from the OEM seat bracket hole:

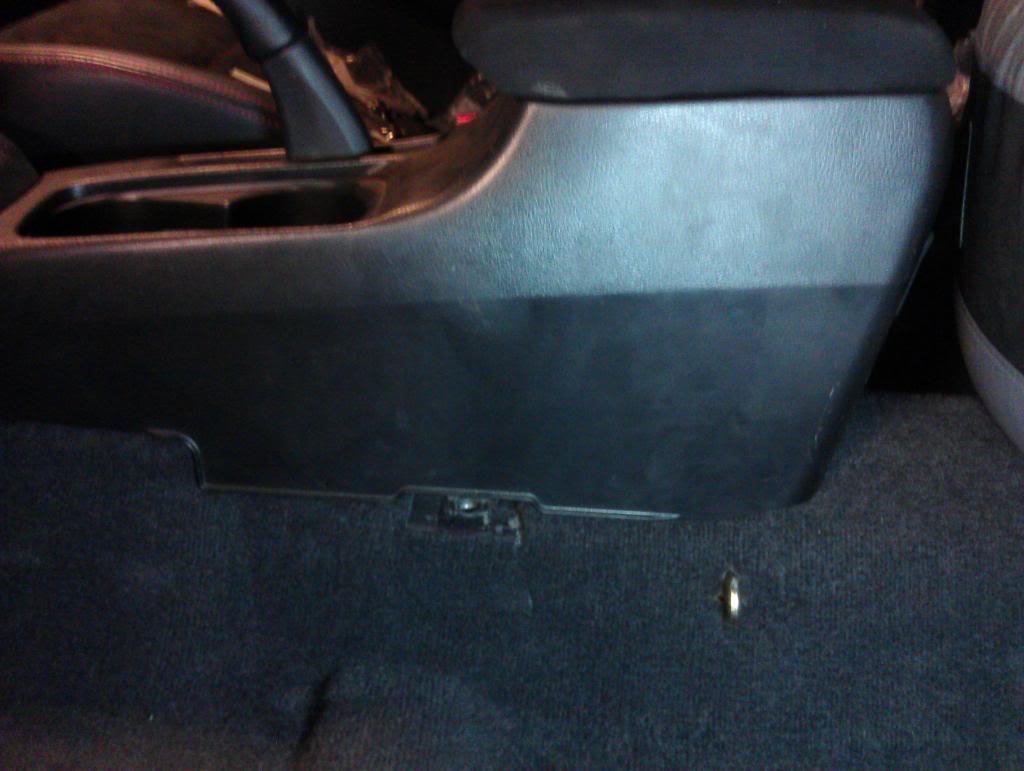
And about 1 3/4" down from the bottom edge of the center console:
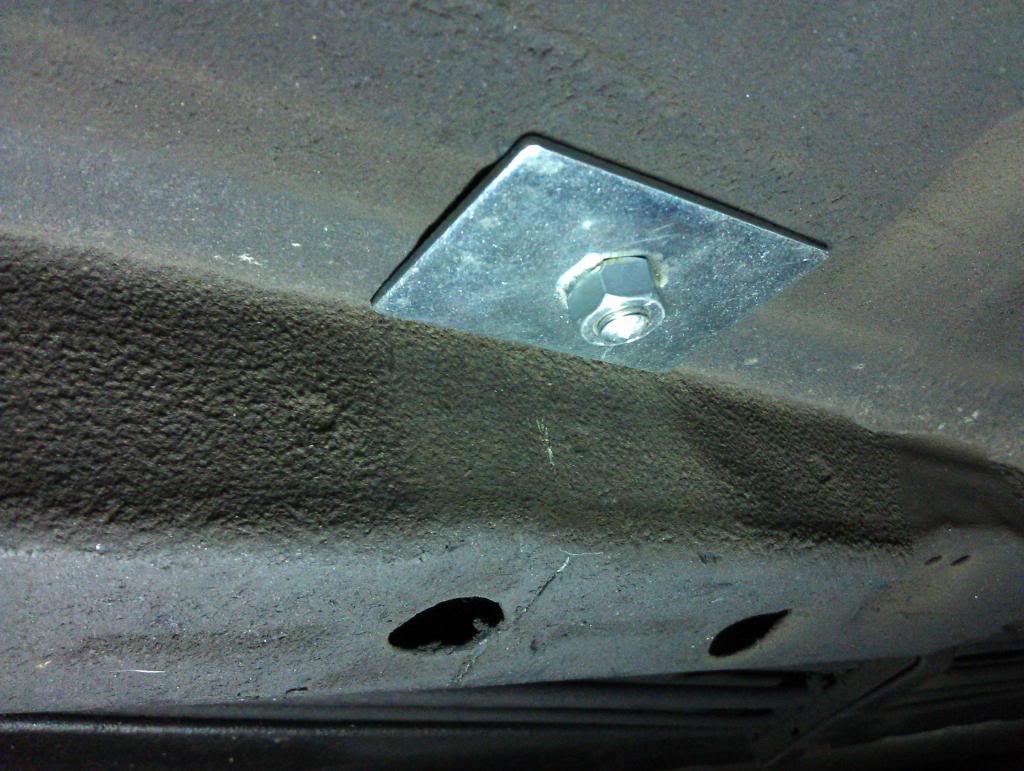
The eyebolt installed, inside the car:
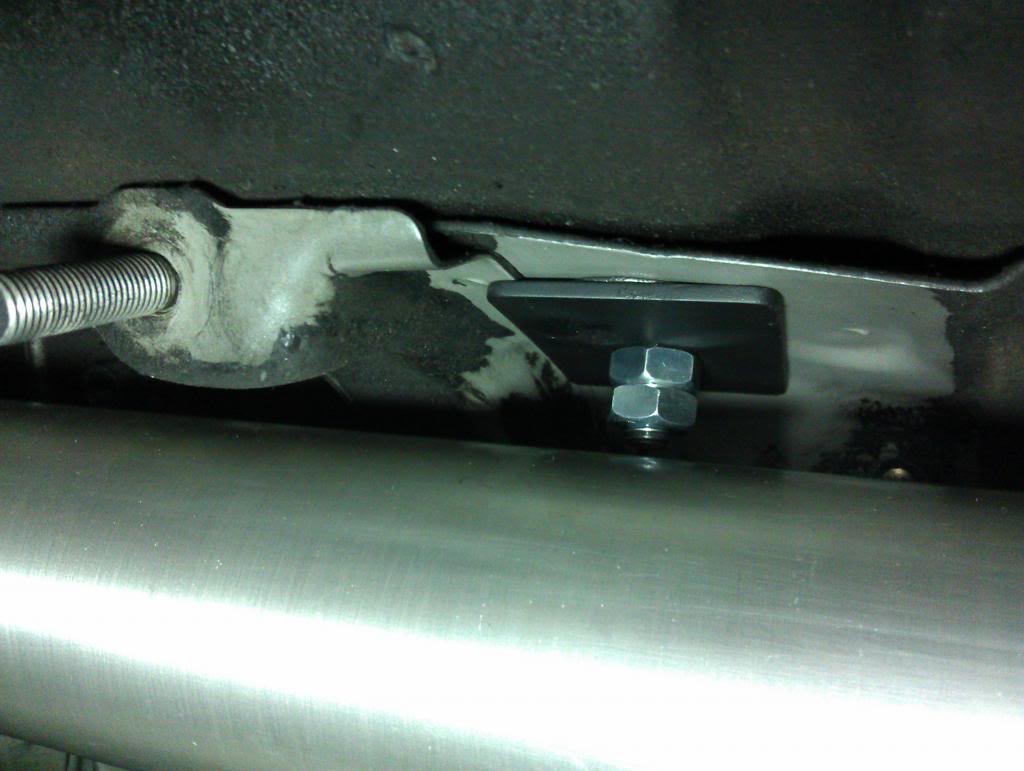
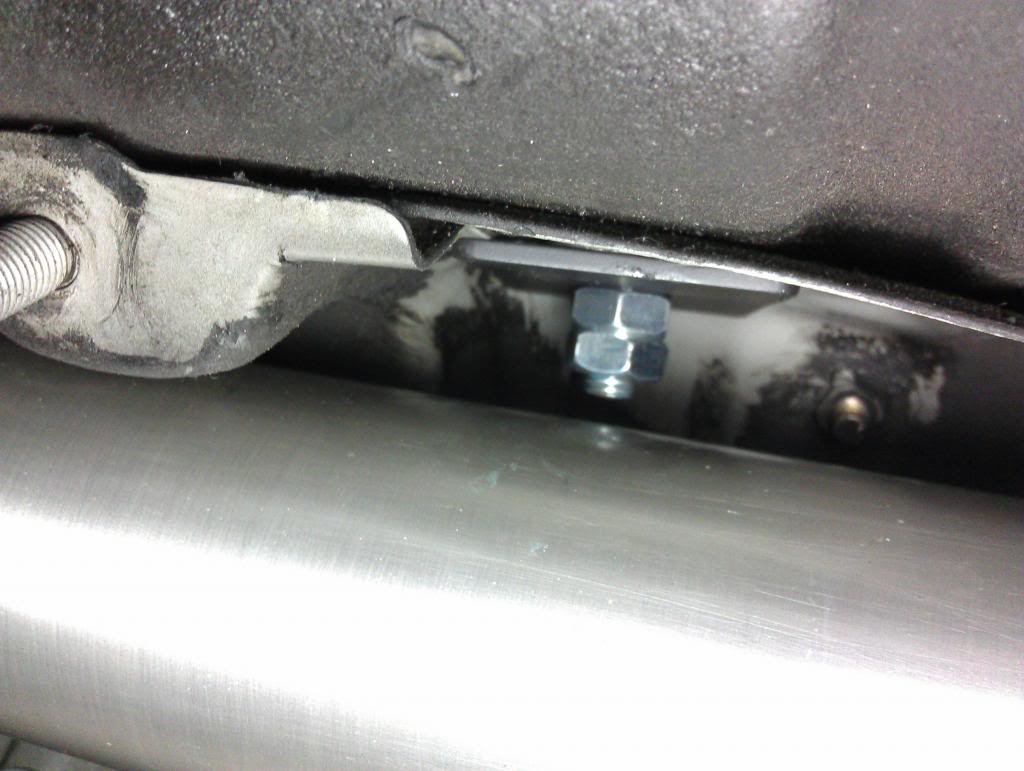
And underneath (I used a little black Permatex under the backing plate just in case the nut ever came loose, I shouldn't lose the backing plate too... shouldn't happen as I Loctited the two jam nuts of course):
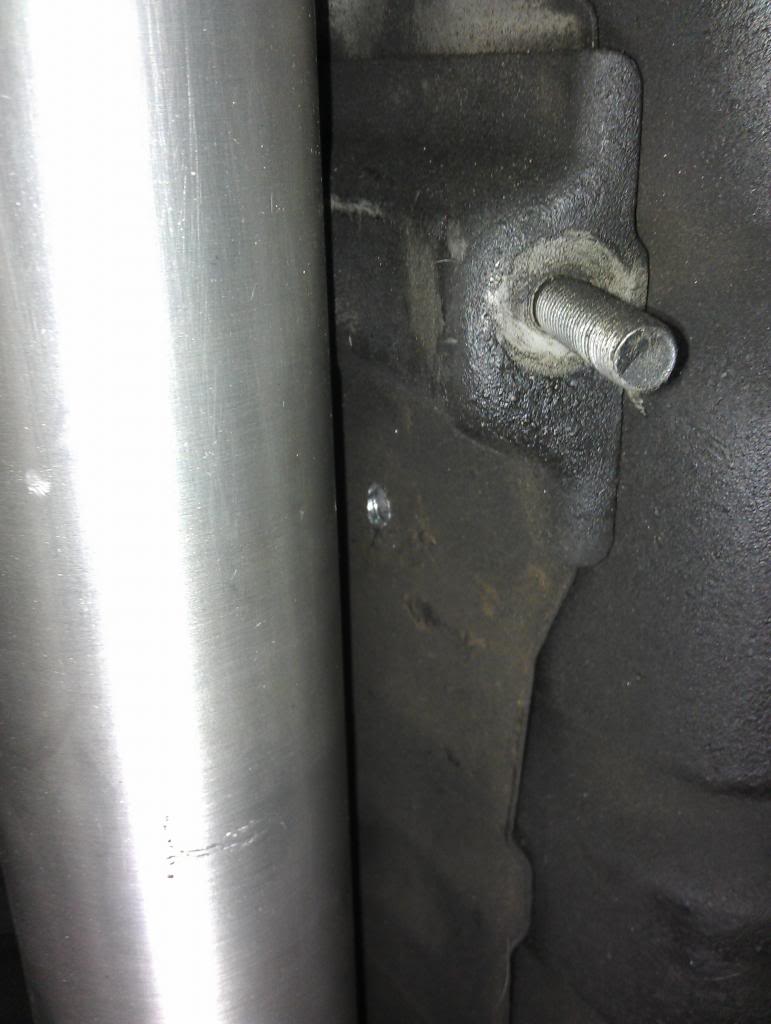
There's about a 1/4" clearance to the driveshaft, which is plenty:
Eyebolt, steel backing plate, and two nuts: six ounces, or .38 lb.:

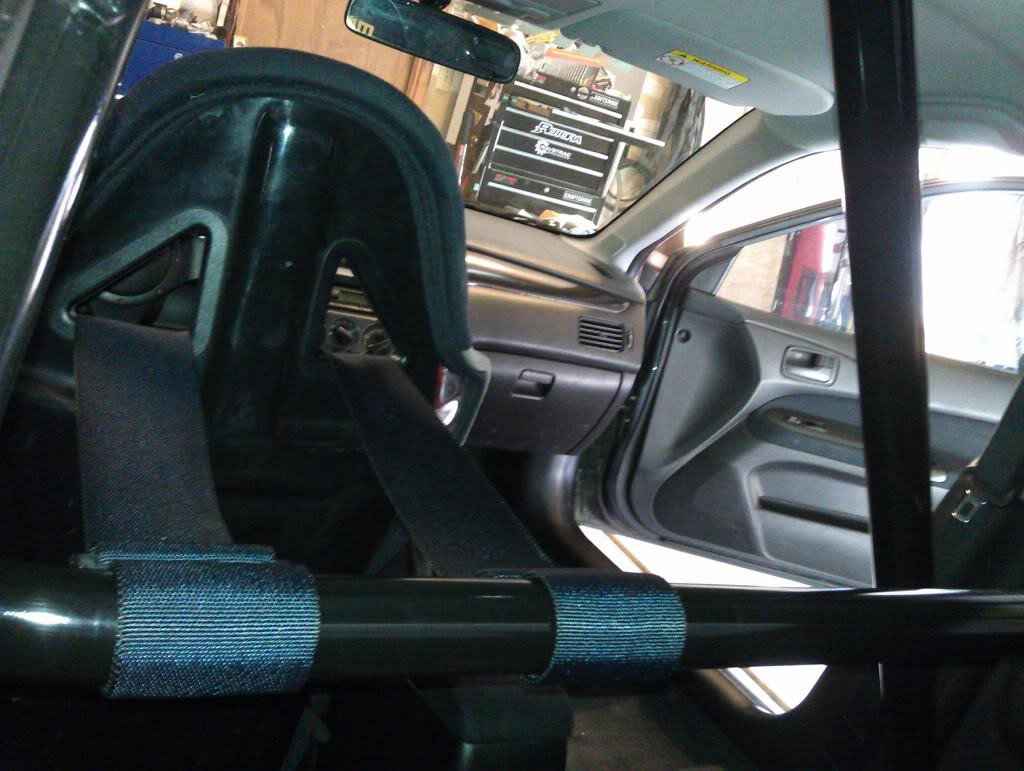
Finally, pics of it all done:


Here's a great reference for proper installation of a racing harness... makes it clear that doing it right takes careful thought and consideration about where (and how) you attach the mounting points: http://www.schrothracing.com/sdocs/2...structions.pdf
I chose a G-Force harness (#7001BK) because I felt it was the better option between the two least expensive cam-lock harnesses on the market (G-Force and Crow Enterprizes). I've played with Crow cam-lock and it felt like it released too easily... I could imagine accidentally flipping the lever and causing the latch to come undone with some sort of totally random and unintended hand movement while driving. The G-Force, on the other hand, feels very positive, and you have to rotate the latch a full 90 degrees to release it.
There are two options with the G-Force Pro cam-lock six-point harness: pull up or pull down tightening. I went with the traditional pull-down style, because the pull-down harness is not only SFI 16.1 certified, but also FIA certified, which gives you five years of track approval with SCCA racing, as opposed to only two years with the SFI rating. The safety certification of racing harnesses is only good for a limited time from the date of manufacture because the nylon webbing will degrade and weaken with age, so you have to get harnesses "rewebbed" after they expire... annoying, but the rule is in place to help minimize the chance of injury or death in racing incidents, so it is what it is.
In retrospect, now that I've actually installed it, I can see that I should have opted for the pull-up style, because with the pull-down style belt, the buckles end up crammed against the edges of the seat, right on top of your hip bones, and it's virtually impossible to adjust or tighten the lap belts once you're sitting in the seat. You have to adjust the lap belts prior to sitting down into the seat. It's acceptable for a single-driver car, but it would not work at all for a race car that had to accommodate different-sized drivers and quick driver changeovers.
Last note: the difference between a five-point and six-point belt is that six-point belt reduces the chance of the anti-submarine belts (i.e., the belt(s) that go down through the seat to the floor, between your legs) injuring your nuts in the case of an accident. Doesn't sound pretty, and it does happen, but it's still better than a severe injury to your internal organs if your body manages to slide down during the accident, and the lap belt rides up higher than your hip bones, which is what the anti-sub belts prevent from happening.
A video that shows submarining in a head-on collision:
Here's the G-Force belts, pre-install. They weighed 6.68 pounds (without the snap-hook belt ends):
And their certification tags:
Obviously, you can't determine the proper mount points for the harness until you get the seat mounted, as the angles of the belts relative to the seat/body position will change depending on how far forward or back you sit when you're driving. This makes choosing your mounting points more of a compromise if you'll have sliders and drivers with vastly different length legs.
For the two anti-sub belts, I followed the guidelines in the Schroth racing harness instruction PDF and set them a little back of the seat opening so that under tension, the angle of the anti-sub belts will be at about 20 degrees from vertical. I used a black Sharpie to mark the carpet, about 4" apart:
I decided to use eyebolts combined with snap-hook belt ends to attach the lap belts and anti-sub belts (the shoulder belts just got wrapped around the integrated harness bar of the Autometer roll bar). The eyelets allows for the belts to be oriented properly to the body, and the snap ends allows for convenient quick-connecting. Plus it was how the harnesses were set up in my friend's NASA GTS3-spec race car, so I followed his example.
The G-Force harness set doesn't come with the QR snap-hook type belt ends, so I ordered them separately (from Summit Racing via eBay is the cheapest, they're about 4 bucks each). The part numbers are 107H (2" for the anti-sub belts) and 107W (3" wide for the lap belts):
Just like with the feet of a bolt-in roll bar, you have to have a backing plate/nut assembly to minimize the chance of the eyebolt ripping through the floor. You can get the eyebolts and backing plates from places like HRPworld.com or pegasusautoracing.com.
https://www.pegasusautoracing.com/gr...oupID=HARNHARD
And here's where the eyebolts for the anti-sub belts ended up, inside the car:
And you can see that the backing plates end up right next to that rectangular support beam running longitudinally down the car—and that on one side, the plate is mounted right ABOVE the brake lines! Obviously, you must take great care not to puncture these when you're using the awl and drill to make the hole for the eyebolt:
For the left-side lap belt, I went with an eyebolt that threaded directly into the OEM bolt hole for the OEM shoulder/lap belt, at the bottom of the pillar. It's not in the right location to achieve the ideal 60-degree-from-horizontal mounting angle that the lap belts are supposed to be at, but it's pretty close, and I figure the OEM threaded nut that's integrated into the unibody as a seat belt fixing point is probably as strong or stronger than drilling a hole through the sheetmetal and putting a smallish backing plate behind it.
The proper size for the eyebolt that threads into the OEM seat belt attachment point is a M11 x 1.25, definitely an oddball size. One of the few places to order Takata eyebolts that fit most Japanese cars' OEM seat bolt attachment points is HeelToe Automotive, and yes, everyone sells the Takata eyebolts for 10 bucks each:
http://www.heeltoeauto.com/takata-sa...t-eb-02-u.html
However, I've since learned that M11 x 1.25 is virtually identical to SAE 7/16"-20, and so you should be able to use a OMP 7/16"-20 eyebolt (part # DB/420) too, which are about half the price @ $5 each.
On the right side, I decided to drill through the floor and create my own mount, rather than use the OEM seat bracket mounting point, for two reasons: number one, the eye bolt would interfere with the re-installation of the center console, because the right-rear mounting point of the seat bracket is UNDER the storage cubby of the console; and number two, the seat bracket mounting point is too far forward to create the proper angle for the lap belt.
I had to choose the location for the right-side lap belt eyebolt carefully, because of the design of the driveshaft tunnel under the car. Basically, there's only one good spot that's flat enough for the backing plate to rest against, and provides enough clearance for the protruding end of the eyebolt and nut to the driveshaft (a bigger problem on my car than most Evos because I have a larger-diameter aluminum driveshaft).
The spot I went with is about 6 1/4" back from the OEM seat bracket hole:
And about 1 3/4" down from the bottom edge of the center console:
The eyebolt installed, inside the car:
And underneath (I used a little black Permatex under the backing plate just in case the nut ever came loose, I shouldn't lose the backing plate too... shouldn't happen as I Loctited the two jam nuts of course):
There's about a 1/4" clearance to the driveshaft, which is plenty:
Eyebolt, steel backing plate, and two nuts: six ounces, or .38 lb.:
Finally, pics of it all done:
Last edited by EGbeater; Jun 2, 2014 at 12:17 PM.


Thread
Thread Starter
Forum
Replies
Last Post
EGbeater
Evo Electrical / Audio / Security
28
Jul 18, 2019 01:24 PM
EGbeater
Evo Engine / Turbo / Drivetrain
38
Apr 25, 2015 10:22 AM
EGbeater
Motor Sports
2
Mar 25, 2011 10:03 AM
EGbeater
Evo General
17
Oct 20, 2010 11:39 PM